
New Hooker/Holley 1st-gen parts compatibility with Ridetech TruTurn
 03-24-2014, 09:49 AM
#81
TECH Apprentice
iTrader: (1)
Join Date: Feb 2008
Location: Seacoast of NH
Posts: 354
Likes: 0
Received 0 Likes
on
0 Posts
Todd�.I have the whole Hooker/Holley set up in for my 69 camaro. The headers do not have a flange on the 3" collector end. What is recommended for the connection from the collector to the muffler system?
 03-24-2014, 12:28 PM
#82
TECH Junkie
Thread Starter


[IMG] [/IMG]Hello Don. The Hooker headers you have are designed and configured to attach directly to the new Hooker 3" exhaust system for this same application utilizing the low-profile double I.D. couplers you see in this image and which are included with the exhaust system. We sell these same clamps separately if you want to install another brand of exhaust system in a similar manner and we also sell a reducer kit that allowa you to install the headers with the new Hooker 2.5" exhaust system (or any other 2.5" system).
 [/IMG]Hello Don. The Hooker headers you have are designed and configured to attach directly to the new Hooker 3" exhaust system for this same application utilizing the low-profile double I.D. couplers you see in this image and which are included with the exhaust system. We sell these same clamps separately if you want to install another brand of exhaust system in a similar manner and we also sell a reducer kit that allowa you to install the headers with the new Hooker 2.5" exhaust system (or any other 2.5" system).
03-24-2014, 03:45 PM
[/IMG]Hello Don. The Hooker headers you have are designed and configured to attach directly to the new Hooker 3" exhaust system for this same application utilizing the low-profile double I.D. couplers you see in this image and which are included with the exhaust system. We sell these same clamps separately if you want to install another brand of exhaust system in a similar manner and we also sell a reducer kit that allowa you to install the headers with the new Hooker 2.5" exhaust system (or any other 2.5" system).
03-24-2014, 03:45 PM
#83
TECH Apprentice
iTrader: (1)
Join Date: Feb 2008
Location: Seacoast of NH
Posts: 354
Likes: 0
Received 0 Likes
on
0 Posts
^ Perfect�..i have a brand new 2.5" system i installed last year, so i'll need the reducer kit with the clamps. The only reducers i saw were black�do you have a part number for the reducer your recommending that is similar color as the headers? The whole kit works great! If i can give anyone a piece of advice when installing the headers�make sure you follow directions and put the drivers side header in when your dropping in the new engine. I didn't and had to role the engine on its side until the transmission hit the tunnel and started lift the car�and i still had a bear of a time. All clearances are good and the transmission is sitting down at a 3 degree drop. These kits are going to save a lot of people time, money and frustration!
03-24-2014, 04:28 PM
#84
TECH Junkie
Thread Starter
^ Perfect�..i have a brand new 2.5" system i installed last year, so i'll need the reducer kit with the clamps. The only reducers i saw were black�do you have a part number for the reducer your recommending that is similar color as the headers? The whole kit works great! If i can give anyone a piece of advice when installing the headers�make sure you follow directions and put the drivers side header in when your dropping in the new engine. I didn't and had to role the engine on its side until the transmission hit the tunnel and started lift the car�and i still had a bear of a time. All clearances are good and the transmission is sitting down at a 3 degree drop. These kits are going to save a lot of people time, money and frustration!
03-24-2014, 07:53 PM
#85
TECH Apprentice
iTrader: (1)
Join Date: Feb 2008
Location: Seacoast of NH
Posts: 354
Likes: 0
Received 0 Likes
on
0 Posts
42107HKR is the part number for the reducer kit; the tubing and the two clamps included in the kit to attach them to the headers are made from stainless steel, so you can use them bare or paint them to match whatever you have. The outlet of the reducers are 2.5" straight tubing, so you'll have to adapt the end of your exhaust to fit to it if it features 3-bolt flanges. If you want to be able to butt connect it to the end of the adapters on the headers with the same type of coupler clamps shown in my photo above, we offer them in a 2.5" version as well.
03-25-2014, 01:34 PM
#87
TECH Junkie
Thread Starter
Hey buddy, my ears were burning and I figured I find you here today...the exhaust systems are current on the production schedule in our facility, so I would expect a week a half to be a good guess.
I also noticed that the next run of 302-2 Holley oil pans are in machining right now, so those will also be available real soon.
I also noticed that the next run of 302-2 Holley oil pans are in machining right now, so those will also be available real soon.
03-25-2014, 05:15 PM
#88
TECH Junkie
Thread Starter
Ok I meant to put together some pictures and measurements this weekend but I never got around to it. Here is what I found out though. The stock idler arm for a 69 Camaro is 5.25 inches long center to center and this is what I originally had on my car. It cleared the 302-2 oil pan but just barely and I had to dimply the header to fit which I posted pictures of above. The moog replacement idler arms for a 68 and 69 is 5.375 inches center and center had the best clearance at the oil pan but the clearance at the passenger header was about the same. I found out the 67 used a 5.8 inch idler arm so I ordered one of those Proforged part 102-10003. The clearance at the oil pan was about the same as the 5.25 which confused me a bit because I expected it to be better but I believe this is because the 5.8 inch arm allows you to have a little more steering throw because of the longer length. With the 5.8 inch arm there is still a header clearance issue but it is less than with the shorter arms. I with my dimple I had minimum clearance with the 5.25 arm but here is pictures of the clearance with the 5.8 inch arm.
Net Net there is no solution to the holley long tubes without modification. You will either need to move the engine back a half inch or so or modify the header. The 5.8 inch idler arm from a 67 Camaro gave me the best clearance at the header but its really close at the oil pan. The 302-2 pan will fit with the tru turn setup but the steering to oil pan clearance is really close.
Stock pitman arm lengths:
Non power steering 5.25 inches
Non power steering quick ratio 5.8 inches
Power steering 5.8 inches
Stock Idler arm
67 5.8 inches
68-69 5.25 inches
Moog replacement part K6099 5.375 inches
67 replacement Proforged part 102-10003 5.8 inches
These pictures are with the holley 302-2 oil pan, holley mounts, 1 7/8 long tube headers and a 5.8 inch pitman and 5.8 inch idler arm.
Here is where I got most of my steering info:
http://www.pozziracing.com/camaro_steering.htm
03-26-2014, 07:10 AM
#89
TECH Apprentice
iTrader: (1)
Join Date: Feb 2008
Location: Seacoast of NH
Posts: 354
Likes: 0
Received 0 Likes
on
0 Posts
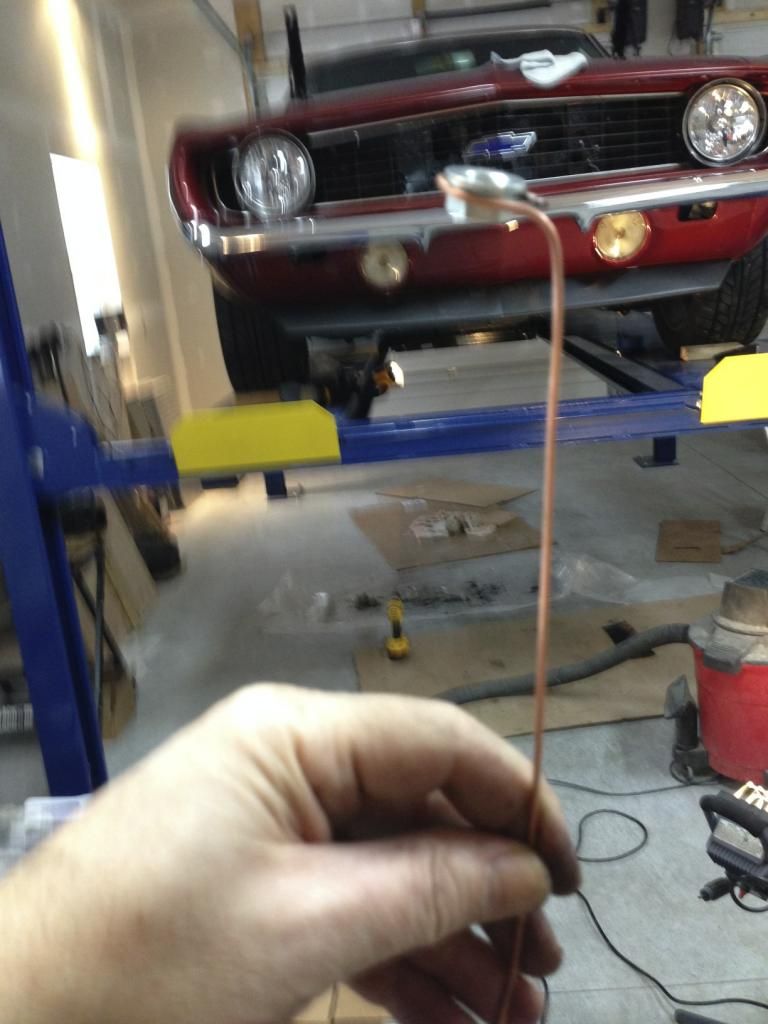
I thought i would share this little trick i did on the installation of the plates to the frame.The nuts are difficult to get at in order to start them on the bolt coming through because of the weird angles the frame puts the bolt. I took some 12 gauge wire i used for my garage and looped the end around the nut…which has a flange on it. Put the nut into the wire then push it up against the frame were the bolt comes through and push the wire until it bends to the angle of the frame. I was able to put the nuts on the bolts as easy as having direct access

 03-26-2014, 08:54 AM
#90
TECH Junkie
Thread Starter
I thought i would share this little trick i did on the installation of the plates to the frame.The nuts are difficult to get at in order to start them on the bolt coming through because of the weird angles the frame puts the bolt. I took some 12 gauge wire i used for my garage and looped the end around the nut�which has a flange on it. Put the nut into the wire then push it up against the frame were the bolt comes through and push the wire until it bends to the angle of the frame. I was able to put the nuts on the bolts as easy as having direct access
03-26-2014, 01:13 PM
#91
TECH Junkie
Thread Starter
Hey Dub, what's the final word on the combined fitment of all your Hooker and Ridetech parts? You've been inactive for quite a few days here so I'm hoping you've had the opportunity to get everything in the car.
03-26-2014, 03:00 PM
#93
TECH Junkie
Thread Starter
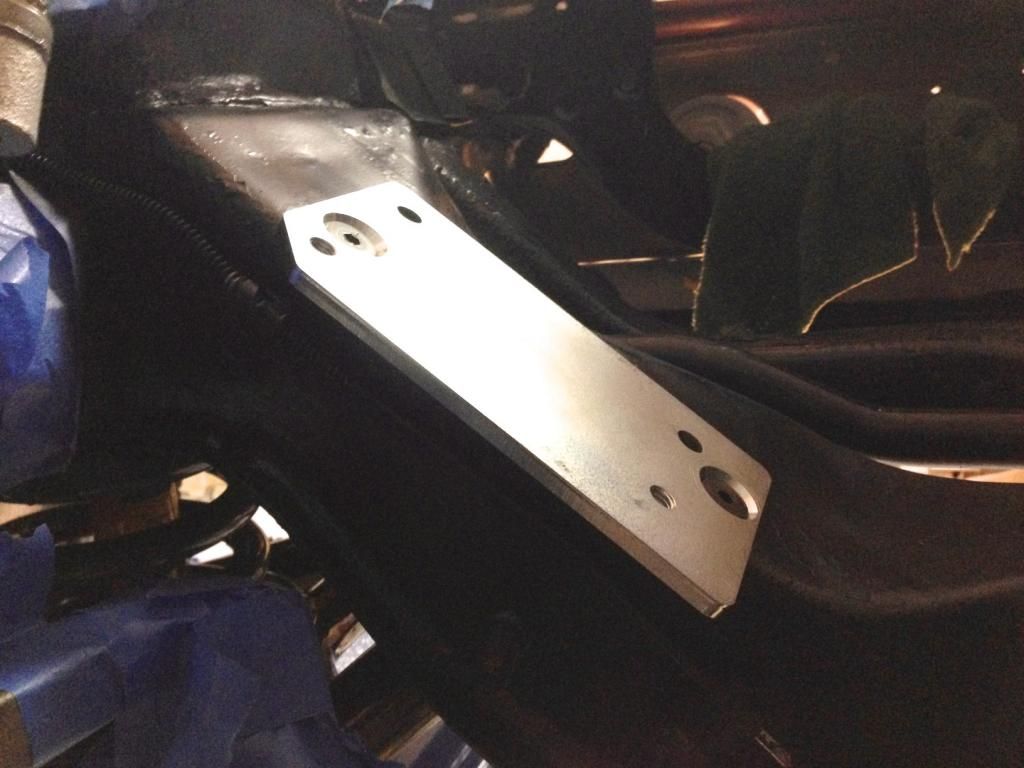
Hey Bandit, yes they are deeper that you would normally see in a countersunk hole but the slight amount of the bottom of the taper extending out beyond the back side of the plate actually helps to center the plates in the holes. There are 1/4" thick back up plates inside the subframe, which prevents anything but the threaded portion of the bolts from coming through the inside of the subframe. I will probably revisit the plates in the future and reduce the size of the hole to change the visual appearance of the bolts in the holes; I've installed the plates multiple times and they tighten down completely, so there's no issue in that regard.
 03-27-2014, 06:59 AM
#95
TECH Junkie
Thread Starter
I've not done anything else on the project since cobbling together a crude prototype before the car I had here was returned to the owner. I'm working on another project right now that I need to complete before I can jump back on it and push it forward. You most likely won't see anything become available until around the middle of summer.
03-28-2014, 09:48 AM
#96
TECH Junkie
Thread Starter
For those following this thread, I've modified the single tube on cwylie's passenger side header assembly that was coming in contact with the inner tie rod on the Ridetech Truturn set-up and have set it back to him. Cwylie should have it back in the car soon and be able to update everyone on the compatibility improvement.
03-28-2014, 03:07 PM
#97
Teching In

Join Date: Mar 2014
Posts: 5
Likes: 0
Received 0 Likes
on
0 Posts
For those following this thread, I've modified the single tube on cwylie's passenger side header assembly that was coming in contact with the inner tie rod on the Ridetech Truturn set-up and have set it back to him. Cwylie should have it back in the car soon and be able to update everyone on the compatibility improvement.
03-28-2014, 03:17 PM
#98
TECH Junkie
Thread Starter
That's correct paulk68, it's not something Hooker will be offering a special application for and instead is a modification I performed for cwylie to show what is possible by a qualified fabricator someone may know, or can hire. If all goes as planned I will outline how the modification was accomplished using U-bends.
 03-28-2014, 08:04 PM
#100
TECH Junkie
Thread Starter
I unfortunately don't have any idea as I don't work in sales or the shipping department. Seeing the pans being machined while traversing the plant was a first-hand observation I made however, so the out-going shipments can't be far off if they haven't taken place yet. Sorry I can't help you more on that one.