
1937 Ford Sedan


 03-29-2016, 10:45 AM
#322
TECH Regular
Thread Starter

"Time and rust works, see when the metal rusts away, it takes the undercoating with it, eliminating the need to scrape it......  No need to thank me, I'm here to help!"
I may just leave the other side alone - the tire should eventually rub away the proper amount of clearance right ?
No need to thank me, I'm here to help!"I may just leave the other side alone - the tire should eventually rub away the proper amount of clearance right ?
 04-01-2016, 06:02 PM
#324
TECH Regular
Thread Starter
Thanks David that's exactly the kind of response I was hoping for! I made some parts ahead of time trying to get that factory look where you really can't tell the car has been worked on.
Using Daddy Bill's CAD system (cardboard aided drawing) I made a 32" diameter template to give 2 extra inches around the 28" tall tire. I found some mild steel 1" diameter tubing and found a place in town that could roll it - not bend but roll it half the diameter and leave the tails long around the template. Then I ran it through a band saw and split the tubing in half.
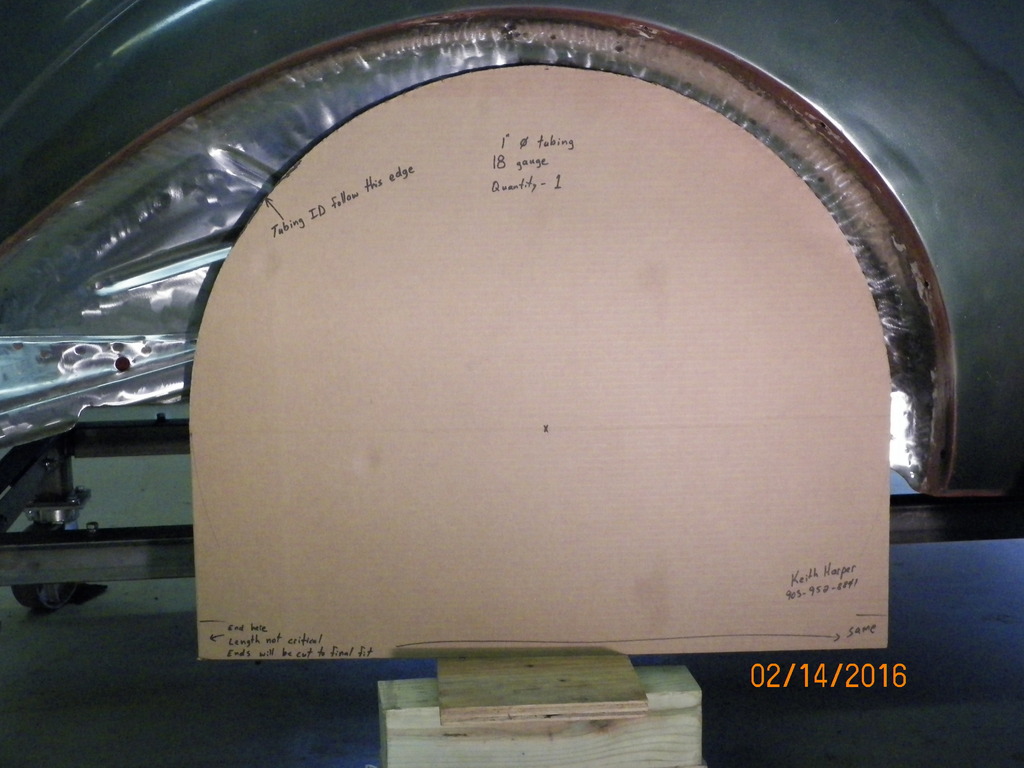
Using Daddy Bill's CAD system (cardboard aided drawing) I made a 32" diameter template to give 2 extra inches around the 28" tall tire. I found some mild steel 1" diameter tubing and found a place in town that could roll it - not bend but roll it half the diameter and leave the tails long around the template. Then I ran it through a band saw and split the tubing in half.

Last edited by Kharp; 04-01-2016 at 06:39 PM.
04-01-2016, 06:20 PM
#325
TECH Regular
Thread Starter
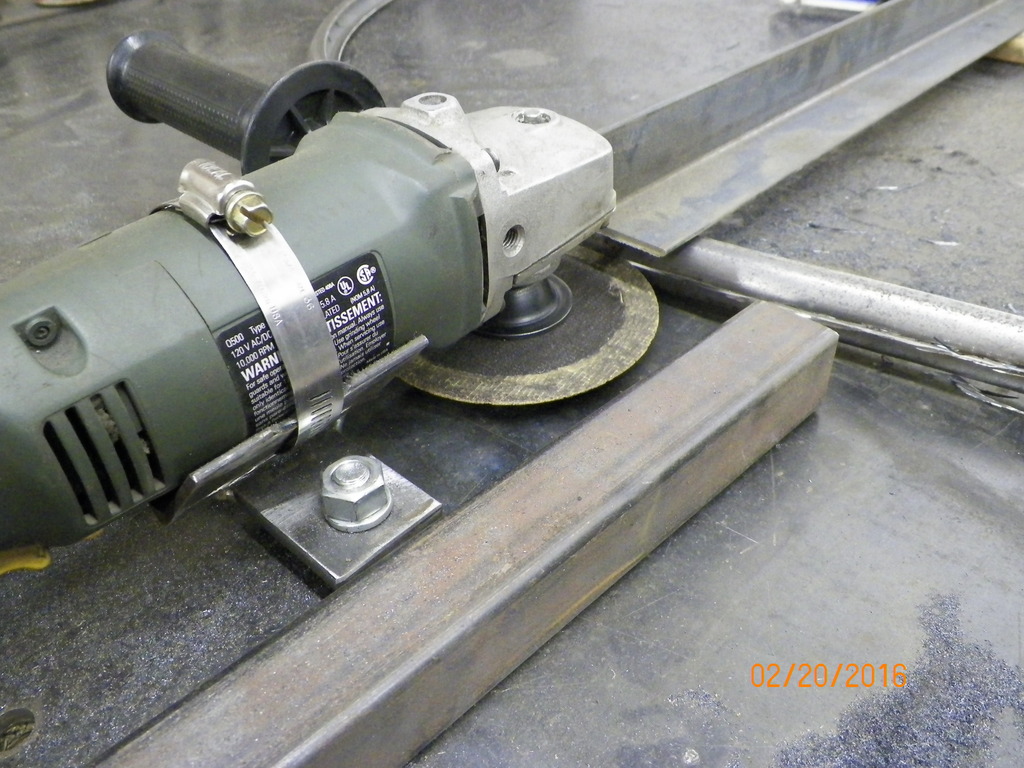
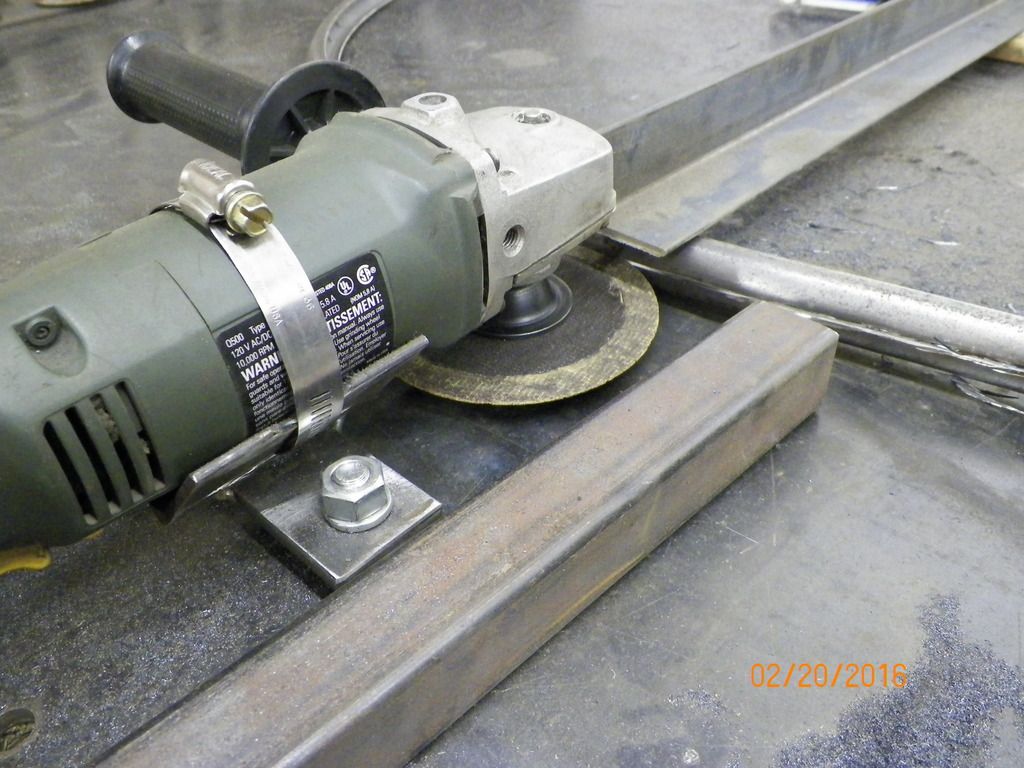
The band saw cut was OK, but not perfect. Still needed to make more cuts to get the tubing into quarter sections. I was thinking of making a better backstop for the band saw when the Fab Director came up with this idea to mount a grinder and feed the material through it. We fed it through and left some tiny uncut sections so it didn't spring out. Finished it up with a small dremel tool and it worked like a charm - perfectly straight cuts 
 04-01-2016, 06:27 PM
#326
TECH Regular
Thread Starter
End result is 4 pieces of tubing with a nice radius. At the time these were made I wasn't exactly sure how they would be used, but I was trying to come up with a cleaner look than a squared off flange.


 04-01-2016, 06:37 PM
#328
TECH Regular
Thread Starter
After......
Used 4 small pieces of the radius in the bottom section to help tie it back together around this body mount. With some welding, grinding, and body work hopefully it will look like it was made that way.
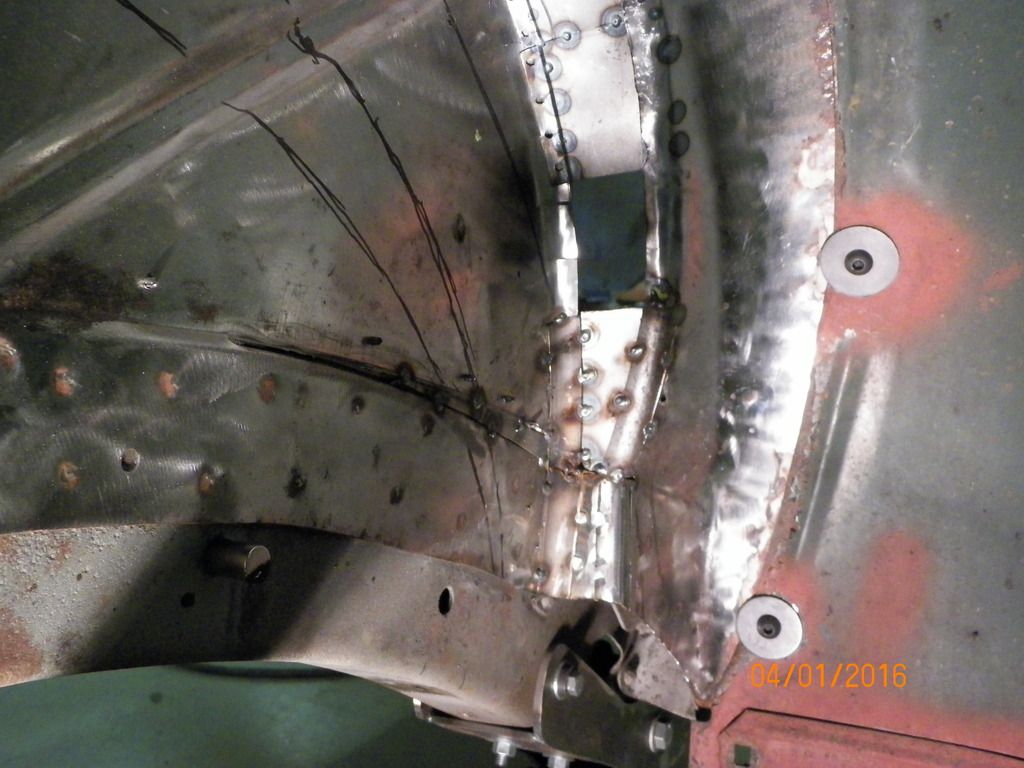
Used 4 small pieces of the radius in the bottom section to help tie it back together around this body mount. With some welding, grinding, and body work hopefully it will look like it was made that way.
 04-01-2016, 07:18 PM
#329
TECH Regular
Thread Starter
I'm not really set up very well for sheet metal work, but I did find a tool to borrow that is worth noting. Patented in 1867 and used in the early 1900's, this little hand crank machine works like a charm for putting an offset flange on the edge of these filler panels - thanks Butch!
Might as well use some tools of the same vintage as the ol' car
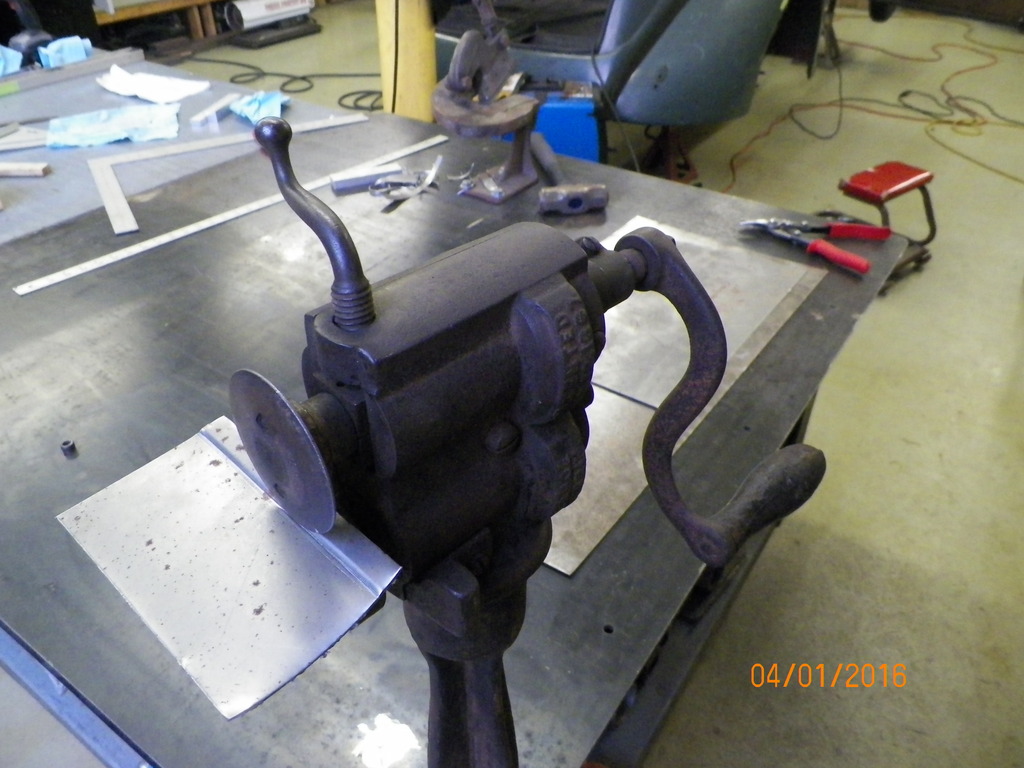
Might as well use some tools of the same vintage as the ol' car

Last edited by Kharp; 04-03-2016 at 07:45 PM.
04-01-2016, 07:19 PM
#330

The band saw cut was OK, but not perfect. Still needed to make more cuts to get the tubing into quarter sections. I was thinking of making a better backstop for the band saw when the Fab Director came up with this idea to mount a grinder and feed the material through it. We fed it through and left some tiny uncut sections so it didn't spring out. Finished it up with a small dremel tool and it worked like a charm - perfectly straight cuts
Freak'in Brilliant !!!!!!
04-01-2016, 07:25 PM
#331
TECH Regular
Thread Starter
Fab Director came up with this cheap and easy forming tool. Took a piece of 1/2" x 1" Aluminum and cut several slots. Works great!


 04-06-2016, 10:30 AM
#335
TECH Apprentice
The band saw cut was OK, but not perfect. Still needed to make more cuts to get the tubing into quarter sections. I was thinking of making a better backstop for the band saw when the Fab Director came up with this idea to mount a grinder and feed the material through it. We fed it through and left some tiny uncut sections so it didn't spring out. Finished it up with a small dremel tool and it worked like a charm - perfectly straight cuts
THEN, I read it was the Fab Director's idea...
 04-08-2016, 02:38 PM
#337
TECH Regular
Thread Starter
I was hoping to have some pictures of a finished micro tub by now, but I've had some welding issues and I thought I would share what I learned. The inside of the car is burned in and looks fine. I ran out of wire, loaded a fresh roll in and started tackling underneath the car inside the wheel well. I've struggled the last 2 nights with being able to run a nice overhead bead. I've played with voltage, wire speed, better ground, less stickout, increased gas pressure, new tip, and whatever else I could think of. Is it me? Is it the old metal? I tried a piece of scrap on my table and it welds fine. Go back to overhead and it turns ugly. What in the world??? Well.....turns out to be not enough wire tension. It had enough wire tension to pull correctly in normal positions, but once the mig gun is raised and twisted slightly overhead there wasn't enough wire tension to be able to push it through the gun. So it looks like a wire speed deal the way it would pop and carry on, but really it just wasn't feeding smoothly. A small amount of increased wire tension made all the difference in the world! THANKS BUTCH for your help on this problem! Now my weekend plans include grinding the ugly off and doing it right .
. 
 04-21-2016, 08:50 PM
#340
TECH Regular
Thread Starter
Drivers side has more challenges. First place is where the fuel neck goes through. Second place is the hump where the spare tire goes. Here is the first step of cutting around the fuel neck and taking out part of the hump.

