


1937 Ford Sedan

Thread Starter
TECH Regular


Joined: Mar 2015
Posts: 485
Likes: 123
From: Tyler, TX
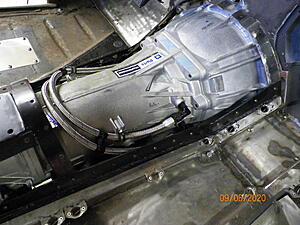
Eric thanks for checking on me! I didn't even get an email notice I just happened to look on here the other day to see what kind of projects were going. Anyway, good news/bad news.....bad news is I did not work on the car from May through August, BUT I am now back on it pretty steady. Trans lines, power steering lines, trans dipstick, oil dipstick, all that sort of misc stuff getting checked off the list.
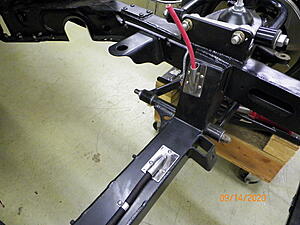
Interesting thing on my power steering bracket I built a while back. I bought a hard line from Detroit Speed to get around the pump, but it looked like it was going to be supporting too much weight so I created a bracket for it. Months later I was looking at a Holley catalog and noticed they offer something VERY similar off the shelf. Guess they thought it needed something too
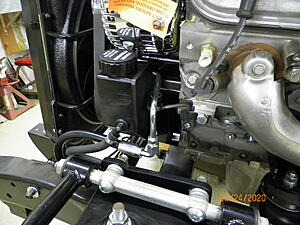


Interesting thing on my power steering bracket I built a while back. I bought a hard line from Detroit Speed to get around the pump, but it looked like it was going to be supporting too much weight so I created a bracket for it. Months later I was looking at a Holley catalog and noticed they offer something VERY similar off the shelf. Guess they thought it needed something too

Thread Starter
TECH Regular
Joined: Mar 2015
Posts: 485
Likes: 123
From: Tyler, TX
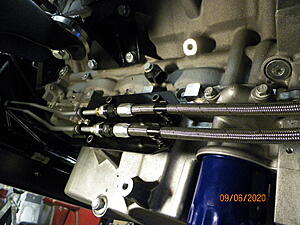
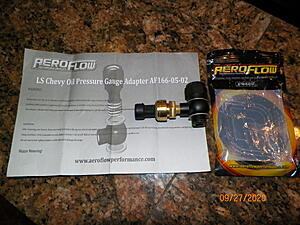
I found this part and wanted to pass it on for someone looking to use the factory oil pressure sending unit and an aftermarket sending unit for an aftermarket gauge. I have mocked it up and there is plenty of clearance to have both sending units at the back of the intake with a tee from Aeroflow. I know you can drill/tap down by the oil filter for an extra sending unit, but this way will make my wiring much cleaner. The part ships from Austrailia and I received it in about 3 weeks. As long as the crush sleeves don't leak I'll be in business.

Thread Starter
TECH Regular
Joined: Mar 2015
Posts: 485
Likes: 123
From: Tyler, TX
I've been making a list for a while of all the things that needed to be done the next time the motor was out. Well it's out. Here are a few misc pics....
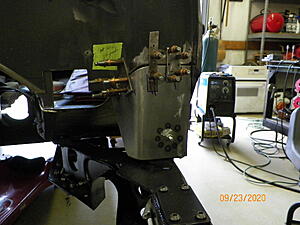
Made some pass throughs to route the alternator wire around the steering to get to the starter post. It's #4 and pretty beefy, but that's what Vintage Air sent with the kit.
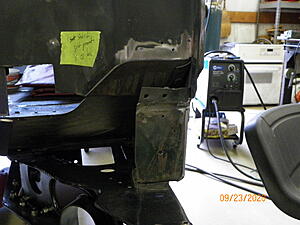
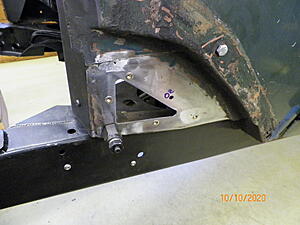
Added these 2 pieces to the bottom of the firewall. Bitchin sent these with the firewall, but at first I thought they were just for looks. When I took the body off and put it on the dolly the 2 front body mounts tried to fold in just slightly. These add on pieces should prevent that and they make it look finished as well.
Original mount

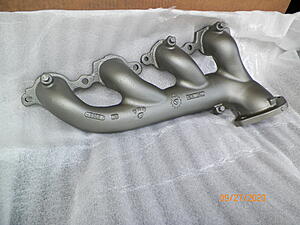
Also sent off my exhaust manifolds to be coated. Hats off to Jet Hot these look REALLY good!
Made some pass throughs to route the alternator wire around the steering to get to the starter post. It's #4 and pretty beefy, but that's what Vintage Air sent with the kit.

Added these 2 pieces to the bottom of the firewall. Bitchin sent these with the firewall, but at first I thought they were just for looks. When I took the body off and put it on the dolly the 2 front body mounts tried to fold in just slightly. These add on pieces should prevent that and they make it look finished as well.
Original mount


Also sent off my exhaust manifolds to be coated. Hats off to Jet Hot these look REALLY good!

I'd give some thought to some rubber hose or wiring loom on the stainless braid tranny lines where they come over the top of the tranny case. The stainless braid will abrade the aluminum case over time. Lovely work! Guy locally has a '37 powered by a 2.0L Ford Ecoboost --- really sweet set up.
LS1 Tech Stories
The Best V8 Stories One Small Block at Time

Topdon ONE vs. Artidiag 800 BT2: Which is the Diagnostic Tablet For You?
Pouria Savadkouei
Gas Monkey Built a 6-Wheel Ferrari Testarossa With a Corvette LT4 Engine
Verdad Gallardo
7 Most Reliable High-Performance Engines GM Has Ever Built
Verdad Gallardo
Amazing '71 Camaro Restomod Is Modern Muscle Car Under the Skin
Verdad Gallardo
6 Common C5 Corvette Failures and What's Involved In Repairing Them
Pouria Savadkouei
Retro Modern Bandit Pontiac Trans AM Comes With Burt Reynolds' Autograph
Verdad Gallardo
Top 10 Greatest Cadillac V Series Performance Models Ever, Ranked
Pouria Savadkouei
Top 10 Most Powerful Chevy Trucks Ever Made!

Hennessey's New Supercharged Silverado ZR2 Has 700 HP
Verdad Gallardo Thread Starter
TECH Regular
Joined: Mar 2015
Posts: 485
Likes: 123
From: Tyler, TX
Finished the access doors at the bottom of the firewall. This is where I will be able to hook up O2 sensors and fish wires through. Bought a tool for installing rivnuts and it worked great thanks Bill for the suggestion!
Many misc items marked off the list while the motor is out. Trying to figure out where to run wires in/out. Really like these Seals It Grommets.
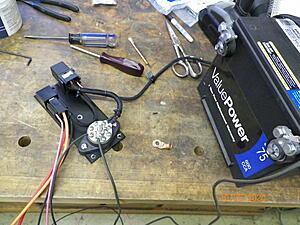
First moving part on the car was the electric fan. By the way what is the best way to post short videos on here? Tested the relays on the bench and was curious how much current draw it really had since its on a 70A relay. Pretty high start up current of low 50's and then settles down to about 17 amps in the run state according to the meter I borrowed. Mine will not measure DC current over 10 amps.


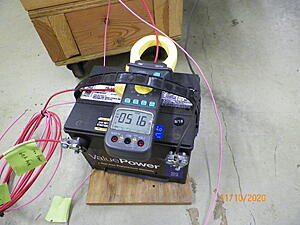
Next project is to locate a battery and many items under the back seat. I'm calling it the substation. More soon......


Many misc items marked off the list while the motor is out. Trying to figure out where to run wires in/out. Really like these Seals It Grommets.

First moving part on the car was the electric fan. By the way what is the best way to post short videos on here? Tested the relays on the bench and was curious how much current draw it really had since its on a 70A relay. Pretty high start up current of low 50's and then settles down to about 17 amps in the run state according to the meter I borrowed. Mine will not measure DC current over 10 amps.


Next project is to locate a battery and many items under the back seat. I'm calling it the substation
. More soon...... Thread Starter
TECH Regular
Joined: Mar 2015
Posts: 485
Likes: 123
From: Tyler, TX
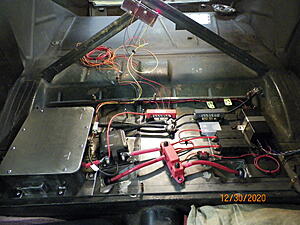
Time to tackle the area under the back seat where the battery will be located. I've been referring to it as the substation . I had "roughed in" the battery location when we did the exhaust, but it was just a hole in the floor to use as a starting point. I've never really seen how most people do all this wiring so I just built what was in my head.

Made some transition pieces to get the cables inside the car. One pair for the battery and an extra positive to a remote jump terminal under my running board.
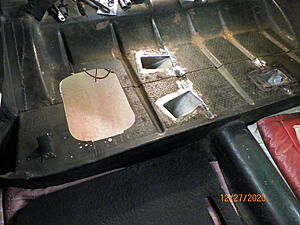
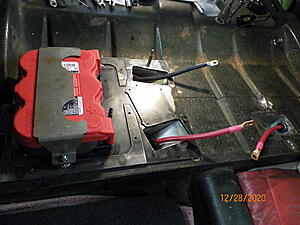
Added some plate to support weight of battery and to have something to build off of.
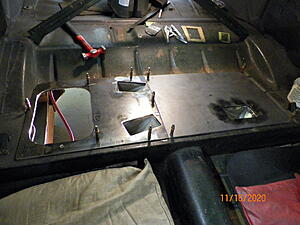
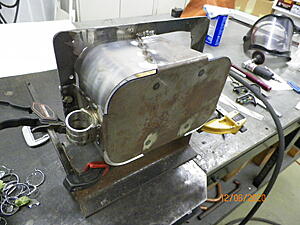
Bought a battery box from a 4 wheel drive place and modified to my liking
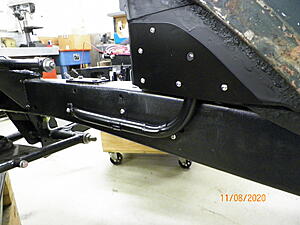
View from below. Used some #12 hose and bulkhead fittings to protect the battery cables and keep some exhaust heat away hopefully.

Battery mounted nice and solid.
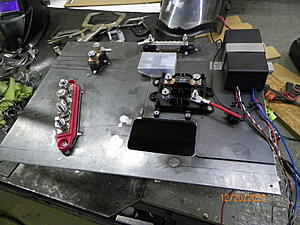
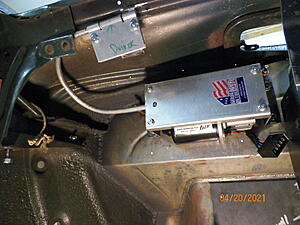
Mounting the components. Top right black box is the electric emergency brake controller.
Still a few temporary wires, but this is as far as I can go right now. I have the main power where I can toggle on/off as I add stuff and test.
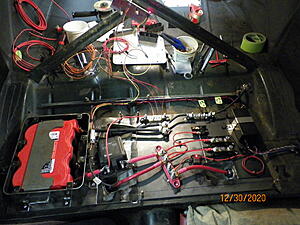
Buttoned up for now. Meanwhile Kwhizz finishes a couple of cars
. I had "roughed in" the battery location when we did the exhaust, but it was just a hole in the floor to use as a starting point. I've never really seen how most people do all this wiring so I just built what was in my head.
Made some transition pieces to get the cables inside the car. One pair for the battery and an extra positive to a remote jump terminal under my running board.

Added some plate to support weight of battery and to have something to build off of.

Bought a battery box from a 4 wheel drive place and modified to my liking

View from below. Used some #12 hose and bulkhead fittings to protect the battery cables and keep some exhaust heat away hopefully.

Battery mounted nice and solid.

Mounting the components. Top right black box is the electric emergency brake controller.

Still a few temporary wires, but this is as far as I can go right now. I have the main power where I can toggle on/off as I add stuff and test.

Buttoned up for now. Meanwhile Kwhizz finishes a couple of cars

Last edited by Kharp; Dec 30, 2020 at 08:21 PM.
Thread Starter
TECH Regular
Joined: Mar 2015
Posts: 485
Likes: 123
From: Tyler, TX
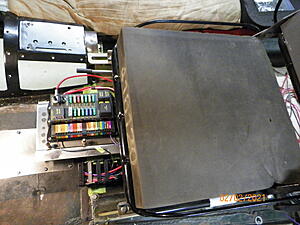
Work has been getting interfering with my build lately, but here's a small item checked off. The area behind my dash is going to have many components so I decided to mount my fuse panel under the driver seat. Of course the first question is what if I have trouble and need to access it? Through some brainstorming at work, during a break , with 2 of my co workers who are following the build we came up with the idea of drawer slides and a cable guide to deal with the wires.
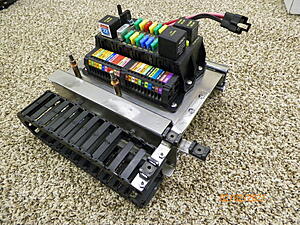
The cable guide radius is just a little tight for the large wires, but the concept worked well enough to proceed. Now that I know I have plenty of room under the seat I may order a cable guide with a slightly larger radius when I actually start wiring it. All the wires will get cleaned up later I just wanted to see if this would work.
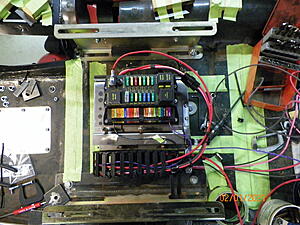
Seat in drive position
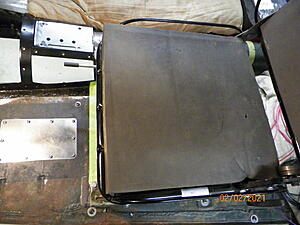
Seat all the way back and panel pulled out. Hopefully the interior guy can make me a removable panel or some sort of skirt on the front of the seat.
, with 2 of my co workers who are following the build we came up with the idea of drawer slides and a cable guide to deal with the wires.
The cable guide radius is just a little tight for the large wires, but the concept worked well enough to proceed. Now that I know I have plenty of room under the seat I may order a cable guide with a slightly larger radius when I actually start wiring it. All the wires will get cleaned up later I just wanted to see if this would work.

Seat in drive position

Seat all the way back and panel pulled out. Hopefully the interior guy can make me a removable panel or some sort of skirt on the front of the seat.

Last edited by Kharp; Feb 2, 2021 at 08:06 PM.
Thread Starter
TECH Regular
Joined: Mar 2015
Posts: 485
Likes: 123
From: Tyler, TX

Thread Starter
TECH Regular
Joined: Mar 2015
Posts: 485
Likes: 123
From: Tyler, TX
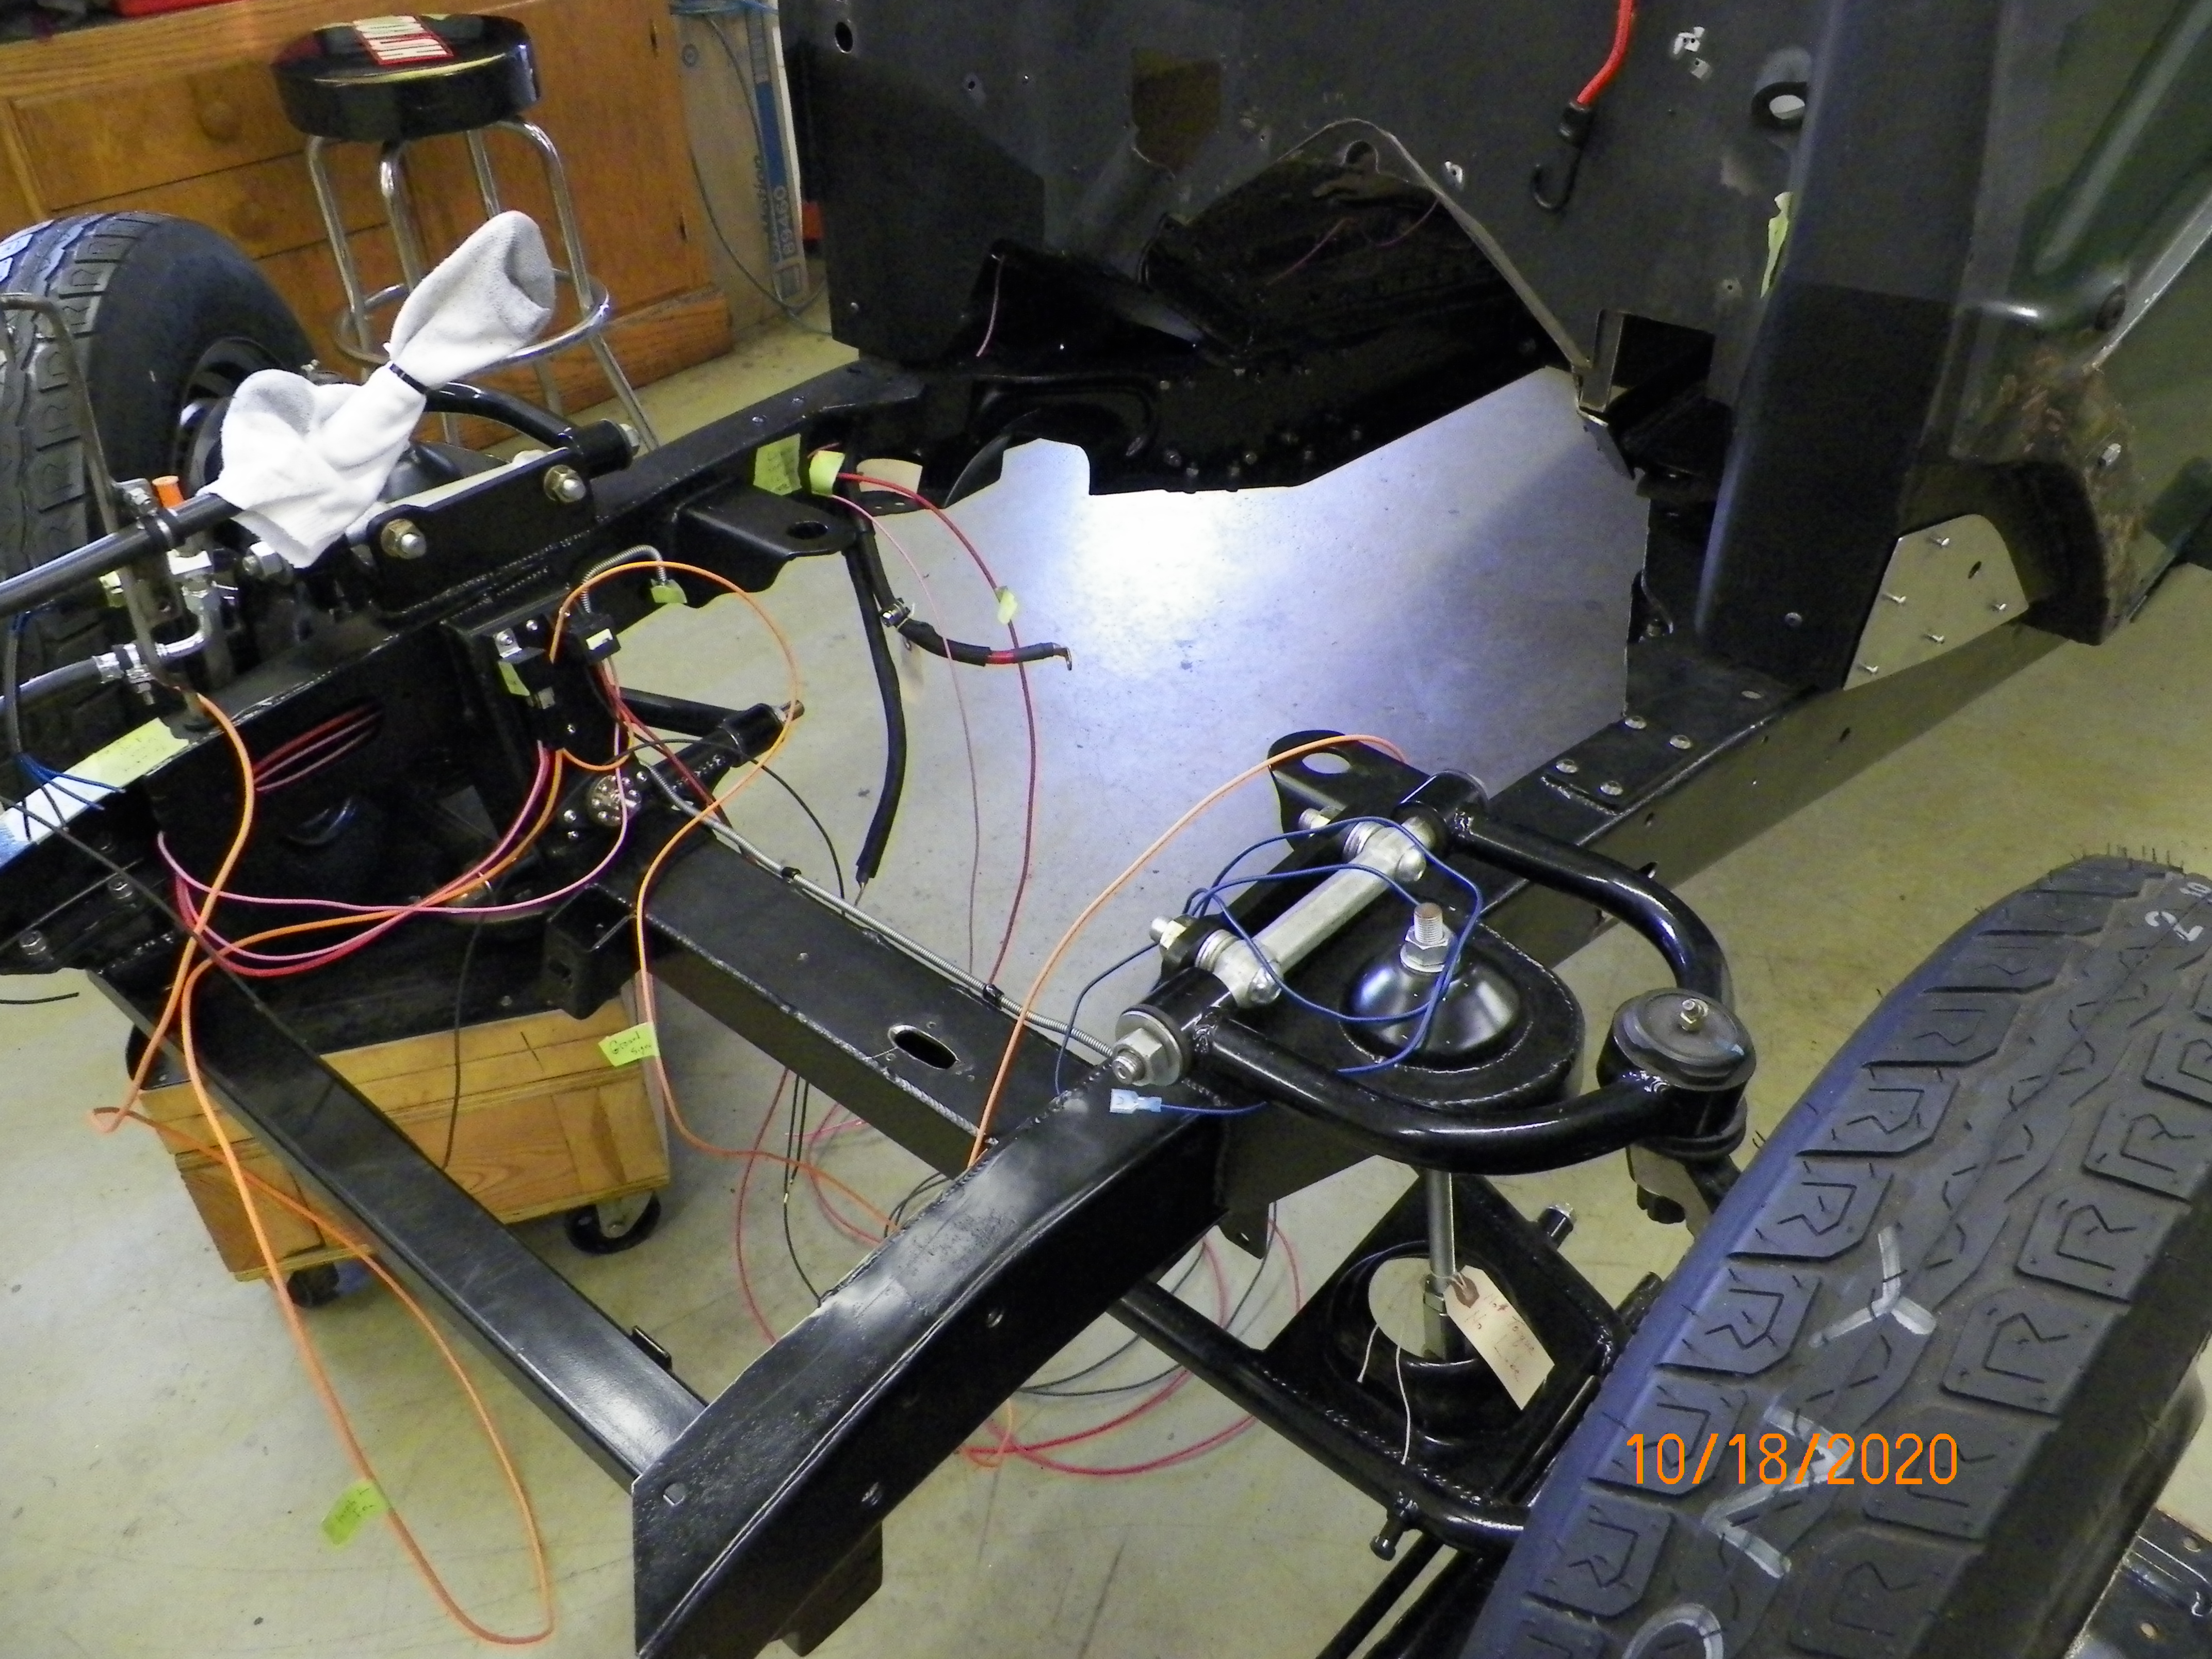
I've had something on the list for a while, but I've been putting it off because I knew it wouldn't be any fun. The electric emergency brake needed finishing and that means hanging out on the creeper for a while  .
.
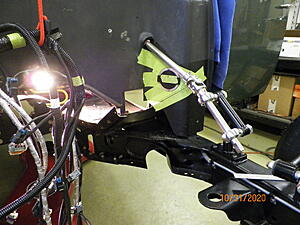
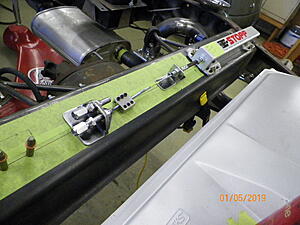
Recall when the chassis was built I used the top of the crossmember for layout work and then mounted everything underneath the crossmember. I tested it out at the time knowing it would need to be made permanent when the body was back on. Here is the pic from then.
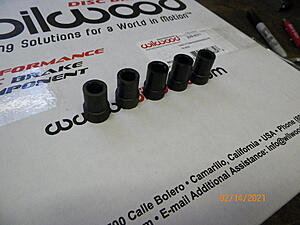
Now I needed to run the cables from the actuator to the calipers. Had some bushings made for all places the cables enter and exit.
Cables guided through corner.
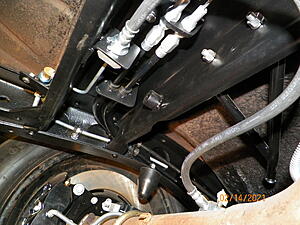
Made some clips with a nut welded on the back to hold the cables under the car.
Here are the clips welded in place. The undercoating I had to remove in these places was like chipping concrete and that is why the car survived so well! The E brake works like a charm. I just need to extend some wiring and find a home for the pushbutton.

Today my work is closed and I would love to be in my shop, but I'm not sure my heaters, yes plural, will be able to get it warm enough today. I have a package unit with a heat pump that ran all night, but with an outside temp of 7 degrees this morning it was 35 in the shop. I lit my Dearborn and now have it up to a whopping 50. This is so "not normal" for East Texas. Maybe the shop will be tolerable after lunch.....
.Recall when the chassis was built I used the top of the crossmember for layout work and then mounted everything underneath the crossmember. I tested it out at the time knowing it would need to be made permanent when the body was back on. Here is the pic from then.

Now I needed to run the cables from the actuator to the calipers. Had some bushings made for all places the cables enter and exit.

Cables guided through corner.

Made some clips with a nut welded on the back to hold the cables under the car.

Here are the clips welded in place. The undercoating I had to remove in these places was like chipping concrete and that is why the car survived so well! The E brake works like a charm. I just need to extend some wiring and find a home for the pushbutton.

Today my work is closed and I would love to be in my shop, but I'm not sure my heaters, yes plural, will be able to get it warm enough today. I have a package unit with a heat pump that ran all night, but with an outside temp of 7 degrees this morning it was 35 in the shop. I lit my Dearborn and now have it up to a whopping 50. This is so "not normal" for East Texas. Maybe the shop will be tolerable after lunch.....


You guys had it worst then we did in Mass. we got down to 7 but it was at night and we made it to the middle teens. I hope you didn't have too much damage from the cold.
A lot of nice progress since the last time I got to check in. Nice job on the E Stopp set up.
A lot of nice progress since the last time I got to check in. Nice job on the E Stopp set up.
Thread Starter
TECH Regular
Joined: Mar 2015
Posts: 485
Likes: 123
From: Tyler, TX
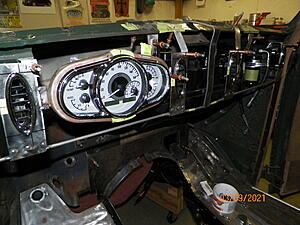
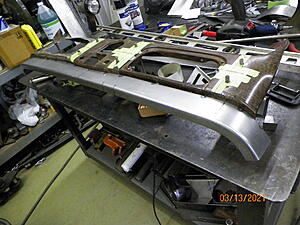
Thanks Wayne! Well the snow has melted in East Texas and it's back to warm weather with the shop door open . Time to tackle some items on the dash. Fab director had a vision of a wire frame of the dash to locate the 4 AC vents and the gauge cluster. Gauge cluster bezel was made in a post waaay back.
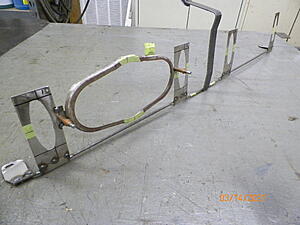
With this installed in the car it should help figure out the layout behind the dash and allow some access to do things without actually having the dash in the car.
I wanted a dash extension to mount some switches, lights, start button, etc so the dash won't be so crowded. Here is step 1 and a sample piece made from a borrowed shrinker (thanks Butch!).
Its hard to tell from the picture but the dash has many curves and falls off in both directions from center.
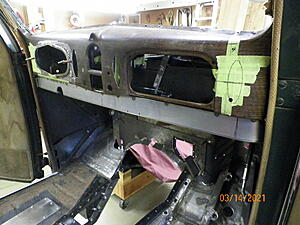
Installed in car. Steering column will pass through lower half of dash extension. Behind the dash will be very busy so I'll probably be here for a while.....
. Time to tackle some items on the dash. Fab director had a vision of a wire frame of the dash to locate the 4 AC vents and the gauge cluster. Gauge cluster bezel was made in a post waaay back.
With this installed in the car it should help figure out the layout behind the dash and allow some access to do things without actually having the dash in the car.

I wanted a dash extension to mount some switches, lights, start button, etc so the dash won't be so crowded. Here is step 1 and a sample piece made from a borrowed shrinker (thanks Butch!).

Its hard to tell from the picture but the dash has many curves and falls off in both directions from center.

Installed in car. Steering column will pass through lower half of dash extension. Behind the dash will be very busy so I'll probably be here for a while.....

Looking good! I remember when I was building my car, I had the dash in and out about a million times! LOL But it is way easier than having to work under a solid mounted dash. I actually made the top of mine fit over some tabs, then the bottom bolts on with the 2 factory screws, so it comes out pretty quick and easy.
Thread Starter
TECH Regular
Joined: Mar 2015
Posts: 485
Likes: 123
From: Tyler, TX
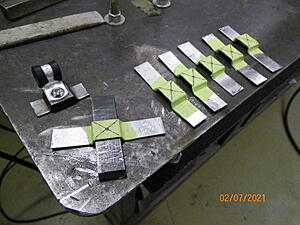
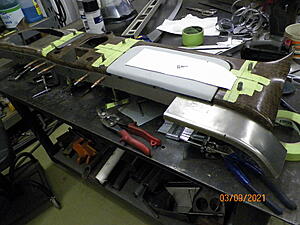
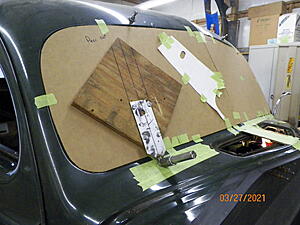
Small item for experienced builders, but a big item for me to check mostly off the list. I've been dreading the windshield wipers for a while now. I moved the wiper arm posts from above the windshield to below the windshield in the cowl area for a much cleaner look. As an added bonus the motor is no longer vacuum dependent and has an intermittent feature This fab director built fixture worked great for locating the wiper arm posts.
I like the look and have room on the inside to run the cable.
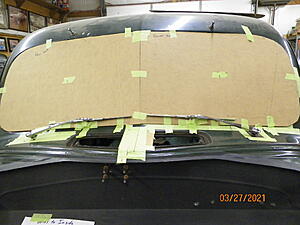
Motor mounted and first run of tubing done. Had to stop here to locate some things near the passenger side post, but glad to get past the hard part
This fab director built fixture worked great for locating the wiper arm posts.
I like the look and have room on the inside to run the cable.

Motor mounted and first run of tubing done. Had to stop here to locate some things near the passenger side post, but glad to get past the hard part
