68 Camaro Build with a Gen V Swap
#61
Yeah I thougt about using that, its cool. All the companies making accessory drives for these motors and others with my accessory drive using the LT1 intake use an additional idler pulley to get the belt out of the way of the TB. If for whatever reason I cannot get my intake routed correctly around the belt or fan I'll grab one of these.
#62
I smartened up a bit and put the car back on the blocks so I don't break my back.
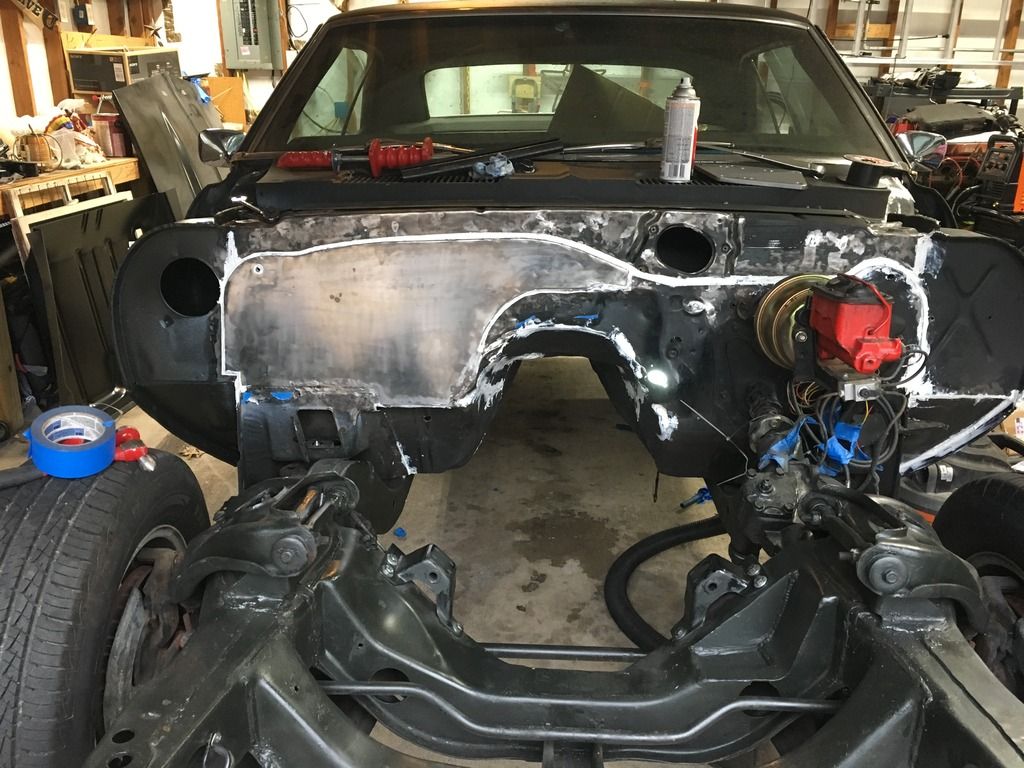
Went ahead and started to remove this section of firewall to insert my DSE smooth panel. I cleaned out the seam sealer and spot welds to start then cut out a preliminary area to test fit the panel. While I was test fitting the area I found that the firewall and cowl were pushed back roughly 2" to fit the old distributor so I had to find a tool to fix this. I ended up borrowing my friends slide hammer that screws into the sheet metal rather than spot welds to he sheet metal. This worked good for pulling out the majority of the large dented section but the amount of holes needed was going to destroy the cowl so I left it as is once I got the firewall and cowl pretty much in line with the rest of the cowl. I'll acquire a spot welder in the near future and finish up the smaller dents. All holes were filled on the firewall lap and cowl and ground down flush prior to welding the panel in place. I'll need to go back later and fill the throttle petal hole and a couple other areas down low on the firewall. Also addressed the rust around the whiper motor hole.
Once I got it fitted I went ahead and welded the panel in place then went back and ground down the welds a bit.
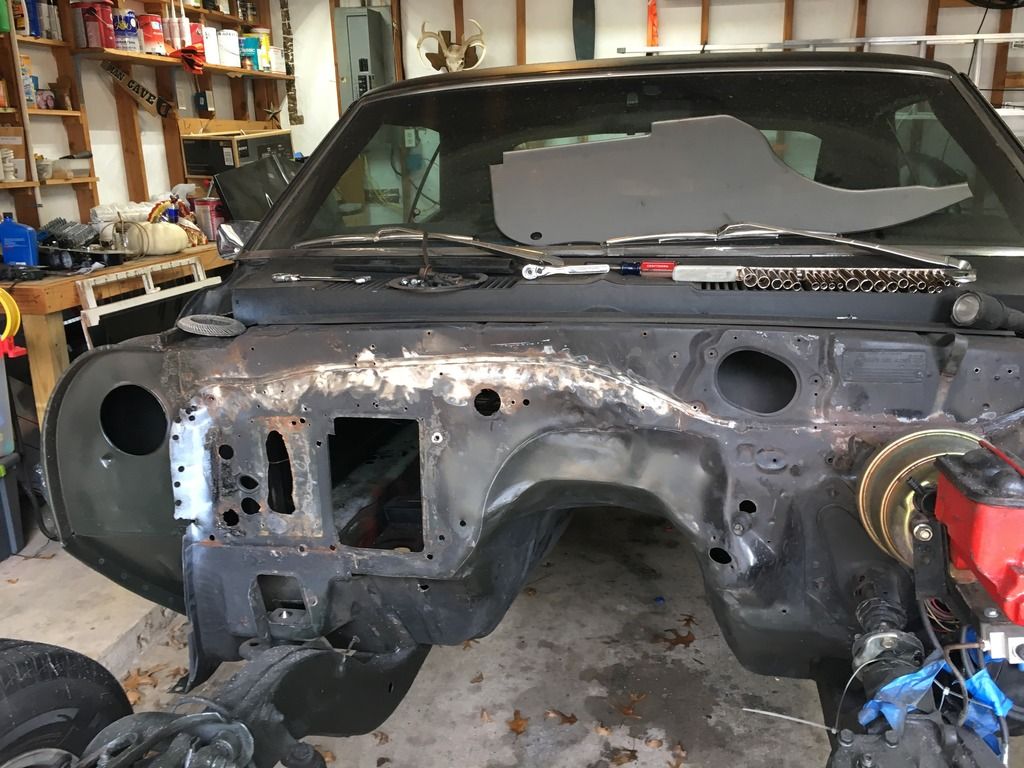
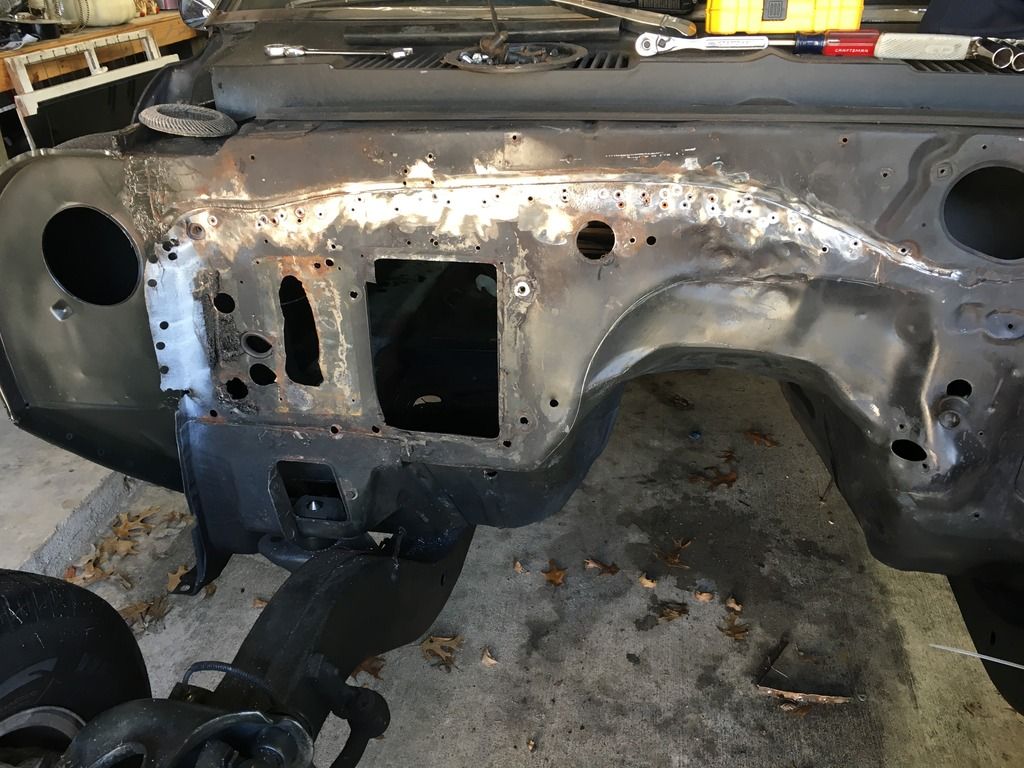
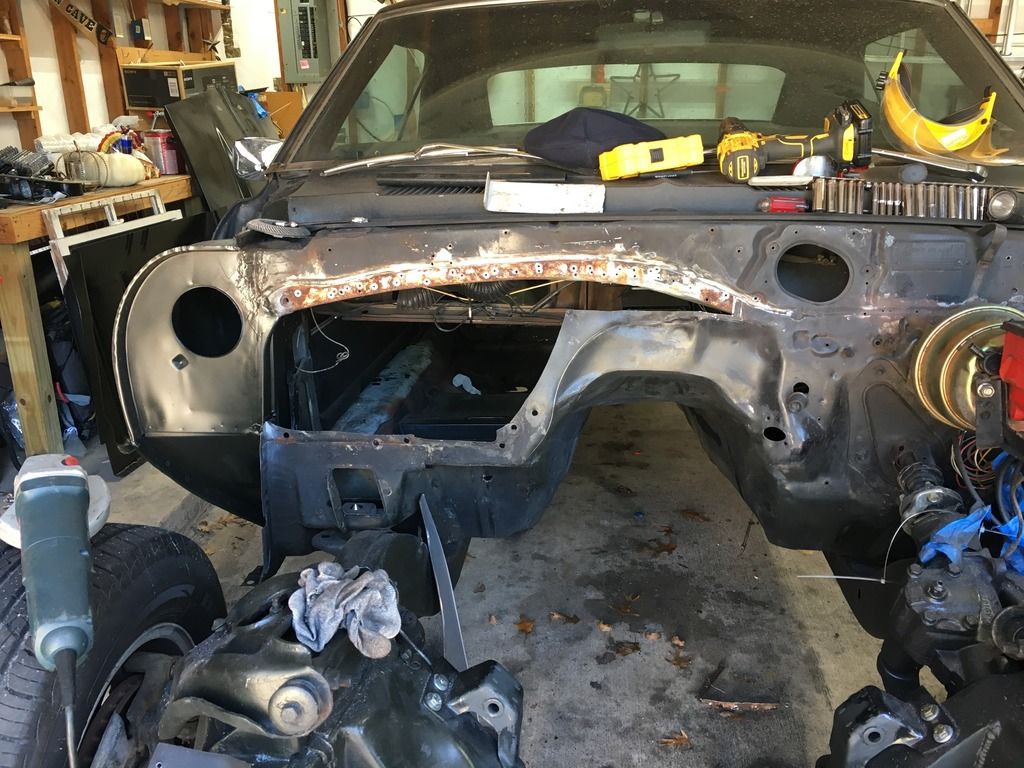
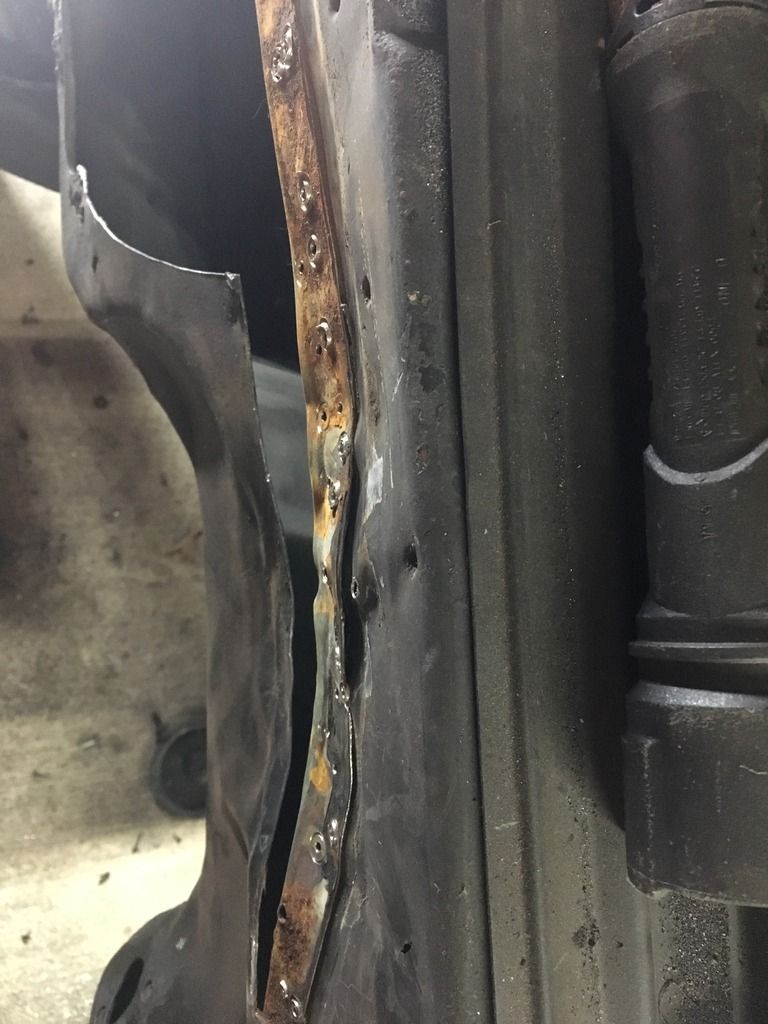
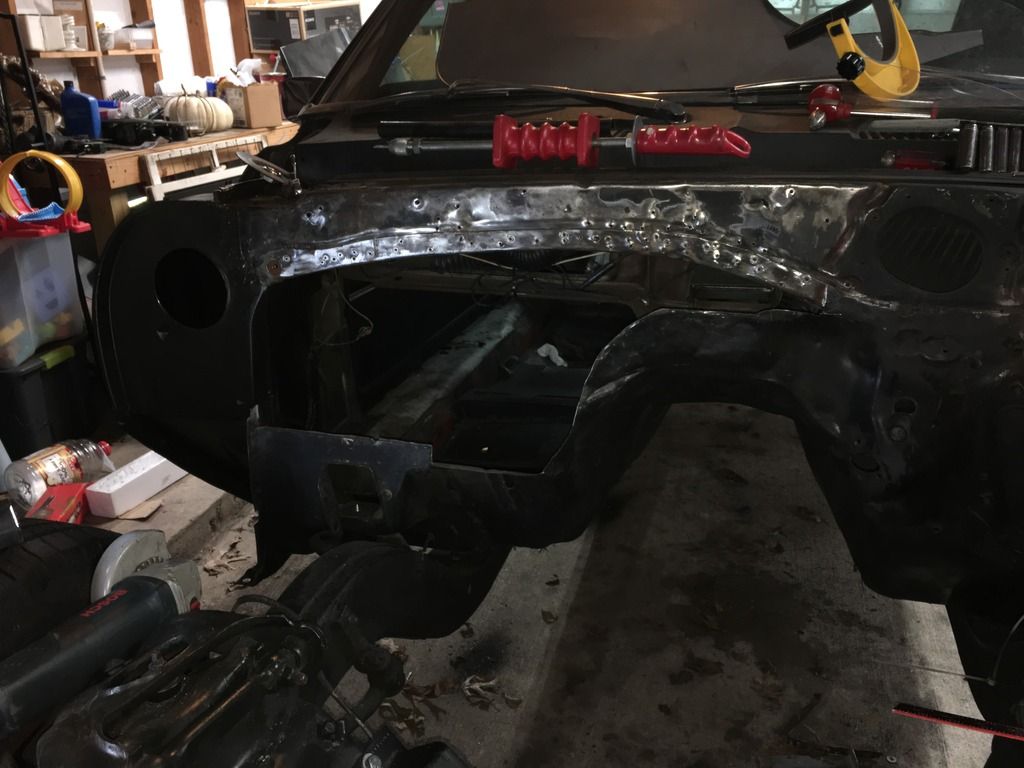
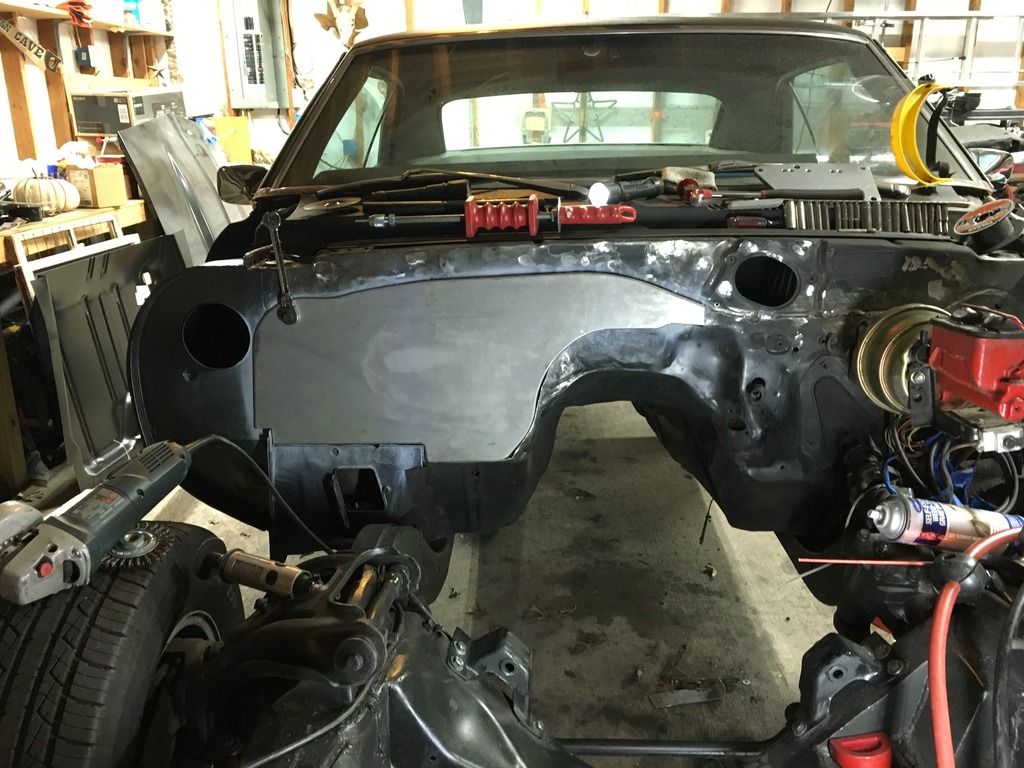
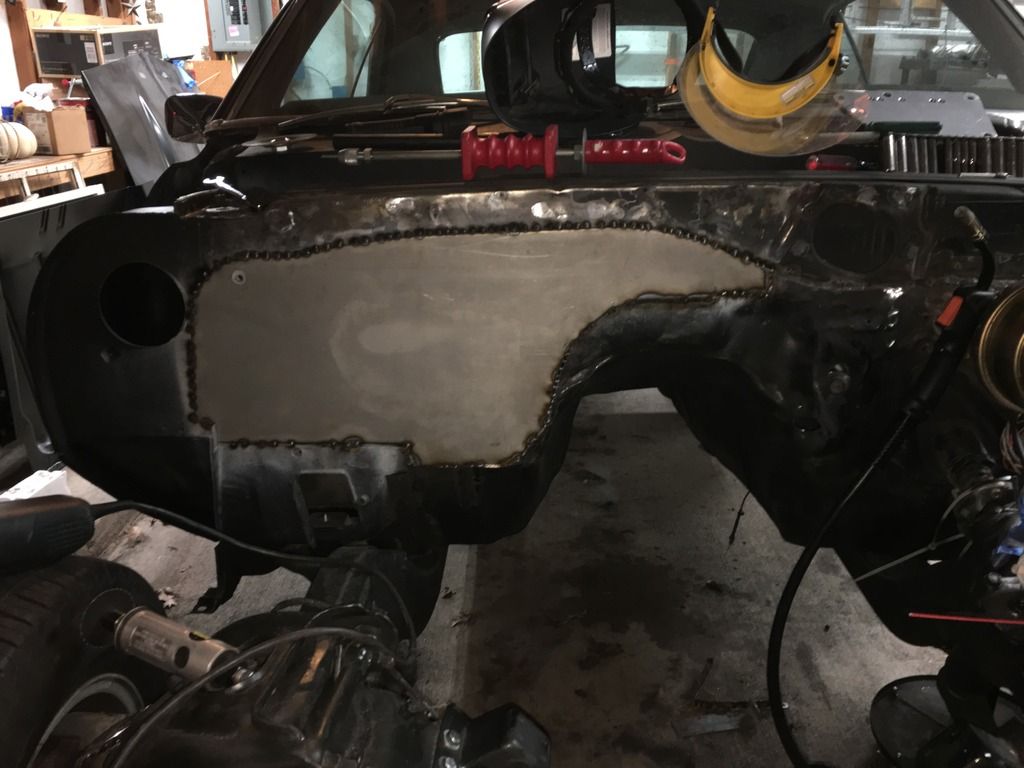
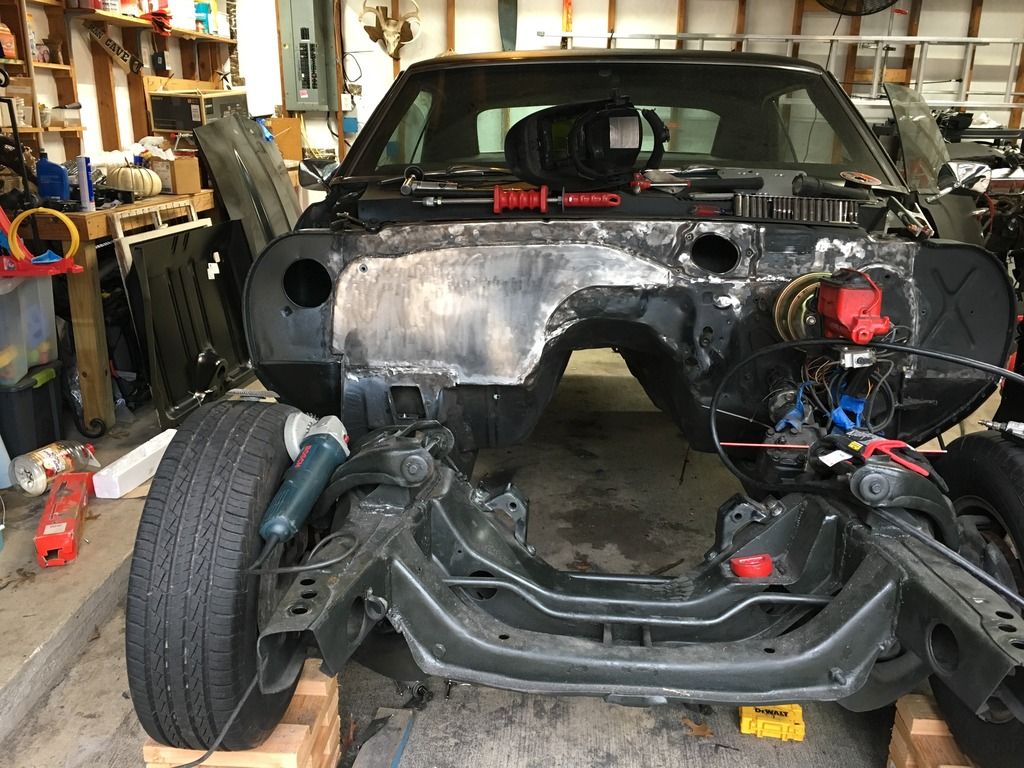
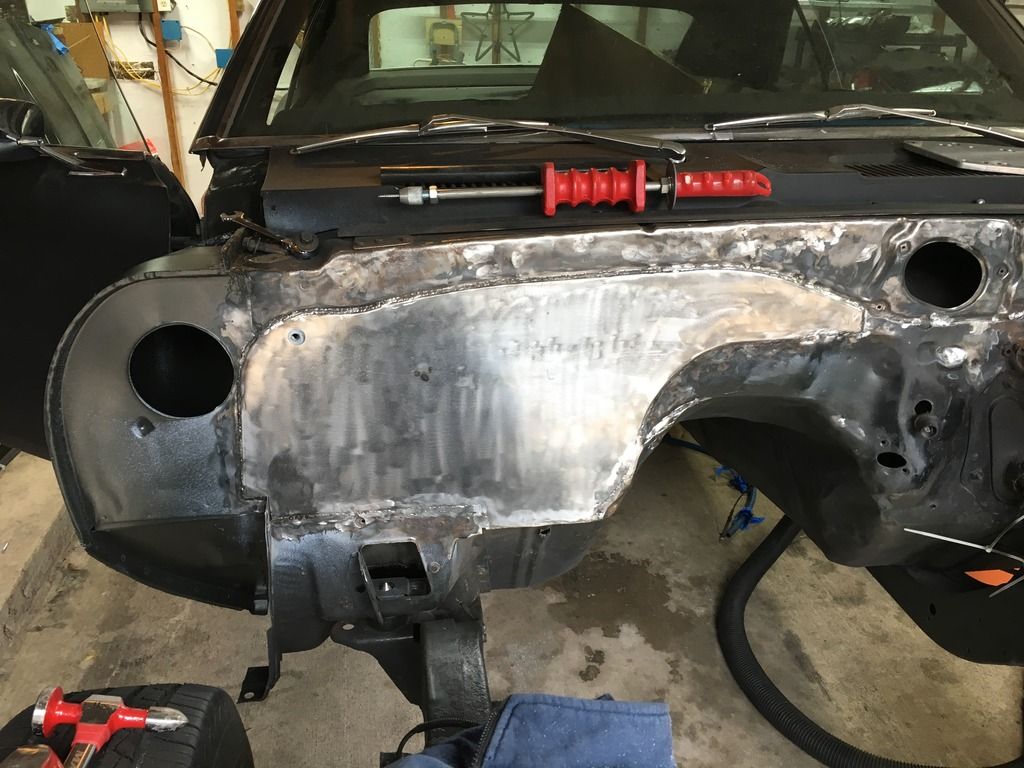
The burn marks on the panel you see is my sweet nut I welded on the backside to bolt up the Vintage Air motor.
Went ahead and started to remove this section of firewall to insert my DSE smooth panel. I cleaned out the seam sealer and spot welds to start then cut out a preliminary area to test fit the panel. While I was test fitting the area I found that the firewall and cowl were pushed back roughly 2" to fit the old distributor so I had to find a tool to fix this. I ended up borrowing my friends slide hammer that screws into the sheet metal rather than spot welds to he sheet metal. This worked good for pulling out the majority of the large dented section but the amount of holes needed was going to destroy the cowl so I left it as is once I got the firewall and cowl pretty much in line with the rest of the cowl. I'll acquire a spot welder in the near future and finish up the smaller dents. All holes were filled on the firewall lap and cowl and ground down flush prior to welding the panel in place. I'll need to go back later and fill the throttle petal hole and a couple other areas down low on the firewall. Also addressed the rust around the whiper motor hole.
Once I got it fitted I went ahead and welded the panel in place then went back and ground down the welds a bit.


The burn marks on the panel you see is my sweet nut I welded on the backside to bolt up the Vintage Air motor.
The following users liked this post:
Motown 454 (07-28-2022)
#63
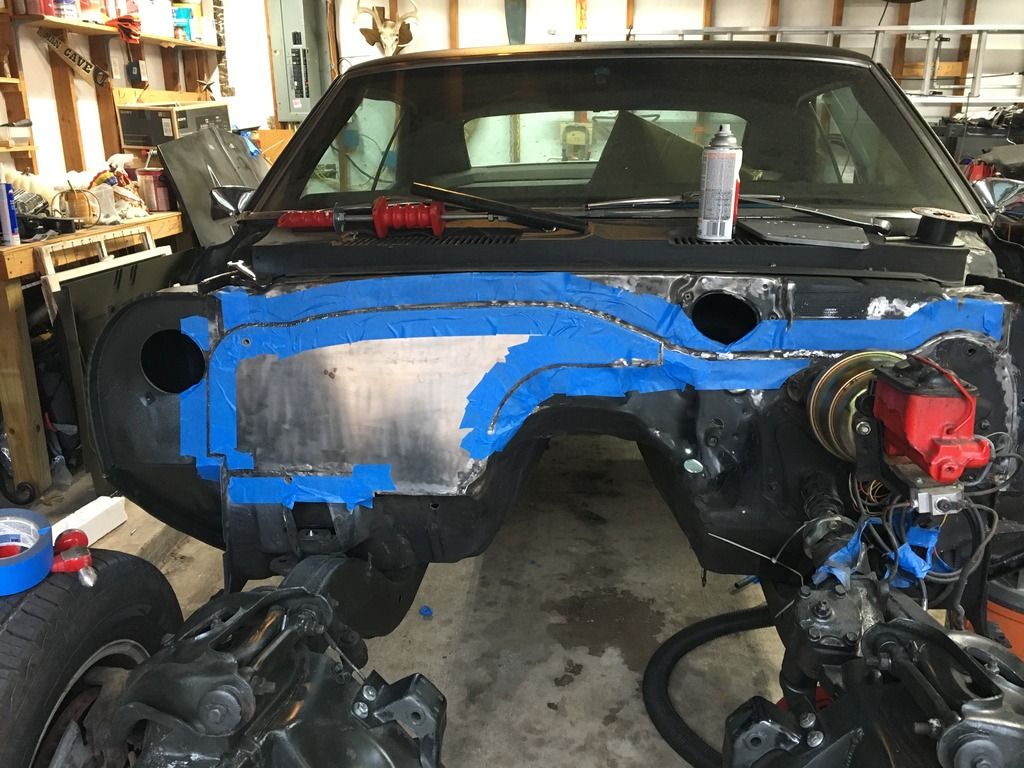
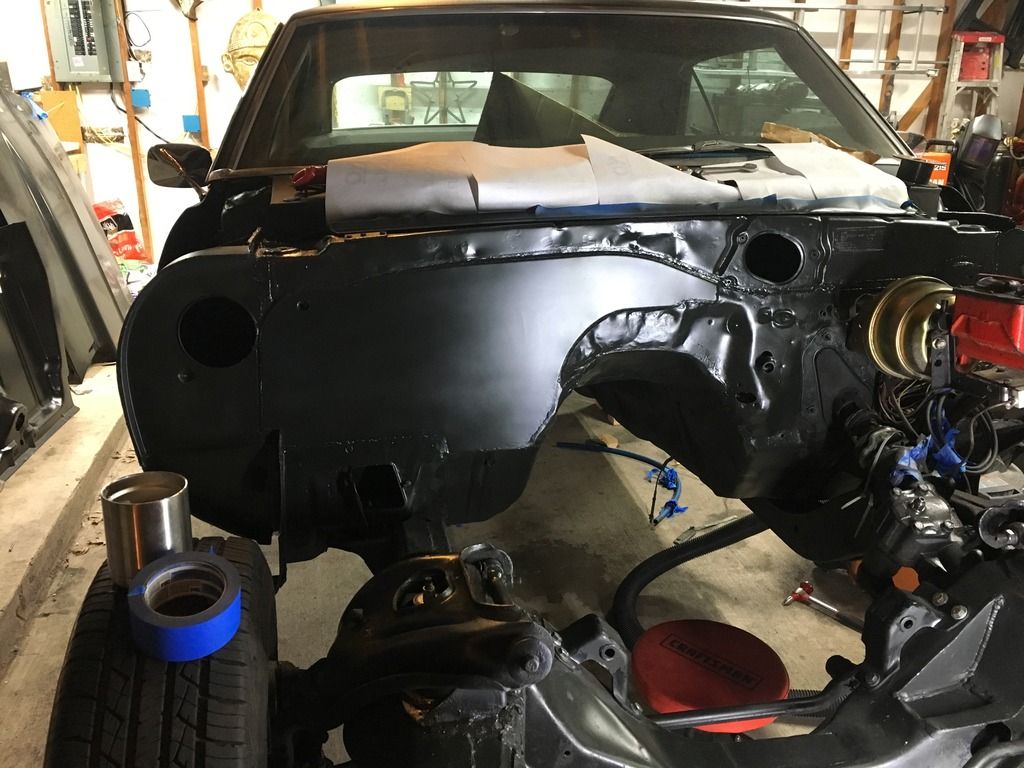
The next day I cleaned it up real good and applied seam sealer and put some primer on it. Applied seam sealer to a few areas on the tunnel along the welds used to make the tunnel higher too.
Like I said, I'll need to go back and pull the cowl out a bit to get it straight. You can see I also did not get it completely flush with the cowl, I was not going for that, I just wanted to get rid of the heater box and make it look a little better.
I don't have a picture but my Vintage Air motor had to be moved over about an inch from the original position due to fitment issues with the raised tunnel. I also welded a nut to the back of the new panel to secure the motor and it fits good now.


#65
Thanks!
I got a few more weeks worth of body fab work to do then I'll jump back on the motor and I be installing a new AAW harness.
Just got word that the headers are done and should be shipped back to me soon so I'll need to see if they fit now. The only issue I see is a problem with the headers is that the motor now sits lower so we'll have to wait and see.
#68
I have a tig. tig braze is an option Iíll consider. Iíve done some work with silicon-bronze and itís easy but not very cheap and Iíd probably need a decent amount of rods.
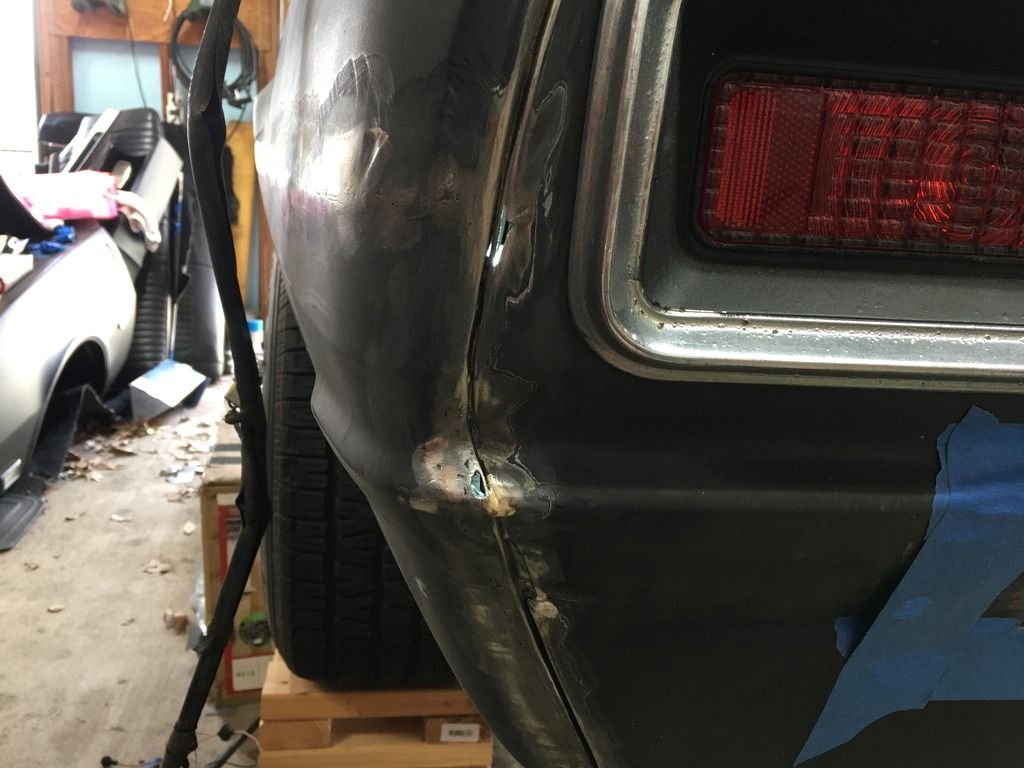
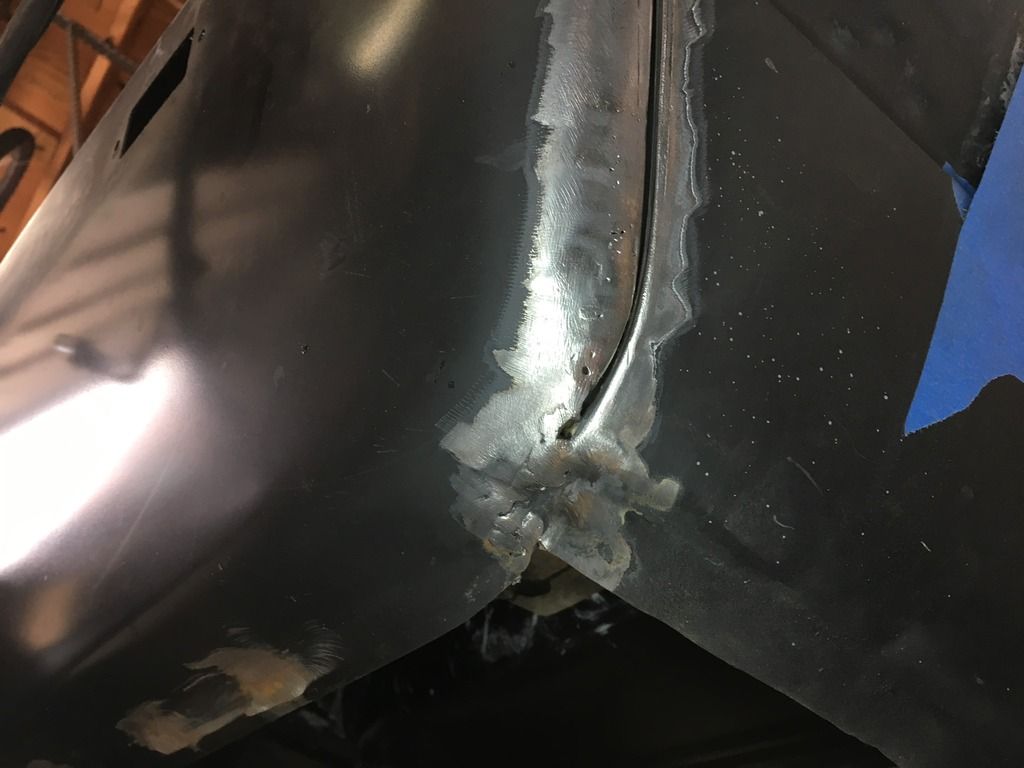
Bondo or body sealer may happen depending on my time i can dedicate to this area. I already repaired the holes in the panel and quarter. I may even just revisit this area when it comes time to paint.
Bondo or body sealer may happen depending on my time i can dedicate to this area. I already repaired the holes in the panel and quarter. I may even just revisit this area when it comes time to paint.
#69
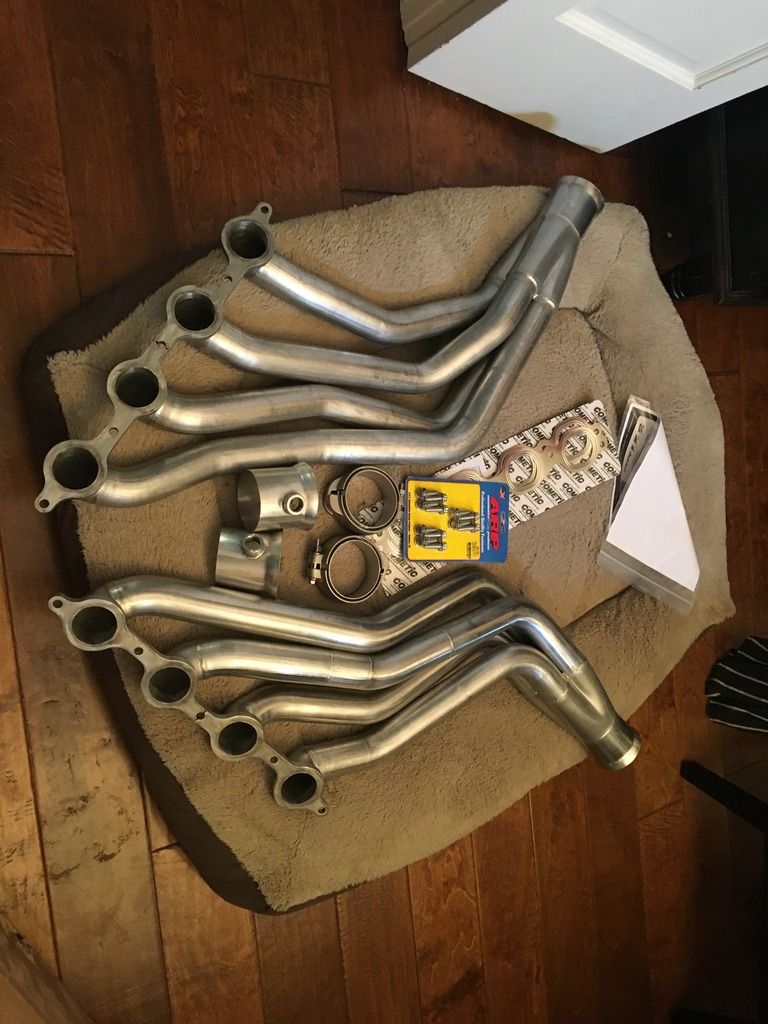
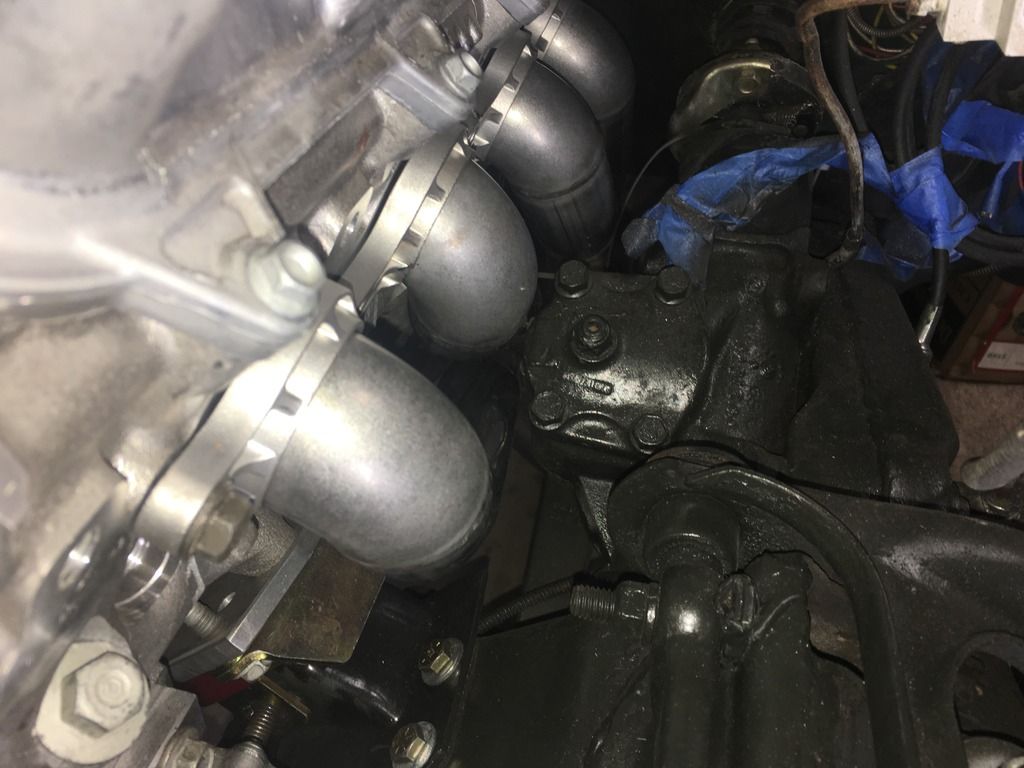
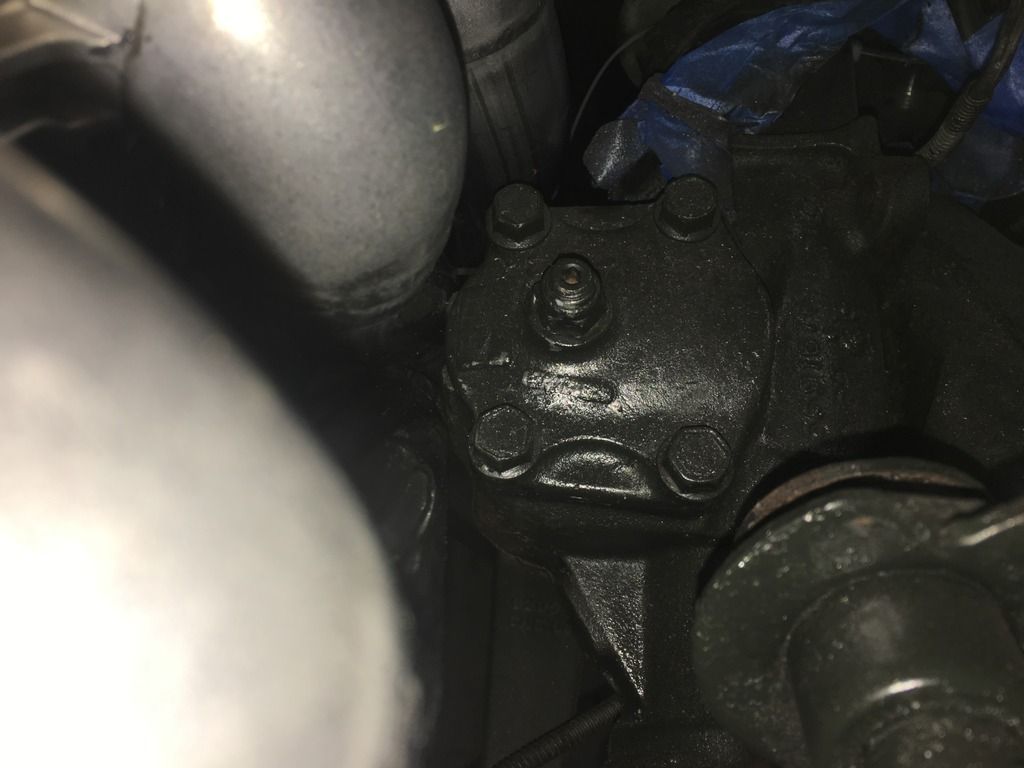
I got the headers in and the final product looks nice!
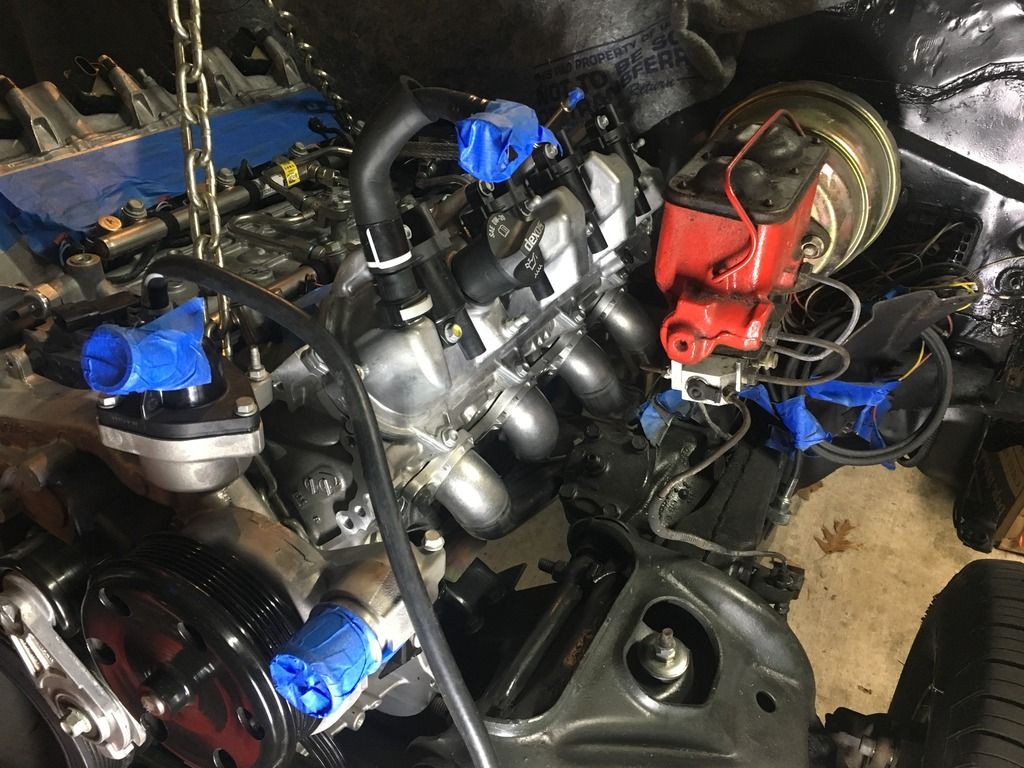
I stuck the motor back in real quick to check the fitment and they slid in like a glove. They make a little contact with the PS box where the cast lines running vertically on the outside of the housing as seen in the photos. I'll end up grinding those areas down a little and it should give me enough room, if not I'll massage the tubes a little. The revisions Ultimate Headers would have worked perfect had we not dropped the motor down more. They said they would adjust the headers more if needed but I think I can get it going
I don't have a photo but the tube is very close the the knock sensor bolt and I'm going to need to swap out the bolt for something smaller, maybe an allen key style fastener and all will be good.


#70
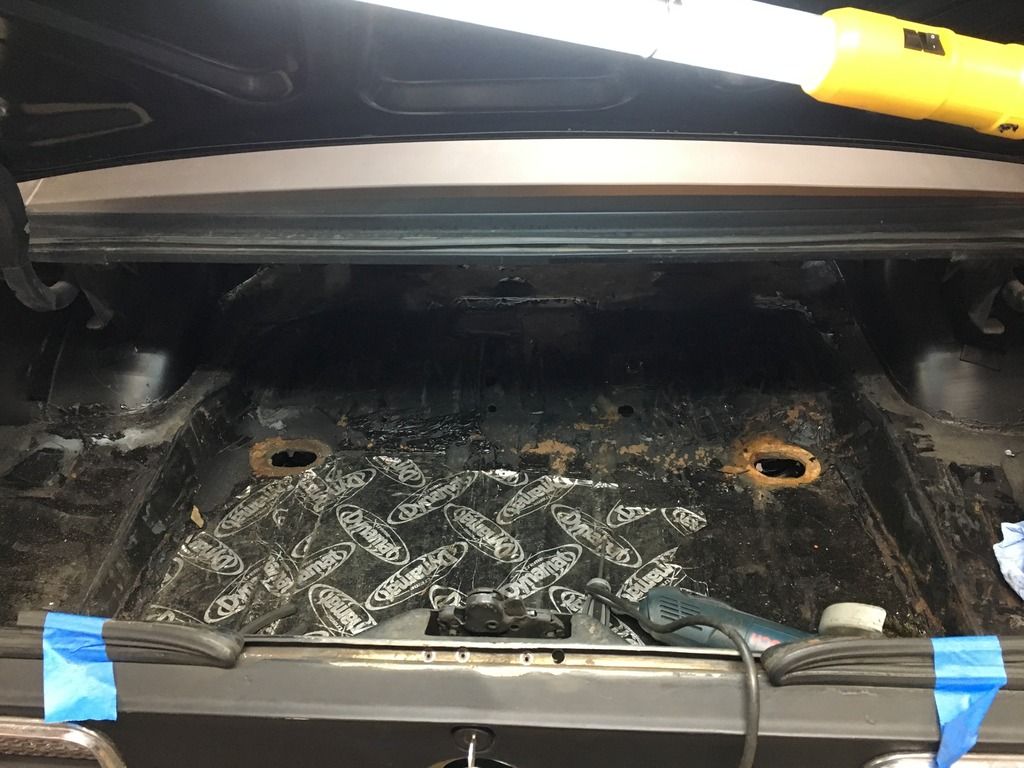
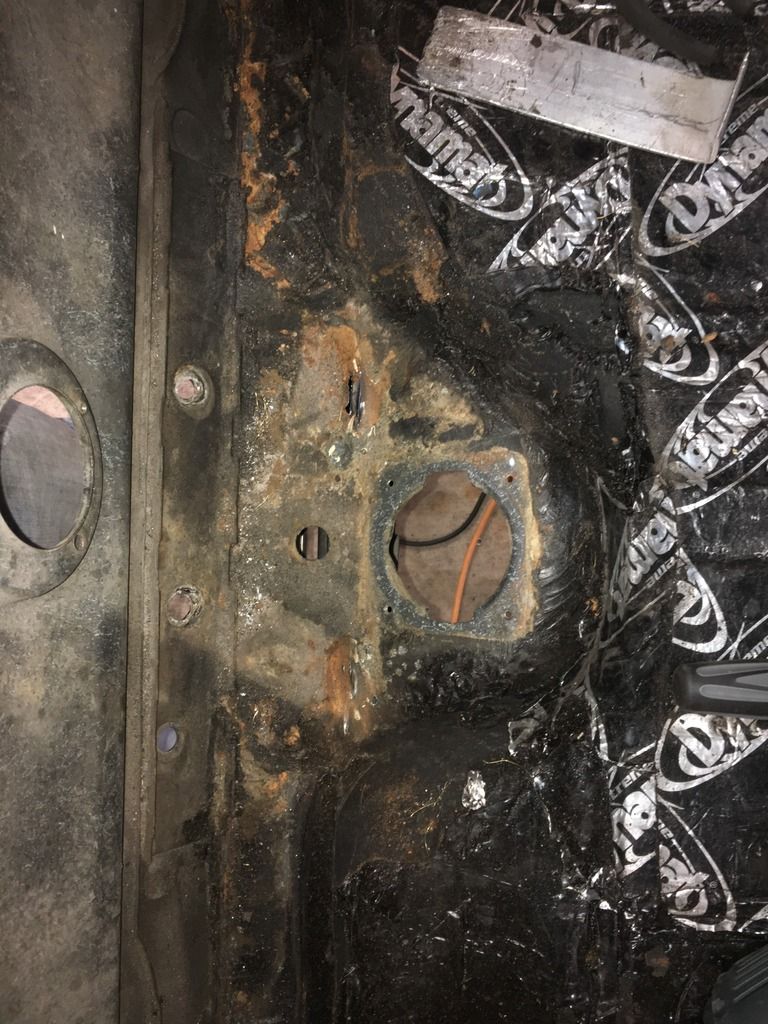
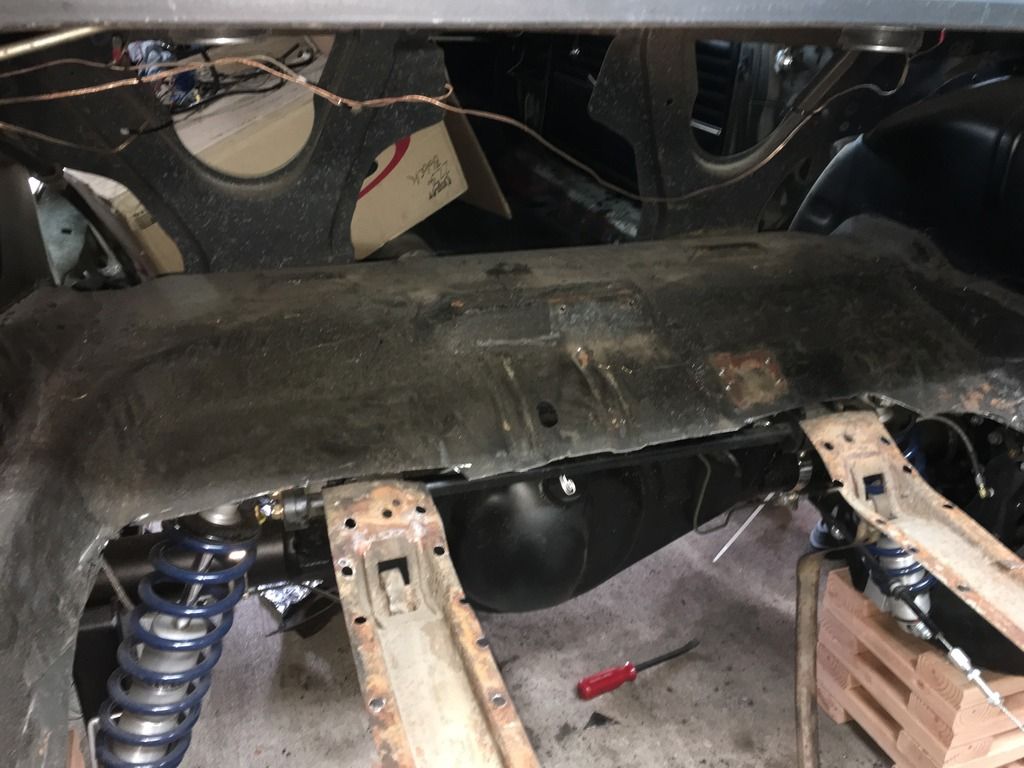
I started working on my trunk at this point. When I did the tubs and 4 link I found some pinholes on the bottom of the trunk after I removed the gas tank so I figured it would be good to install a new section.
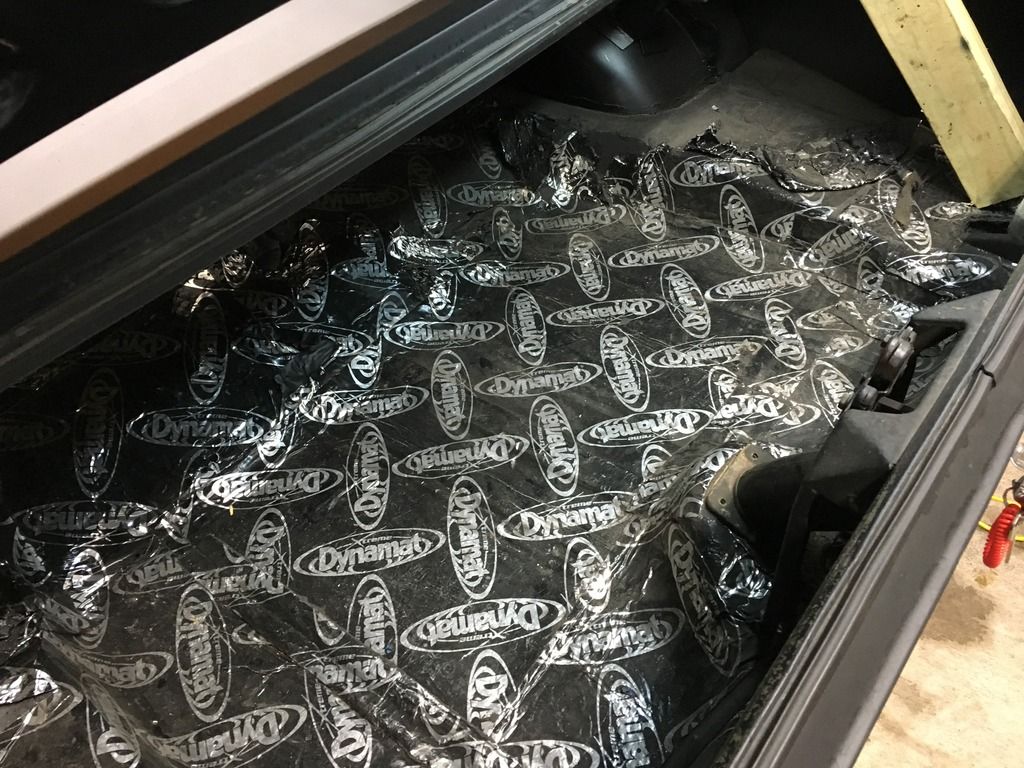
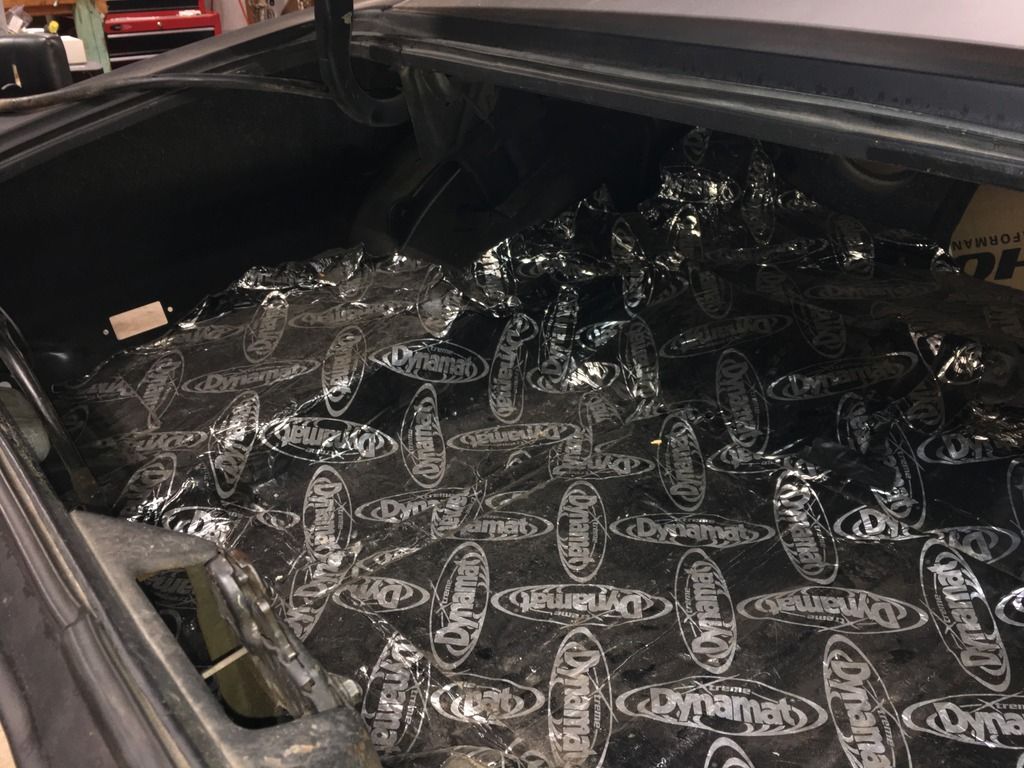
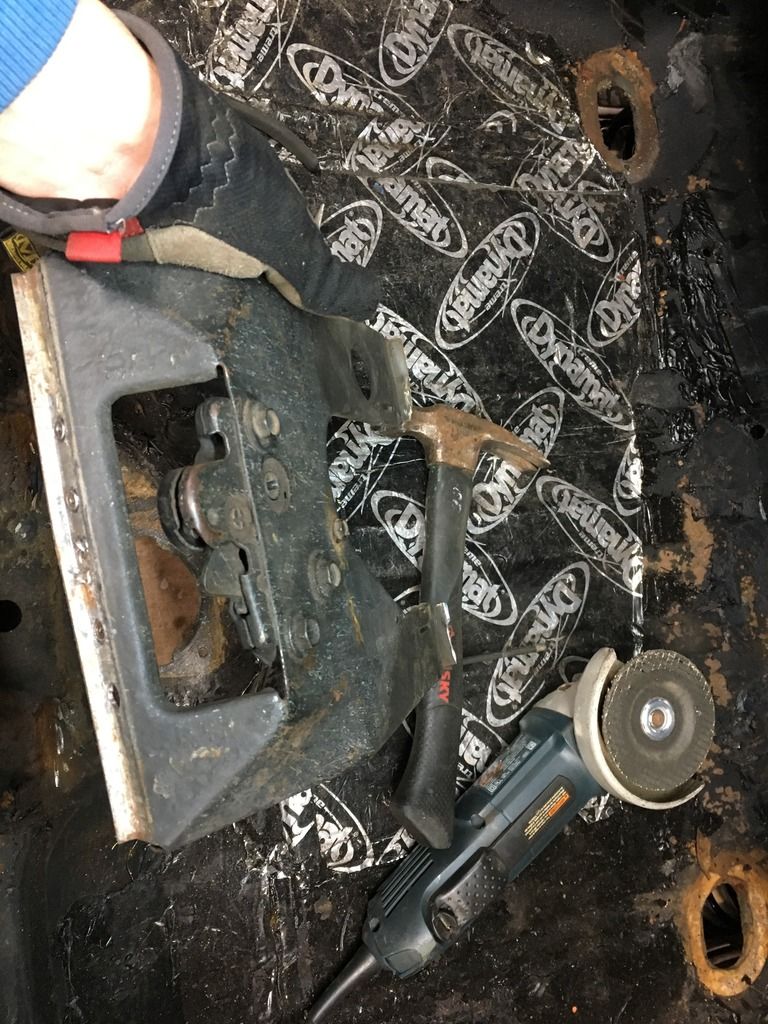
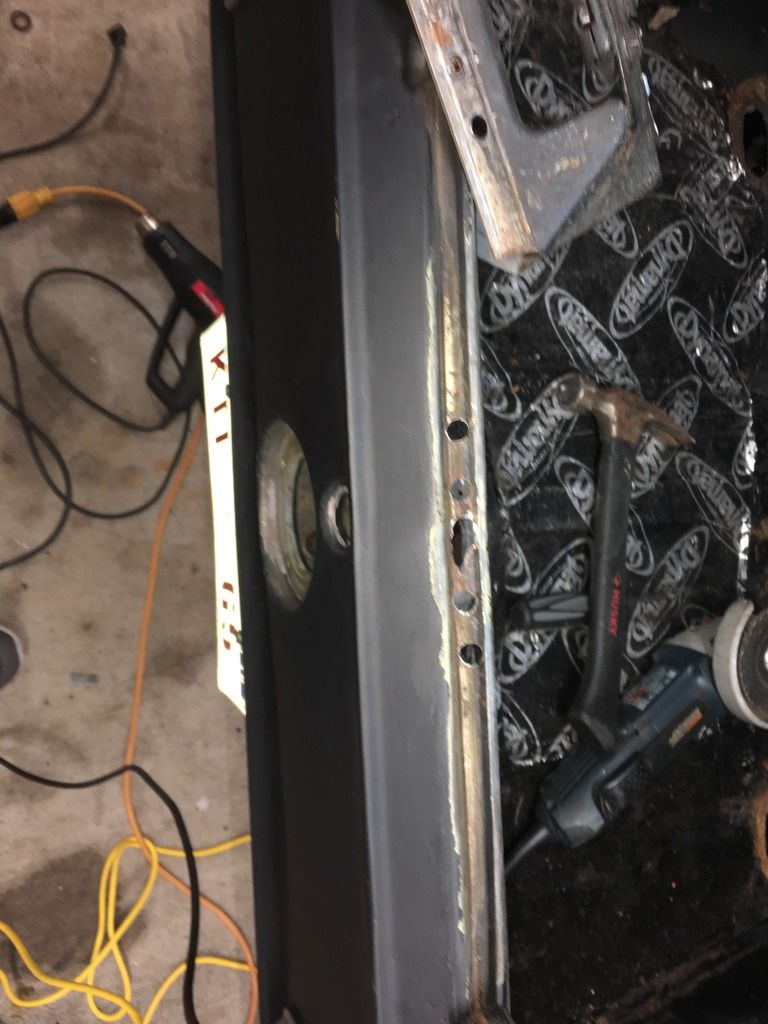
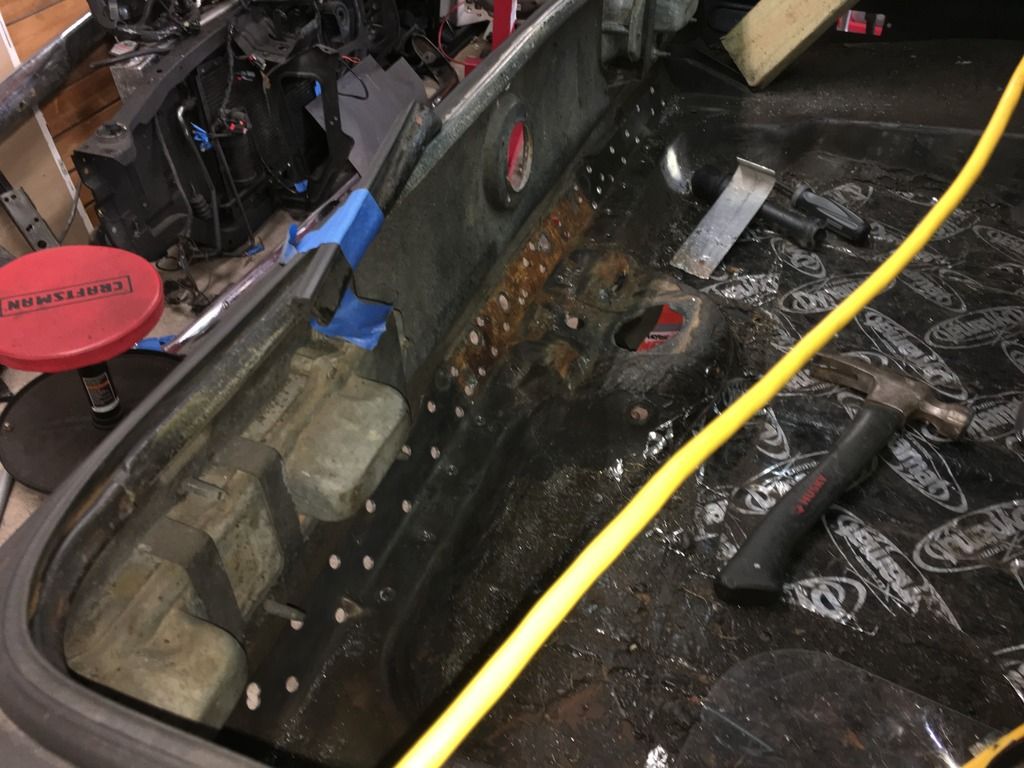
The Dynamat Extreme was covering the trunk floor and had to be removed. This stuff is such a pain in the *** to remove! I did some research on how to remove this stuff and it basically came down to heat or dry ice. I did the heat trick when I did the tubs and it took a while so I decided to try dry ice this go around. Long story short, this tar doesn't like to freeze. The ice would freeze the top metal layer of the Dynamat and the sheet metal below but the tar would still be sticky and would not come off. With the top layer freezing it would release from the tar but the tar would remain in place, just made more of a mess really in my case. I purchased 10lbs and crushed it up and even tried to just lay the block of ice in one area and it did not help. I ended up using heat to get off the majority of it then a wire wheel to get to bare metal.
After I got some of the Dynamat off I took off the trunk support bracket.


#71
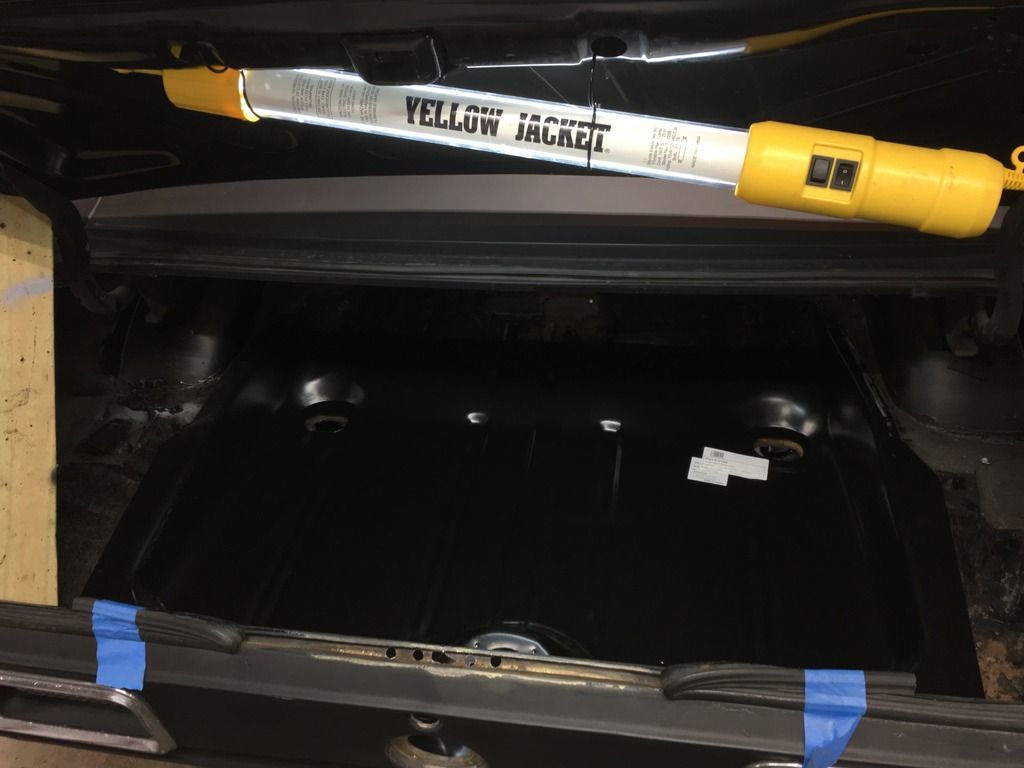
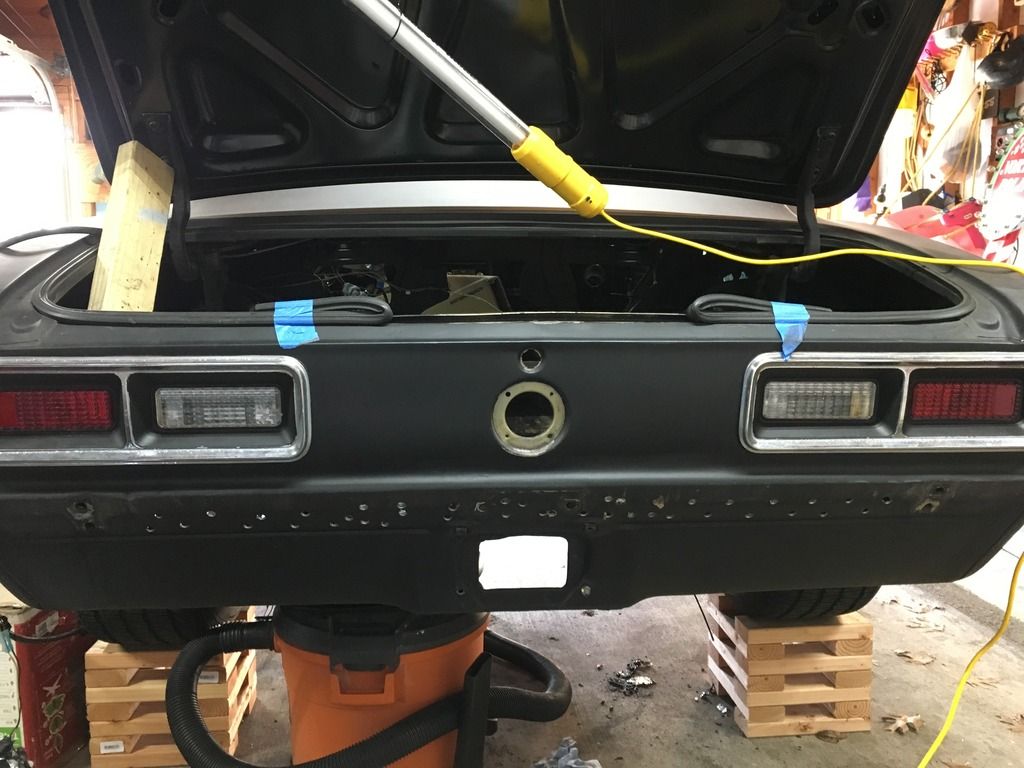
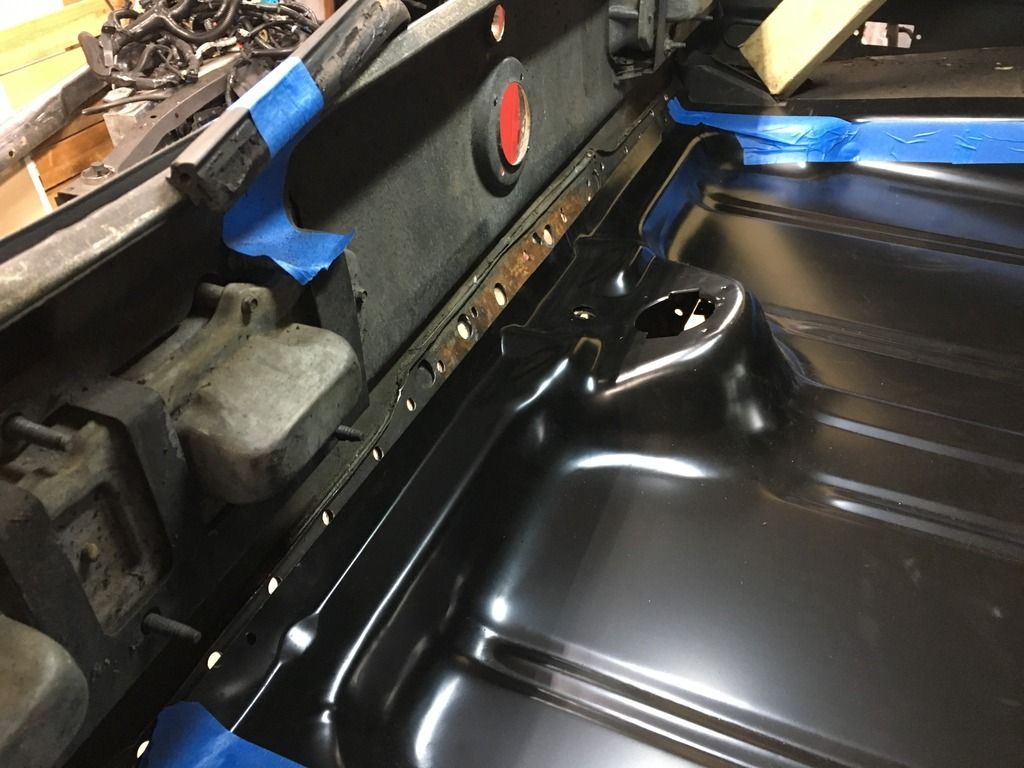
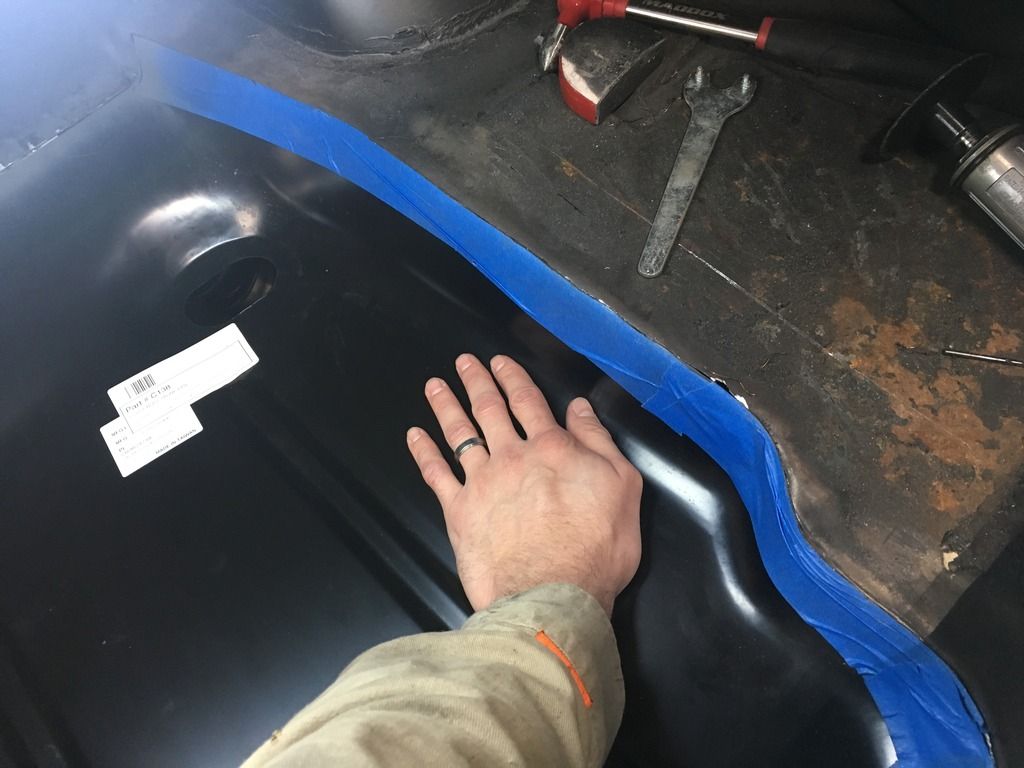
I then trimmed the pan around my mini tubs and set it in place to check the fitment and it looked good other than sitting a little high with the original still in there.
The original pan had a larger lip that sat up taller than the new pan and I didnt realize this until I made a mess drilling out all the spot welds on the back panel. I'll need to get a chill bar and fill in a few dozen holes later on...
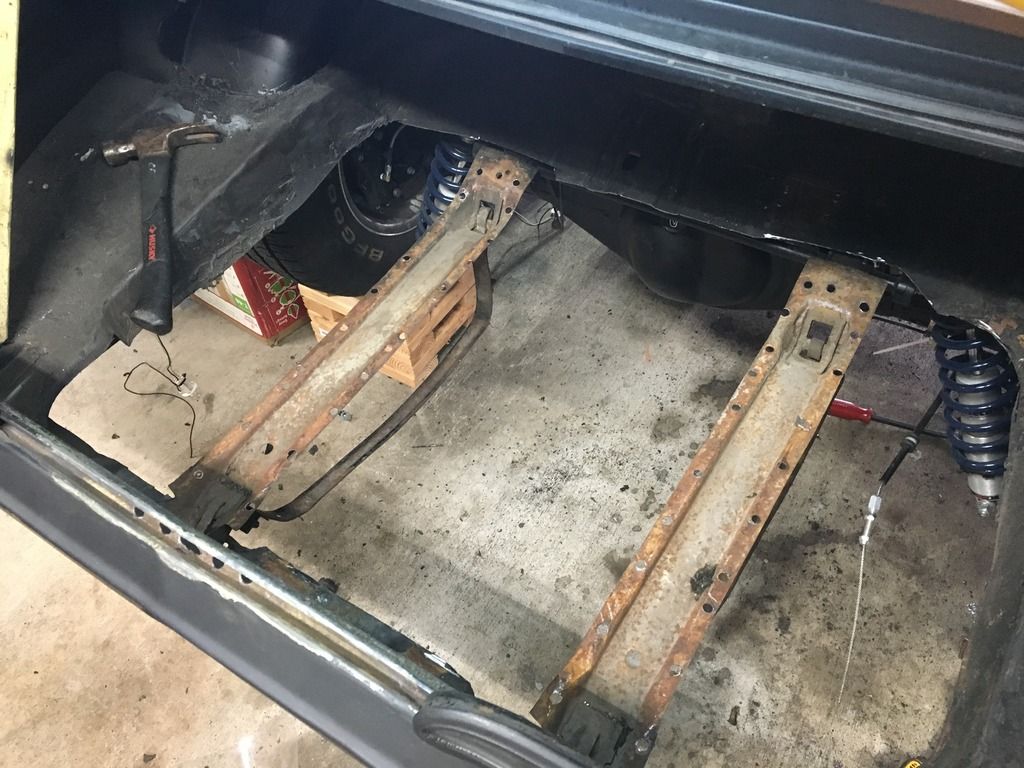
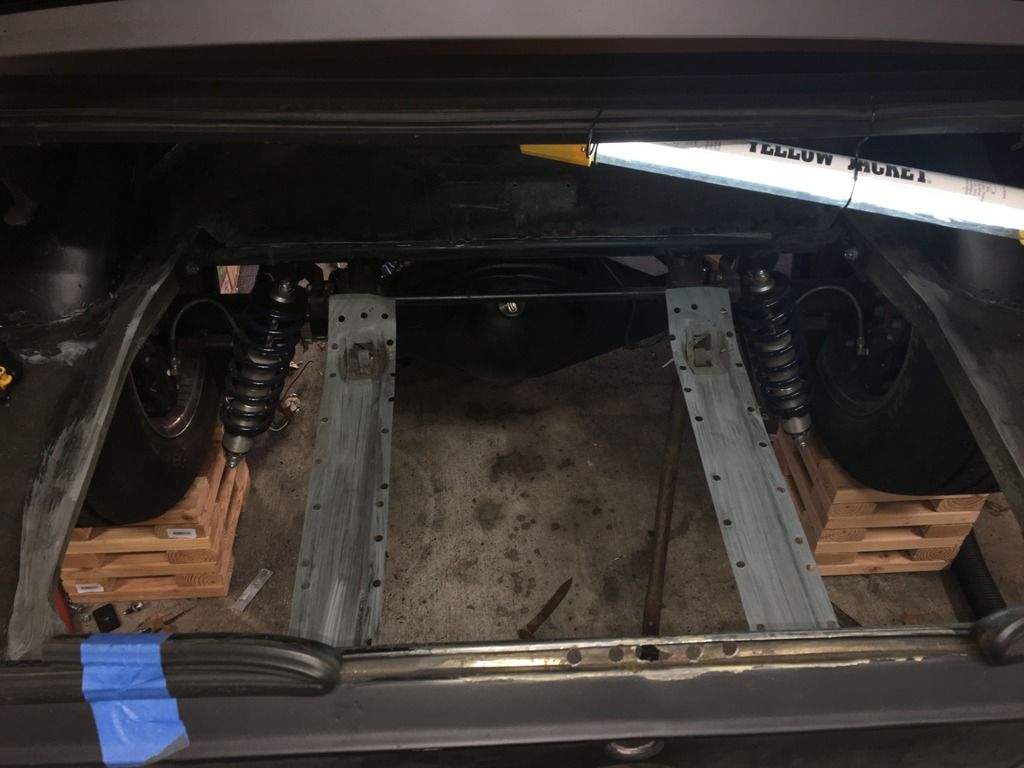
After all those holes I made more to release the gas tank supports from the bottom of the pan and then cut out the majority of the pan to start fitting it up better. In one of the last pictures you can see the Ridetech airbar supports the trunk supports perfectly where it bolts through the trunk floor, this will help me to get it fitted correctly too.


#72
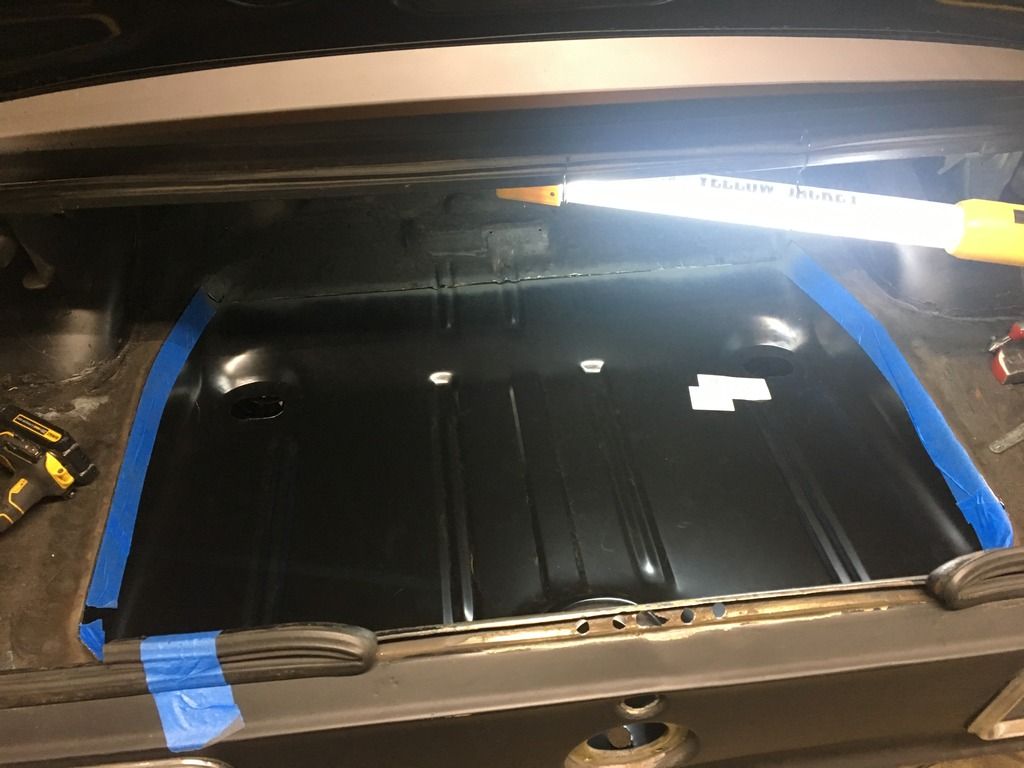
I chose to leave the frame rails alone and not mess with the metal around these areas because its in good condition and I'm about done with cutting out spot welds... I have access to both sides of the trunk pan where I'm but welding it all into place so it should work out fine. Got some weld through primer were needed and proceeded on.
Got it all cut out and the fit is very good. Only took about 20 attempts taking the new pan in and out until I got it where I wanted haha. Used some sheet metal screws and got it tacked in and then welded the gas tank supports from the bottom.
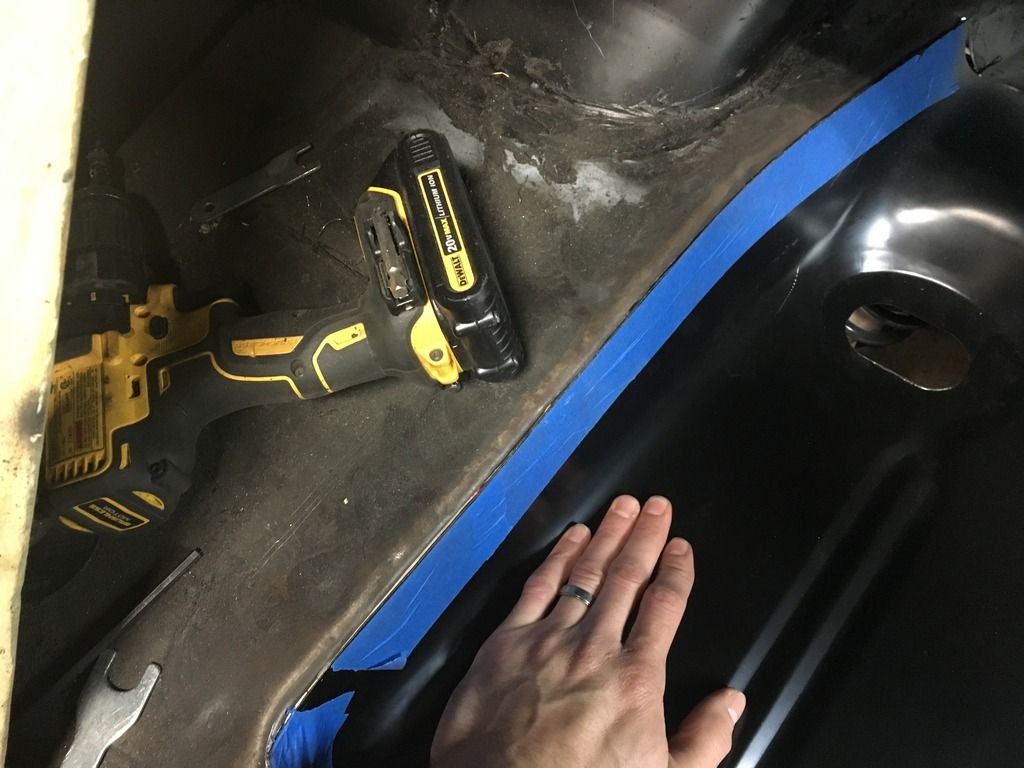
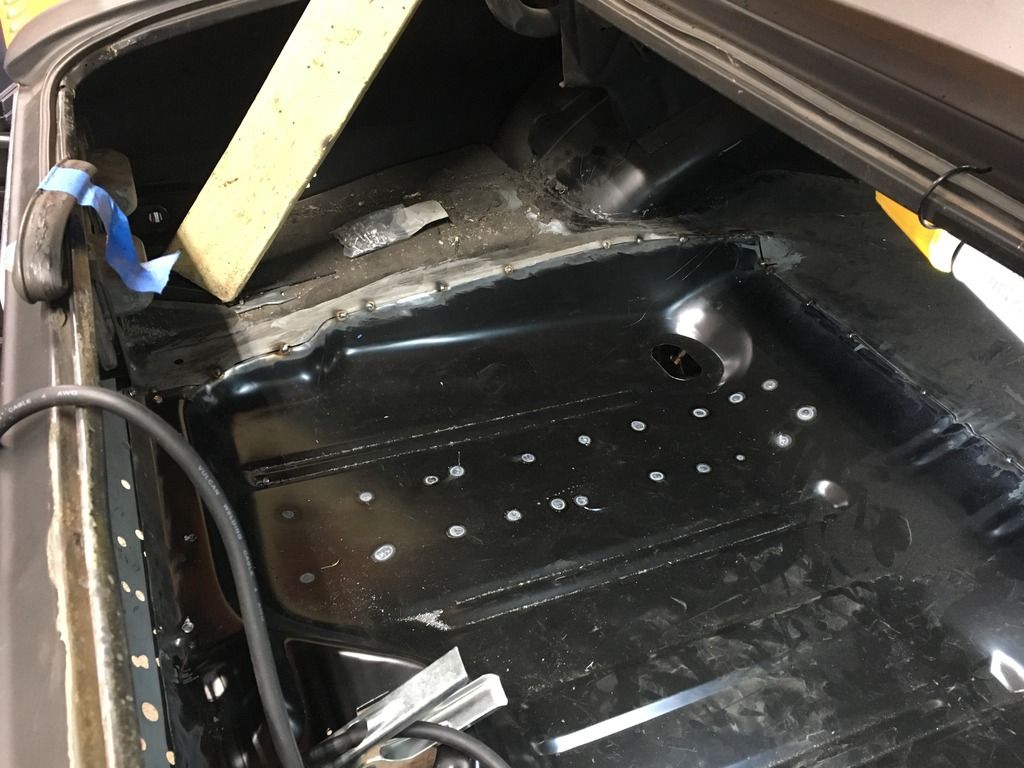
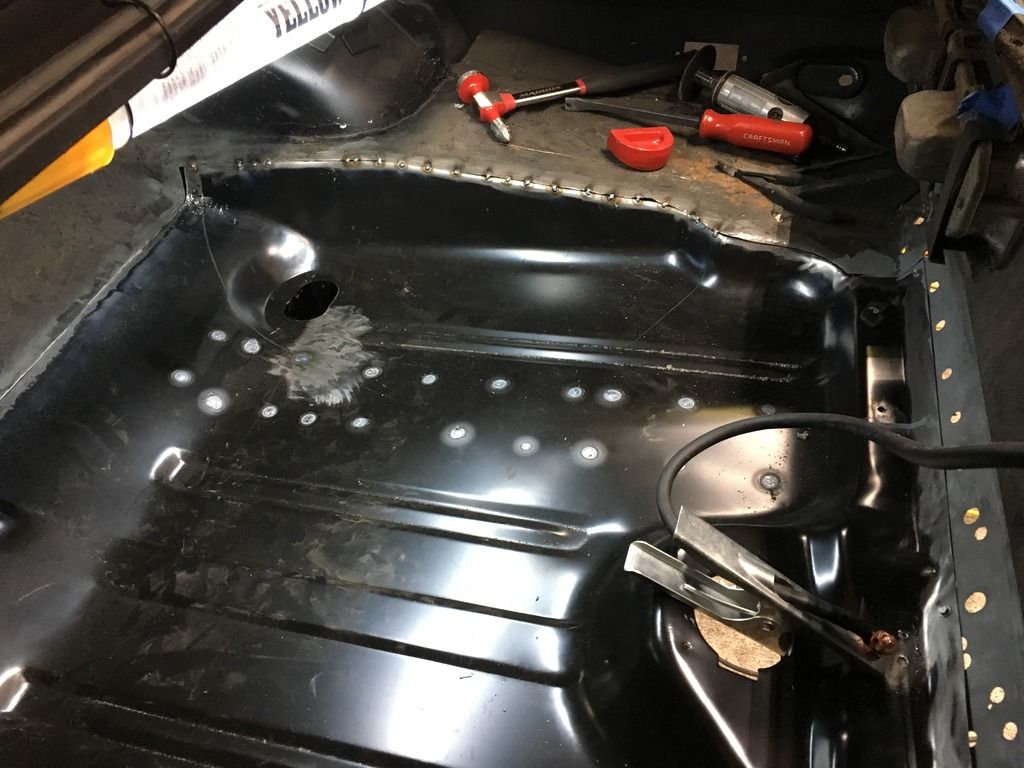
Got it all cut out and the fit is very good. Only took about 20 attempts taking the new pan in and out until I got it where I wanted haha. Used some sheet metal screws and got it tacked in and then welded the gas tank supports from the bottom.


#73
Got it all fully welded in and then ground down the welds. While I was there I also took off all the additional Dynamat off the trunk area above the frame rails.
Only Issue I had to deal with was the Ridetech Airbar still being installed. I did not want to remove this and the pan just about sits right on top of the bar so I used a bunch of 1/8" aluminum spacers between the bar and trunk pan so I did not weld to it on accident, it also helped to keep things cool and provided a little backing to weld over.
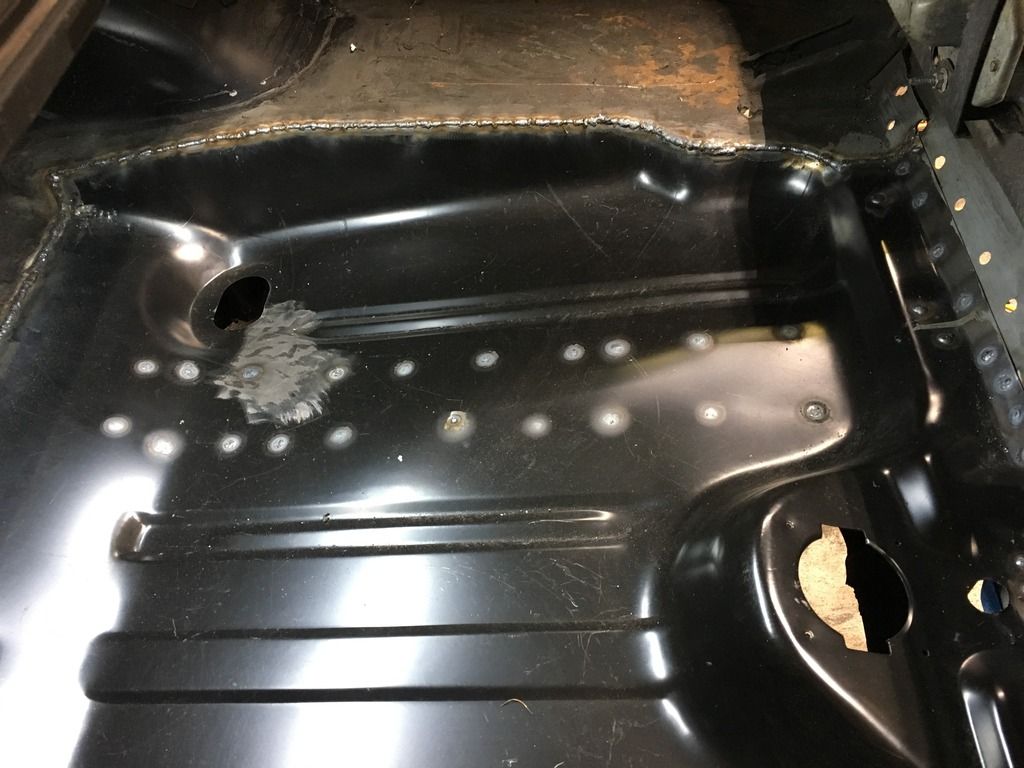
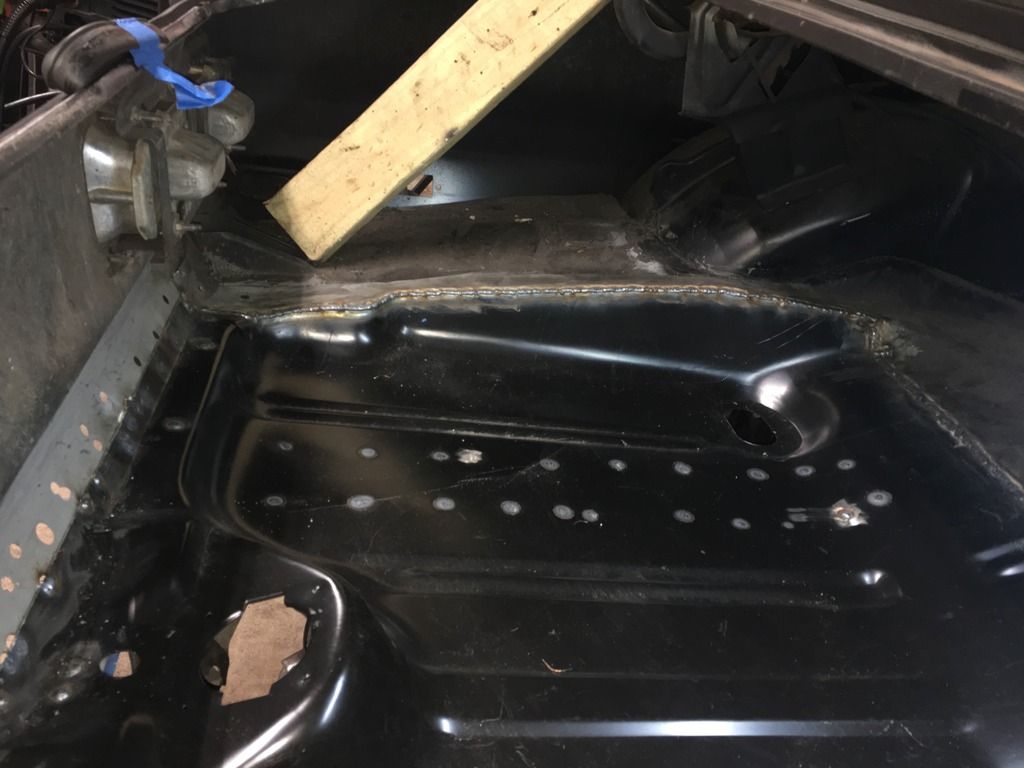
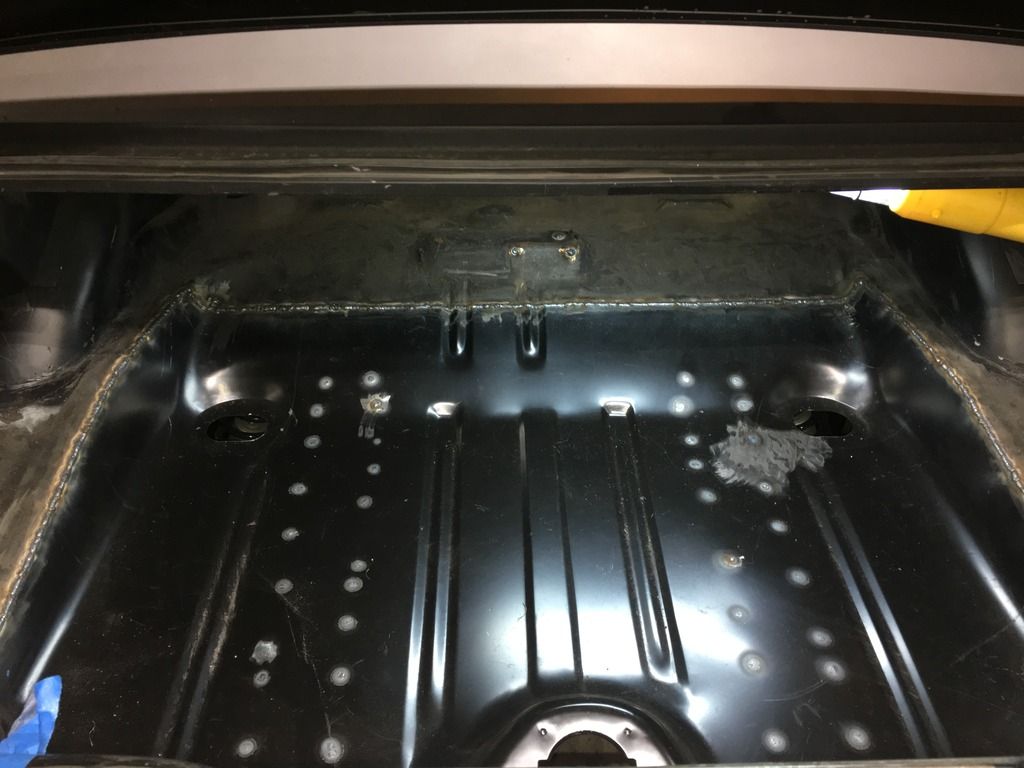
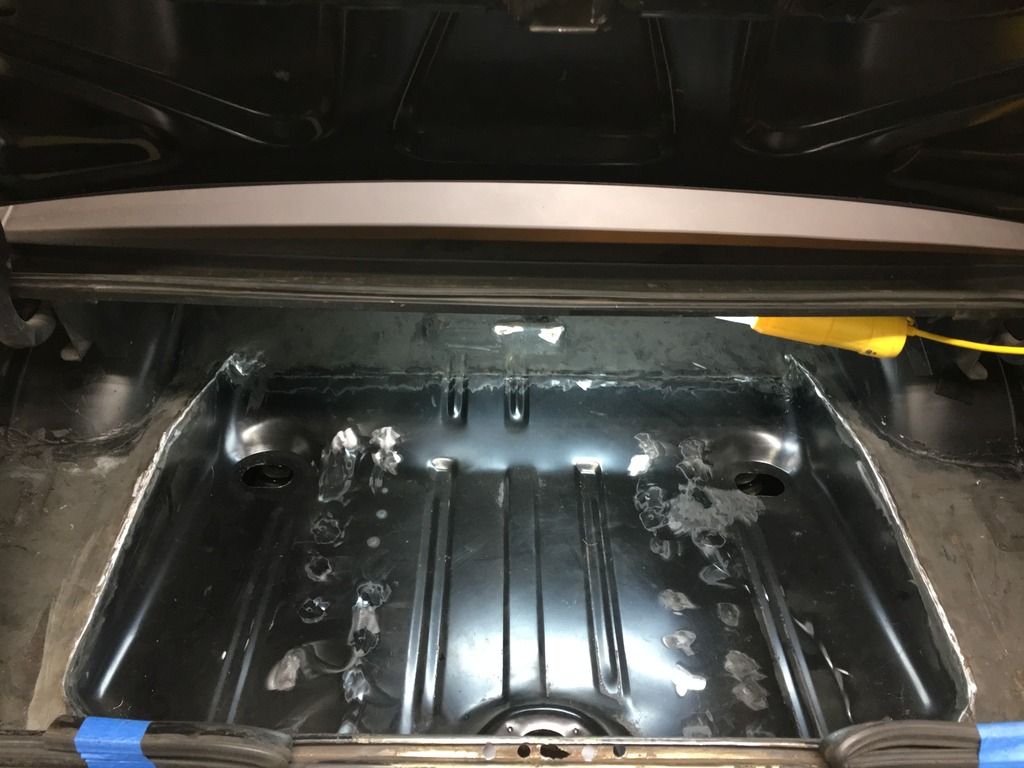
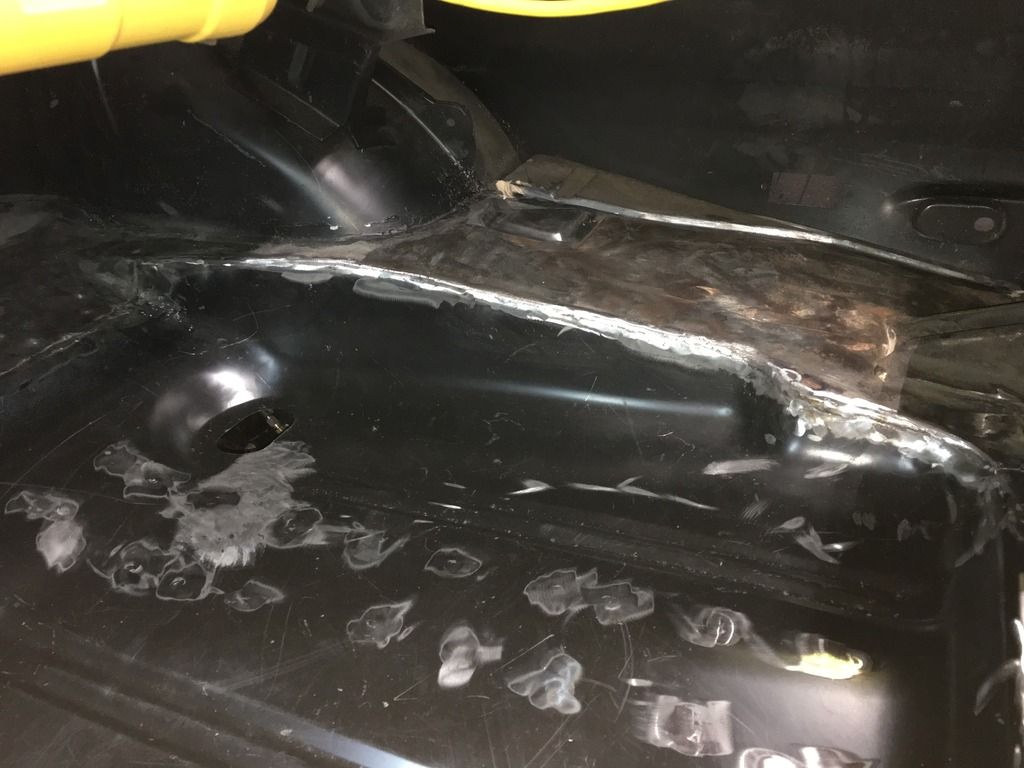
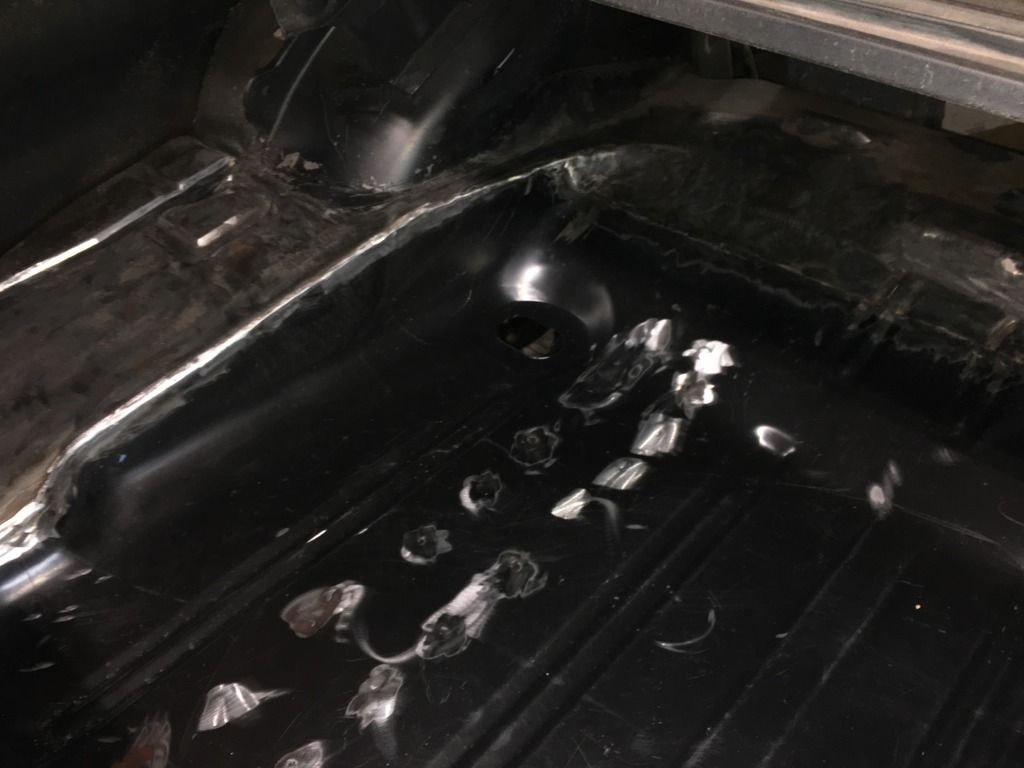
Only Issue I had to deal with was the Ridetech Airbar still being installed. I did not want to remove this and the pan just about sits right on top of the bar so I used a bunch of 1/8" aluminum spacers between the bar and trunk pan so I did not weld to it on accident, it also helped to keep things cool and provided a little backing to weld over.


#74
Got a couple of shots form under the car. That good penetration will hopefully keep the trunk from falling off haha. As you can see the weld is sitting just about on top of the airbar so I'll need to grind this down later on next time I remove the bar.
I seam sealed the areas inside the trunk needed attention and primed it for the time being.
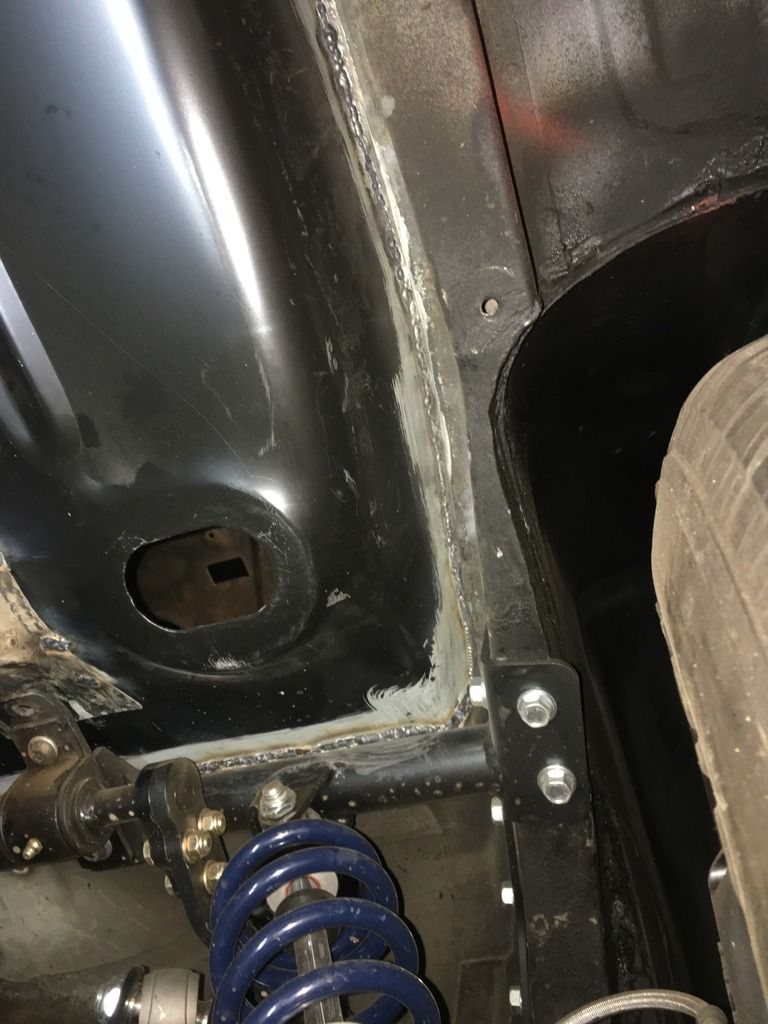
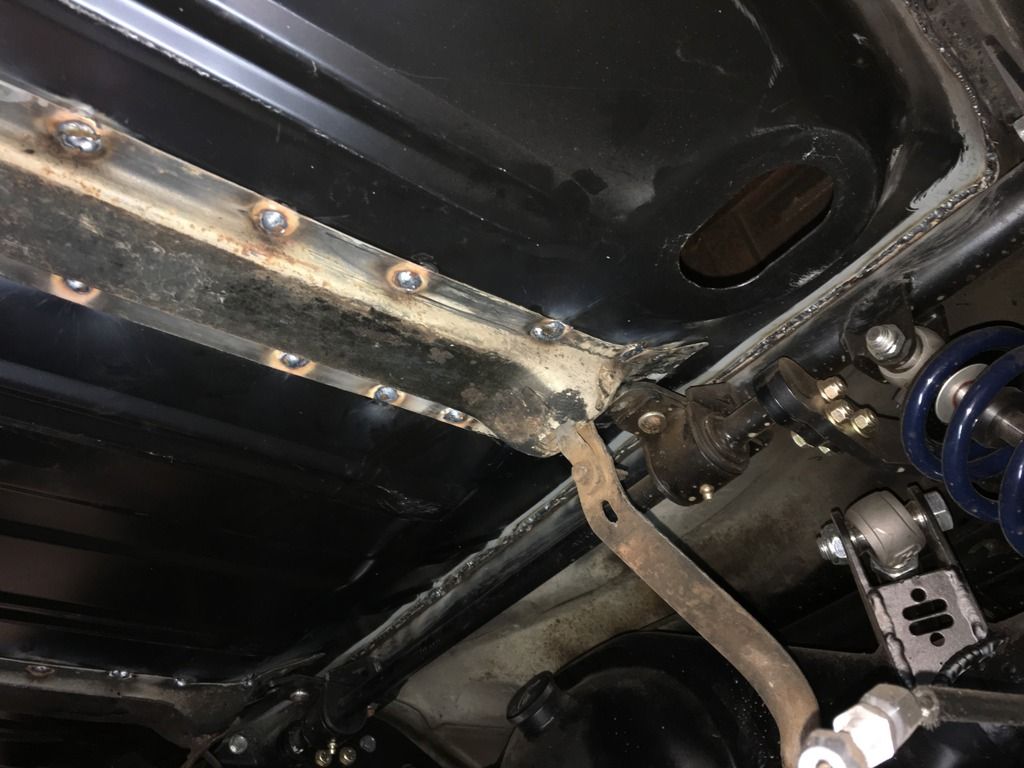
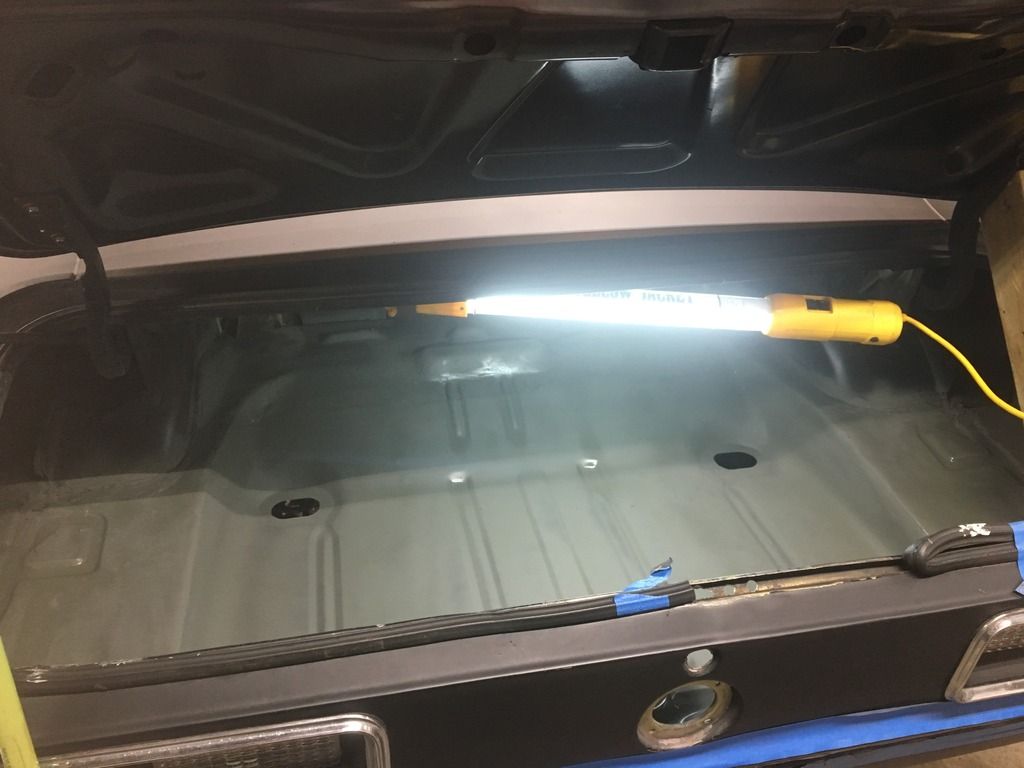
I seam sealed the areas inside the trunk needed attention and primed it for the time being.


#76
Thank you sir!
Guess you have a different user name on lateral G. Its funny, I clicked on your sig link and I have been keeping up with your build already. Yours looks Great! I'm wanting to look into the peddle shifter option as well but I want to get her back on the road first then do a few mods.
Guess you have a different user name on lateral G. Its funny, I clicked on your sig link and I have been keeping up with your build already. Yours looks Great! I'm wanting to look into the peddle shifter option as well but I want to get her back on the road first then do a few mods.
#77
#78
I took a small break from the trunk and focused on some of the patch work on the quarters the local shop did. I removed the paint and welded some pinholes along their shotty welds and fixed other areas like gouges with their cutoff wheel that was hidden in there... After some more welding I ground everything smooth and put some filler on the seams for the time being. While I was doing the filer I also put some on my trunk welds to make it look a little better once its painted later. I still need to go back and sand everything later still.
You can see the pinholes on the PS quarter. I don't have a pic of that side after I filled the pinholes.
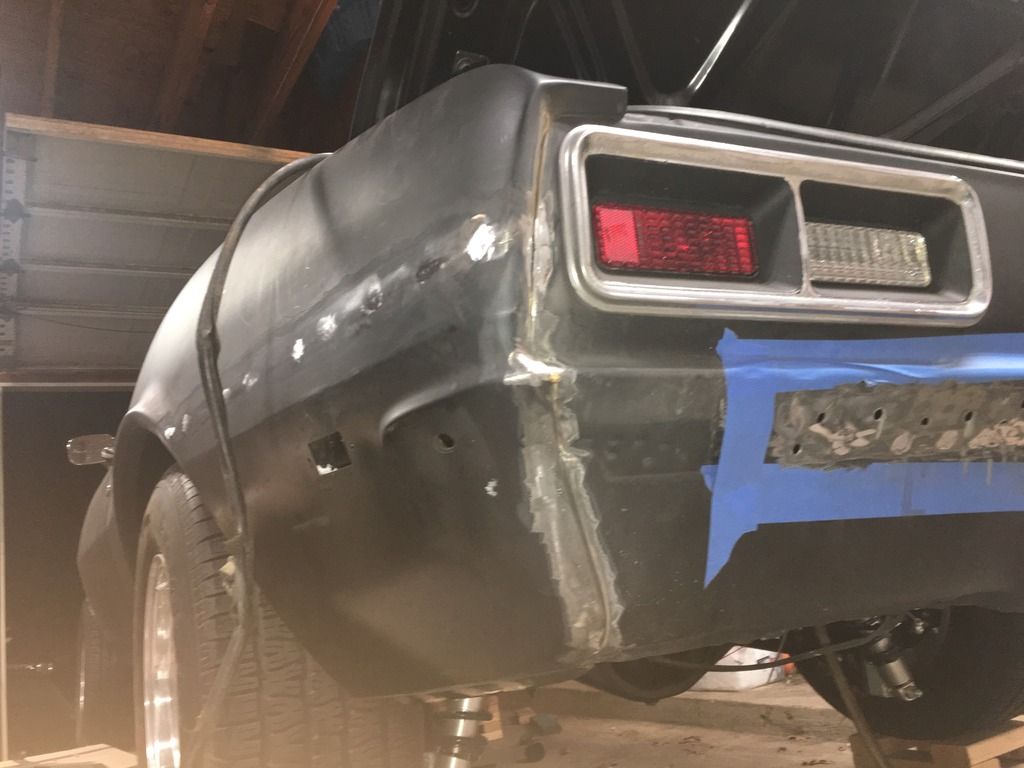
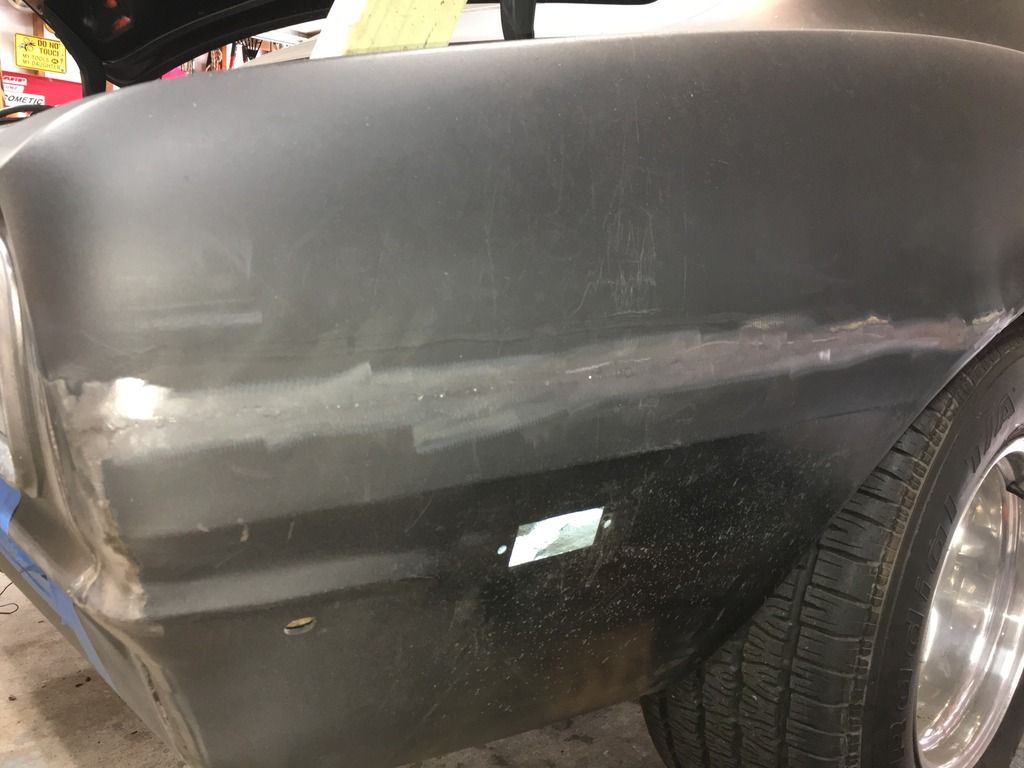
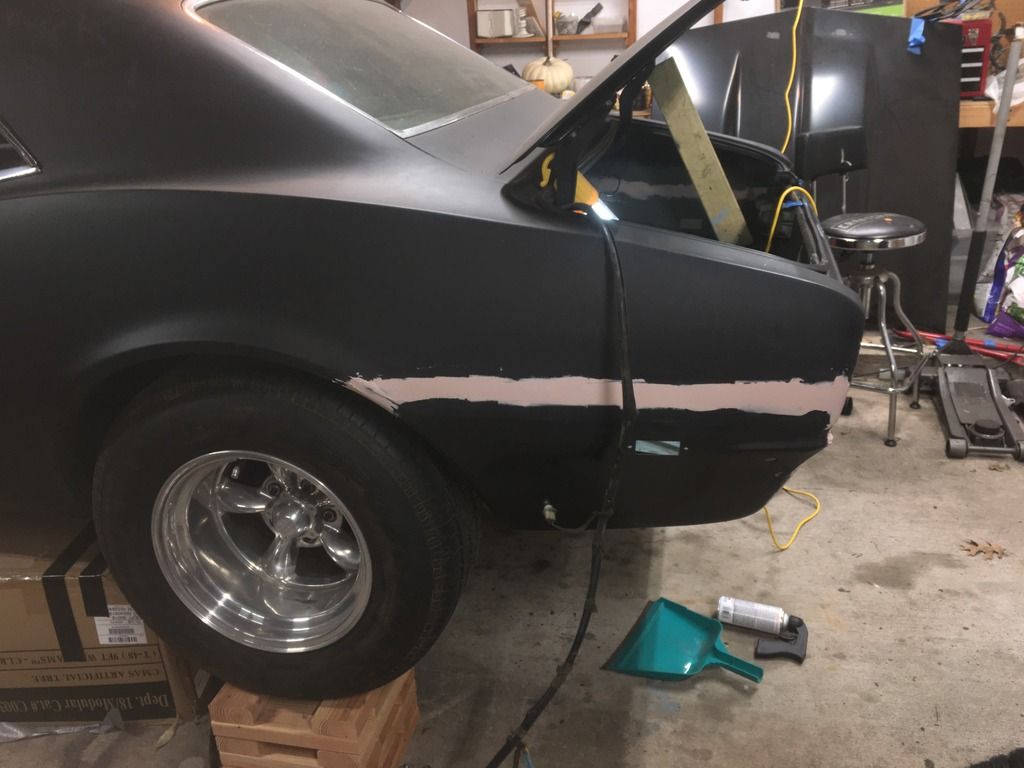
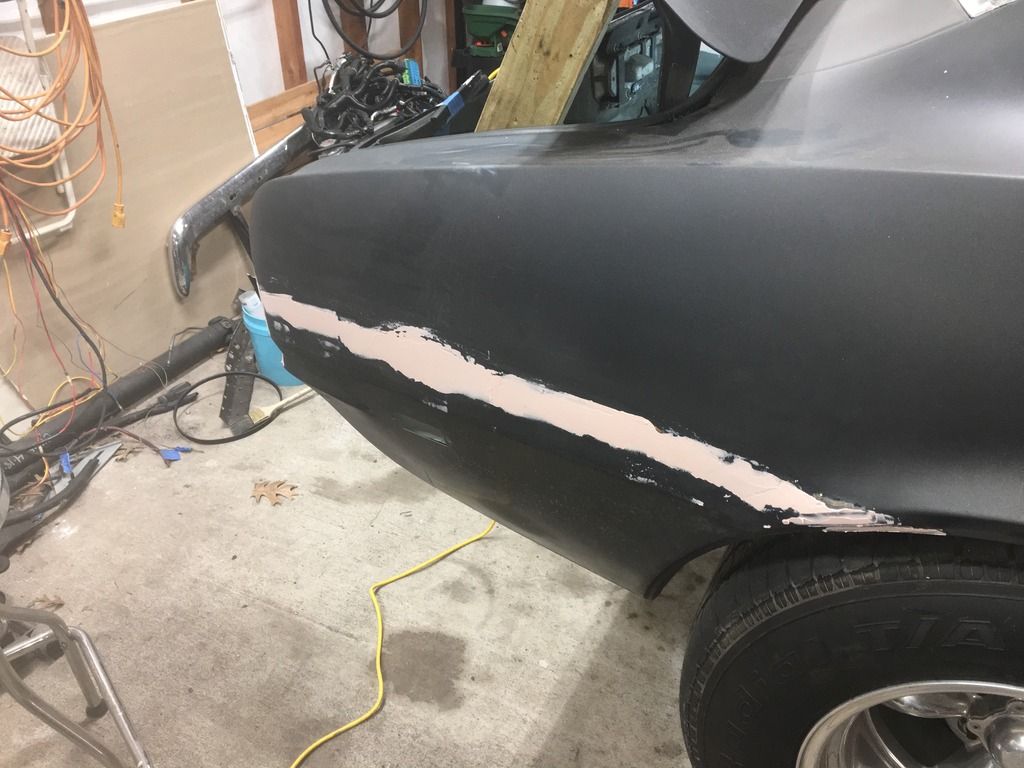
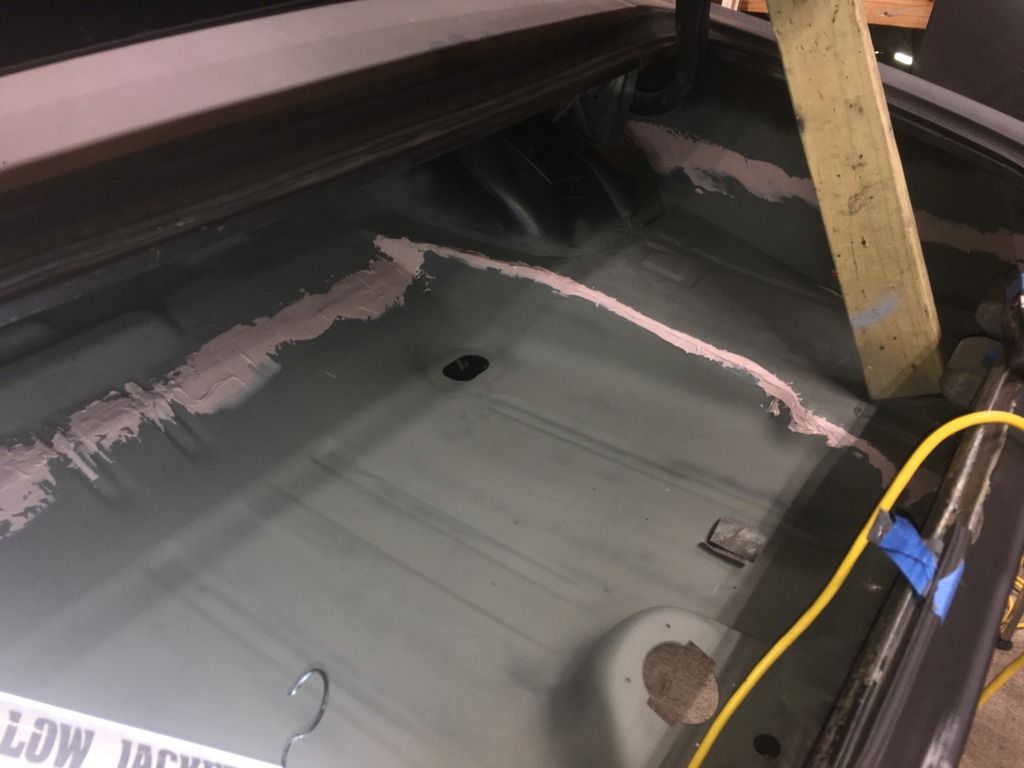
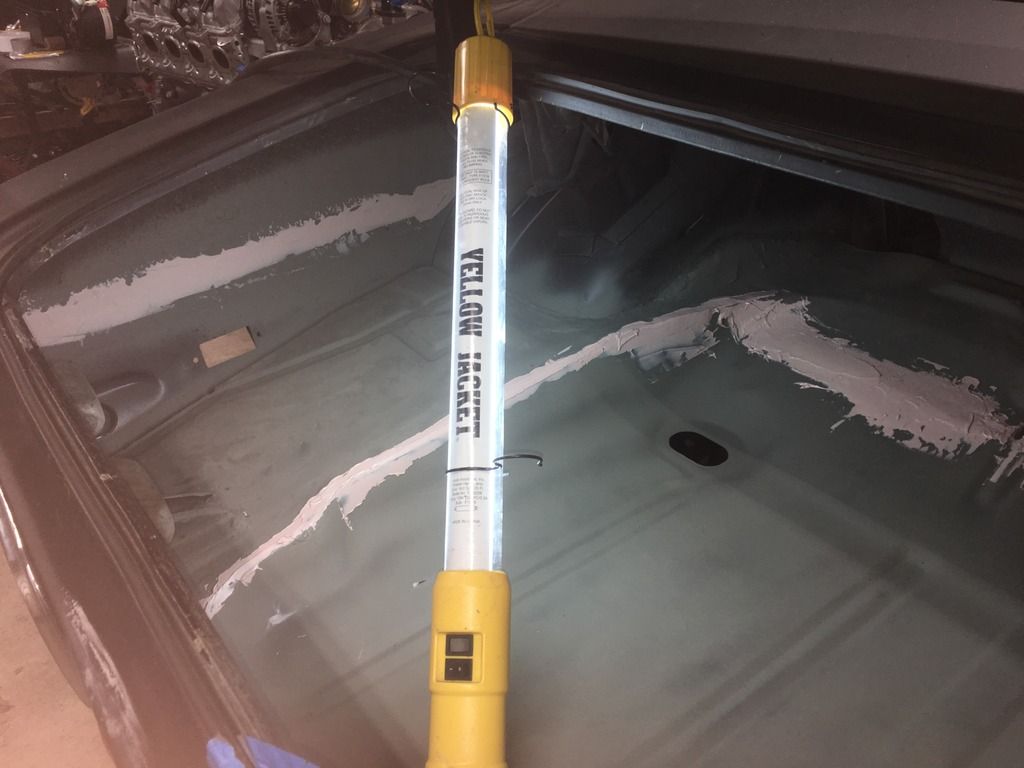
You can see the pinholes on the PS quarter. I don't have a pic of that side after I filled the pinholes.


#79
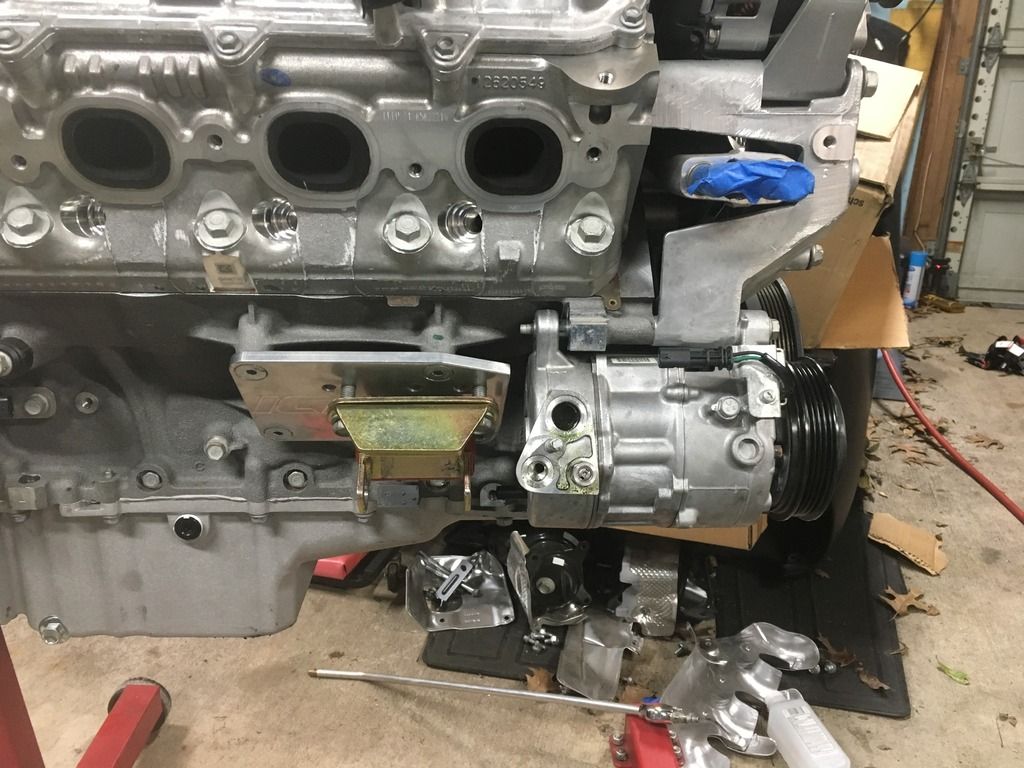
I have been looking into accessory drives again and for some reason I'd rather have the ac mounted low to keep everything tucked in and not break the bank. I found a new Holley bracket for the Gen V LT1/4 setups but nobody makes the truck version nor do I want to make a bracket at this time. I think I'm also going to add the ICT power steering pump bracket that sits under the alternator.
I did some research and a good amount of people run the Gen V compressors on their swaps and they do so with Vintage Air too. A guy from Pro-Touring shed some light on how to make the variable displacement compressor on the Gen V compressors run in the fixed displacement mode. Its very simple if I understand correctly... just supply 12v to the variable displacement valve (2nd plug on compressor) when the compressor clutch is activated and it will operate like a fixed compressor. From my understanding of the LS3 style compressors is that they are variable and they do not have an extra plug like the gen V compressors to send the 12v to.
I spoke to Speartech about this and they are not too familiar with the AC compressors but they did tell me that when they were first doing the Gen V harnesses a customer requested his harness to be setup for the factory compressor and they did so. The customer reached out to them with a problem, his compressor was not accepting a charge. They determined the problem with this is that the valve needed to see 12v in order for the compressor to work correctly. I'm assuming the factory AC system sends some sort of signal on and off to make it variable or something along those lines? So we will see if a constant 12v when the clutch is activated will get the job done? Speartech said they now setup their harnesses using the factory compressor so that the valve sees 12v when the clutch is activated. They also recommend a Sanden compressor rather than the factory if possible so we'll see. If all else fails I can find a way to stick a Sanden unit in there later down the road.
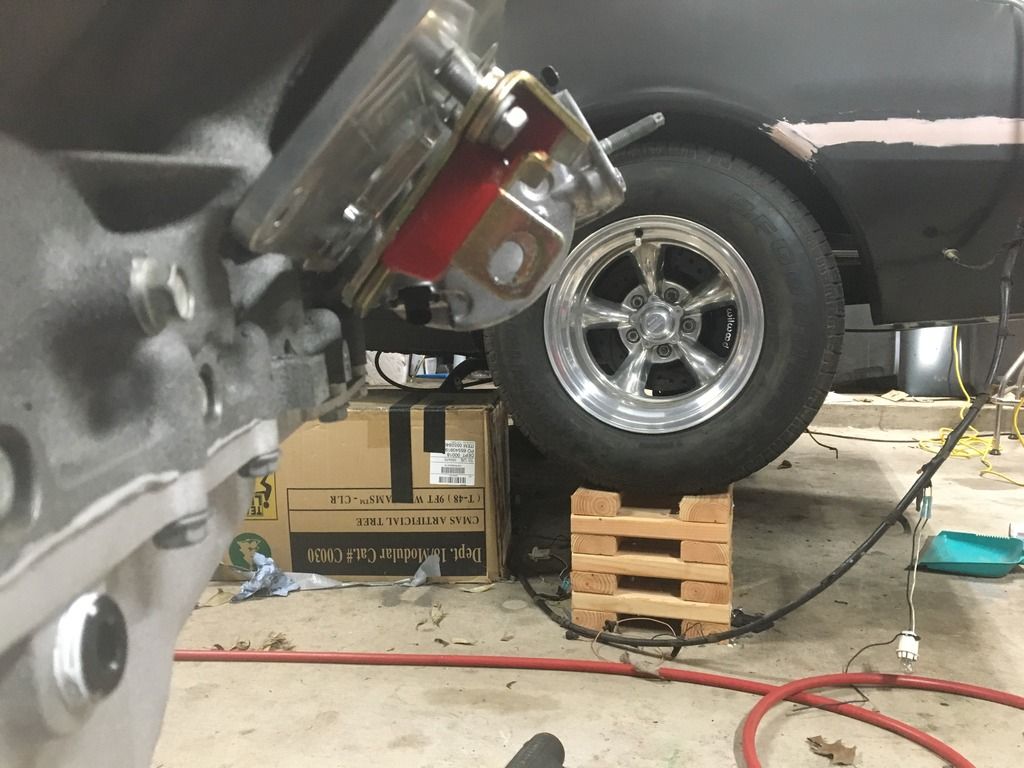
Now I have cut the ICT motor mount adapters to fit the compressor. The compressor sits snug against the block.
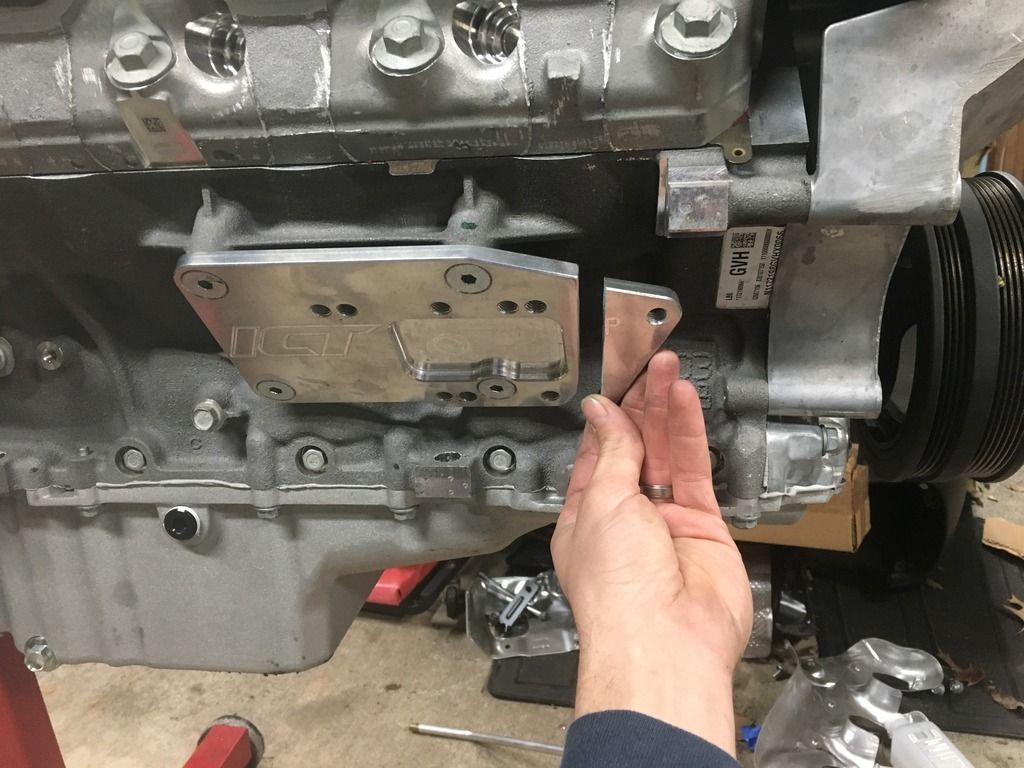


#80
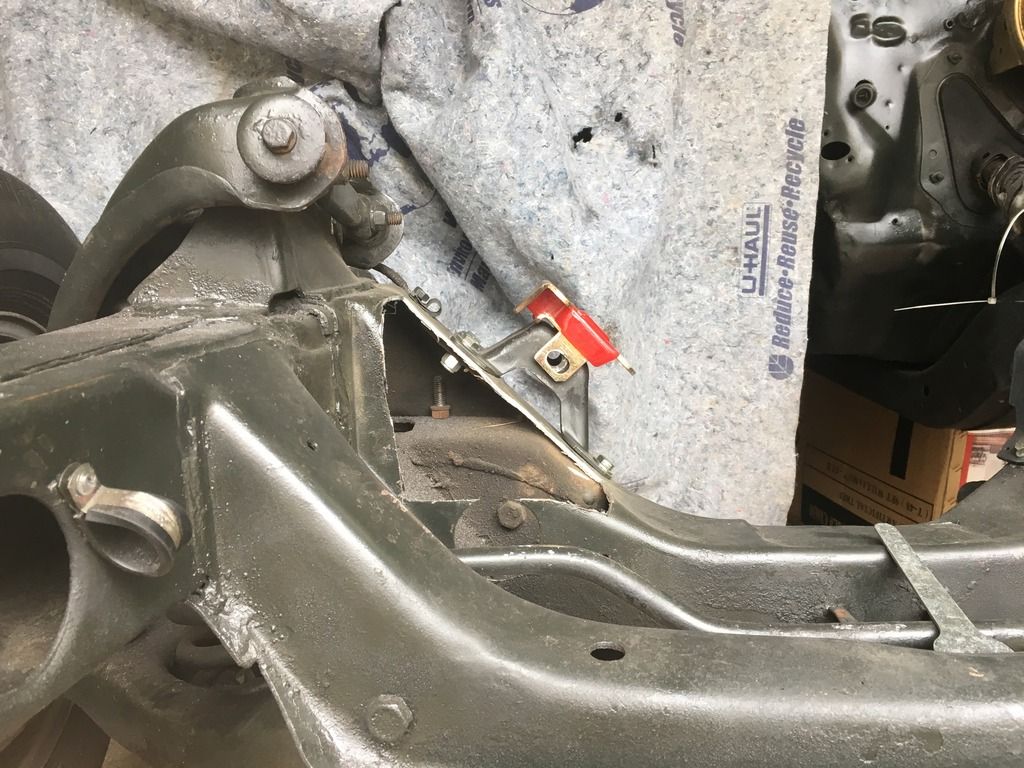
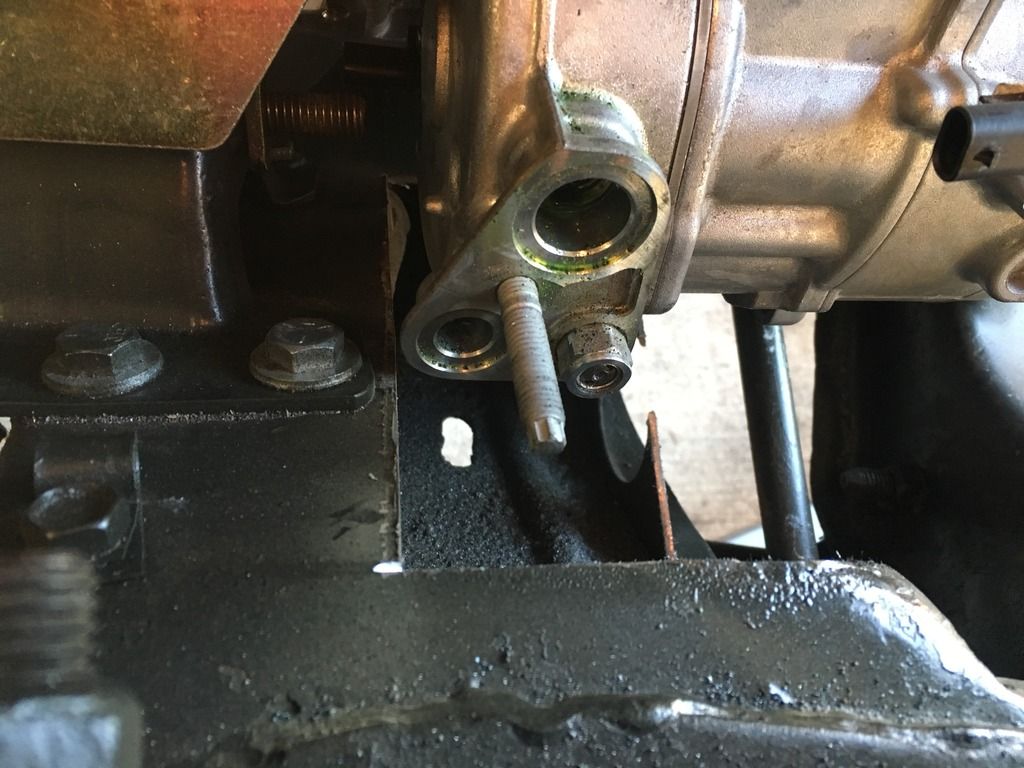
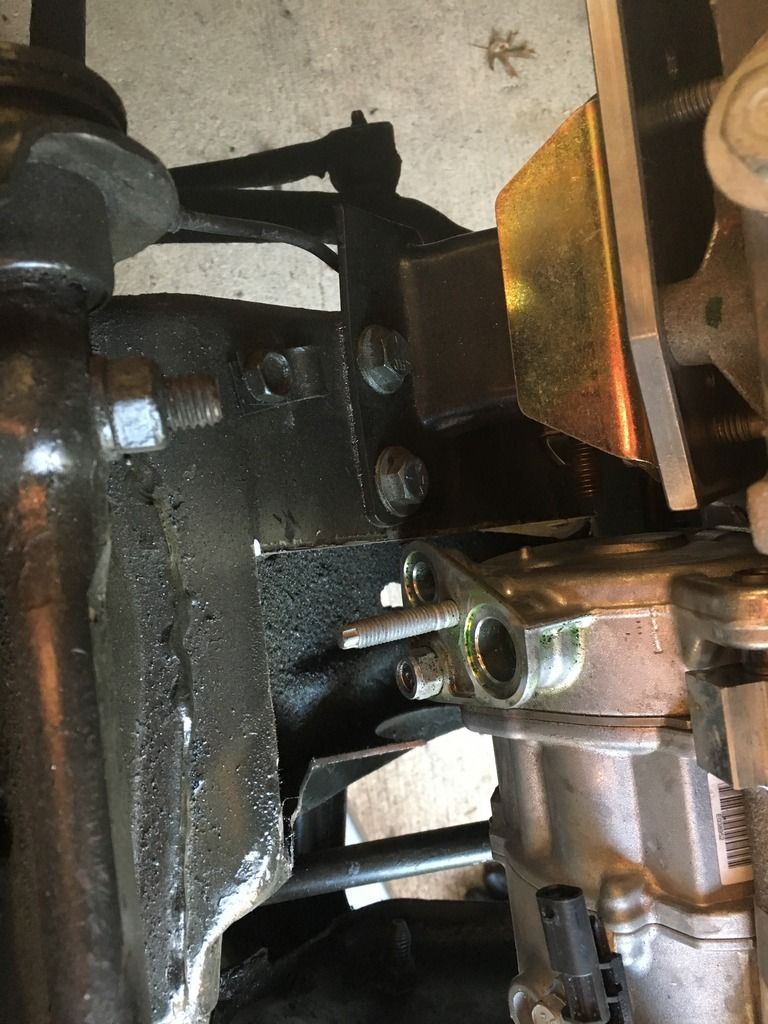
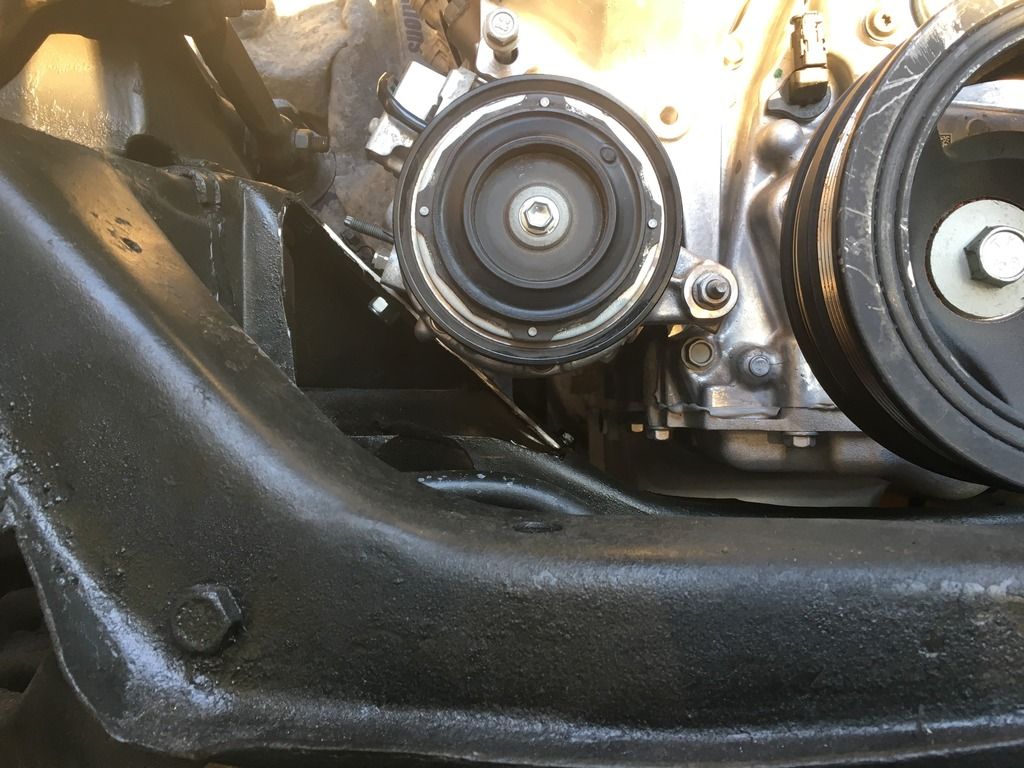
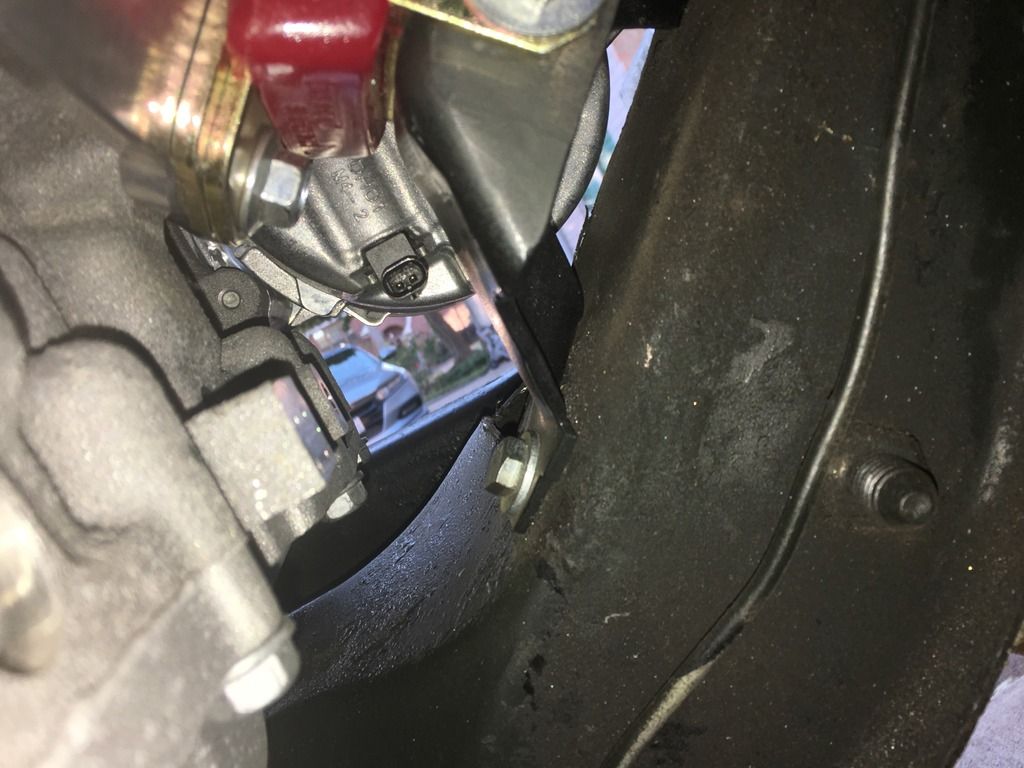
I installed a motor mount and began measuring the amount of metal needed to be notched from the frame. Not too much needed to be removed but I clearance enough to be able to fit the ac lines and hopefully be able to install the compressor or remove it when the motor is installed.
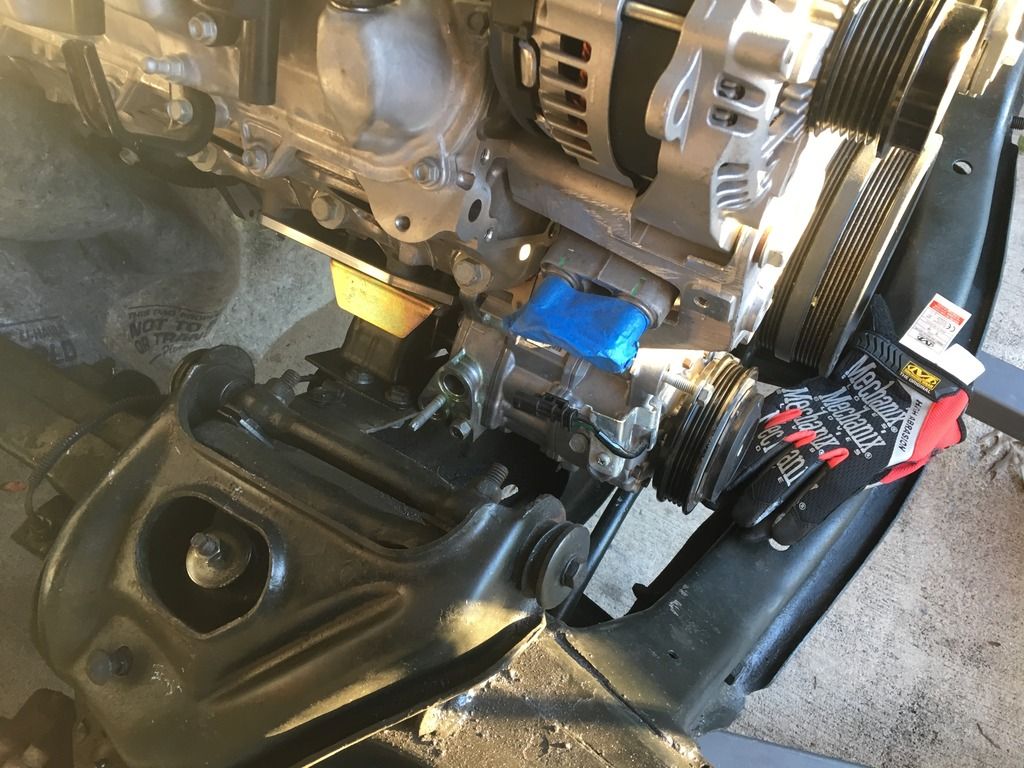
As you can see in the pictures the suction and discharge are very close to the motor mount stand, I ended up cutting another 1/8" or so off it. It looks like excessive metal was removed for this but almost this much will be required to removed the compressor once the motor is installed. The compressor pivots from the lower stud and needs room to swing down.
Another area of concern I had was the variable displacement valve but it ended up in a good position with plenty of room to hook it up.


