When you click on links to various merchants on this site and make a purchase, this can result in this site earning a commission. Affiliate programs and affiliations include, but are not limited to, the eBay Partner Network.
MT 275 DR is listed at 28.2" and doesn't grow. Should be a noticeable difference from a 29.5er that would probably be 30.5" at 150+. With the iffy aero, make sure you run a radial up front.
MT 275 DR is listed at 28.2" and doesn't grow. Should be a noticeable difference from a 29.5er that would probably be 30.5" at 150+. With the iffy aero, make sure you run a radial up front.
Will do, radials all around. This is just an 1/8th mile car for now. We'll see how it goes!
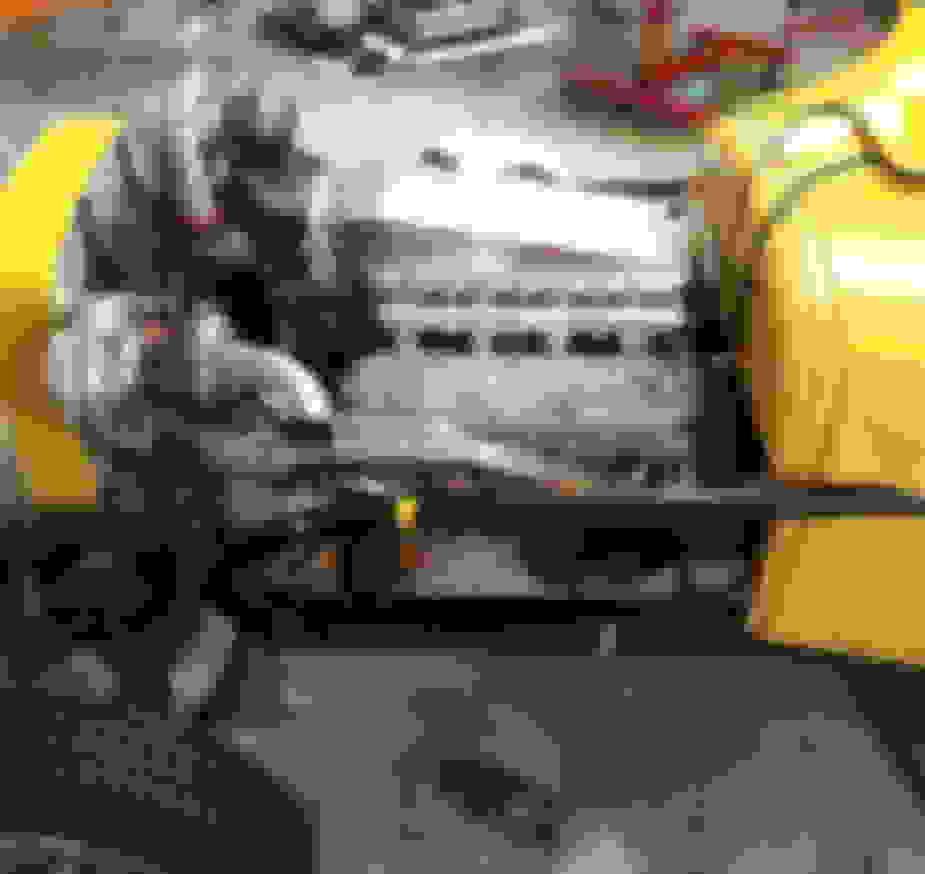
Made a little progress. Borrowed a mock up ls1 block and dropped it using the MID plate that came with the chassis. This put the LS engine mounts a full 6.5" aft of the mounts in the car currently! I left this positioning and wanted to get decent idea of FWD and AFT weights. I was hoping for 60/40 and nose heavy. Added the intake and turbos (temp mock up, not the final location)
Got out my Thrifty homemade scales (built by Aknovaman on this forum) and went to work. Loaded up 225lbs in the driver seat, 60lbs on the fuel cell, 25lbs on the intake and 25lbs on the radiator. I had forgot the LS1 was empty... (no rotating assy/cam etc) But came up with 2083 as my total weight. 210lbs lighter on the front suspension. (my scales were at the shock points, not under wheels) Looks like It will be about 2200-2300lbs when its done. I'll shave weight where I can. Battery, driver seat, and a few other places I can address. A bud is letting me borrow his "real" 4 point scales this week. So It will be interesting to see how these differ from my Thrifty home made units.
Last edited by Forcefed86; 11-16-2020 at 01:50 PM.
Been busy! Finally found an engine. 2011 Alum 5.3 w/ 105k. Had a "tick" and picked it up for $500 local! Sold the 243 heads for $300 right away. Going to run the 12k mile 862's I've had on the shelf awhile.
Found 1 bad lifter. Aside from having more carbon and crap caked up in the ring lands and piston tops than I've ever seen, the engine looked great. Bearings were all good, had tight rings at .017. I opened the tops up to .028 and left the bottom. Larger than I usually go by a mile, but this one won't be intercooled so I'm playing it safe. Ball honed the cylinders quick since this engine looked like the rings maybe weren't' seating or something odd. The 2nd ring on 2 of the DOD cylinders was pretty much seized in the piston. Guessing the DOD was malfunctioning for awhile. The engine oil was also VERY stringy. Like they filled it up with Lucas oil stabilizer to try and quiet that lifter maybe. Guessing that may have contributed to all the carbon build up too.
Also noticed the coating they use on the pistons is now at the bottom of the cylinder as well? Tried my best to not get the ball hone on it. I never noticed that on my other motors?
Pulled the heads apart and hand lapped the valves. Sometimes wonder if I'm doing more harm than good doing this. Can't imagine my 12k mile heads really needed it. Anyone have thoughts on this? Better to leave "as is"? Am i tearing up any kind of hardened outer valve seat by lapping them?
Went ahead and drilled the push rod holes out to 1/2" for the 3/8 BTR push rods. Not sure if this was really necessary. For the time and effort it took... Might as well? Installed the ultimate RPM spring kit and MS3 camshaft with Moral lifters
LS9 Head gaskets and ARP BOLTS. Torqued at 86ftlb.
Waiting on my timing gears and cover and I'll have the engine buttoned up!
Last edited by Forcefed86; 12-03-2020 at 07:57 PM.
Back to the mockup. I really wanted to run factory manifolds but I couldn't find a pair that worked and did't look horrible once I flipped them up. The steering shaft and frame prevented me from any standard down pointing manifold. I tried several. They are all so un symmetrical. Just couldn't do it with an open engine bay. So I picked up the standard LS Vband cheap manifolds and T4 flanges. Even now one side is 1.17" shorter and about 1" higher! I may cut them apart and correct this... Haven't decided If I should put the effort into modifying a set of $160 manifolds that will likely crack an a few years. Probably better off leaving them as is and replacing them as needed over the years.
Think I've settled on this for placement. I welded up the motor and trans mounts. Also using a MID plate and have that bolted in. Trans mount is a bit "odd" but I think It will be plenty sturdy with the mid plate. My master cylinder and brake pedal assy were all right where the trans mount needed to be, so I made due.
Need to pull this motor out and cut the old mounts out to free up some space.
Also Picked up a "Black Magic" fan from a member here that I think looks 10x better than what I had on there. And likely flows 2x the air. Thanks Scotty!
Last edited by Forcefed86; 12-03-2020 at 08:05 PM.
Looking good. Lapping valves - surely worthwhile to do if they don't pass the vacuum or fluid leak test.
Thanks, It's always something I just "did" when I had a head off in my gen1 SBC days. Was just curious if there may be some sort of hardened surface I was removing/destroying. Or if may be there was some ultra small angle job in there I wiped out when I'm shade tree speed lapping with a power drill! I did not fluid check them, they just looked like they had seen better days. Hell, I should have leak checked them after I lapped them! I may have made them worse.
Last edited by Forcefed86; 12-04-2020 at 08:16 AM.
For some reason the valves always look bad. Especially the exhaust valves. I have lapped them on a couple of my cylinder heads and I don't see how you can damage them unless they have a custom valve job.
Its GM, they don't spend any more money than necessary. The valves are not cut together with a specific cylinder head. The heads and valves were made in huge batches so lapping oem parts will actually show improvement. A good example is the face of the valve is not centered, while only cosmetic it does show some thriftiness.
As far as the coating on the bottom of the cylinder, that should be just very excessive carbon buildup. I ball honed my LFA and found the same thing, it took two 15 second passes to get it off. I have seen this a lot on turbo engines of various makes, usually when the skirt is not full round, it builds up on the area neither the rings nor skirts touch.
I had excessive carbon buildup in my pistons as well. Next time use the old piston rings to spin them while squeezing them to scrape the carbon inside, and then get new piston rings.
Thanks, It's always something I just "did" when I had a head off in my gen1 SBC days. Was just curious if there may be some sort of hardened surface I was removing/destroying. Or if may be there was some ultra small angle job in there I wiped out when I'm shade tree speed lapping with a power drill! I did not fluid check them, they just looked like they had seen better days. Hell, I should have leak checked them after I lapped them! I may have made them worse.
Yeah, no concerns with lapping. You're not doing anything different than a cutter. Key - make sure all debris is cleaned when done. I recommend to always check for leakage and go from there. If leaking, the seat and valve face will get eaten up by combustion blowing past in short order if things are not cleaned/sealed up. If seat and valve face look real bad, time for new valves and seats cut. Side note - if heads are apart, worthwhile to look and see that the bowl is blended to the seat. If not, reasonable gains are had with minor work. Lastly, I don't know what GM uses for valve seat angles on the LS heads and if there is any easy improvements there when needing seats cut.
Probably not the best tool for checking valve/seat leaks. Vacuum or liquid is simple.
Caution using that smoke machine on an evap system. Over pressurizing the evap system can damage the tank pressure sensor or vacuum pressure valves that are used on many imports. Note - the evap system is designed based on vacuum not positive pressure. I'd recommend installing a .5psi propane regulator and low pressure gauge (0-3psi) to know pressure is safe. I also use a an adjustable 5L/min flow meter on the supply side so you know, based on flow alone, if you have a leak and approx how big.
As far as the coating on the bottom of the cylinder, that should be just very excessive carbon buildup. I ball honed my LFA and found the same thing, it took two 15 second passes to get it off. I have seen this a lot on turbo engines of various makes, usually when the skirt is not full round, it builds up on the area neither the rings nor skirts touch.
I had excessive carbon buildup in my pistons as well. Next time use the old piston rings to spin them while squeezing them to scrape the carbon inside, and then get new piston rings.
No, its defiantly a coating... Its exactly the same as the coating on the pistons... Its in 2 very distinctive shapes on either side of the bore and perfectly applied. Assuming Its to assist with piston rocking and noise on cold starts. Same reason the coating on the pistons were used. Just hadn't seen it at the bottom of the bores until I opened a newer motor.
That car is going to be a handful! Dingle ball honing the cylinders and reusing the same rings (gapped) doesn't really cause any issues?
I've done it on motors in the past with no issues. At least no issues I was aware of. This one just had SO much build up and the pistons. And the walls were glazed looking in places. I felt a quick hone would be better than nothing. I could defiantly be wrong! I thought it may actually help seat the old rings a little better if there was an issue prior. I did this with a used set of rings in an older motor. All the rings went back in their old "married" cylinders. I hope it will be ok, honestly don't know.
Not much new progress. Waiting on timing parts to drop the 5.3 in. Pulled the mock up motor to give it back. Cut the old motor mounts out and Finished out the new mounts w/ a couple gussets.
I knew it wouldn't work, but it was worth a laugh trying to drill the cast stainless turbo elbows with the Harbor freight hole saw. The $10 amazon SS bit chewed through it quite well! Very happy with that purchase!
Did a quick and dirty mig job for the gate flanges.
ICT coil brackets came in. Think I'm going to run these in the cab. Then run long wires out to the plugs and under the manifolds. Still undecided. They look nice thou. Def. save some space as well.
Trying to decide if i'm goign to paint the manifolds and engine in this new BBQ paint copper. The black has always held up in the past. This looks more brown to me, but looked ok on the more reflective surface of the can. Also not sure the paint will stick to polished manifolds. Tempted to just do the standard black and leave the manifolds alone. Opinions on the copper/bronze color?
I would be very surprised if that stuff can handle the temp of the hot side of a turbo. They can easily get up an over 1,500 degrees.
Prepare to be surprised! Been running it for years on turbos and hot sides. It holds up extremely well. Better than vht or any other paint ive seen. It does discolor slightly. Well, the black and ultra black anyway. Never used the copper. This coating is two years old. And it had a turbo blanket over it. I coat header wrap and blankets in it too. Sheds water/oil and keeps the annoying glass fibers out of my skin. Just not so sure how it will hold up on non porous material. Stops rust anyway.


 11-16-2020, 01:28 PM


 I did not fluid check them, they just looked like they had seen better days. Hell, I should have leak checked them after I lapped them! I may have made them worse.