


1970 GTO Version 3.0
Thread Starter
Joined: Mar 2003
Posts: 10,617
Likes: 1,883
From: Little Austin
I am on a Cerakote roll. This morning I blasted the oil pan, turbine housing, and compressor cover. They are currently baking in the Weber.
Andrew

TECH Senior Member


Joined: Jun 2016
Posts: 22,303
Likes: 3,619
From: Central Cal.
I remember when Japanese cars became more common, and I always liked the way the engines were detailed. Aluminum timing and valve covers and intake manifold, black block and head (if iron), and painted air cleaner and other sheet metal stampings.
Meanwhile, American engines looked like they got dunked in a vat of the corporate color of the year (Ford blue, Chevy orange, etc.).
Details make a difference!
Thread Starter
Joined: Mar 2003
Posts: 10,617
Likes: 1,883
From: Little Austin
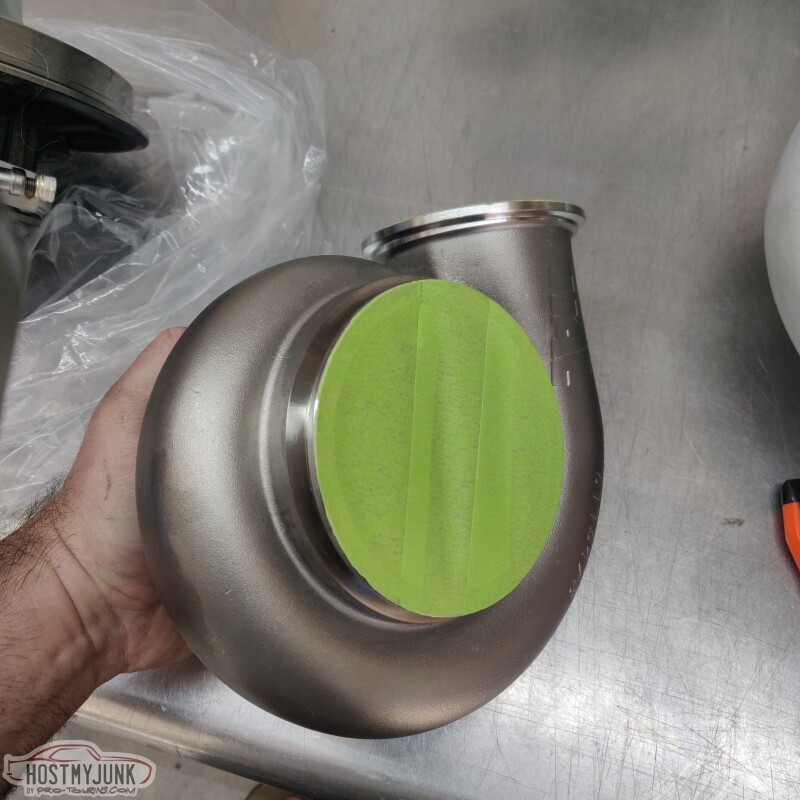
I couldn't let this string of warm days go to waste, so this morning I went to Vic's house again. He was once again kind enough to let me use his blast cabinet to prep the oil pan, turbine housing, and the compressor cover.
Both the turbine housing and the compressor cover have machined surfaces that needed to be masked off. Here is the exhaust housing before blasting.
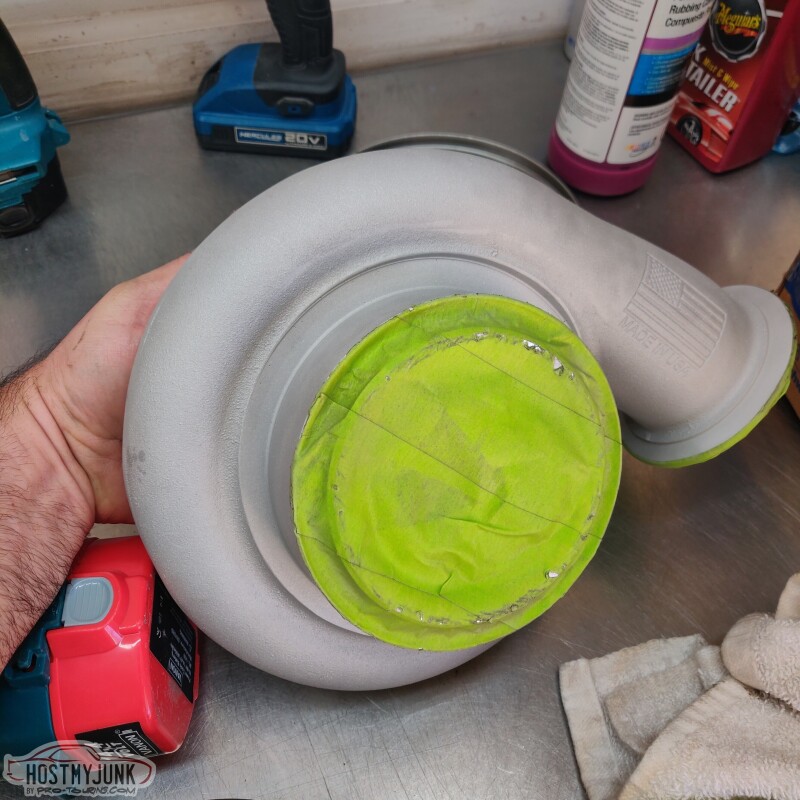
This is the compressor housing after blasting. I also blasted the oil pan and then washed it in his solvent tank.
Then into the Weber they went for an hour at 500 degrees.
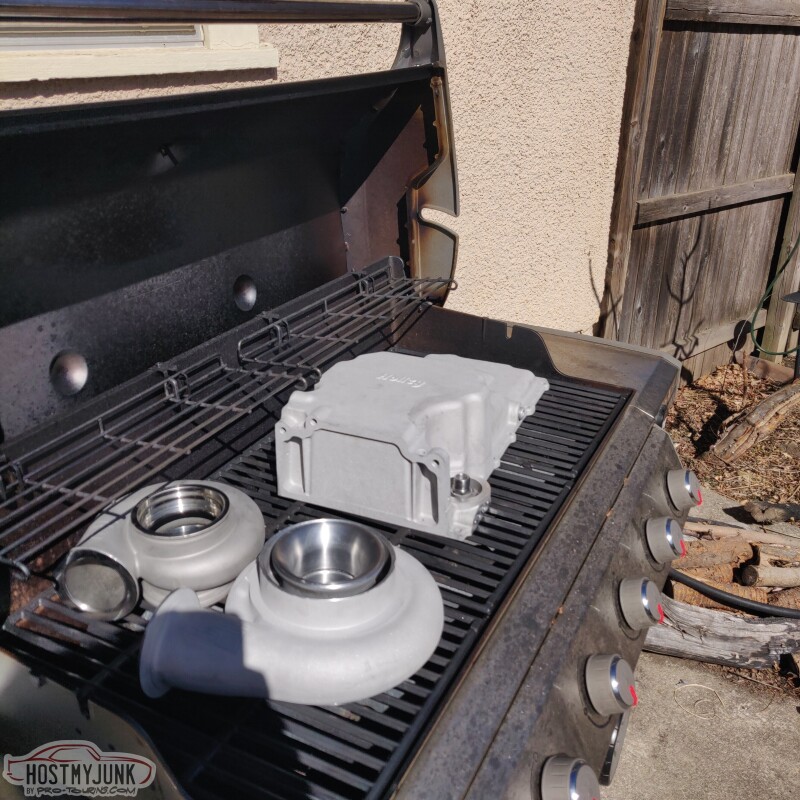
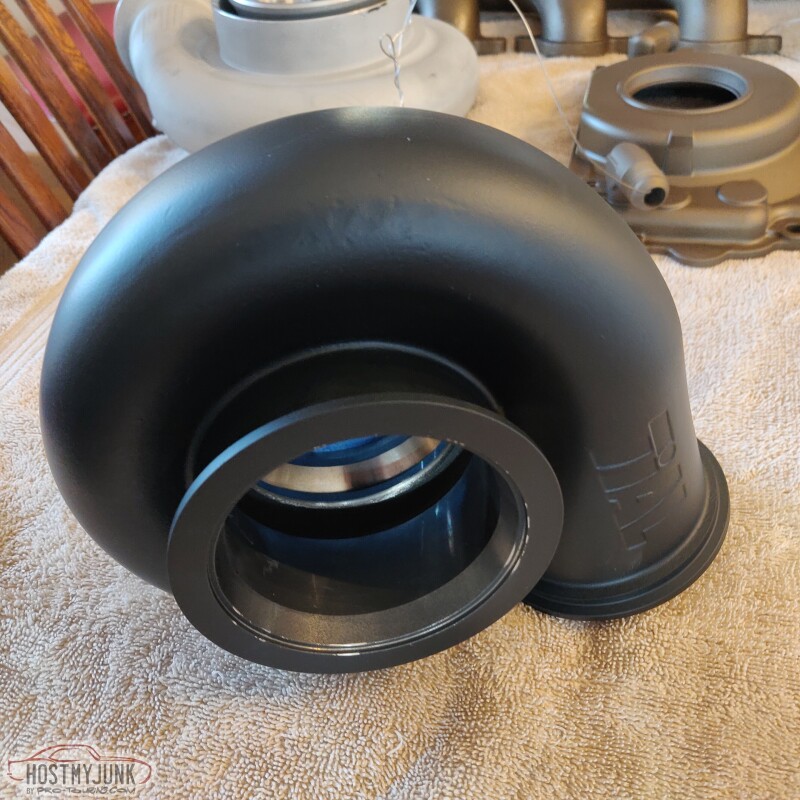
When I ordered the sample pack from Cerakote, I got burnt bronze, glacier black and glacier titanium. So I wanted to try those colors. I chose glacier black for the turbine housing. Here is it right after I sprayed it.
After having some time to dry, it is settling into a very nice, rich black with an eggshell sheen.
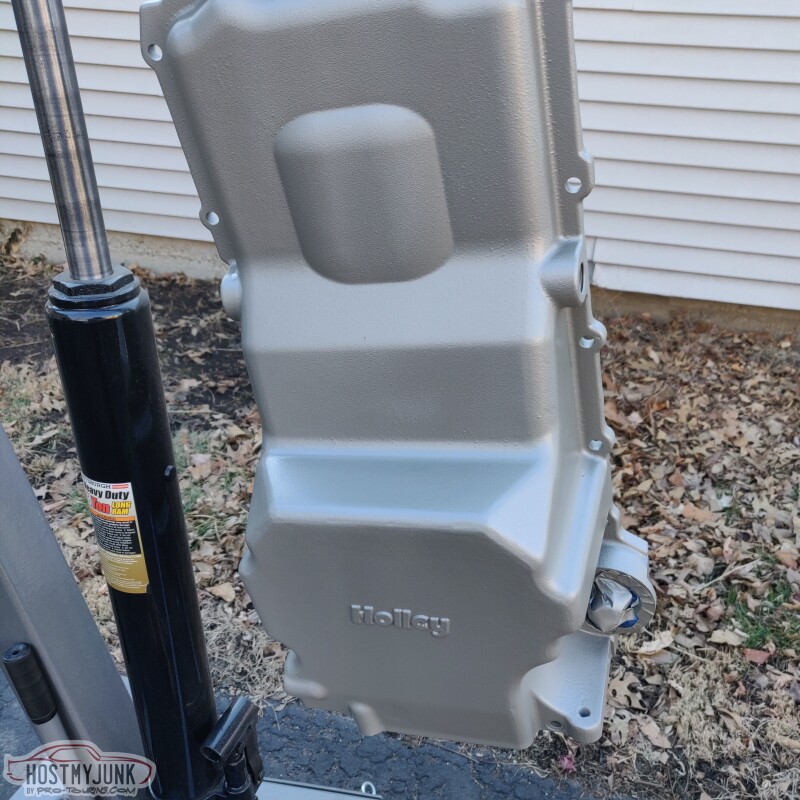
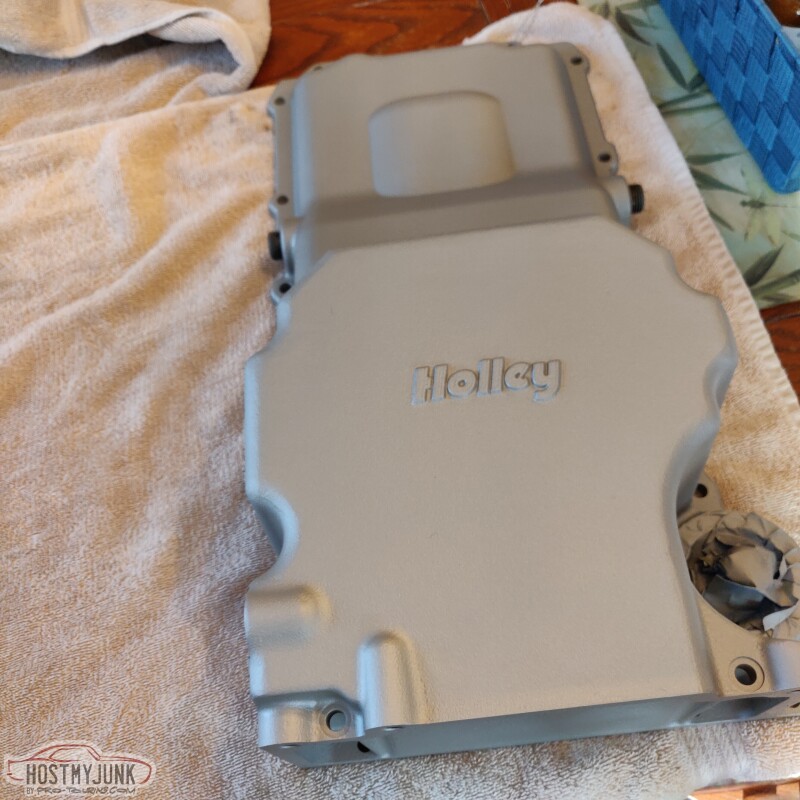
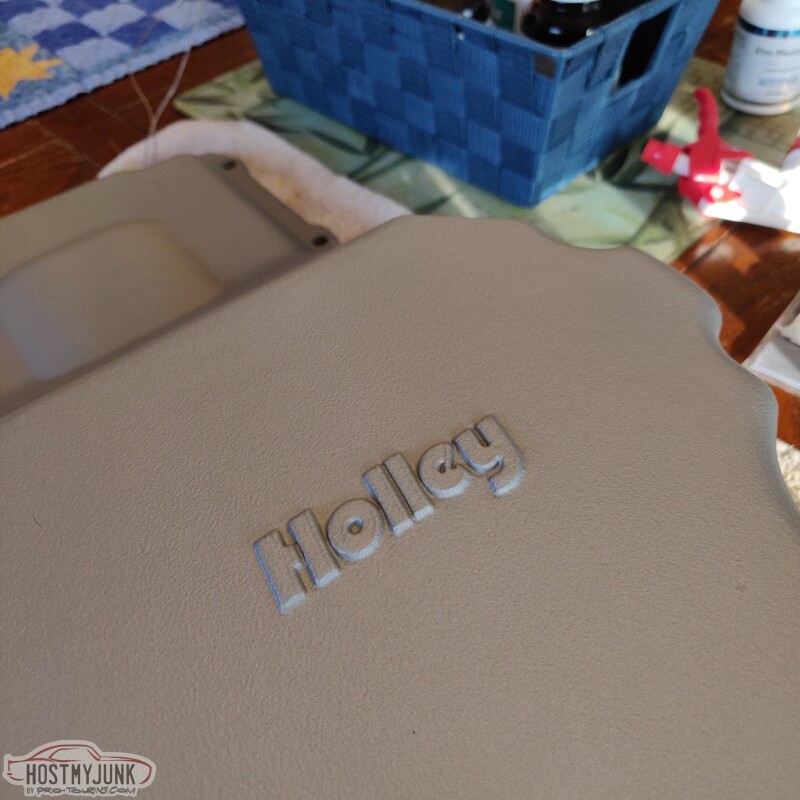
This is the glacier titanium. It is a little boring and I don't think I would use it on anything else. The main reason for doing the pan was so that it wouldn't instantly get dirty as base aluminum castings tend to do.
I have more burnt bronze and glacier black on order. The compressor housing will be burnt bronze as will the lower and upper parts of the Holley intake manifold. The Tick intercooler in between the upper and lower will be glacier black.
Andrew
Both the turbine housing and the compressor cover have machined surfaces that needed to be masked off. Here is the exhaust housing before blasting.
This is the compressor housing after blasting. I also blasted the oil pan and then washed it in his solvent tank.
Then into the Weber they went for an hour at 500 degrees.
When I ordered the sample pack from Cerakote, I got burnt bronze, glacier black and glacier titanium. So I wanted to try those colors. I chose glacier black for the turbine housing. Here is it right after I sprayed it.
After having some time to dry, it is settling into a very nice, rich black with an eggshell sheen.
This is the glacier titanium. It is a little boring and I don't think I would use it on anything else. The main reason for doing the pan was so that it wouldn't instantly get dirty as base aluminum castings tend to do.
I have more burnt bronze and glacier black on order. The compressor housing will be burnt bronze as will the lower and upper parts of the Holley intake manifold. The Tick intercooler in between the upper and lower will be glacier black.
Andrew
Thread Starter
Joined: Mar 2003
Posts: 10,617
Likes: 1,883
From: Little Austin
Thread Starter
Joined: Mar 2003
Posts: 10,617
Likes: 1,883
From: Little Austin
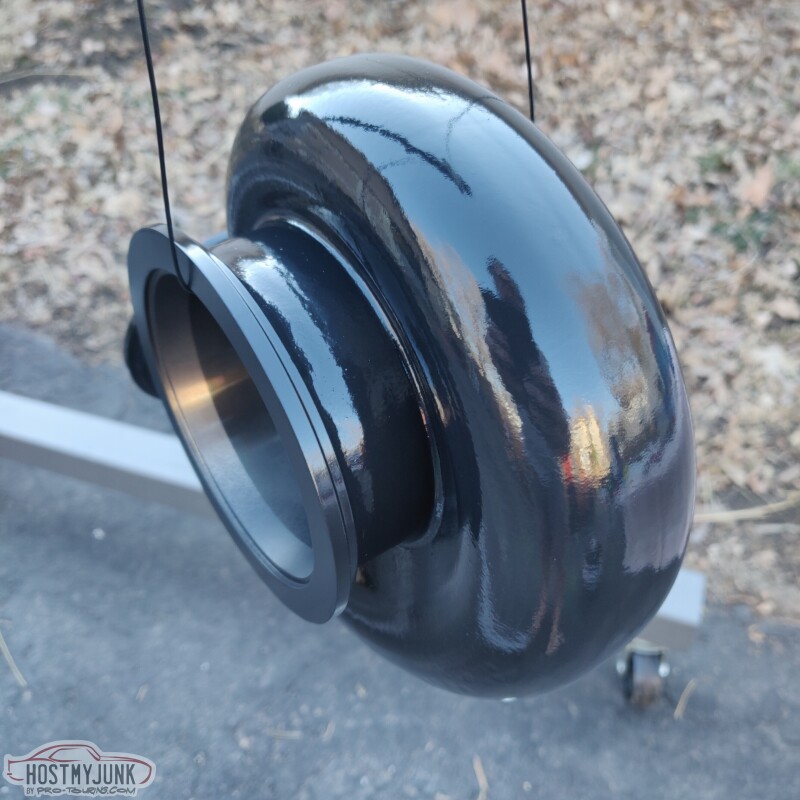
Here is the turbine housing after it had dried overnight. I really like the sheen. This is the Glacier Black.
This is the glacier titanium after it has dried. It basically looks like cast aluminum
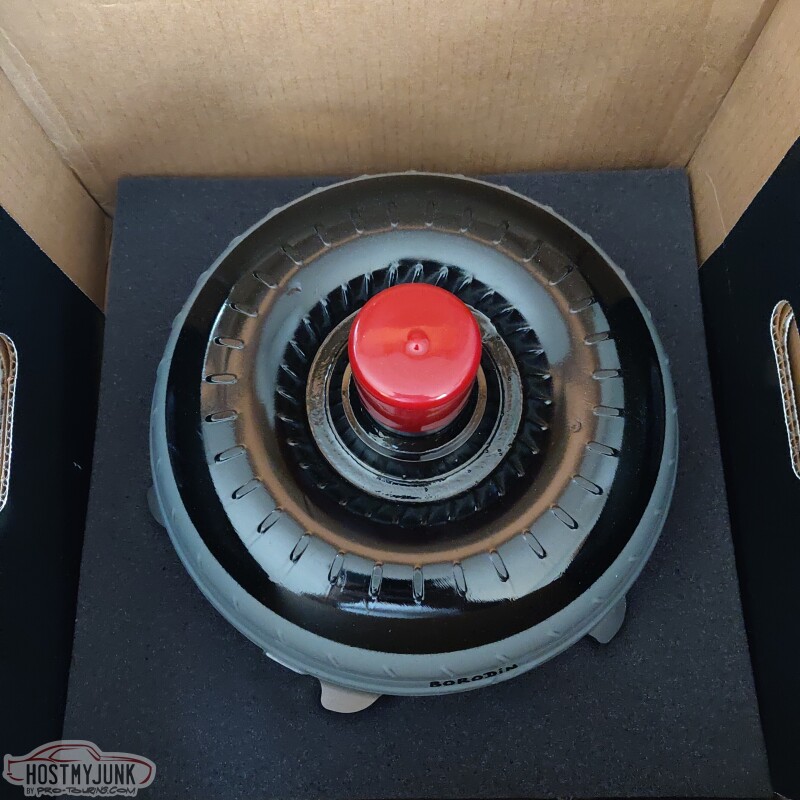
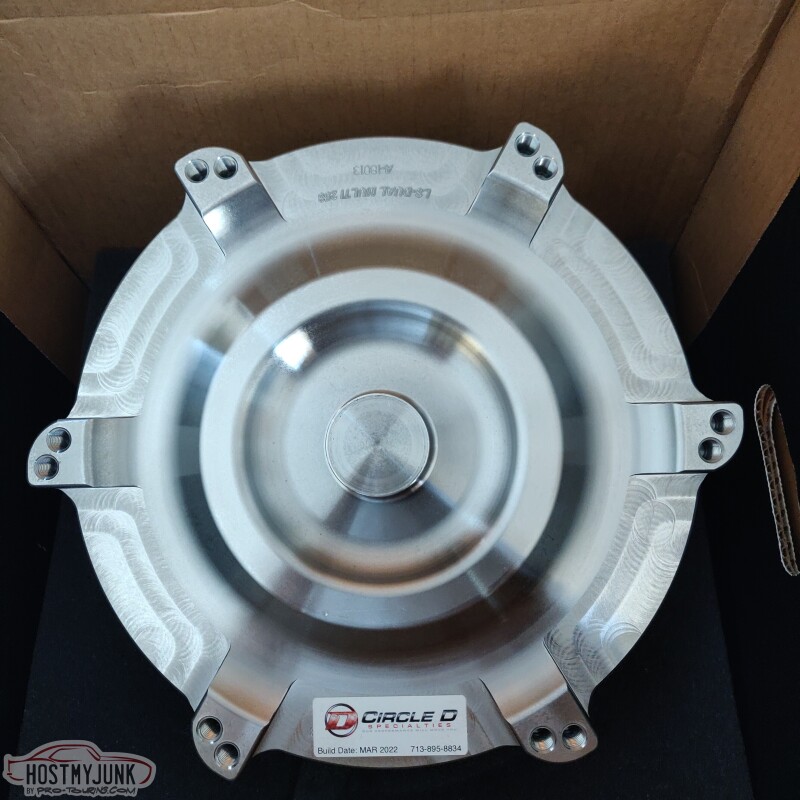
Today I also received the Circle D converter. It is the triple disk, billet converter.
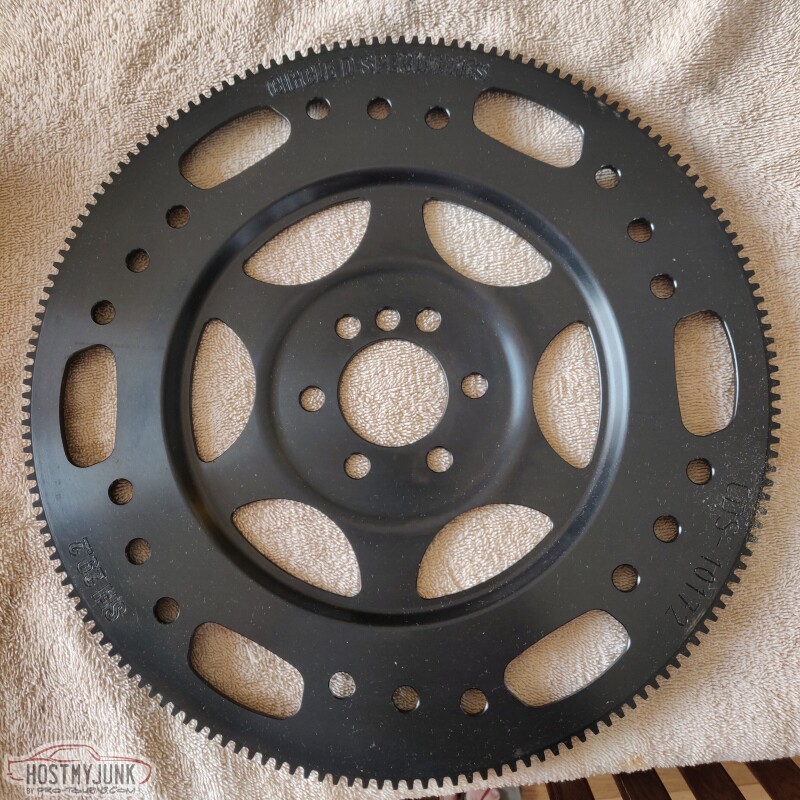
I also got their billet steel flex plate, just to make sure.
Andrew
This is the glacier titanium after it has dried. It basically looks like cast aluminum
Today I also received the Circle D converter. It is the triple disk, billet converter.
I also got their billet steel flex plate, just to make sure.
Andrew
LS1 Tech Stories
The Best V8 Stories One Small Block at Time

Gas Monkey Built a 6-Wheel Ferrari Testarossa With a Corvette LT4 Engine
Verdad Gallardo
7 Most Reliable High-Performance Engines GM Has Ever Built
Verdad Gallardo
Amazing '71 Camaro Restomod Is Modern Muscle Car Under the Skin
Verdad Gallardo
6 Common C5 Corvette Failures and What's Involved In Repairing Them
Pouria Savadkouei
Retro Modern Bandit Pontiac Trans AM Comes With Burt Reynolds' Autograph
Verdad Gallardo
Top 10 Greatest Cadillac V Series Performance Models Ever, Ranked
Pouria Savadkouei
Top 10 Most Powerful Chevy Trucks Ever Made!

Hennessey's New Supercharged Silverado ZR2 Has 700 HP
Verdad Gallardo
Coachbuilt N2A Anteros Is an LS2-Powered C6 Corvette In Italian Clothes
Verdad Gallardo
Thread Starter
Joined: Mar 2003
Posts: 10,617
Likes: 1,883
From: Little Austin
Thread Starter
Joined: Mar 2003
Posts: 10,617
Likes: 1,883
From: Little Austin
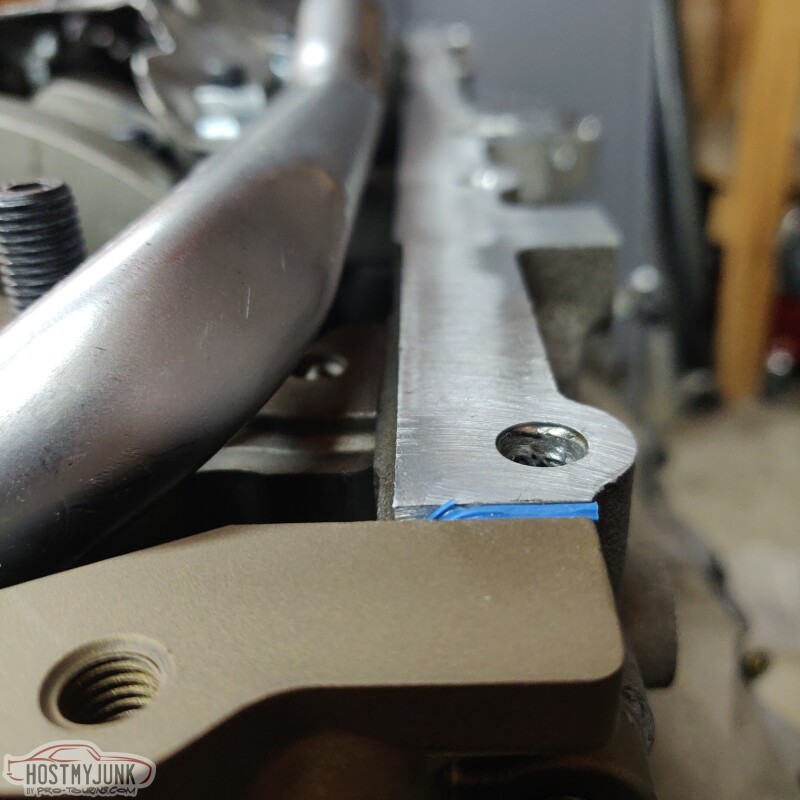
Despite the weather being a little chilly today, I decided to go out to the garage and make some progress on the engine. Besides, my wife is tired of all the car parts banging around the house.
I needed to get the bottom of the block buttoned up, so the first order of business was to get the windage tray and the oil pick-up installed. Since this engine now had ARP main studs, I had to open up a couple of oval shaped holes on the windage tray. A step drill made really fast work of it.
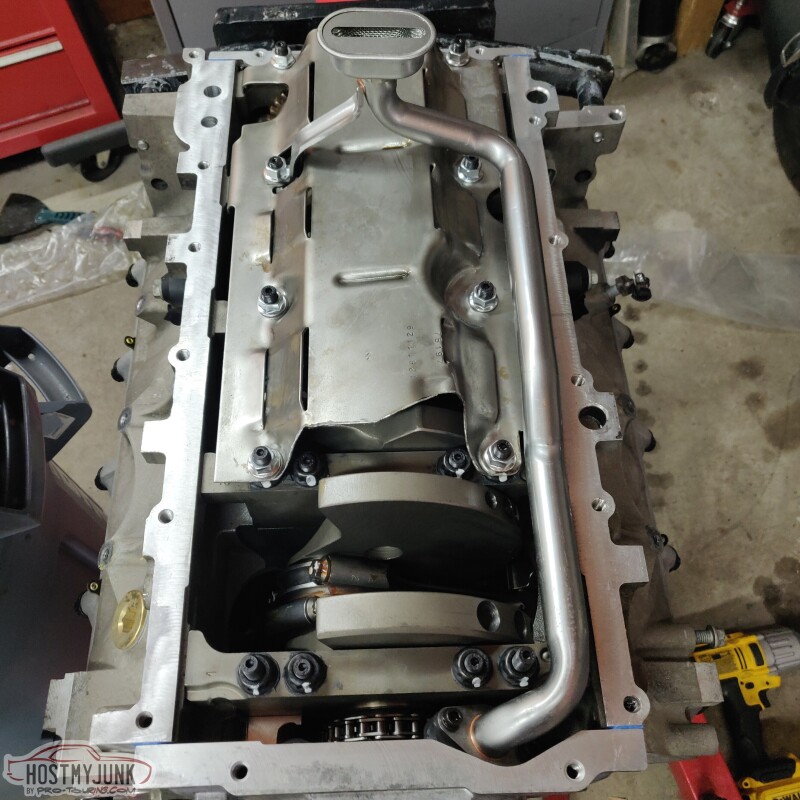
The ARP main stud kit came with new nuts for the windage tray.
Took the old front cover off and saw marks from when the engine builder degreed the cam.

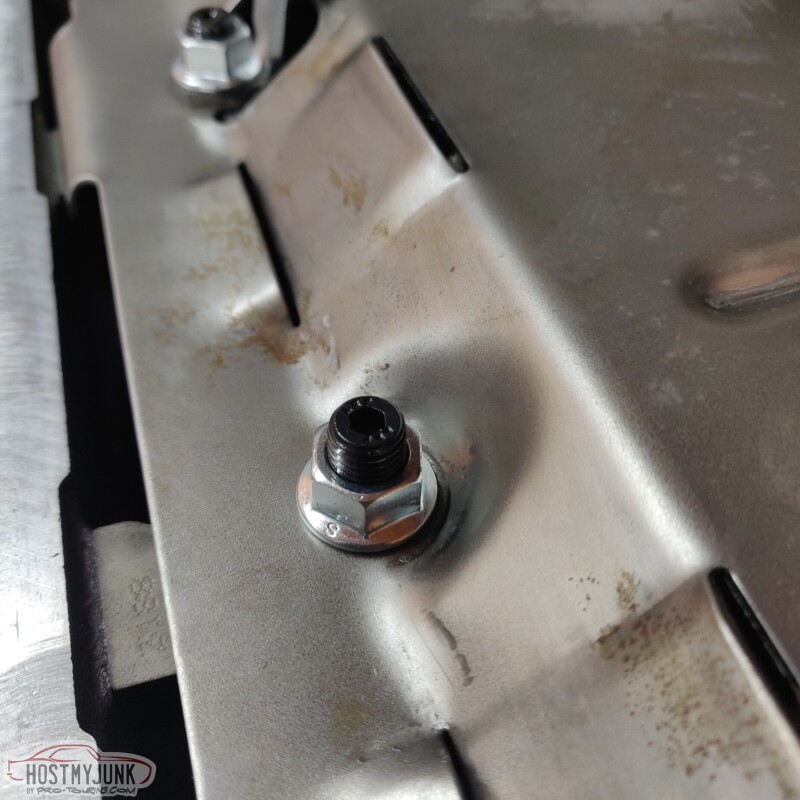
I started to install the oil pan, and the very first bolt was cross threading...Had to make a trip to Napa for a tap, but thankfully I managed to fix it.
Installed a new crank seal.
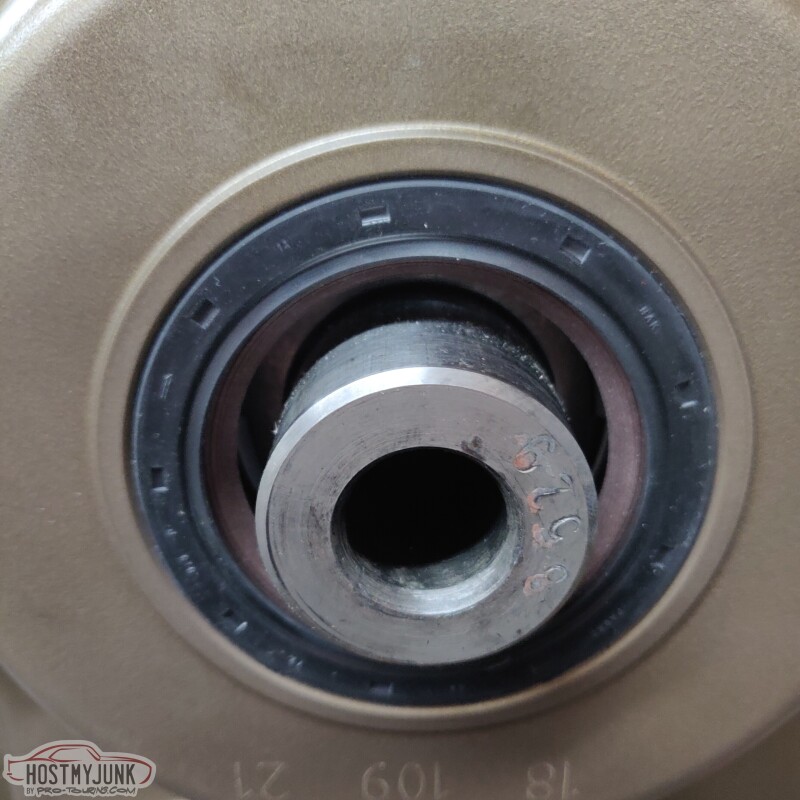
Then I took a break and baked the balancer hub in the oven for an hour, and just like last time, it slid right on.
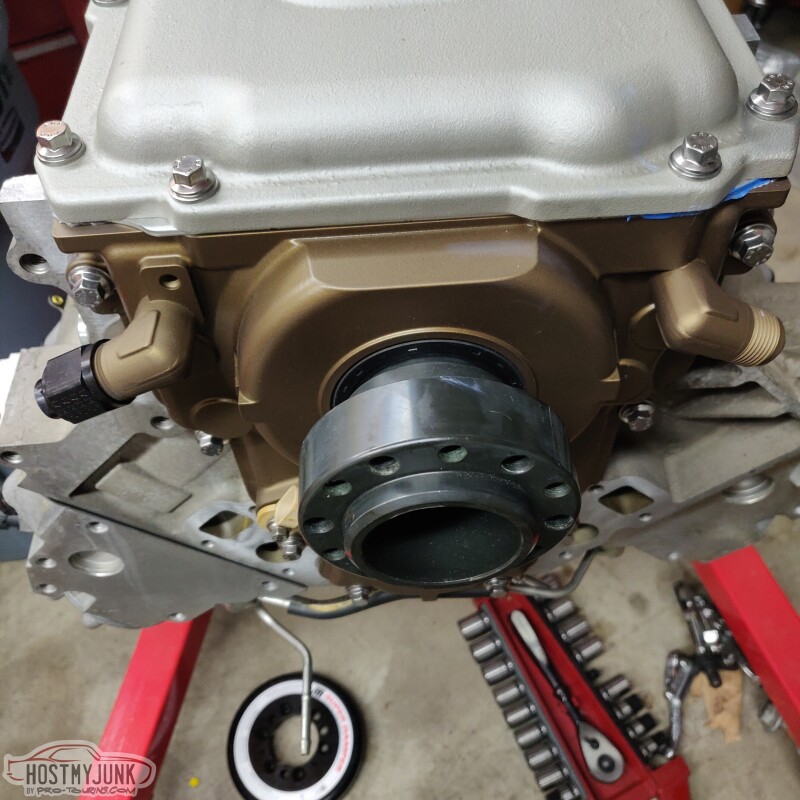
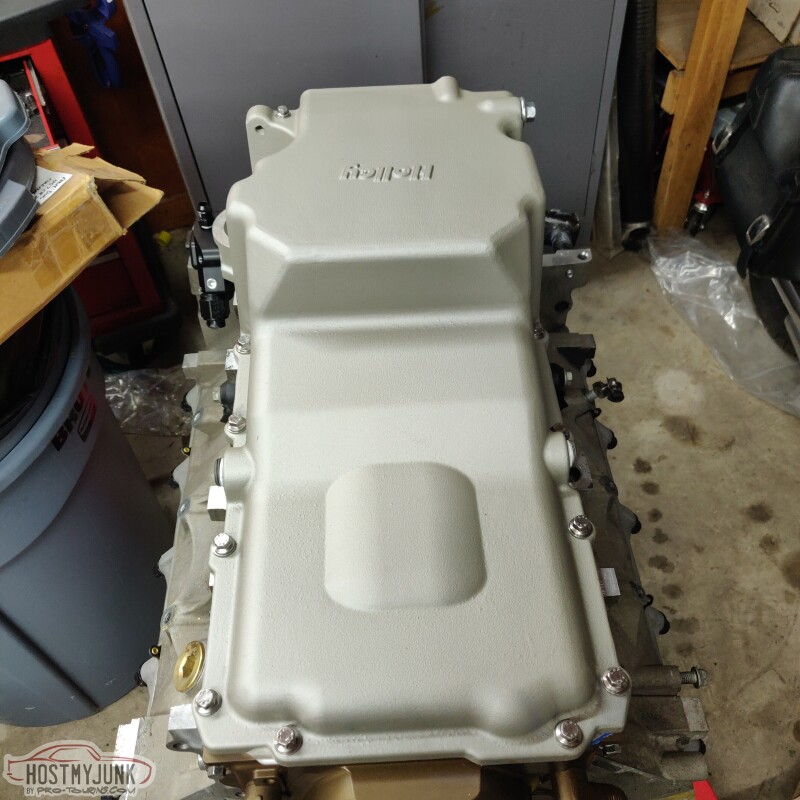
Then the pan was installed, hopefully for the last time!
More to come...
I needed to get the bottom of the block buttoned up, so the first order of business was to get the windage tray and the oil pick-up installed. Since this engine now had ARP main studs, I had to open up a couple of oval shaped holes on the windage tray. A step drill made really fast work of it.
The ARP main stud kit came with new nuts for the windage tray.
Took the old front cover off and saw marks from when the engine builder degreed the cam.
I started to install the oil pan, and the very first bolt was cross threading...Had to make a trip to Napa for a tap, but thankfully I managed to fix it.
Installed a new crank seal.
Then I took a break and baked the balancer hub in the oven for an hour, and just like last time, it slid right on.
Then the pan was installed, hopefully for the last time!
More to come...
Thread Starter
Joined: Mar 2003
Posts: 10,617
Likes: 1,883
From: Little Austin
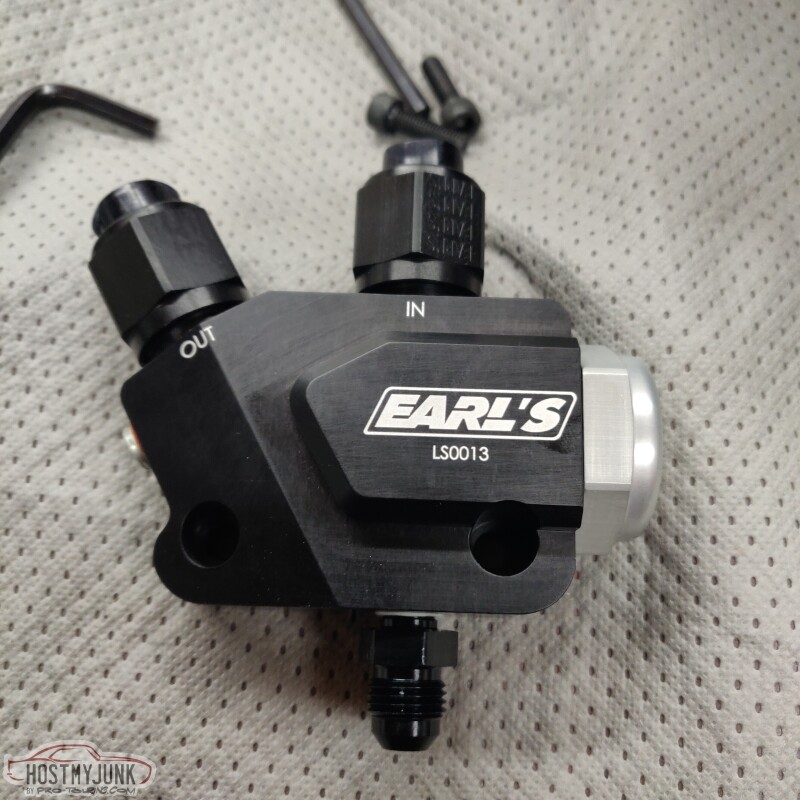
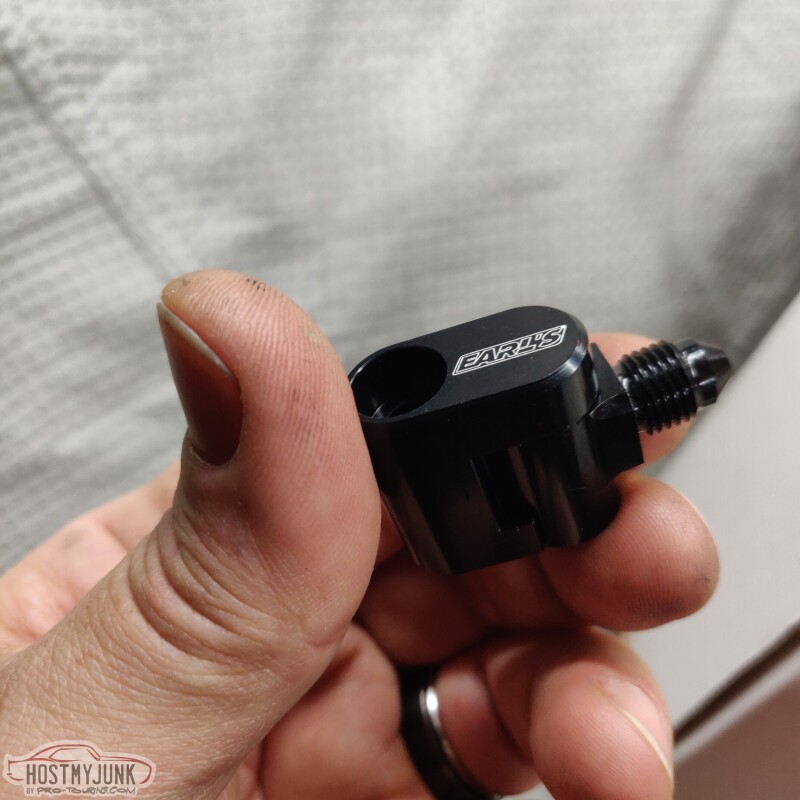
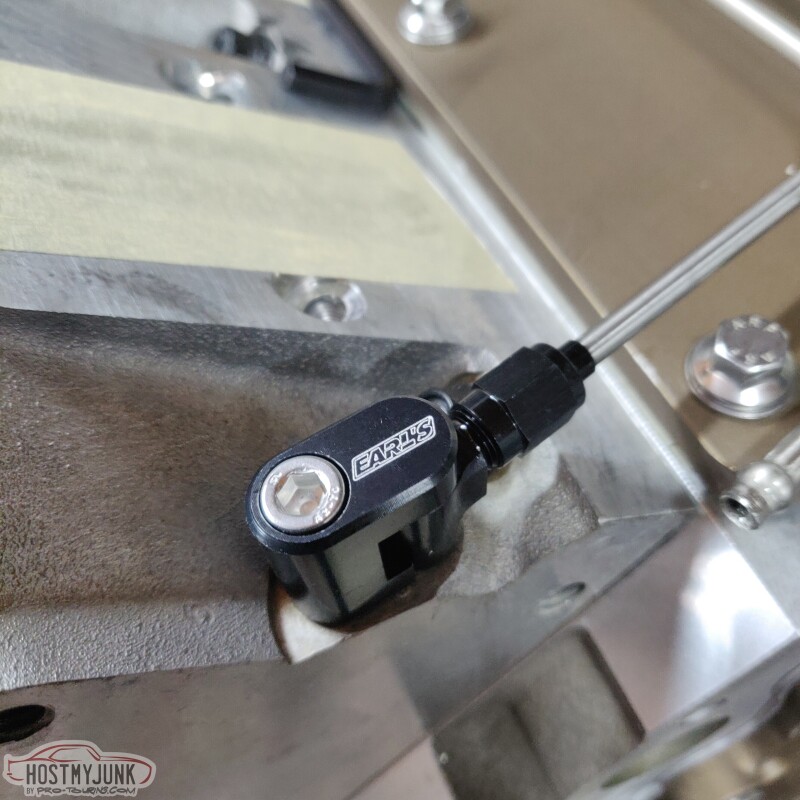
I knew that I needed to plumb oil to the turbo, so I chose this adapter from Earl's. This one is also set-up for an oil cooler and has a build in thermostat. I haven't decided if I am going to use an oil cooler, but I will be using the bottom port for turbo oil feed.
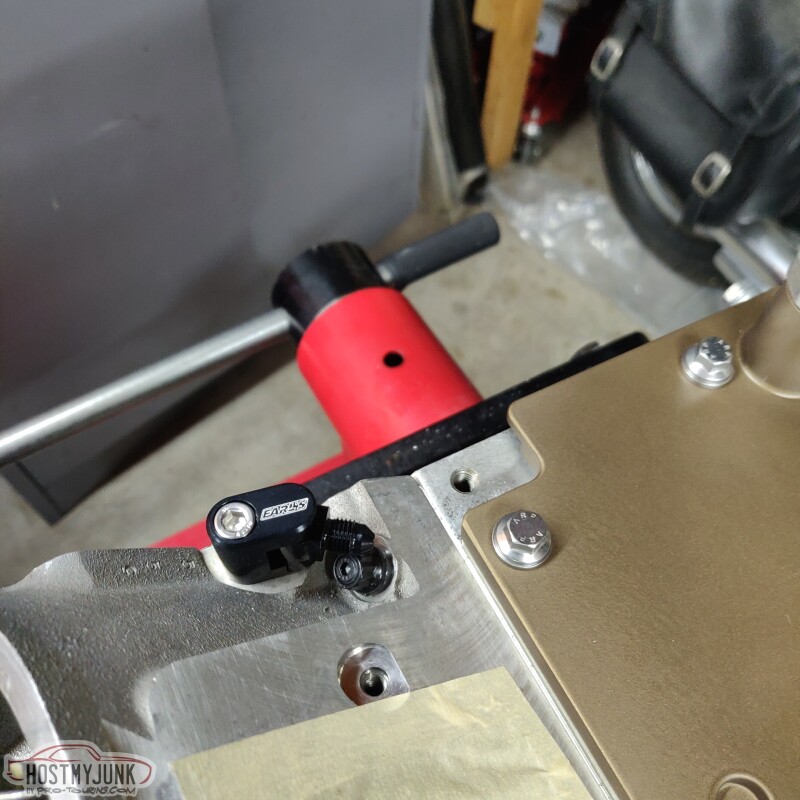
There is a lot of debate as to whether having rear steam ports help in boosted applications. I decided that it can't hurt, so I drilled out the little rivets that were installed in the rear of the heads.
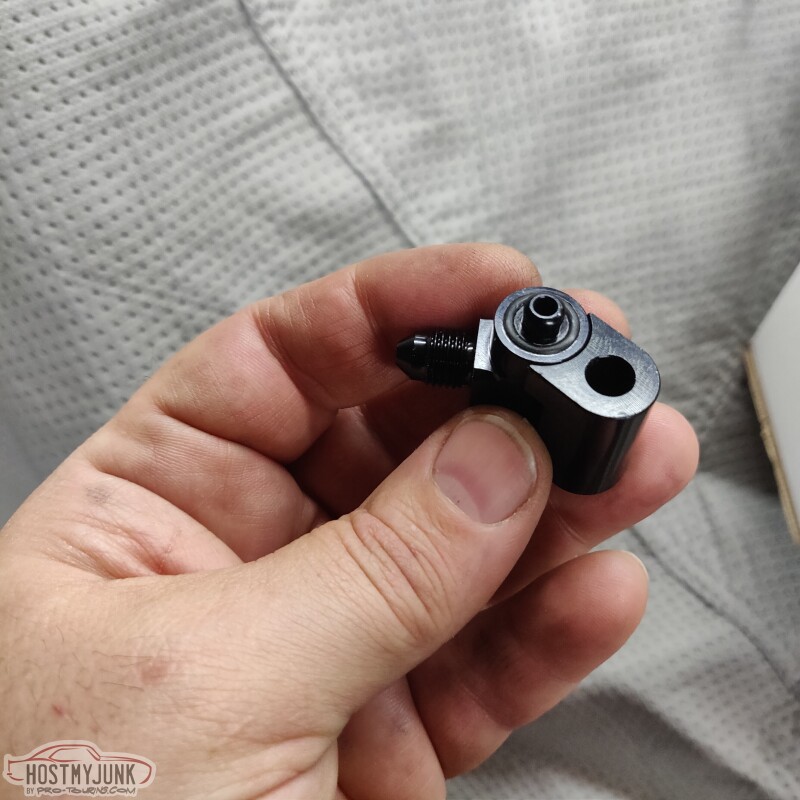
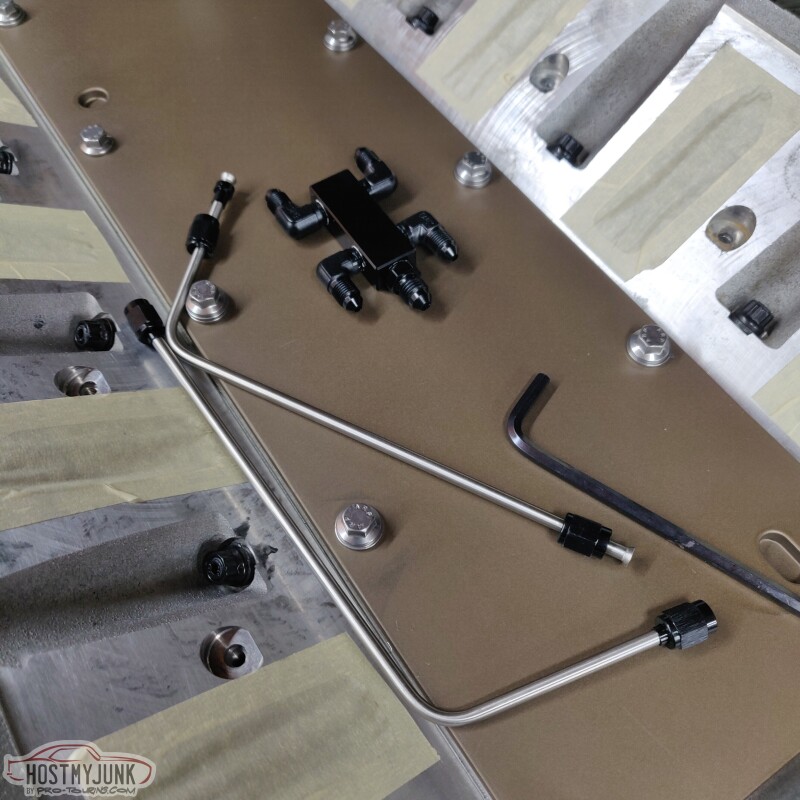
These are the steam vent adapters that are part of the Earl's 4 port steam vent kit. I really like this design because they use o-rings and they swivel.
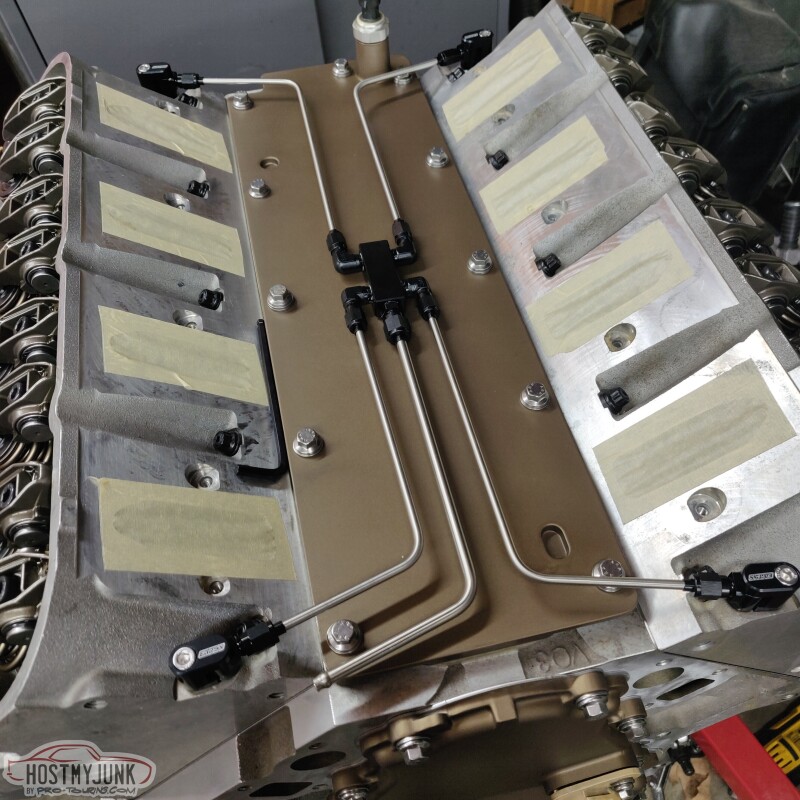
The kit included an assembled central manifold and 5 pre-bent lines.
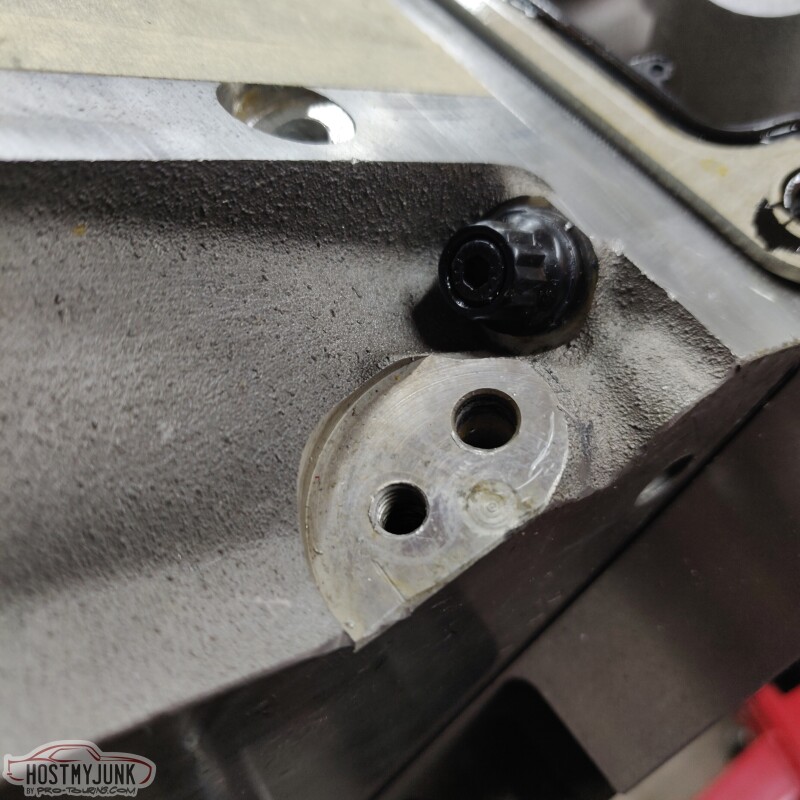
Here is the adapter installed in the rear of the head. The picture makes it look like they are hitting one of the head studs, but it's not even close.
More to come...
There is a lot of debate as to whether having rear steam ports help in boosted applications. I decided that it can't hurt, so I drilled out the little rivets that were installed in the rear of the heads.
These are the steam vent adapters that are part of the Earl's 4 port steam vent kit. I really like this design because they use o-rings and they swivel.
The kit included an assembled central manifold and 5 pre-bent lines.
Here is the adapter installed in the rear of the head. The picture makes it look like they are hitting one of the head studs, but it's not even close.
More to come...
Thread Starter
Joined: Mar 2003
Posts: 10,617
Likes: 1,883
From: Little Austin
This is the whole kit, fully assembled. The center tube is the outlet and will be plumbed to an existing hole on the mid-mount water pump casting. I don't particularly like the way that the steam manifold just sort of hangs in mid air. I am contemplating mounting it somehow to the valley cover so it has some support.
I love the little details, like the laser etched Earl's logo.
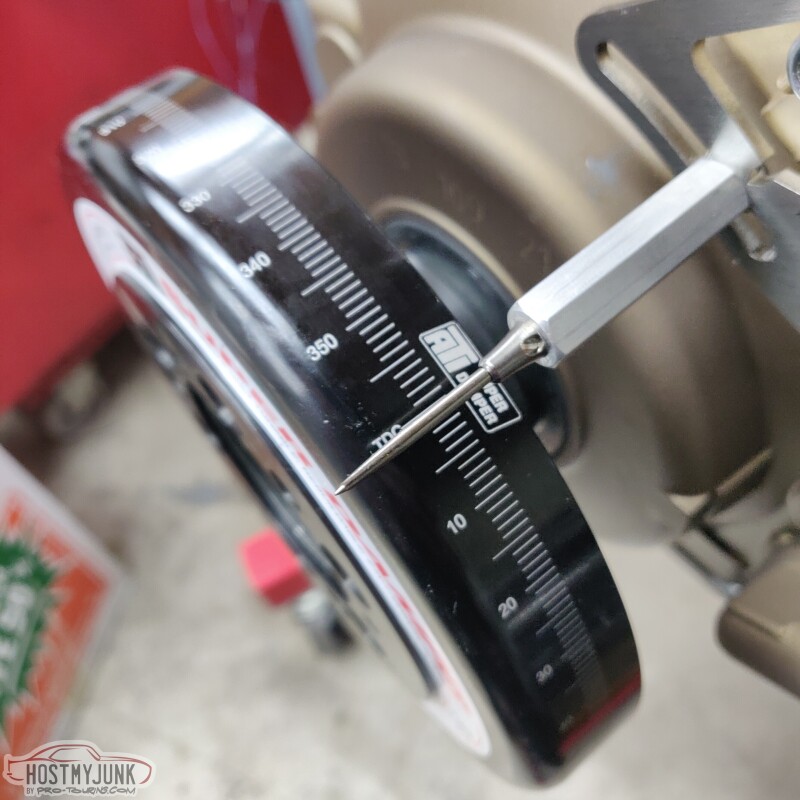
Since this is a turbo build, I felt like having the ability to confirm ignition timing was critical. The Holley mid-mount kit that I got included a fully marked ATI balancer. The balancer hub also has a key that mates with the key on the Molnar crank. This made everything pretty simple to add a timing pointer.
I chose one from Mighty Mouse solutions. It is a simple design and is inexpensive. The kit includes two studs that replace one of the front cover bolts and the cam sensor bolt.
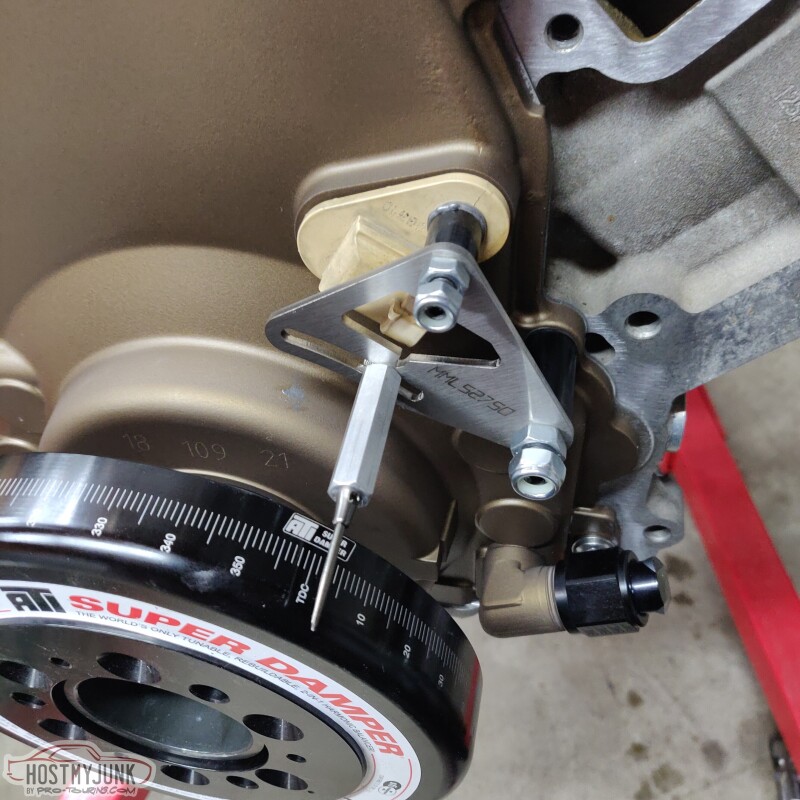
My engine builder left the engine at TDC on the compression stroke, and everything seemed to line up perfectly. I do have a piston stop, so I may verify TDC at some point to make sure it is perfect. I ordered a kit with a slightly longer pointer, but it will be easy to trim it back.
This is where I left off for the day.
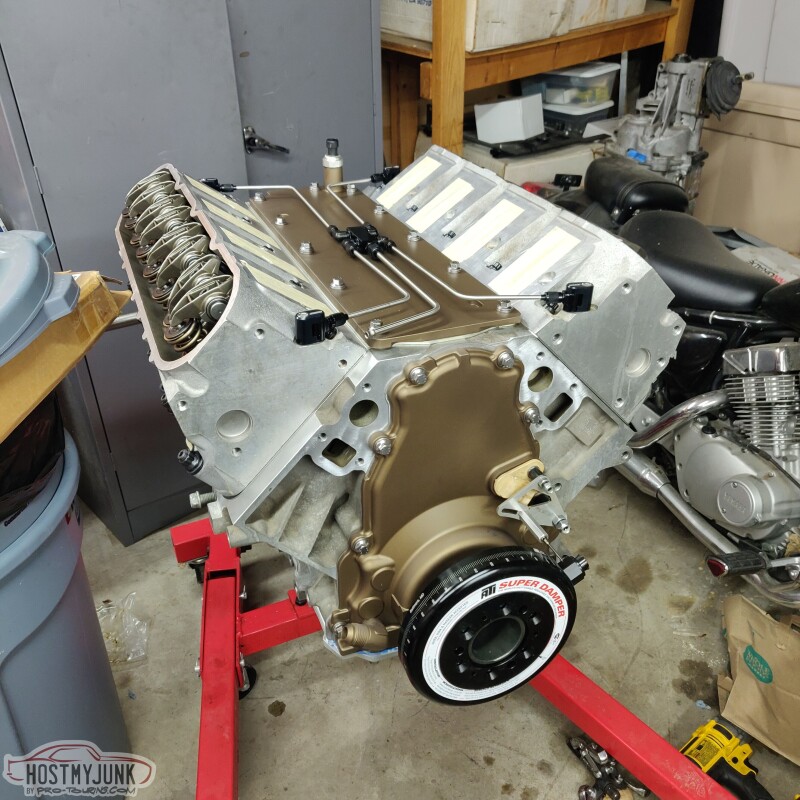
Progress is being made...
Andrew
I love the little details, like the laser etched Earl's logo.
Since this is a turbo build, I felt like having the ability to confirm ignition timing was critical. The Holley mid-mount kit that I got included a fully marked ATI balancer. The balancer hub also has a key that mates with the key on the Molnar crank. This made everything pretty simple to add a timing pointer.
I chose one from Mighty Mouse solutions. It is a simple design and is inexpensive. The kit includes two studs that replace one of the front cover bolts and the cam sensor bolt.
My engine builder left the engine at TDC on the compression stroke, and everything seemed to line up perfectly. I do have a piston stop, so I may verify TDC at some point to make sure it is perfect. I ordered a kit with a slightly longer pointer, but it will be easy to trim it back.
This is where I left off for the day.
Progress is being made...
Andrew
TECH Senior Member
Joined: Jun 2016
Posts: 22,303
Likes: 3,619
From: Central Cal.
Man, that is coming out NICE! Love all the attention to detail you are investing into it. That steam kit is one of the nicest I've seen! But Earl's has a rep to maintain...
Carry on...
Carry on...
Thread Starter
Joined: Mar 2003
Posts: 10,617
Likes: 1,883
From: Little Austin
Andrew