When you click on links to various merchants on this site and make a purchase, this can result in this site earning a commission. Affiliate programs and affiliations include, but are not limited to, the eBay Partner Network.
Andrew,
What brand is the trans bango fittings? I always wondered if they offered enough flow. I remember seeing one before and the through hole always seemed small. I�ve never seen that hole diameter in the descriptions before.
this time around i went with custom from orme bros and am very happy with them. recently ive decided to shy away from the self assemble ends cause theyre only 'sorta' reusable and they are much bulkier than crimp ones. same with the higher end teflon hoses. all my older rubber hoses end up dry and crunchy quick enough theyre never actually reusable. anyway, glad you didnt fire it up with those. its truly a safety hazard, i know first hand.
I used to do a lot of hydraulic work and I have a set of these wrenches, they were a life saver in many instances, the crows feet you mentioned might do the trick as well, many places sell similar wrenches at much cheaper prices than Snap On, Harbor Freight sells them as well in a set that goes from 3/8” to 1-1/4”.
I used to do a lot of hydraulic work and I have a set of these wrenches, they were a life saver in many instances, the crows feet you mentioned might do the trick as well, many places sell similar wrenches at much cheaper prices than Snap On, Harbor Freight sells them as well.
I have those in SAE and metric, I don't use them much, but when needed they are worth their weight in gold...
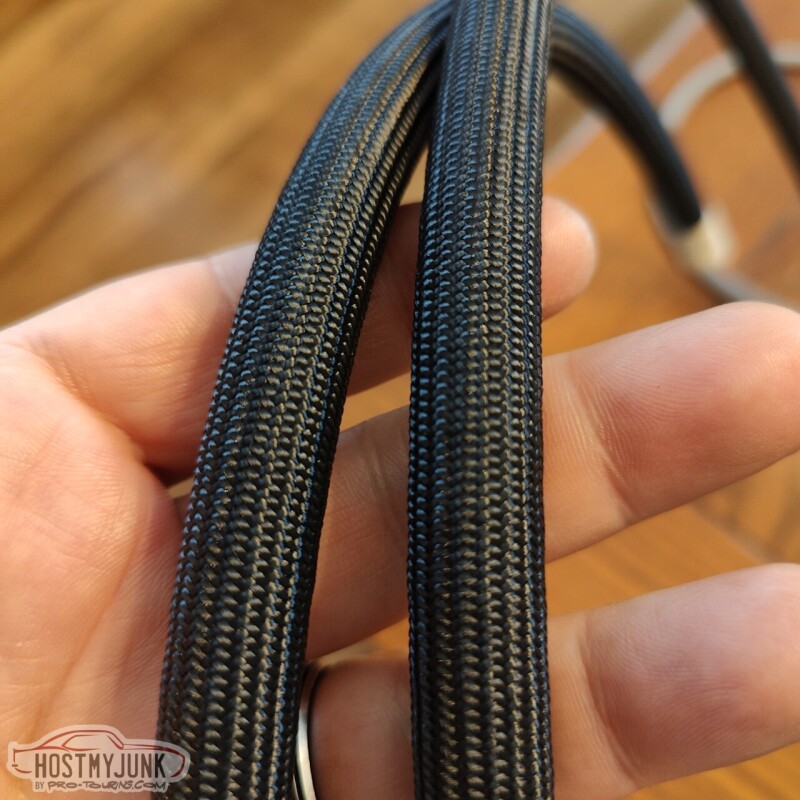
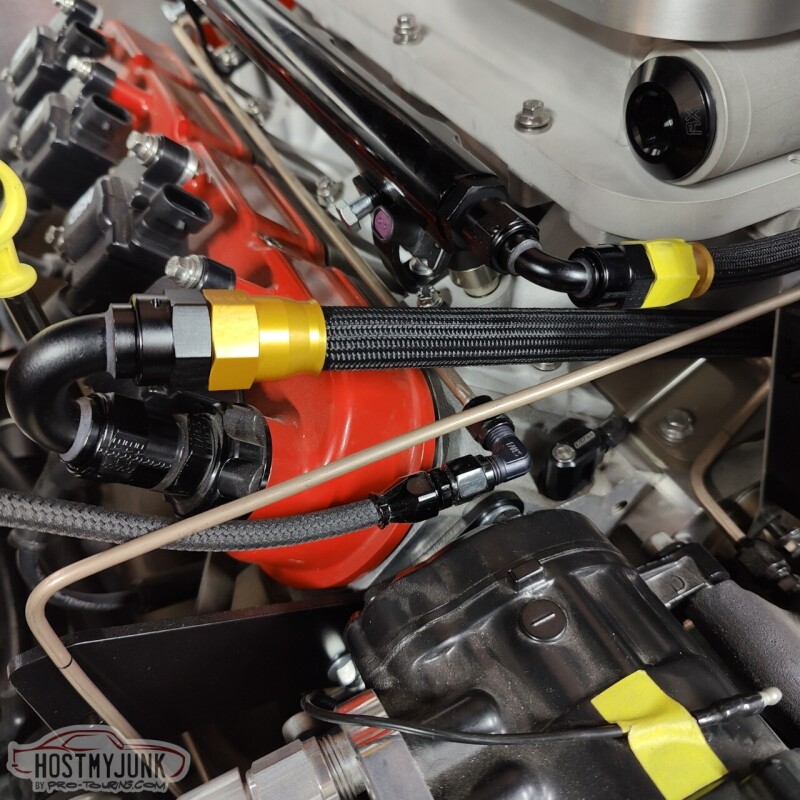
This is Earl's Ultra Pro hose and it is by far the nicest hose I have ever worked with. It is super flexible, light weight, and looks fantastic. Sadly, for some reason, Earl's no longer sells this hose in sizes smaller than AN-10. I had a 6 foot section of AN-6 hose that I had purchased a while back.
So I decided to use it to make some of the needed hoses under the hood. This is the fuel rail crossover that links the two rails together in the front.
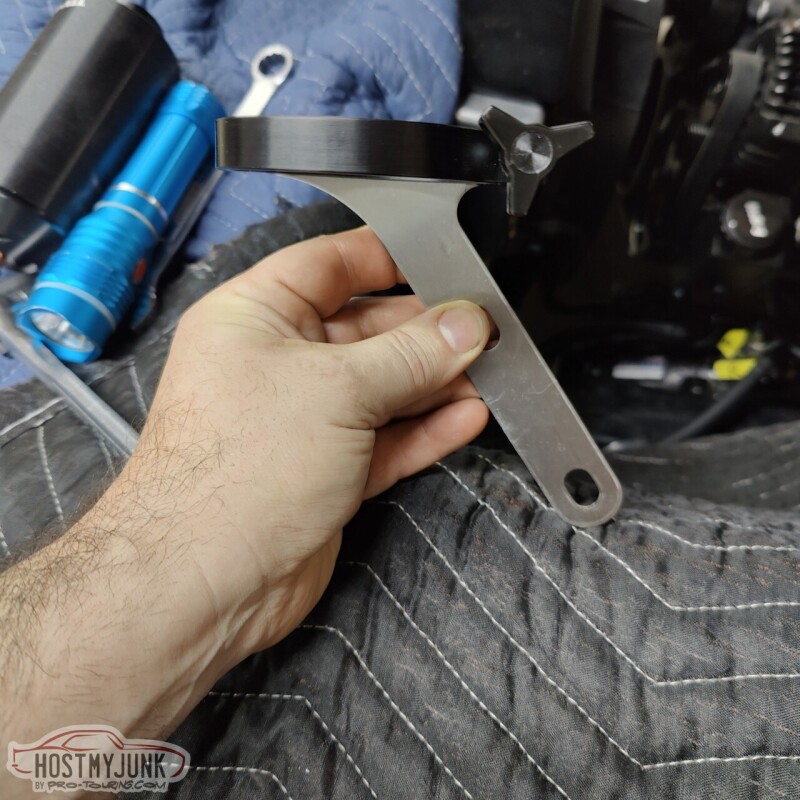
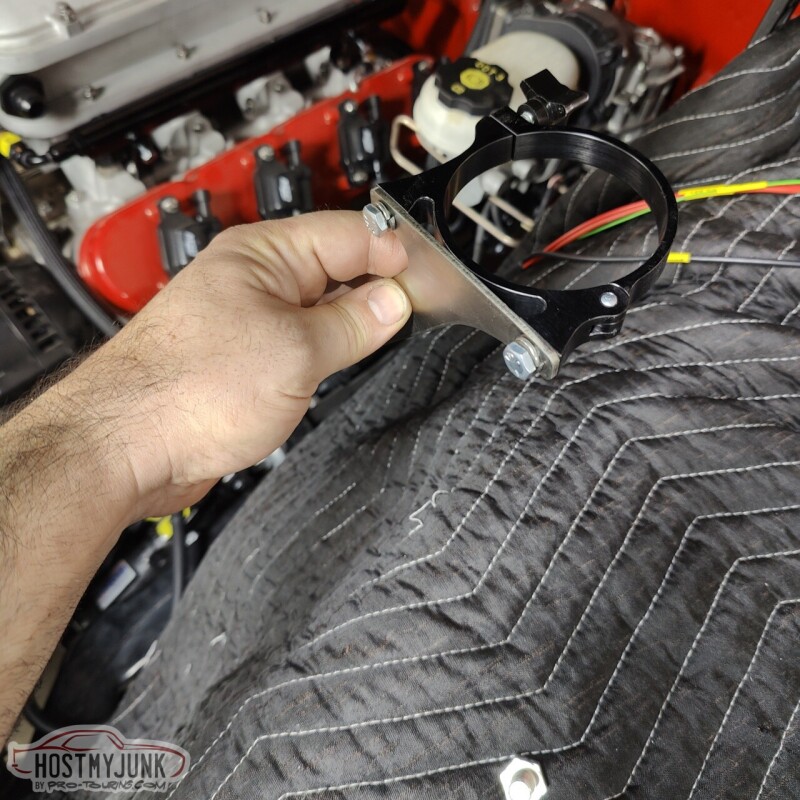
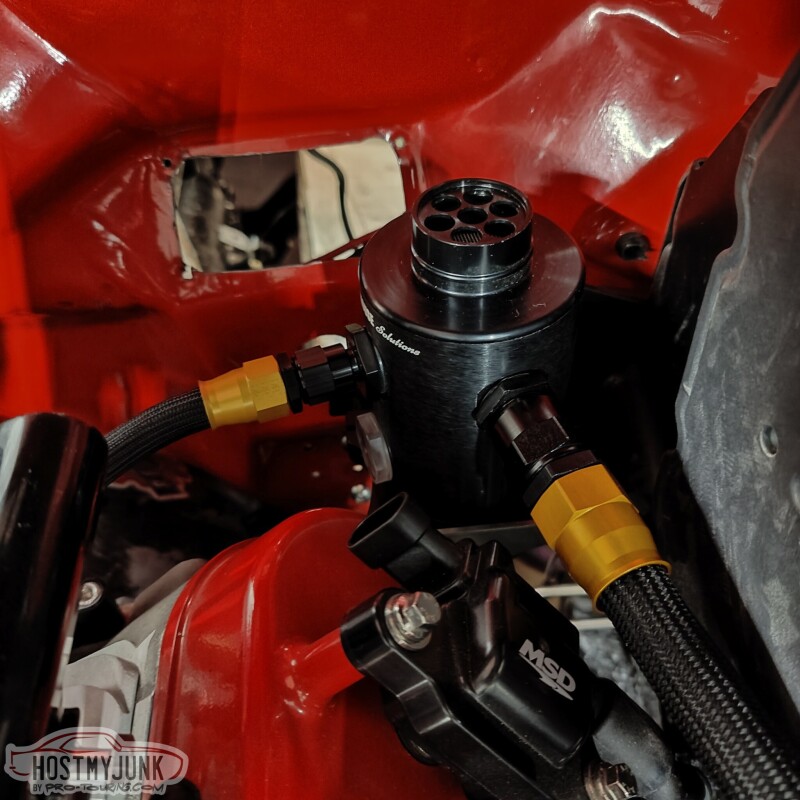
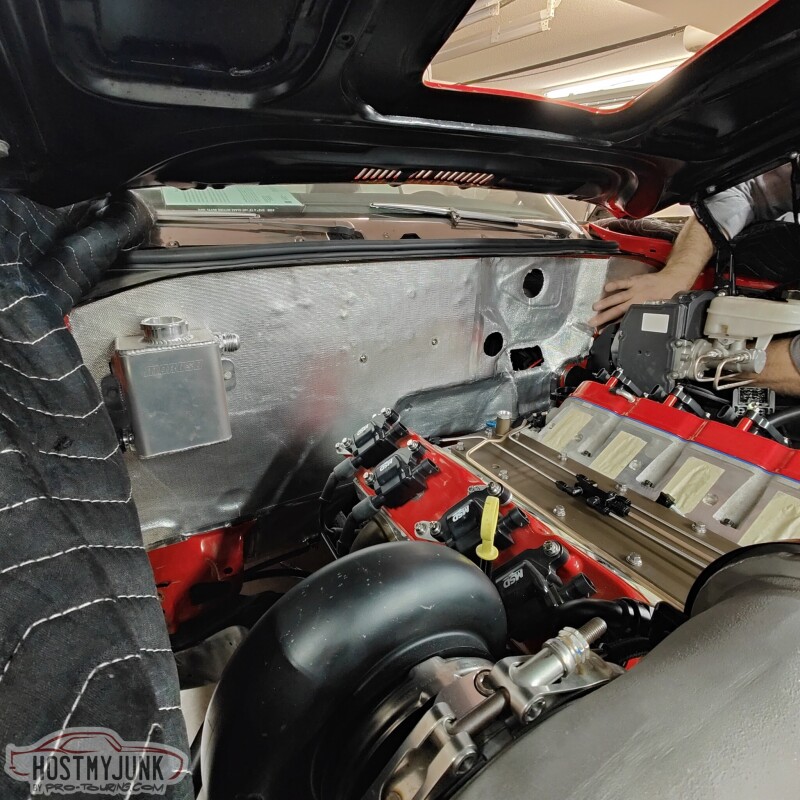
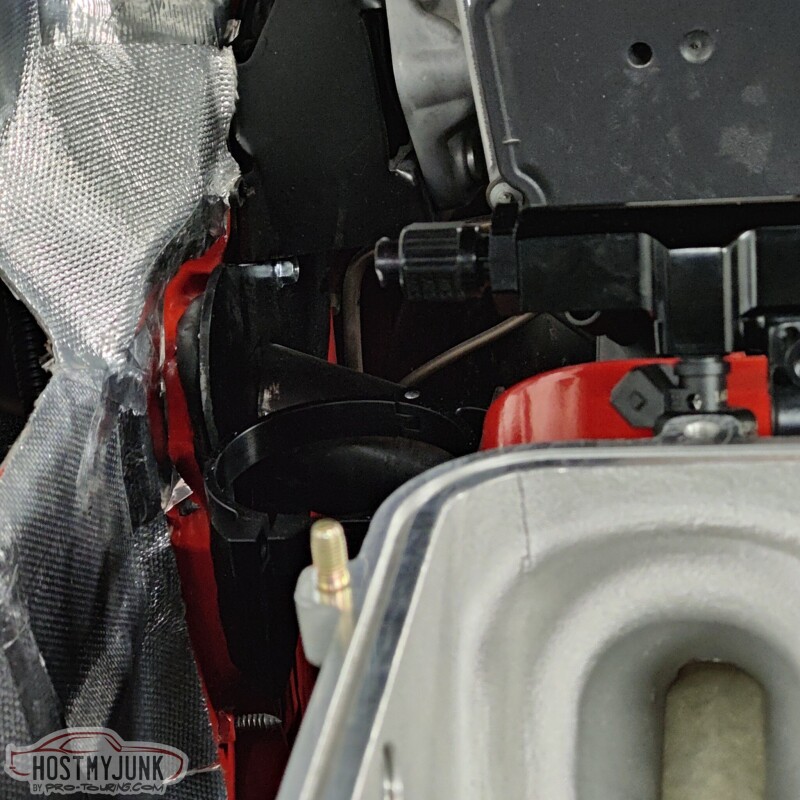
The original plan was to have the Mighty Mouse catch can mounted to the master cylinder mount. However, with the Bosch iBooster in place, that was no longer an option. I got on the MM website and saw they had a basic mount that was designed to bolt to the head.
Mounting it to the front of the heads was not an option. The passenger side has the turbo and the driver's side has the alternator. I could have modified this mount to work on the driver's side front, but instead, I chose to flip it around and mount it to the back of the driver's head.
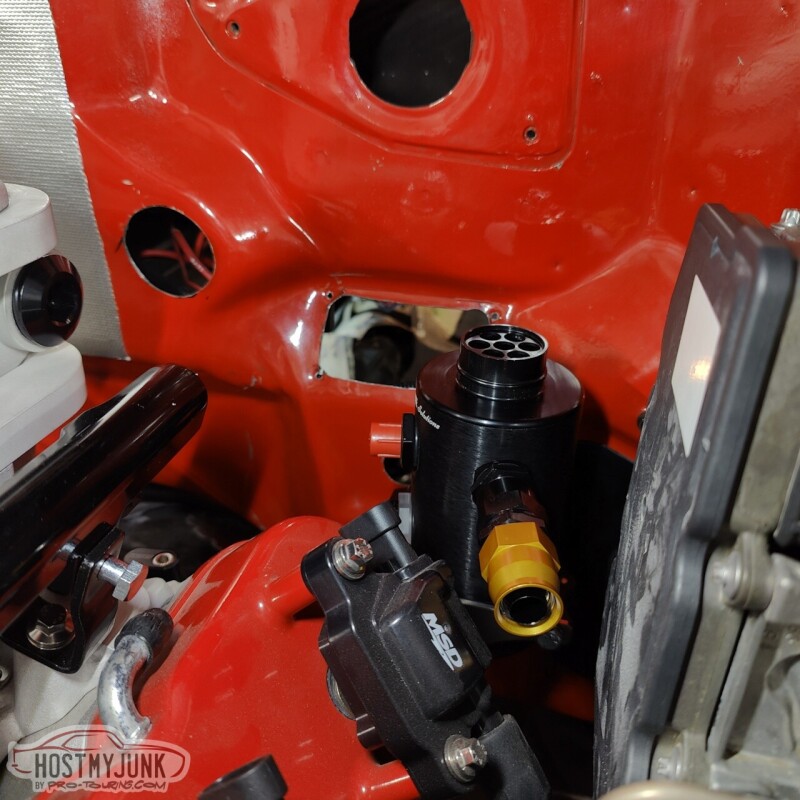
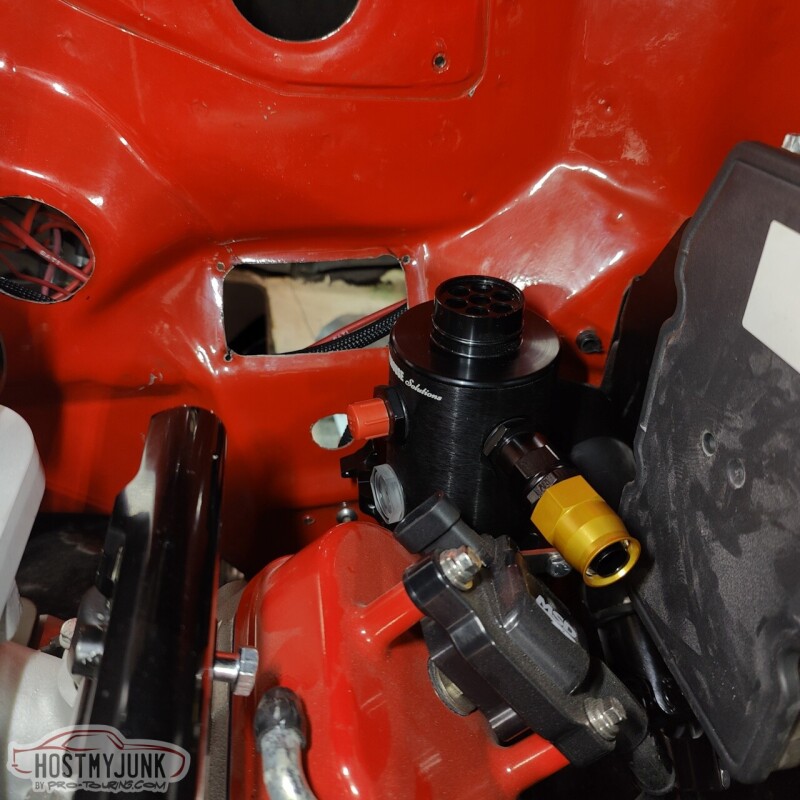
It fit perfectly in the back.
It places it approximately in the same location as the MC mount. There is plenty of clearance all around the can and the mount.
I got this 150 degree fitting and some Earl's Ultra Pro hose in AN-10.
The hose then gently bonds to the catch can.
And in the front, it passes under the plate that holds the boost solenoids.
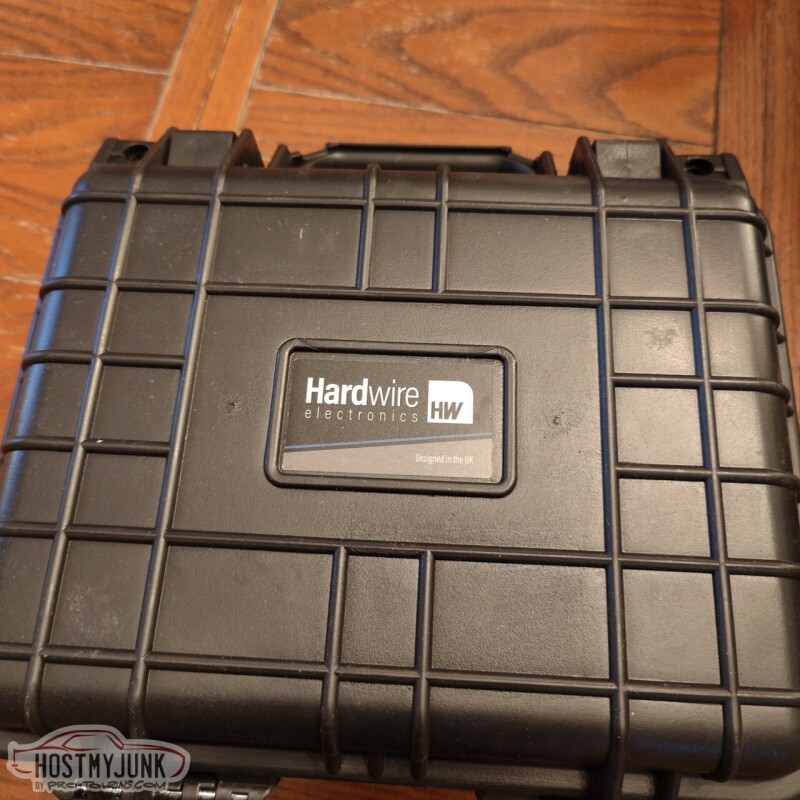
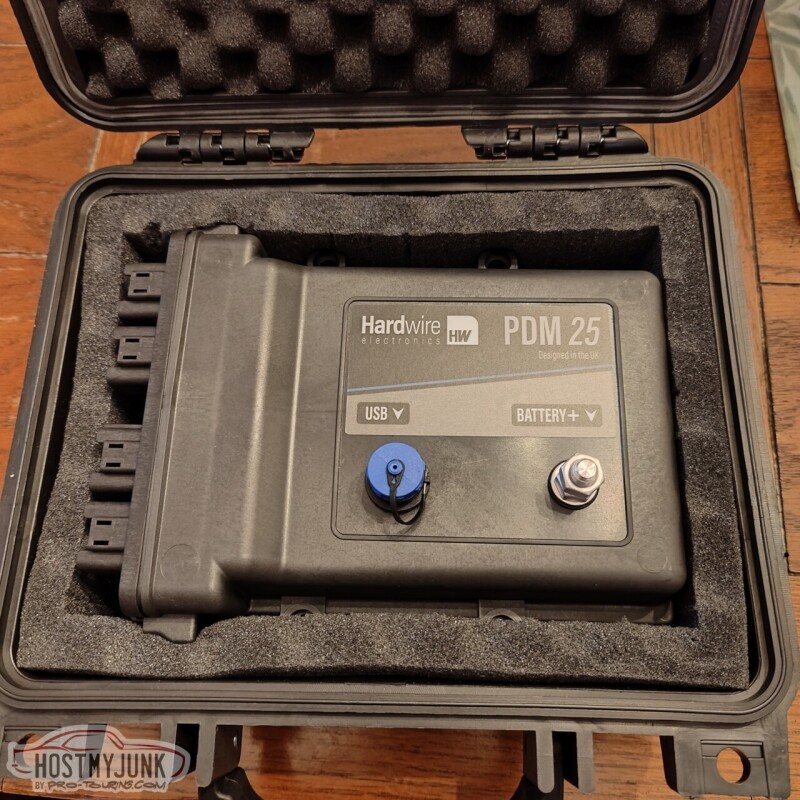
I saw these guys at the PRI show and was very intrigued by the product. This has way more channels than I need for the moment, but I may eventually have it handling the power distribution for the whole car. For now, the original harness will take care of all the interior and exterior lighting and the power windows. The Hardwire PDM will be use for the EFI, AC, and any other system under the dash.
The Hardwire PDM also supports the Holley 3rd Party CAN protocol (AKA the Racepak protocol), so I be able to do some neat things. More to come on that much later when I start on the wiring.
i have a smartwire ive been trying to get rid of, could have kept you in the holley family. but im interested to hear how you like the hardwire.
with the nexus i completely rewired my entire wagon so it now has zero relays and 2 fuses (for a couple small always on items) in the whole car. its really neat and gives the car a very modern feel when working on it.
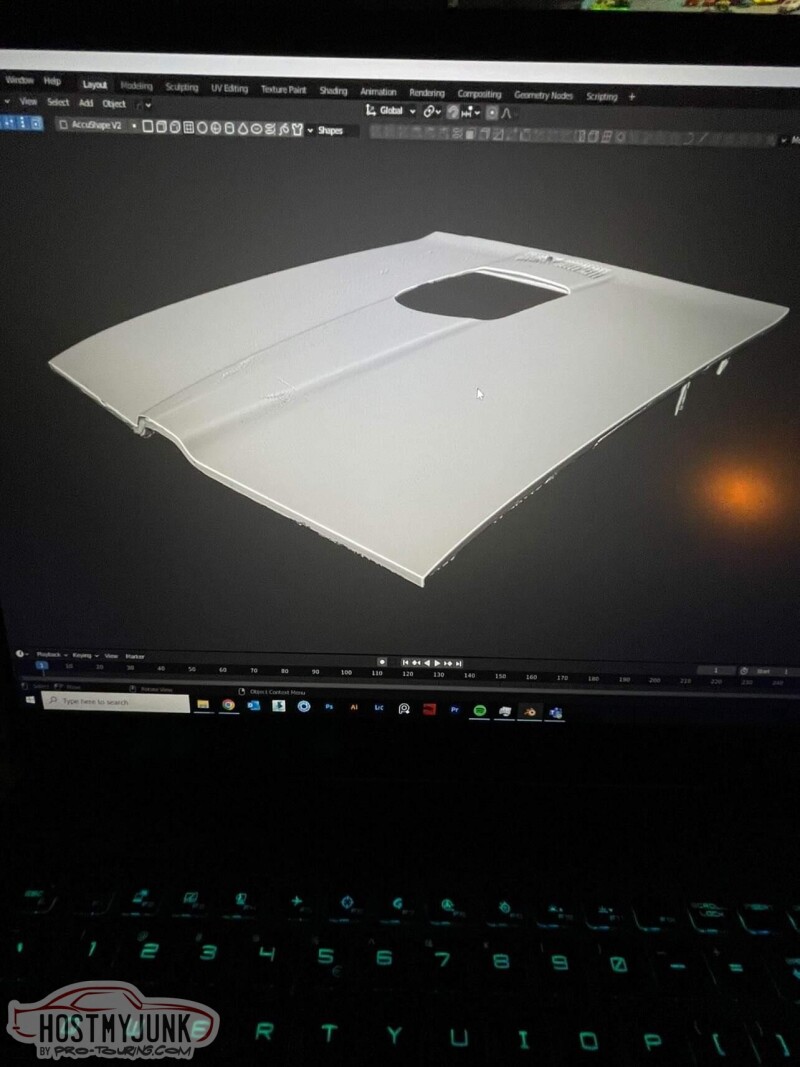
The hood 3D scan turned out really well. I had a chance to work with Kris Horton with the tuning on his Chevelle and he has been working on a rendering of my GTO. He will use the hood scan to refine the rendering and also come up with various ideas about how to deal with the hole in the hood.
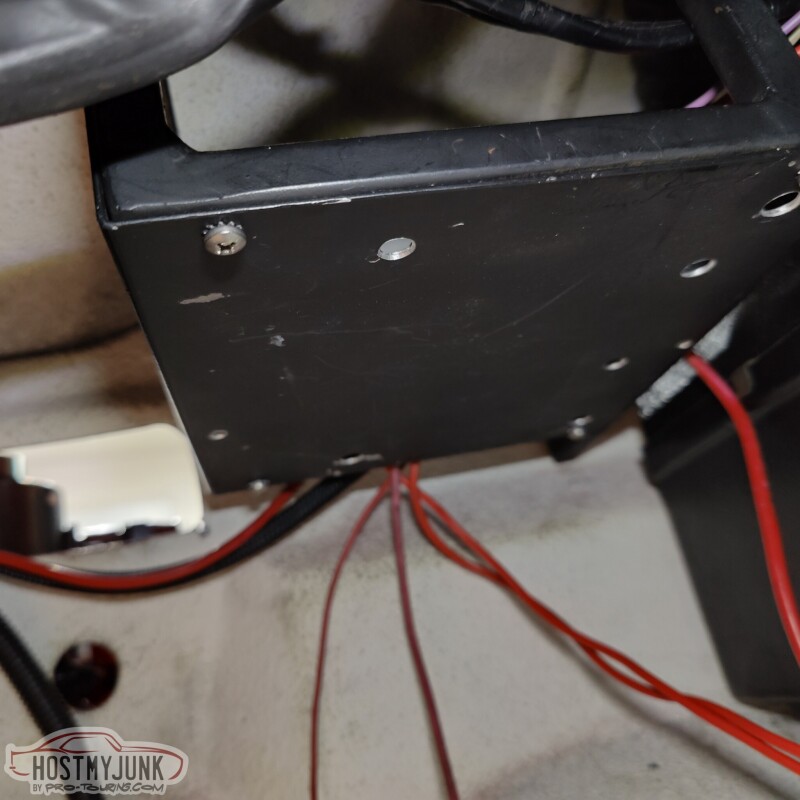
Next on the list was finding a suitable location for the Hardwire PDM. My under-dash structure is not like a typical A-body because 20 years ago a frame was built to hold the VA AC unit. Part of this fram structure was also a little shelf where the old Holley Commander 950 ECU used to live.
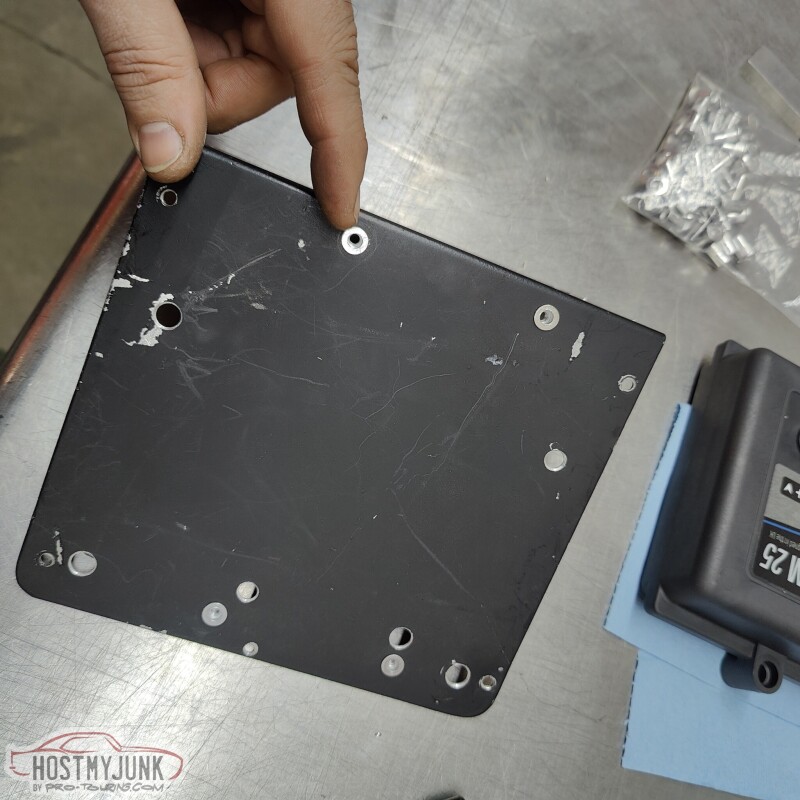
I figured that attaching the PDM under the shelf would be the perfect, central location.
I added some #8 rivnuts to the plate...
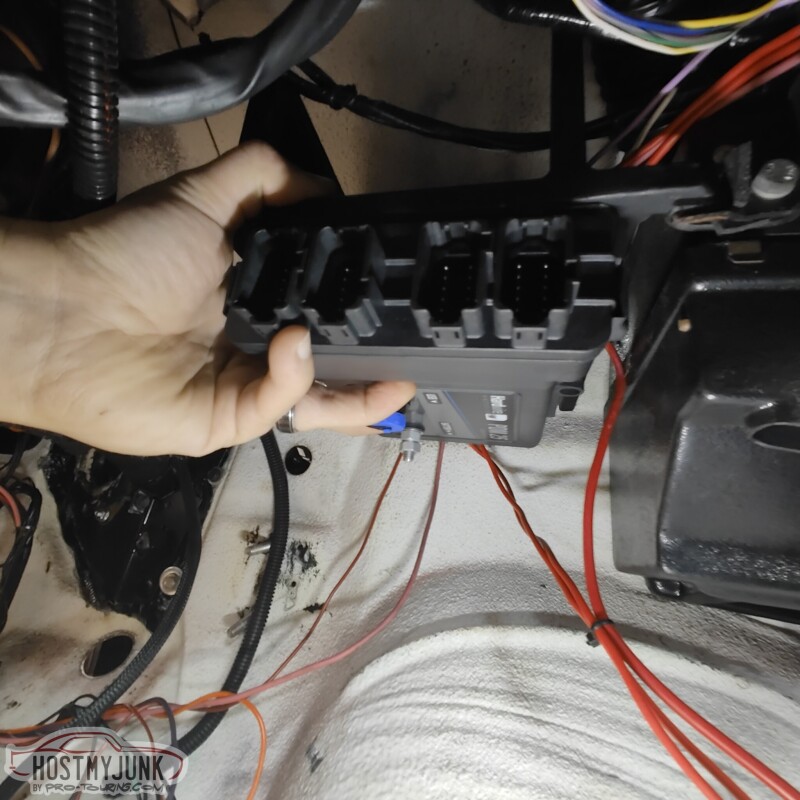
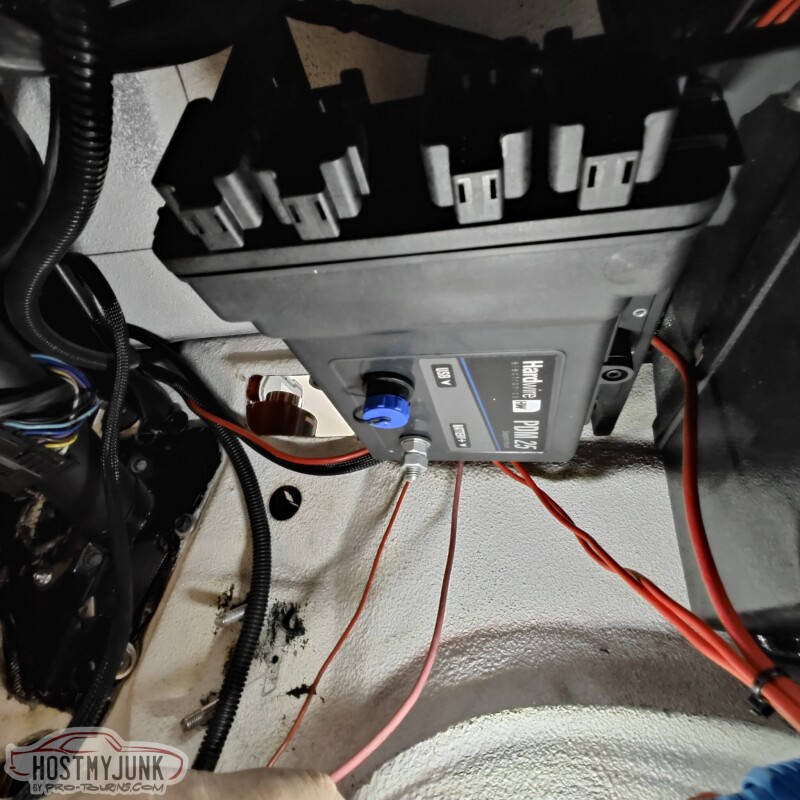
With the PDM bolted down in place...
It is slightly below the level of where the old ash tray used to be, but it is much more inconspicuous than what the pictures indicate. It is tucked up under the dash, while still having all of the connectors easily accessible.
More plumbing....I made the short hose that goes from the catch can to the back of the intake manifold.
Lastly, I made a short hose for the power steering pressure side.
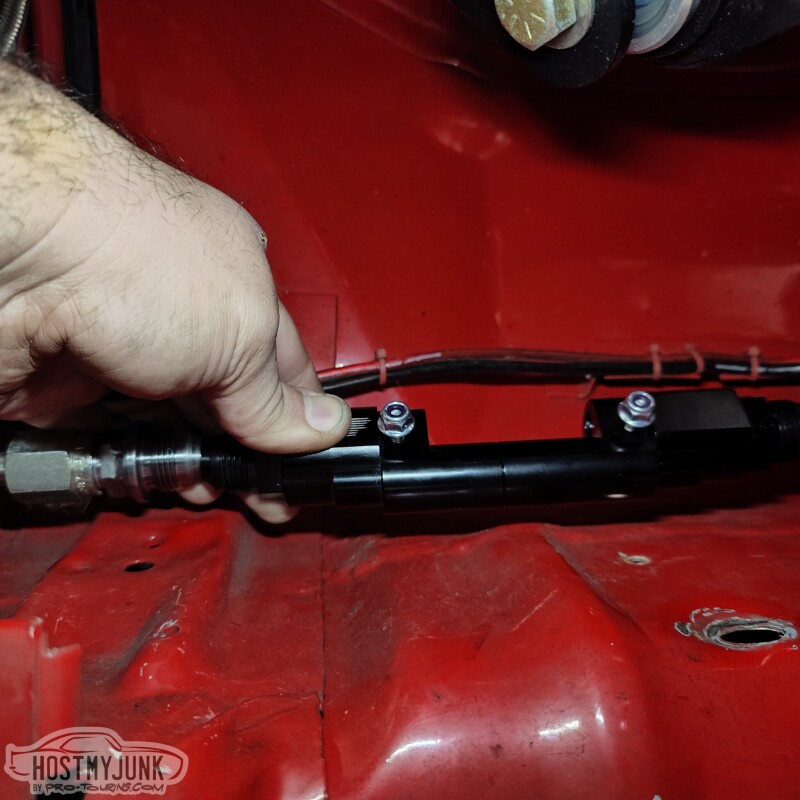
When I originally built the car, twenty years ago, I had the foresight to install a 1/2" stainless fuel hardline that runs from the back, along the frame rail, and exits here at the front of the frame. It already had a AN-8 male fitting on the end.
I have been sourcing some of my plumbing supplies here locally from Star Performance. This PTFE hose is branded under the Red Horse brand of hoses and fittings.
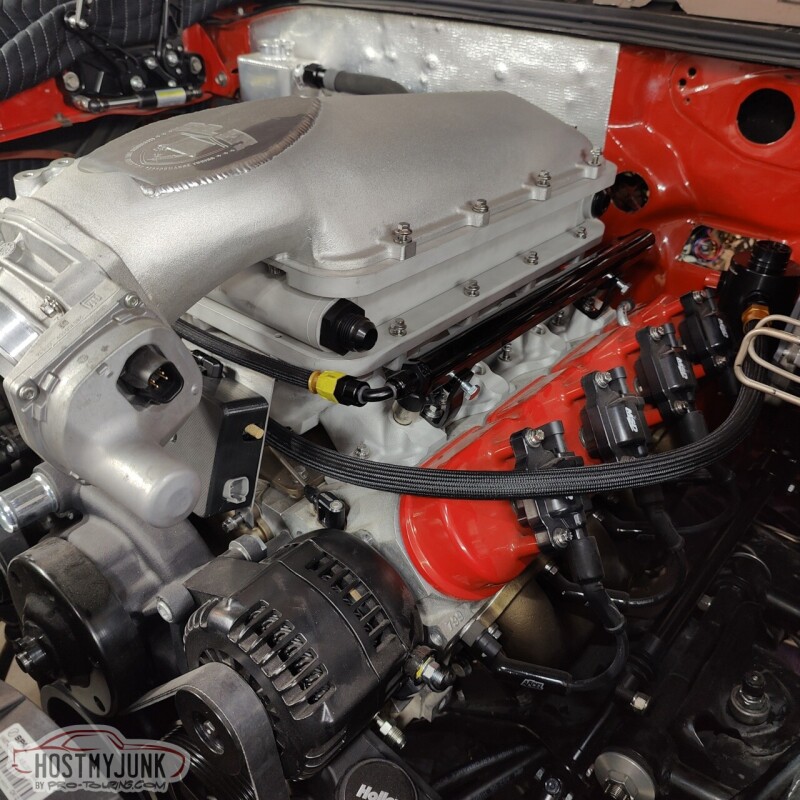
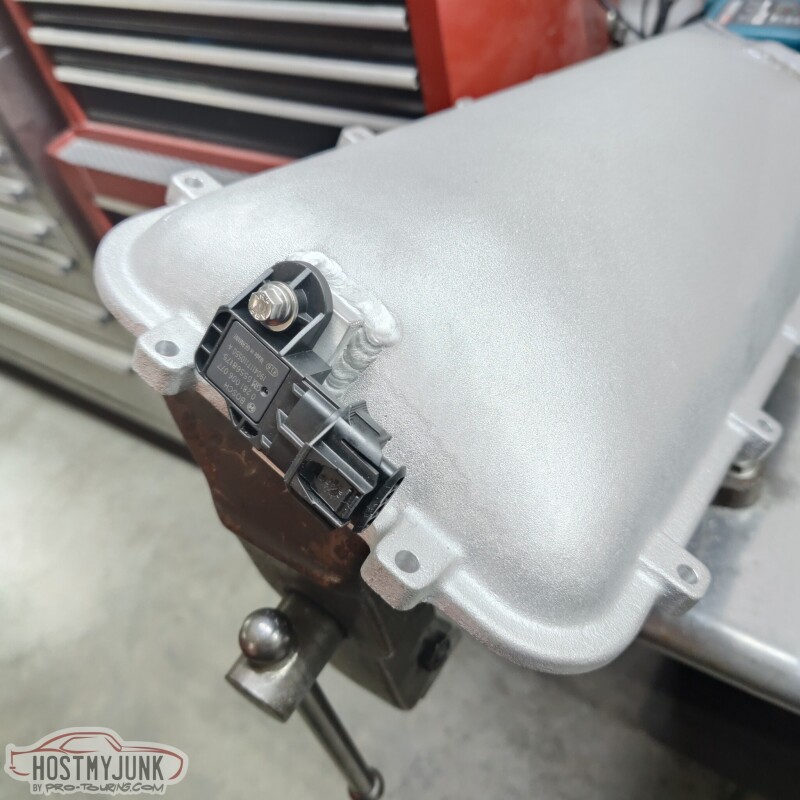
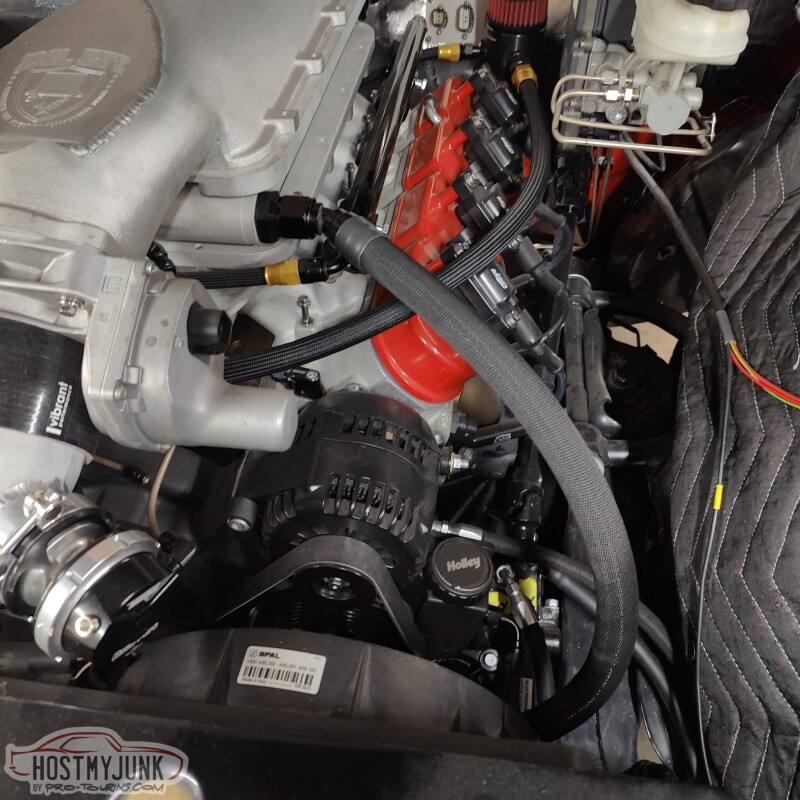
Vic and I also made a little mount for the TMAP sensor that is above the Tick intercooler. This way I can datalog both air temperature and boost pressure above and below the intercooler, so I can see how well it is working.
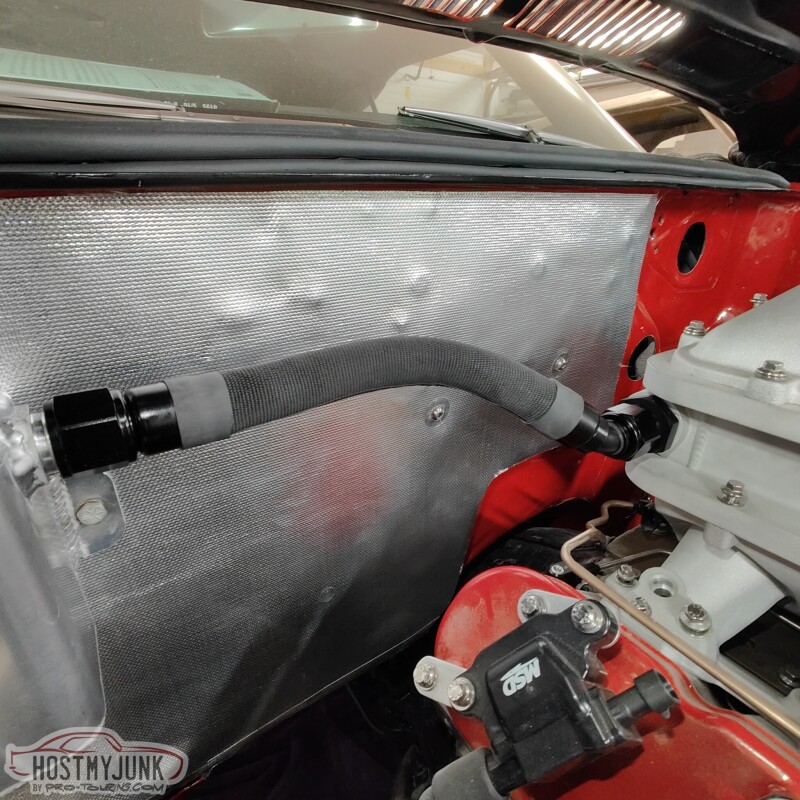
Vic also cut out the rest of the panels to cover the firewall. I really like the overall look. It looks clean and adds a layer of heat insulations.
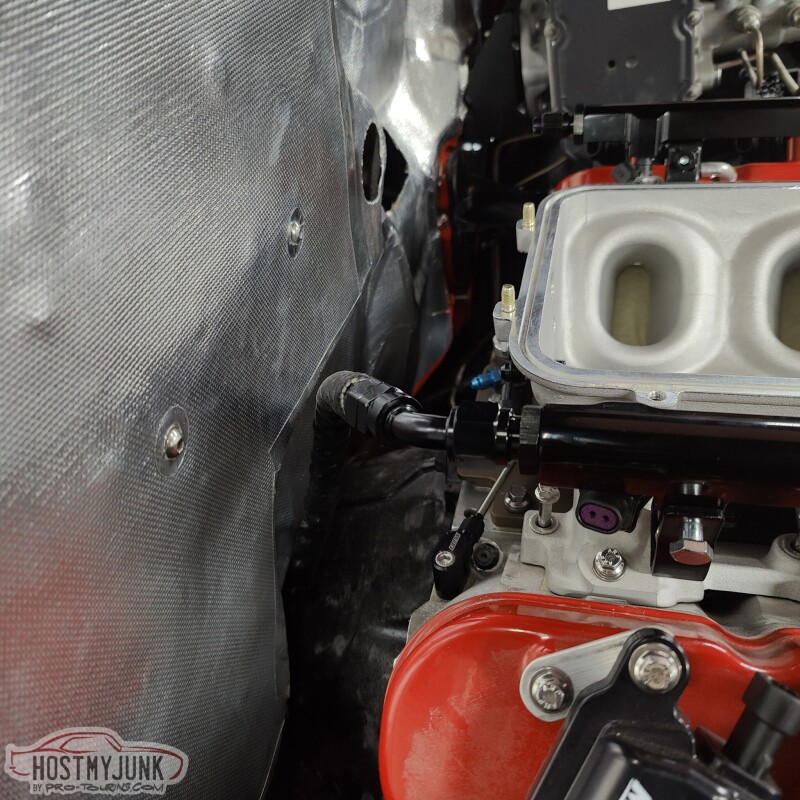
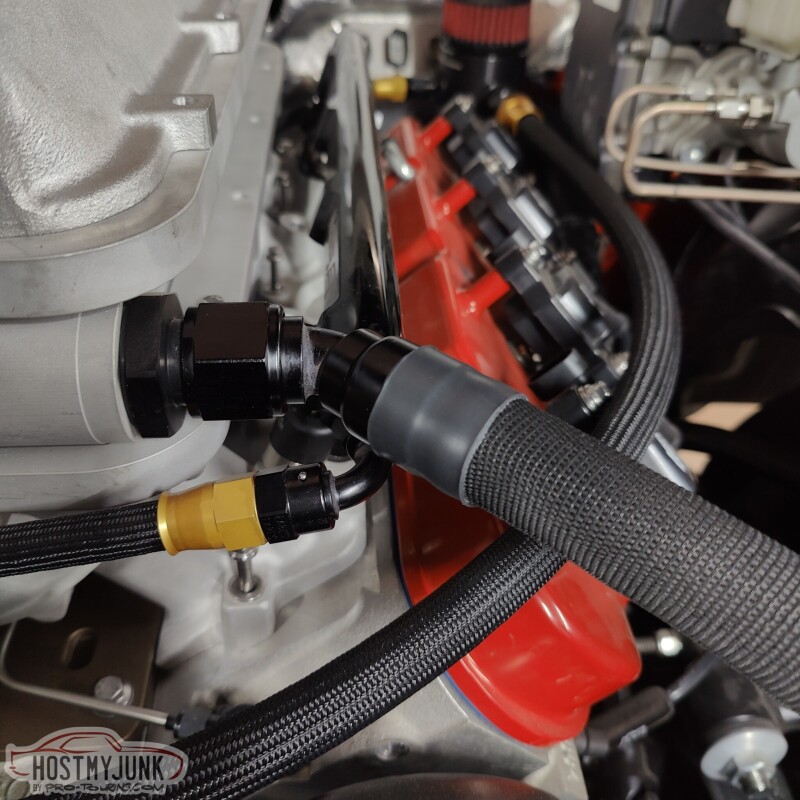
Back to the fuel system. I was originally going to bring the -8 hose from the frame rail, to the back of the intake and have a Y-bock and 2 -6 hoses to the rails. This was proving to be kind of a pain in the a$$, so I made my life easier...
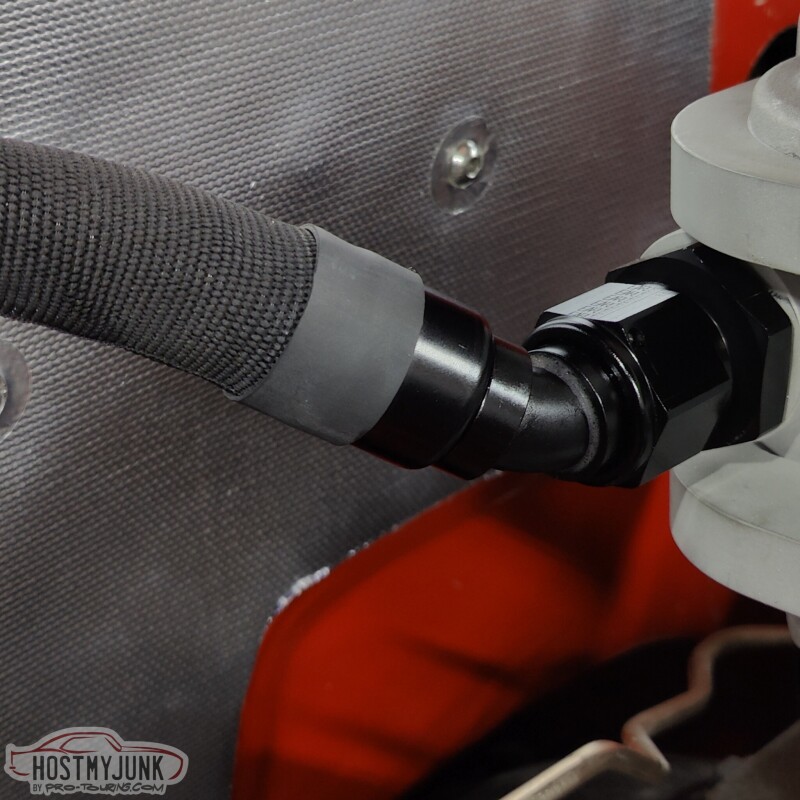
The -8 hose from the frame rail feeds into the passenger side fuel rail.
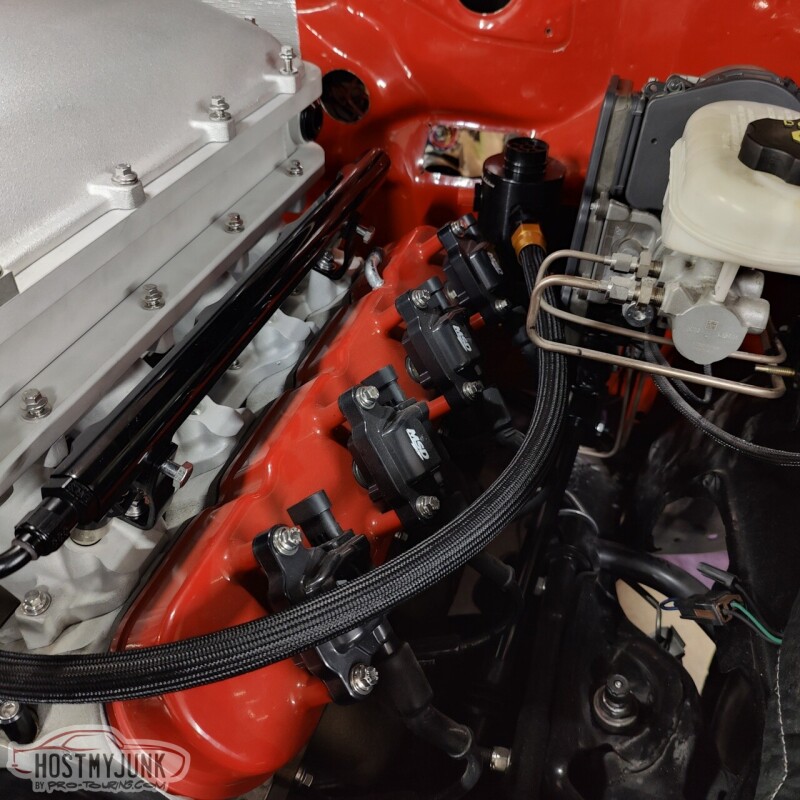
There is a cross-over hose at the front and the rear of the driver's side fuel rail is capped off.
I also bent up a little NiCopp tube for the blow-off valve.
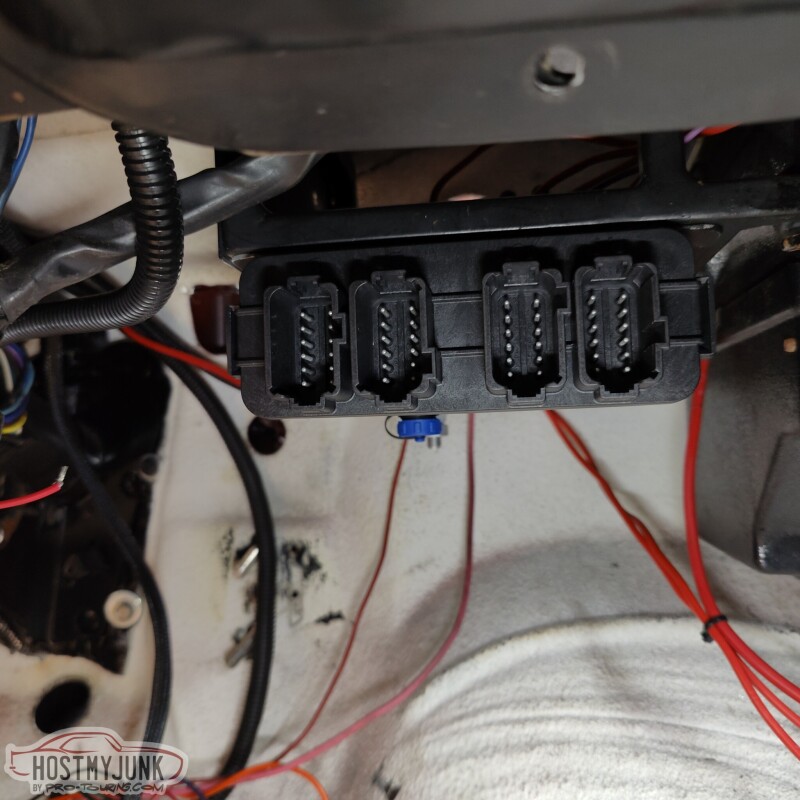
This is the plate that I had made earlier. These connectors will be for the injectors and coil harnesses.
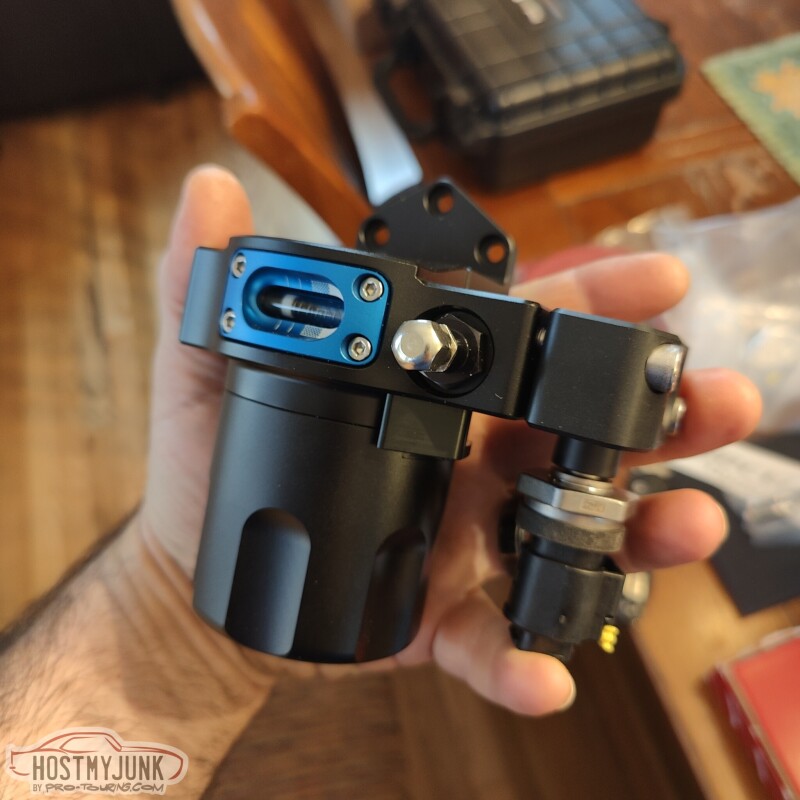
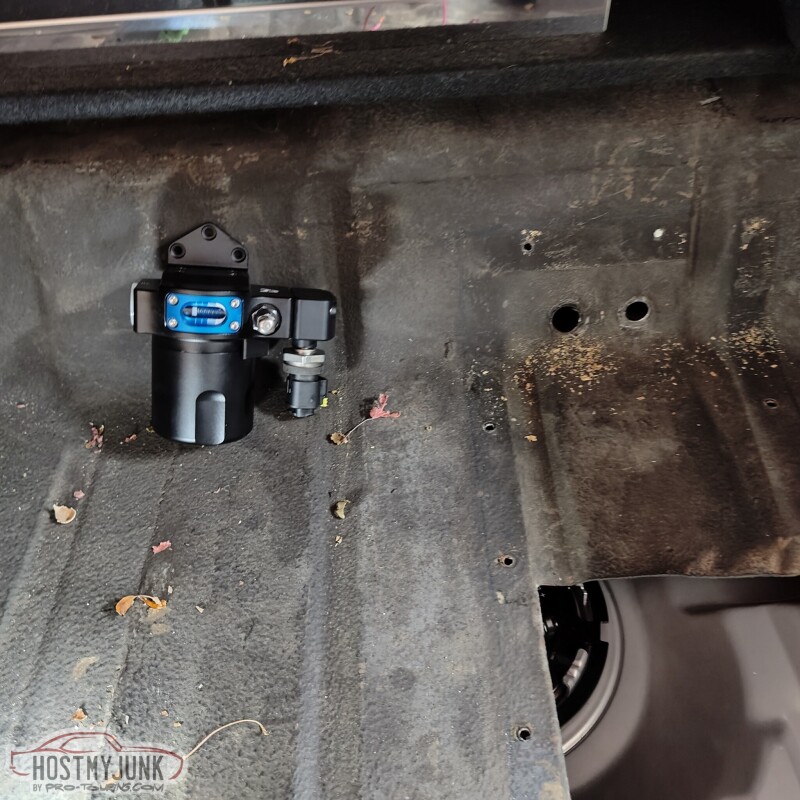
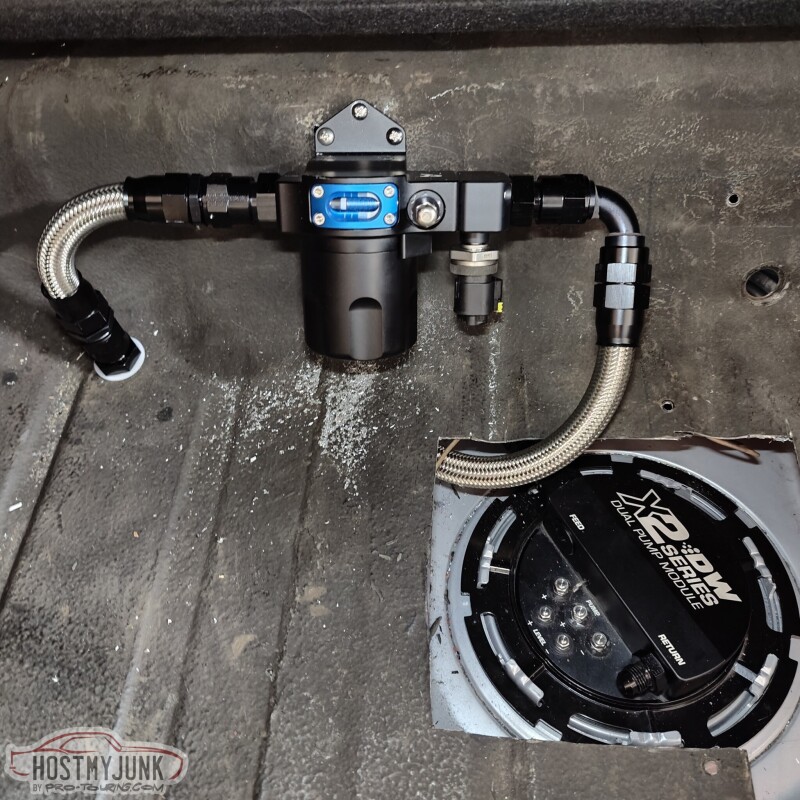
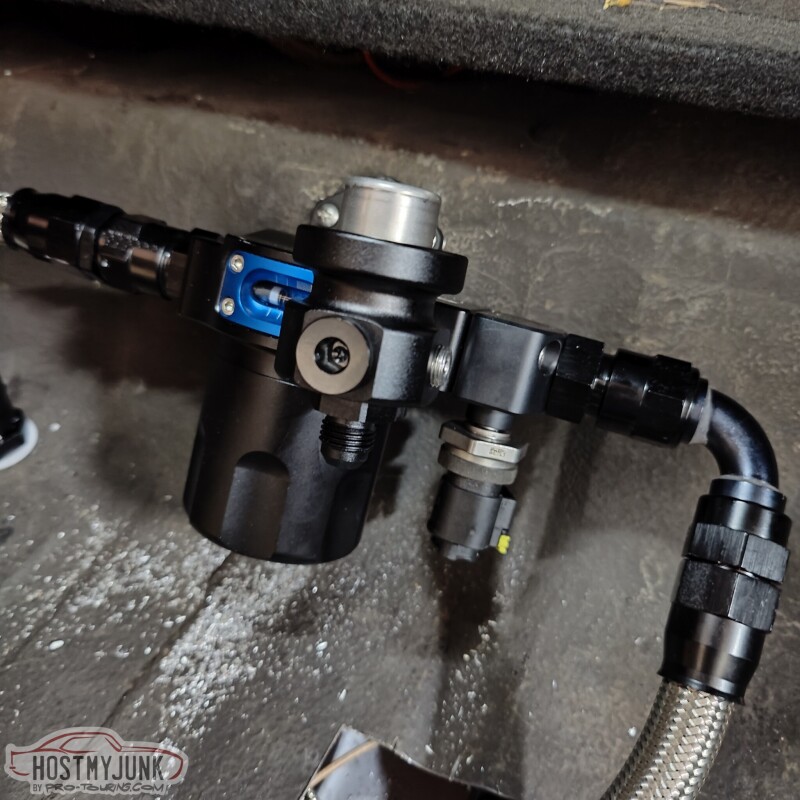
With the fuel plumbing finished up under the hood, it was time to figure out what needed to be done in the back. I recently ordered some wiring supplies from www.milspecwiring.com, and as I browsed their website, I got suckered in by this little piece of jewelry. It is the Injector Dynamics ID750 fuel filter. I got mine with the optional Bosch Motorsports fuel pressure/temp sensor. The little Schrader valve port will be repurposed to plumb the pressure relief valve that was recommended by Carl at Vaporworx.
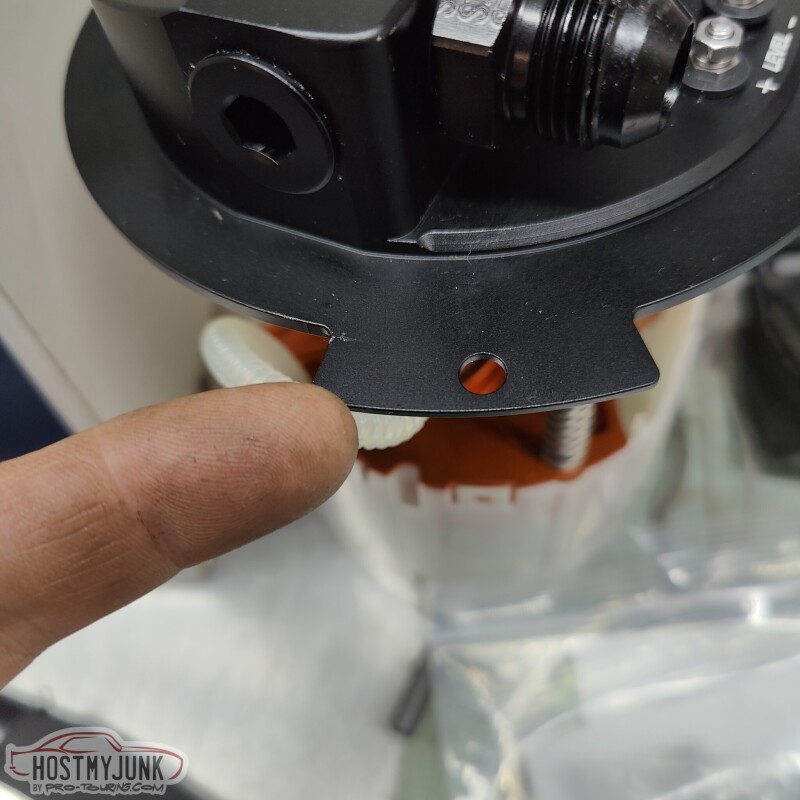
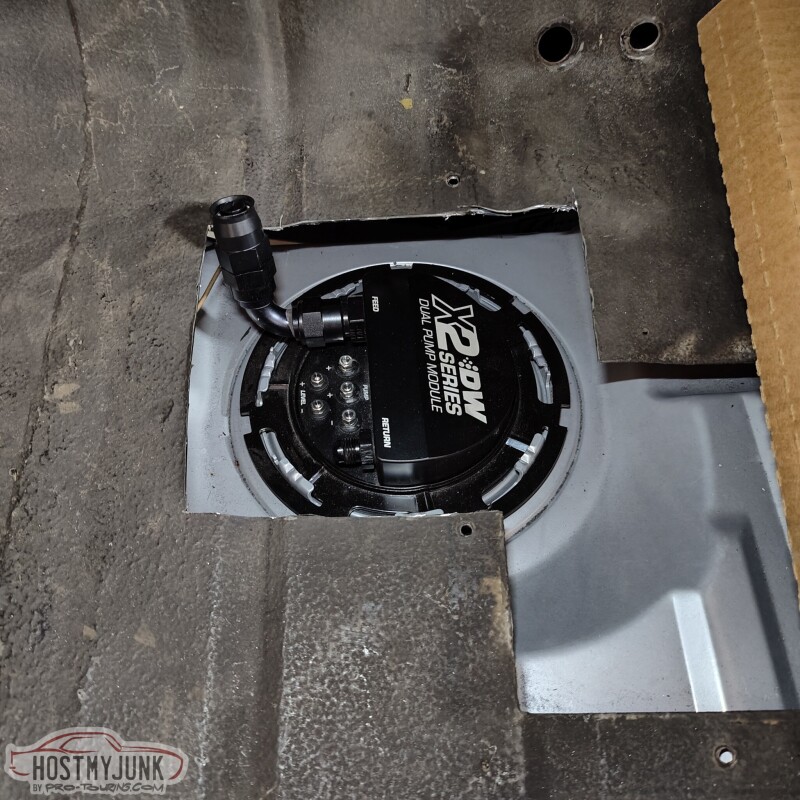
The DeatschWerks 5th Gen Camaro pump module that I am using has this alignment tab that is used in the OEM application to properly clock the pump. Since mine is going into a Rick's RestoMod tank, I did not need this tab, so it was cut off.
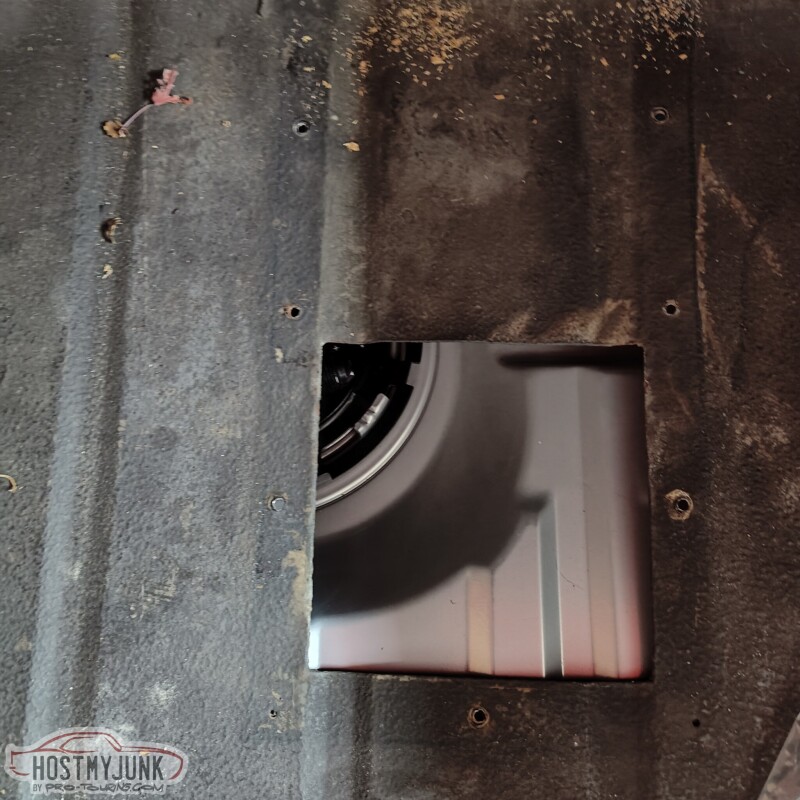
Once the tank was installed in the car, it was obvious that the access hole that was there before was not going to work.
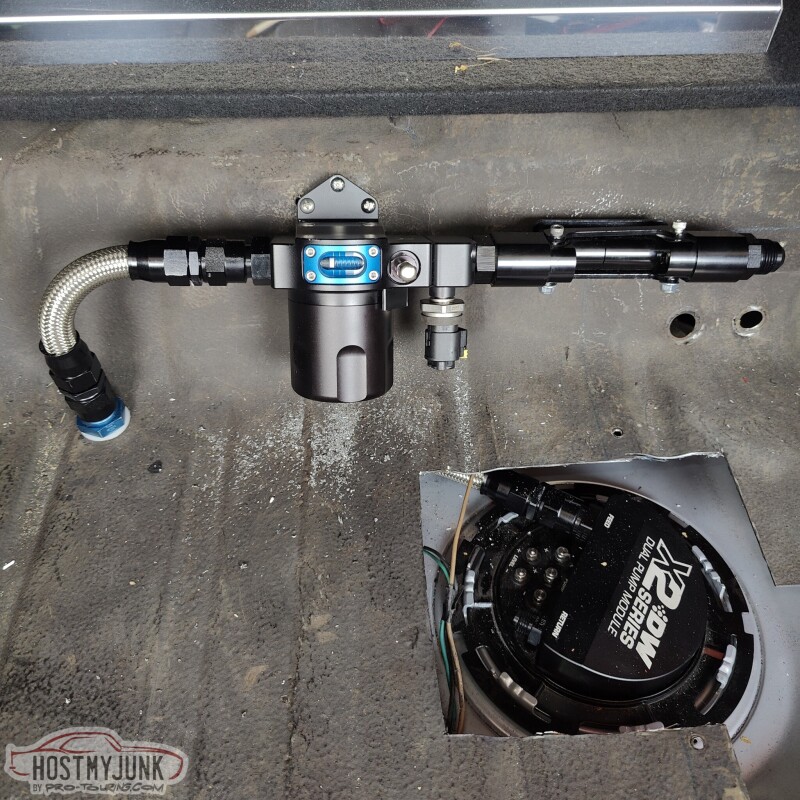
I am also thinking that the fuel filter, flex fuel sensor, and the pressure relief valve will be plumbed inside the trunk. There is just not a lot of room under the car. I know it is "risky" (whatever that means) but that is how I am going to do it.
I got the whizzwheelofdeath out and made a new hole in the trunk. All of this will get cleaned up with a nice cover panel.
The upside to this arrangement is that servicing the fuel filter, flex fuel sensor, and the wiring would be very simple and easy.
It may be easier than under the car, but won't it make a mess in the trunk? I had a basically empty gas can tip over in my trunk once and the smell didn't go away for a couple weeks.
It may be easier than under the car, but won't it make a mess in the trunk? I had a basically empty gas can tip over in my trunk once and the smell didn't go away for a couple weeks.
That is the trade off...Then again, how often will the fuel filter need to be serviced?
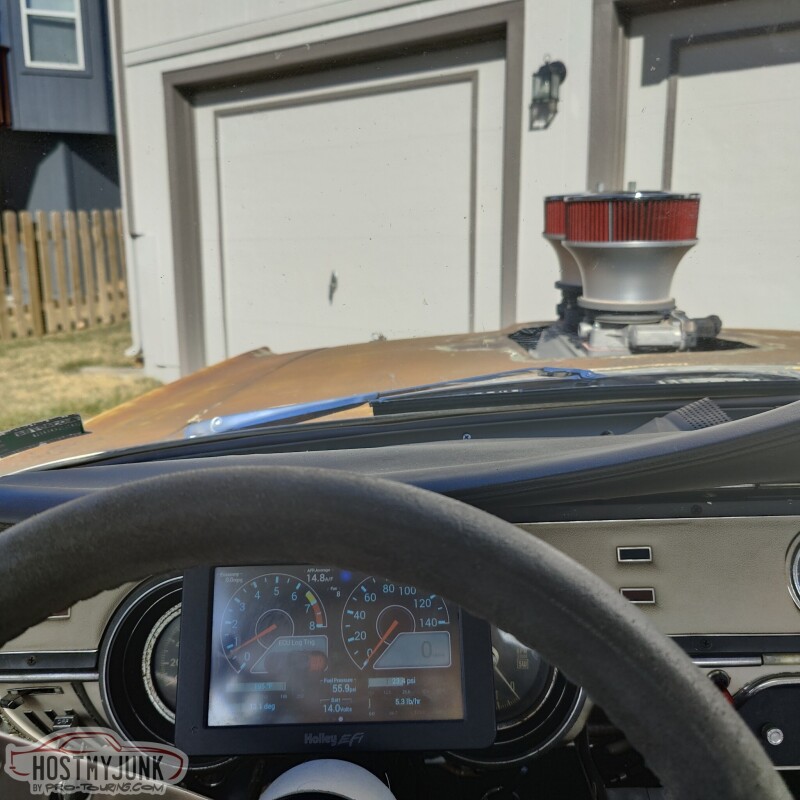
Today it was "drive your hotrod to work day" so I drove the Cougar to Vic's place.
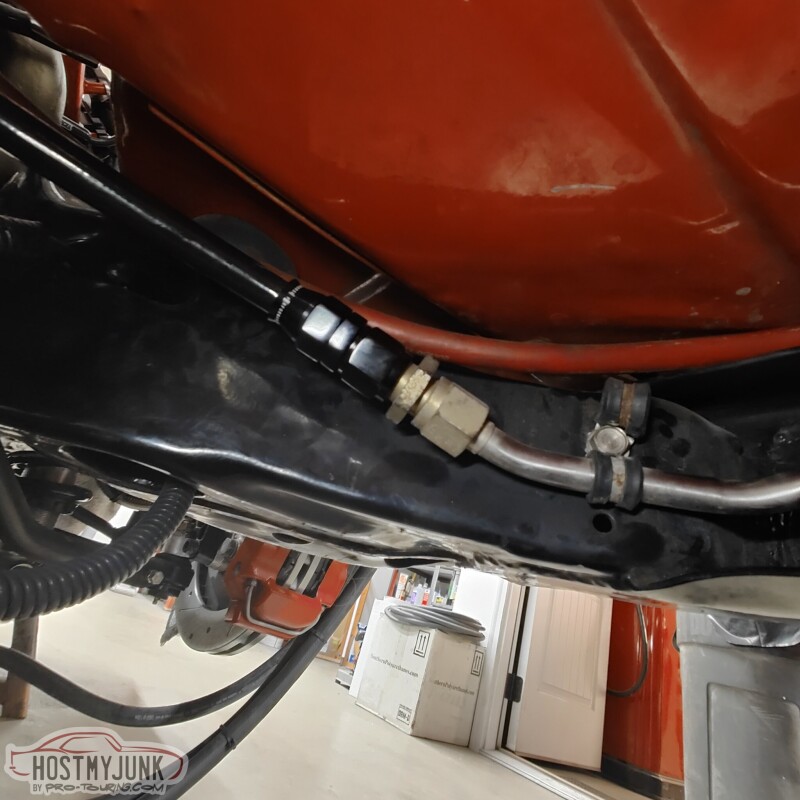
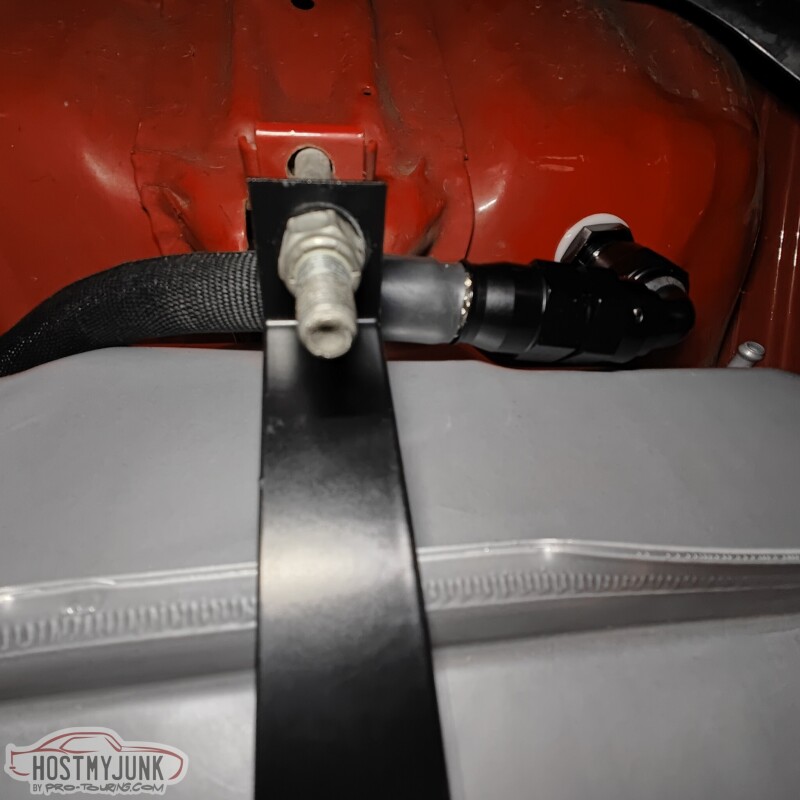
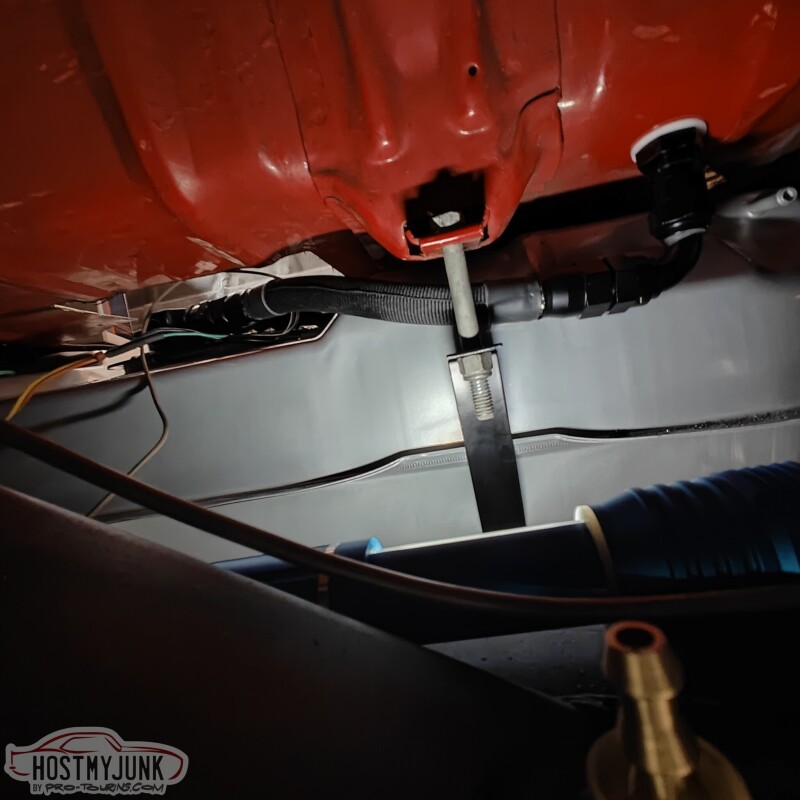
I put some fabric sleeving on the fuel line that goes from the pump to the bulkhead. This is how it looks when viewed from the bottom. It looks like it is touching, but there is clearance all around that hose.
This view is from the front, looking over the top of the rear axle.
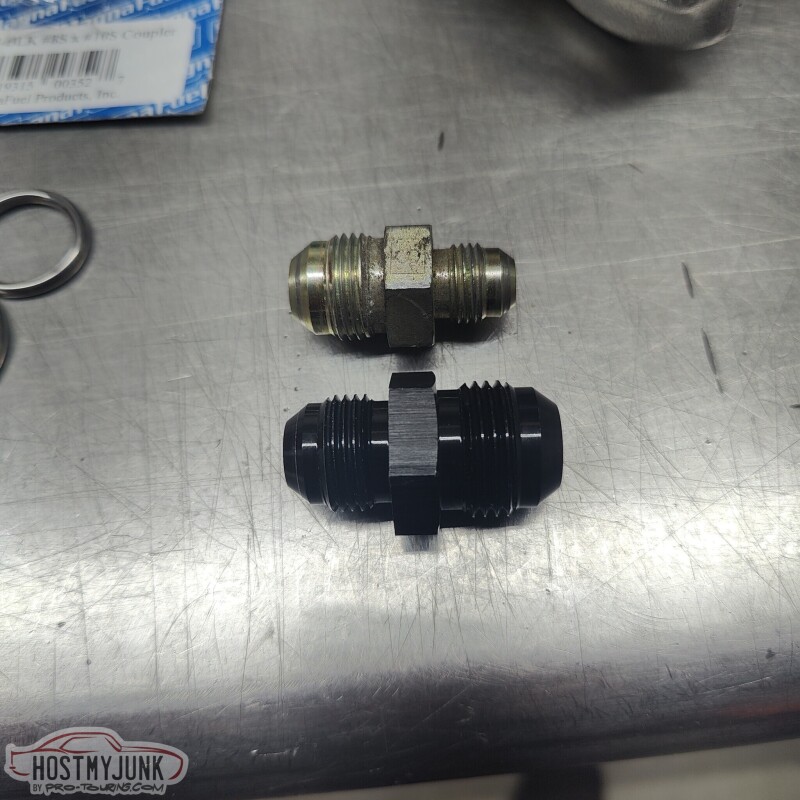
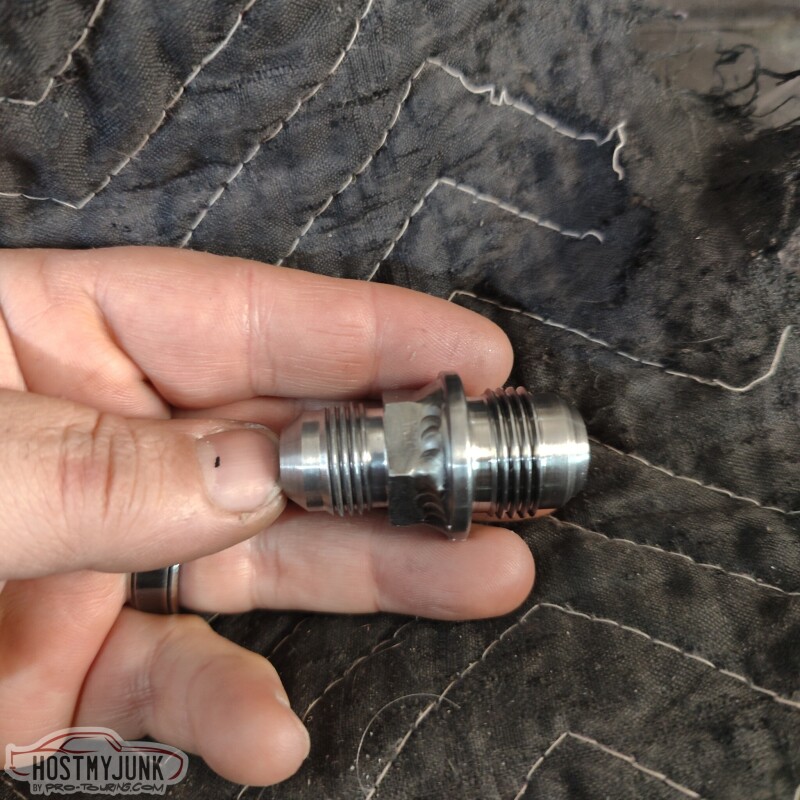
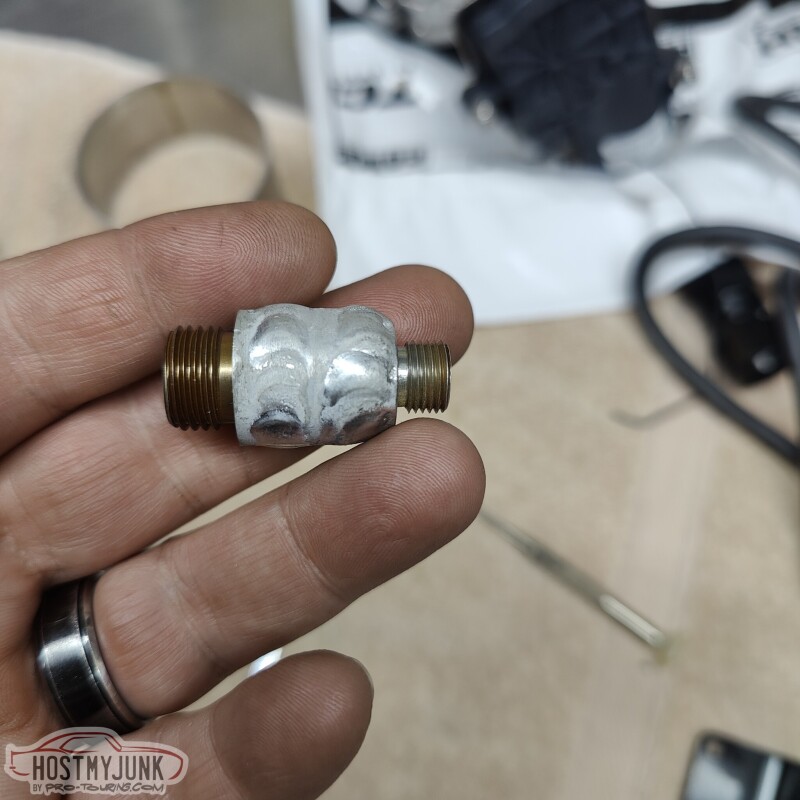
Once that was sorted, I moved to the other side where the 1/2" stainless tube terminates. The top fitting is what I had in there. It is a -AN8 to -AN6 male union.
Since the fuel like that I am using in the rear is -AN10, I needed the adapter shown at the bottom. The one that I got from Star Performance was aluminum, as they didn't have any steel ones. After discussing it with Vic, it was decided that a steel fitting would be more appropriate. So we got a -AN10, steel male weld bung, and Vic made a new fitting, using part of the old fitting.
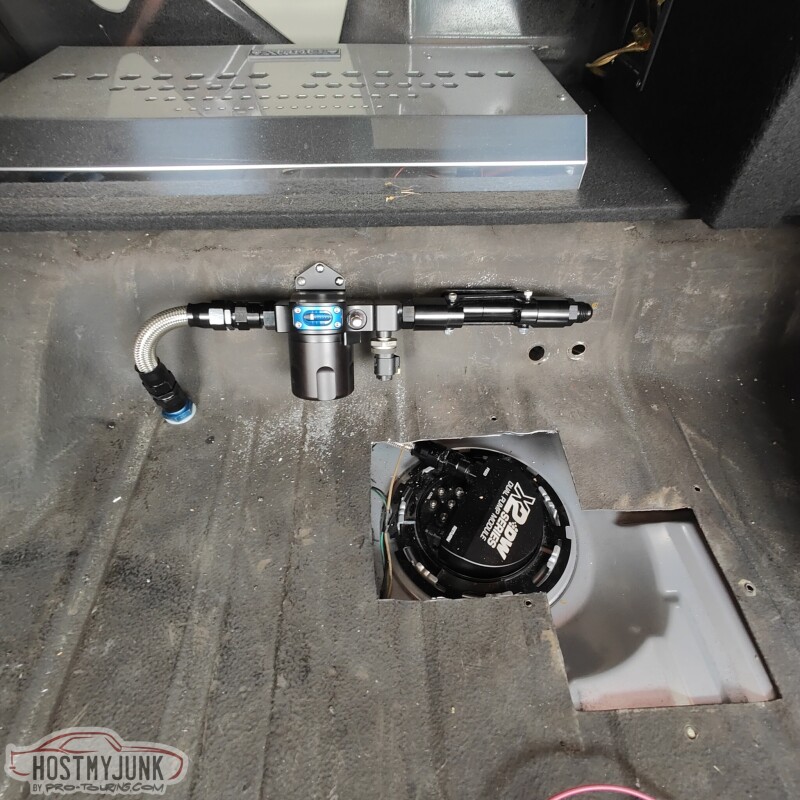
The other thing that I decided to change was not have the flex fuel sensor holder be right after the fuel filter. Even with the filter shifted to the left as much as possible, I just don't have the linear room to mount everything and still have enough room for the hoses to routed appropriately. With the flex fuel holder gone, this is how I plan to run the hose. It will sweep gently, back under the trunk floor and turn back towards the right side, where the stainless tube is located.
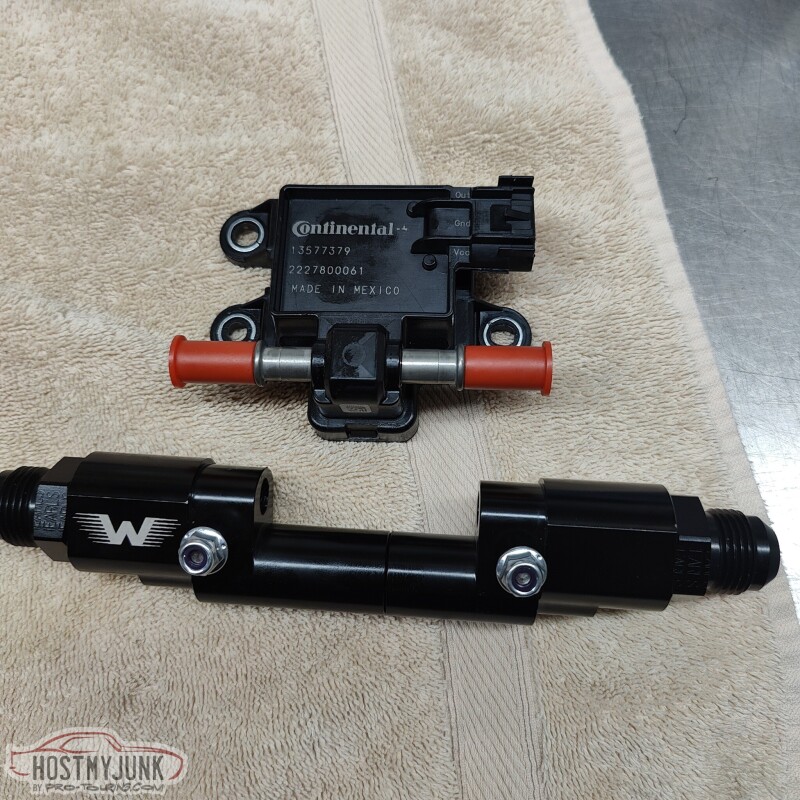
The flex fuel sensor holder will be attached to the end of the tube with a -AN10 to -AN10 female union.
I got the flex fuel sensor, but of course I got the wrong one to work with the Motion Raceworks holder...
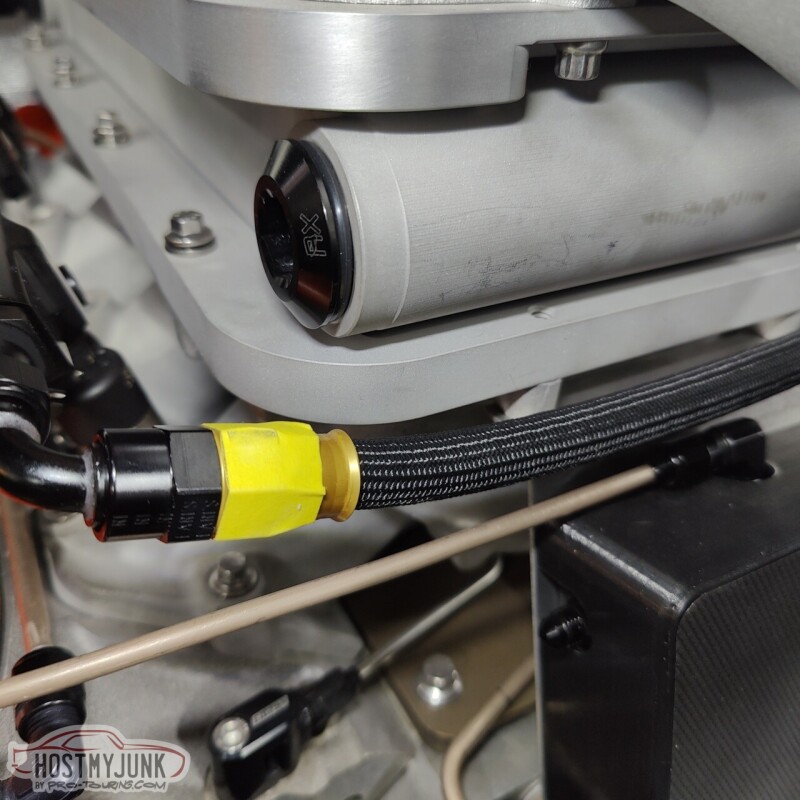
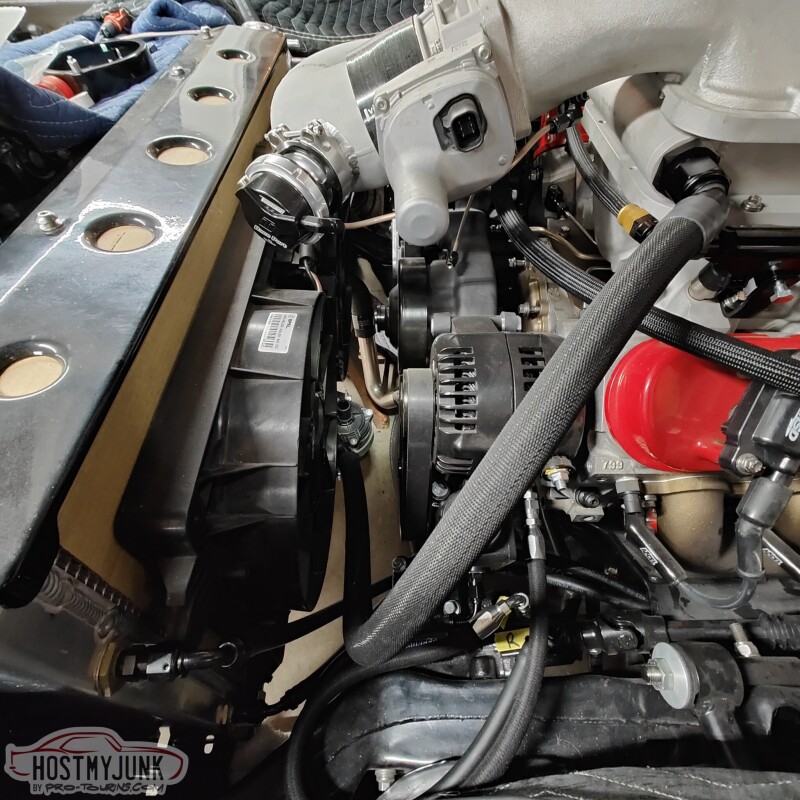
I was missing one last fitting to complete the intercooler hoses. The inlet to the intercooler needs a 45 degree fitting in order to clear the fuel rail that is below it. I used the fabric heat shrink on top of the Earl's Super Stock hose and it looks remarkably similar to the Earl's Ultra Pro hose.
This hose makes a gentle sweep down and towards the center of the fan shroud...
Where it connects to the water pump. You can see the pump mounted to the fan shroud.
Vic took a couple of fittings and welded them together to make an adapter.
The adapter is used to mount the pressure relief valve.
Carl from VaporWorx told me this was necessary to keep the system from getting vapor locked. He told me to purchase a small Radium Engineering fuel pressure regulator and send me a special 80psi diaphragm for it.
When the car has been running for a while, then it is turned off, pressure in the feed line can build up and lock up the injectors from firing. This valve will burn the feed line once the pressure exceeds 80psi.
I also got a modern Helical exhaust valve that uses a K�ster 3 pin motor. This will be controlled by the Holley Dominator ECU.
Gas Monkey Built a 6-Wheel Ferrari Testarossa With a Corvette LT4 Engine
Slideshow: The controversial Ferrari F6 swaps its original flat-12 for a Corvette Z06-derived LT4 V8 and sends power to four rear wheels through a custom-built drivetrain.
7 Most Reliable High-Performance Engines GM Has Ever Built
Slideshow:These GM engines didn't just make huge power, they survived abuse, boost, track days, and six-digit mileage with a reputation for refusing to quit.
6 Common C5 Corvette Failures and What's Involved In Repairing Them
Slideshow: From wobbling harmonic balancers to failed EBCMs, these are the issues that define long-term C5 ownership and what repairs typically involve.
Retro Modern Bandit Pontiac Trans AM Comes With Burt Reynolds' Autograph
Slideshow: A modern Camaro transformed into a retro icon, this limited-run "Bandit" build blends nostalgia with brute force in a way few revivals manage.
Top 10 Greatest Cadillac V Series Performance Models Ever, Ranked
Slideshow: Cadillac didn't just crash the high-performance luxury vehicle party, it showed up loud, supercharged, and occasionally a little unhinged...
Coachbuilt N2A Anteros Is an LS2-Powered C6 Corvette In Italian Clothes
Slideshow: A one-off sports car that looks like a vintage Italian exotic-but hides a C6 Corvette underneath-just sold for the price of a new mid-engine Corvette.