
1968 Camaro Resto-mod LS3/6 speed; Project Penny Pincher


 04-06-2021, 02:04 PM
#82
 04-09-2021, 09:09 AM
#83
I think it should be time for a update soon.
The following users liked this post:
G Atsma (04-09-2021)
04-09-2021, 11:49 AM
#84
TECH Fanatic
Thread Starter
iTrader: (27)

I'm still making progress, but nothing really to show for it. Planning out my wiring, parts gathering and buttoning up some boring things that don't photograph well. I'm also waiting on the flywheel tool so that I can do a final torque on the balancer bolt after I drill/pin the balancer. The cheap eBay tool I bought doesn't fit. Weird I know... So I bought the Kent Moore tool and that should be here next week. I'm hoping to thrash on it tonight and get an update shortly. If everything goes right for me this week, I'll hopefully be turning the key by next weekend.
04-13-2021, 08:32 AM
#85
TECH Fanatic
Thread Starter
iTrader: (27)
I've been working outside getting the house around for the early spring we are having. It's been nice enough for the last 3 weeks that I could have been driving my car which is extremely rare in NY. I've been plugging away with little projects here and there and have enough content for an update. After reading about all the problems that guys were having with the stock Tremec shifters leaking, I kept my eye out for a good used one and found a great deal on a barely used Hurst shifter. It didn't come with the shifter adapter, but I made one since Holley wanted $94 plus shipping for the little adapter. The shifter feel is much tighter compared to the stock Tremec. I measured before and after since I had the stock one installed at the time. The throw was about 5" from 3rd to 4th with the stock shifter, and 3.25" with the Hurst. This shifter takes out the slop and makes for a more firm shift.

What I started with


Finished product, and also got the boot fit up nicer than I had it last fall.

I have also been working on a DBC throttle bracket for the last few weeks here and there. I finished it up last night and am very happy with how it turned out. 1/8" aluminum plate and a 02ish truck throttle cable bracket that I trimmed the 3rd mount off of. I used a piece of cardboard, then a thin piece of aluminum, then the final piece.


Final product. It works really well and I also have room if I decide to run a cruise control module.

I have also been working on prepping the supercharger for the final install. Now that I confirmed that the snout needed no further porting, I replaced the spring isolator with an Eaton solid unit then silicone'd it all back together with Loctite 598. Note that this is what is supposed to be used, not just any black/gray silicone.


I also bought some aluminum online and made up some plates to reinforce my intercooler brick. I sent those out to be welded and should have them back by the weekend.

Then externally I had to make a clearance for the fuel fitting off of my fuel rail. I added a fuel pressure adapter so that I can put a regular gauge on there in the event I needed another spot to troubleshoot my fuel pressure. At the time I had lost my fitting, but I used this -6AN fitting I had to mock it up. I was positive that one of my boys took it and put it in a drawer or bucket or something. I'm also planning to make a bracket to mount the fill port for the supercharger coolant off of those two holes. Will make for a nice simple bracket to mount that fill port.


Well it wasn't the kids that lost it...

I also starting on my wiring. Carl from Vaporworx recommended 8ga wire from the battery directly to the Pressureworx module, so I'll do just that. I also routed the MAP wires along with the fuel pump wires so that I can utilize the boost referenced feature. Not much to show, but this big mess. I'm glad that I went with Carl's recommendation of 25' of wire because I needed all but about 3'. I was planning on buying 15', but I would have been way short.


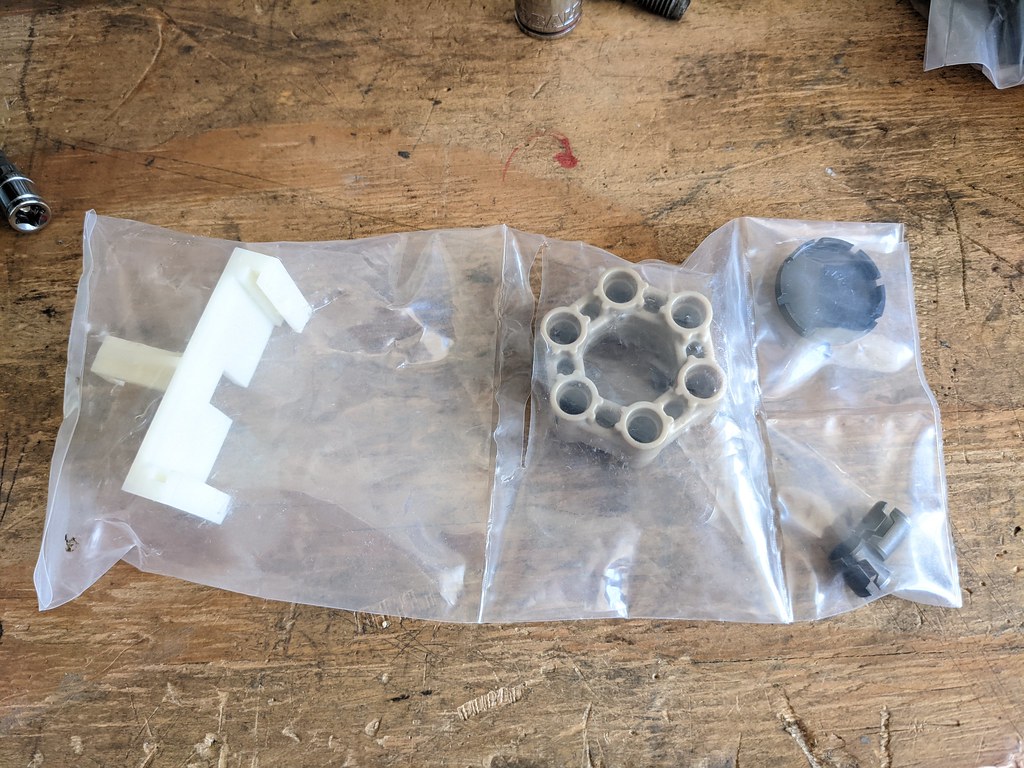
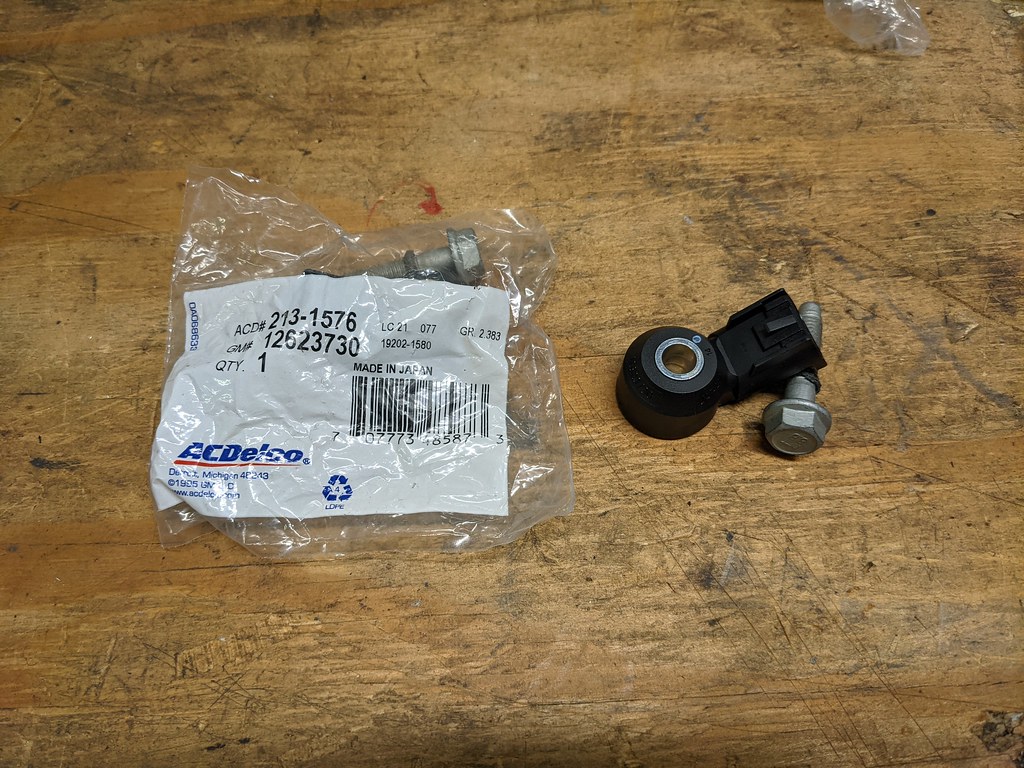
I also had a few parts come in from RockAuto. New knock sensors and a really nice molded hose for my booster. Both were really cheap. That molded hose will work perfectly and routes so cleanly around the supercharger. It's the part number for a ZL1 Camaro, but could be the same for a CTS-V. It needs to be modified slightly, but I'll grab a picture when it's installed.

Cheers,
Ryan
What I started with
Finished product, and also got the boot fit up nicer than I had it last fall.
I have also been working on a DBC throttle bracket for the last few weeks here and there. I finished it up last night and am very happy with how it turned out. 1/8" aluminum plate and a 02ish truck throttle cable bracket that I trimmed the 3rd mount off of. I used a piece of cardboard, then a thin piece of aluminum, then the final piece.
Final product. It works really well and I also have room if I decide to run a cruise control module.
I have also been working on prepping the supercharger for the final install. Now that I confirmed that the snout needed no further porting, I replaced the spring isolator with an Eaton solid unit then silicone'd it all back together with Loctite 598. Note that this is what is supposed to be used, not just any black/gray silicone.
I also bought some aluminum online and made up some plates to reinforce my intercooler brick. I sent those out to be welded and should have them back by the weekend.
Then externally I had to make a clearance for the fuel fitting off of my fuel rail. I added a fuel pressure adapter so that I can put a regular gauge on there in the event I needed another spot to troubleshoot my fuel pressure. At the time I had lost my fitting, but I used this -6AN fitting I had to mock it up. I was positive that one of my boys took it and put it in a drawer or bucket or something. I'm also planning to make a bracket to mount the fill port for the supercharger coolant off of those two holes. Will make for a nice simple bracket to mount that fill port.
Well it wasn't the kids that lost it...
I also starting on my wiring. Carl from Vaporworx recommended 8ga wire from the battery directly to the Pressureworx module, so I'll do just that. I also routed the MAP wires along with the fuel pump wires so that I can utilize the boost referenced feature. Not much to show, but this big mess. I'm glad that I went with Carl's recommendation of 25' of wire because I needed all but about 3'. I was planning on buying 15', but I would have been way short.
I also had a few parts come in from RockAuto. New knock sensors and a really nice molded hose for my booster. Both were really cheap. That molded hose will work perfectly and routes so cleanly around the supercharger. It's the part number for a ZL1 Camaro, but could be the same for a CTS-V. It needs to be modified slightly, but I'll grab a picture when it's installed.
Cheers,
Ryan
04-13-2021, 09:11 AM
#86
That�s a big update. It won�t be long now
04-13-2021, 02:07 PM
#87
I thought u bought a vette pedal �cause you were going DBW with your new Holley Terminator X Max?
There�s too many exciting build going on here, I m getting even more confused:::::::shaking my head in shame::::::::
There�s too many exciting build going on here, I m getting even more confused:::::::shaking my head in shame::::::::
04-14-2021, 01:40 PM
#88
TECH Fanatic
Thread Starter
iTrader: (27)
Yes, I did buy the C6 pedal, LS3 TB and bought Terminator X Max, but after waiting for a month of being on backorder, I pulled the plug from MCB. They were great and gave me a refund. I didn't want to wait any longer and glad I did because it's still on backorder until 4/16 according to Holley's site. I'll keep them because I'm sure at some point I'll want to swap to DBW, but for now I bought a NW DBC TB. There's some acronyms for you haha
The following users liked this post:
Jimbo1367 (04-15-2021)
04-19-2021, 07:12 AM
#89

You think you'll have any issues with that shifter bracket rotating over time? I would imagine it would stay put with that lock washer there, but with only one bolt, you never know...
04-19-2021, 07:21 AM
#90
04-19-2021, 08:29 AM
#91
TECH Fanatic
Thread Starter
iTrader: (27)
I made a bunch of progress this weekend and I officially have reached the end of the parts buying stage... well maybe more tires, but you get the idea. Earlier in the week I broke broke down and finally picked up a bigger torque wrench. I've needed one that goes over the 150 lb ft unit that I have a few times now and this seemed like a good time since I had to torque my crank bolt. Before I torqued it though I wanted to pin the crank which as super easy with the kit from LSX Innovations.

I only ordered the torque wrench, but when I looked in my box there was also an extension set. Funny because I've been meaning to buy another 1/2" extension. Thanks AutoZone!

I picked up another crank holding fixture that bolts in place of the starter because surprise, the overseas one that I bought didn't even come close to fitting. I got the one from MAF and it was a perfect fit. After I bolted it in position I torqued the crank bolt per the instructions. Now can I just say that 235 lb ft is a lot of torque! Glad that's over.

Next up was making a bracket to hold my reservoir/ fill cap. For a little bracket like that, it looks simple, but took me a while to get it just right. It sits about an inch higher than the highest part of the brick so it should do it's job to purge all the air out of the system. I want to replace those bolts with some button head or allen socket bolts.

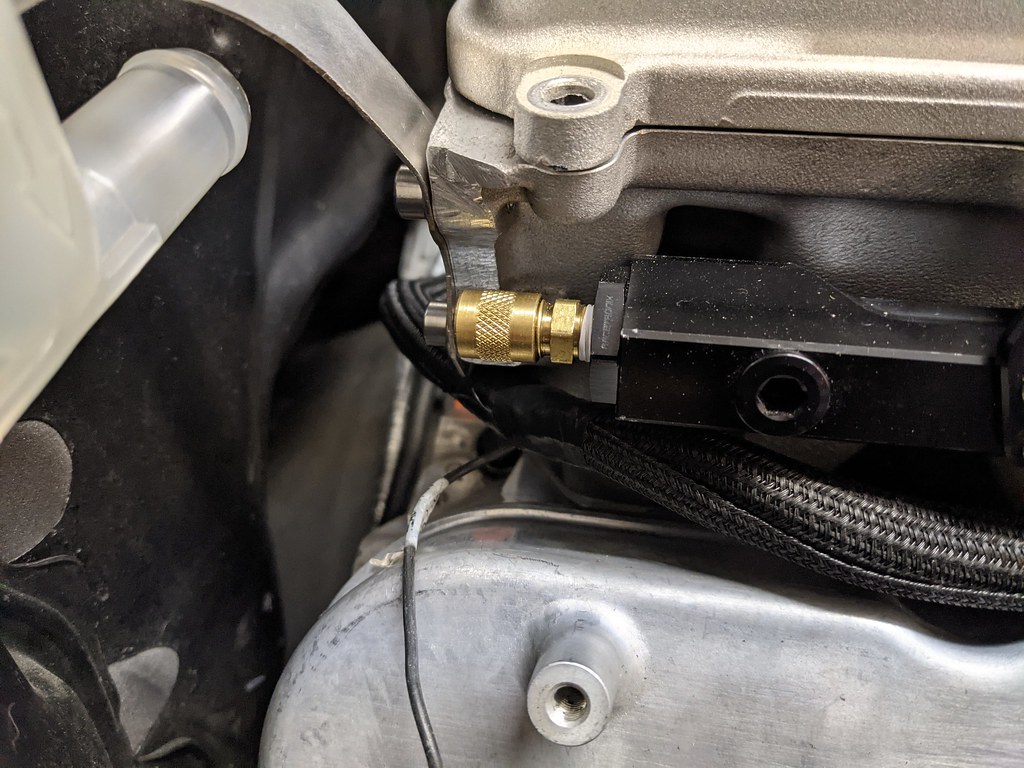
Here is the fuel pressure tester schrader valve I added. Could come in handy someday.
I've been holding off on installing anything on this side of the motor until I got the balancer torqued so I had clear access to the starter area. Installed my eBay find LS3 starter and was anxious to know if it worked. So I installed it, tested the starter solenoid and it easily bumped the motor over. Such a tease...

I also found an nice place to mount my fuel pump controller. Nice and out of the way, on this little mounting plate I made. I have the wires from the battery and crimped the terminals and it's installed on the controller now. Just need to crimp the battery side and then from the controller to the fuel pump itself. Shouldn't be long now and I can test fire the fuel pump and controller. Before I test it though I also need to make a bracket to add the flex fuel sensor inline.


Not sure why I kept putting it off, but I made my fuel crossover too. I used all Racetronix fittings and lines and they installed very easily. Very pleased with them.

I have been working on and off for about 2 weeks trying to figure out the best place to install my catch can. I was hoping to place it roughly in the same spot as the cylinder head mount, but the 8 rib tensioner occupied one of the mounting holes. What I was going to do is shave off 1/4" from the backside of the bracket and then it would bolt in place. Then my father in law came over and said why don't you find a way to maybe bolt it to the tensioner bracket. Then a lightbulb went off and I came up with this pretty clever idea. Since the bolt hole that holds the tensioner on is tapped all the way through and is completely open on the backside, I installed a longer bolt through it and it created a stud that I could use on the backside. Then all I had to do was shorten the bracket that came with it and drill/tap one hole on the bracket. Doesn't harm the integrity of the bracket, creates a nice spot to mount the can low and gives easy access to it for service. Super happy with that install.
Took way more time that I wanted, but I'm super happy with the results. The lines are backwards incase someone notices. I'll need to switch them before I fire up the motor.


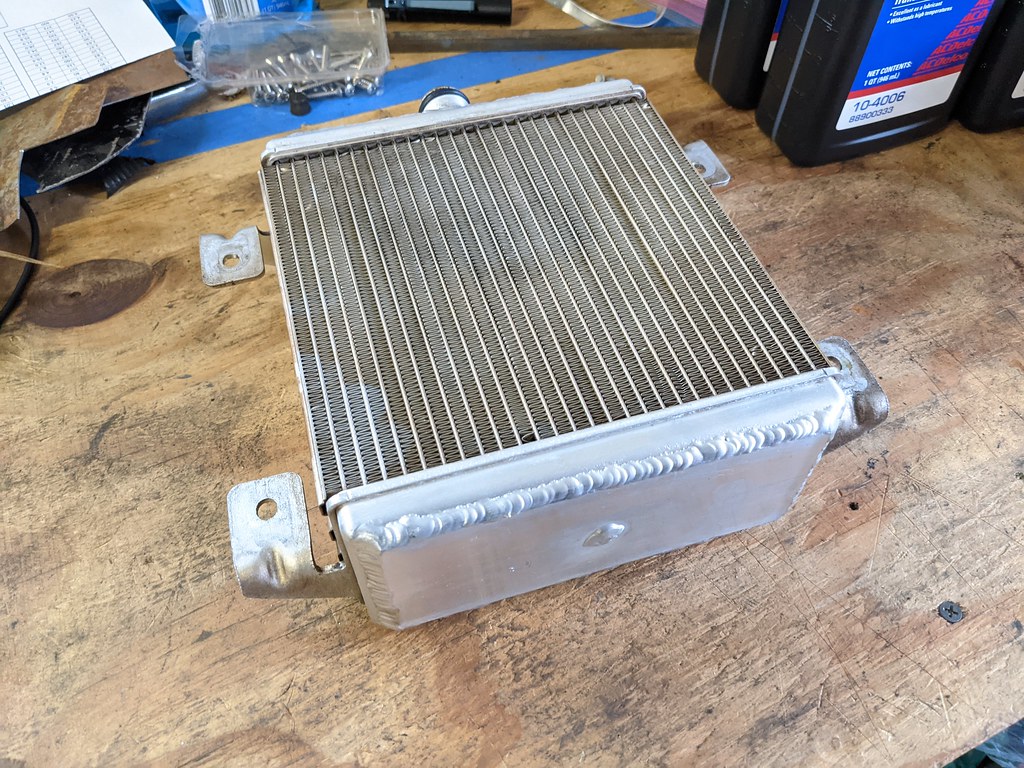
Then my last parts showed up. I had a buddy from Florida help me out and welded my brick for me. Shipped it there and back safely so that made me happy. Brian did a great job, thanks again man! For those that don't know, the stock intercooler bricks can collapse from boost even under stock psi. So it's really important to reinforce them, but especially if you overdrive the supercharger like I did.

Then the PLM heat exchanger came in. I've seen a few guys run this in a first gen Camaro one of which was an RS so I know it fits well. I'm going to copy what the RS guy did so I already know how I'm going to mount it. Just need to make a bracket.

I also opted to use the GM Synchromesh which is supposed to be the best for the TR6060 and T56 Magnum's.

Now that the intercooler brick was here I didn't waste any time and got that installed Friday night. Then I kept grabbing parts off my bench and before I knew it, the motor was completely assembled and final torqued.
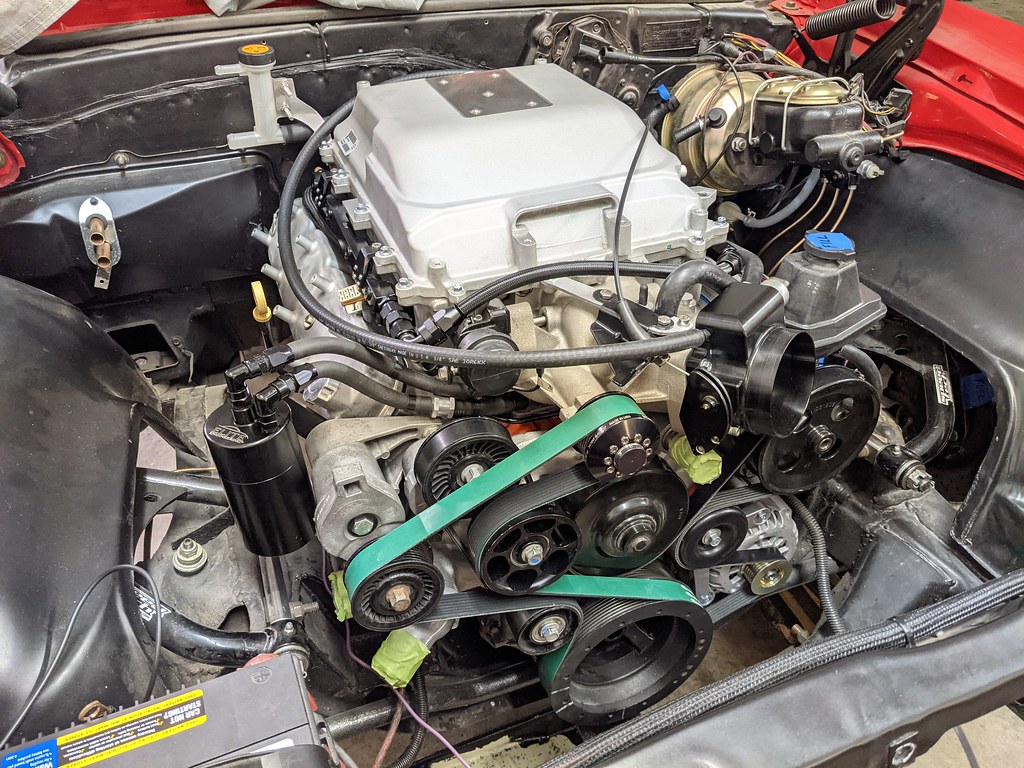

I'm getting so excited now! My punch list is getting very short and I'm really down to finishing some wiring for the ECU/Fuel pump, bolting my exhaust back on, fill/top off all fluids, prime the motor and send it! I'm hoping to get a few nights in the garage this week and turn the key next weekend.
Cheers,
Ryan
I only ordered the torque wrench, but when I looked in my box there was also an extension set. Funny because I've been meaning to buy another 1/2" extension. Thanks AutoZone!
I picked up another crank holding fixture that bolts in place of the starter because surprise, the overseas one that I bought didn't even come close to fitting. I got the one from MAF and it was a perfect fit. After I bolted it in position I torqued the crank bolt per the instructions. Now can I just say that 235 lb ft is a lot of torque! Glad that's over.
Next up was making a bracket to hold my reservoir/ fill cap. For a little bracket like that, it looks simple, but took me a while to get it just right. It sits about an inch higher than the highest part of the brick so it should do it's job to purge all the air out of the system. I want to replace those bolts with some button head or allen socket bolts.
Here is the fuel pressure tester schrader valve I added. Could come in handy someday.
I've been holding off on installing anything on this side of the motor until I got the balancer torqued so I had clear access to the starter area. Installed my eBay find LS3 starter and was anxious to know if it worked. So I installed it, tested the starter solenoid and it easily bumped the motor over. Such a tease...
I also found an nice place to mount my fuel pump controller. Nice and out of the way, on this little mounting plate I made. I have the wires from the battery and crimped the terminals and it's installed on the controller now. Just need to crimp the battery side and then from the controller to the fuel pump itself. Shouldn't be long now and I can test fire the fuel pump and controller. Before I test it though I also need to make a bracket to add the flex fuel sensor inline.
Not sure why I kept putting it off, but I made my fuel crossover too. I used all Racetronix fittings and lines and they installed very easily. Very pleased with them.
I have been working on and off for about 2 weeks trying to figure out the best place to install my catch can. I was hoping to place it roughly in the same spot as the cylinder head mount, but the 8 rib tensioner occupied one of the mounting holes. What I was going to do is shave off 1/4" from the backside of the bracket and then it would bolt in place. Then my father in law came over and said why don't you find a way to maybe bolt it to the tensioner bracket. Then a lightbulb went off and I came up with this pretty clever idea. Since the bolt hole that holds the tensioner on is tapped all the way through and is completely open on the backside, I installed a longer bolt through it and it created a stud that I could use on the backside. Then all I had to do was shorten the bracket that came with it and drill/tap one hole on the bracket. Doesn't harm the integrity of the bracket, creates a nice spot to mount the can low and gives easy access to it for service. Super happy with that install.
Took way more time that I wanted, but I'm super happy with the results. The lines are backwards incase someone notices. I'll need to switch them before I fire up the motor.
Then my last parts showed up. I had a buddy from Florida help me out and welded my brick for me. Shipped it there and back safely so that made me happy. Brian did a great job, thanks again man! For those that don't know, the stock intercooler bricks can collapse from boost even under stock psi. So it's really important to reinforce them, but especially if you overdrive the supercharger like I did.
Then the PLM heat exchanger came in. I've seen a few guys run this in a first gen Camaro one of which was an RS so I know it fits well. I'm going to copy what the RS guy did so I already know how I'm going to mount it. Just need to make a bracket.
I also opted to use the GM Synchromesh which is supposed to be the best for the TR6060 and T56 Magnum's.
Now that the intercooler brick was here I didn't waste any time and got that installed Friday night. Then I kept grabbing parts off my bench and before I knew it, the motor was completely assembled and final torqued.
I'm getting so excited now! My punch list is getting very short and I'm really down to finishing some wiring for the ECU/Fuel pump, bolting my exhaust back on, fill/top off all fluids, prime the motor and send it! I'm hoping to get a few nights in the garage this week and turn the key next weekend.
Cheers,
Ryan
 04-19-2021, 12:24 PM
#93
TECH Fanatic
Thread Starter
iTrader: (27)
I'm going to try the coil delete upgrade. If I can't get that to run, I'll probably add them back on haha. In my mind coils are filed under wiring, but I'll have them installed soon.
If I can't get that to run, I'll probably add them back on haha. In my mind coils are filed under wiring, but I'll have them installed soon.
04-20-2021, 09:07 AM
#94
I forgot what cam you�re running, would you please share them again ?
you should be proud of yourself, that�s apt of work you did so far. Even more proud when it�s running as no odd noises. ^5
you should be proud of yourself, that�s apt of work you did so far. Even more proud when it�s running as no odd noises. ^5
04-21-2021, 07:51 AM
#95
TECH Fanatic
Thread Starter
iTrader: (27)
I'm running the Summit Stage 1 Ghost Cam. It's on the smaller side, but should work really well with boost. I'm really happy with how everything is coming together for sure. I've been chipping away this week on some things so that hopefully I can fire it up this weekend. Just need to button up a few things with the wiring on the fuel pump controller, build a bracket for my flex fuel sensor, reinstall my exhaust, mount heat exchanger/pump, fill all my fluids and send it. I guess when I write it all down there's still a lot to do...
04-21-2021, 09:12 AM
#96
Small things left. How r u doing flex fuel with TERMINATOR X?
04-21-2021, 09:33 AM
#97
TECH Fanatic
Thread Starter
iTrader: (27)
I'm going to wire it into one of my available inputs and create an offset table very similar to how the stock GM ECUs handle it. I'm using the same continental sensor that everyone uses.
04-21-2021, 02:05 PM
#98
I never knew that could be done like that. Please take detailed photos once u do it
thanks
jim
thanks
jim
