


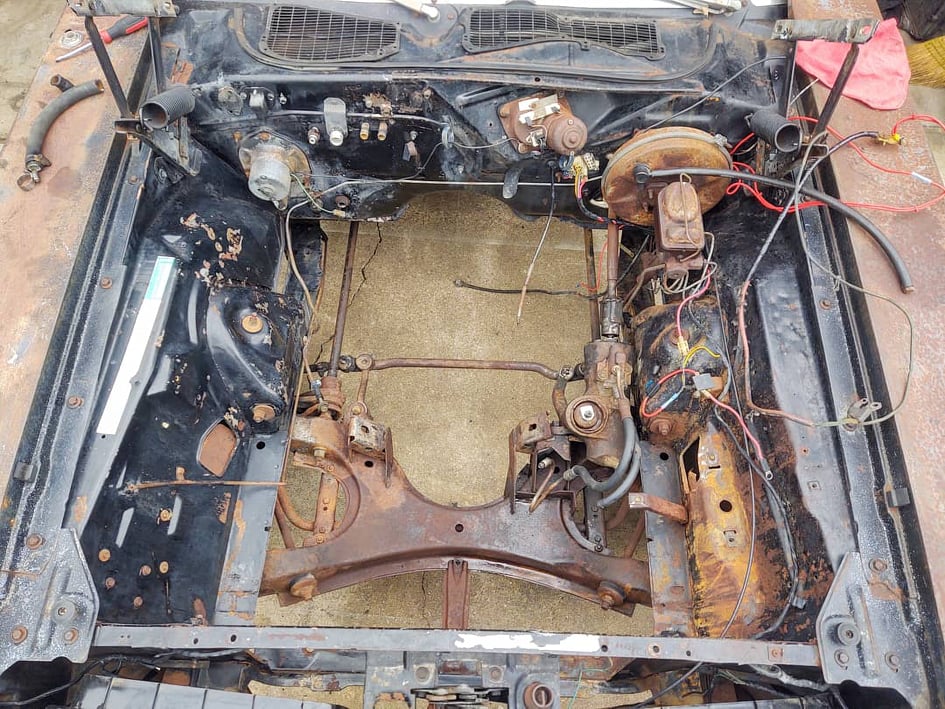
 Interesting the way the steering is set up in these cars.
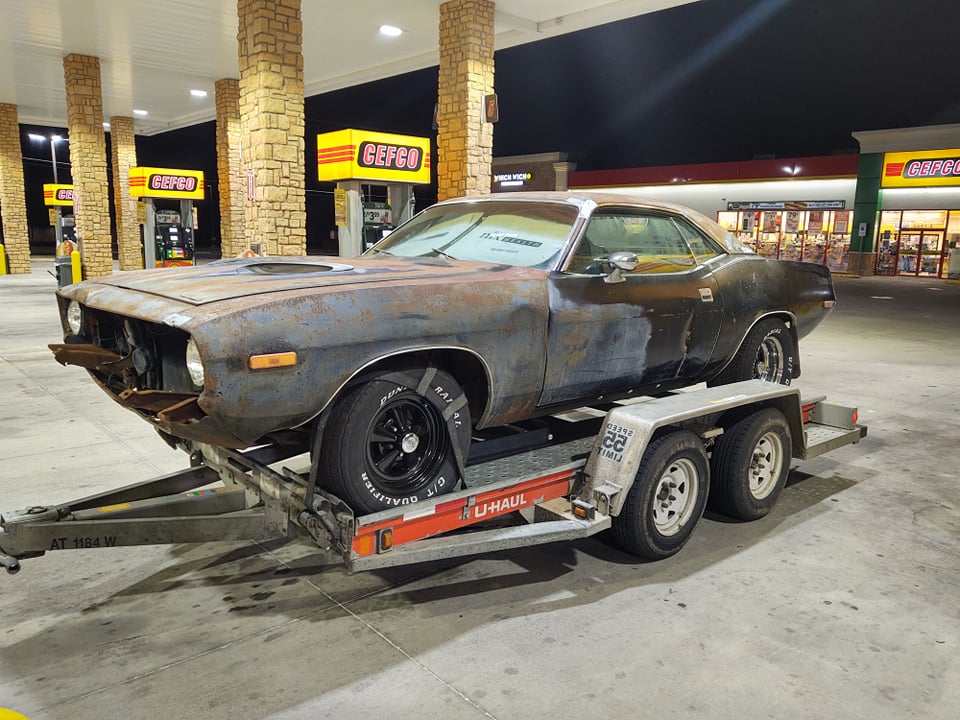
73 Cuda LS Swap
Looks like it's cleaning up really nicely! Speaking from experience, I think you have a great plan. Start with a cheaper motor, then get all of the fitment and supporting mods done. We all know that the real cost with LS swaps are everything but the motor and trans haha. Then when it's all fitting good and running/driving then you can save up for the big motor. I had an LS1 in my car first, then upgraded this winter to a bigger motor and it was nice just bolting most of the stuff back together since all LS motors are the same dimensionally. Keep up the good work!! In for progress pictures.

Thread Starter
Launching!


Joined: Jul 2016
Posts: 248
Likes: 100
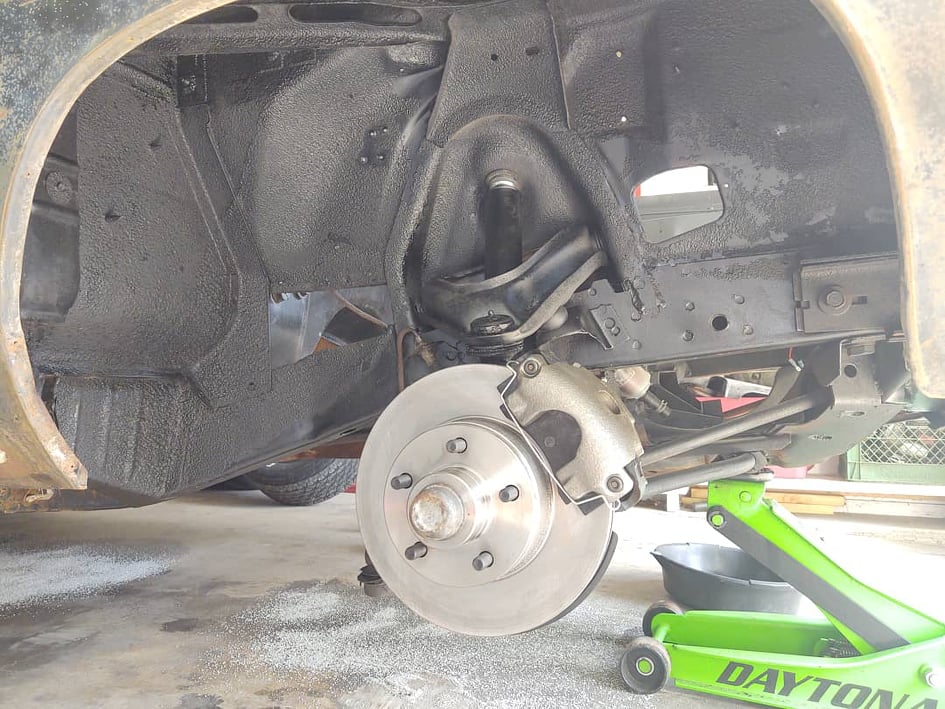
This is just a small photo dump of what i've done so far and how the car looked the day i got it.
 wwwtdbank
wwwtdbankGiven if all the issues on this were fixed this would be a 75k resto that's only worth 40k to the right Mopar buyer. Just a 340 alone is nearly 10k for a complete "original" one. Mopar...

TECH Senior Member

Joined: Jul 2009
Posts: 8,032
Likes: 661
I�m not a Mopar guy, but I�ve always loved this body style. I also dig 68 Baracudas too. I�d love to see one of those LS swapped too.
I bet a lot of people will be watching this swap. Secretly or proudly LOL
I bet a lot of people will be watching this swap. Secretly or proudly LOL
Thread Starter
Launching!
Joined: Jul 2016
Posts: 248
Likes: 100
Oh i know, im really doing this thread for the ones in the shadows that want to do this but don't want to deal with the criticism. If i had a better phone id make YouTube videos for it.
Thread Starter
Launching!
Joined: Jul 2016
Posts: 248
Likes: 100
You mean what a pain in the a** lol. That center link is a pain by itself for headers and then the torsion bars. The way driver side long tube headers are made for these cars are theres a big gap in the middle of the pipes because you have to remove the center link and run it THROUGH the pipes... Its ridiculous. So, im pretty sure my only option is to run a set of Speedway headers and hope a mid pipe clears the center link.
LS1 Tech Stories
The Best V8 Stories One Small Block at Time

6 Common C5 Corvette Failures and What's Involved In Repairing Them
Pouria Savadkouei
Retro Modern Bandit Pontiac Trans AM Comes With Burt Reynolds' Autograph
Verdad Gallardo
Top 10 Greatest Cadillac V Series Performance Models Ever, Ranked
Pouria Savadkouei
Top 10 Most Powerful Chevy Trucks Ever Made!

Hennessey's New Supercharged Silverado ZR2 Has 700 HP
Verdad Gallardo
Coachbuilt N2A Anteros Is an LS2-Powered C6 Corvette In Italian Clothes
Verdad Gallardo
Awesome K5 Blazer Restomod Comes With C7 Corvette Power
Verdad Gallardo
10 Camaros You Should Never Buy

10 LS Engine Myths That Refuse to Die
Verdad Gallardo
Teching In
Joined: Apr 2018
Posts: 20
Likes: 1
Thread Starter
Launching!
Joined: Jul 2016
Posts: 248
Likes: 100
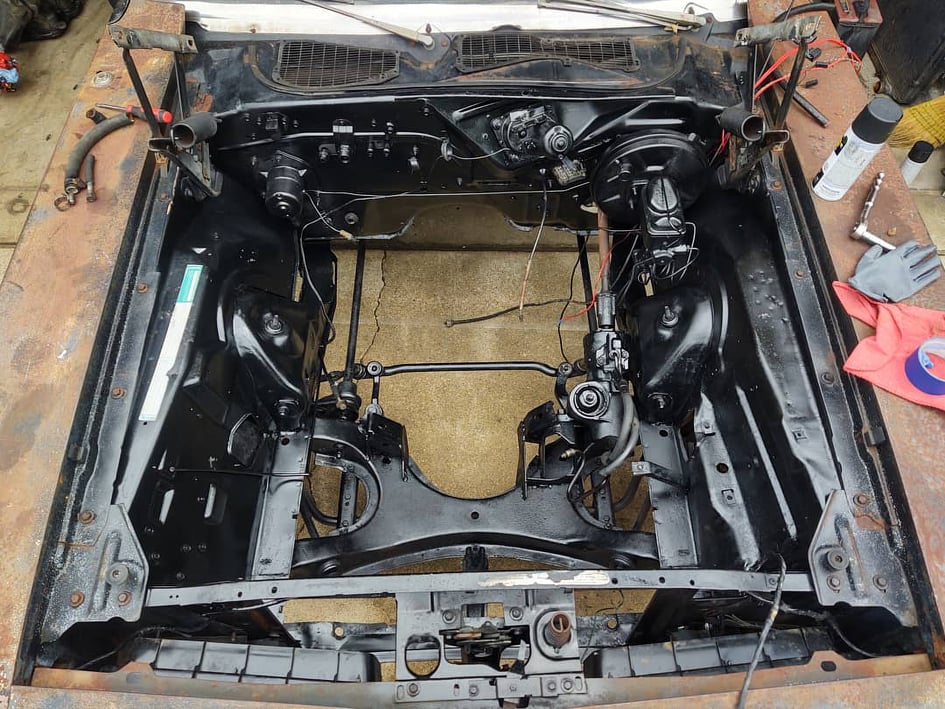
They definitely are, even when using mopar engines and transmissions. They still get in the way. I really like that to adjust front ride height all you have to do is loosen a bolt compared to putting in lowering springs but id still prefer the torsion bars be gone. Eventually id go to a coil over set up and get rid of them and the leafs in the rear.
You mean what a pain in the a** lol. That center link is a pain by itself for headers and then the torsion bars. The way driver side long tube headers are made for these cars are theres a big gap in the middle of the pipes because you have to remove the center link and run it THROUGH the pipes... Its ridiculous. So, im pretty sure my only option is to run a set of Speedway headers and hope a mid pipe clears the center link.

Thread Starter
Launching!
Joined: Jul 2016
Posts: 248
Likes: 100
I believe all the big name brand companies do since coil overs arent so much "Mopar" specific. I got a guy in my pro touring group on Facebook running front and rear coil overs on his 70 Challenger and just to throw it out there. He builds engines on the side for a living and is a Mopar guy. He wishes he had put a LS in his challenger rather than the 6.1 lol
Thread Starter
Launching!
Joined: Jul 2016
Posts: 248
Likes: 100
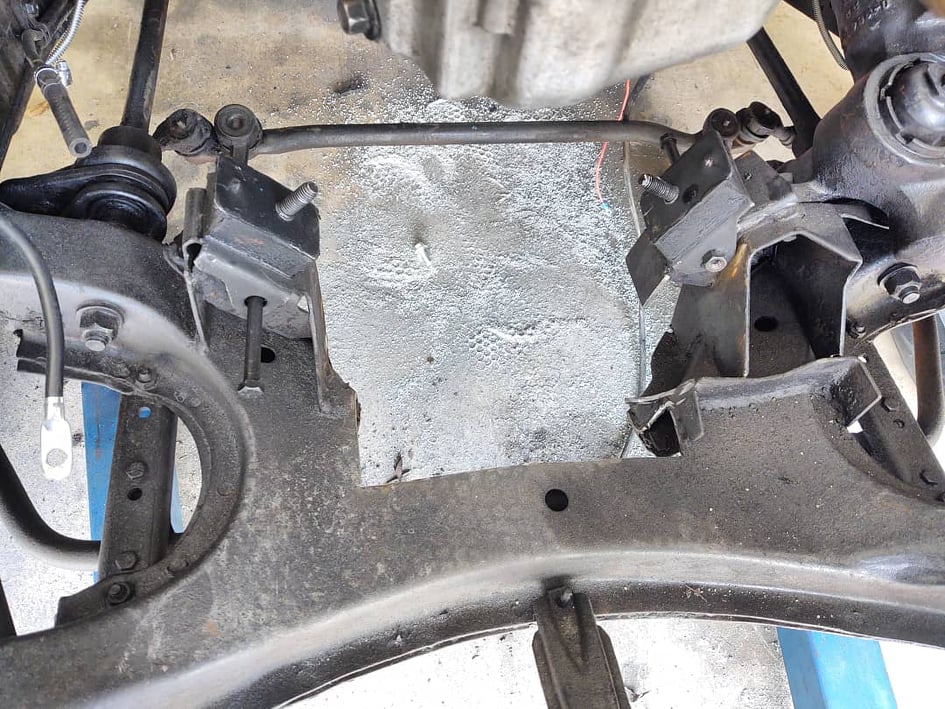
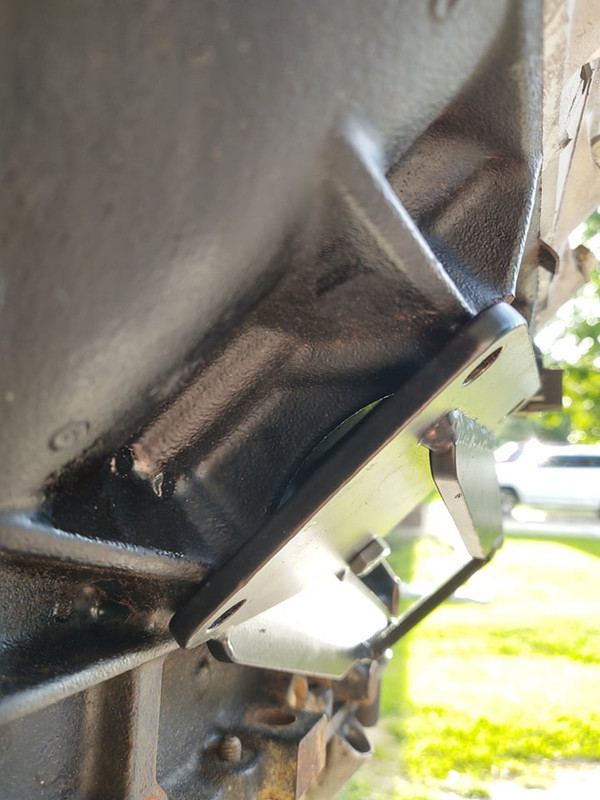
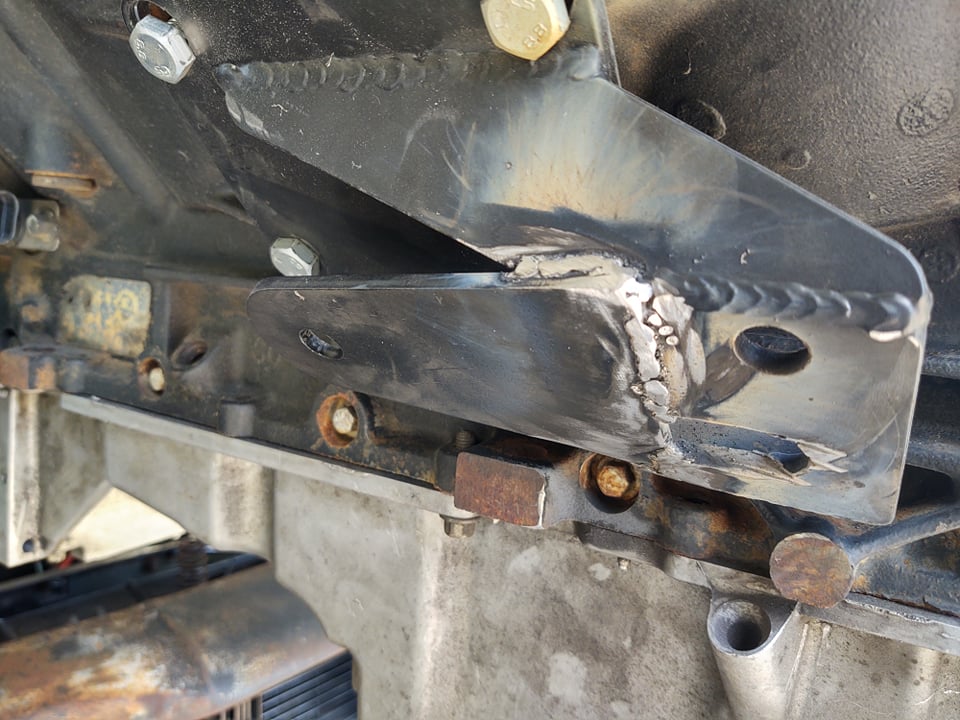
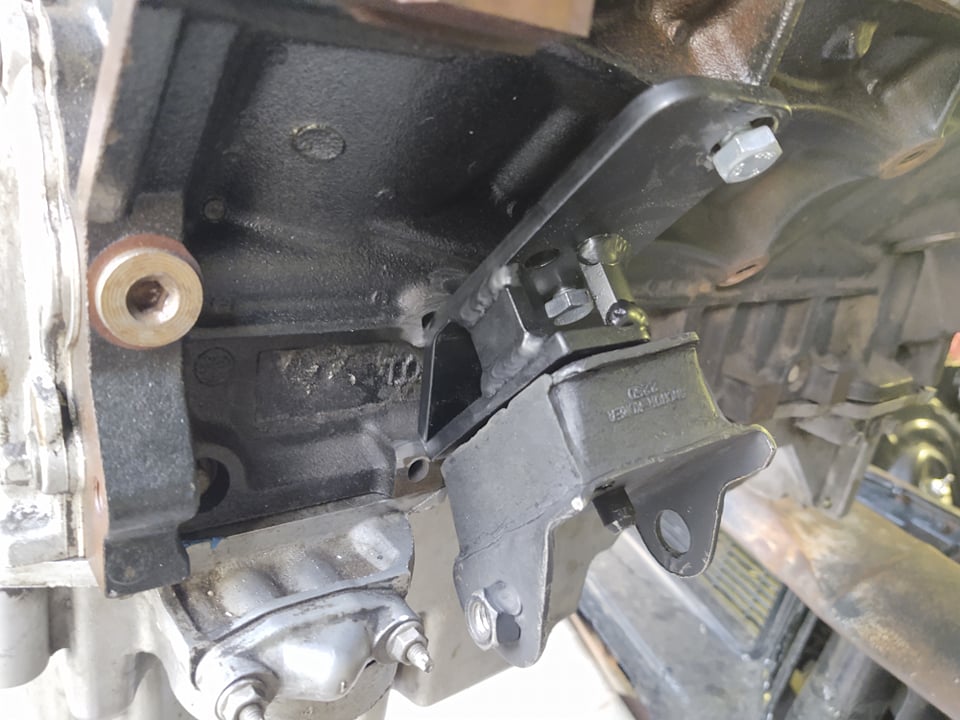
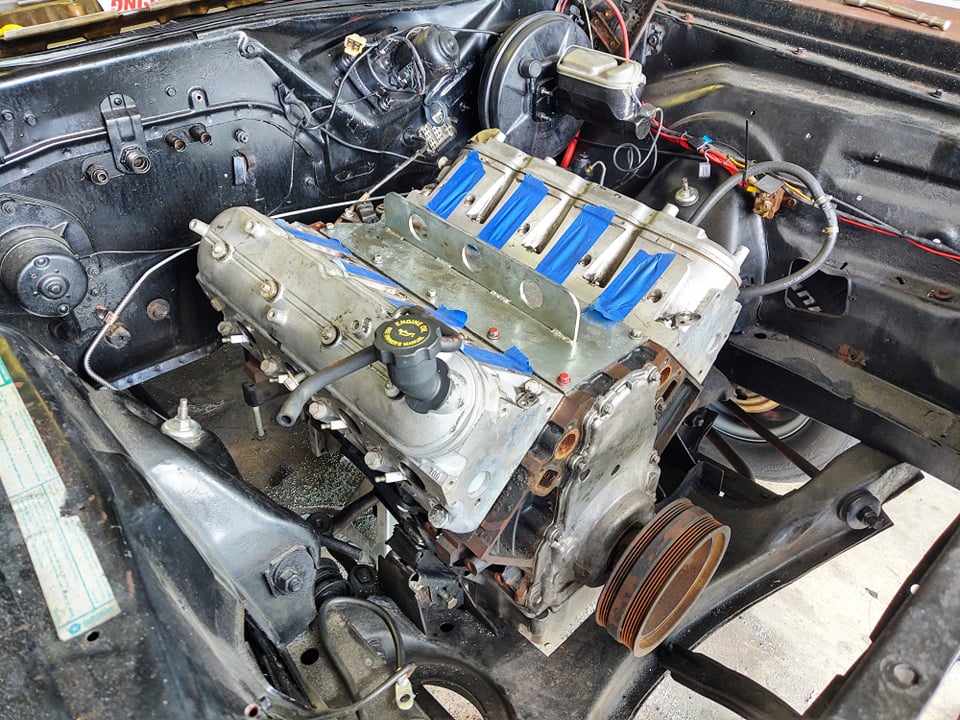
Finally. The engine mounts are done. I say finally because it feels like it took 2 weeks to figure this out but i only started last night and spent about 3 hours figuring it out then finished it today with another 2+ hours of figuring it out. I will try my best to explain it step by step and have the pictures follow the step but i took a lot of pics and i may not do it that way by accident. If you have any questions just ask. I did a lot of hacking i didn't need to do so ill leave those parts out lol. Also, im sure many can do a better process then i did but im the guinea pig in uncharted waters so, this is how i did it. Also, if you can fabricate im sure this would be much easier. Im not skilled like that lol. But here it goes.
-Cut K frame to fit GTO front sump oil pan, or you can spend $800 on a mid sump oil pan.
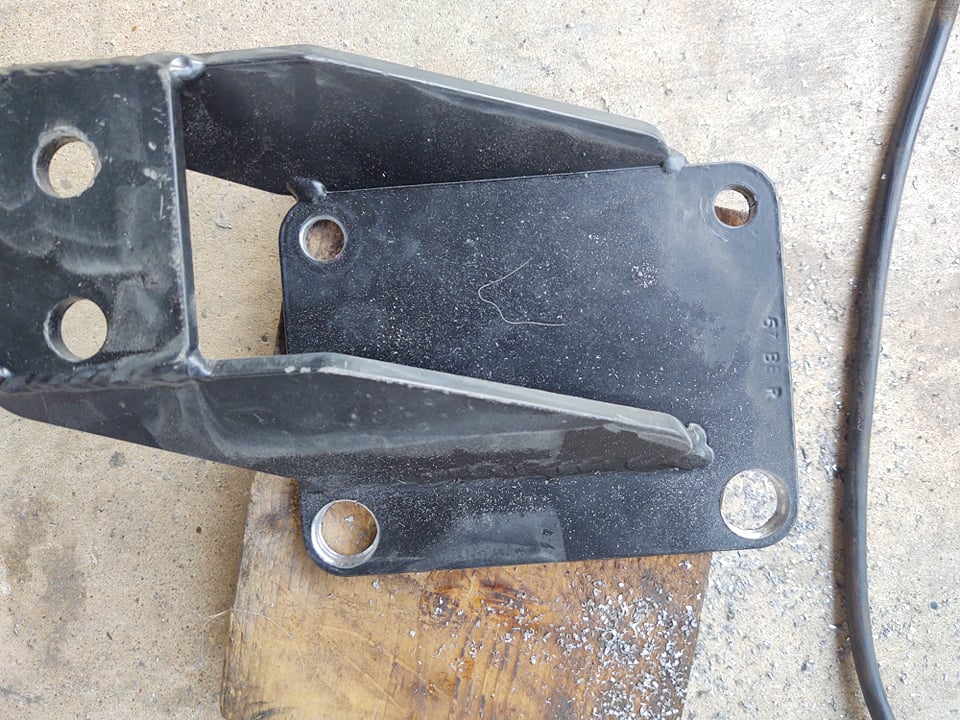
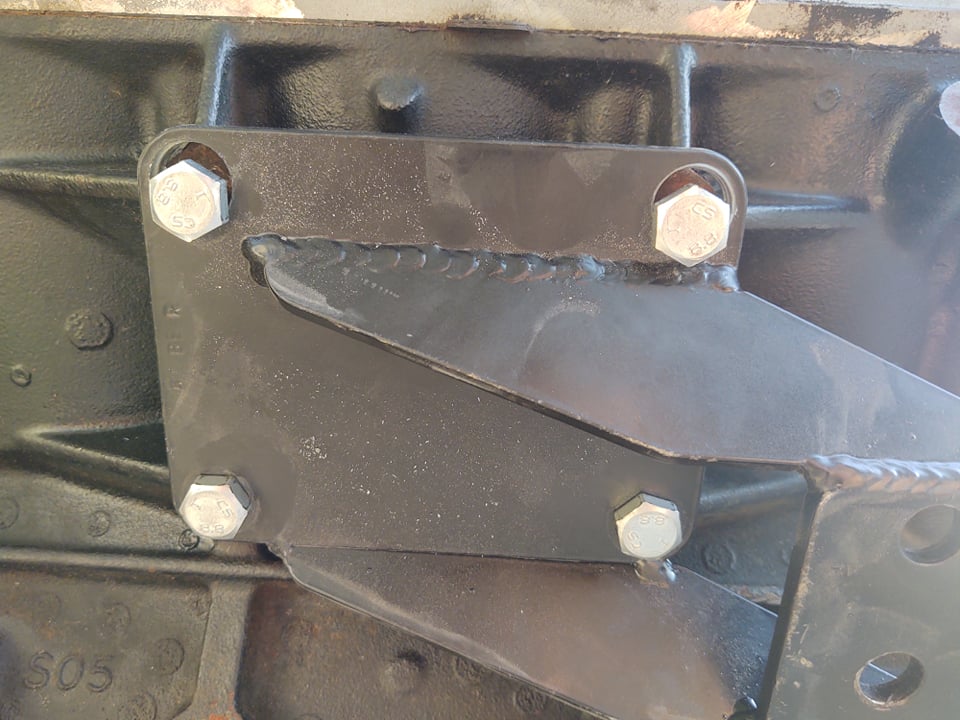
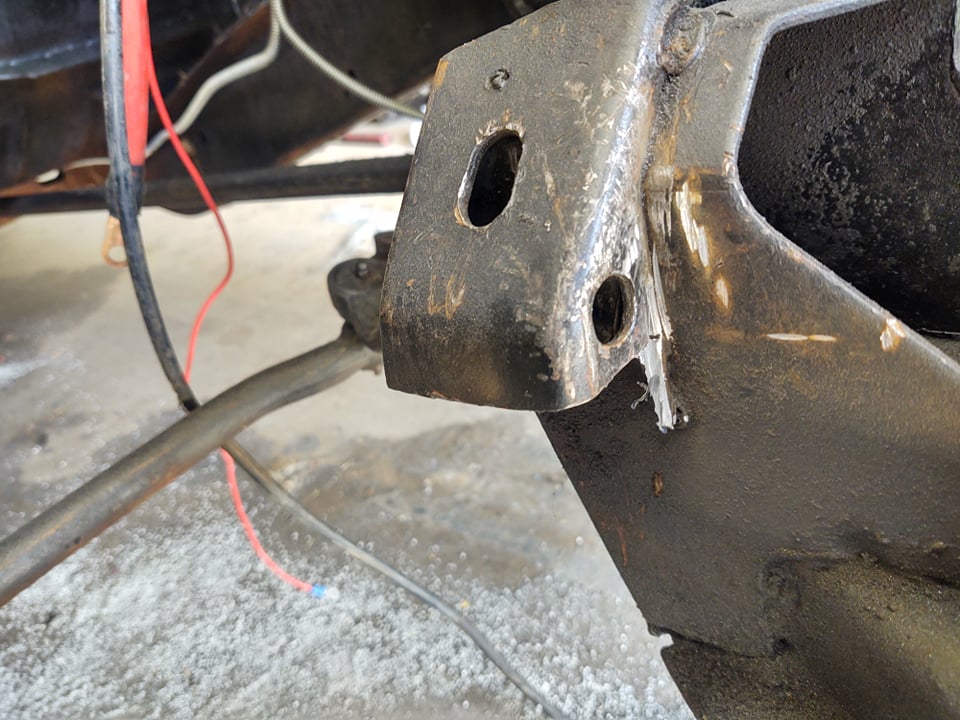
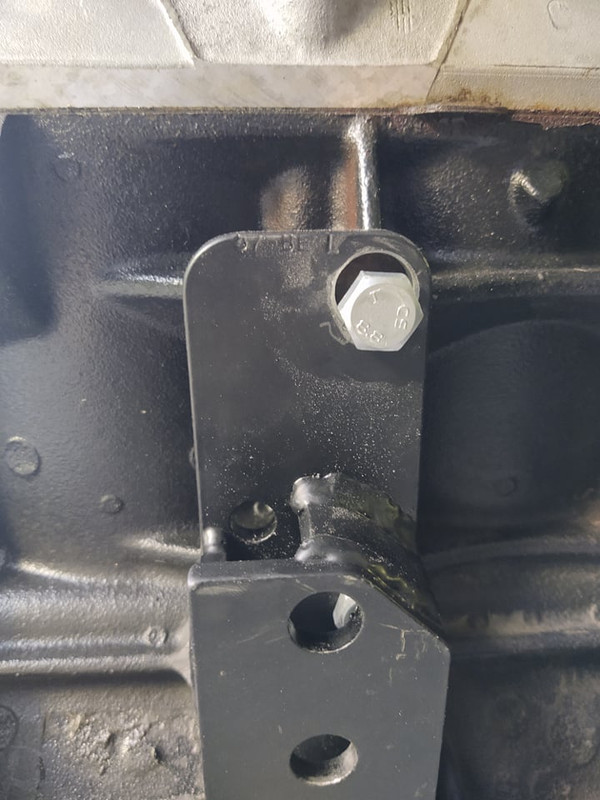
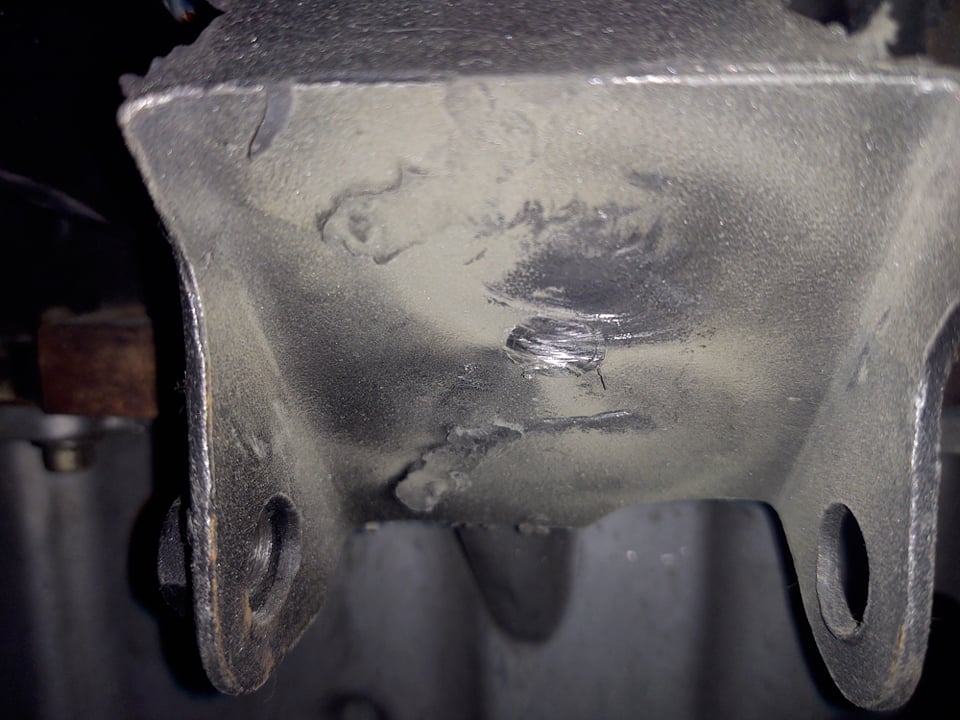
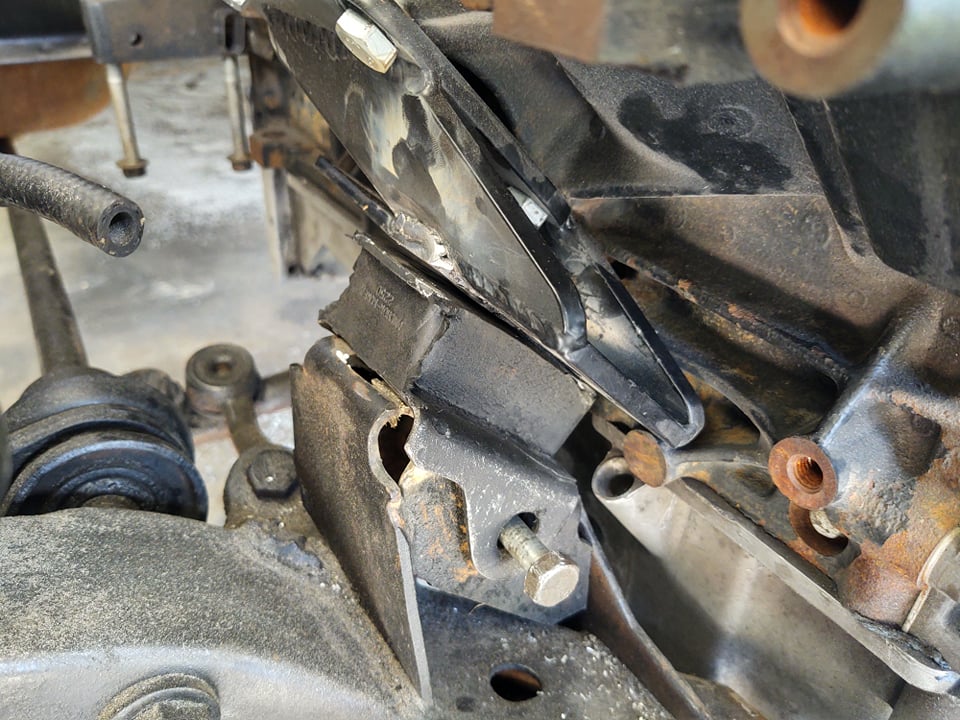
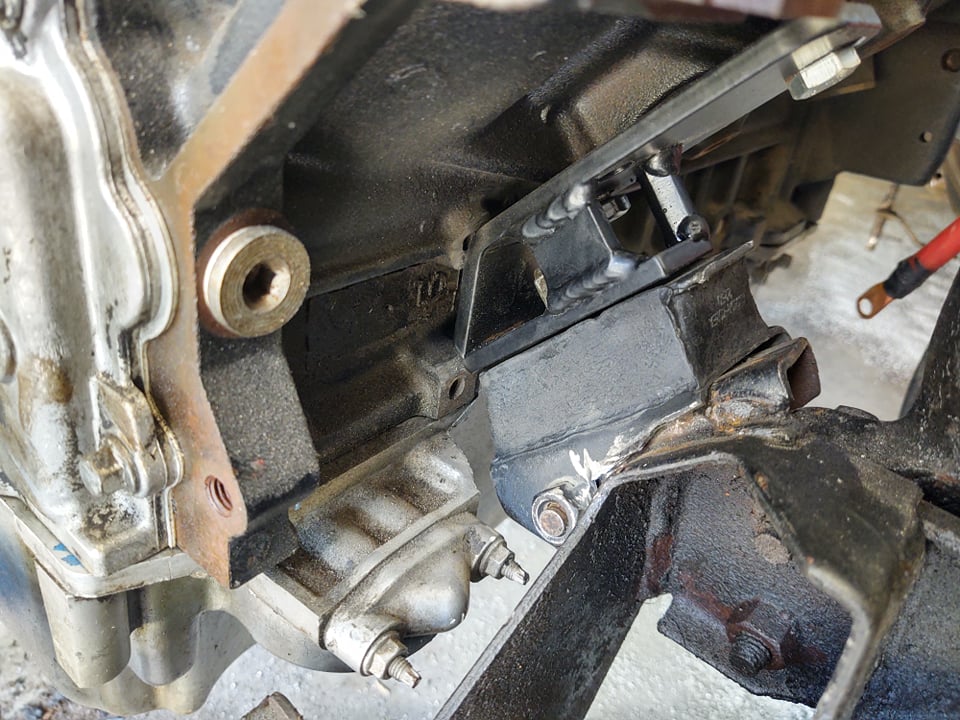
-I bought the Mancini Gen 3 hemi swap mounts. I welded a plate on the passenger side mount and cut a diagonal slit about 2 inches and the same width as the bolt hole that the motor mounts goes through. Its basically making the passenger side mount adjustable because when the driver side engine mount is on the k frame it pulls the back of the driver side engine towards the driver side. I have no clue why, so making the passenger side adjustable you can simply pull the passenger side and make it center in the engine bay.
-You will have to wollow out all but 1 hole on the passenger side engine mount where it bolts to the block as the Hemi blocks have a little bit more space between all of the holes. Same on the driver side but you will only have to do 1 (only if you got the same mounts i did, theres only 2 mounting holes)
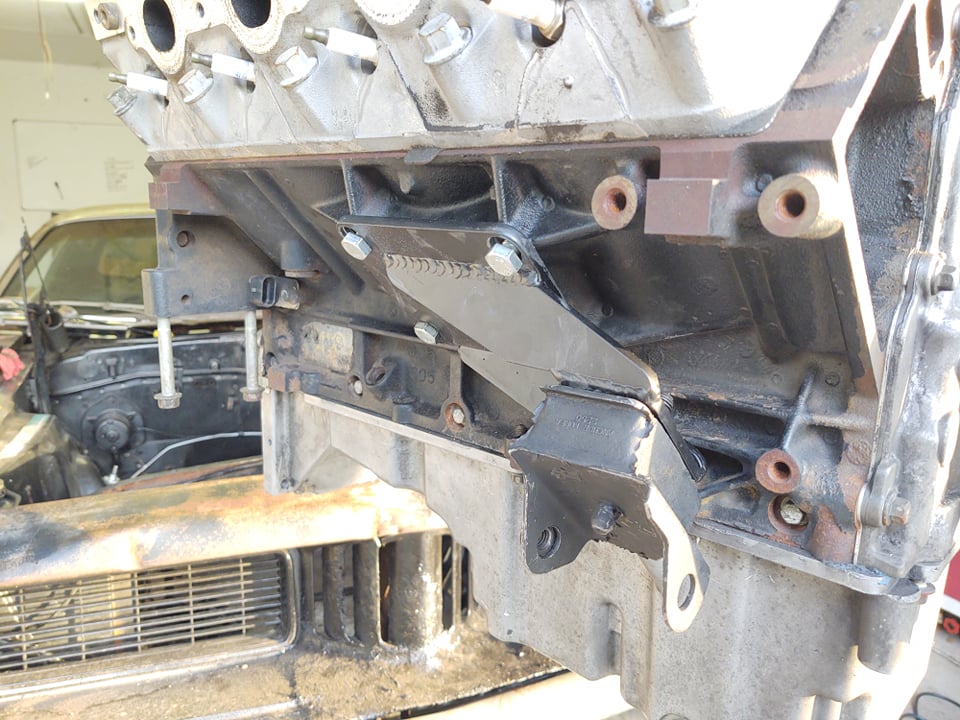
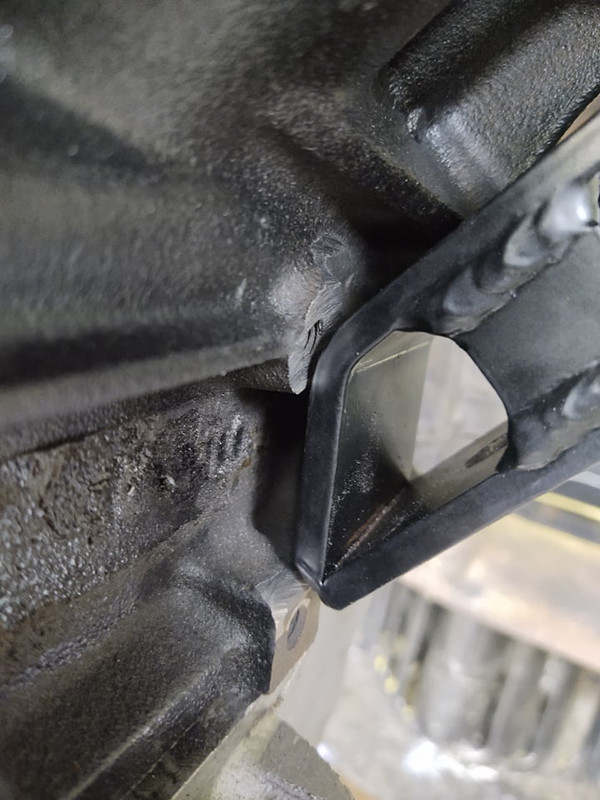
-On the driver side you will have to clearance the block in non important places for the engine mount to sit flush against the engine. You will have to do the same with the passenger side, You have to grind down a good amount of the rear AC bracket hole. You cant use low mount AC on this car anyways so it doesn't hurt anything.
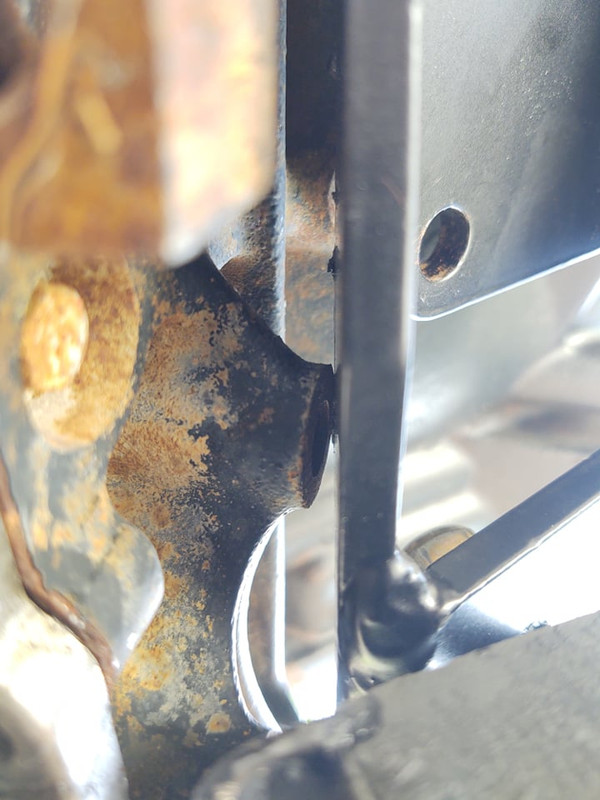
-The driver side mount that mounts to the K frame will have to be cut right up against the nut welded to the mount it self. This gives it some wiggle room when setting it on the K frame
-You will need to cut the little dimples on the under side of the motor mounts.
Hopefully the pics can explain better than me trying to remember it all step by step. Honestly, i think it may have been easier to just weld some plates to the stock plates that the stock mounts bolt to on Mopar engines but, this is how i ended up doing it and at least i know for the next e body, what to do. All bolts will be getting washers put on them when i do the final bolting down of everything. Next is transmission.
 bank of america tennessee
-Cut K frame to fit GTO front sump oil pan, or you can spend $800 on a mid sump oil pan.
-I bought the Mancini Gen 3 hemi swap mounts. I welded a plate on the passenger side mount and cut a diagonal slit about 2 inches and the same width as the bolt hole that the motor mounts goes through. Its basically making the passenger side mount adjustable because when the driver side engine mount is on the k frame it pulls the back of the driver side engine towards the driver side. I have no clue why, so making the passenger side adjustable you can simply pull the passenger side and make it center in the engine bay.
-You will have to wollow out all but 1 hole on the passenger side engine mount where it bolts to the block as the Hemi blocks have a little bit more space between all of the holes. Same on the driver side but you will only have to do 1 (only if you got the same mounts i did, theres only 2 mounting holes)
-On the driver side you will have to clearance the block in non important places for the engine mount to sit flush against the engine. You will have to do the same with the passenger side, You have to grind down a good amount of the rear AC bracket hole. You cant use low mount AC on this car anyways so it doesn't hurt anything.
-The driver side mount that mounts to the K frame will have to be cut right up against the nut welded to the mount it self. This gives it some wiggle room when setting it on the K frame
-You will need to cut the little dimples on the under side of the motor mounts.
Hopefully the pics can explain better than me trying to remember it all step by step. Honestly, i think it may have been easier to just weld some plates to the stock plates that the stock mounts bolt to on Mopar engines but, this is how i ended up doing it and at least i know for the next e body, what to do. All bolts will be getting washers put on them when i do the final bolting down of everything. Next is transmission.
bank of america tennesseeLast edited by 78TranzAm; Jun 30, 2021 at 07:01 PM.

TECH Senior Member
Joined: Jun 2016
Posts: 22,293
Likes: 3,617
From: Central Cal.
Coil overs themselves are pretty generic, but the bracketry and suspension arms are model-specific. I just haven't heard too much about Mopar suspension packages. Maybe Global West and Hotchkis might, but I don't know nor have I checked, TBH
Thread Starter
Launching!
Joined: Jul 2016
Posts: 248
Likes: 100
Ya duh, sorry. Guess that shows how much i don't pay attention to them either lol. But i think hes running Hotchkis or RideTech.
Thread Starter
Launching!
Joined: Jul 2016
Posts: 248
Likes: 100
So today was a rough one. I expected the trans to be a very simple just "mock up and make a mount"... Not the case. I spent nearly 6 hours test fitting,cutting,test fitting, cutting. The car beat my a** today. The Texas heat and humidity doesn't help either lol.
But basically i got it done. It took so long because it was just a lot of getting under the car, getting back up, jacking the engine up, jacking the transmission up, clearancing the trans tunnel, clearancing some of the transmission and just back and fourth back and fourth. All to find out the only option was cutting the whole trans tunnel. So now i have it sitting right about where it all should bolt up. The engine has a very slight tilt back but if i jack up the trans the half inch i need to level the engine a half inch then the driveshaft will interfere with the floor and the pinion angle will be pretty out of wack.
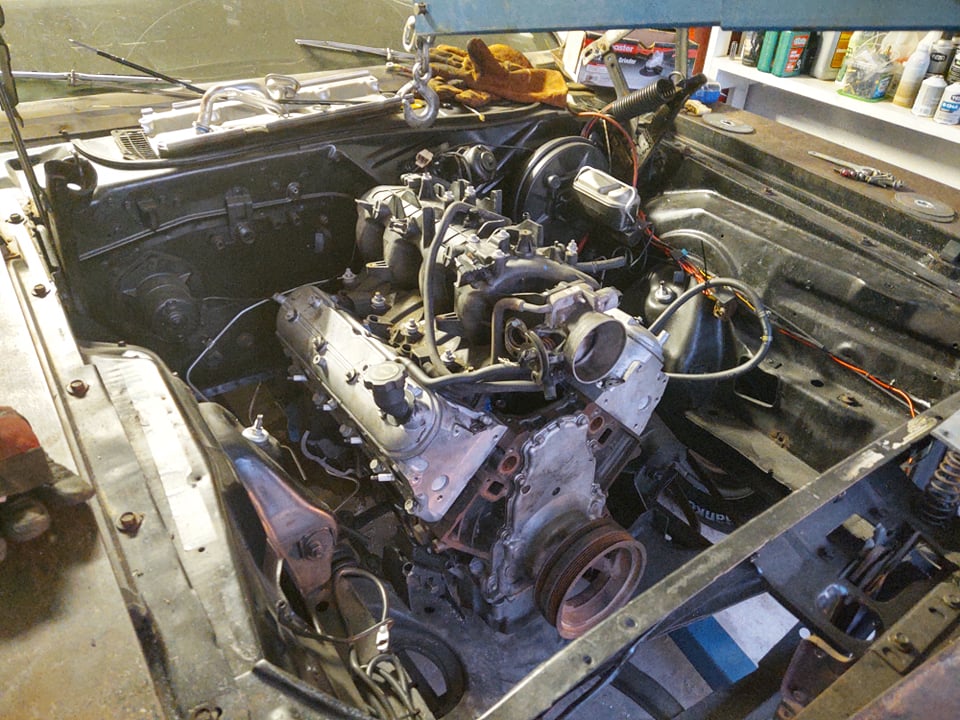
I threw the truck intake on and it might just clear.
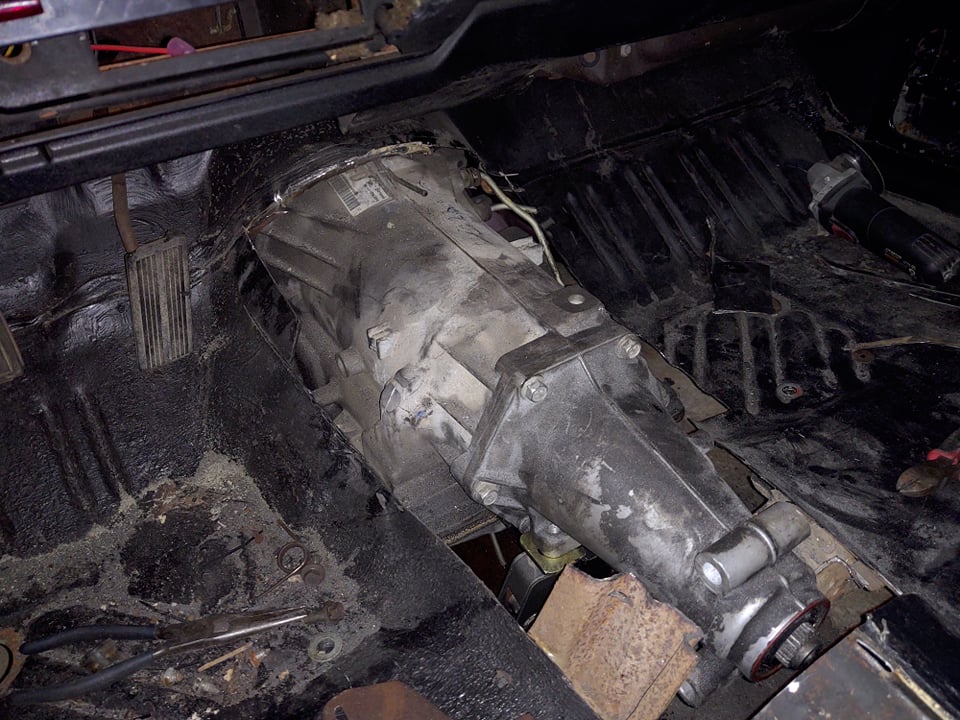
But basically i got it done. It took so long because it was just a lot of getting under the car, getting back up, jacking the engine up, jacking the transmission up, clearancing the trans tunnel, clearancing some of the transmission and just back and fourth back and fourth. All to find out the only option was cutting the whole trans tunnel. So now i have it sitting right about where it all should bolt up. The engine has a very slight tilt back but if i jack up the trans the half inch i need to level the engine a half inch then the driveshaft will interfere with the floor and the pinion angle will be pretty out of wack.
I threw the truck intake on and it might just clear.