
Project '98 S-10 drag truck....
 12-13-2006, 08:23 PM
#41
On The Tree
Thread Starter
iTrader: (26)

Join Date: Oct 2005
Location: Windsor, Ontario, Canada
Posts: 116
Likes: 0
Received 0 Likes
on
0 Posts
well there have been a few ideas rolling around in my head about the motor... But I have come to settle with just gassing it. I'd love to go with a supercharger or Turbo, But There's not enough room under the hood of these S-series trucks!  I like the fact that with nitrous I can just keep it tame for when I just want to have fun, or don't wanna pay to fill the bottle. But when I want to get serious I will hose the hell outta her! lol
My plan is to go with a 402ci LS2 aluminum block. Thats the last thing on my list of things to do at this point, I still have lots to do in the mean time. lol.
I like the fact that with nitrous I can just keep it tame for when I just want to have fun, or don't wanna pay to fill the bottle. But when I want to get serious I will hose the hell outta her! lol My plan is to go with a 402ci LS2 aluminum block. Thats the last thing on my list of things to do at this point, I still have lots to do in the mean time. lol.
 12-13-2006, 08:34 PM
#42

That truck looks sick! very nice craftsman ship on the 4 link and cage, that thing fits in there with the dash like it came that way!
Oh and BTW anyone stateside, looking for DIY garages..get a buddy in the military we got "auto hobby" shops, paint shops, machine shops, wood shops, metal fab shops, that you can do work on for like 2 bucks an hour with hundreds of thousands of dollars in tools and equipment, hell they even have people that will do welding and motor dissassembly/cleaning and machine work for you if you're that damn lazy! i know all the guys on all the shifts at the one on my base on a first name basis if that tells you how much time i spend in there....
Oh and BTW anyone stateside, looking for DIY garages..get a buddy in the military we got "auto hobby" shops, paint shops, machine shops, wood shops, metal fab shops, that you can do work on for like 2 bucks an hour with hundreds of thousands of dollars in tools and equipment, hell they even have people that will do welding and motor dissassembly/cleaning and machine work for you if you're that damn lazy! i know all the guys on all the shifts at the one on my base on a first name basis if that tells you how much time i spend in there....
12-13-2006, 10:12 PM
#43
Launching!
Join Date: Jun 2006
Location: Arizona
Posts: 200
Likes: 0
Received 0 Likes
on
0 Posts

The only thing I've been wondering is does the cab have to be removed in order to cut and weld that new rear frame clip on? Or is it possible to just remove the bed and still get it done?
12-14-2006, 05:15 AM
#44
On The Tree
Thread Starter
iTrader: (26)
Join Date: Oct 2005
Location: Windsor, Ontario, Canada
Posts: 116
Likes: 0
Received 0 Likes
on
0 Posts
You could complete the narrowed frame swap without removing the cab.... It is possible. Although it would be slightly more of a pain in the ***... I removed everything because I wanted to sandblast and paint my frame.
Hope this helps.
Hope this helps.
12-14-2006, 01:44 PM
#45
Launching!
Join Date: Jun 2006
Location: Arizona
Posts: 200
Likes: 0
Received 0 Likes
on
0 Posts
Originally Posted by 1BadDime
You could complete the narrowed frame swap without removing the cab.... It is possible. Although it would be slightly more of a pain in the ***... I removed everything because I wanted to sandblast and paint my frame.
Hope this helps.
Hope this helps.
Thanks for the info,
-Taylor
12-20-2006, 12:05 AM
#46
Teching In

Join Date: Jan 2006
Location: Lufkin, TX.
Posts: 29
Likes: 0
Received 0 Likes
on
0 Posts
Ever considered a remote mount turbo ? I have reacently found a 98 regular cab with a 2001 5.3 ,ls hot cam and 100 shot that i am going to purchase . The thing runs like a 12.4 1/4 w/o spray an 11.9 with. I have an 04 ecsb that has an sts on it . going to try and make the sts work on the s-10. Is that cage an S&W also ?
12-20-2006, 07:17 PM
#47
On The Tree
Thread Starter
iTrader: (26)
Join Date: Oct 2005
Location: Windsor, Ontario, Canada
Posts: 116
Likes: 0
Received 0 Likes
on
0 Posts
The cage was built custom at Stenod Performance in Michigan. www.stenodperformance.com
And I have considered a rear mounted turbo..Hell I could fit 2 of the biggest nastiest turbos under that bed.. But We'll have to see. lol I change my mind every day it seems. One step at a time, I'd like to just get all the little stuff wrapped up in the next couple of months and then put all my effort into the engine/drivetrain.
And I have considered a rear mounted turbo..Hell I could fit 2 of the biggest nastiest turbos under that bed.. But We'll have to see. lol I change my mind every day it seems. One step at a time, I'd like to just get all the little stuff wrapped up in the next couple of months and then put all my effort into the engine/drivetrain.
01-29-2007, 09:02 PM
#49
On The Tree

Join Date: Apr 2003
Location: Valdosta, GA
Posts: 101
Likes: 0
Received 0 Likes
on
0 Posts
did u use a stand alone injection system or factory ecm and wire harness on lt1 swap would be
interested in lt1 parts for the s-10 if u want to sell them let me know
interested in lt1 parts for the s-10 if u want to sell them let me know
03-08-2007, 08:57 PM
#50
On The Tree
Thread Starter
iTrader: (26)
Join Date: Oct 2005
Location: Windsor, Ontario, Canada
Posts: 116
Likes: 0
Received 0 Likes
on
0 Posts
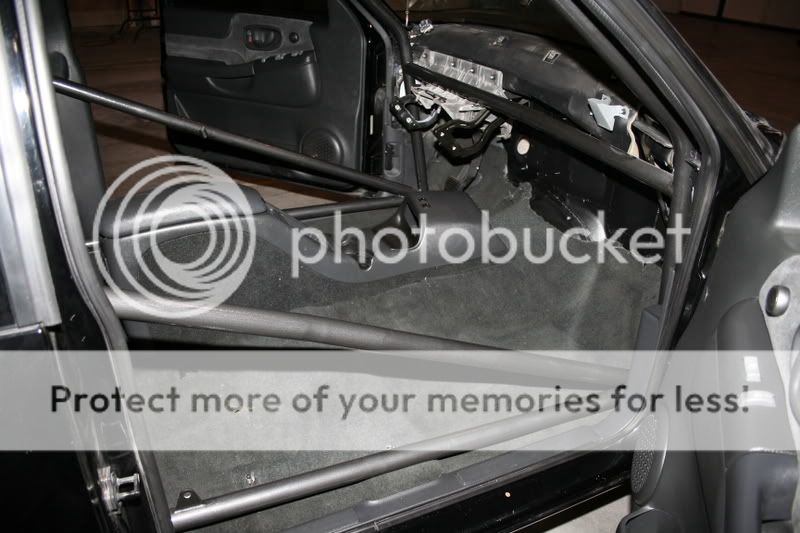
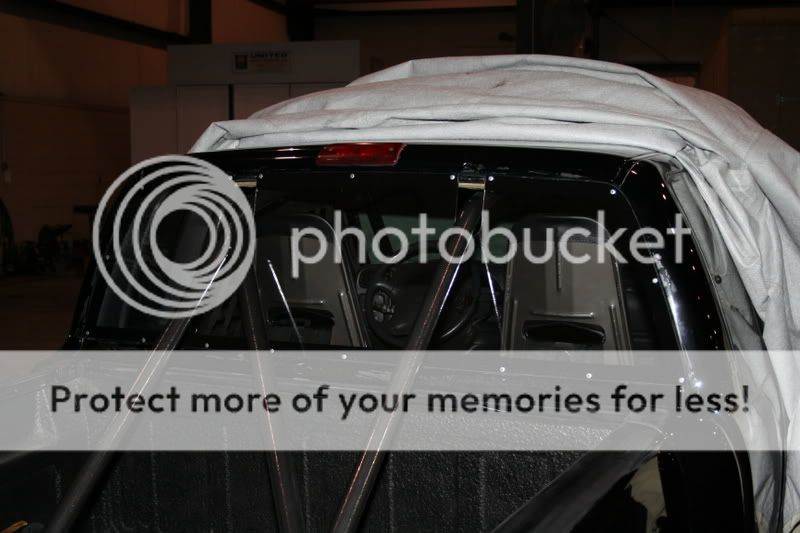
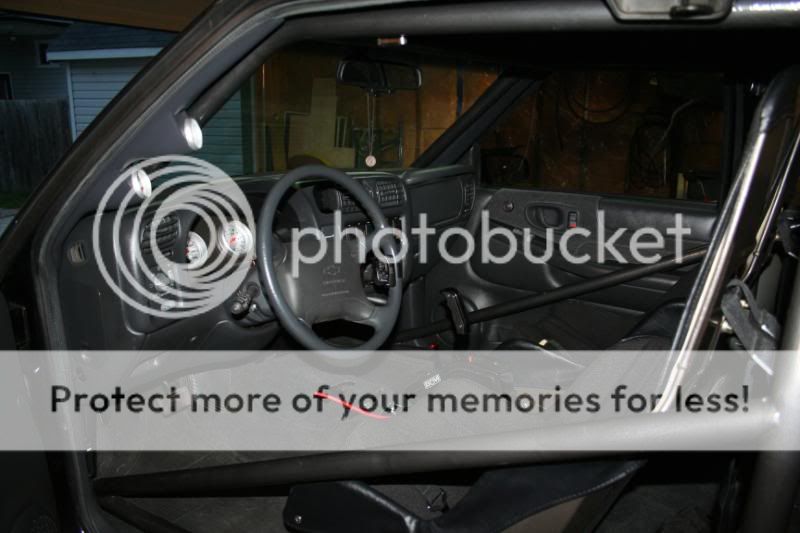
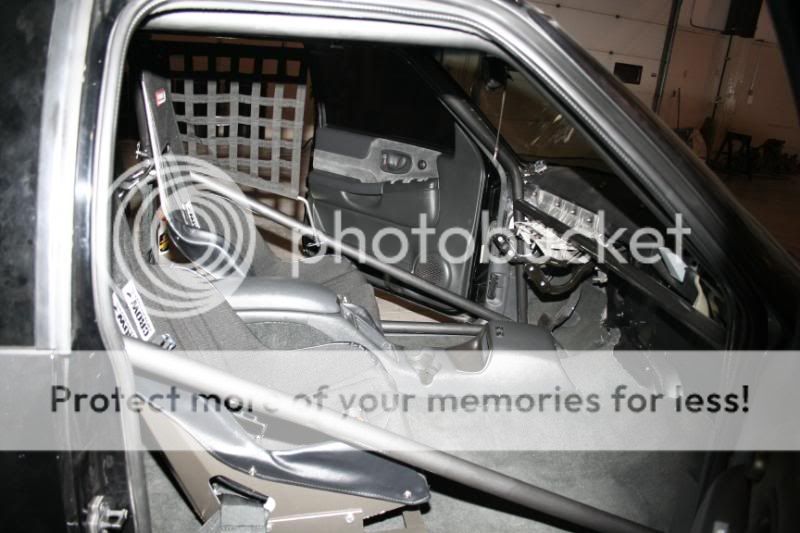
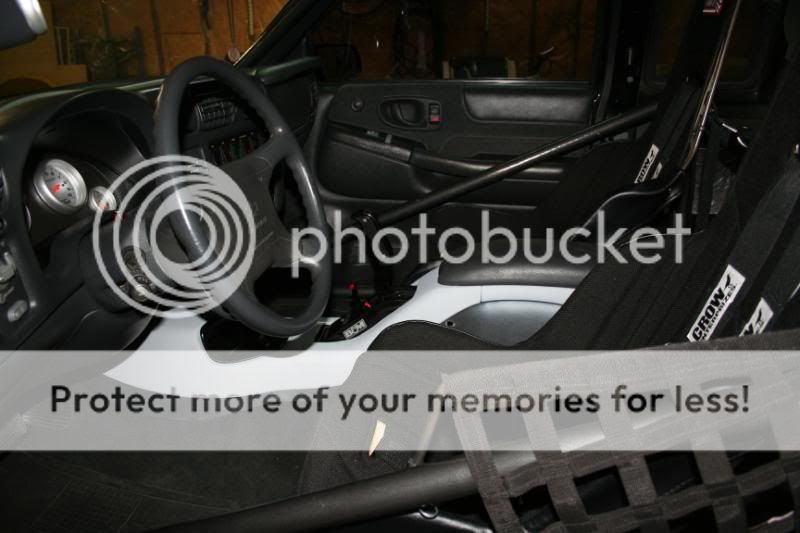
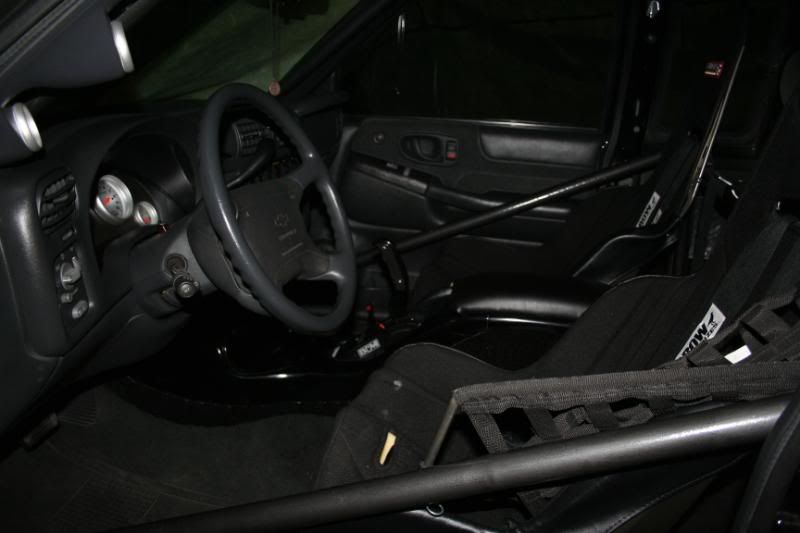
It's been a while again...but I'm back..LOL!! Much more to report on now!! Interior is moving along nicely..and the firewall is back in one piece again.... and the brakes will be moving along soon now too.
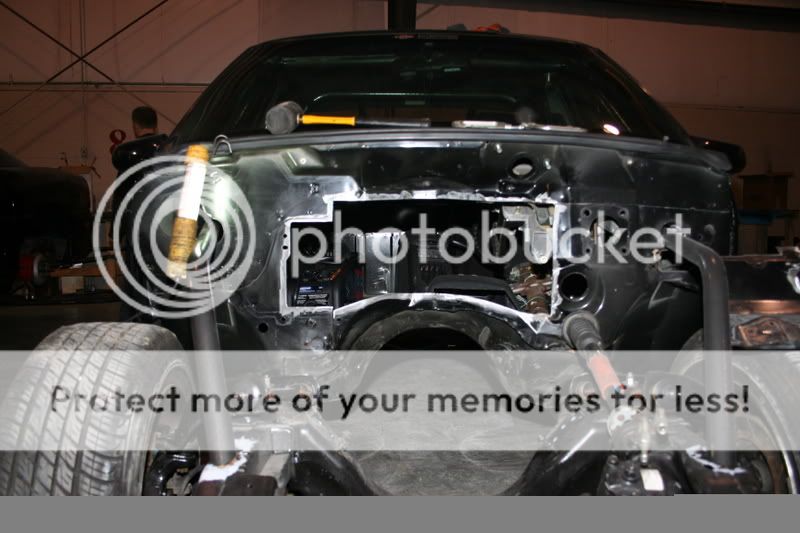
what I had....
what i did....
how it sits now... not too bad i think.
Interior went back in very nicely... I'm very happy with it so far.
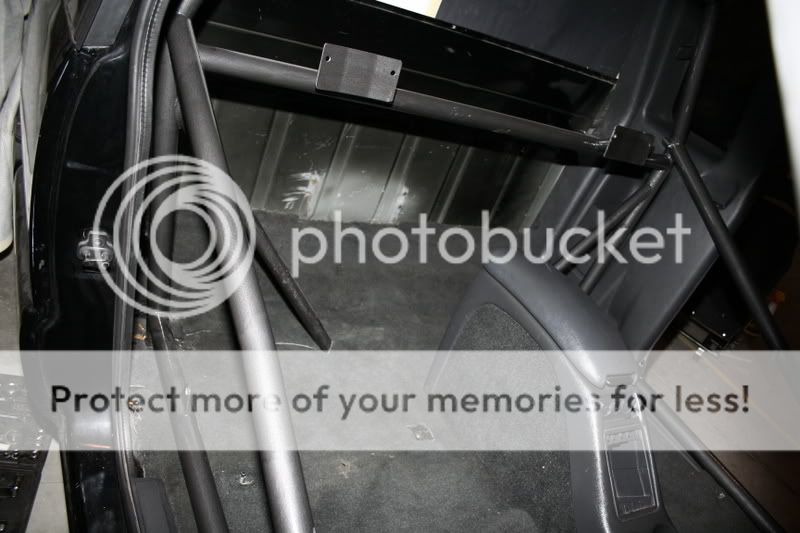
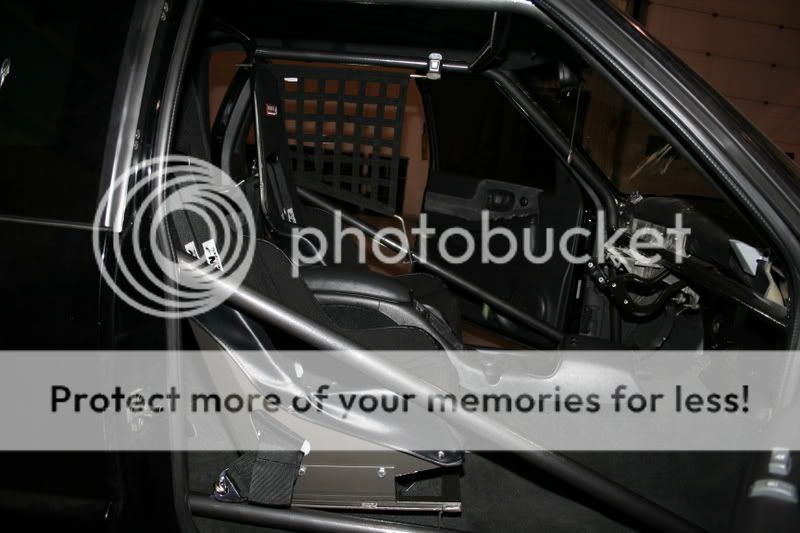
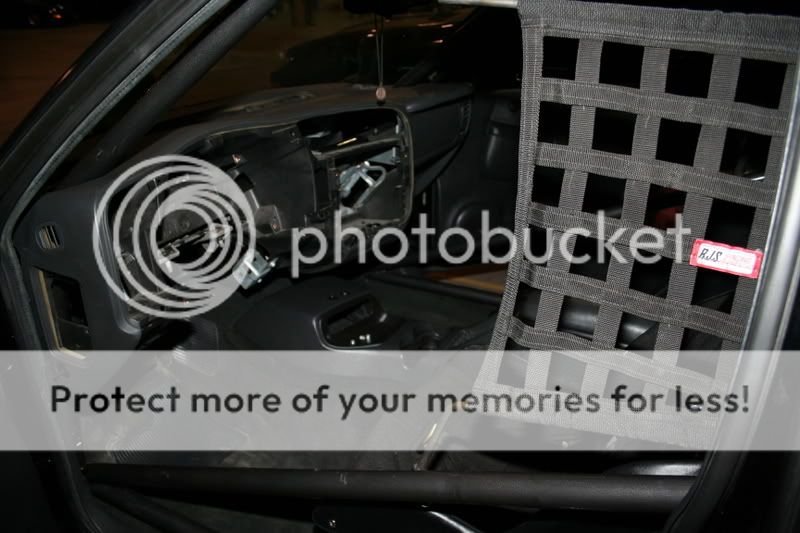
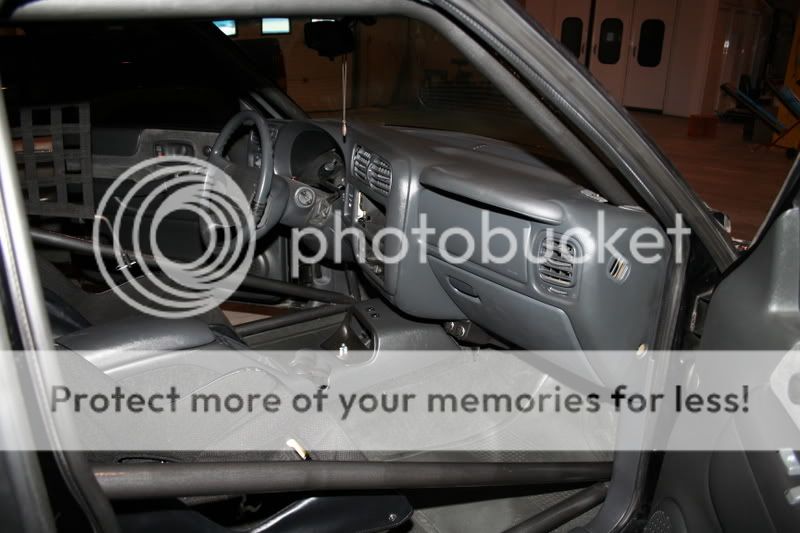
still have lots to do..... I'll keep the pictures rollin' =)
what I had....
what i did....
how it sits now... not too bad i think.
Interior went back in very nicely... I'm very happy with it so far.
still have lots to do..... I'll keep the pictures rollin' =)
03-08-2007, 08:57 PM
#51
On The Tree
Thread Starter
iTrader: (26)
Join Date: Oct 2005
Location: Windsor, Ontario, Canada
Posts: 116
Likes: 0
Received 0 Likes
on
0 Posts
ok...here we go with a few more updates....
My Lexan rear window is now in...just have to make a couple of filler pieces for the slots I had to put in it...that should be this week though.
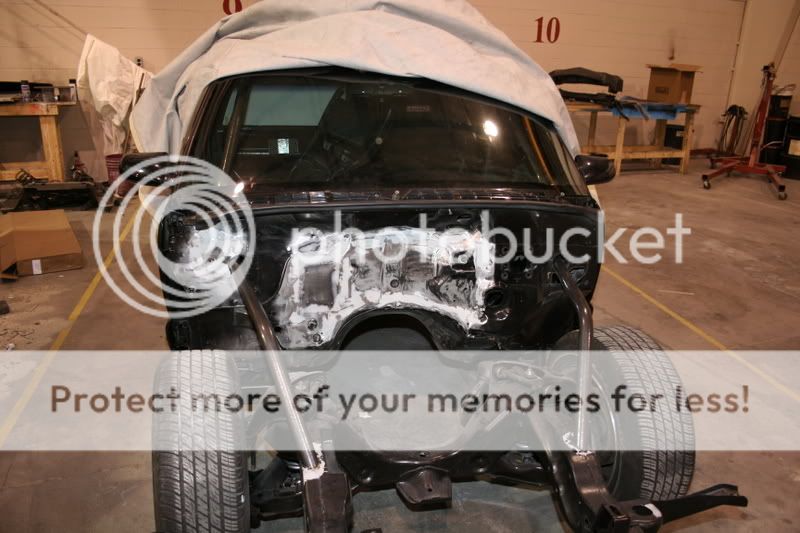
Firewall is now painted black.. not that exciting, but hey it matches now! =)
And the fun part is now beginning...Brakes! Ugh! I hate 'em already. Should be done some time this week though, I just need a few more fittings and I'll be golden.
Thanks for lookin' ... I'll keep the pictures coming as I go along.
Jim
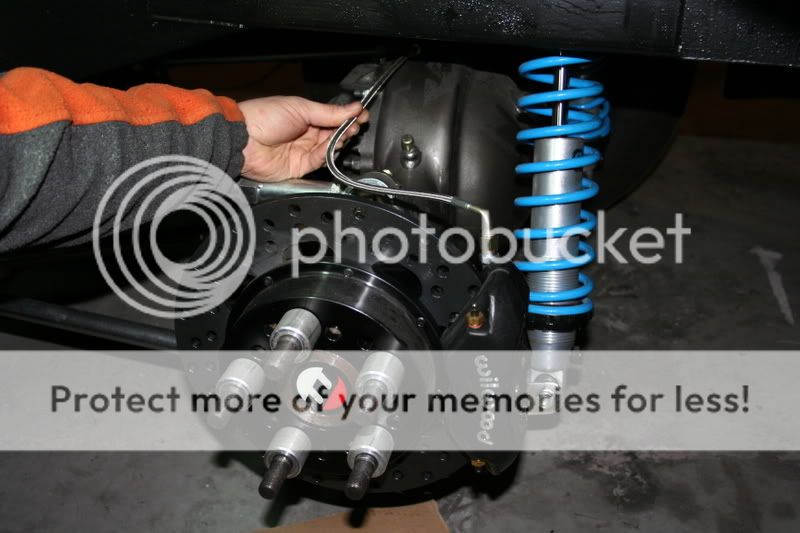
Here's the front brake line setup.... just needs a few clips to hold it down and it will be good. And you might notice that the K-member is missing a rather large chunk out of it as well.... I removed a section and added the bar in to make more room for oil pan clearance.
My Lexan rear window is now in...just have to make a couple of filler pieces for the slots I had to put in it...that should be this week though.
Firewall is now painted black.. not that exciting, but hey it matches now! =)
And the fun part is now beginning...Brakes! Ugh! I hate 'em already. Should be done some time this week though, I just need a few more fittings and I'll be golden.
Thanks for lookin' ... I'll keep the pictures coming as I go along.
Jim
Here's the front brake line setup.... just needs a few clips to hold it down and it will be good. And you might notice that the K-member is missing a rather large chunk out of it as well.... I removed a section and added the bar in to make more room for oil pan clearance.
 that is NICE! what did you decide on for wheels & tires? can't wait to see a pic of it on all 4's!
  03-09-2007, 03:07 PM
#54
On The Tree
Thread Starter
iTrader: (26)
Join Date: Oct 2005
Location: Windsor, Ontario, Canada
Posts: 116
Likes: 0
Received 0 Likes
on
0 Posts
Yeah...that clearance in the front isn't done yet. just good enough for now. I will be gusseting it all in the end. and as for the the rear end of the truck...I was lucky, it was all available through S&W racecars... I just bought the whole rear frame from them. I had to do the measuring, cutting, welding but they did most of the hard work for me. =)
And I hope to have it sitting on the new rim and tire setup soon to, but I just bought a house and I'll have to sacrifice a bit from my project for a bit untill we're settled in at the new house. But I can't wait to see it with the new meats on it too!!
Thanks for the nice comments...
Jim
And I hope to have it sitting on the new rim and tire setup soon to, but I just bought a house and I'll have to sacrifice a bit from my project for a bit untill we're settled in at the new house. But I can't wait to see it with the new meats on it too!!
Thanks for the nice comments...
Jim
11-11-2007, 09:04 AM
#56
On The Tree
Thread Starter
iTrader: (26)
Join Date: Oct 2005
Location: Windsor, Ontario, Canada
Posts: 116
Likes: 0
Received 0 Likes
on
0 Posts
Well..its been almost a year... but more updates. 
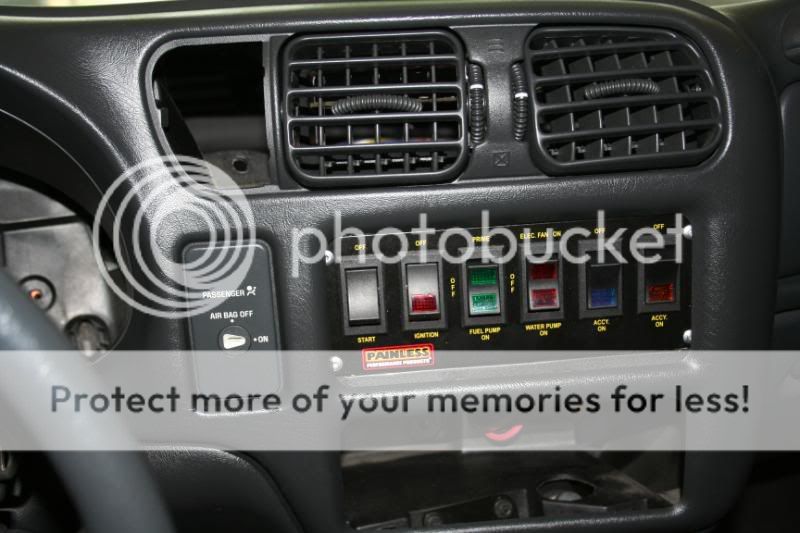
Ok..... pretty much finished my Painless switch panel installation. It turned out pretty good I think. I just need to put some black touch up paint on the rivets to hide them a bit better.
Here's a few of the steps to get this done....
I had to first cut out a piece of aluminum to fit my dash, and the switch panel...
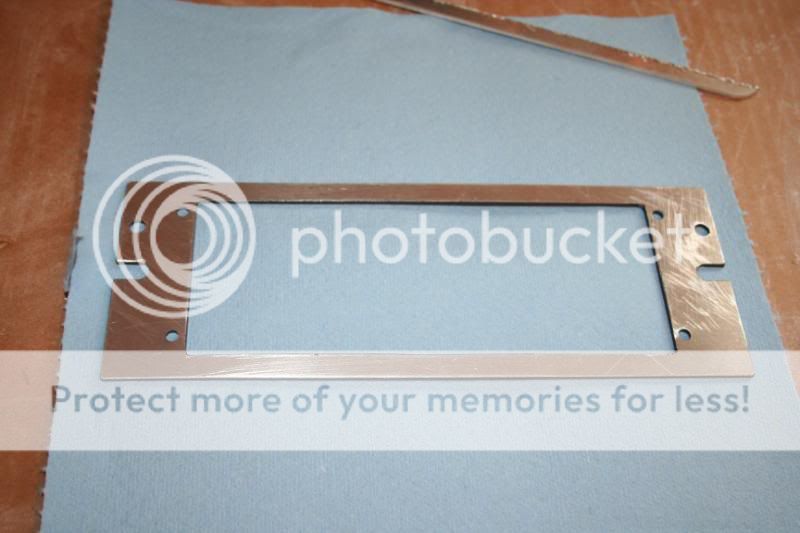
After that..it got a little bit of paint, and it was ready to put together.
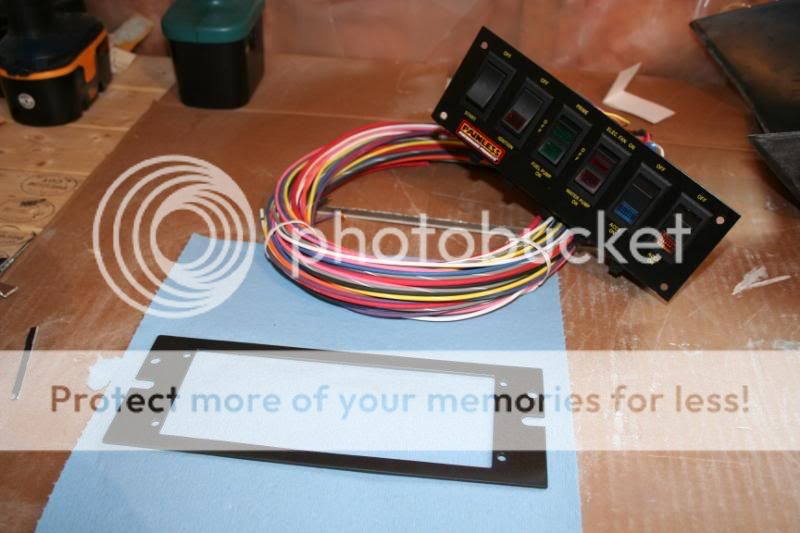
Ok.... agter riveting it all together it's about ready to put in the truck...
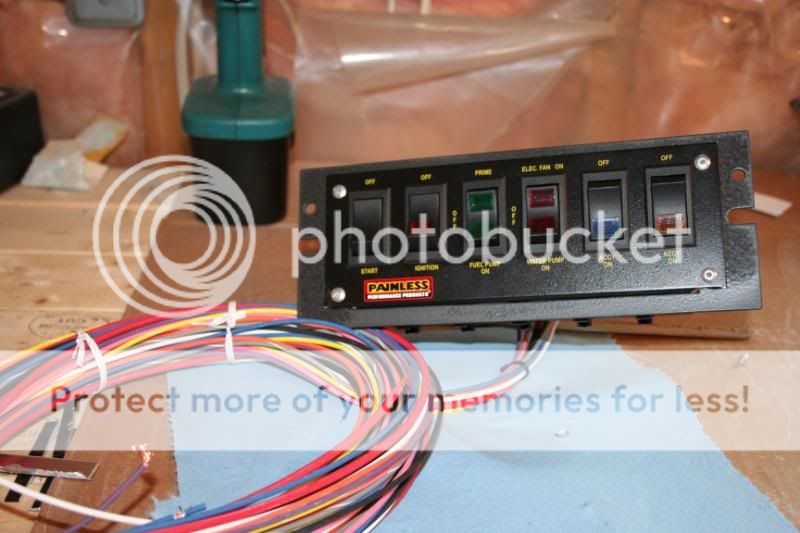
A couple of screws later it was all done...snapped the dash back in to see how I did. Not bad. It should work real good though.
Gage cluster finishing touches....
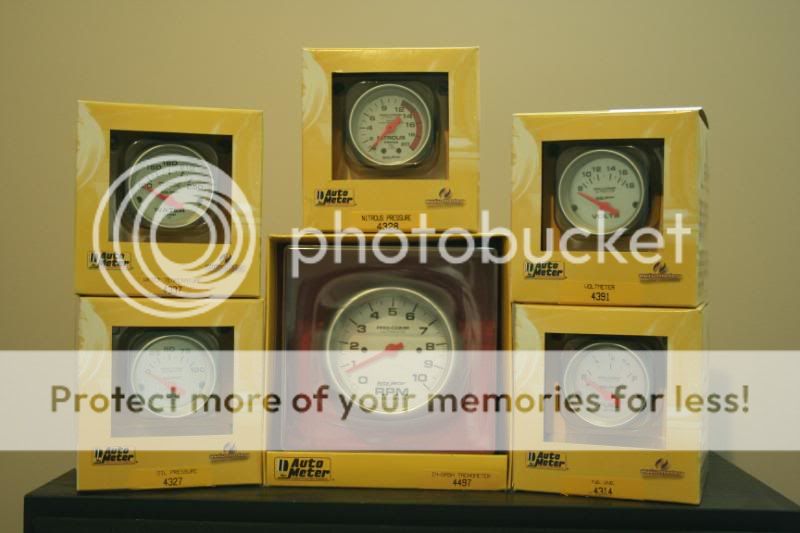
And today I started and pretty much finished work on my gage cluster, Here's what I did.....
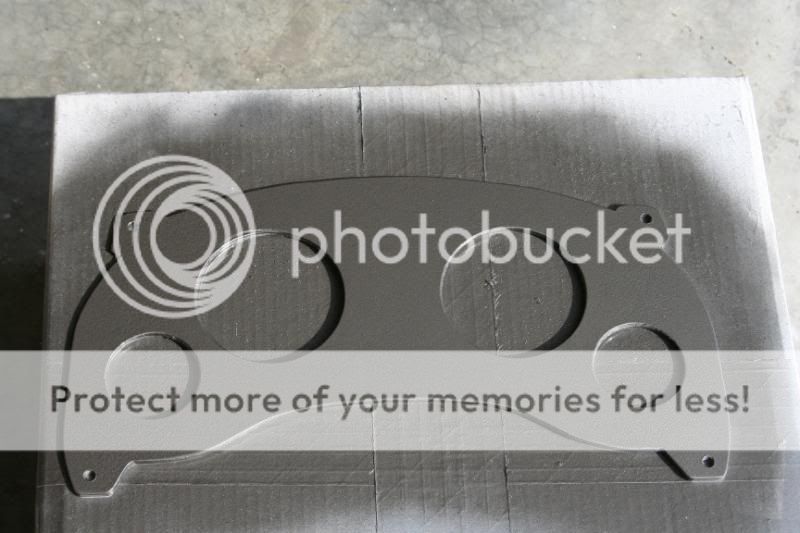
I started off with a bare piece of 3/16" aluminum and shaped it to match my old cluster. Cut a few holes for gages, a few coats of paint and I had this.
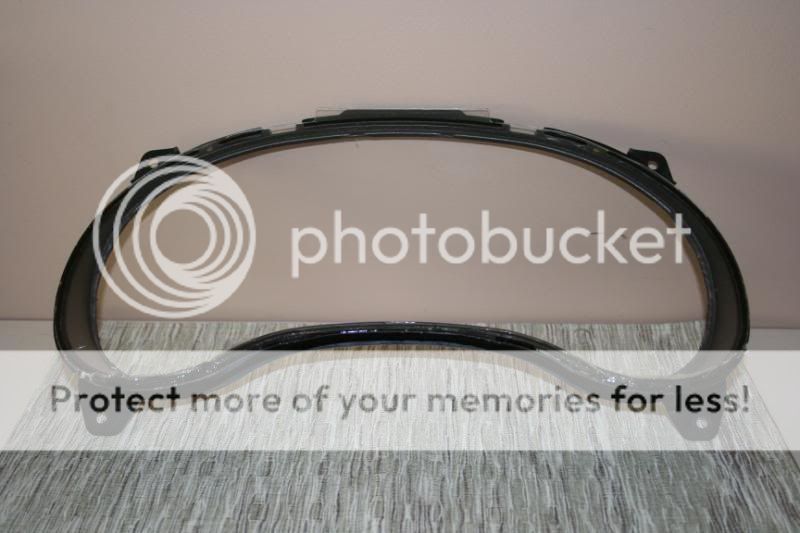
Then I took the clear plastic cluster shield off of my old gage cluster, and cut off all the undesired plastic tha wasn't needed and I had this.
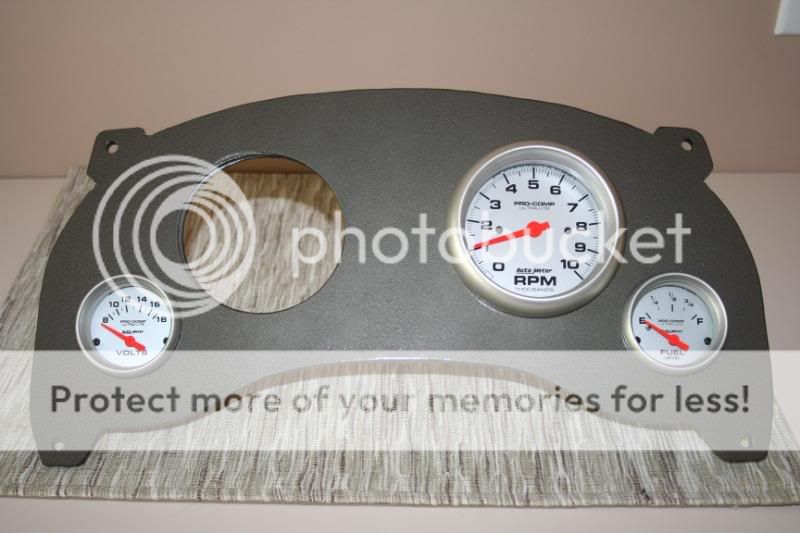
After all that was done I mounted the gages that I had into the cluster to test fit...... and it fits pretty good. I am missing the speedometer, but that can go in when i recieve it.
Now I place the aluminum cluster into my dash.....
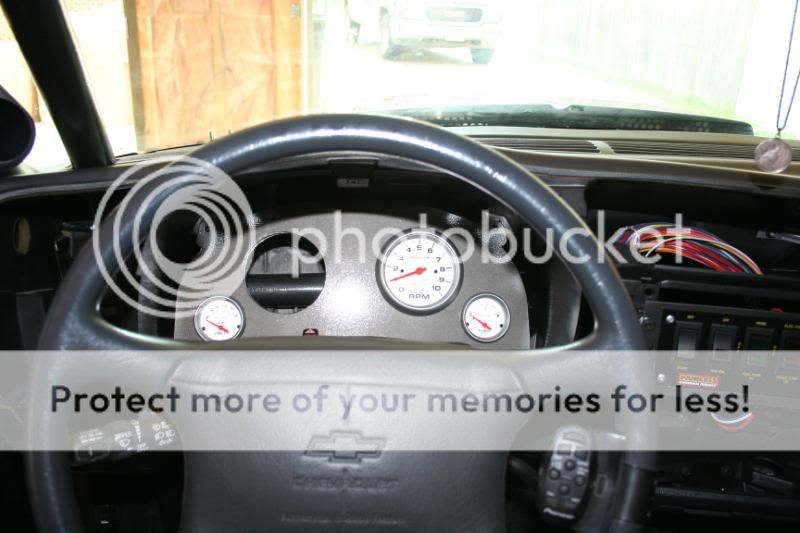
Then cover it with the clear shield and bolt them both into the stock mounting position....

Put the dash back in, add the pillar gages in place and check it out.... It all worked out great. And trust me, this picture doesn't do it justice. It looks awesome. 8)

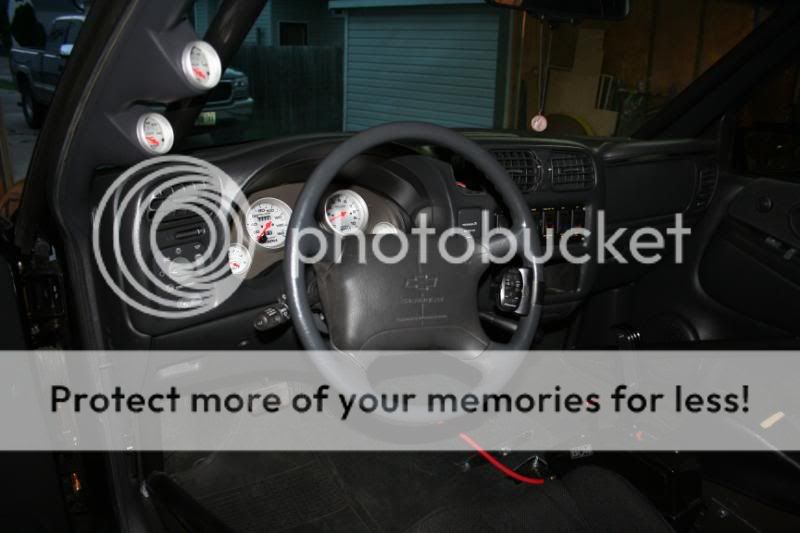
The interior is pretty much finished now except for a spot underneath my switch panel that needs a cover plate, and my center console which has been an ongoing process thats taking quite a while. It shall be impressive when its finished. 8)
Ok..... pretty much finished my Painless switch panel installation. It turned out pretty good I think. I just need to put some black touch up paint on the rivets to hide them a bit better.
Here's a few of the steps to get this done....
I had to first cut out a piece of aluminum to fit my dash, and the switch panel...
After that..it got a little bit of paint, and it was ready to put together.
Ok.... agter riveting it all together it's about ready to put in the truck...
A couple of screws later it was all done...snapped the dash back in to see how I did. Not bad. It should work real good though.
Gage cluster finishing touches....
And today I started and pretty much finished work on my gage cluster, Here's what I did.....
I started off with a bare piece of 3/16" aluminum and shaped it to match my old cluster. Cut a few holes for gages, a few coats of paint and I had this.
Then I took the clear plastic cluster shield off of my old gage cluster, and cut off all the undesired plastic tha wasn't needed and I had this.
After all that was done I mounted the gages that I had into the cluster to test fit...... and it fits pretty good. I am missing the speedometer, but that can go in when i recieve it.
Now I place the aluminum cluster into my dash.....
Then cover it with the clear shield and bolt them both into the stock mounting position....
Put the dash back in, add the pillar gages in place and check it out.... It all worked out great. And trust me, this picture doesn't do it justice. It looks awesome. 8)
The interior is pretty much finished now except for a spot underneath my switch panel that needs a cover plate, and my center console which has been an ongoing process thats taking quite a while. It shall be impressive when its finished. 8)
11-11-2007, 09:08 AM
#57
On The Tree
Thread Starter
iTrader: (26)
Join Date: Oct 2005
Location: Windsor, Ontario, Canada
Posts: 116
Likes: 0
Received 0 Likes
on
0 Posts
Oh but I'm not done..
Well, still working on the interior of the truck, but progress is definitly being made! almost everything inside is finished ..... all but one thing. The center console. I'm trying my hardest to keep the interior as "Stock" looking as possible.... and using the factory center console was always my wish.
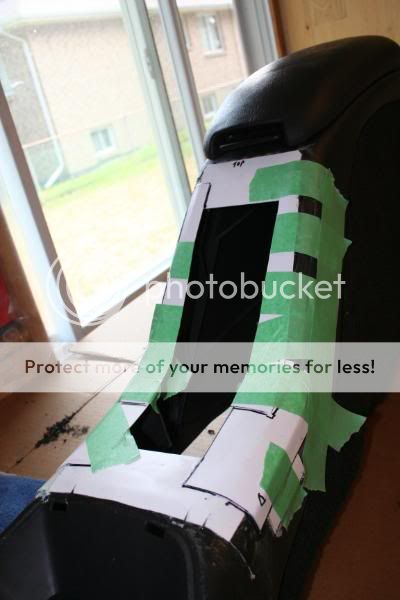
The idea is all mine, but the work I have to credit to Joe (AKA the "Riddler") I have not used any fiberglass products before, and I needed a bit of help here as I kind of messed up a bit cutting out my factory console. :oops:
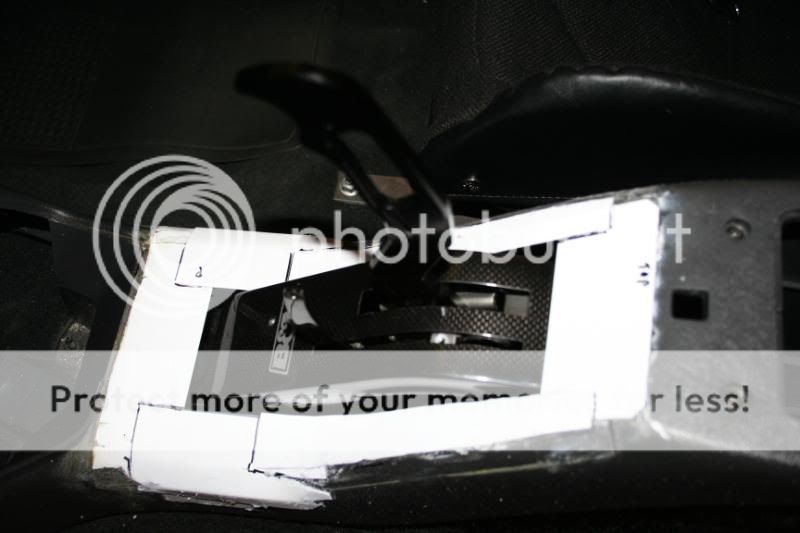
Here's my best picture of the console before anything was done.
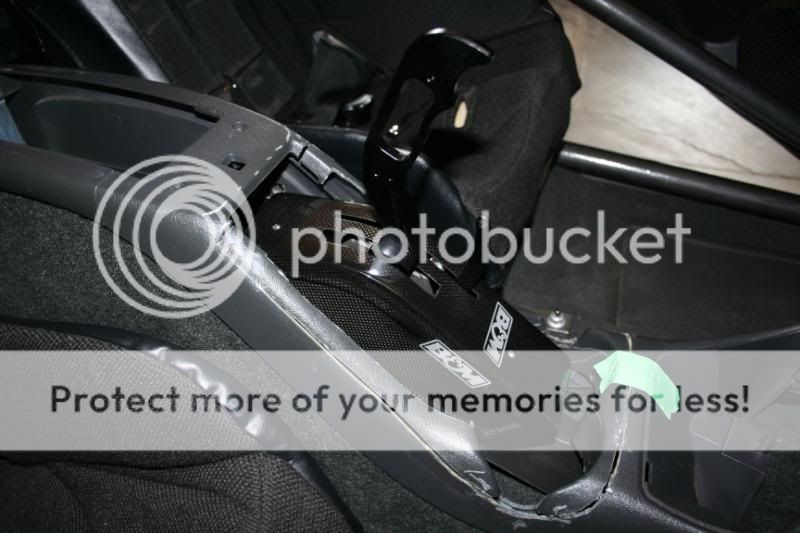
Now I wanted my B&M carbon fiber ratchet shifter to blend into this console perfectly, and the spot where my cd holder and cup holder was right in the way. And this is where i cut too much out as you can see.
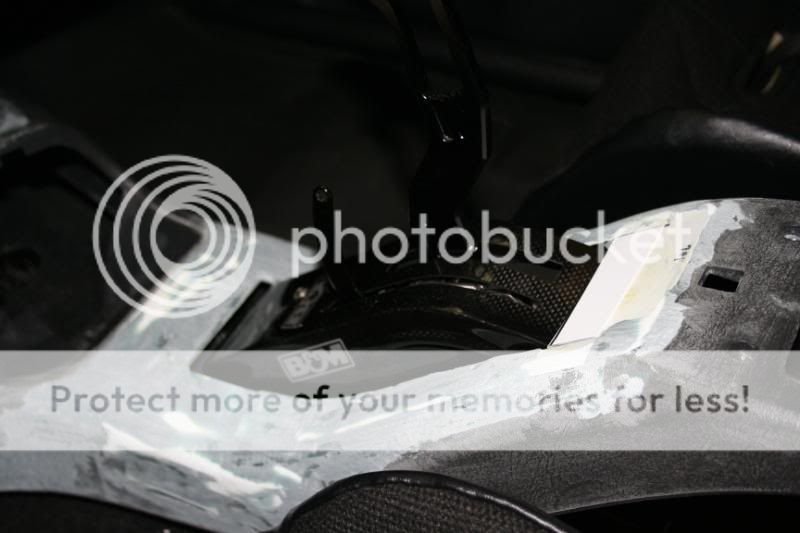

Now its far from being finished, but its getting there. Theres quite a bit of smoothing out to do, paint, and re-upholstering the bottom edges to blend in with the carpet.

I may have lost the cup holders... But I think I'll most likely spill whatever is in them!
I have more updates... But I'll let this one soak in for a while..... My engine combination has a minor change in it from last year....But nothing too far off course.
Well, still working on the interior of the truck, but progress is definitly being made! almost everything inside is finished ..... all but one thing. The center console. I'm trying my hardest to keep the interior as "Stock" looking as possible.... and using the factory center console was always my wish.
The idea is all mine, but the work I have to credit to Joe (AKA the "Riddler") I have not used any fiberglass products before, and I needed a bit of help here as I kind of messed up a bit cutting out my factory console. :oops:
Here's my best picture of the console before anything was done.
Now I wanted my B&M carbon fiber ratchet shifter to blend into this console perfectly, and the spot where my cd holder and cup holder was right in the way. And this is where i cut too much out as you can see.
Now its far from being finished, but its getting there. Theres quite a bit of smoothing out to do, paint, and re-upholstering the bottom edges to blend in with the carpet.
I may have lost the cup holders...
But I think I'll most likely spill whatever is in them! I have more updates... But I'll let this one soak in for a while..... My engine combination has a minor change in it from last year....But nothing too far off course.
11-11-2007, 10:29 AM
#59
On The Tree
Thread Starter
iTrader: (26)
Join Date: Oct 2005
Location: Windsor, Ontario, Canada
Posts: 116
Likes: 0
Received 0 Likes
on
0 Posts
Jim
11-11-2007, 11:29 AM
#60
On The Tree
Thread Starter
iTrader: (26)
Join Date: Oct 2005
Location: Windsor, Ontario, Canada
Posts: 116
Likes: 0
Received 0 Likes
on
0 Posts
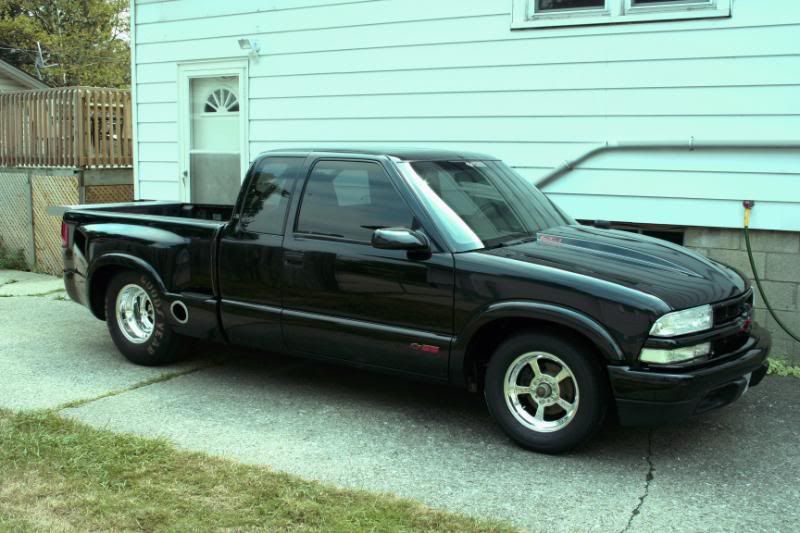
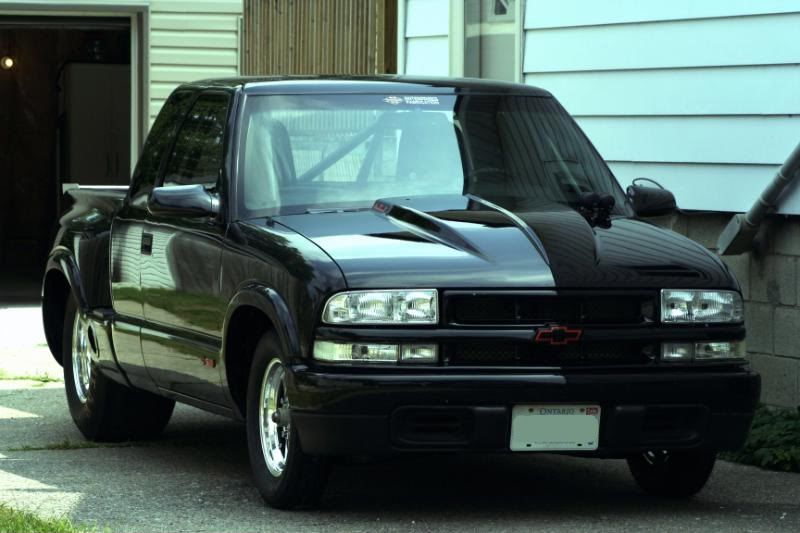
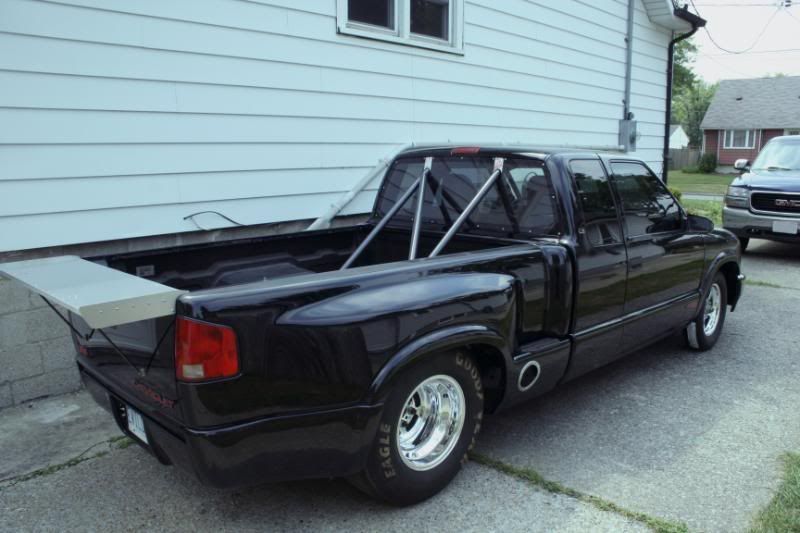
Ok..I found a few new update pictures for this thread. I have a picture of the finished console..carpeted and painted. looks nice I think.
And after that Iwas bored so I decided to push the truck out of the garage and give her a breath of fresh air. Its been 2 long years so far...just pickig away at things when i can.... So i cleaned her up and strapped the front end down a bit so it could look like it sits properly ( it still has no engine in it)
Heres some payoff pictures.... The only thing on the outside left to do is make an aluminum tonneau cover.
Soon to be updated is my engine build.... I have been buying up parts like mad as of late.... and I shall update my progress real soon.
Thanks,
Jim