

Ls2-4l80e Chevelle **UPDATED WITH PICS**
 07-14-2009, 08:11 AM
#141
Staging Lane
Join Date: Apr 2009
Posts: 89
Likes: 0
Received 0 Likes
on
0 Posts
I had no idea what you were talking about for a second then I realized you must be referring to my car blog. haha!
Yes, you have a convertible and I believe the mounts you are talking about doesn't exist in the coupe. It took me a while to figure out the energy suspension instruction sheet but once I understood the sort of cryptic diagram I believe i've got it right. Since I don't have a lift or any space to lift the body i'm putting off changing the other mounts until she drives. Thanks for the heads up!!!
Edit: I just looked at the instruction sheet again. The #4 location, as they call it, does require a different bushing setup. I haven't gotten there yet but again, thanks!
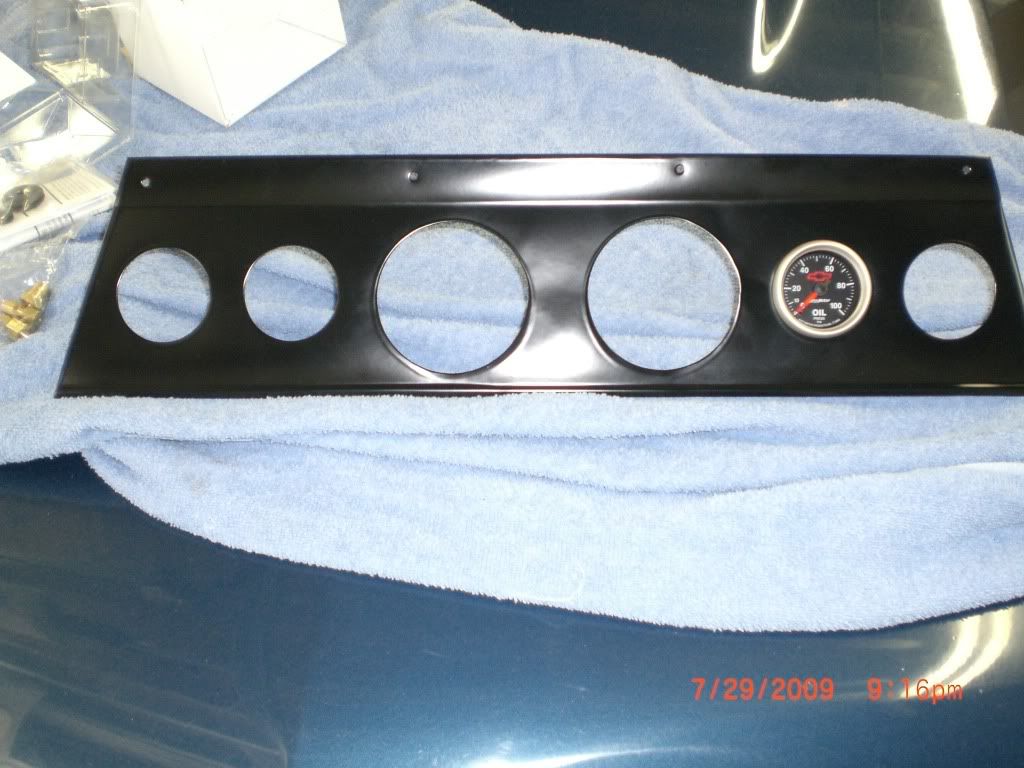
The dash panel is home made. I realized you can fit a flat piece of 1/8" alum back there nicely. I drilled the holes and wrapped with BMW felt material and used simple Equus gauges. This is sort of an issue right now because I can't decide how to retrofit for the LSx PCM digital output. A buddy retrofitted an S2000 digital gauge into his NSX and the outcome was awesome. It's more $$ than i'm comfortable with I think. I can find more pics if you're interested. It took me about 3hrs of work.
So on to the mounts... I know pist0lpete is using the same combo I currently have on the car. I'm basically mimicking his setup more or less but I do think my mounts aren't as high as his (still trying to fig this out). I'm using the factory 2002 F-body manifolds (which have been great for fitment) and the stock F-body oil pan which requires some TLC everytime I drop her in. However, my biggest problem now is my alternator to GC steering box clearance. I ordered a Borgeson U-joint in place of the rag joint but the alternator is still only 1/8" away from the box. I still have to center the motor about 1/4" too. It's going to hit. My only option is to raise the motor about 1/4" which will give me some more clearance on the oil pan/crossmember for that little bit of peace of mind. Then I have to figure out if my trans tunnel has enough room and if my pinion angle will still be ok.
I've still got a lot of work ahead!!!
Yes, you have a convertible and I believe the mounts you are talking about doesn't exist in the coupe. It took me a while to figure out the energy suspension instruction sheet but once I understood the sort of cryptic diagram I believe i've got it right. Since I don't have a lift or any space to lift the body i'm putting off changing the other mounts until she drives. Thanks for the heads up!!!
Edit: I just looked at the instruction sheet again. The #4 location, as they call it, does require a different bushing setup. I haven't gotten there yet but again, thanks!
The dash panel is home made. I realized you can fit a flat piece of 1/8" alum back there nicely. I drilled the holes and wrapped with BMW felt material and used simple Equus gauges. This is sort of an issue right now because I can't decide how to retrofit for the LSx PCM digital output. A buddy retrofitted an S2000 digital gauge into his NSX and the outcome was awesome. It's more $$ than i'm comfortable with I think. I can find more pics if you're interested. It took me about 3hrs of work.
So on to the mounts... I know pist0lpete is using the same combo I currently have on the car. I'm basically mimicking his setup more or less but I do think my mounts aren't as high as his (still trying to fig this out). I'm using the factory 2002 F-body manifolds (which have been great for fitment) and the stock F-body oil pan which requires some TLC everytime I drop her in. However, my biggest problem now is my alternator to GC steering box clearance. I ordered a Borgeson U-joint in place of the rag joint but the alternator is still only 1/8" away from the box. I still have to center the motor about 1/4" too. It's going to hit. My only option is to raise the motor about 1/4" which will give me some more clearance on the oil pan/crossmember for that little bit of peace of mind. Then I have to figure out if my trans tunnel has enough room and if my pinion angle will still be ok.
I've still got a lot of work ahead!!!
RYU-make sure there is 2 body mounts that are not as deep as the rest -they go under the front seats-my kit didnt provide them as i learned the hard way.is that a haneline dash panel?as for the mounts , i tried every combo and ended up using the combo with the shorter mounts with a little spacing- none of the taller mounts worked out forone reason or another- where did you get the battery terminal blocks? thanks JOHN
Last edited by RYU; 07-14-2009 at 08:18 AM.


 07-14-2009, 07:14 PM
#144
Staging Lane
Join Date: Apr 2009
Posts: 89
Likes: 0
Received 0 Likes
on
0 Posts
Are you talking about the distribution "t" that's to the right of this picture (not shown)?
I took this pic because I was uncomfortable with the UCA resting on the brake lines in the "at rest" position. Seems like there is a lot of load on there with a compressed spring fully seated.
I also did a big picture dump on my blog so if you need more pics of something let me know.
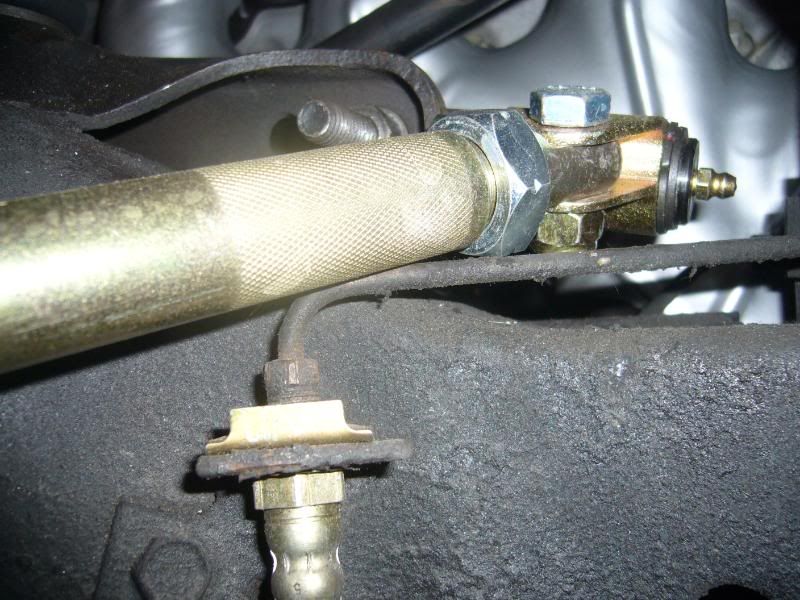
I took this pic because I was uncomfortable with the UCA resting on the brake lines in the "at rest" position. Seems like there is a lot of load on there with a compressed spring fully seated.
I also did a big picture dump on my blog so if you need more pics of something let me know.
07-14-2009, 10:15 PM
#145
TECH Enthusiast
Thread Starter

Yes the "t" toward the right of your pic. if you get a chance . I wasnt able to find the mounts tonight but from my recollection those mounts werent even an option--whatever combinations i used it was always with either of the first two frame mounts ( with the offset mounting tabs. as a reference how far is your pass. side head from the firewall? JOHN
07-14-2009, 11:25 PM
#146
Staging Lane
Join Date: Apr 2009
Posts: 89
Likes: 0
Received 0 Likes
on
0 Posts
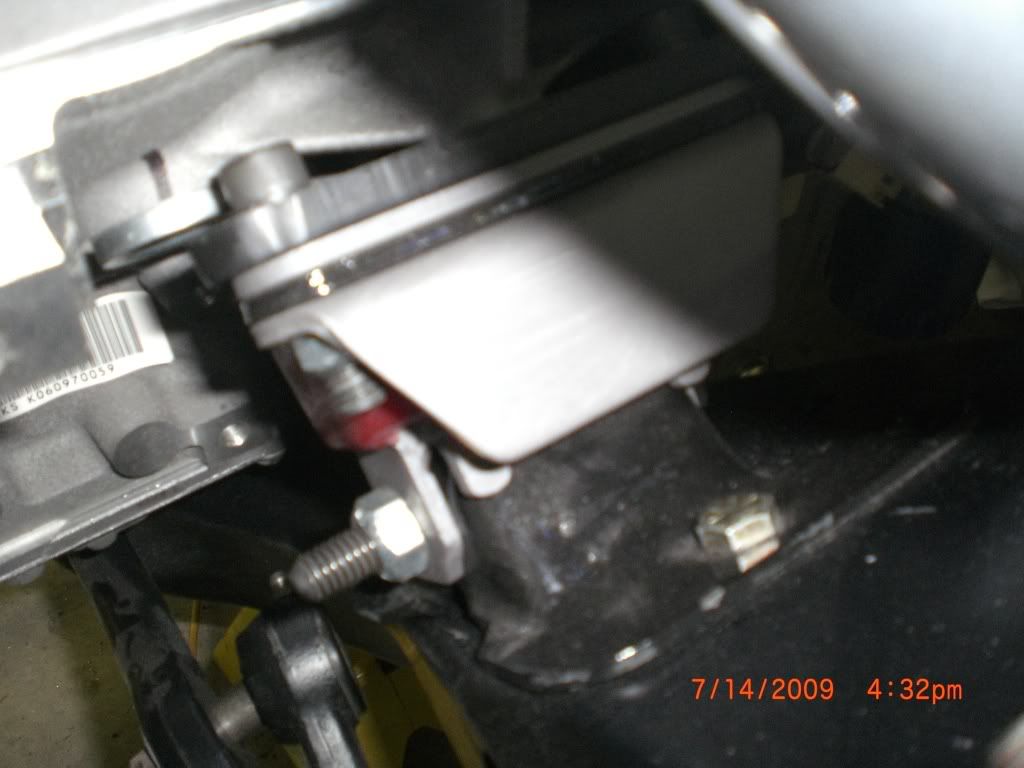
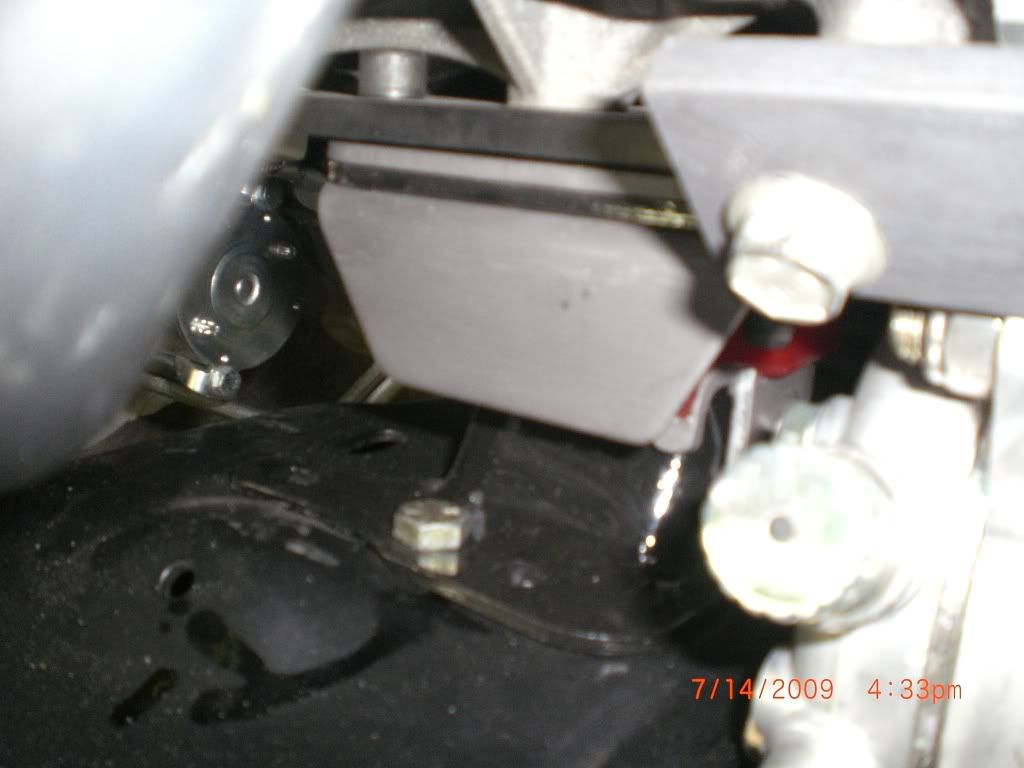
I just got home so it might be too late to go out and take pictures. I hope to have them tomorrow. Are you checking for fitment? My engine is hovering right now so it's not really seated. Not sure if that matters for this pic. I also looked at my camera... I don't have any angles that show the t-fitting unfortunately.
Can I ask if you can recall what type of issues you encountered with that mount? Reason I ask is that I will still probably need to raise my motor and I need to know if your issues were with added height or was it specifically with the fitment of those mounts. It sounds like you had problems with the mounting holes and not really the height?
Can I ask if you can recall what type of issues you encountered with that mount? Reason I ask is that I will still probably need to raise my motor and I need to know if your issues were with added height or was it specifically with the fitment of those mounts. It sounds like you had problems with the mounting holes and not really the height?
Yes the "t" toward the right of your pic. if you get a chance . I wasnt able to find the mounts tonight but from my recollection those mounts werent even an option--whatever combinations i used it was always with either of the first two frame mounts ( with the offset mounting tabs. as a reference how far is your pass. side head from the firewall? JOHN
07-15-2009, 07:06 AM
#147
TECH Enthusiast
Thread Starter
the "t" pic is so i can try to order some stock lines that have to fit into a custom application, look on page 6 post 104 , 6 th pic down of my thread. there is a decent pic of the mount setup.I'll snap a few today. what trans are you using? that will make a difference , so will your steering linkage. i tried to keep the eng. as low as possible but the steering was the overiding factor in the whole picture. JOHN


 07-15-2009, 11:32 AM
#149
Staging Lane
Join Date: Apr 2009
Posts: 89
Likes: 0
Received 0 Likes
on
0 Posts
i'm about 3/4-1" from firewall on pass side. i just got a borgeson u-joint to replace the rag joint but had to clearance the GC steering box some. Still have some clearance problem though. Im' using the F-body alternator stock location.
hope these pics help.
hope these pics help.
07-16-2009, 10:52 AM
#150
TECH Enthusiast
Thread Starter
ryu , my pass. side head is 1 inch from the firewall. i found the mounts , and also engine mounts i didnt use ,and another set of mounts
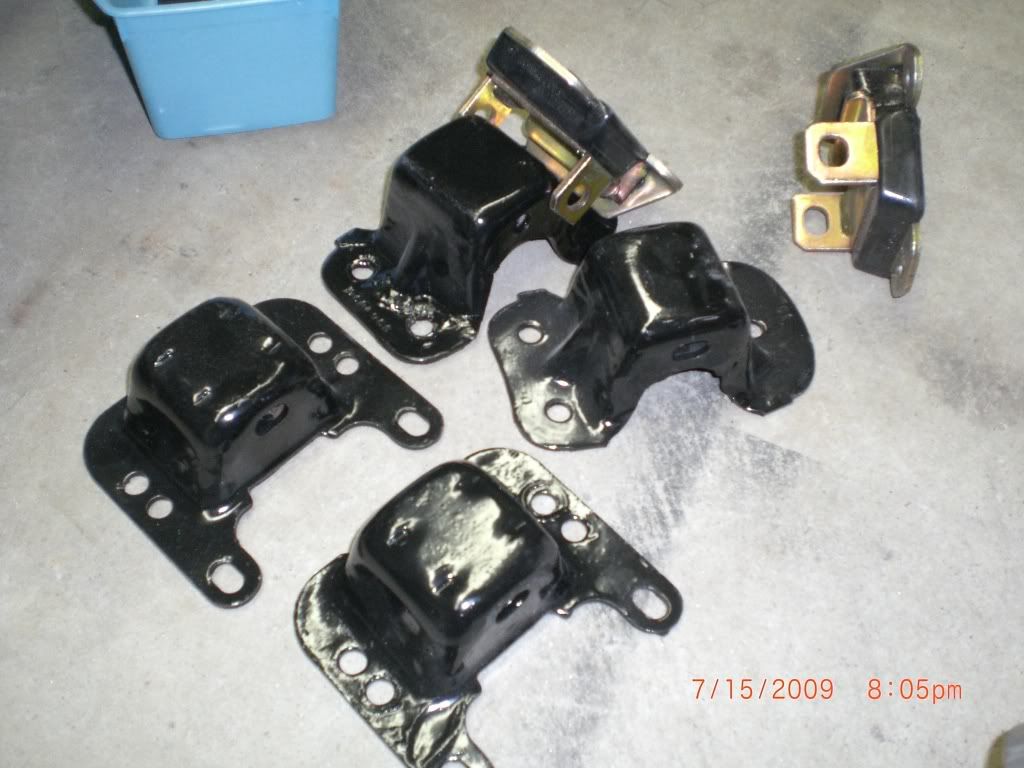
20$ for any pair of items plus shipping - the tall set looks like it was re-welded ( on the left bottom ) I por 15-ed them JOHN
what trans are you using ? thanks for the brake pic JOHN
20$ for any pair of items plus shipping - the tall set looks like it was re-welded ( on the left bottom ) I por 15-ed them JOHN
what trans are you using ? thanks for the brake pic JOHN
07-16-2009, 11:00 AM
#151
Staging Lane
Join Date: Apr 2009
Posts: 89
Likes: 0
Received 0 Likes
on
0 Posts
4L60e, the baby one.
You've got PM!
You've got PM!
ryu , my pass. side head is 1 inch from the firewall. i found the mounts , and also engine mounts i didnt use ,and another set of mounts
20$ for any pair of items plus shipping - the tall set looks like it was re-welded ( on the left bottom ) I por 15-ed them JOHN
what trans are you using ? thanks for the brake pic JOHN
20$ for any pair of items plus shipping - the tall set looks like it was re-welded ( on the left bottom ) I por 15-ed them JOHN
what trans are you using ? thanks for the brake pic JOHN
07-21-2009, 08:39 AM
#154
TECH Enthusiast
Thread Starter
Started car for first time, almost 2 1/2 years after purchase of motor, we cranked about 6 times with no fuel to get oil pressure. then connected fuel pump and it fired right up - what a nice feeling! had to fix a few fuel leaks by tightening up some of the over 20 fittings ,exhaust is temped out , hopefully I'll get that done next week . re installed rear, and driveshaft, homemade trans fittings did not leak, homemade ac brackets are working too . will fill rear today, and try to get shifter mounted and make hole for trans harness and shifter cable ( I had speartech make the trans harness to not go through the firewall to keep it neat and the trans is too close to the tunnel for the harness to pass) rad. hoses are temp until I find the right fitting rubber hoses , they were on sale at summit .need to do something with the steam line.JOHN
07-26-2009, 02:30 PM
#155
Launching!

Join Date: Jan 2008
Posts: 232
Likes: 0
Received 0 Likes
on
0 Posts
Jonh, I would like to get u the pic of the break line, but the car is taped off ready for paint and I cant get to it. I'll send u a pic as soon as it comes out. Can u send me a link to the web site for those gauges and the price u paid for them. Thanks
07-27-2009, 07:33 AM
#156
TECH Enthusiast
Thread Starter
I'll snap a pic later of 1 of the guages when I get home ( I only bought 1 so far).You can go on summit racing .com and look up autometer sport comp ll . I'll link it to you later . JOHN
 07-30-2009, 04:24 PM
#159
Staging Lane
Join Date: Apr 2009
Posts: 89
Likes: 0
Received 0 Likes
on
0 Posts
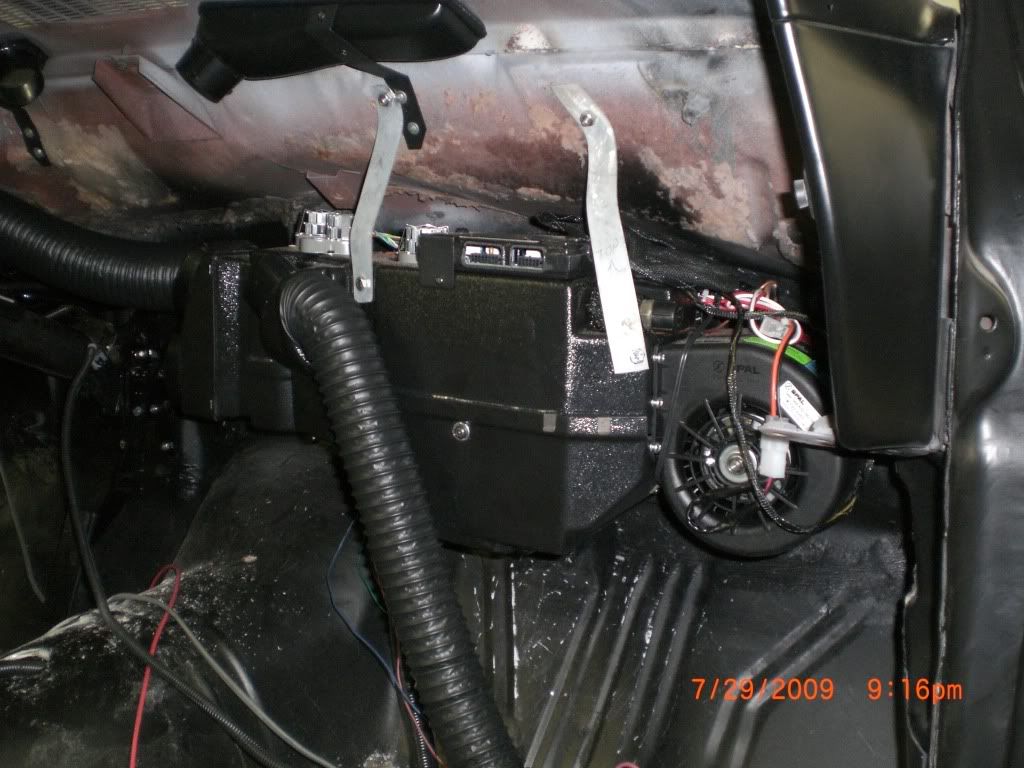
If you don't mind i'd really be interested to see how the other side of this looks like. What did you do with the old blower hole and how do the Vintage air plumbing route?
I have a big blower hole i'm not sure what to do with yet and plan to go with a Vintage Air Hybrid sometime in the future
07-30-2009, 04:51 PM
#160
TECH Enthusiast
Thread Starter
look on page 6 of this thread - post # 110 theres some pics of the firewall. I'll use a bulkhead fitting or route the hoses through the old hole for the blower, if i use the old hole I'll have to seal it up good being that it will be exposed to weather through the cowl. it is tight where the vintage air unit is. JOHN