



1970 GTO Version 2.0



Thread Starter
Joined: Mar 2003
Posts: 10,617
Likes: 1,883
From: Little Austin
Well...just like many of you, I can't seem to leave it alone. I am all moved to my new place and I finally have a garage again. I decided to do a little tinkering with the sub and did a little experiment...see link...
http://www.pro-touring.com/threads/1...Sub-experiment
After goofing around with the MicroSub, I decided to really take a look with my existing set-up. I discovered that the rear package tray was not exactly solid. The "professionals" that installed the box in the first place, cut out a huge square section right out of the middle, which really weakened the package tray. This isn't so much of an issue, unless there is a 50 pound box with a substantial sub attached to it. I am quite certain that the whole package tray used to move around quite a bit, which isn't exactly ideal. Also, I found that the box itself wasn't well made. Part of it was made of MDF, while another part was made of regular particle board. Also, instead of installing a proper terminal, they simply made a hole in the box, passed the wire through, and called it a day. No silicone...nothing...not even gum.
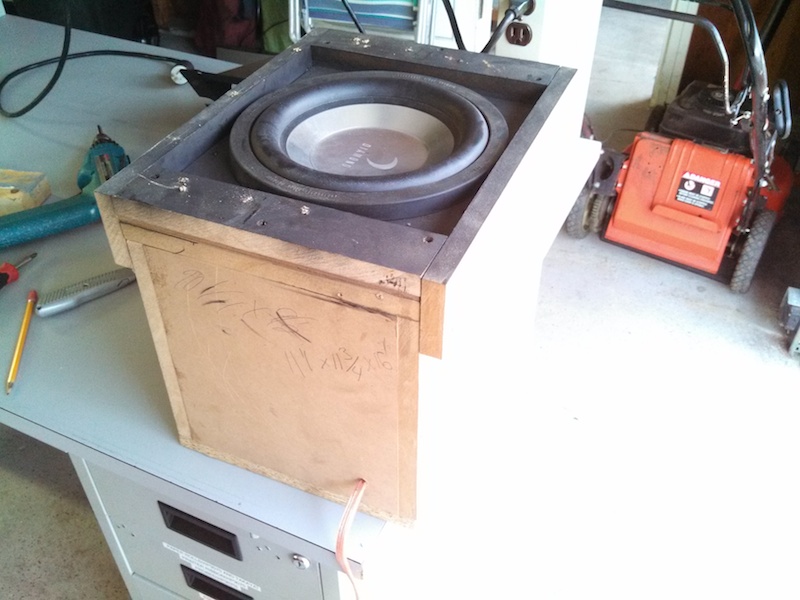
On a brighter note, once I pulled the sub, I realize that it was a Diamond Audio M6...and not a M3 as I originally thought. This was the top of the line sub back in the day and has dual 500w 4 ohm voice coils.
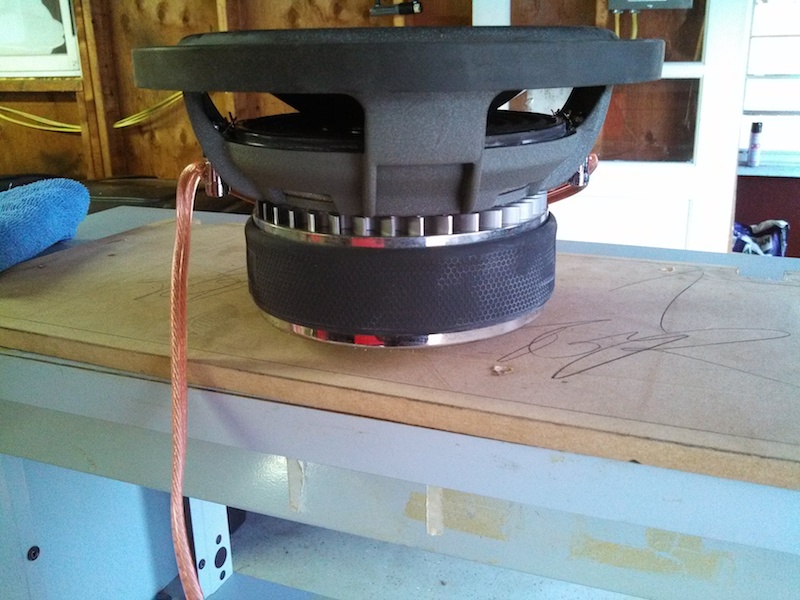
At least they wired it properly for a 2 ohm load. The other good news is that the box is the right size for the driver. Diamond Audio designed these subs to work in fairly small sealed enclosures, around .75 cubic feet. I took some measurements and after a few calculations got .72 cubic feet, after taking the volume of the driver into account. The good news is that with a little TLC, I think I can reuse this box. It is just the right size to fit on top of the hump that GM A-bodies have in the trunk and obviously the volume is right.
So now the questions...
Would it be better to point the driver towards the rear?
Would it be better to point the driver towards the rear seat back?
Any suggestions for anchoring this thing?
I am also quite certain that I am not driving this bad boy with enough power. Right now it is getting 350 watts, and that's just not enough. I bet the driver isn't even broken in.
I did pick up a used Xtant 601 a while back, so I am tempted to use it for the sub.
All comments and suggestions are welcome...
Andrew
http://www.pro-touring.com/threads/1...Sub-experiment
After goofing around with the MicroSub, I decided to really take a look with my existing set-up. I discovered that the rear package tray was not exactly solid. The "professionals" that installed the box in the first place, cut out a huge square section right out of the middle, which really weakened the package tray. This isn't so much of an issue, unless there is a 50 pound box with a substantial sub attached to it. I am quite certain that the whole package tray used to move around quite a bit, which isn't exactly ideal. Also, I found that the box itself wasn't well made. Part of it was made of MDF, while another part was made of regular particle board. Also, instead of installing a proper terminal, they simply made a hole in the box, passed the wire through, and called it a day. No silicone...nothing...not even gum.
On a brighter note, once I pulled the sub, I realize that it was a Diamond Audio M6...and not a M3 as I originally thought. This was the top of the line sub back in the day and has dual 500w 4 ohm voice coils.
At least they wired it properly for a 2 ohm load. The other good news is that the box is the right size for the driver. Diamond Audio designed these subs to work in fairly small sealed enclosures, around .75 cubic feet. I took some measurements and after a few calculations got .72 cubic feet, after taking the volume of the driver into account. The good news is that with a little TLC, I think I can reuse this box. It is just the right size to fit on top of the hump that GM A-bodies have in the trunk and obviously the volume is right.
So now the questions...
Would it be better to point the driver towards the rear?
Would it be better to point the driver towards the rear seat back?
Any suggestions for anchoring this thing?
I am also quite certain that I am not driving this bad boy with enough power. Right now it is getting 350 watts, and that's just not enough. I bet the driver isn't even broken in.
I did pick up a used Xtant 601 a while back, so I am tempted to use it for the sub.
All comments and suggestions are welcome...
Andrew
I have put a few sub in cars back in the day and the reason we mounted the speakers pointed backward at the trunk was to get more noise outside the vehicle. In the gto I guess I would try it different positions and test drive it before mounting it for good. I've never heard sub's in older cars. The trunks are allot bigger. It would also make a difference depending on your setup. Sub type, amp, and even your treble bass and amp boost or input. I had a pair of 12s that sounded very distorted pointing at the back of the seat and it got too loud too fast. Pointed backward sounded best in the drivers seat and straight up the reverberated off the roof.
Thread Starter
Joined: Mar 2003
Posts: 10,617
Likes: 1,883
From: Little Austin
I have put a few sub in cars back in the day and the reason we mounted the speakers pointed backward at the trunk was to get more noise outside the vehicle. In the gto I guess I would try it different positions and test drive it before mounting it for good. I've never heard sub's in older cars. The trunks are allot bigger. It would also make a difference depending on your setup. Sub type, amp, and even your treble bass and amp boost or input. I had a pair of 12s that sounded very distorted pointing at the back of the seat and it got too loud too fast. Pointed backward sounded best in the drivers seat and straight up the reverberated off the roof.
Andrew
Thread Starter
Joined: Mar 2003
Posts: 10,617
Likes: 1,883
From: Little Austin
In short, FML.
I spent about 6 hours doing this:
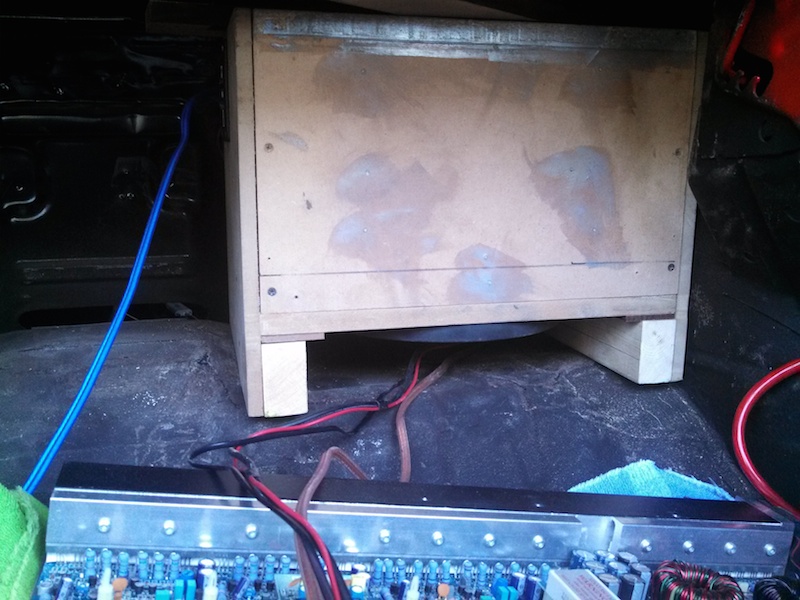
Only to try this afterwards:
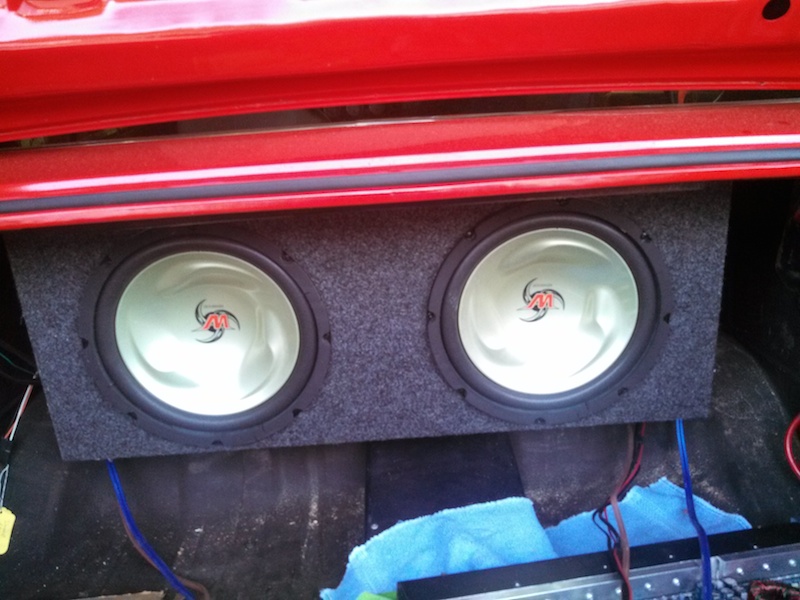
What look like cheap *** 12" Kenwoods totally rocked...If only I had done that first...as I said, FML.
Andrew
I spent about 6 hours doing this:
Only to try this afterwards:
What look like cheap *** 12" Kenwoods totally rocked...If only I had done that first...as I said, FML.
Andrew
Thread Starter
Joined: Mar 2003
Posts: 10,617
Likes: 1,883
From: Little Austin
I scratched the fiberglass box idea. Instead, I decided that it would be simpler and easier to build a shelf behind the seat that would support the sub on the passenger side and allow for space for the amp on the driver's side.
Here is what I came up with. It isn't super pretty, but it will do the job. The trunk of my car was never meant to be a show piece, it is there to haul crap.
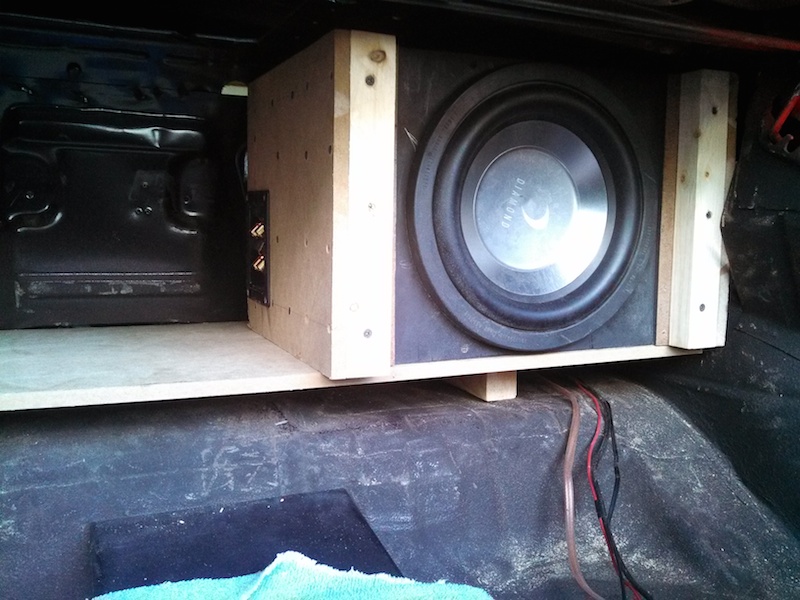
The shelf is 1/2" MDF and is supported by the hump in the middle and some trimmed down 2x4s on the edges. The 2x4s will be attached to the trunk divider and the sub will be anchored to the bottom of the package tray. Should be pretty solid.
Here you can see where the amp will go.
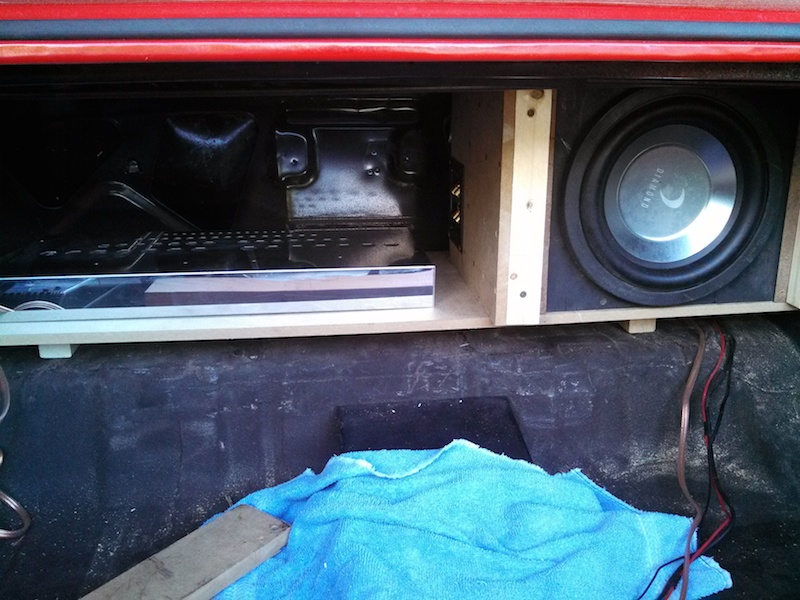
There will be ample space all around it for cooling and all the wires will come in from behind and underneath and should look pretty clean.
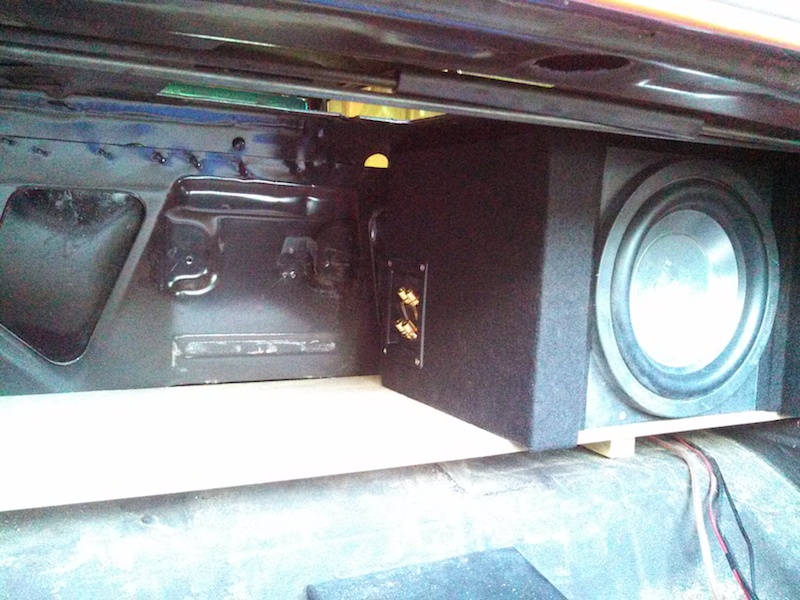
I even decided that I should make everything a little prettier and wrapped the sub in black felt and I will do the same for the shelf.
Stay tuned for more, as I just placed an order with Don at Sound Deadener Showdown
This is turning into sub/interior sound deadener redo...
Any comments and suggestions are welcome as always.
Andrew
Here is what I came up with. It isn't super pretty, but it will do the job. The trunk of my car was never meant to be a show piece, it is there to haul crap.
The shelf is 1/2" MDF and is supported by the hump in the middle and some trimmed down 2x4s on the edges. The 2x4s will be attached to the trunk divider and the sub will be anchored to the bottom of the package tray. Should be pretty solid.
Here you can see where the amp will go.
There will be ample space all around it for cooling and all the wires will come in from behind and underneath and should look pretty clean.
I even decided that I should make everything a little prettier and wrapped the sub in black felt and I will do the same for the shelf.
Stay tuned for more, as I just placed an order with Don at Sound Deadener Showdown
This is turning into sub/interior sound deadener redo...
Any comments and suggestions are welcome as always.
Andrew
Thread Starter
Joined: Mar 2003
Posts: 10,617
Likes: 1,883
From: Little Austin
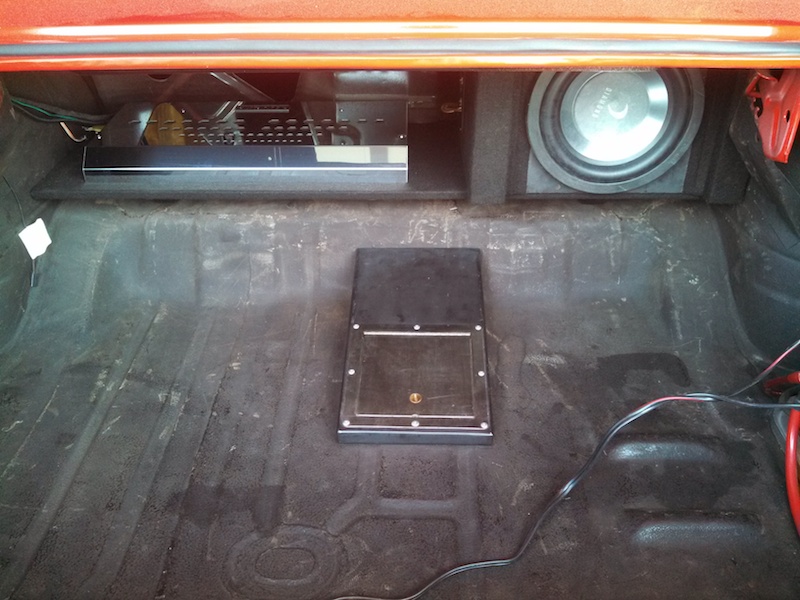
Today I wrapped up the sub-woofer installation. It's really a pain to work so deep inside the trunk. Luckily I had the rear seat out and I could get at some of what I needed to do from inside the passenger compartment.
Here is a shot of the shelf after I wrapped it with some felt:
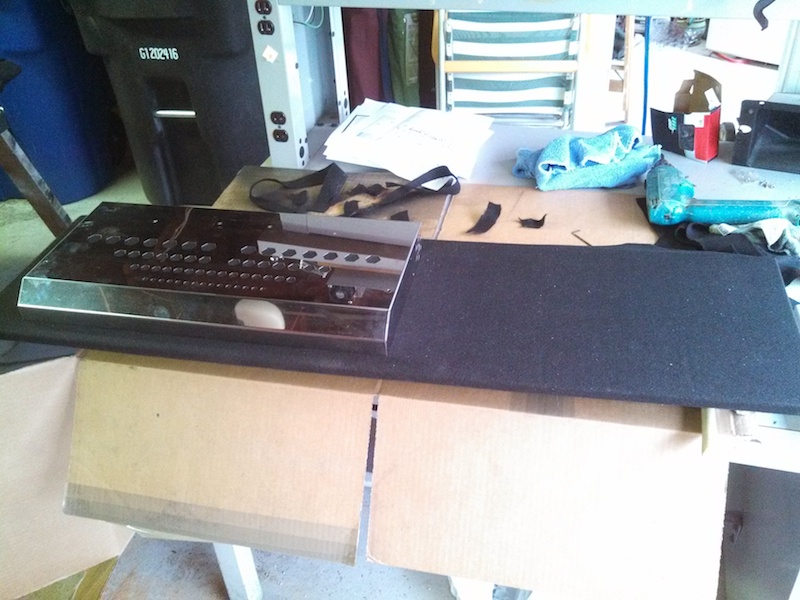
All of the wiring for the amp goes under the shell and is tucked towards the back.
Here is the final product.
I've also been playing around with making videos for those of you that prefer that sort of thing...
All questions and comments are welcome as always.
Andrew
Here is a shot of the shelf after I wrapped it with some felt:
All of the wiring for the amp goes under the shell and is tucked towards the back.
Here is the final product.
I've also been playing around with making videos for those of you that prefer that sort of thing...
All questions and comments are welcome as always.
Andrew
Last edited by Project GatTagO; Jul 25, 2014 at 06:07 PM.
LS1 Tech Stories
The Best V8 Stories One Small Block at Time

Gas Monkey Built a 6-Wheel Ferrari Testarossa With a Corvette LT4 Engine
Verdad Gallardo
7 Most Reliable High-Performance Engines GM Has Ever Built
Verdad Gallardo
Amazing '71 Camaro Restomod Is Modern Muscle Car Under the Skin
Verdad Gallardo
6 Common C5 Corvette Failures and What's Involved In Repairing Them
Pouria Savadkouei
Retro Modern Bandit Pontiac Trans AM Comes With Burt Reynolds' Autograph
Verdad Gallardo
Top 10 Greatest Cadillac V Series Performance Models Ever, Ranked
Pouria Savadkouei
Top 10 Most Powerful Chevy Trucks Ever Made!

Hennessey's New Supercharged Silverado ZR2 Has 700 HP
Verdad Gallardo
Coachbuilt N2A Anteros Is an LS2-Powered C6 Corvette In Italian Clothes
Verdad Gallardo Thread Starter
Joined: Mar 2003
Posts: 10,617
Likes: 1,883
From: Little Austin
Yesterday I tackled another project. Since I removed the subwoofer from under the rear package tray, I was not faced with having a hole in the rear package tray trim piece. I had some nice vinyl that I had purchased a while back, so I decided to cover the package tray with it. The end result wasn't perfect, but I think it turned out pretty well..
Follow along:
Andrew
Follow along:
Andrew

Looks good.
I've done what you are doing several times. Next time I would use fiberglass resin on the entire package tray, sand it smooth (using body filler if necessary) and then cover the result in vinyl. This would have eliminated the visible effects of your previous subwoofer hole. Vinyl is much like paint - it doesn't hide anything very well except a previous colour.
I've done what you are doing several times. Next time I would use fiberglass resin on the entire package tray, sand it smooth (using body filler if necessary) and then cover the result in vinyl. This would have eliminated the visible effects of your previous subwoofer hole. Vinyl is much like paint - it doesn't hide anything very well except a previous colour.
Thread Starter
Joined: Mar 2003
Posts: 10,617
Likes: 1,883
From: Little Austin
Looks good.
I've done what you are doing several times. Next time I would use fiberglass resin on the entire package tray, sand it smooth (using body filler if necessary) and then cover the result in vinyl. This would have eliminated the visible effects of your previous subwoofer hole. Vinyl is much like paint - it doesn't hide anything very well except a previous colour.
I've done what you are doing several times. Next time I would use fiberglass resin on the entire package tray, sand it smooth (using body filler if necessary) and then cover the result in vinyl. This would have eliminated the visible effects of your previous subwoofer hole. Vinyl is much like paint - it doesn't hide anything very well except a previous colour.
I did fill in the actually hole, but there was a small gap there. It was definitely a learning experience since I have never done anything like that before.
Andrew
You've been around long enough to know these cars are never done. 
Thread Starter
Joined: Mar 2003
Posts: 10,617
Likes: 1,883
From: Little Austin
Thread Starter
Joined: Mar 2003
Posts: 10,617
Likes: 1,883
From: Little Austin
As always, little projects tend to take on a life of their own. What started out as a simple subwoofer reconfiguration turned into a rear seat sound deadener project as well.
As I said before, I used products from www.sounddeadenershowdown.com. The methodology that they describe involves a two step process.
First, the metal is prepared using CLD tiles to deaden the metallic ringing that is common when raw steel is tapped or banged. The CLD tiles have an aluminum top and the bottom is a very sticky butyl material. The goal is to apply it to about 25-30% of the panel around it's center mass.
Second, a layer of closed cell foam is applied over the whole area and on top of that mass loaded vinyl is laid to block any sound from penetrating into the passenger compartment.
I applied the CLD tiles all over my package tray, the rear seat/trunk separator panel, and the area under the rear seat. Then I started at the top of the package tray and went all the way to the front of the rear seats with the foam and the MLV. The MLV is hard to work with as it does not mold well and it only bends in one direction. On the other hand, MLV can be bonded (almost welded) to itself using special vinyl adhesive. Using the adhesive I was able to form a solid sheet all the way from the top of the package tray and bond it solidly to the vinyl that was already there which stopped at the rear seat area.
Here is the finished product:
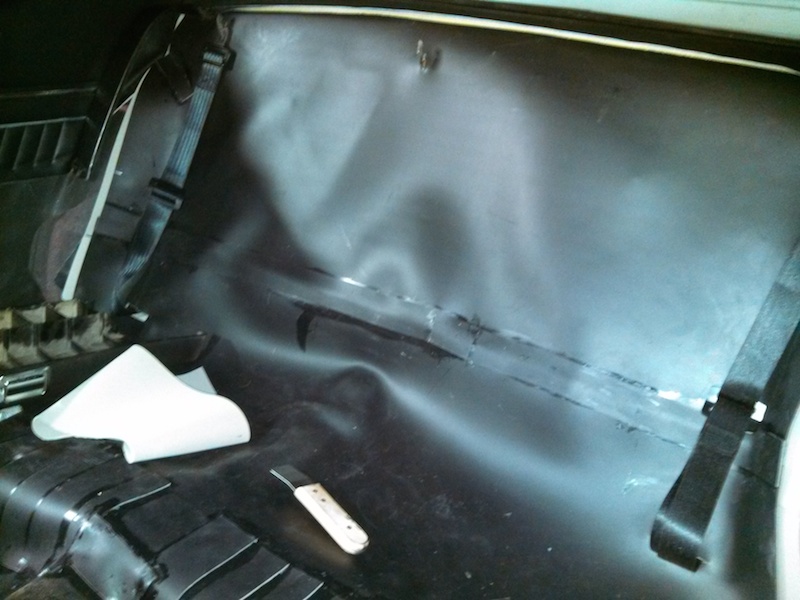
Ideally, I would have also covered the side panels the same way, but I discovered that the foam and vinyl add thickness which creates fitment problems with all the trim panels. Ultimately I decided that this was as far as I was going to go for now.
First driving impression is that what I did definitely reduced the driveline noise that was penetrating the cabin. This made for much quieter driving experience when going down the highway.
Andrew
As I said before, I used products from www.sounddeadenershowdown.com. The methodology that they describe involves a two step process.
First, the metal is prepared using CLD tiles to deaden the metallic ringing that is common when raw steel is tapped or banged. The CLD tiles have an aluminum top and the bottom is a very sticky butyl material. The goal is to apply it to about 25-30% of the panel around it's center mass.
Second, a layer of closed cell foam is applied over the whole area and on top of that mass loaded vinyl is laid to block any sound from penetrating into the passenger compartment.
I applied the CLD tiles all over my package tray, the rear seat/trunk separator panel, and the area under the rear seat. Then I started at the top of the package tray and went all the way to the front of the rear seats with the foam and the MLV. The MLV is hard to work with as it does not mold well and it only bends in one direction. On the other hand, MLV can be bonded (almost welded) to itself using special vinyl adhesive. Using the adhesive I was able to form a solid sheet all the way from the top of the package tray and bond it solidly to the vinyl that was already there which stopped at the rear seat area.
Here is the finished product:
Ideally, I would have also covered the side panels the same way, but I discovered that the foam and vinyl add thickness which creates fitment problems with all the trim panels. Ultimately I decided that this was as far as I was going to go for now.
First driving impression is that what I did definitely reduced the driveline noise that was penetrating the cabin. This made for much quieter driving experience when going down the highway.
Andrew

Thread Starter
Joined: Mar 2003
Posts: 10,617
Likes: 1,883
From: Little Austin
Thread Starter
Joined: Mar 2003
Posts: 10,617
Likes: 1,883
From: Little Austin
I shot some video that shows more of the installation process of the sound deadener. The video is a little longer than I wanted, but it is what it is...
Andrew
Andrew
Thread Starter
Joined: Mar 2003
Posts: 10,617
Likes: 1,883
From: Little Austin

On The Tree
Joined: Oct 2010
Posts: 179
Likes: 0
From: Kansas City
Still trying to decide if I'm going to go for your Viper red paint, or try something different.