


1970 GTO Version 2.0
Thread Starter
Joined: Mar 2003
Posts: 10,615
Likes: 1,883
From: Little Austin
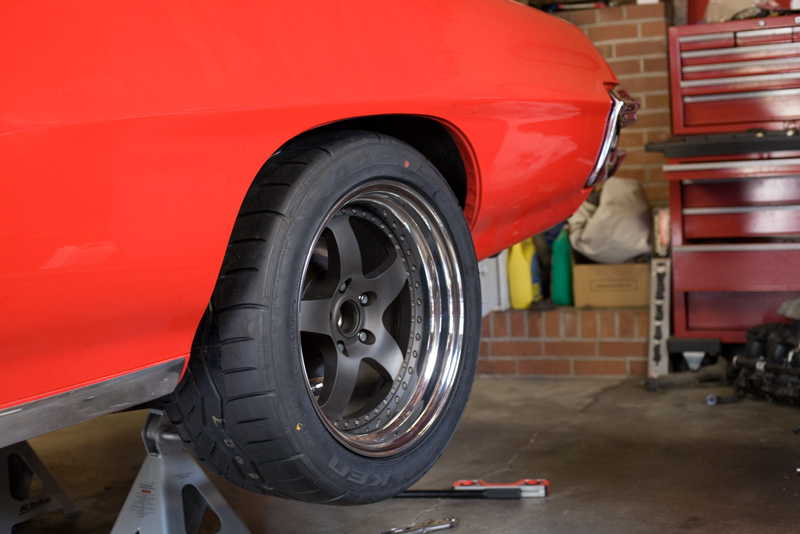
At 4pm this afternoon I showed up at the polisher's place and the wheels were done, as promised. I have to admit the results were better than I imagined. This guy is simply amazing. His name is Jeff Smith and it turns out he did all of the brushed aluminum work on Bob Johnson's Cuda. I am pretty sure that they weren't this nice when I first got the wheels. I got them home, masked off the front, and spray painted the inner hoop silver. I figured that having a painted inner rim will be easier to clean than a plain aluminum one. After painting I applied a generous coating of wax to the polished surface to seal them a little bit. After that it was time to assemble the wheels. I lined up the center according to the marks that I made before taking the wheels apart. This way the wheels go together exactly the same way with the center going back to its rim. I used a little anti-seize on the splined section of the bolts and drove them through the center and the rim. Then I flipped the wheel over and started torquing the nuts in a star pattern. It took about 2 hours to do one wheel but the results were well worth it. It's like a brand new wheel!


The little notch marks on the back are to keep track of the torque sequence. With 40 nuts to tighten, it is very easy to loose your place.
Andrew
The little notch marks on the back are to keep track of the torque sequence. With 40 nuts to tighten, it is very easy to loose your place.
Andrew
Wheels look great Andrew. A couple quick questions:
Is the charcoal color the only color for the centers or are lighter colors available?
Is the thickness of the coating enough to interfere with the mounting on the hub for hubcentric wheels?
Is the charcoal color the only color for the centers or are lighter colors available?
Is the thickness of the coating enough to interfere with the mounting on the hub for hubcentric wheels?
Thread Starter
Joined: Mar 2003
Posts: 10,615
Likes: 1,883
From: Little Austin
Today I assembled the rest of the wheels and had the tires mounted. I am very impressed with the Falken tires. Neither front wheels needed any weight. One rear tire needed .75 oz while the other balanced with only .50 oz. That is very impressive considering the size of the tires.
Andrew
I just read through 13 pages and damn was it worth it. Great project, no skimping on the details and the car looks amazing. Very impressive, keep up the good work! It's awesome to see the documentation of the project and I'm sure you are helping countless people with the information you are providing.
LS1 Tech Stories
The Best V8 Stories One Small Block at Time

6 Common C5 Corvette Failures and What's Involved In Repairing Them
Pouria Savadkouei
Retro Modern Bandit Pontiac Trans AM Comes With Burt Reynolds' Autograph
Verdad Gallardo
Top 10 Greatest Cadillac V Series Performance Models Ever, Ranked
Pouria Savadkouei
Top 10 Most Powerful Chevy Trucks Ever Made!

Hennessey's New Supercharged Silverado ZR2 Has 700 HP
Verdad Gallardo
Coachbuilt N2A Anteros Is an LS2-Powered C6 Corvette In Italian Clothes
Verdad Gallardo
Awesome K5 Blazer Restomod Comes With C7 Corvette Power
Verdad Gallardo
10 Camaros You Should Never Buy

10 LS Engine Myths That Refuse to Die
Verdad Gallardo Thread Starter
Joined: Mar 2003
Posts: 10,615
Likes: 1,883
From: Little Austin
I just read through 13 pages and damn was it worth it. Great project, no skimping on the details and the car looks amazing. Very impressive, keep up the good work! It's awesome to see the documentation of the project and I'm sure you are helping countless people with the information you are providing.
Shaun,
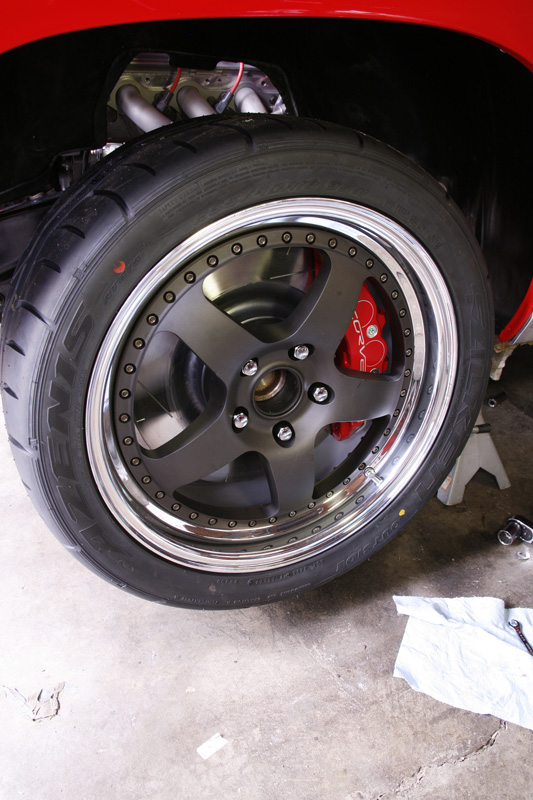
"MEAN" was the first word that came to mind. The dark wheels tie in nicely with the black interior.
Andrew


Teching In
Joined: Feb 2008
Posts: 48
Likes: 2
Andrew:
Followed the Goat w/ interest. I'm about to start a "crate motored LSx" 85 Monte SS project with 5 or 6 sp manual transmission. Thinking about using the GM Parts harness/controller. See you are using the GMPP harness kit which includes "drive by wire throttle control". Have you given any thought to creating a Cruise Control feature. If so, can you describe?
Followed the Goat w/ interest. I'm about to start a "crate motored LSx" 85 Monte SS project with 5 or 6 sp manual transmission. Thinking about using the GM Parts harness/controller. See you are using the GMPP harness kit which includes "drive by wire throttle control". Have you given any thought to creating a Cruise Control feature. If so, can you describe?

Thread Starter
Joined: Mar 2003
Posts: 10,615
Likes: 1,883
From: Little Austin
Andrew
I can't give you too much crap. I have had my frame finished for like 2 months now and haven't done a thing lately. Mainly I have been waiting on the body shop now. I am interested to see how the overall look turns out. I was thinking about having the centers of my torq thrust II wheels powder coated black before you posted yours. I really like it but I think I am going to go with different wheels and tires.
Thread Starter
Joined: Mar 2003
Posts: 10,615
Likes: 1,883
From: Little Austin
This morning I got my brake components from Kore3. Tobin at Kore3 has outstanding customer service and I am very pleased with the parts. I got C6 Z06 calipers, 14" DBA 4000 rotors, and Hawk HP Plus pads.
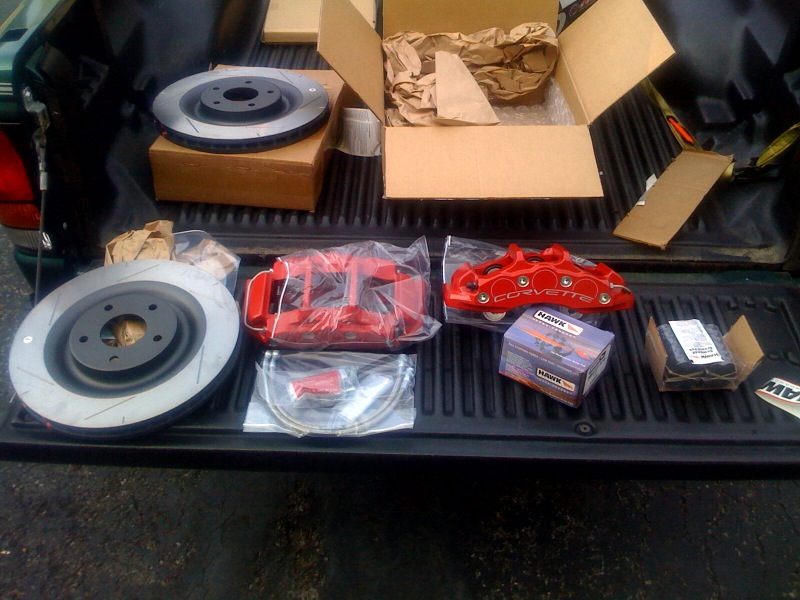
More pictures to come.
Andrew
More pictures to come.
Andrew
looks good andrew. What size (width,offset) is your front wheel and how is clearance with the those massive calipers. Im assuming you used the KORE3 template to check for clearance
Thread Starter
Joined: Mar 2003
Posts: 10,615
Likes: 1,883
From: Little Austin
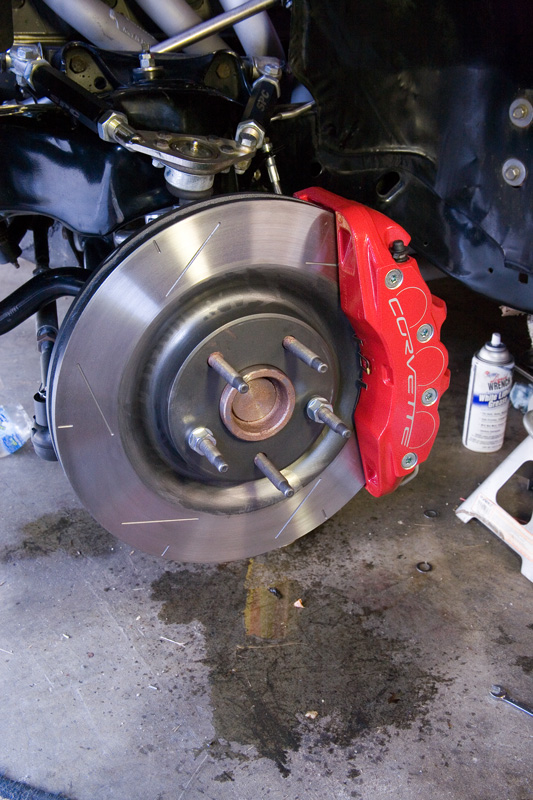
I drove it again this evening. In the morning I am going to get an alignment. The C6 Z06 brakes are very nice. I really like how the ATS spindles work with the OEM style brakes. Everything bolted together beautifully.

The car is sitting a little higher in the front now. This is due to the fact that my old spindles had a 2 inch drop compared to stock. I believe the ATS spindles are about an inch lower than stock. I was going to lower it, but I think I am going to keep it this way. It's nice not having to worry about any sort of rubbing with the tires. I also think that the springs will settle some over the winter.
Andrew
Thread Starter
Joined: Mar 2003
Posts: 10,615
Likes: 1,883
From: Little Austin
I measured the distance from the ground to the headers and right now it is 5". While the car would look a little better lowered, I think it is important to keep the car as practical as possible, without the danger of hurting parts. So for now, it will stay where it is.
Today I did a little project that I have been neglecting to do. Many of you have asked me what I am doing to retain the axle in rebound. To recap, I am using short 9.5" springs in the rear. The problem is that when the axle drops, the springs get unloaded. This is not a good situation. And while the odds of getting the car air borne are fairly slim, if it were to happen it might be catastrophic. The other issue is that the single pigtail springs do not seat really well in the upper spring pocket.
I picked these up on eBay for $20 shipped:
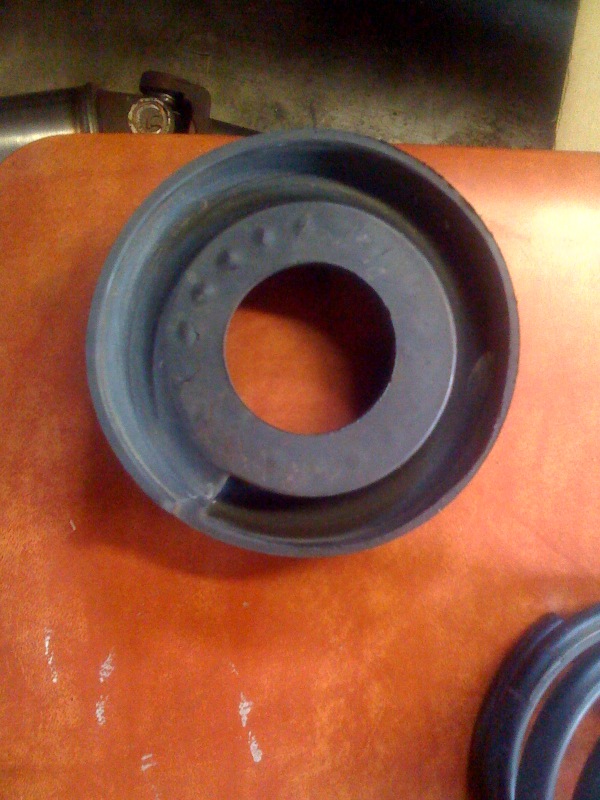
They are rubber spring isolators from a 4th gen F-body. They fit the single pigtail springs perfectly:
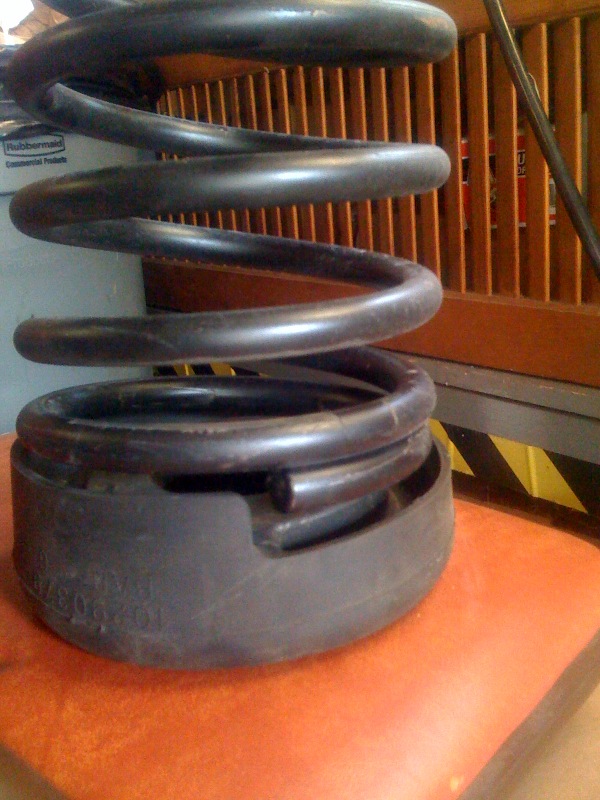
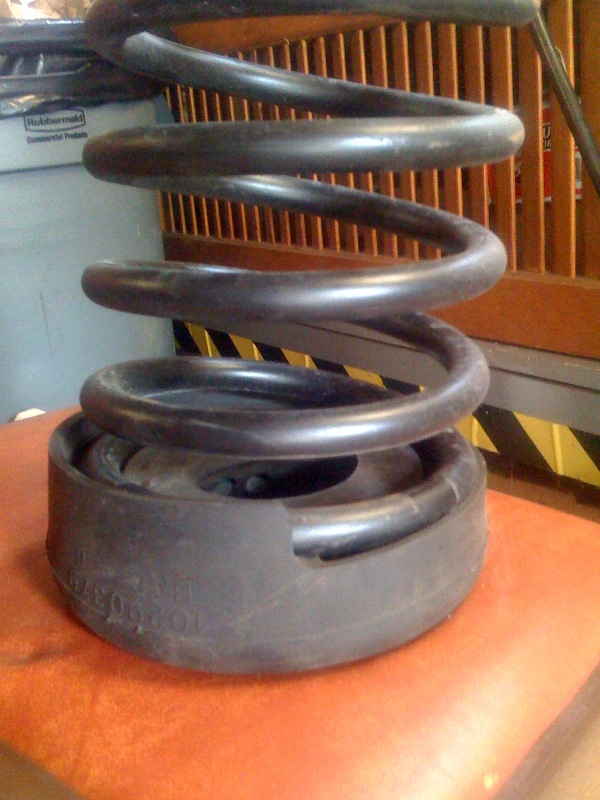
The rubber spring isolators fit perfectly into the upper spring pocket on the a-bodies.
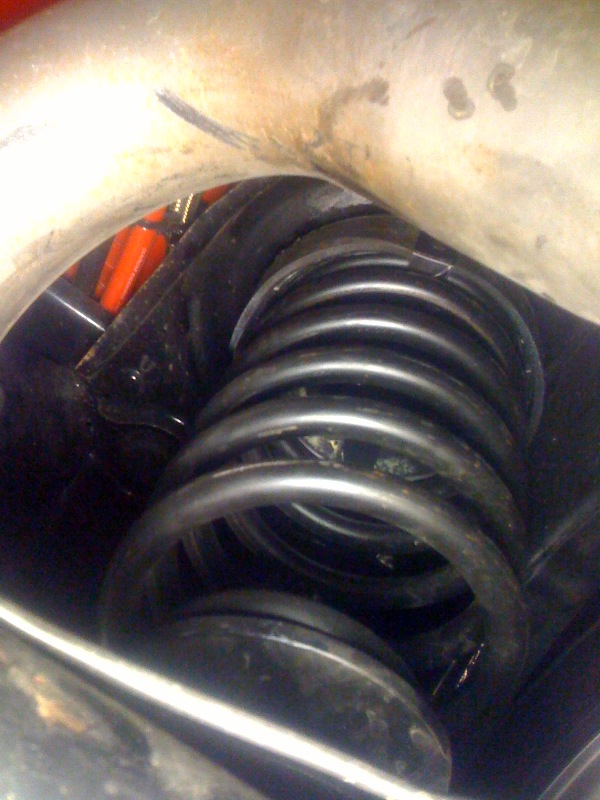
Here is what I did to keep the axle from dropping too far. I took a 2" nylon axle strap. It used these to loop over the rear axle when I was towing the car. At the top I attached one end to the T-bar of the upper shock mount:
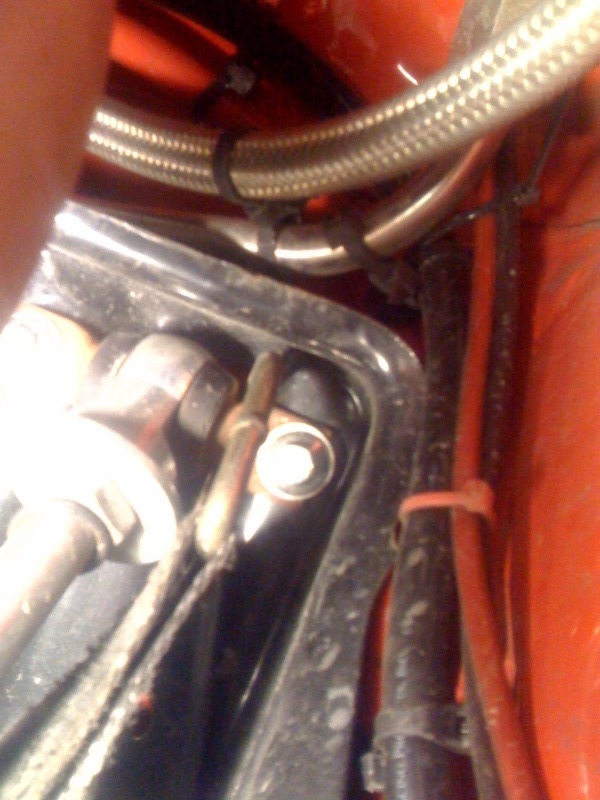
At the bottom I looped the loop around the shock mount stud:
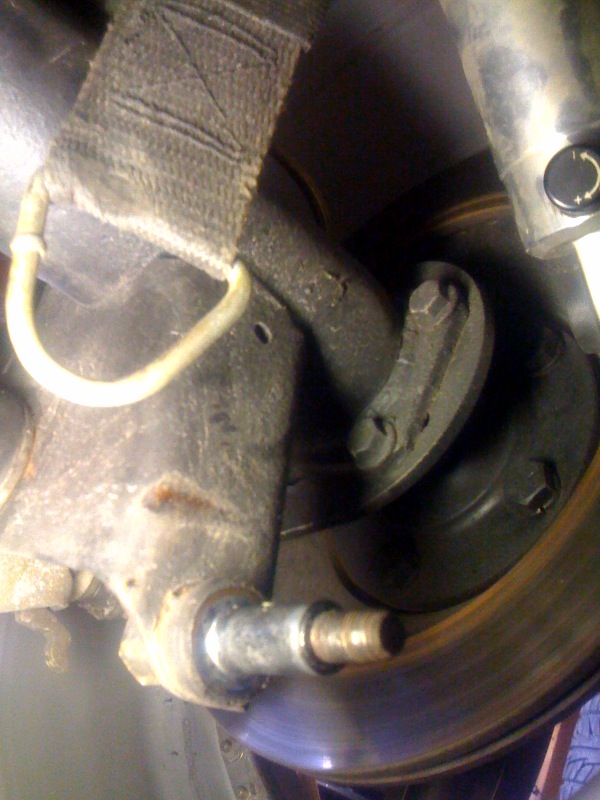
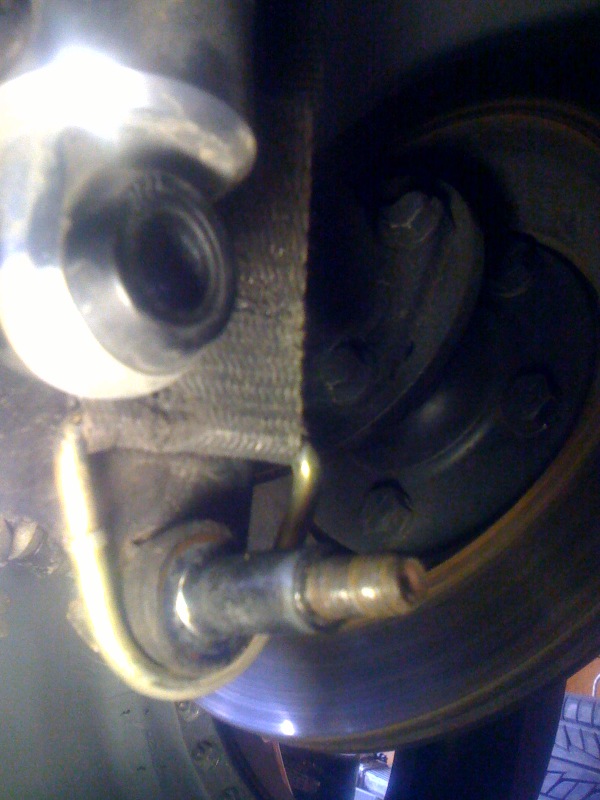
When the axle drops and hangs by the straps, the springs are still compressed about 1". This will keep them safely in place in case I want to do some Dukes of Hazzard maneuvers. :screwy:
Andrew
Today I did a little project that I have been neglecting to do. Many of you have asked me what I am doing to retain the axle in rebound. To recap, I am using short 9.5" springs in the rear. The problem is that when the axle drops, the springs get unloaded. This is not a good situation. And while the odds of getting the car air borne are fairly slim, if it were to happen it might be catastrophic. The other issue is that the single pigtail springs do not seat really well in the upper spring pocket.
I picked these up on eBay for $20 shipped:
They are rubber spring isolators from a 4th gen F-body. They fit the single pigtail springs perfectly:
The rubber spring isolators fit perfectly into the upper spring pocket on the a-bodies.
Here is what I did to keep the axle from dropping too far. I took a 2" nylon axle strap. It used these to loop over the rear axle when I was towing the car. At the top I attached one end to the T-bar of the upper shock mount:
At the bottom I looped the loop around the shock mount stud:
When the axle drops and hangs by the straps, the springs are still compressed about 1". This will keep them safely in place in case I want to do some Dukes of Hazzard maneuvers. :screwy:
Andrew

Really enjoyed reading this. Lot's of very useful information.
I'd already built several "hot rods" by the time you were born -- so you're
not really old (it's all relative anyway). I'm an ME (major in machine deign - minor in heat transfer) and about to retire.
I prefer to start with the pre WWII Fords. However, it doesn't matter which "canvass" you chose to paint on -- so long as you do first class work and pay attention to details.
Your GTO is a splendid example of the "hot rodders art".
I'll be pleased if my steel '32 roadster (LS7/T-56) turns out any where nearly as nice.
Congratulations on a job very well done!