
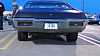
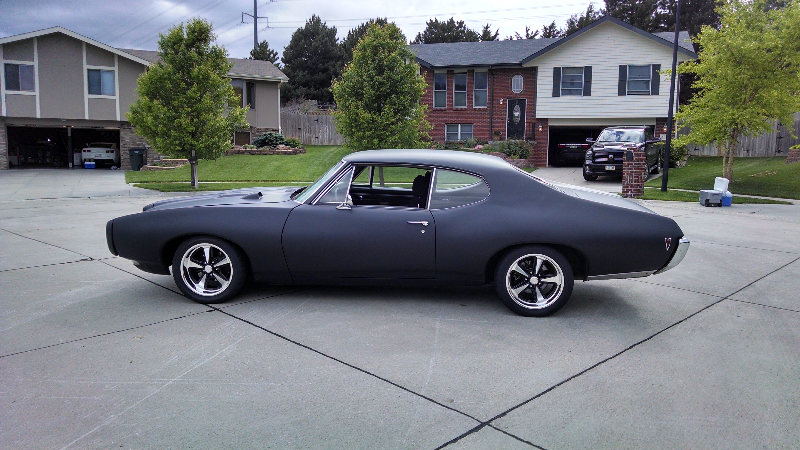
68 Lemans LS1 T56 swap
 05-11-2014, 06:28 AM
#121

Switched to the rear trying not to draw as much attention. And went on a cruise/ rear clearance and traction test drive.
No issues.
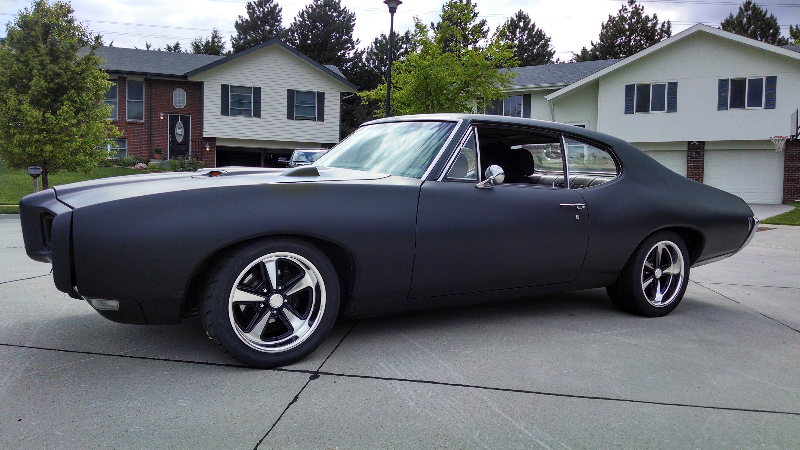
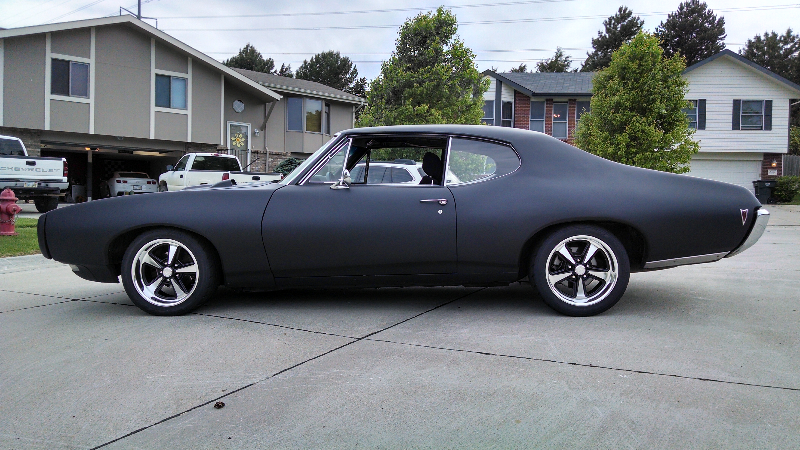
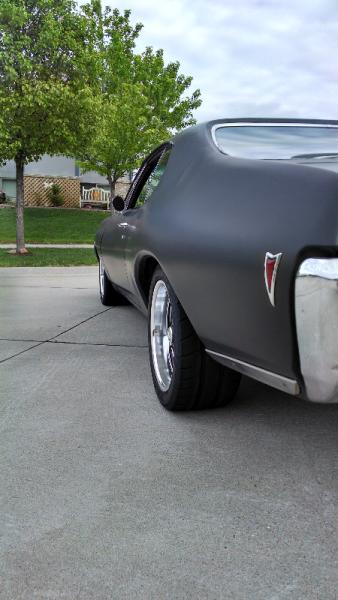
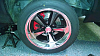
Since they fit front and rear I am going to run 275/40r17 front and rear

Looks amazing I am very pleased and it keeps the look I was going for
My neighbor asked me what's the point they look the same. I tried to explain they were almost twice as wide. Speed rated performance tire. Might of wasted my breath.
Thought I might notice a ride difference. Feels the same especially when running the two different tires. Feels same front to back. Feels more stable when Cornering and rear feels more planted. Can't wait to try all four in the corners.
Thinking in the future sell the 15" rubber and getting 2 mickey Thompson street et for the 15x7 rims for the drag strip. And I need a drive shaft hoop. If I get into auto cross more. I might go with nt05r or nt01 or toyo or falkens. And would need another set if 17s Auto cross/road course is my main goal. But I have some friends I need to beat. There are a few options around but I have no idea how to join race or what the rules are.
No issues.
Since they fit front and rear I am going to run 275/40r17 front and rear
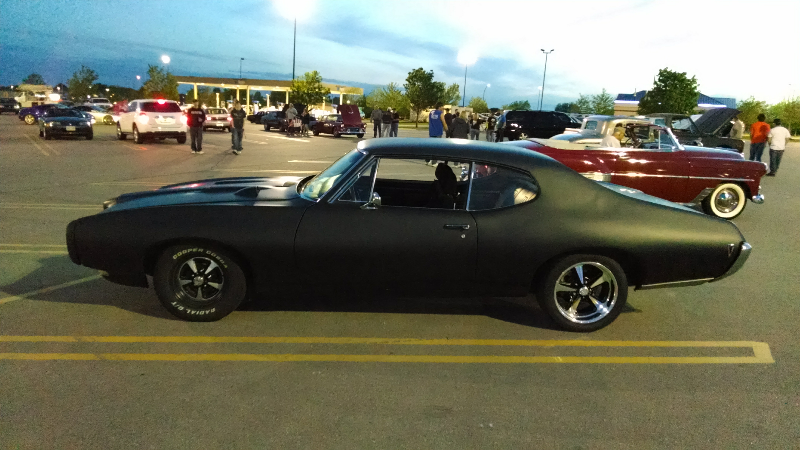
Looks amazing I am very pleased and it keeps the look I was going for
My neighbor asked me what's the point they look the same. I tried to explain they were almost twice as wide. Speed rated performance tire. Might of wasted my breath.

Thought I might notice a ride difference. Feels the same especially when running the two different tires. Feels same front to back. Feels more stable when Cornering and rear feels more planted. Can't wait to try all four in the corners.
Thinking in the future sell the 15" rubber and getting 2 mickey Thompson street et for the 15x7 rims for the drag strip. And I need a drive shaft hoop. If I get into auto cross more. I might go with nt05r or nt01 or toyo or falkens. And would need another set if 17s Auto cross/road course is my main goal. But I have some friends I need to beat. There are a few options around but I have no idea how to join race or what the rules are.

 05-30-2014, 11:21 PM
#123
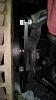
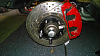
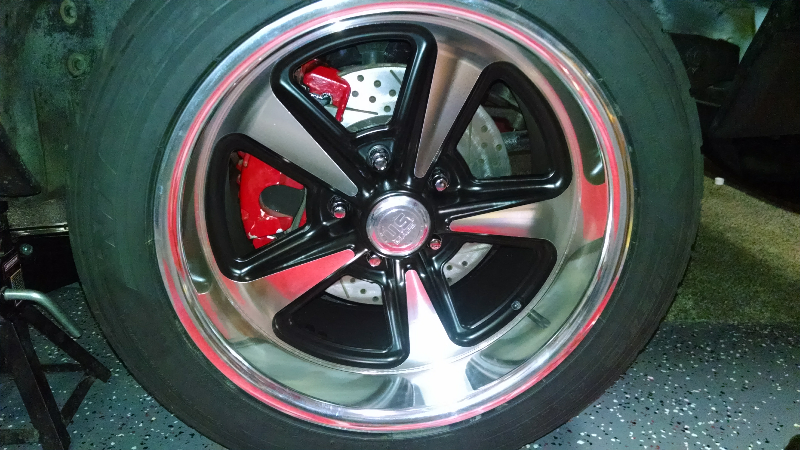
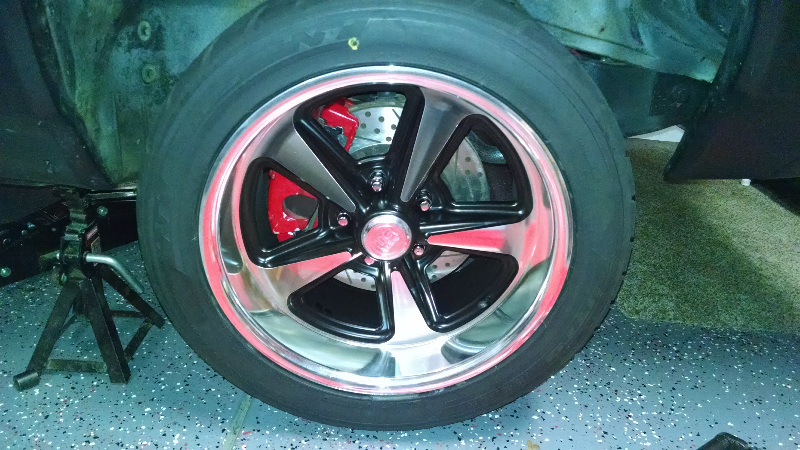
The big rims for me thinking about brake upgrades found these cheap
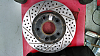
With calipers and caliper mounts. I got the bracket from rich hoag and painted them. My old drum stuff unable to locate so I bought two hubs from CPP with bearings seals washer nuts and pin for 60 I knocked the studs out and went to put in the longer stud's dorman 610-259 and first one I put on cracked the hub. Long story short called CPP and repo part and they recommend drilling it out for the 610-259 so I tried it on my cracked thread and if I drill it to 15/32" the stud's will go in with out cracking. So I ordered a second hub 20 bucks and have the other hub ready to go. Also interesting the hub is already 5.9" so it fit right in my baer rotors. No need to turn them down.

LS1 brakes from 01 camaro
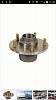

With calipers and caliper mounts. I got the bracket from rich hoag and painted them. My old drum stuff unable to locate so I bought two hubs from CPP with bearings seals washer nuts and pin for 60 I knocked the studs out and went to put in the longer stud's dorman 610-259 and first one I put on cracked the hub. Long story short called CPP and repo part and they recommend drilling it out for the 610-259 so I tried it on my cracked thread and if I drill it to 15/32" the stud's will go in with out cracking. So I ordered a second hub 20 bucks and have the other hub ready to go. Also interesting the hub is already 5.9" so it fit right in my baer rotors. No need to turn them down.
LS1 brakes from 01 camaro
 06-08-2014, 10:54 AM
#125
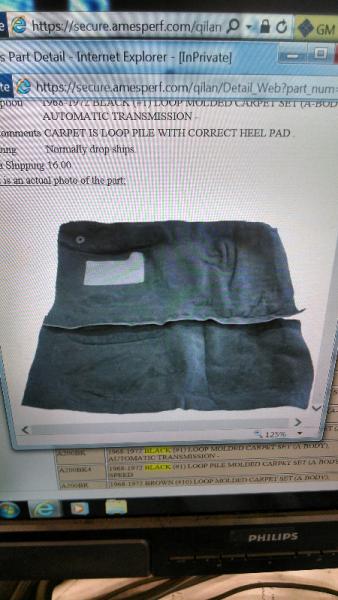
Finally getting ready to put carpet in the car. Steel floor is getting too hot. I go some thermal barrier and tape. Tru-max blip12506. Going to coat the floor with por15 and tape the insulation in. Need to order carpet.
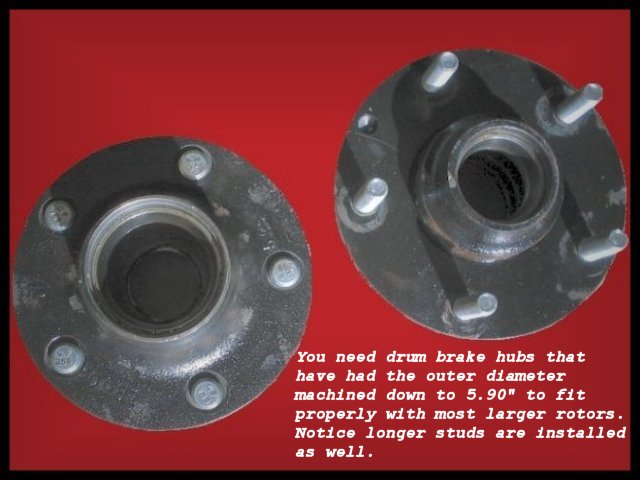
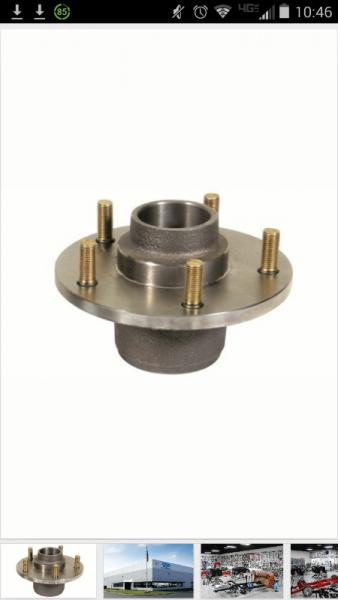
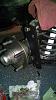
Disc brakes parts are finally all here I ruined one hub because they Don use factory Chevelle knurl so u drilled them out to 15/32 and installed the dorman studs 610-259 7/16-20 by 1 3/4"
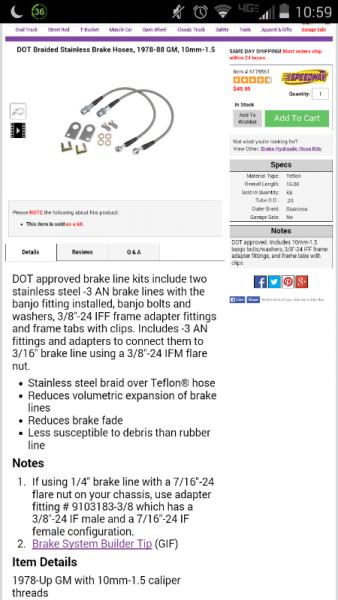
I got stainless hoses 3/8 flared on frame side and 10mm banjo for fbody calipers
50 bucks. Had stainless on it already so I had to!

Rubber hoses are available 30 bucks

Disc brakes parts are finally all here I ruined one hub because they Don use factory Chevelle knurl so u drilled them out to 15/32 and installed the dorman studs 610-259 7/16-20 by 1 3/4"
I got stainless hoses 3/8 flared on frame side and 10mm banjo for fbody calipers
50 bucks. Had stainless on it already so I had to!
Rubber hoses are available 30 bucks
06-10-2014, 10:00 PM
#126
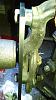
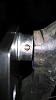
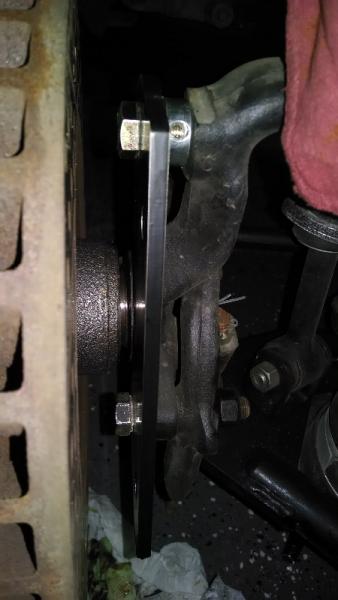
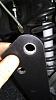
If you have disc spindles a spacer is needed. If your drum spindles are machined for disc or have disc spindles you need a spacer. the drum spindles need nothing. Bolts up. You will have to make something to take up the space of the larger disc upper bolt. A small bushing The drum upper bolt is 1/2 fine thread the disc is 5/8 fine thread.


 06-11-2014, 12:48 PM
#128
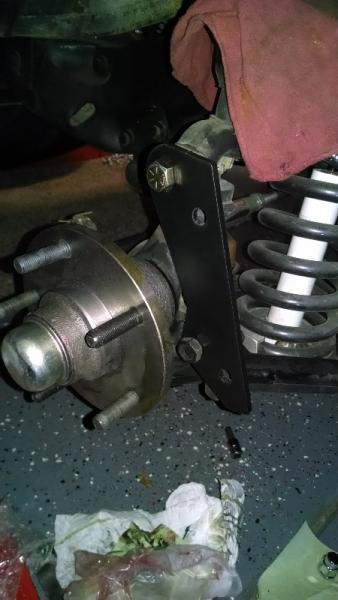
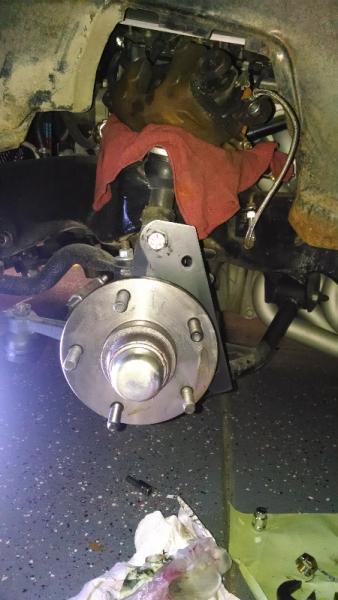
You can use your drum spindles you will NOT need to machine them down.
With the CPP drum hub you don't need to machine them to fit inside the fbody rotor.
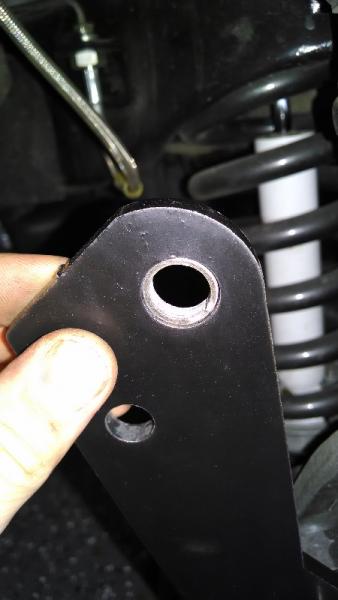
The factory drum spindle with the bracket from rich hoag will clear the fbody rotor.
that's why I needed the spacer mine were machined for OEM style rotors. The studs I used are dorman 610-259 The upper bolt you can get at a hardware store. If you need it I made a little bushing to go around the 1/2 bolt because the bracket has a 5/8 hole in it. Red loctite on the upper bolt.
With the CPP drum hub you don't need to machine them to fit inside the fbody rotor.
The factory drum spindle with the bracket from rich hoag will clear the fbody rotor.
that's why I needed the spacer mine were machined for OEM style rotors. The studs I used are dorman 610-259 The upper bolt you can get at a hardware store. If you need it I made a little bushing to go around the 1/2 bolt because the bracket has a 5/8 hole in it. Red loctite on the upper bolt.
06-12-2014, 12:18 PM
#129
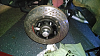
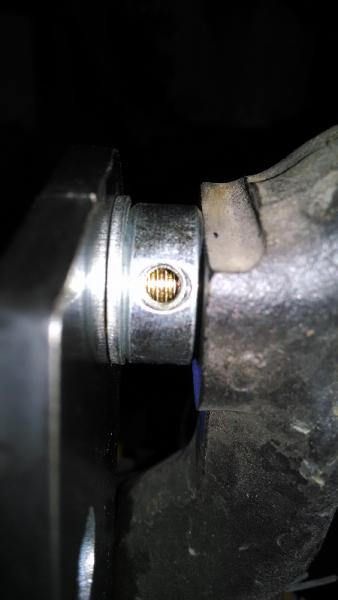
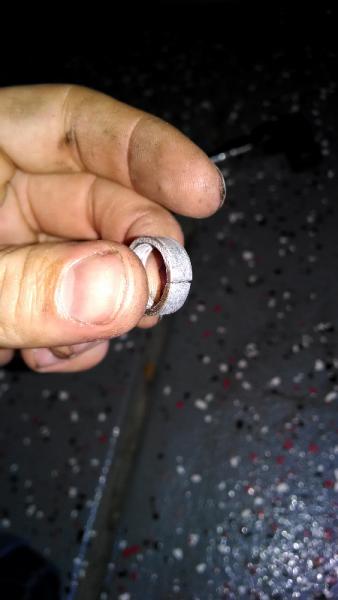
This is the bushing I made to take up the difference between the drum 1/2 bolt and the disc 5/8 bolt.

I don't know why the brackets have a 5/8 hole if drum spindles are 1/2" unless not all drum spindles are 1/2 upper bolt. These are my pontiac factory drum spindles.

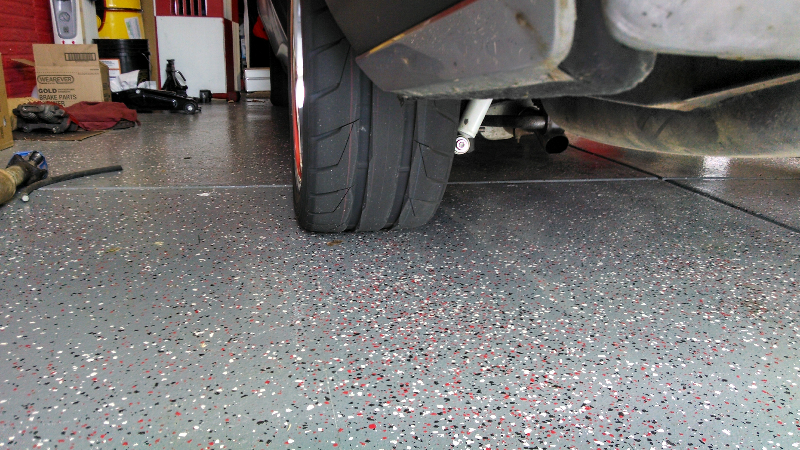
Got it bled last night. I highly recommend reverse bleeders. I always use them on hydraulic clutch's but I bled my front brakes myself in about 10 mins.
I don't know why the brackets have a 5/8 hole if drum spindles are 1/2" unless not all drum spindles are 1/2 upper bolt. These are my pontiac factory drum spindles.

Got it bled last night. I highly recommend reverse bleeders. I always use them on hydraulic clutch's but I bled my front brakes myself in about 10 mins.
07-19-2014, 08:52 AM
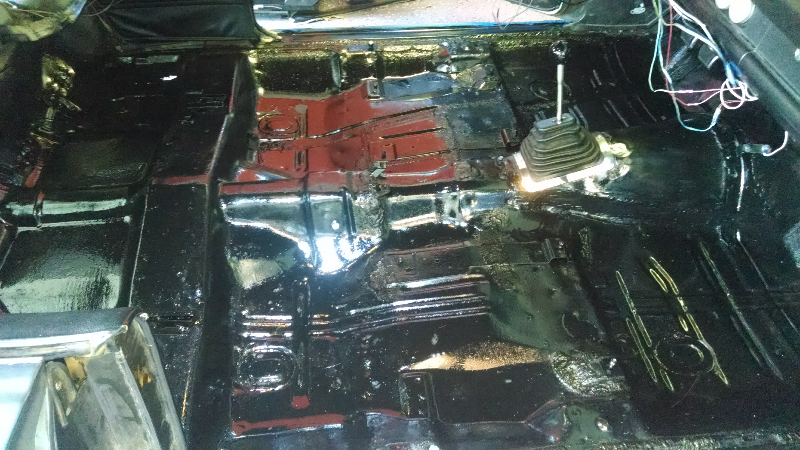
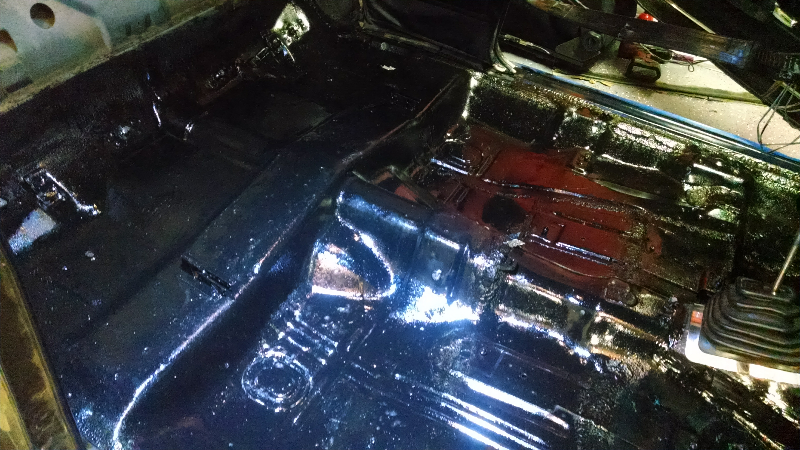
#130
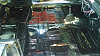
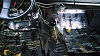
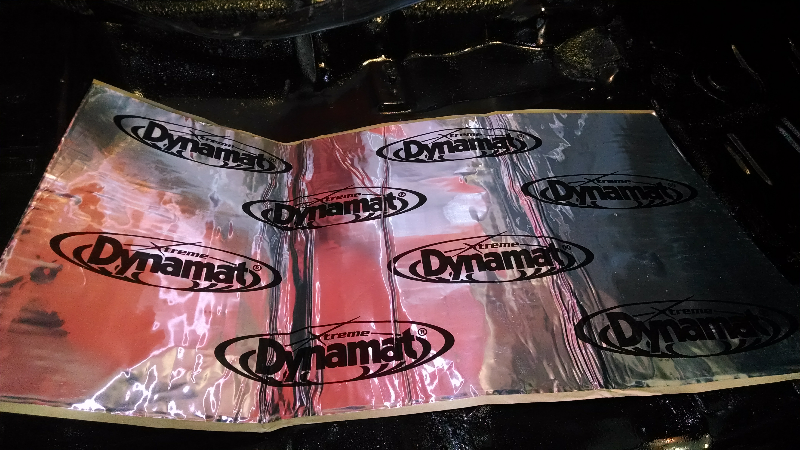
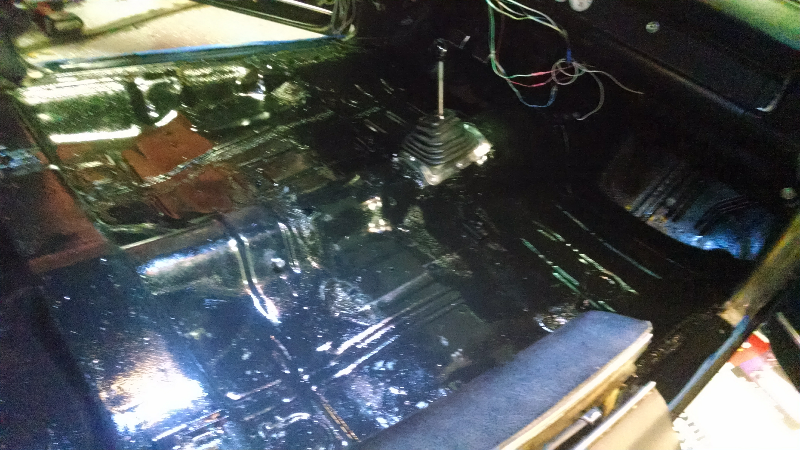
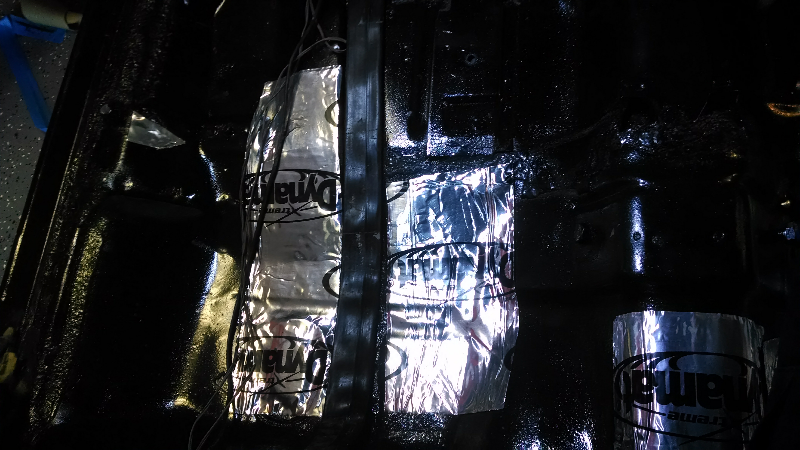
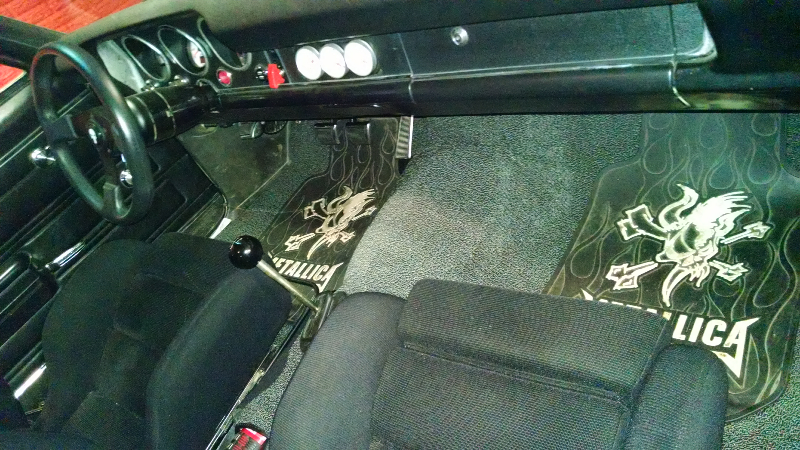
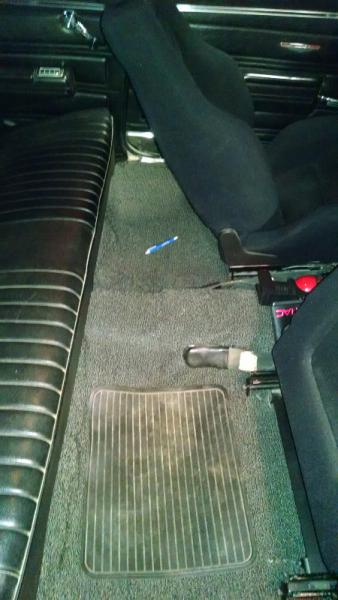
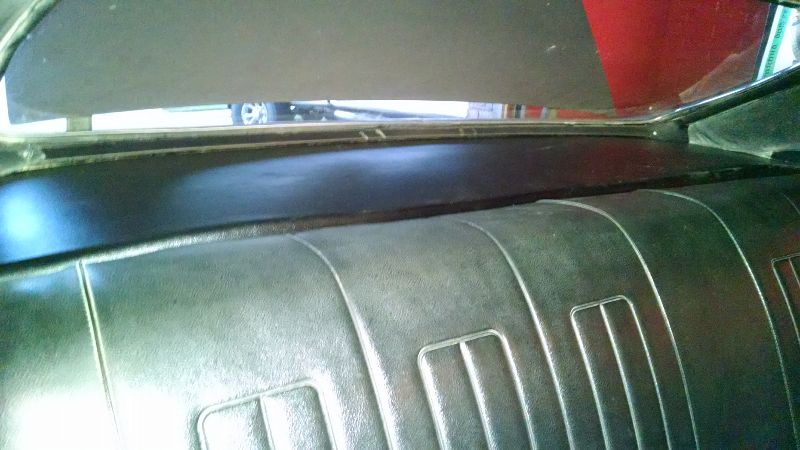
Fixing up the interior now I got molded carpet and a box of Dynomat I painted the floor with por15 and applied the dynomat to the firewall and floor and transmission tunnel.
Unfortunately I pitched the original carpet years ago and have been driving it with floor mats on the steel floor. I'm going to reduce heat inside the car for more comfortable cruising and if I ever get the money to do a A/C system. It will be more efficient.
If I had the original carpet I may have helped using it as a template for the holes and sizing. But after the transmission tunnel enlarging for the t56 the extra carpet and since it's still trim to fit I had plenty to go over the hump.
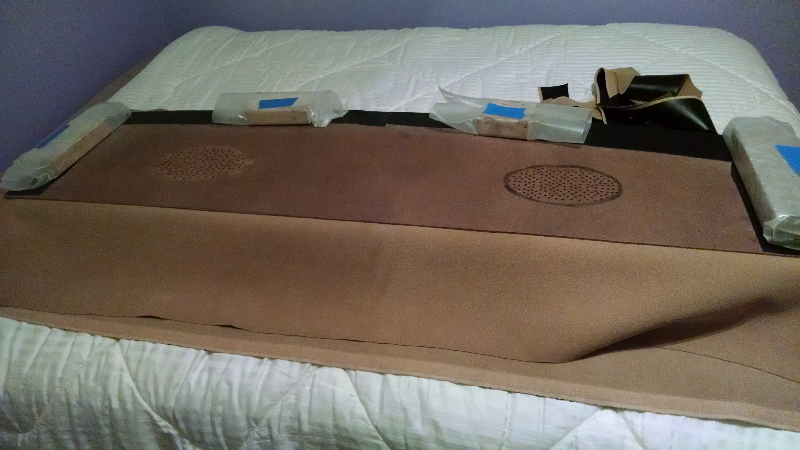
I am also had a piece of 1/8 board made for a package tray. Luckily vinyl was on sale half price locally because I had to buy enough to make 2 package trays. 2.5 yards regular 34.99 a yard. Half price was 45 bucks. And some 3m super77 spray adhesive. I drilled lots of small holes were the speakers are because I wanted to hide them for a cleaner look and at night no reflection in the back window.
Still have allot to do. Glue the package tray and fit the driver seat and shifter boot and install seat belts
Unfortunately I pitched the original carpet years ago and have been driving it with floor mats on the steel floor. I'm going to reduce heat inside the car for more comfortable cruising and if I ever get the money to do a A/C system. It will be more efficient.
If I had the original carpet I may have helped using it as a template for the holes and sizing. But after the transmission tunnel enlarging for the t56 the extra carpet and since it's still trim to fit I had plenty to go over the hump.
I am also had a piece of 1/8 board made for a package tray. Luckily vinyl was on sale half price locally because I had to buy enough to make 2 package trays. 2.5 yards regular 34.99 a yard. Half price was 45 bucks. And some 3m super77 spray adhesive. I drilled lots of small holes were the speakers are because I wanted to hide them for a cleaner look and at night no reflection in the back window.
Still have allot to do. Glue the package tray and fit the driver seat and shifter boot and install seat belts
07-19-2014, 09:03 AM
#131
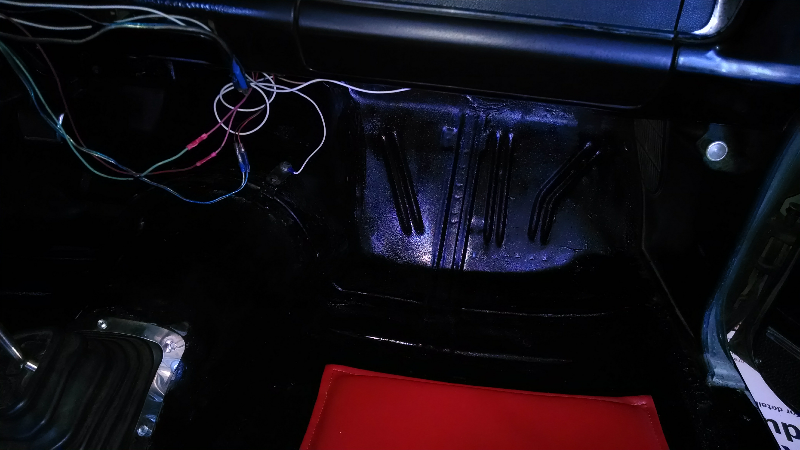
I had issues along the way. First carpet install. I removed all of the belts seats and panels. The drivers kick panel held me up it would of been easier to remove it but the ebrake pedal needs to come out also for the astro vent air to clear the body. More work than planned but I started to take the pedal out and one of the two studs that go through the firewall I could not remove. the threads must have gald and removed all the threads on the but and the stud. To the point it spins freely on the stud both ways. So I worked the carpet under the kick panel and the half loose ebrake pedal. I have a small ratchet that takes 1/4 bits to get the short Philips screws out of the kick panel that the e brake covered up. Wasn't easy as it sounds but I got it done. Trimmed a little at a time. And got it in I'll post more pictures of the progress I made and hopefully finish this weekend


 07-23-2014, 10:16 PM
#132
Finished carpet and package tray install much quieter in the car sounds more like a modern car. Forgot to plug the dimmer switch in. So only a short drive tonight getting too dark for no headlights. I thought my hideaways weren't working. Also got my horn working. Tapped on the relay it must be getting time to replace it. Still finishing up a few other things I got started during this upgrade. She needs as good cleaning dust dirt and carpet fuzz everywhere.


 07-26-2014, 08:12 AM
#133
My dimmer switch got unplugged or I forgot to plug back in.
A dimmer groomer didn't come with my carpet and the only place I've found one is year one.
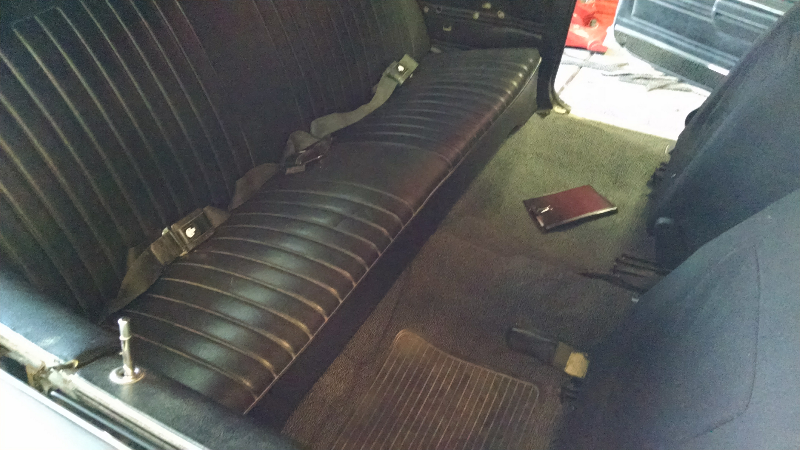
Now I have headlights. I talked to a friend and found I installed the rear seatbelts wrong. I put them back in the way I removed them pointing down. Which makes the belts too short. So I pulled the rear seat one more time and flipped them around.
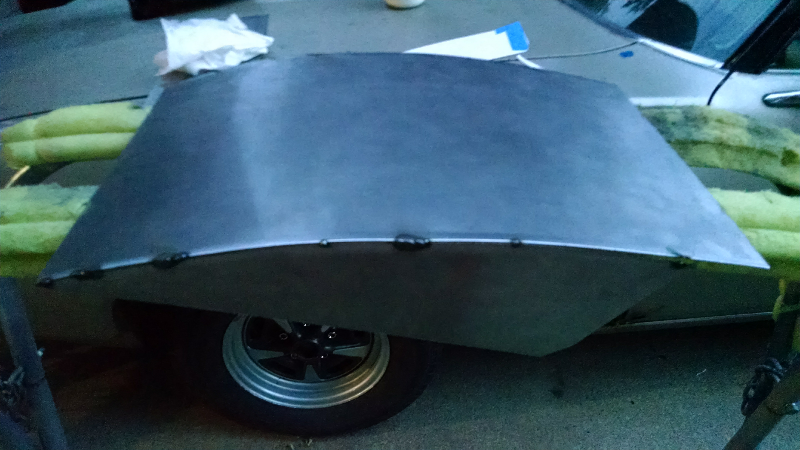
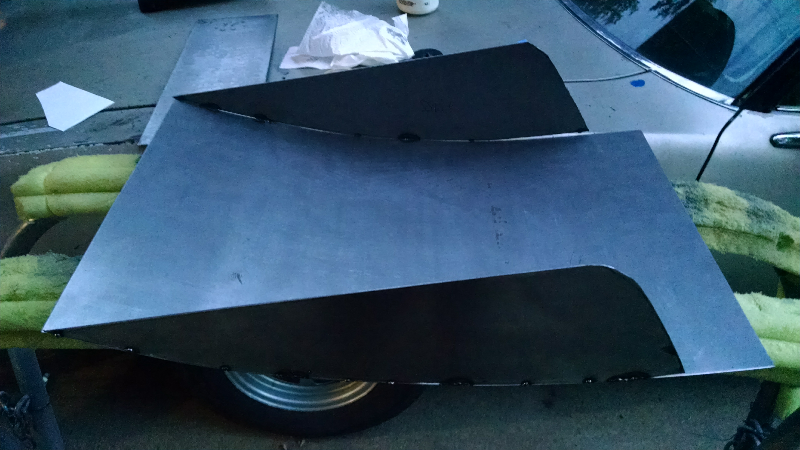
I also plan on making my hood scoops functional.
A dimmer groomer didn't come with my carpet and the only place I've found one is year one.
Now I have headlights. I talked to a friend and found I installed the rear seatbelts wrong. I put them back in the way I removed them pointing down. Which makes the belts too short. So I pulled the rear seat one more time and flipped them around.
I also plan on making my hood scoops functional.
07-26-2014, 08:44 AM
#134
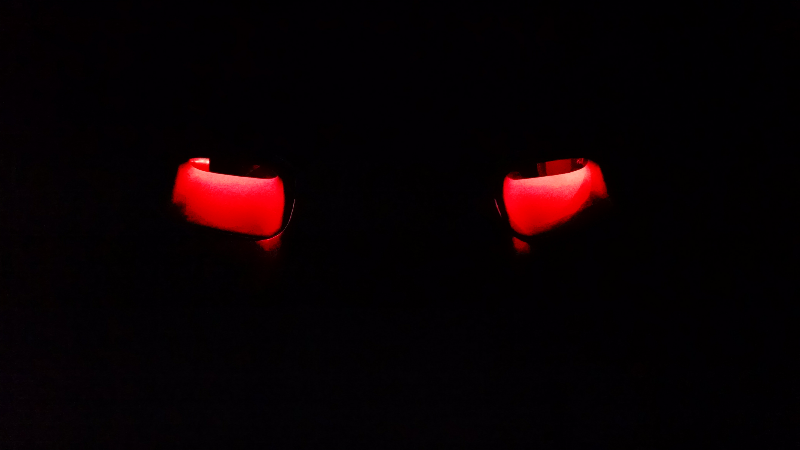
Common project on these cars is the hideaway conversion or making them work. I have made my own and it's much cheaper than reproduction parts or electric actuators. Which id love to have but can not spend that 1000 bucks.
I used two Toyota vsv valves some wire and vacuum hose , a check valve and factory springs and hideaway parts. I didn't use the vacuum can because it works fine without it and they move quickly so leaving the engine running a few seconds longer is no big deal. This eliminates the need for a hideaway headlight switch vacuum can and extra Ts and hoses.
I used two new vacuum actuators from Ames performance 70 each. They have diaphragm or bladder that moves the arm the side that gets the vacuum is the way the arm moves. Top goes up bottom for down. rest of my hideaway setup came from a donor nose I bought at a swap meet.
Tip: buy a setup with all the headlight buckets. Hideaway buckets are special and the only part not reproduced. I am still looking for another one non hideaway are 90* off.
I got new bushings kit 19 bucks and one over center spring because I only had one. And assemble it like it should be. Some adjusting of the actuator mount and upper spring may be necessary to get full up and full down.
I used a vacuum supply from the intake as close to the front as possible. With the $5 check valve installed Ran it to the both vsv valves with a T one up and one down vsv and then the other side of the vsv T and to each actuator up and each down.
Wiring is similar I got connectors from Acdelco 16? Each? I don't remember. Grounded them on the horn ground and spliced the power together and ran it with a long wire inside to dimmer switch. Reason being I wanted the hideaways to function only when headlights are on. And I could have park lights only with the hideaways closed. The trick I found is the vsv don't vent. So they would work moving one direction once and couldn't move after because it was working against the other sides vacuum so the second vsv is opposite the first it vents the side not getting vacuum. Allowing it to move. I hid everything behind the center of the nose.

 08-10-2014, 12:31 AM
#137
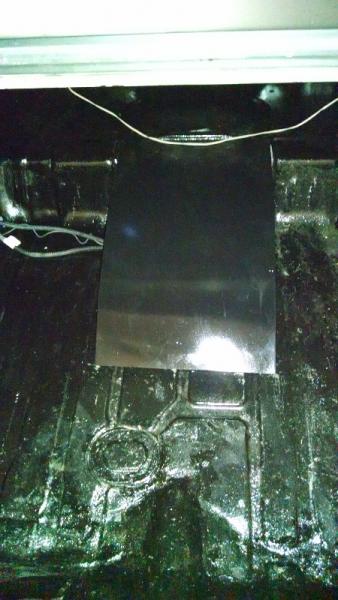
Always have wanted to make the scoops functional. I plan on keeping the air filter where it is and try making a venturi style cold air intake to suck cold air past the air filter on its way back.
I also tried to spool the intake duct to put the air filter on top of the intake and route the air from the scoops straight down. I gave up on that because of little clearance and the air filter wouldn't fit and duct work large diameter bends didn't work either.
I also tried to spool the intake duct to put the air filter on top of the intake and route the air from the scoops straight down. I gave up on that because of little clearance and the air filter wouldn't fit and duct work large diameter bends didn't work either.
10-11-2014, 08:24 AM
#138
I added some lighting. I've turned then on twice when it's out of the garage. My in-laws white 57 bel-air has blue under glow and blue grill lights. The under glow is awful but the grill lights look cool. Luckily I only have 15 dollars in this mod. I'm not sure I love it yet or am ready to cruise all night with them on.


Hopefully its update worthy.
It's getting colder here and I still don't have a heater or a/c. I hope the sun will come out for a few days and I could put about 200 miles on her before winter storage time. It would put the odometer at 3000 miles. It actually has 3400 miles on it. I had to send my first gps speed hut speedometer in with 600 miles on it. The time wouldn't set and elevation was 18,000ft. (Really flying) Their gauges have lifetime warrenty.
Two things I want to fix this winter are holley headers and sell the edelbrock headers.
And I bought new gto tail light housings, new tail light lenses and I'm getting a new bumper for Christmas from Santa and my wife. I need to get hardware ordered and get the current bumper removed. plan on assembling everything inside in the bumper and installing it in my garage. Depends on how easily I can get the old one off.
Oh and I have to wait on my led tail lights. I actually sent my tail light housing and lenses in to have them custom made. They are using mine as a template to make their own product. But I'll have the first one of its kind.
Other company's make LEDs like digitails for 68 gto but this place makes programmable ones so you can change your favorite way they light up for turn signals and brake lights.
That's my big problem with these other led places. I've seen their fire bird tail lights and only the outside of the lenses flashes during turning. I think at least the same amount of lights flashing from stock would be a no brainer.
01-10-2015, 02:20 PM
#140
Got my new bumper. Working I. Cold garage removing the old one.
Led taillights prototype should be ready by the end of the month.
Another update I bought a used aluminum 5.3 with a spun rod bearing cheap. Mainly for the nbss intake and 87mm tb I installed it on my 07 k2500 a couple weeks ago. Very pleased with results can't wait to tow with the new mod.
The 5.3 also had a set of 243 heads on it. My plans are to fix the 5.3 short block and put the 241 heads on it.
And put the 243 heads on my ls1. So I'm trying to pick a cam. I am considering the 224r then 228r. I have basically stock ls1, hardened push rods, double roller timing chain, ls6 intake and ported tb. And install hooker long tubes while I'm at it.