
Cam only, winter upgrades. Bitch in on a diet
 02-27-2009, 01:39 PM
#41

I'm not saying it is the way to do it, but when I cut out part of my fender metal I just cut large box sections out of it. That way there was still material to support the fenders. If I remember correctly it was only worth a lb for both sides. If I was to do it again and I still may I would cut the whole piece off.
 03-01-2009, 11:02 AM
#43
thats John, ya I gotta try and keep up with you
Front shocks are Strange single adjustable, I got form Paul at PM performance local in buffalo NY, great price. They ride great on the street, and loosen them up for great track times. I need to get a set of rears soon, probably going dual adjustable. Looking to get alot better 60s this year.
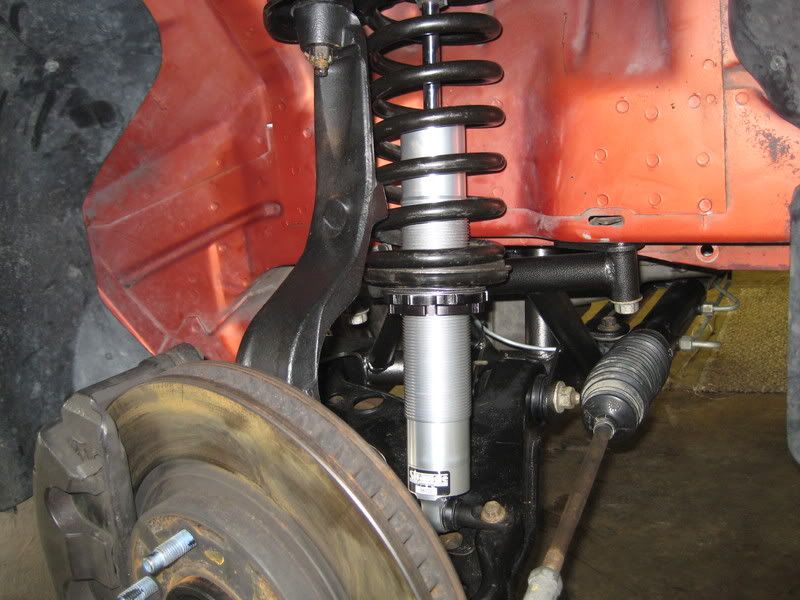
Front shocks are Strange single adjustable, I got form Paul at PM performance local in buffalo NY, great price. They ride great on the street, and loosen them up for great track times. I need to get a set of rears soon, probably going dual adjustable. Looking to get alot better 60s this year.
Last edited by studderin; 01-29-2010 at 10:46 PM.
03-02-2009, 08:25 PM
#45
stocks
Heres some spotweld cutter info
http://www.blairequipment.com/Spotwe...d_Cutters.html
General Instructions for Spotweld Cutters
http://www.blairequipment.com/Spotwe...tructions.html
Video
Windows Media - 1.9 MB
http://www.blairequipment.com/downlo...ld_Cutters.wmv
Mpeg - 7.6 MB
http://www.blairequipment.com/downlo...ld_Cutters.mpg
Last edited by studderin; 03-04-2009 at 06:12 PM.
 03-18-2009, 09:26 PM
#47
Oh ya, I called and you can get everything from them. Same time you get the rails and save on shipping. They know what parts work good for there rails. The PN are
200112- the self ejust Dzus (I needed 12, normal non windseild hood)
200116- dzus springs (12)
200135- the rivits for the Dzus and the springs to the rails.
 03-28-2009, 03:39 PM
#50
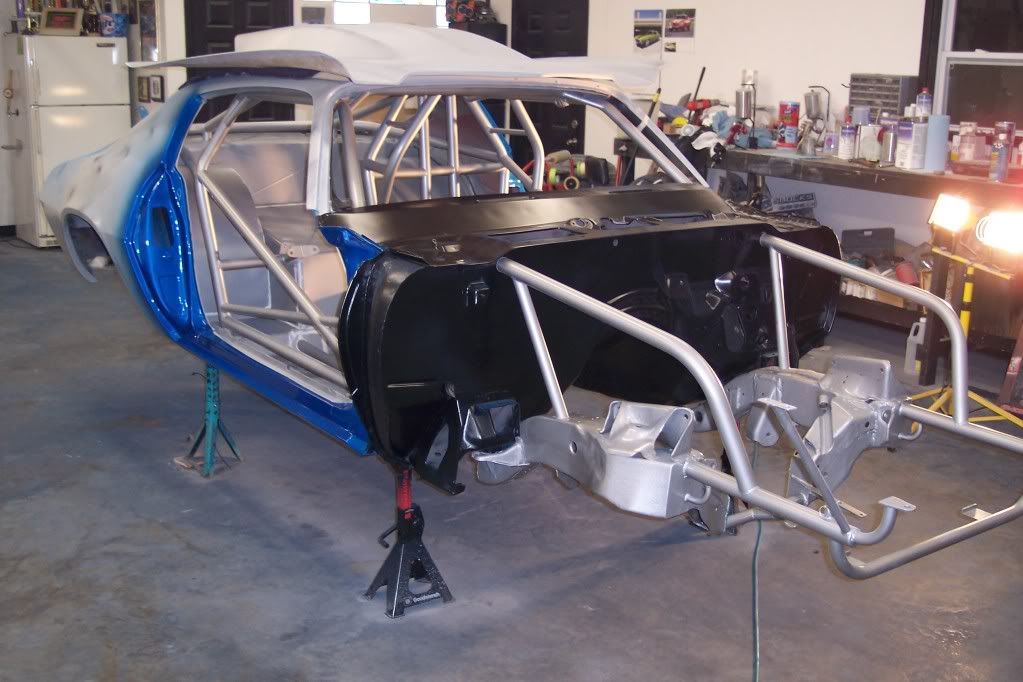
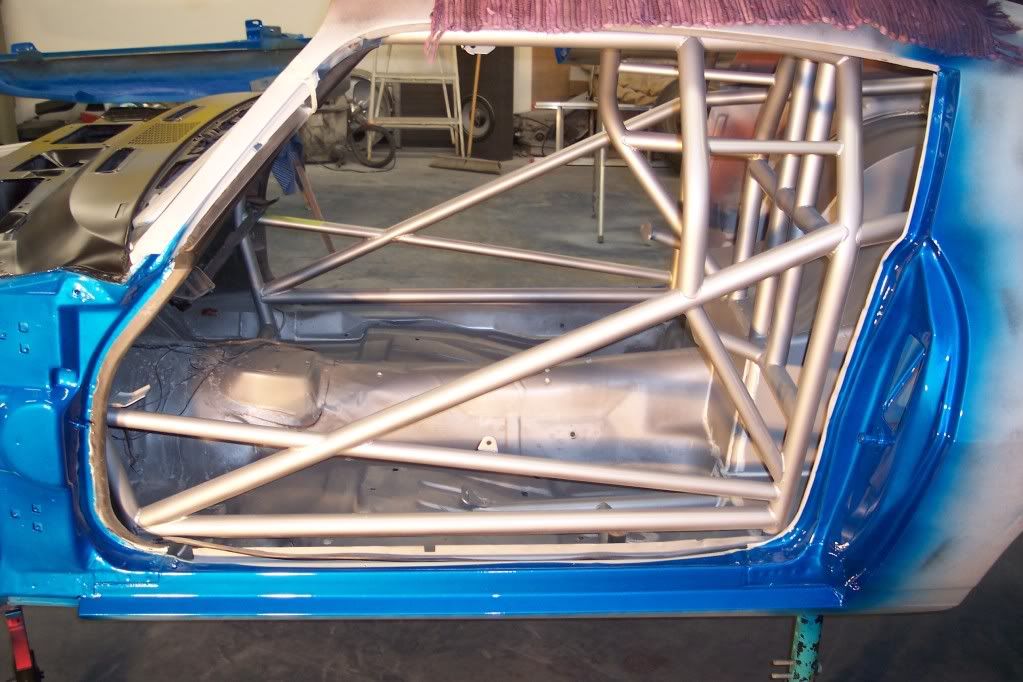
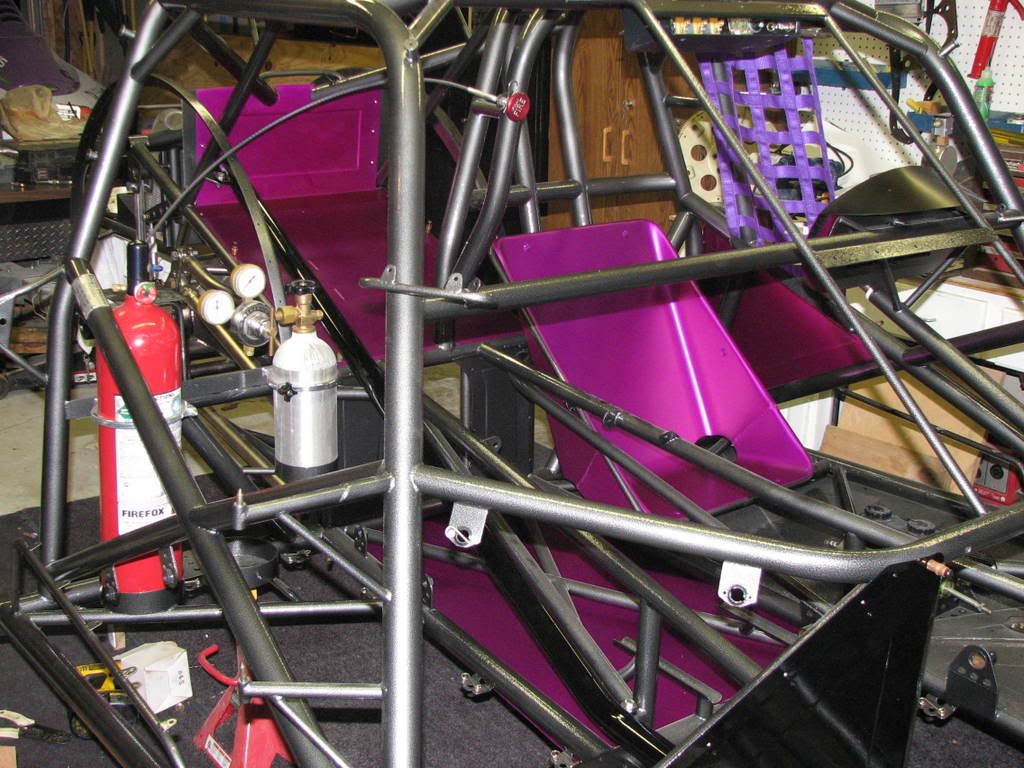
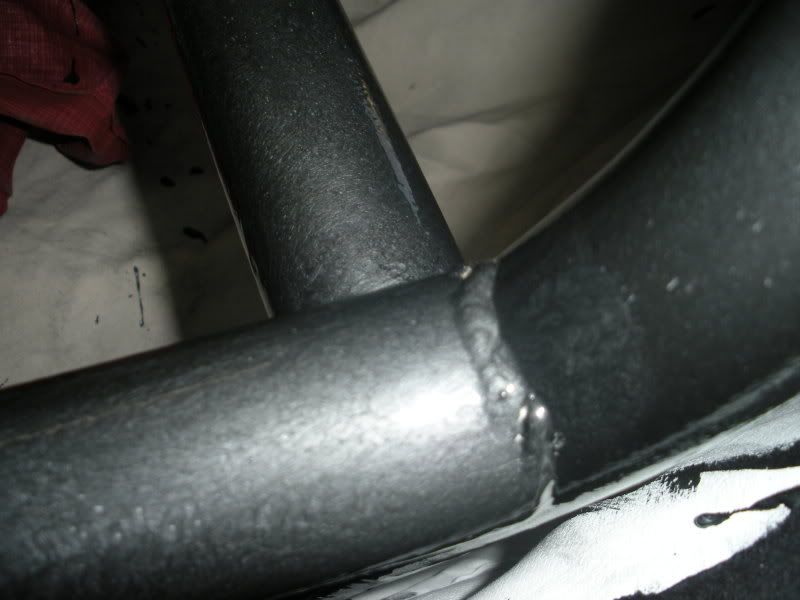
Good news, is wolfe is sending a new main hoop. After a phone call, and sending some pics how it was fitting. I don't have to pay anything, or send the old one back. They already ex changed my rear bars for the over the seat style for shipping coast, that was also really cool of them. They really stand behind there work. I'll get back to refitting the new one when it gets here. Got all the holes welded up and ground down form the bolt in roolbar. And some were the spot weld cutter almost was thew.
Not sure what color to paint it, I'm between simple rustolem hammer finish for no brush strokes and easy to touch up and no matching problems. The Black, or Gray?? maybe even the dark bronze? I wish I could find a dark gray like the BRM stuff.
http://www.rustoleum.com/Product.asp...ct_id=21&SBL=1
Anyone use either? or know anything about them? should match my BMR stuff. And my gunmetal whisler. I think it will look pretty cool for a rollbar, and blend good with the other intior surfaces, better them a smooth, soild color stands out. Or some really strong expoy paint?
For the hood, I found some gold-cadium Dzus to match the SOM better then a chrome, and got orange rivits. Hopefully that looks pretty good, and clean.
Last edited by studderin; 03-28-2009 at 03:53 PM.
03-28-2009, 11:17 PM
#51

from what ive seen the black is more or less dark silver. if you buy it, roll it on a scrap piece of tubing to see if you like it.
there are several cage paint threads on yellowbullet with good pics.
i rolled mine on with an ultra fine foam roller for cabinet doors.
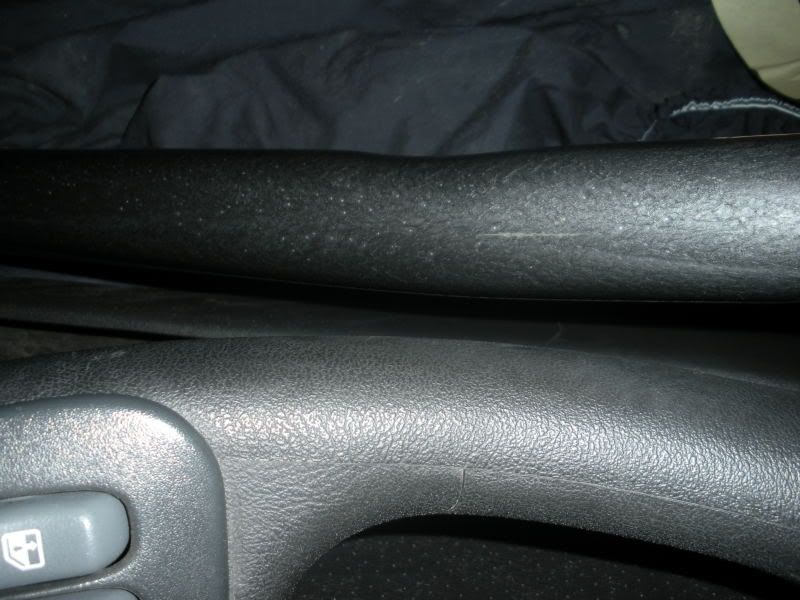
it has a light texture to it that matches my interior plastics very well.
i think its a great alternative to spraying it. that was going to be a mess!
there are several cage paint threads on yellowbullet with good pics.
i rolled mine on with an ultra fine foam roller for cabinet doors.
it has a light texture to it that matches my interior plastics very well.
i think its a great alternative to spraying it. that was going to be a mess!
03-29-2009, 12:40 AM
#52
ya, I forgot about that on YB
http://www.yellowbullet.com/forum/sh...e+paint&page=2
http://i385.photobucket.com/albums/o...GP9442copy.jpg
http://www.yellowbullet.com/forum/sh...e+paint&page=2
http://i385.photobucket.com/albums/o...GP9442copy.jpg
Last edited by studderin; 03-29-2009 at 12:57 AM.
03-29-2009, 06:54 PM
#53
found most of the shades/colors on YB
just a color matched?
Rustoleum hammertone balck

rustoleum hammered gray

Silver Rustoleum Hammertone, thinned and sprayed. (proball too thin)
SEM brand ( rattle can ) Medium Titanum Metallic

powder coated in "Silver Vein" ( I think this in the BMR color)
I'm liking the Rustoleum hammertone gray, or black so far
just a color matched?
Rustoleum hammertone balck
rustoleum hammered gray
Silver Rustoleum Hammertone, thinned and sprayed. (proball too thin)
SEM brand ( rattle can ) Medium Titanum Metallic
powder coated in "Silver Vein" ( I think this in the BMR color)
I'm liking the Rustoleum hammertone gray, or black so far

 04-23-2009, 10:36 PM
#56
thanks,
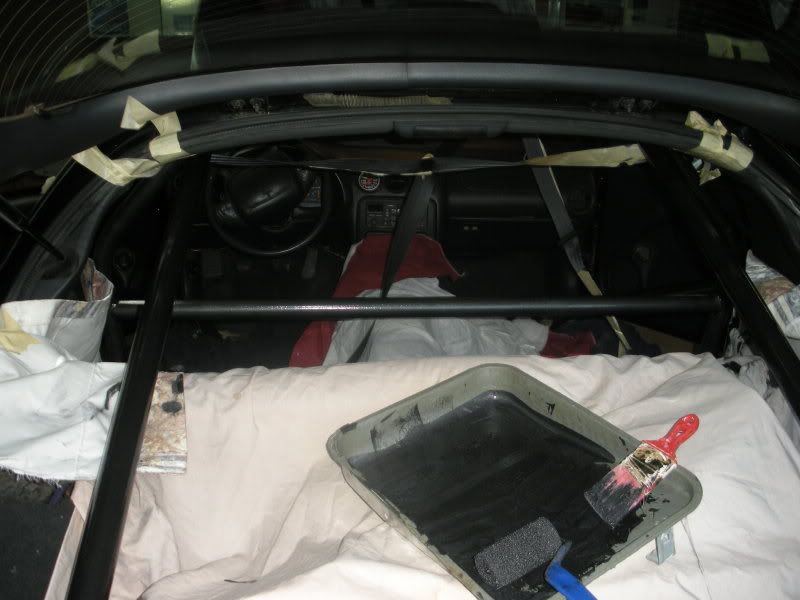
I'm still waiting on the new hoop to get here from wolfe, it was shipped out today finally. The plates are all fit, so it should go in fast. The dash is all back in, and ready for the carpet and seats after it gets welded in. I bought a qt. of the hammerd black paint to use. I made a post about what color weels ago, and a local went with the rustoleum hammer black, and it loks really good.

Put a SS spolier on, fits good for a $220 shipped, painted Ebay spoiler. Got it form the spoliercomany. There a long post about it in the ricer section about them. lol
That sterring wheels is on for good, The hub is for a 3rd gen. I read some guys say. But it dosn't fit our cloums right. And most guys say they just use a few washer behind it to space it out. I put the hub in a lath and turned down the bottem to 3.930 IIRC so it fits inside the plasitc trim. About .500 deep. The horn works with that wheel so thats cool.
Motor and everything is in, runs good just have to do a oil change. I'm gona put fresh plugs in it, still running the same ones from last summer.
I rolled the rear fenders and cut one coil off the rears springs (no insolater) to tuck the 28s better. The old bolt in 6point holes are welded up, in the floor and in the wheel wheels. I repainted them agian just flat black and they look really good.
Got the racecraft rails on. The 1st part of the rails the double holes end is on the wind sheild side. I used I think its a .135 drill for the hardwear fits tight really well. You can tell they got the rails design very nice after making a few diffrent styles. The holes layout pefect around the other fender bolts, with just enogh room to get tools on the bolts. I'm not sure if I'm gona grind off the whole side lip on the hood. Its gona be very weak. I might cut the top rail down a little like I saw somone do, but they might need a little leg brace on the dzus pads I'll have welded on. They will be kinda thin, and weak. I'll see about getting some pics this weekend.
Ill get the weights on the hood hinges, bolts, the latch, and all that. The hindges are alot more then they look.
I'm still waiting on the new hoop to get here from wolfe, it was shipped out today finally. The plates are all fit, so it should go in fast. The dash is all back in, and ready for the carpet and seats after it gets welded in. I bought a qt. of the hammerd black paint to use. I made a post about what color weels ago, and a local went with the rustoleum hammer black, and it loks really good.
Put a SS spolier on, fits good for a $220 shipped, painted Ebay spoiler. Got it form the spoliercomany. There a long post about it in the ricer section about them. lol
That sterring wheels is on for good, The hub is for a 3rd gen. I read some guys say. But it dosn't fit our cloums right. And most guys say they just use a few washer behind it to space it out. I put the hub in a lath and turned down the bottem to 3.930 IIRC so it fits inside the plasitc trim. About .500 deep. The horn works with that wheel so thats cool.
Motor and everything is in, runs good just have to do a oil change. I'm gona put fresh plugs in it, still running the same ones from last summer.
I rolled the rear fenders and cut one coil off the rears springs (no insolater) to tuck the 28s better. The old bolt in 6point holes are welded up, in the floor and in the wheel wheels. I repainted them agian just flat black and they look really good.
Got the racecraft rails on. The 1st part of the rails the double holes end is on the wind sheild side. I used I think its a .135 drill for the hardwear fits tight really well. You can tell they got the rails design very nice after making a few diffrent styles. The holes layout pefect around the other fender bolts, with just enogh room to get tools on the bolts. I'm not sure if I'm gona grind off the whole side lip on the hood. Its gona be very weak. I might cut the top rail down a little like I saw somone do, but they might need a little leg brace on the dzus pads I'll have welded on. They will be kinda thin, and weak. I'll see about getting some pics this weekend.
Ill get the weights on the hood hinges, bolts, the latch, and all that. The hindges are alot more then they look.
Last edited by studderin; 04-23-2009 at 10:44 PM.
04-25-2009, 11:32 AM
#58
thanks, ya Ill weight it with the safty latch and latch ring, than all the other parts. The sopt welded brakets are thick too, for the front hood bumpers. not panning on cutting them off not with everything back on. 
I really like that wheel
[IMG]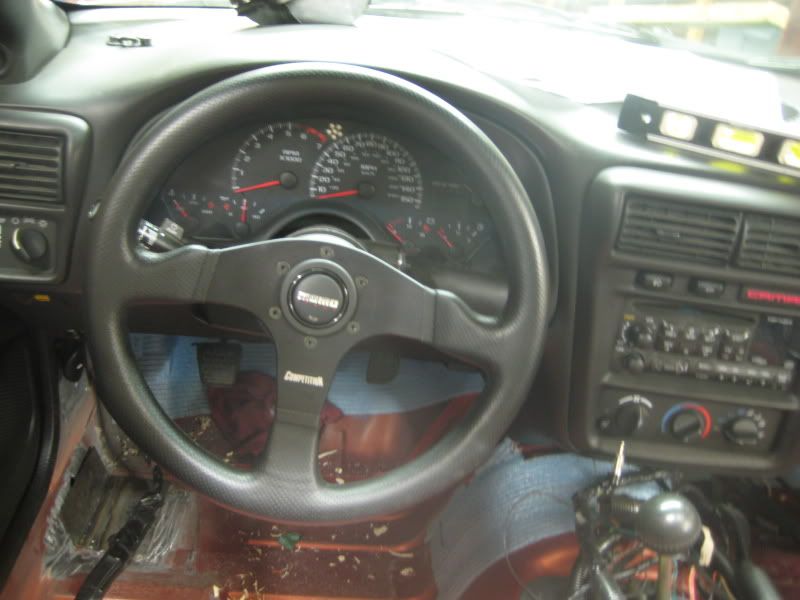 [/IMG]
better pic you can see how you machine donw the hib to fit the cloume better
[IMG]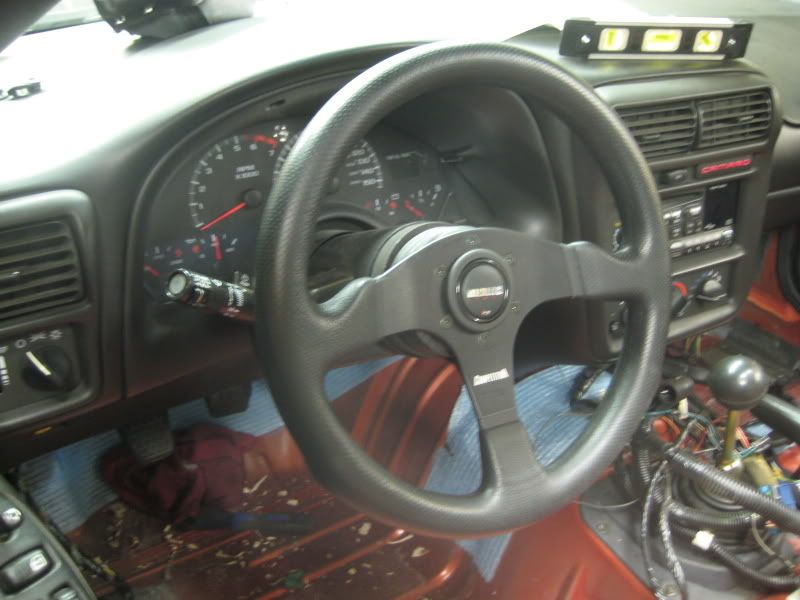 [/IMG]
I really like that wheel
[IMG]
[/IMG]better pic you can see how you machine donw the hib to fit the cloume better
[IMG]
[/IMG]
04-26-2009, 12:34 AM
#59
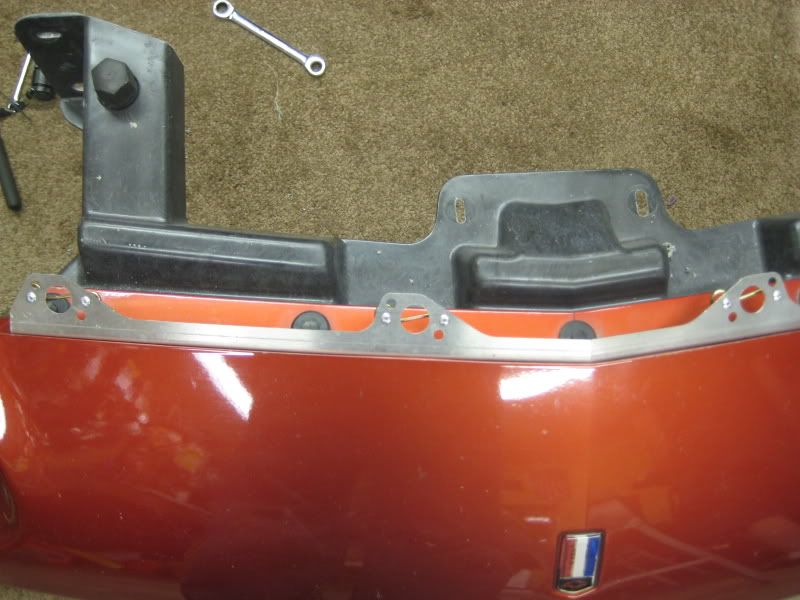
pics on mounting the racecrafter rails.
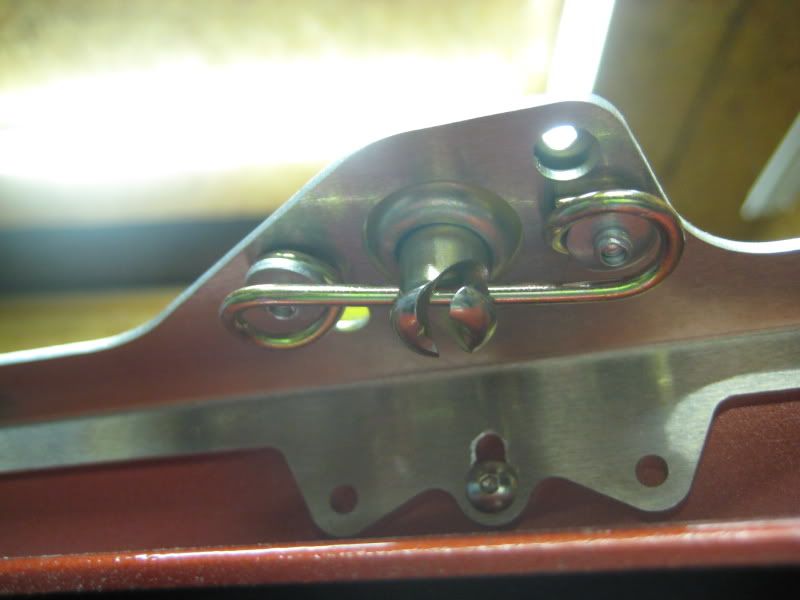
side rail lower bracket, 1st hole are 4inch off the fender edge.
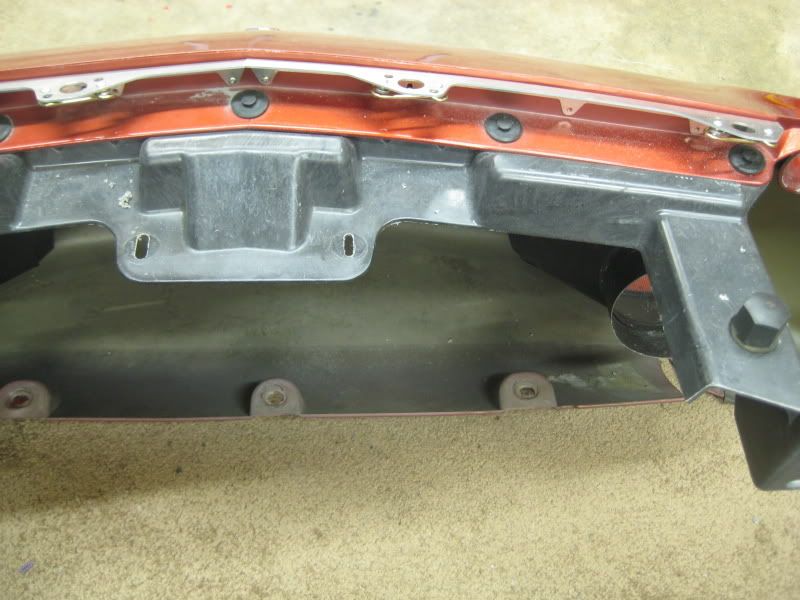
front rails: I fit the joint, a little better came out really nice. Kinda of a pain to get the nuts on in there inside. And gona make getting the headlight in harder, now that the bumper cover is bolted to the fiberglass shelve braket thing. I think I can just unbolt that off the hood latch braket pull it off the studs and fit them in. I hope it thats easy
I see alot of guys mounting the dzus so the rivits are parelle with the body line, that might look better but the think they sould be rotated like this
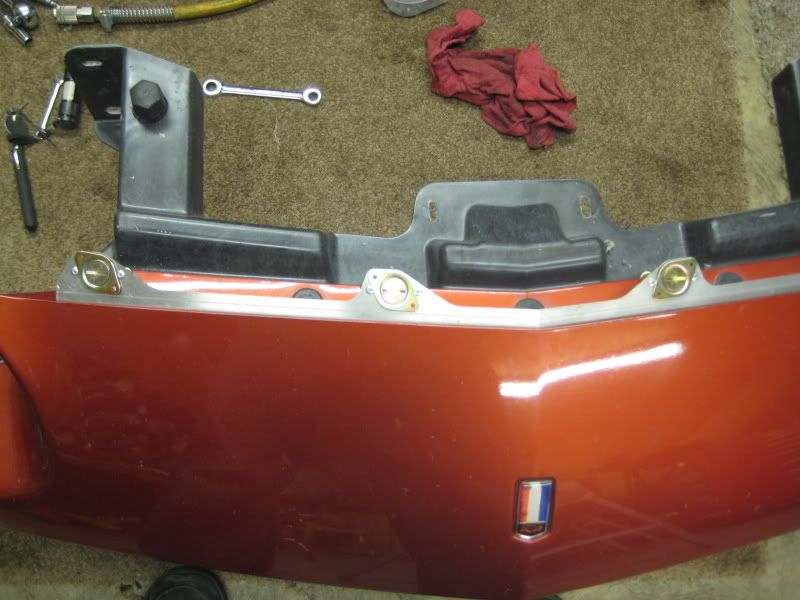
You can see the larger holes in the rails would be for the rivits on the Dzues in the back side of the hood to fit into. If you had them parelle all the rivits would be over themselfs and push on them selfs reallt bad cracking the hood in time probally?
dzus springs are the .375 as racecraft said, with a alum backed washers. but I had tightend them up a bit. Very easy, just some channel locks. Never used zus's beofore but maybe they have more room to adjust them, then if say the .250s with less coils. You'd be screwedon adjustesting them as easy as these. I orderd the gold cadium Dzus form quatermaxx thinking it would match SOM better and "look more stock" haha wtf whats I thinking now looking at the hood.
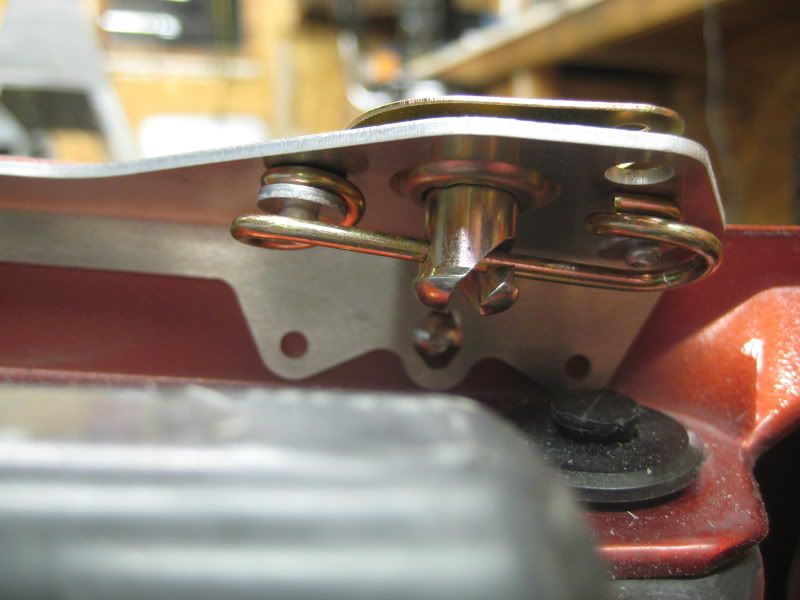
I had a small front lip, on this hood I took down a little so the rails fits tight under the hood. Needed more adjustments then this pic after I have the dzus on the hood.
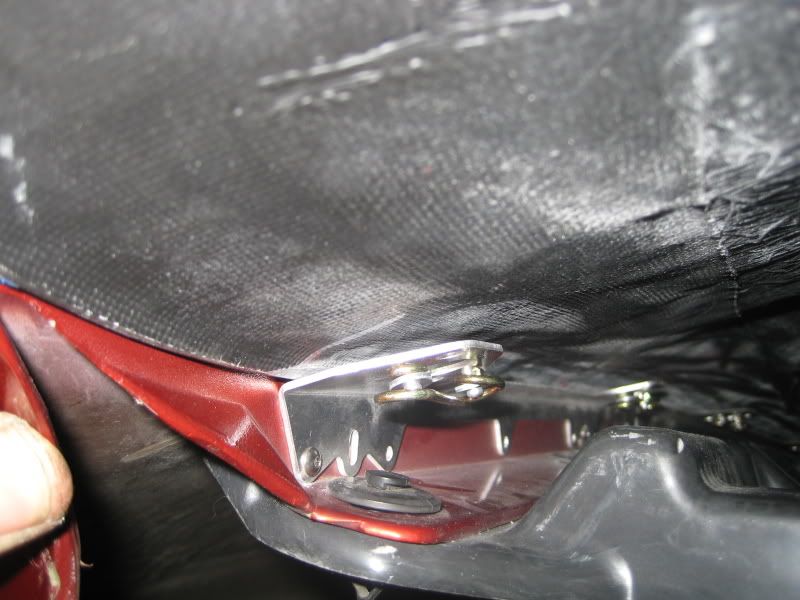
I didn't want to remove the side lip on my hood. It would be really weak, and flexy. I drive that car on the street a ton and work on the car alone alot I can remove the hood by myself pretty easy. (with the painters tape proteching the fenders) with the lip on the hood, just lifting it form the cowl and over a headlight. I saw somone else cut the rails down a little, wiat like a cutoff wheel? But I tried somthing else 1st. I wanted to bent the lip down on them were the slight bend is from racecraft. Keep them strong, but that didnt work on the metal brake I was using, maybe if you have some 1/4 finger dies or somthing barlly pinch them, or make somthing custom, to hold them. I dont know 1st time I got to use a metal brake and didn't know what the hell I was doing. lol So I just cut them down a little for whats was needed to cleal the hood lip. On a surface plate and a height gauge scriber marked .250, witch is just next to the slight bend they come with. (good becuse that still keep them plenty strong bolted on the car) And used a big *** bench shear cut them like butter. Needs 2 people to watch the line, they tip in the shear from the slight bend. Worked out great, I was happy. Might have to tighen the inside of the corner under the hood were it has a bigger corner. And the front it gets bigger right behind the headlight, were the hood get thicked for the corner. But just made the bend in the rails a little more towards the fender


thanks to mike at newera for letting me use the metal brake, and the shear at the shop to do this.
side rail lower bracket, 1st hole are 4inch off the fender edge.
front rails: I fit the joint, a little better came out really nice. Kinda of a pain to get the nuts on in there inside. And gona make getting the headlight in harder, now that the bumper cover is bolted to the fiberglass shelve braket thing. I think I can just unbolt that off the hood latch braket pull it off the studs and fit them in. I hope it thats easy
I see alot of guys mounting the dzus so the rivits are parelle with the body line, that might look better but the think they sould be rotated like this
You can see the larger holes in the rails would be for the rivits on the Dzues in the back side of the hood to fit into. If you had them parelle all the rivits would be over themselfs and push on them selfs reallt bad cracking the hood in time probally?
dzus springs are the .375 as racecraft said, with a alum backed washers. but I had tightend them up a bit. Very easy, just some channel locks. Never used zus's beofore but maybe they have more room to adjust them, then if say the .250s with less coils. You'd be screwedon adjustesting them as easy as these. I orderd the gold cadium Dzus form quatermaxx thinking it would match SOM better and "look more stock"
haha wtf whats I thinking now looking at the hood.I had a small front lip, on this hood I took down a little so the rails fits tight under the hood. Needed more adjustments then this pic after I have the dzus on the hood.
I didn't want to remove the side lip on my hood. It would be really weak, and flexy. I drive that car on the street a ton and work on the car alone alot I can remove the hood by myself pretty easy. (with the painters tape proteching the fenders
) with the lip on the hood, just lifting it form the cowl and over a headlight. I saw somone else cut the rails down a little, wiat like a cutoff wheel? But I tried somthing else 1st. I wanted to bent the lip down on them were the slight bend is from racecraft. Keep them strong, but that didnt work on the metal brake I was using, maybe if you have some 1/4 finger dies or somthing barlly pinch them, or make somthing custom, to hold them. I dont know 1st time I got to use a metal brake and didn't know what the hell I was doing. lol So I just cut them down a little for whats was needed to cleal the hood lip. On a surface plate and a height gauge scriber marked .250, witch is just next to the slight bend they come with. (good becuse that still keep them plenty strong bolted on the car) And used a big *** bench shear cut them like butter. Needs 2 people to watch the line, they tip in the shear from the slight bend. Worked out great, I was happy. Might have to tighen the inside of the corner under the hood were it has a bigger corner. And the front it gets bigger right behind the headlight, were the hood get thicked for the corner. But just made the bend in the rails a little more towards the fenderthanks to mike at newera for letting me use the metal brake, and the shear at the shop to do this.
Last edited by studderin; 04-26-2009 at 12:46 AM.
