

'99 WS6 LQ408 build. Update: 11.4 @ 125
 01-07-2015 | 08:25 PM
#61
TECH Fanatic
Joined: Mar 2014
Posts: 1,268
Likes: 162
This is a 96 Camaro with a LS motor with 2 inch primary tube headers made by Kooks. We have the Spohn K-member, their solid pedestal motor mounts and their pinto rack. Hooked to the stock steering column with their supplied shaft. We have like 3/8's of an inch clearance. No issues. Only two u-joints.
01-07-2015 | 09:41 PM
#62
I've got kooks 1 7/8 headers so they should be about the same. I think the problem is mine stops at the #5 primary then turns and yours goes to the #1 primary. Mine should also go to the #1 primary after I swap out the pipe for the longer pipe Burkhart is sending
01-08-2015 | 05:03 AM
#63
TECH Fanatic
Joined: Mar 2014
Posts: 1,268
Likes: 162
Oh, I see what you mean. Hope that works out good for you. The guys from Burkhart will get you hooked up for sure. They are definitely great people. I thought it was a little strange that it wouldn't work. I figured no matter what K-member or rack you get it still should be at least close if not the same specs no matter who makes them.
One heck of a nice build you got going there.
One heck of a nice build you got going there.
01-08-2015 | 11:55 AM
#64


Damn man sorry about your luck. I have MWC front end kit with afco's and everything fit like a glove. Eric is good and he will help you out all the way. MWC front end kit is simply one of the best out there in my opinion. I have never had any bad luck with any of his products. My entire suspension is from Eric at MWC and I know its badass stuff. Good luck and it looks great.
01-21-2015 | 01:26 PM
#65
Well after two weeks the pipe I need to make the steering linkage literally just got here. Long story short they sent it to the wrong person then yesterday at 10am I told them and I paid for one day shipping. To my surprise one day shipping really means one day shipping.
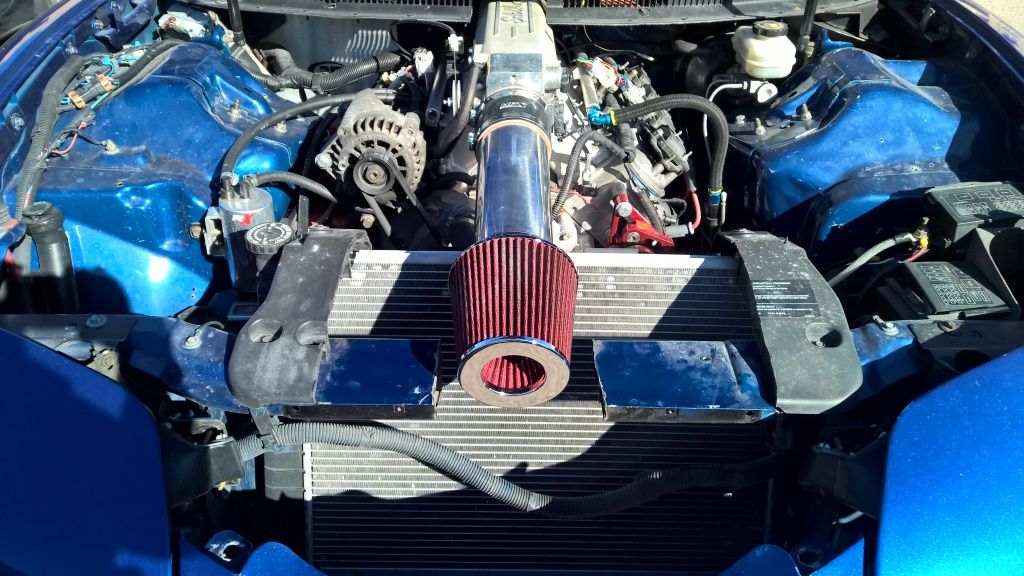
But I have one more thing I want to do before I take it to the track and need some ideas from you guys. Do something about the air intake. As of now all I have is a filter right off the throttle body. I had a SLP lid on it but took it off because the lid outlet slightly angles down, and the throttle body off the Pro Flo XT intake is really high, so I couldnt make some pipe work without 90* bends.
Here is the idea I had. Bought a air filter from auto zone that had a hard plastic casing going all the way around, got some aluminum from Lowes and cut it to size to make a box around it, then was going to angle the rear of the box to go around some 4" aluminum pipe. But when I tried to weld the front of the box together the corners just burnt up. My guess is the ground clamp being on one piece then the other piece wasnt touching each other so not enough ground. After I decided to trash it I tried again on a flat end and its not so bad. Pretty decent for my first time ever with aluminum.
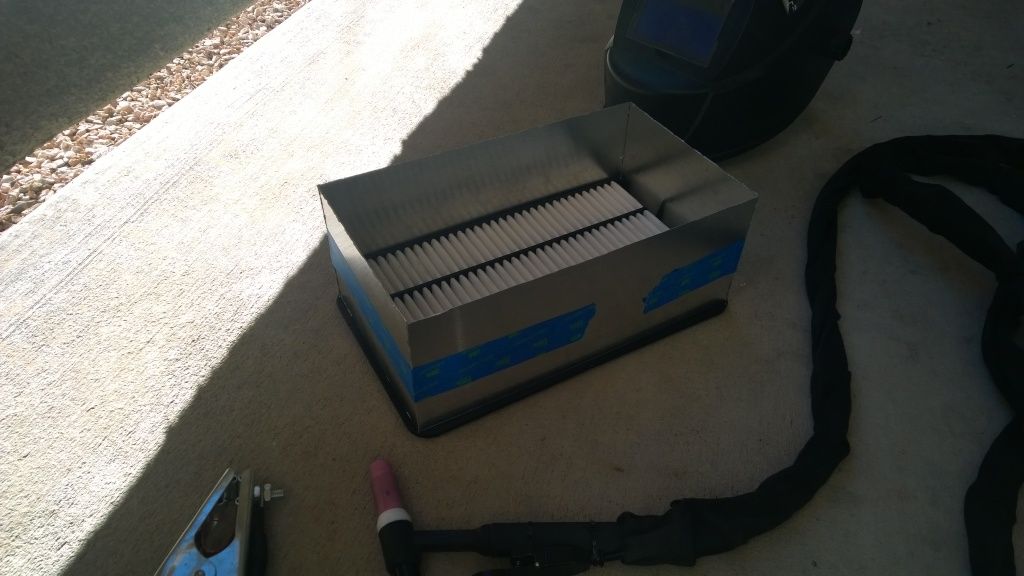

So what ideas do you guys have? Now I'm thinking either a 6" to 4" velocity stack on 4" aluminum pipe with a 45* bend. And then when I want a air filter put on one of those really long and skinny air filters you see on some c5's or WS6s.
 02-02-2015 | 02:59 PM
#69
@Widow Maker, turbo will be this year for sure
@Major Shart, no not yet. I'll be competing in Stick Wars Feb 27th and thats also the day I'm supposed to run the two guys
@Blown06, remember I was going to do a photo shoot but thats right when the rocker arm bolt ripped out. Dont worry though its warming up.
Well I've had a few people inbox me about how to use the FAST fuel rails with the Edelbrock Pro Flo XT. I touched on it once but I'll go into detail with better pictures. I dont have FAST rails, I have Speed Inc high flow rails. But looking at both, the dimensions are nearly identical so this method should would.
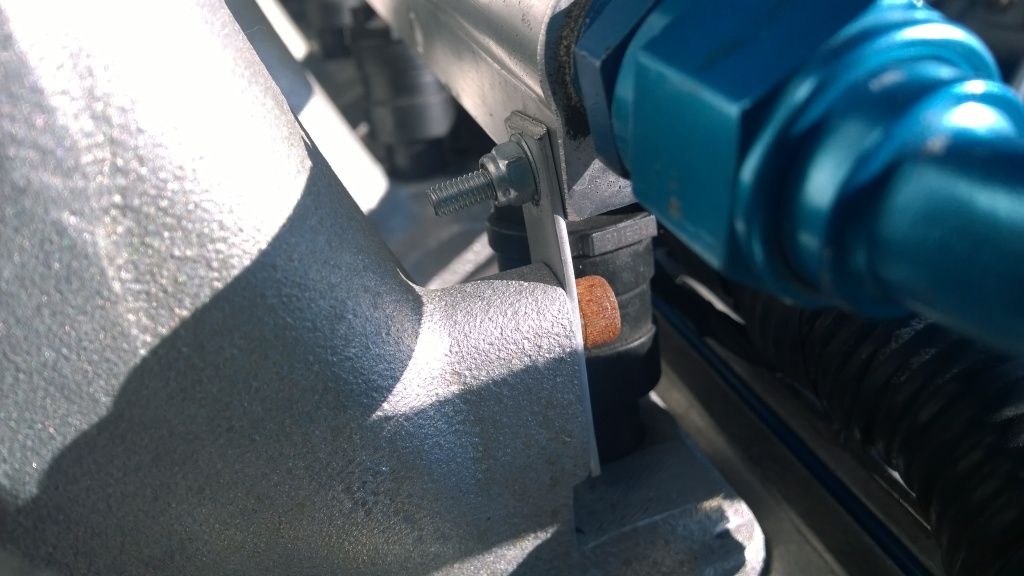
First I bought some thin strips of sheet metal from Lowes. Dont get them too thin or too thick. You want to be able to bend them slightly by hand but not so thin they will flex on their own while mounted. I also bought 4 small fine thread metric bolts, 8 small washers, and 4 lock nuts for the bolts. This will be used to go through the hole you drill through the fuel rail and also the sheet metal strips. I also bought 4 allen head bolts (or whatever they're called) to go into the intake because with normal bolts you cant get a socket around them because the fuel injectors are so close. Sorry I dont remember the thread size. The intake comes with some but they are too long, use those to get the thread size.
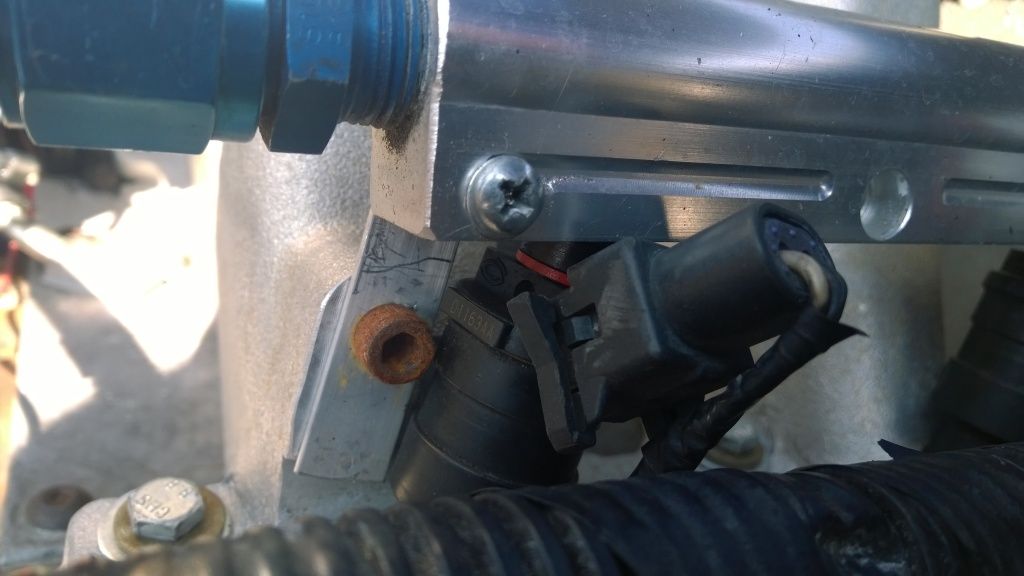
So basically I just drilled small holes through each end of the fuel rails close to where the mounting holes are on the intake. BE CAREFULL IF YOU DRILL TOO HIGH YOU'LL GO THROUGH THE PART WHERE FUEL IS and then you'll have fuel coming out you're mounting holes. No bueno. Then I trimmed the sheet metal to size, fitted it, made some marks where to drill, drilled it, and put all the bolts on.
After you're completely done turn the key over to cycle the fuel pump and see if its leaking out the injector O rings. I had that problem. Just bend the mounting tabs a little to where everything is even and you're done.
Two tips: go ahead and replace your O rings. They're super cheap. And also put a little oil on O rings when you're putting everything together. You'll be putting the fuel rail on and off a few times and oiled O rings just makes things easier.
@Major Shart, no not yet. I'll be competing in Stick Wars Feb 27th and thats also the day I'm supposed to run the two guys
@Blown06, remember I was going to do a photo shoot but thats right when the rocker arm bolt ripped out. Dont worry though its warming up.
Well I've had a few people inbox me about how to use the FAST fuel rails with the Edelbrock Pro Flo XT. I touched on it once but I'll go into detail with better pictures. I dont have FAST rails, I have Speed Inc high flow rails. But looking at both, the dimensions are nearly identical so this method should would.
First I bought some thin strips of sheet metal from Lowes. Dont get them too thin or too thick. You want to be able to bend them slightly by hand but not so thin they will flex on their own while mounted. I also bought 4 small fine thread metric bolts, 8 small washers, and 4 lock nuts for the bolts. This will be used to go through the hole you drill through the fuel rail and also the sheet metal strips. I also bought 4 allen head bolts (or whatever they're called) to go into the intake because with normal bolts you cant get a socket around them because the fuel injectors are so close. Sorry I dont remember the thread size. The intake comes with some but they are too long, use those to get the thread size.

So basically I just drilled small holes through each end of the fuel rails close to where the mounting holes are on the intake. BE CAREFULL IF YOU DRILL TOO HIGH YOU'LL GO THROUGH THE PART WHERE FUEL IS and then you'll have fuel coming out you're mounting holes. No bueno. Then I trimmed the sheet metal to size, fitted it, made some marks where to drill, drilled it, and put all the bolts on.

After you're completely done turn the key over to cycle the fuel pump and see if its leaking out the injector O rings. I had that problem. Just bend the mounting tabs a little to where everything is even and you're done.
Two tips: go ahead and replace your O rings. They're super cheap. And also put a little oil on O rings when you're putting everything together. You'll be putting the fuel rail on and off a few times and oiled O rings just makes things easier.
02-02-2015 | 03:09 PM
#70
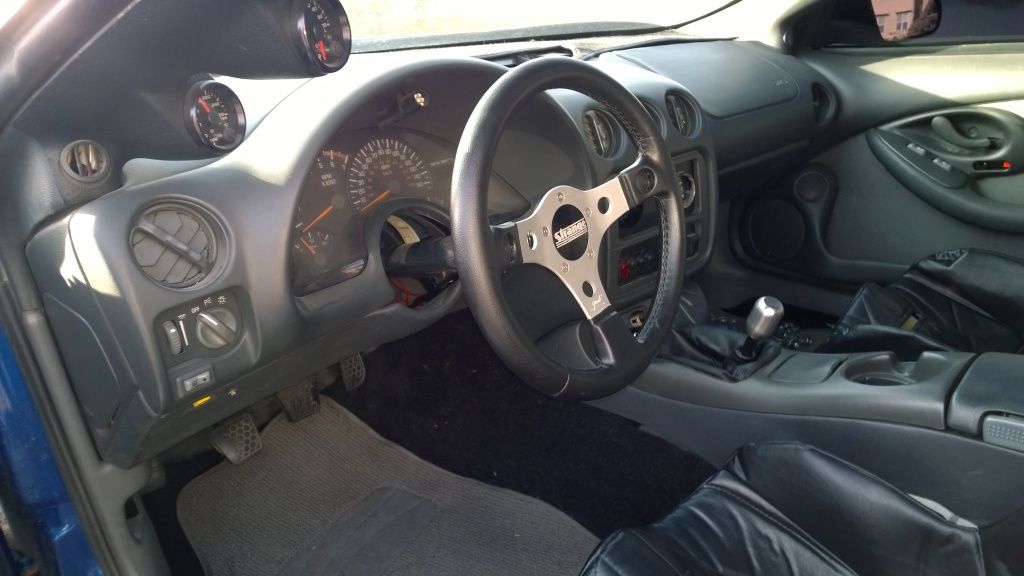
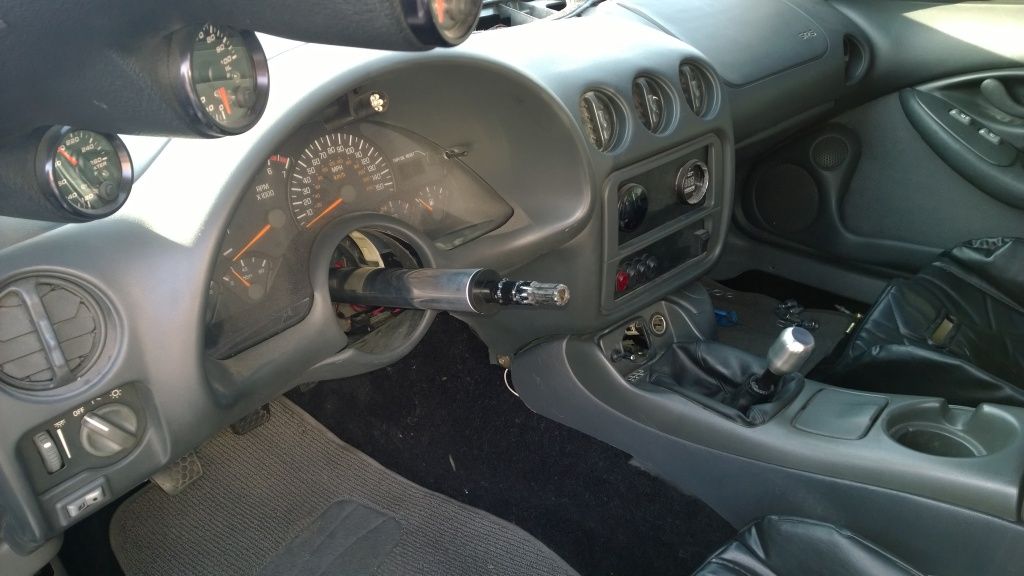
Now thats out the way here is some updates. Got the rod I needed for the steering column. As you can see from this picture it had to be longer to go around my Kooks headers. Its rubbing the headers a little but only under acceleration. Parked I have probably 1/8" clearance. I should have trimmed the short rod down a little bit more and that would have given me a little more room but I think it will live.

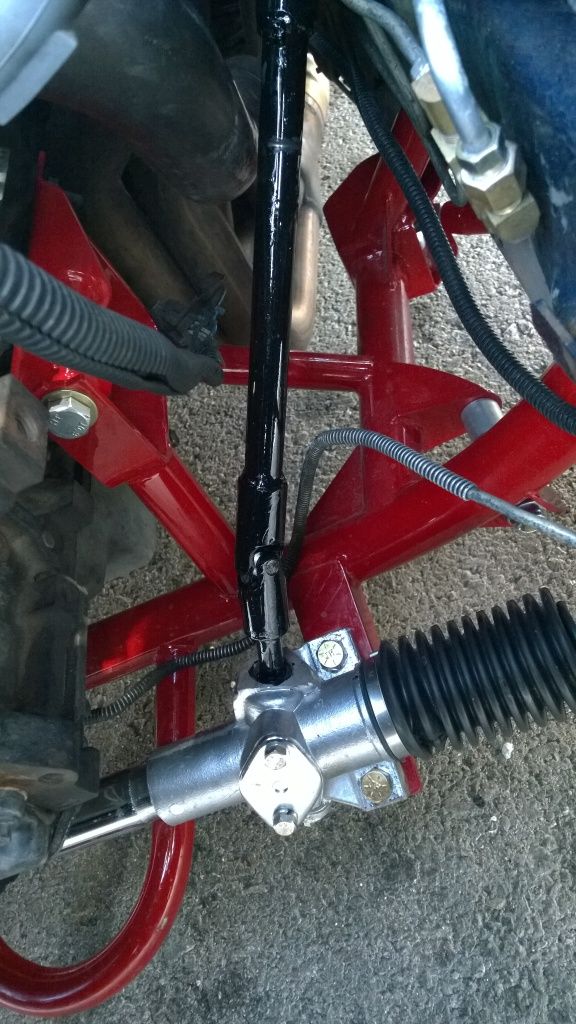
Over all I'm happy and think it looks great. Very light too. The column and steering wheel together weighed like 5.3 lbs if I remember right. Plus I like that its a detachable hub. With a hidden switch to start it, factory door locks, removable steering wheel, and locking aerocatch hood pins I feel its pretty secure.


Over all I'm happy and think it looks great. Very light too. The column and steering wheel together weighed like 5.3 lbs if I remember right. Plus I like that its a detachable hub. With a hidden switch to start it, factory door locks, removable steering wheel, and locking aerocatch hood pins I feel its pretty secure.

 02-02-2015 | 10:48 PM
#71
Hey man,
The post about the fuel rails was exactly what I was looking for. I sort of understood from when you explained it in the other thread but I see what you mean about it not really being a big deal to do.
Thanks again and good luck with the rest of the build.
The post about the fuel rails was exactly what I was looking for. I sort of understood from when you explained it in the other thread but I see what you mean about it not really being a big deal to do.
Thanks again and good luck with the rest of the build.
Last edited by My6speedZ; 02-03-2015 at 01:39 AM. Reason: grammar
02-03-2015 | 01:18 AM
#72
Any time. That's what this thread is for. I can't stand build threads where they say, "I just put this part on, here's a picture and that's all you're getting". Because that always leaves me with a million questions.
 02-03-2015 | 08:53 PM
#75
I might make a removable plate for the steering column hole someday. My first priority would be to do a complete wire tuck and relocation.
I honestly can't remember the web site I got the carpet from. But I hate it and will be changing it at some point. The website said it was pre molded and even the pictures showed it was molded but it came in a big flat roll. It looks ok up front because the wrinkles are under the seats but the rear seat and driveshaft tunnel looks horrible with folds and its setting 6" off the floor over the seat area.
I honestly can't remember the web site I got the carpet from. But I hate it and will be changing it at some point. The website said it was pre molded and even the pictures showed it was molded but it came in a big flat roll. It looks ok up front because the wrinkles are under the seats but the rear seat and driveshaft tunnel looks horrible with folds and its setting 6" off the floor over the seat area.
02-04-2015 | 08:21 AM
#76
TECH Apprentice
Joined: Oct 2014
Posts: 301
Likes: 0
From: Daytona Beach, FL
I honestly can't remember the web site I got the carpet from. But I hate it and will be changing it at some point. The website said it was pre molded and even the pictures showed it was molded but it came in a big flat roll. It looks ok up front because the wrinkles are under the seats but the rear seat and driveshaft tunnel looks horrible with folds and its setting 6" off the floor over the seat area.
02-04-2015 | 11:34 AM
#77
I'd say any carpet would work. Nothing special. The heavy part is the insulation under the carpet. It blew my mind how much heavier it was than the carpet itself. Just throw some carpet in and leave the insulation out
02-04-2015 | 03:59 PM
#78
TECH Apprentice
Joined: Oct 2014
Posts: 301
Likes: 0
From: Daytona Beach, FL
I heard it's a huge pain to remove that stuff from the carpet. I'll find out next week when I get mine gutted.
02-14-2015 | 10:52 PM
#79
So if you look back at my pics for the longest time I've had an air filter right off my throttle body sucking up hot air and getting no ram air effect. Finally got around to fixing that at the last minute because I'm going to a dyno day tomorrow (I'll post results after and maybe a video if someone takes one).
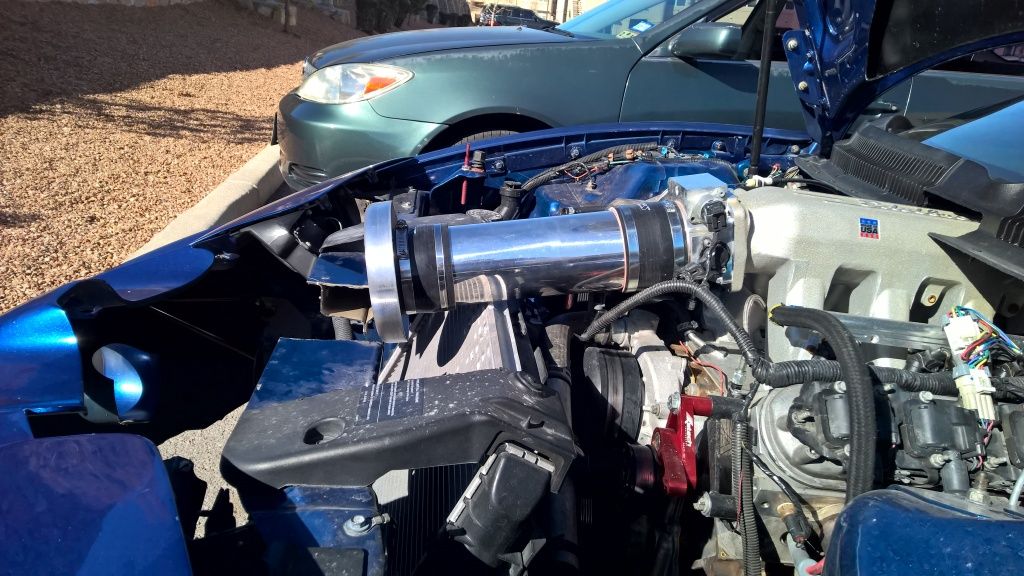
To do this I had to cut the radiator support. This is just a rough cut, I'm going to go back and cut more off, evenly, and weld some caps on. Didnt mind doing this since I'm going to do it anyway when I put in a Griffin radiator for the turbo build.
I bought a 4" piece of aluminum pipe off Amazon for pretty cheap and 2, 4" couplers and bands. I drilled a hole in the bottom of it for the IAT sensor near the throttle body so it would be tucked away. And obviously there isnt a MAF sensor because I'm running a custom 1 bar SD tune that I tune myself with HP tuners
I also got a velocity stack with 4" outlet and 7" inlet for when I go to the track
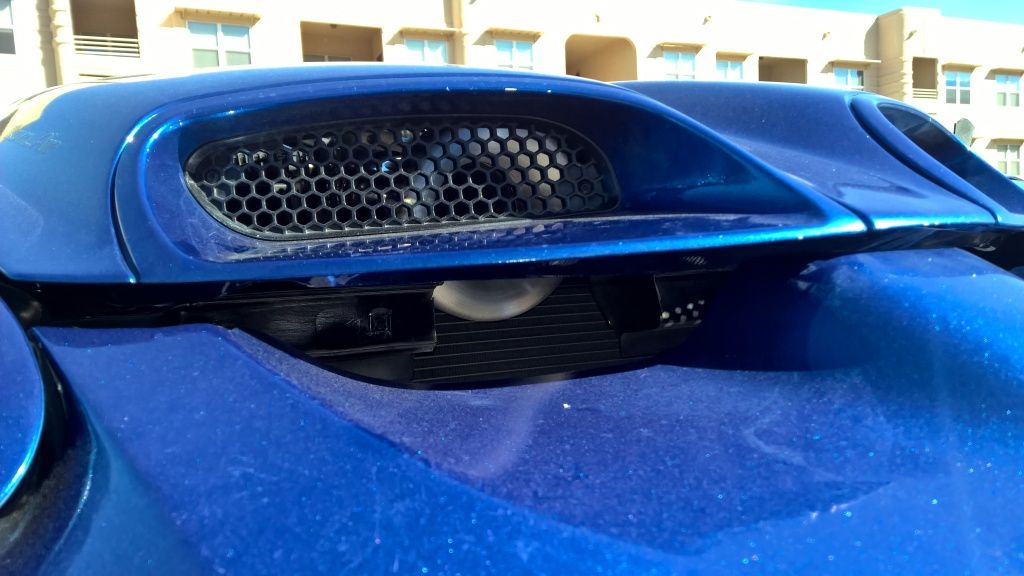
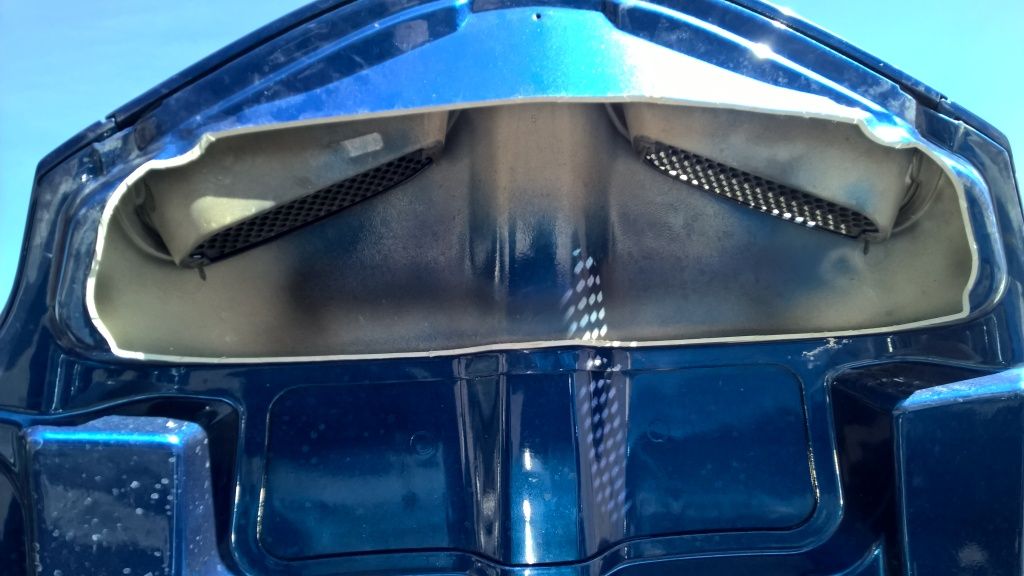
The other thing I did was cut the box out of the hood. The reason was because if you look at it the opening is on like 2" wide and also the length left to right isnt as wide as the nostrils are. Seems to me thats not only minimizing air flowing through but also makes it turbulent. You would have to look at it to see what I'm talking about.
Also the piece goes down and almost completely blocks the two lower nostrils in the bumper. Cutting it out allows for air to flow through all 4, which helps with this intake N/A, and should also help with keeping things cool when I go boosted when paired with the rear of the hood that I cut out.
Again, this is just a rough cut, I'm going to take a dremil to it to even things out and then repaint it
And it seems to work. At my elevation, even on this cool night, with key on engine off I'm only seeing 87kpa (in the summer here it gets down to 80kpa). Took it for a spin with the velocity stack on to fine tune it a little and at speed I'm seeing 92kpa, 5kpa higher. And with the filter right off the throttle body I was seeing on average 2kpa lower than KOEO.
To do this I had to cut the radiator support. This is just a rough cut, I'm going to go back and cut more off, evenly, and weld some caps on. Didnt mind doing this since I'm going to do it anyway when I put in a Griffin radiator for the turbo build.

I bought a 4" piece of aluminum pipe off Amazon for pretty cheap and 2, 4" couplers and bands. I drilled a hole in the bottom of it for the IAT sensor near the throttle body so it would be tucked away. And obviously there isnt a MAF sensor because I'm running a custom 1 bar SD tune that I tune myself with HP tuners
I also got a velocity stack with 4" outlet and 7" inlet for when I go to the track


The other thing I did was cut the box out of the hood. The reason was because if you look at it the opening is on like 2" wide and also the length left to right isnt as wide as the nostrils are. Seems to me thats not only minimizing air flowing through but also makes it turbulent. You would have to look at it to see what I'm talking about.
Also the piece goes down and almost completely blocks the two lower nostrils in the bumper. Cutting it out allows for air to flow through all 4, which helps with this intake N/A, and should also help with keeping things cool when I go boosted when paired with the rear of the hood that I cut out.
Again, this is just a rough cut, I'm going to take a dremil to it to even things out and then repaint it

And it seems to work. At my elevation, even on this cool night, with key on engine off I'm only seeing 87kpa (in the summer here it gets down to 80kpa). Took it for a spin with the velocity stack on to fine tune it a little and at speed I'm seeing 92kpa, 5kpa higher. And with the filter right off the throttle body I was seeing on average 2kpa lower than KOEO.
Last edited by Jc803; 10-12-2015 at 02:26 AM.
