

Project Barney...Turbo T/A
 04-08-2007, 08:27 PM
#1
10 Second Club
Thread Starter
iTrader: (1)
Join Date: Jul 2003
Location: St Petersburg, Fl
Posts: 568
Likes: 0
Received 0 Likes
on
0 Posts
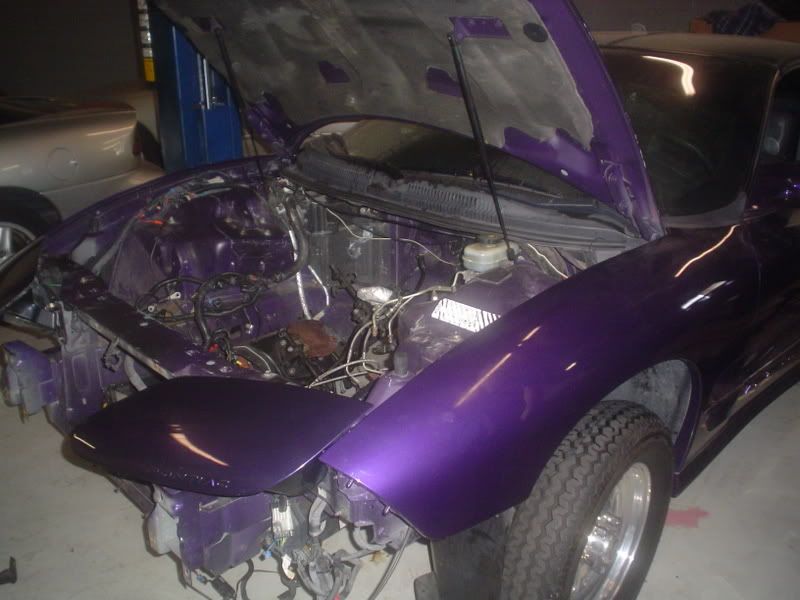
This is the build pics of my 98 Bright Purple Mettalic Trans Am. The car used to be a forged 347 N2O, A4 stall. The car ran a best of 10.78@127 on a 150 shot at full race weight. I wanted to go faster so I decided to do a turbo build. The following pics are of the build up so far.
The first picture is the car the way it arrived at the shop. No motor or transmission.
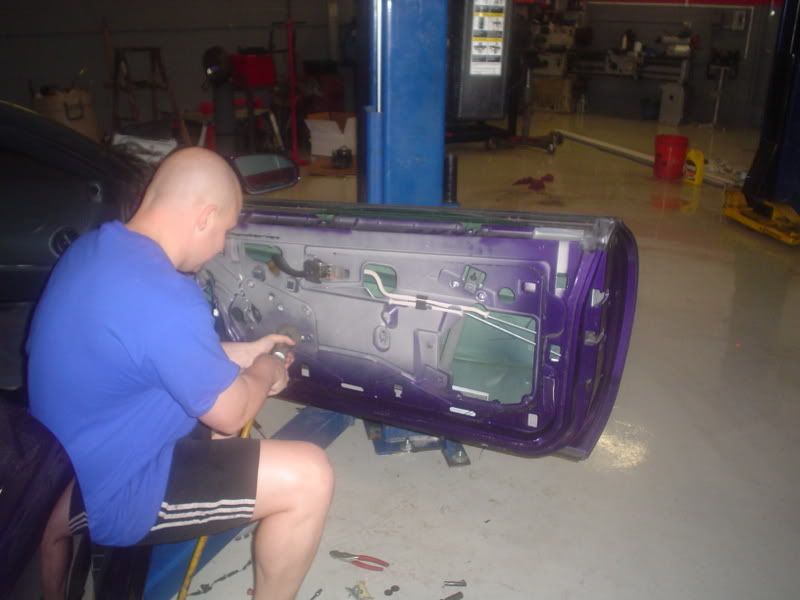
First we stripped all the crap out of the doors. No more windows, or regulators, or motors, or speakers. No wiring... no nothing. Empty door shell. You'd be surprised how much weight can be removed from a door.
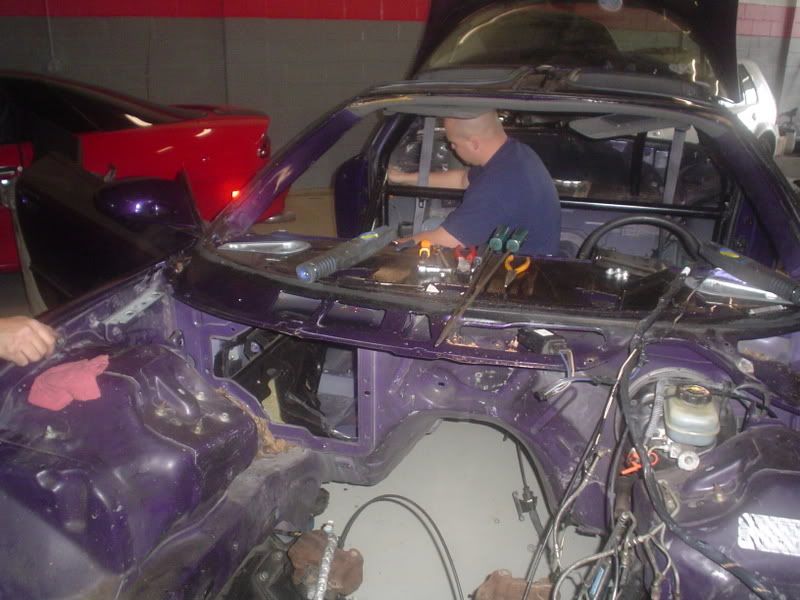
Next, we removed windshield wipers and motors, cowl, and windshield. Big Glass=heavy. Lexan, here we come.
The dashboard was then removed and all the crap behind it. Race cars don't need A/C right? There is a lot of **** behind that dashboard!
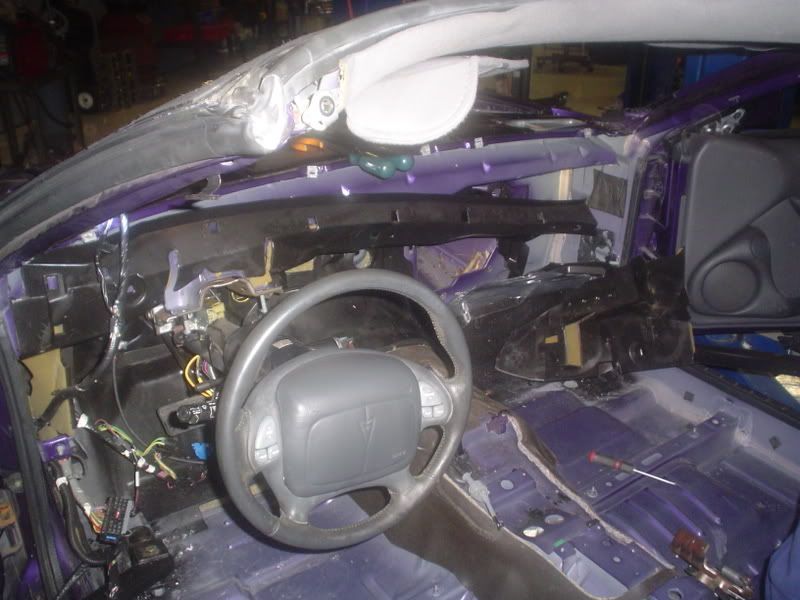
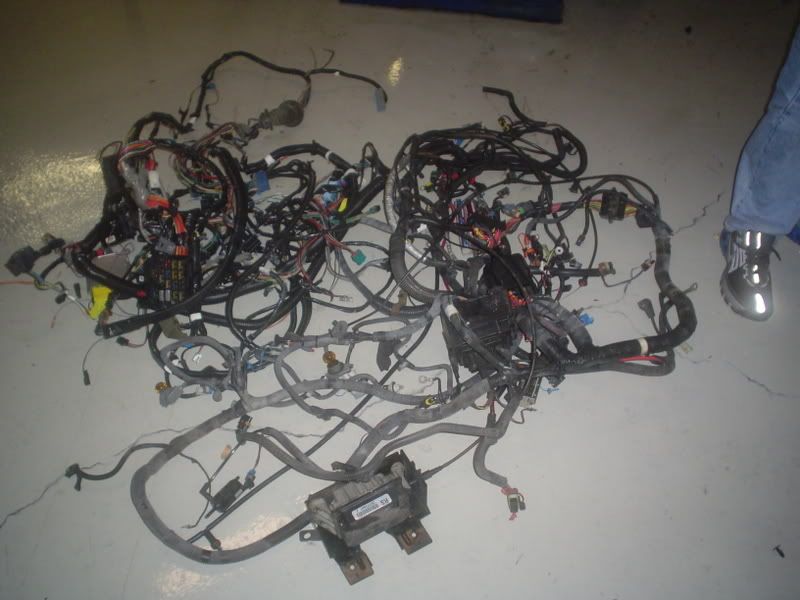
The complete Engine/body wiring was removed along with all the computers, modules, relays, and fuse panels. None of it is going back. The vehicle wiring will be all custom and much lighter. Here is a pic of ALL the vehicles wiring. It's F'n heavy! Not one single wire was left in the car.
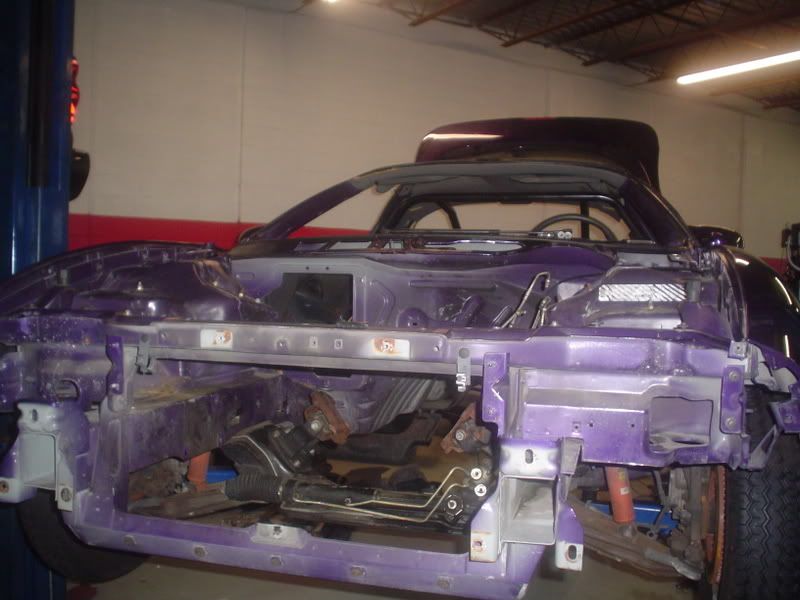
Here's a picture of the nose. Doesn't it look sad? No lights or anything. Who needs lights right?
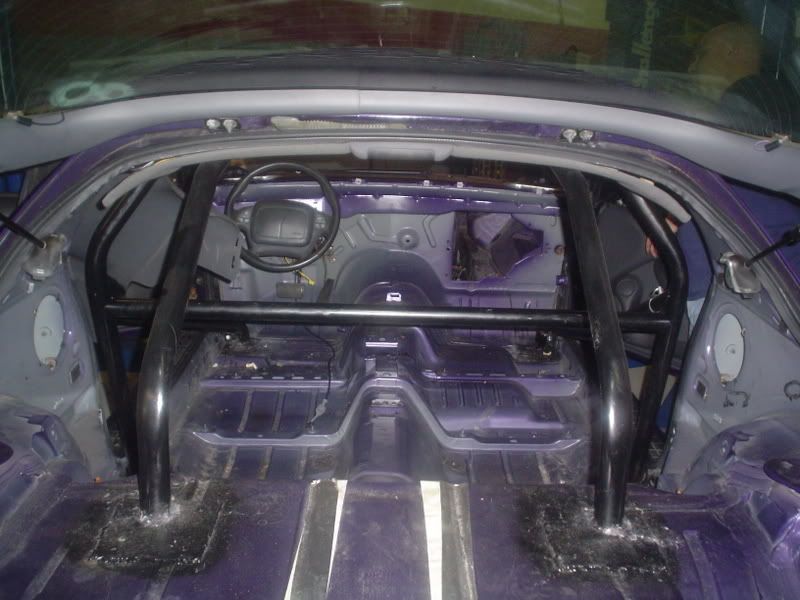
Here's a view from the back. STRIPPED!! Nothing left.
The first picture is the car the way it arrived at the shop. No motor or transmission.
First we stripped all the crap out of the doors. No more windows, or regulators, or motors, or speakers. No wiring... no nothing. Empty door shell. You'd be surprised how much weight can be removed from a door.
Next, we removed windshield wipers and motors, cowl, and windshield. Big Glass=heavy. Lexan, here we come.
The dashboard was then removed and all the crap behind it. Race cars don't need A/C right? There is a lot of **** behind that dashboard!
The complete Engine/body wiring was removed along with all the computers, modules, relays, and fuse panels. None of it is going back. The vehicle wiring will be all custom and much lighter. Here is a pic of ALL the vehicles wiring. It's F'n heavy! Not one single wire was left in the car.
Here's a picture of the nose. Doesn't it look sad? No lights or anything. Who needs lights right?
Here's a view from the back. STRIPPED!! Nothing left.
Last edited by DSG; 04-08-2007 at 08:41 PM.
 04-08-2007, 08:28 PM
#2
10 Second Club
Thread Starter
iTrader: (1)
Join Date: Jul 2003
Location: St Petersburg, Fl
Posts: 568
Likes: 0
Received 0 Likes
on
0 Posts
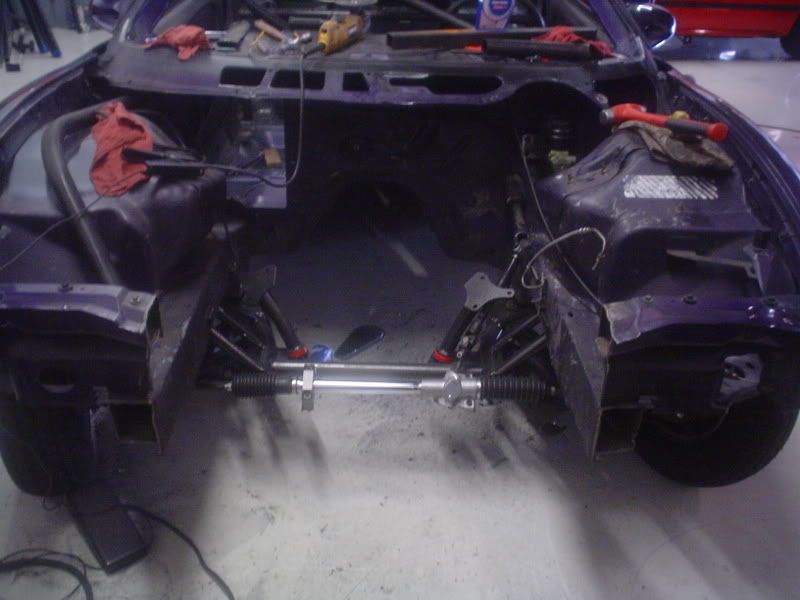
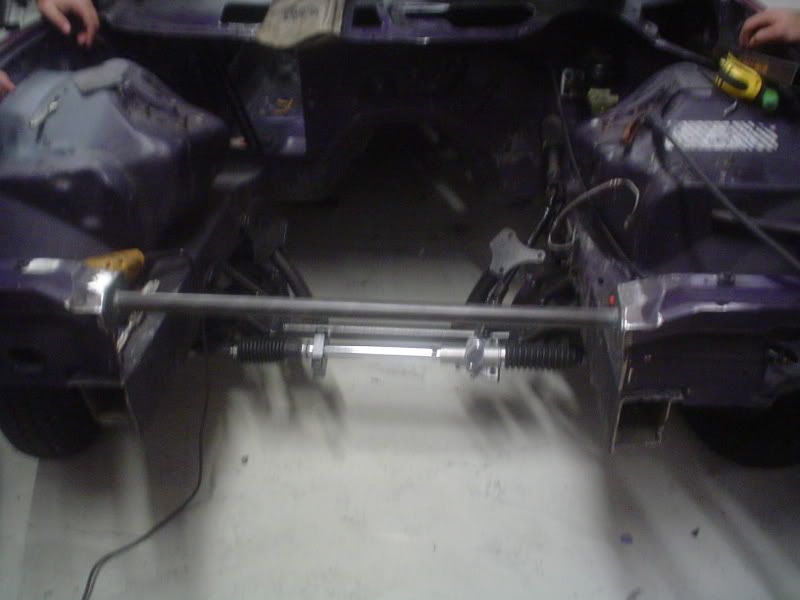
We've installed the BMR tubular crossmember, which wasn't a big deal. It comes equipped for a manual steering rack, so we installed that as well. The Manual Steering rack is a universal type so it requires a little bit of fabrication work. It does not come with a steering shaft so you have to make one. We robbed the ends from the old rack and made our own shaft. The outter tie rods were cut to length and welded on. Yay!! Now it steers again. I know there's no weight in the car, but it seems to steer quite easily. I though the manual rack would make it quite difficult to turn. We'll see how it feels when the motor is dropped in.

We wanted something that wasn't too big so that we could have more room for the turbo and piping. This is the radiator made by Afco. It's a nice piece....
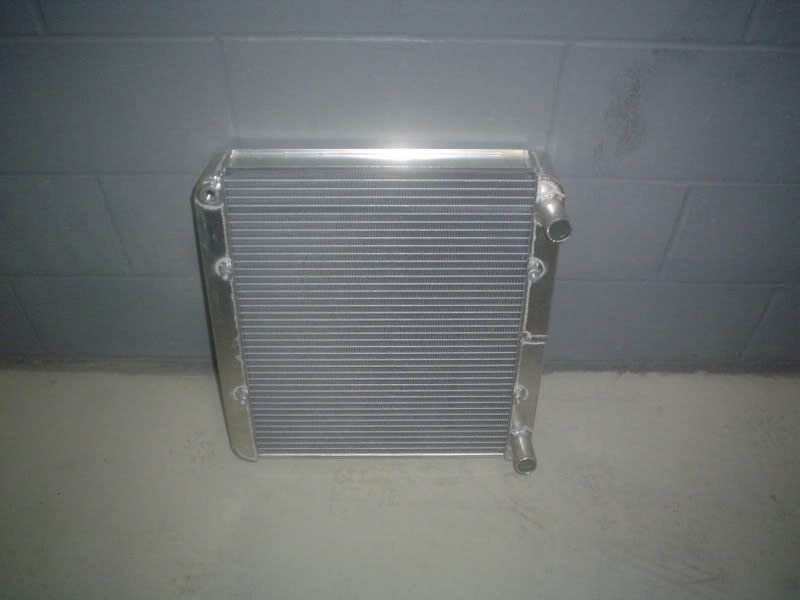
We wanted something that wasn't too big so that we could have more room for the turbo and piping. This is the radiator made by Afco. It's a nice piece....


 04-08-2007, 08:32 PM
#4
10 Second Club
Thread Starter
iTrader: (1)
Join Date: Jul 2003
Location: St Petersburg, Fl
Posts: 568
Likes: 0
Received 0 Likes
on
0 Posts
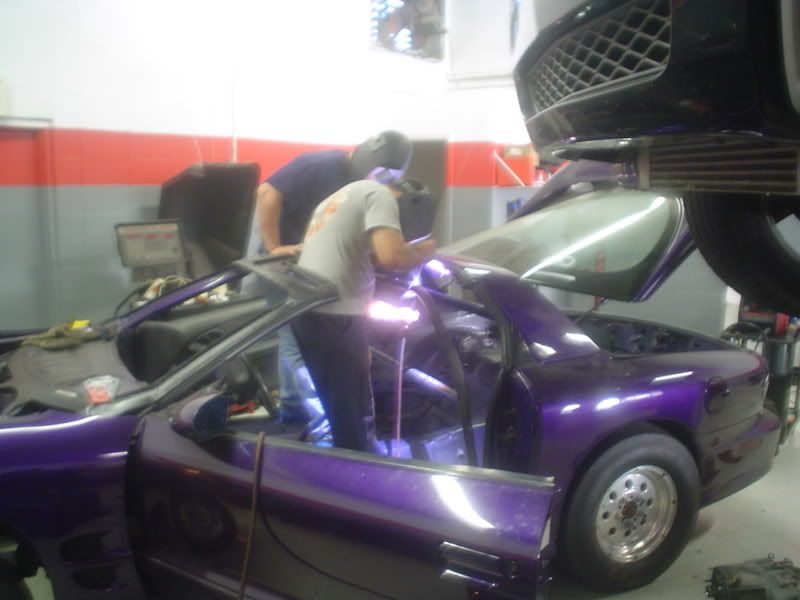
We've been working on the cage trying to get it ready for certification. It turned out to be a little more work than we expected. The bars did not fit exactly as expected and there was much modification needed.
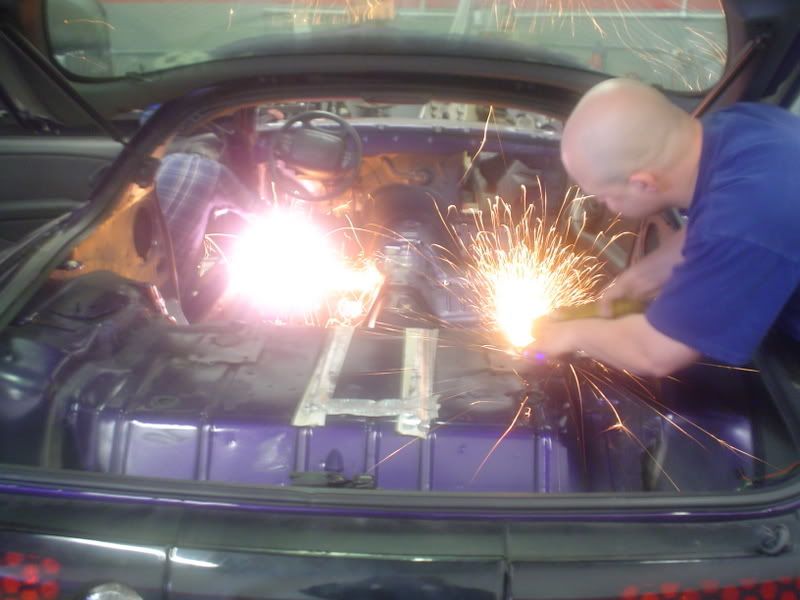
First, we had to cut out the old Wolfe 6 point roll bar. It wasn't going to do the trick. This took just a few minutes with the help of the plasma cutter. After that there was much grinding to do. We had to clean up where the roll bar used to sit.
After that we set the main hoop in place and welded the horizontal bar that goes across. At this point the hoop is held in place with just some wood blocks.
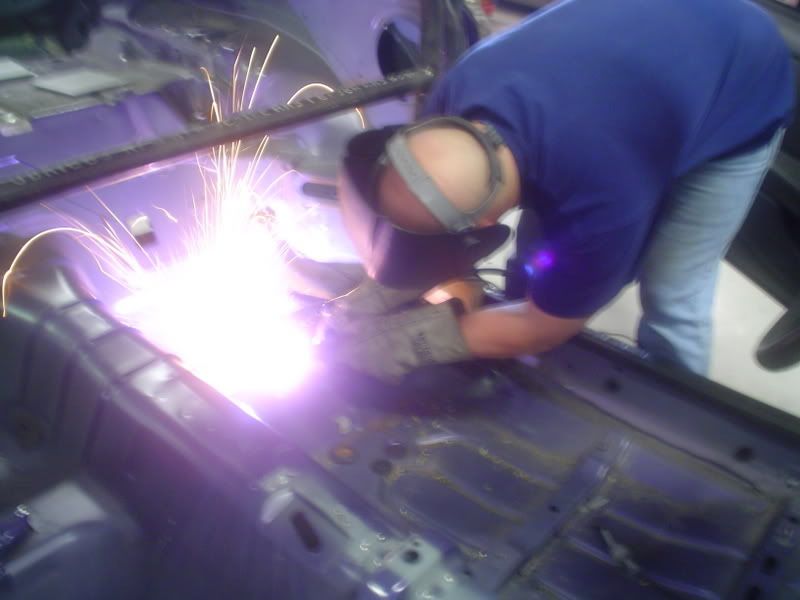
Next we added the rear diagonal bars. This cage is a chrome-moly cage so the rules state that it must be tig welded.
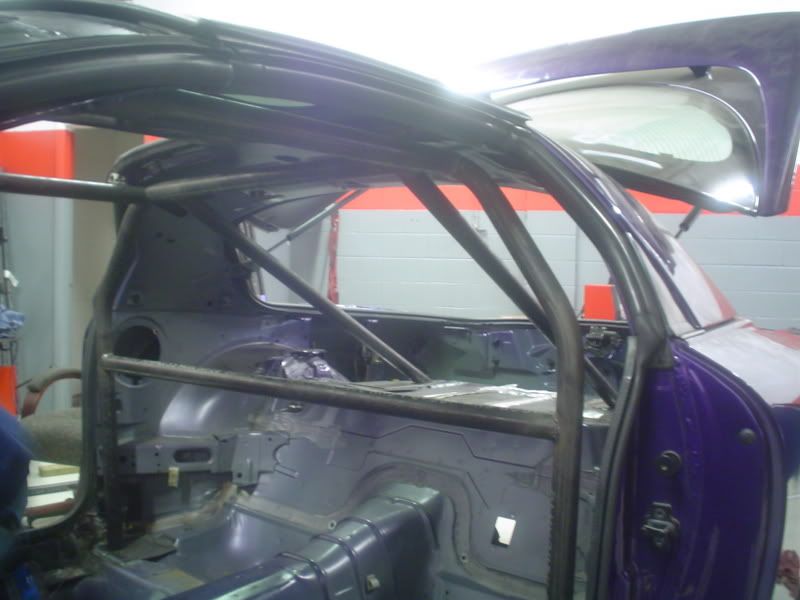
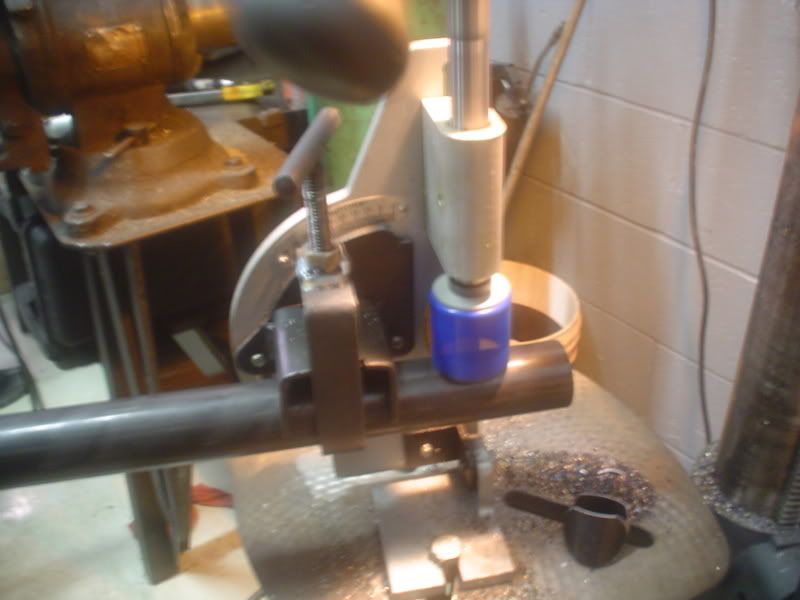
With the rear bars in place, it was time to place the halo over top. We cut the legs of the halo to the right length then jig notched them to fit. here's a picture of our cheap jig notcher.
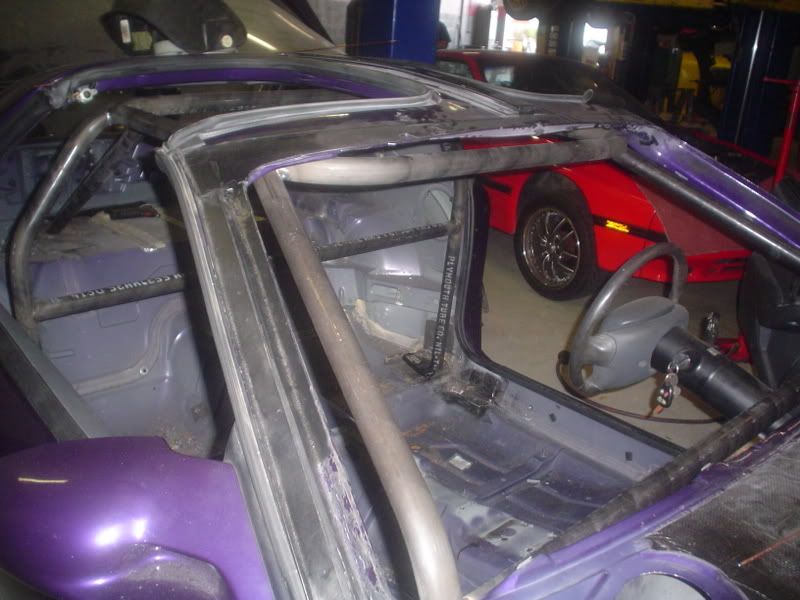
Here's a picture of the halo in place and tack welded.
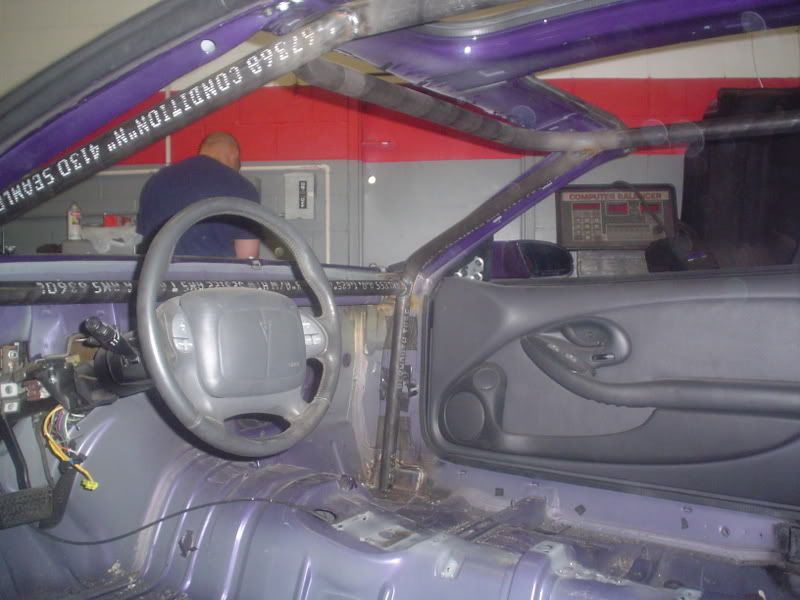
Next we added a the front bars and the horizontal bar behind the dash.
First, we had to cut out the old Wolfe 6 point roll bar. It wasn't going to do the trick. This took just a few minutes with the help of the plasma cutter. After that there was much grinding to do. We had to clean up where the roll bar used to sit.
After that we set the main hoop in place and welded the horizontal bar that goes across. At this point the hoop is held in place with just some wood blocks.
Next we added the rear diagonal bars. This cage is a chrome-moly cage so the rules state that it must be tig welded.
With the rear bars in place, it was time to place the halo over top. We cut the legs of the halo to the right length then jig notched them to fit. here's a picture of our cheap jig notcher.
Here's a picture of the halo in place and tack welded.
Next we added a the front bars and the horizontal bar behind the dash.
04-08-2007, 08:34 PM
#5
10 Second Club
Thread Starter
iTrader: (1)
Join Date: Jul 2003
Location: St Petersburg, Fl
Posts: 568
Likes: 0
Received 0 Likes
on
0 Posts
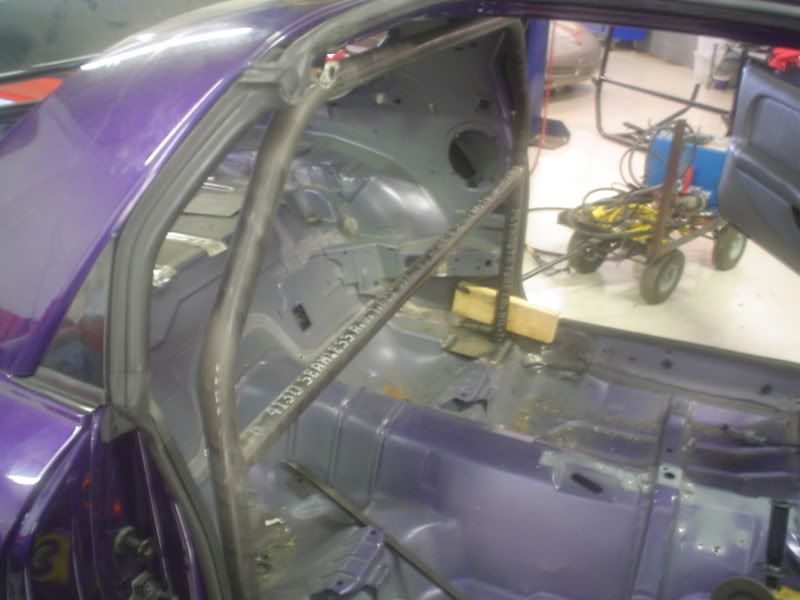
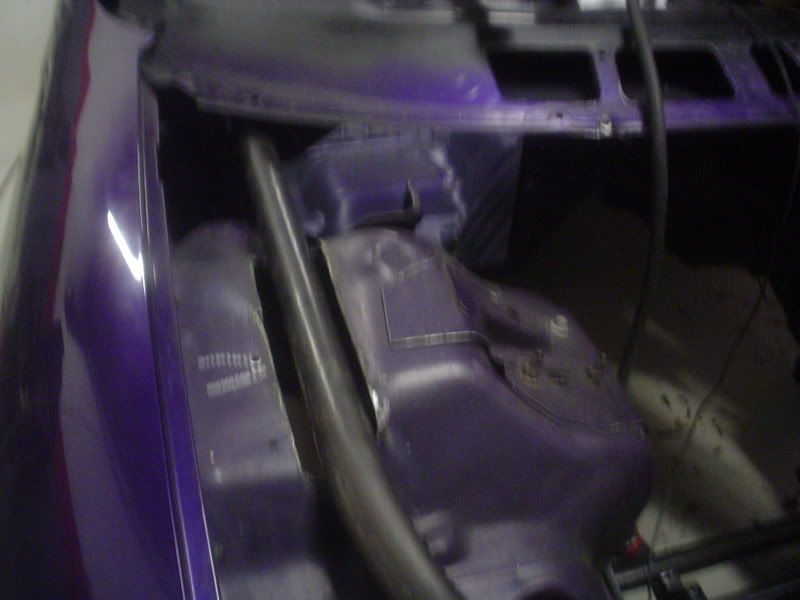
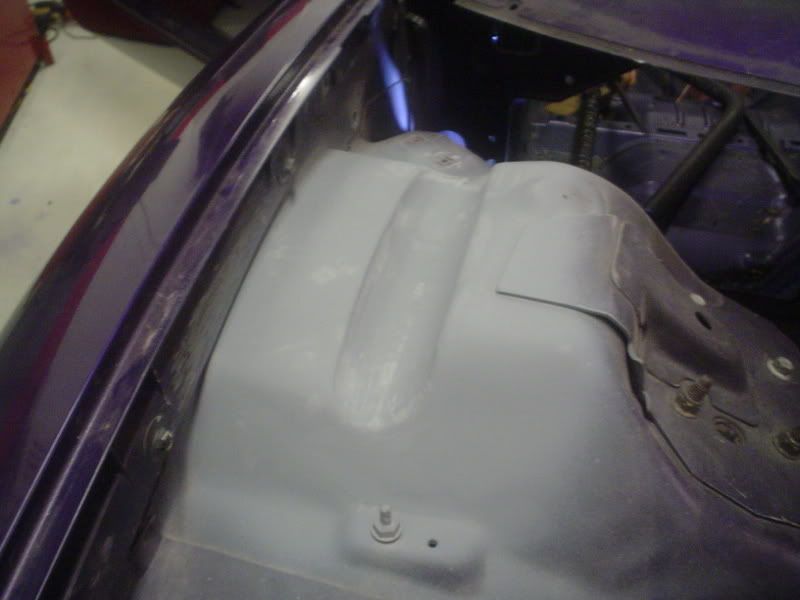
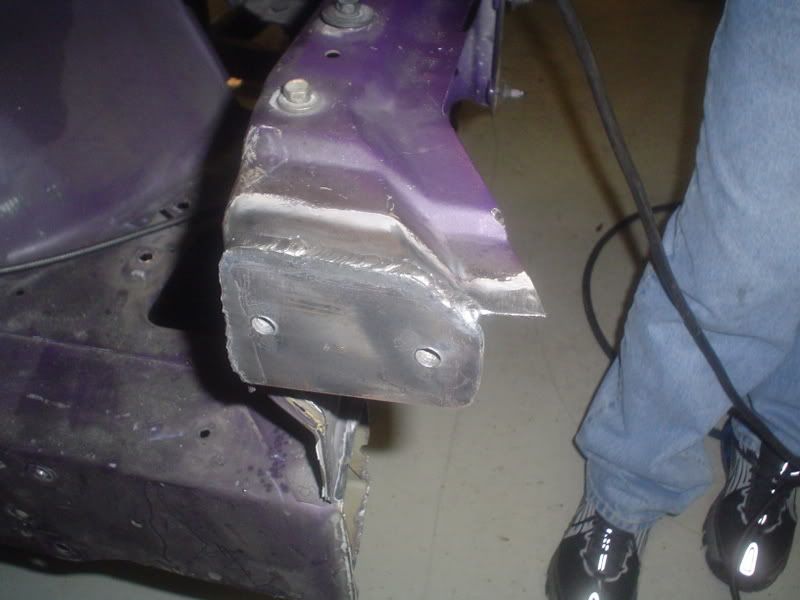
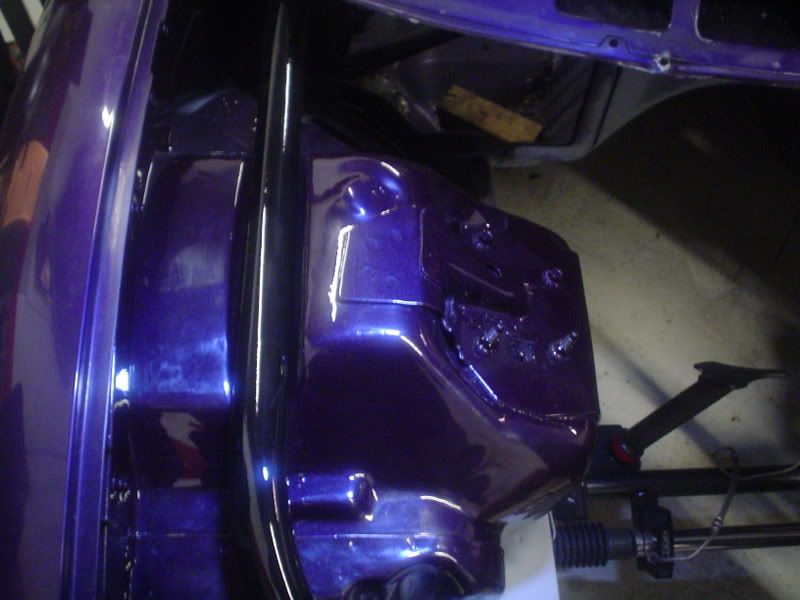
The front bars of the cage don't have enough room, so you have to cut the shock towers to fit them. Most people just cut a hole and leave it as is, or they weld the bar to the hole. We thought we'd do a little neater installation. Here's the first picture with the bar sitting in the hole we cut with the plasma cutter.
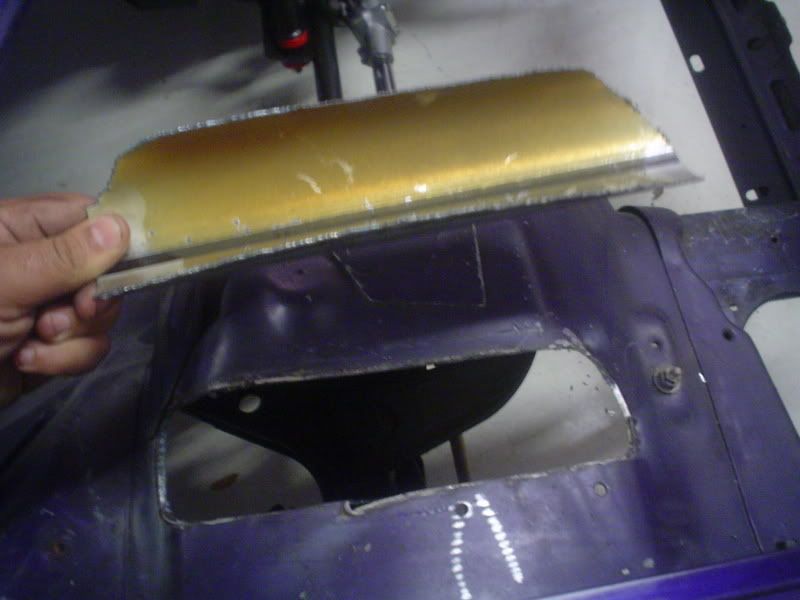
In this picture we cut a half piece of pipe to fit in the hole and fitted it.
It was then TIG welded in and ground nicely. The idea was to make it seamless and appear as if though it came this way from the factory.
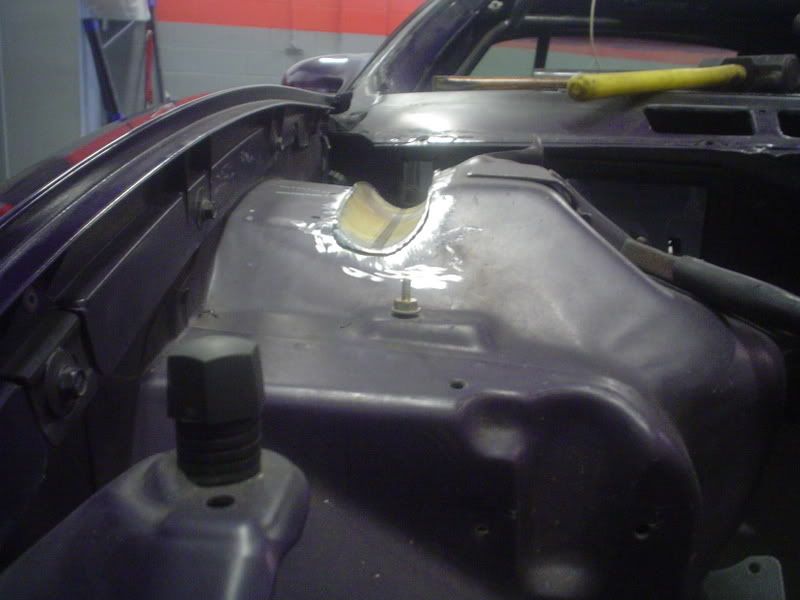
Here is the half pipe after it was completely welded and primed.
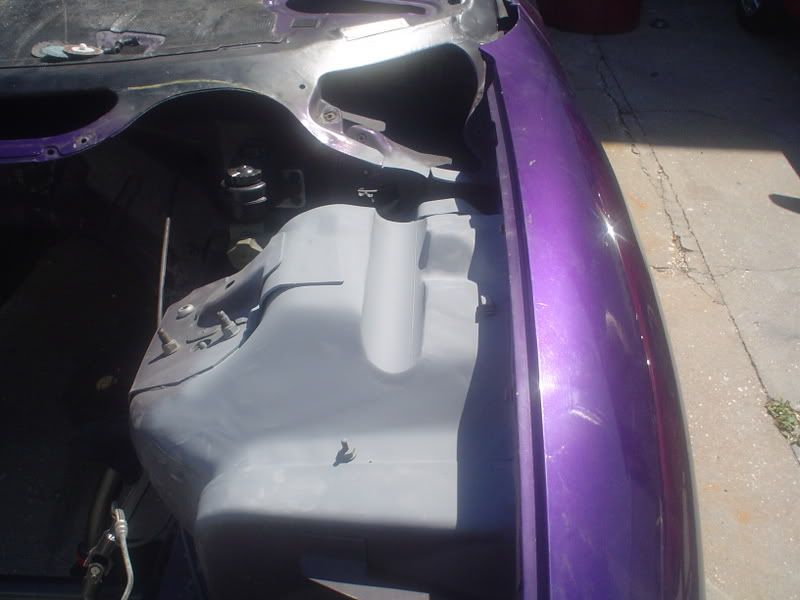
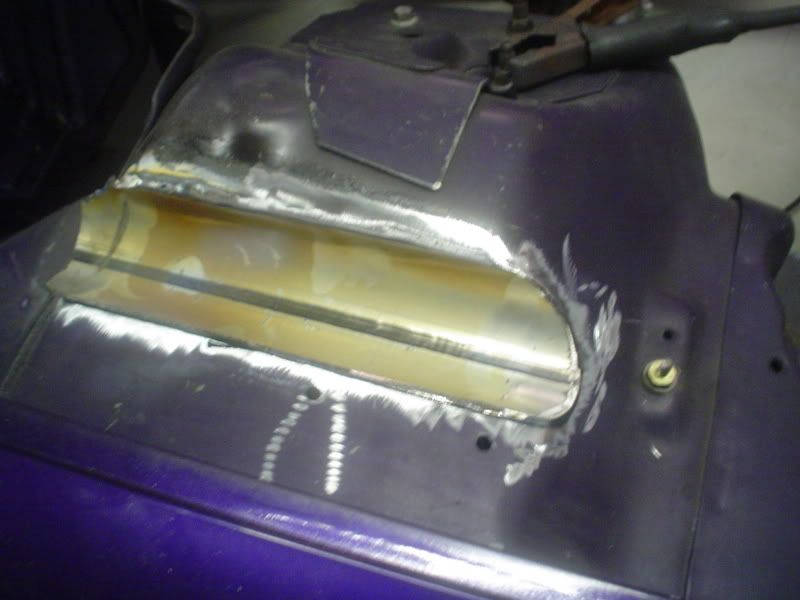
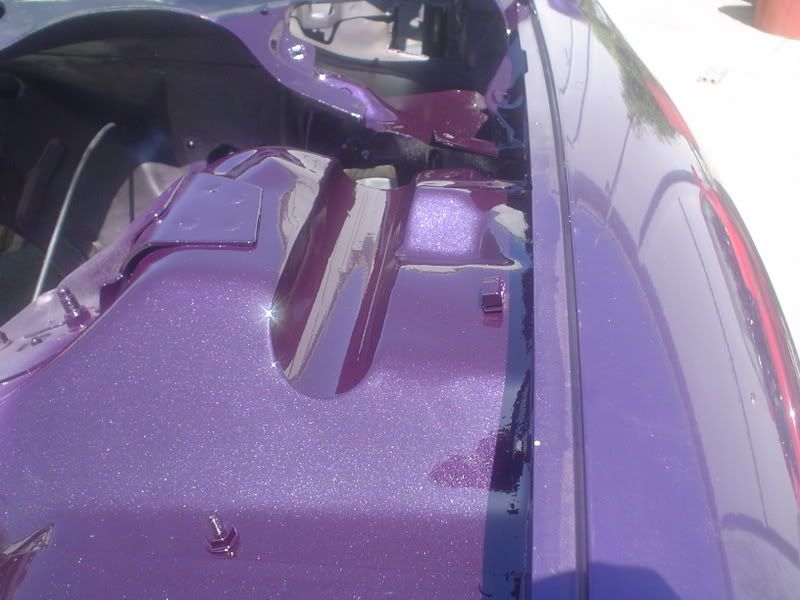
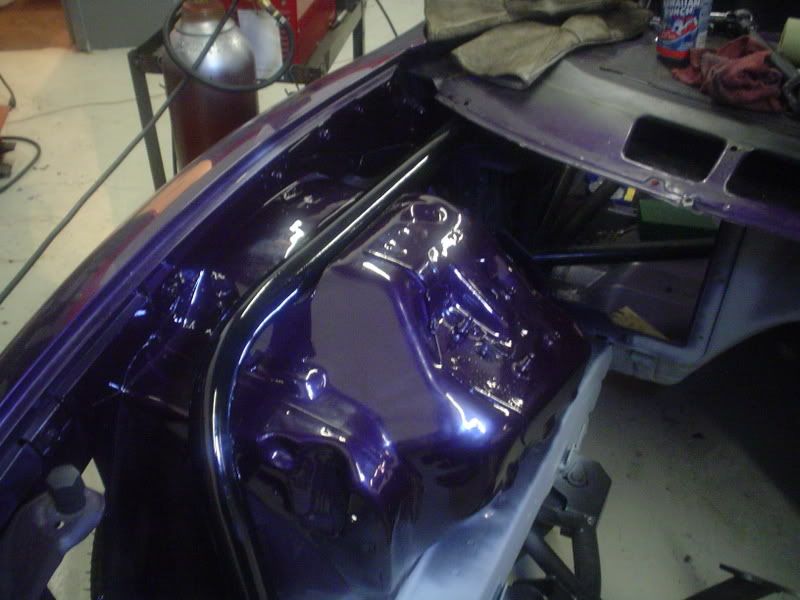
We then had to paint the half pipes because we wouldn't be able to paint them after the tubes were in place. Here's a couple of pictures of both sides after paint...

Next we hacked off the front of the car. We need room for the turbo piping and a nice new radiator support. The original radiator support was removed as was the bumper support. Thank God for plasma cutters!
We then fabricated some end plates where the new radiator support would go.
Then we fabricated a new radiator support with 1" chrome moly tubing. It is set up to be a bolt in place and should make engine removal and installation a breeze.

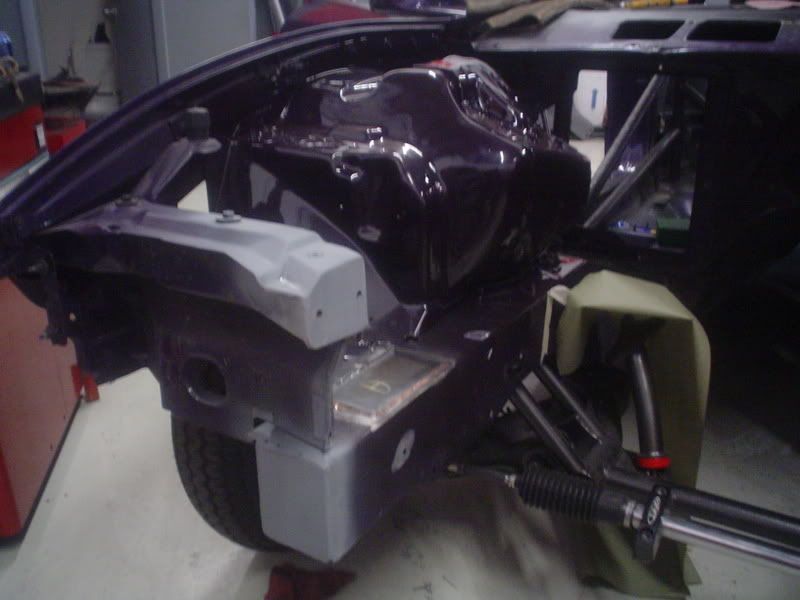
Here's what it looks like with the front tube in place.
That's all we have for this week. The goal is to have the motor plate in and the engine bay done by next weekend. Hopefully we'll have the cage all completed and welded in as well as painted. (Hopefully.)
In this picture we cut a half piece of pipe to fit in the hole and fitted it.
It was then TIG welded in and ground nicely. The idea was to make it seamless and appear as if though it came this way from the factory.
Here is the half pipe after it was completely welded and primed.
We then had to paint the half pipes because we wouldn't be able to paint them after the tubes were in place. Here's a couple of pictures of both sides after paint...
Next we hacked off the front of the car. We need room for the turbo piping and a nice new radiator support. The original radiator support was removed as was the bumper support. Thank God for plasma cutters!
We then fabricated some end plates where the new radiator support would go.
Then we fabricated a new radiator support with 1" chrome moly tubing. It is set up to be a bolt in place and should make engine removal and installation a breeze.
Here's what it looks like with the front tube in place.
That's all we have for this week. The goal is to have the motor plate in and the engine bay done by next weekend. Hopefully we'll have the cage all completed and welded in as well as painted. (Hopefully.)

Trending Topics
04-08-2007, 09:05 PM
#8
10 Second Club
Thread Starter
iTrader: (1)
Join Date: Jul 2003
Location: St Petersburg, Fl
Posts: 568
Likes: 0
Received 0 Likes
on
0 Posts
Thanks guys. all the work is being done by Fernando at Tranmission Phycicians here in Tampa Florida. Fernando is doing 95% of the work while I help out here and there. Fernando is basically building every aspect of the car from the Chassis to the engine and even fabricating all the turbo piping. I mean everything.
His goal and mine also is to get the car to run 8.50's or better. The engine tranny combo is not LSX based. I am going to use a SBC and a 4l60e. We are trying to brake the 4l60e record and have the fastest A4 car in the world. Fernando is building me one heck of a car and its worth every penny. His work is top notch.
He can even paint. He is the one who panted the fenders and did the notching of the shock towers for the front bars of the roll cage.
I will make sure to update the thread with pics as we get work done.

 04-08-2007, 10:34 PM
#13
9 Second Club

Join Date: Jul 2003
Posts: 1,195
Likes: 0
Received 0 Likes
on
0 Posts

I would have probably tied the front bars into the strut towers. You will be able to see the stress on the frontend when the paint flakes off from the roll bar where the strut tower moves around and hits it. JMO though. It might not move at all and it looks really clean. I went 6.26@109 with a 1.31 60ft in the 1/8 with a 4L60E. I had a Yank PT4200 converter and 3.73 gears.
Good luck on your setup. There is no substitute for a turbo. I like the car alot and wish you all the luck.
Good luck on your setup. There is no substitute for a turbo. I like the car alot and wish you all the luck.

 04-08-2007, 11:03 PM
#17
Everytime I see builds like these it makes me want to pull my car apart again and go nuts with it. Oh well. The shop is new, the wifes finishing school at the end of the month, and I still have a full time job. Maybe I will go nuts later. 


