Bittersweet night at gville raceway, updated dyno results on new engine


 03-14-2011, 11:43 PM
#44
On The Tree
iTrader: (3)
Join Date: Dec 2009
Location: Keystone Heights FL
Posts: 182
Likes: 0
Received 0 Likes
on
0 Posts
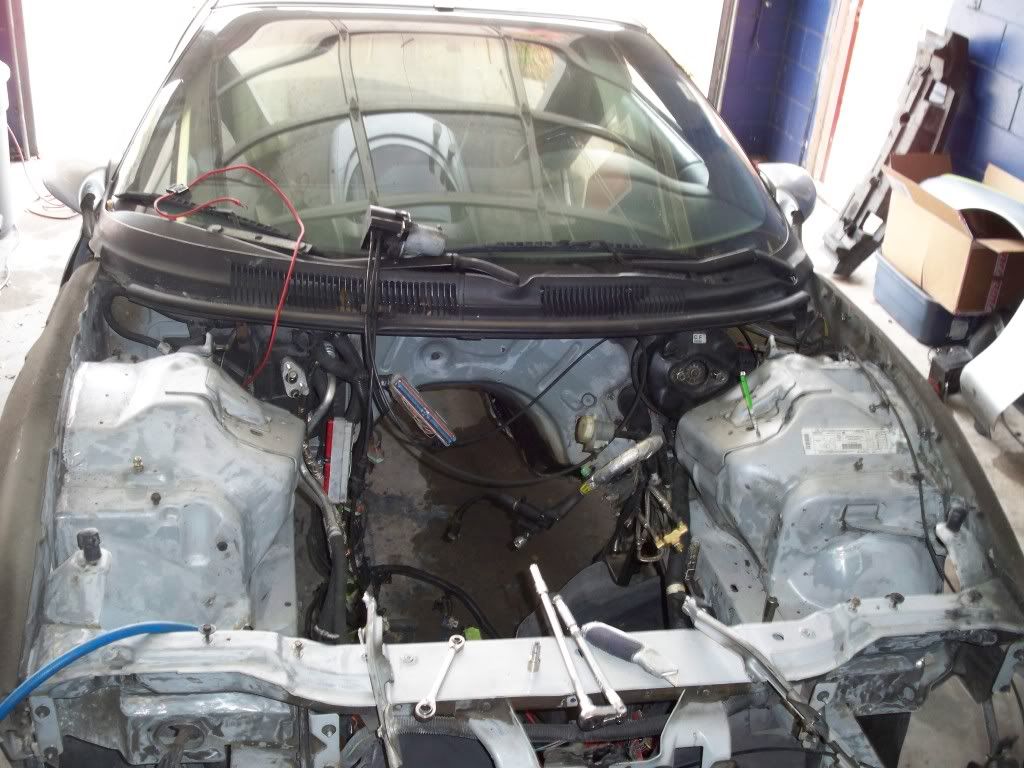
Engine bay looks nice. Paint is all in the prep no matter how much it sucks. I know that is where I always fall a little short.
And I guess if your going to break it do it big.
And I guess if your going to break it do it big.
03-26-2011, 11:05 PM
#46
https://ls1tech.com/forums/generatio...goes-boom.html
He was heads and cam, but experienced the same thing....in 4th around 5500 rpm, and losing #5. Oh well, nothing I can do about it now. Just strange I posted in that thread and a few years later I do the same thing.
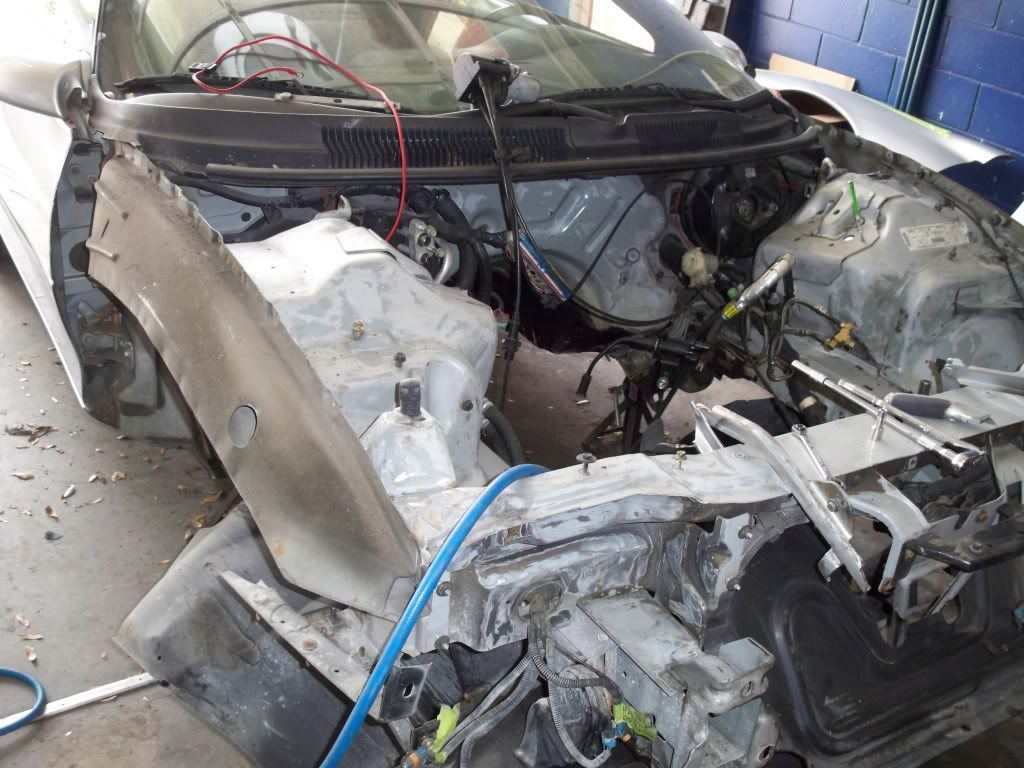
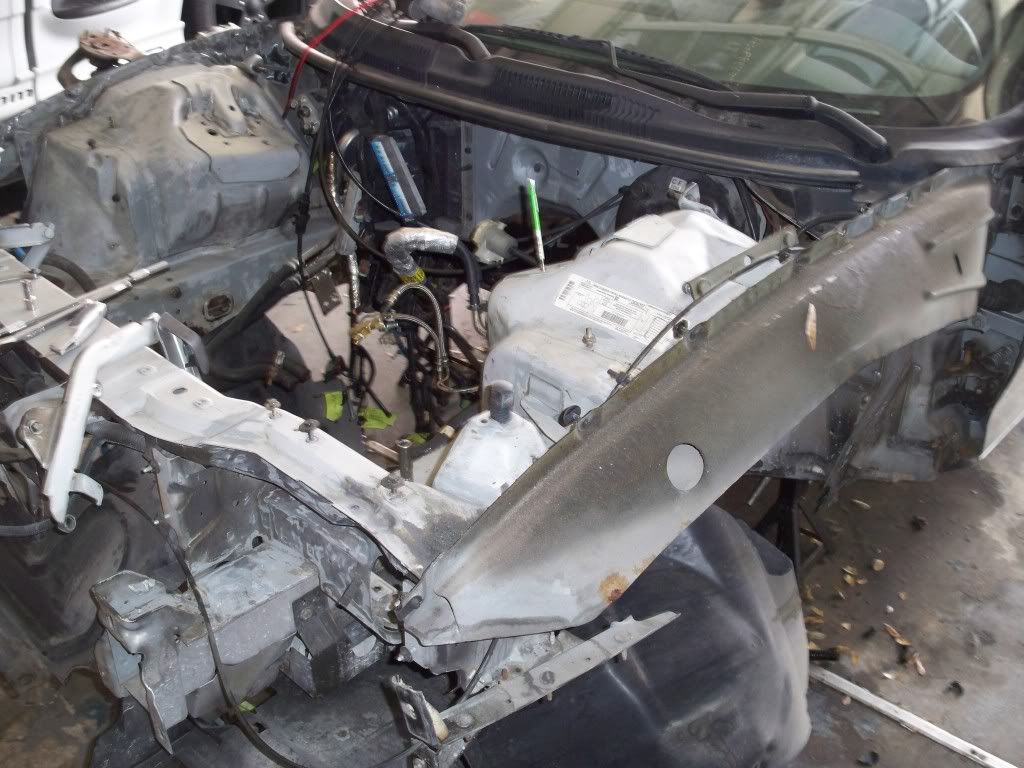
Anyways....did some more work today...
Primer
base coat
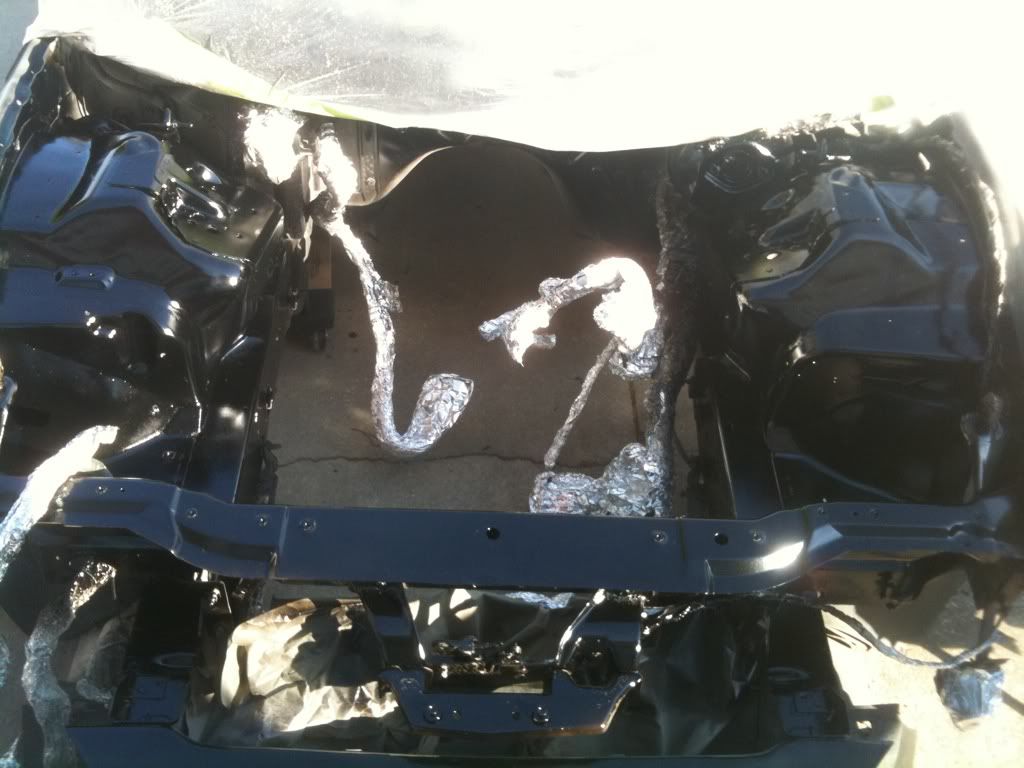
And some clear
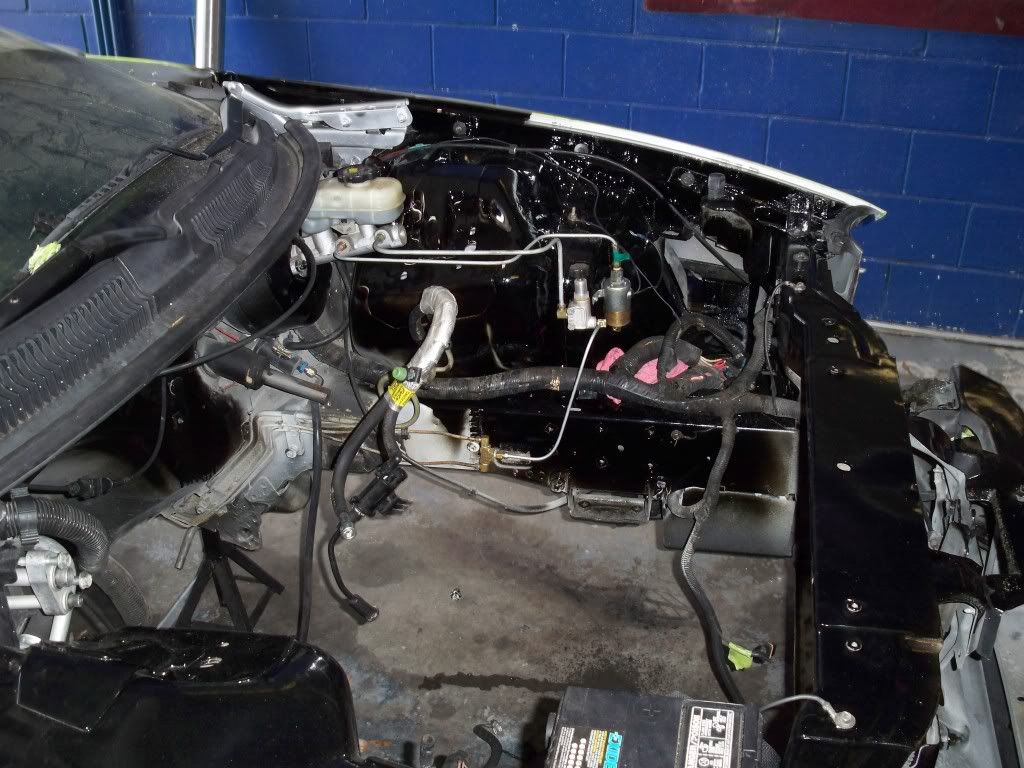
Don't let the pics fool you, it's a complete amateur job. Used the cheap harbor freight hvlp gun for the primer, and the more expensive one for the base/clear. Had a friend that's knowledgable in paint help me out. But, it was shot outside by a novice. It's got dust, runs, and fisheyes....but it's 100x better than it was and that's all I care about. One day the car will get tore down for a complete paint, but not now. Just wanted to clean it up while I had the engine out.
03-30-2011, 07:21 PM
#48
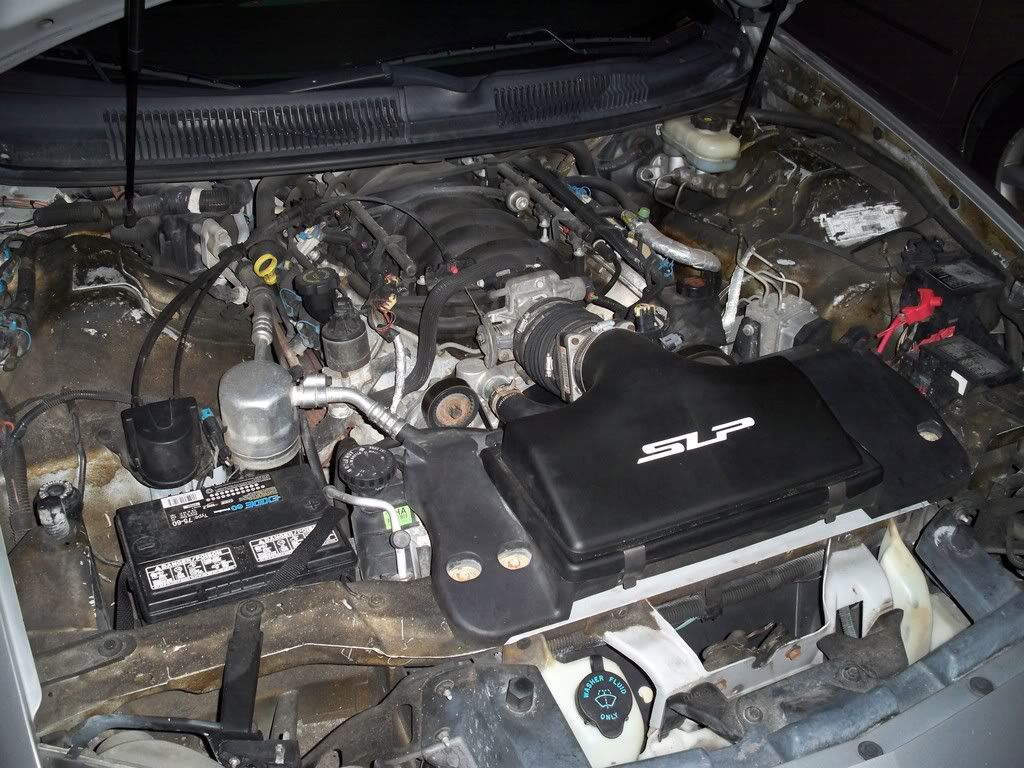
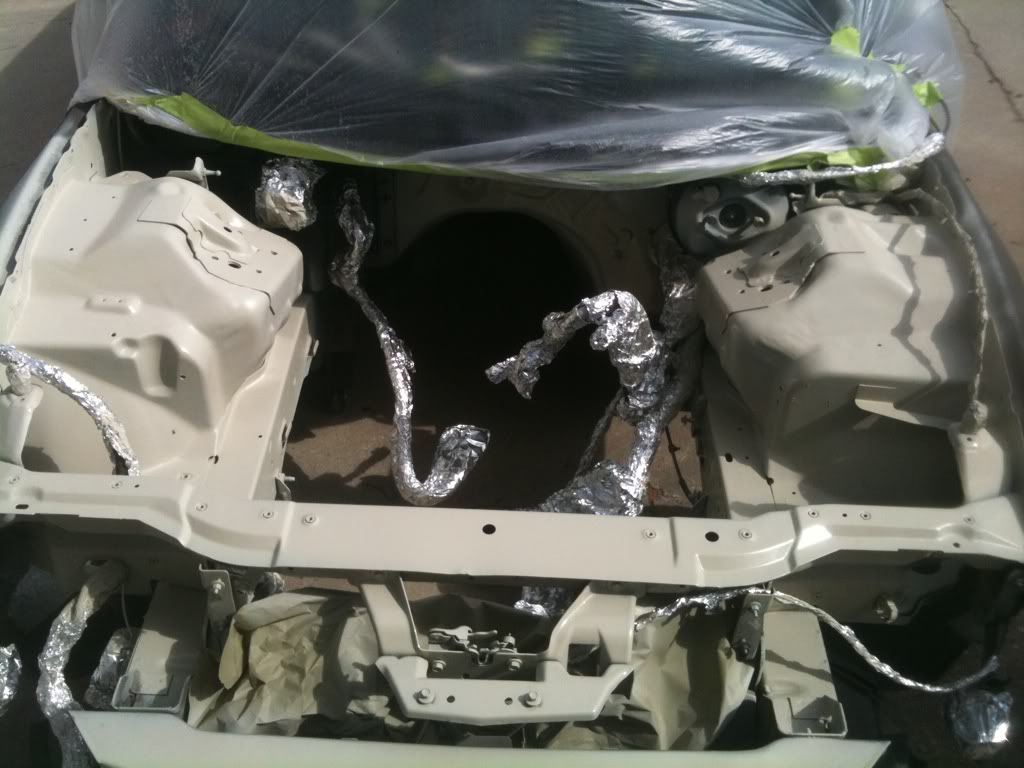
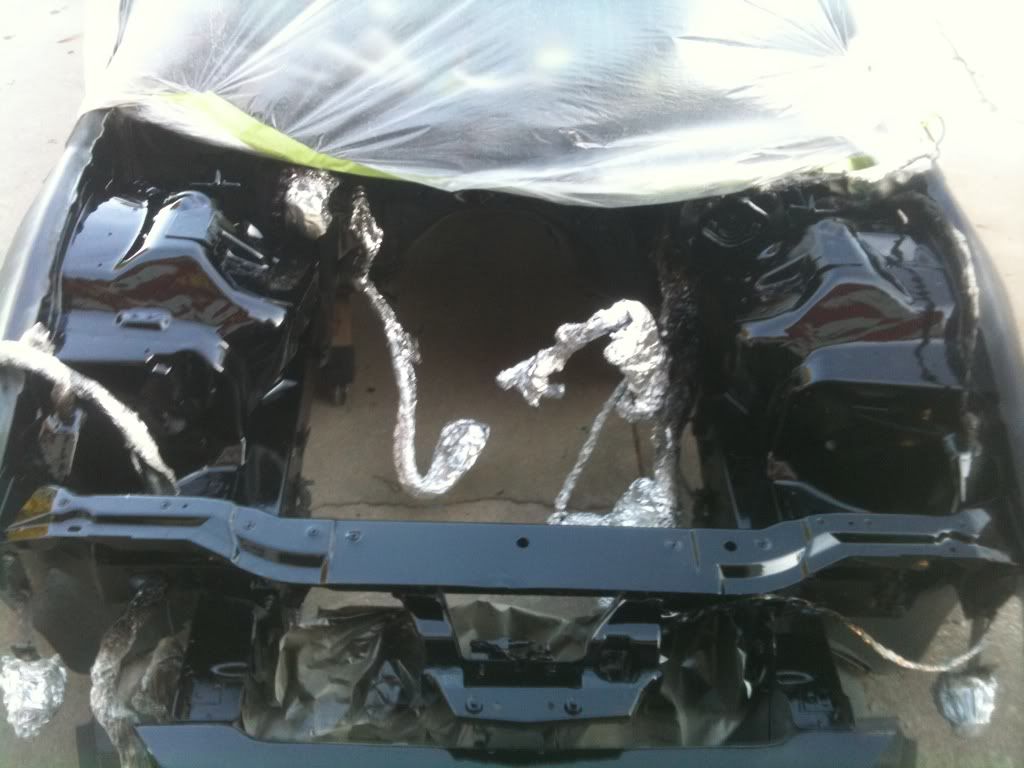
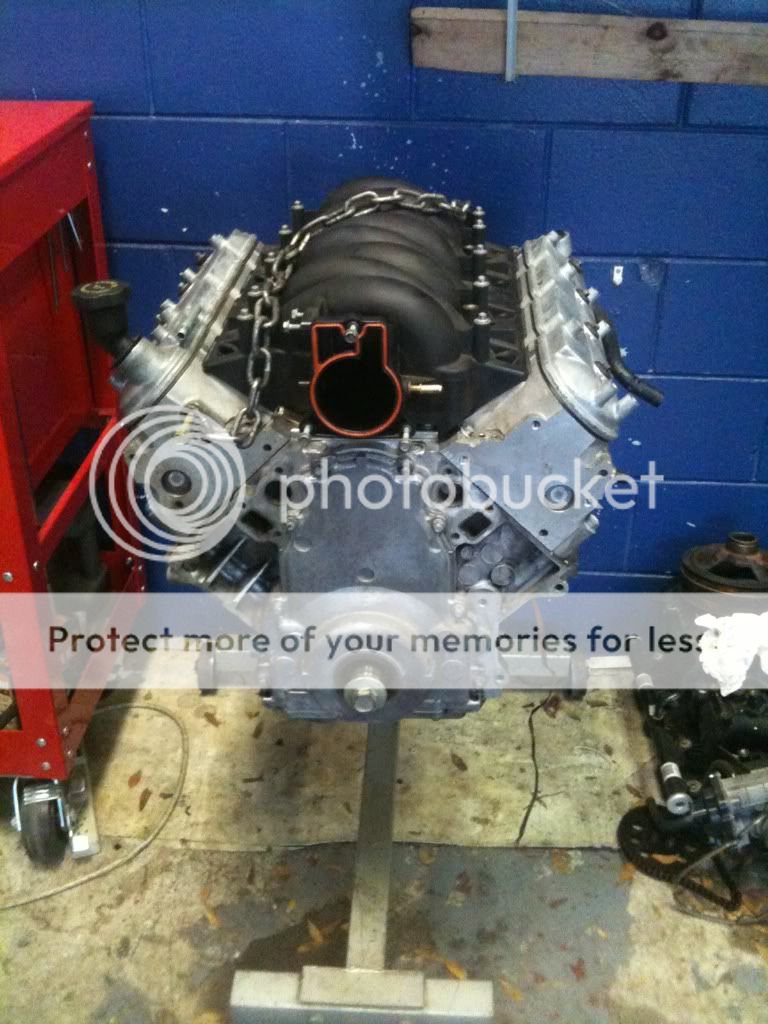
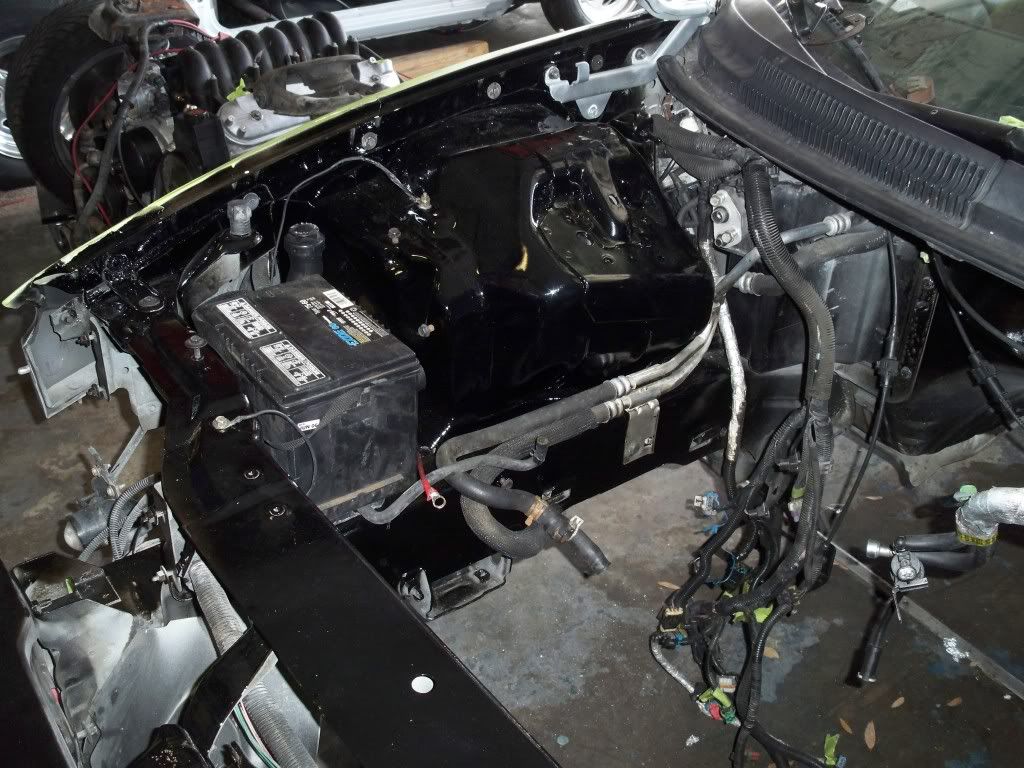
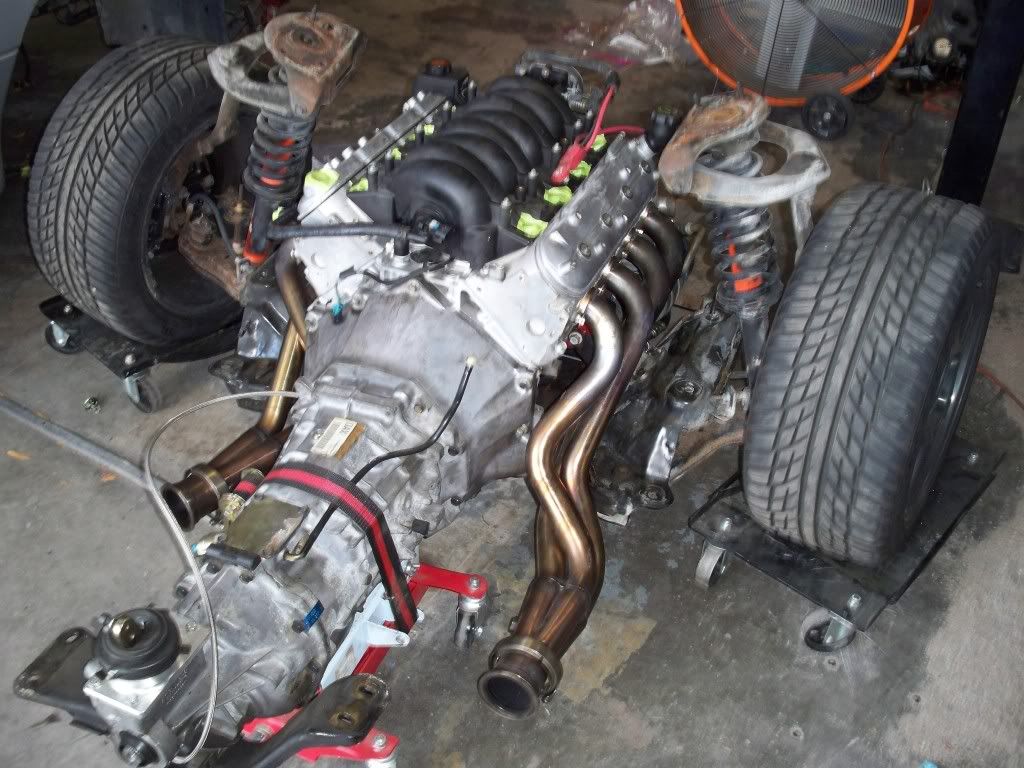
Here she is from pan to intake.
replacing the rear and front seals today and ran into a snag.....I think I found out why this guy I bought it from ended up going to a different ls1.....the holes to bolt the oil pan to the front and rear covers were stripped! luckily, I still have my covers from my blown engine so it was just a time consuming thing. Measured for pushrods a couple days ago and they're on their way. Then it's just a matter of little things (rerouting brake lines and rerouting some other wires) before bolting her back in! I could technically get it done this weekend, but I'm not rushing it.
replacing the rear and front seals today and ran into a snag.....I think I found out why this guy I bought it from ended up going to a different ls1.....the holes to bolt the oil pan to the front and rear covers were stripped! luckily, I still have my covers from my blown engine so it was just a time consuming thing. Measured for pushrods a couple days ago and they're on their way. Then it's just a matter of little things (rerouting brake lines and rerouting some other wires) before bolting her back in! I could technically get it done this weekend, but I'm not rushing it.
04-04-2011, 06:47 PM
#49
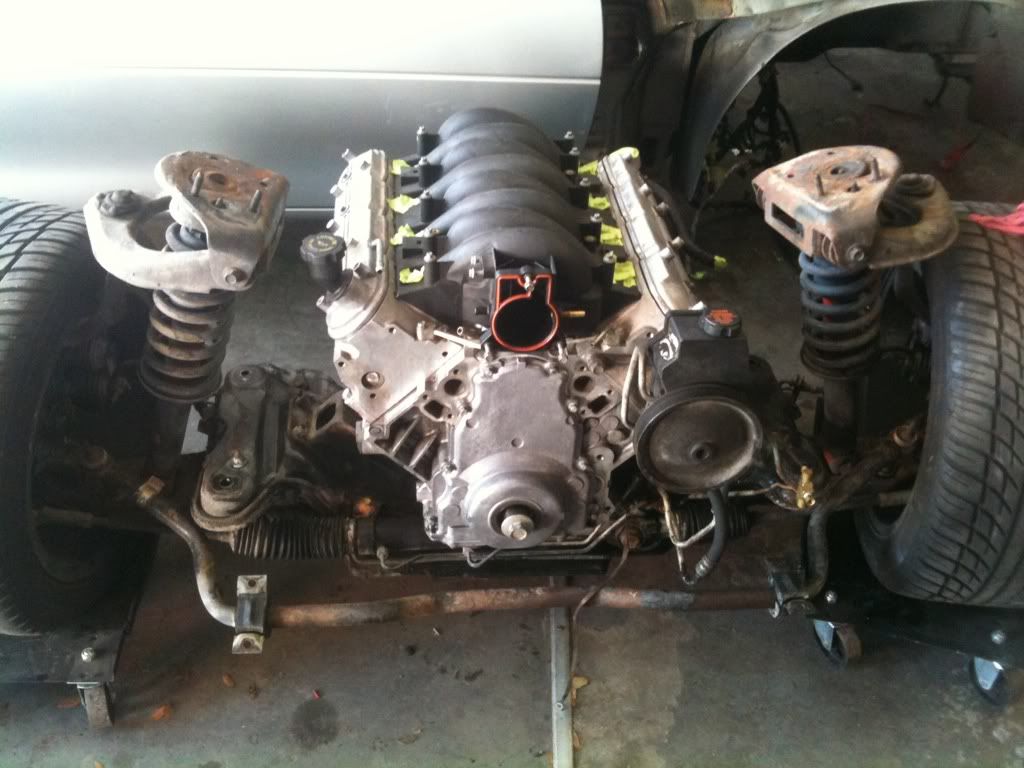
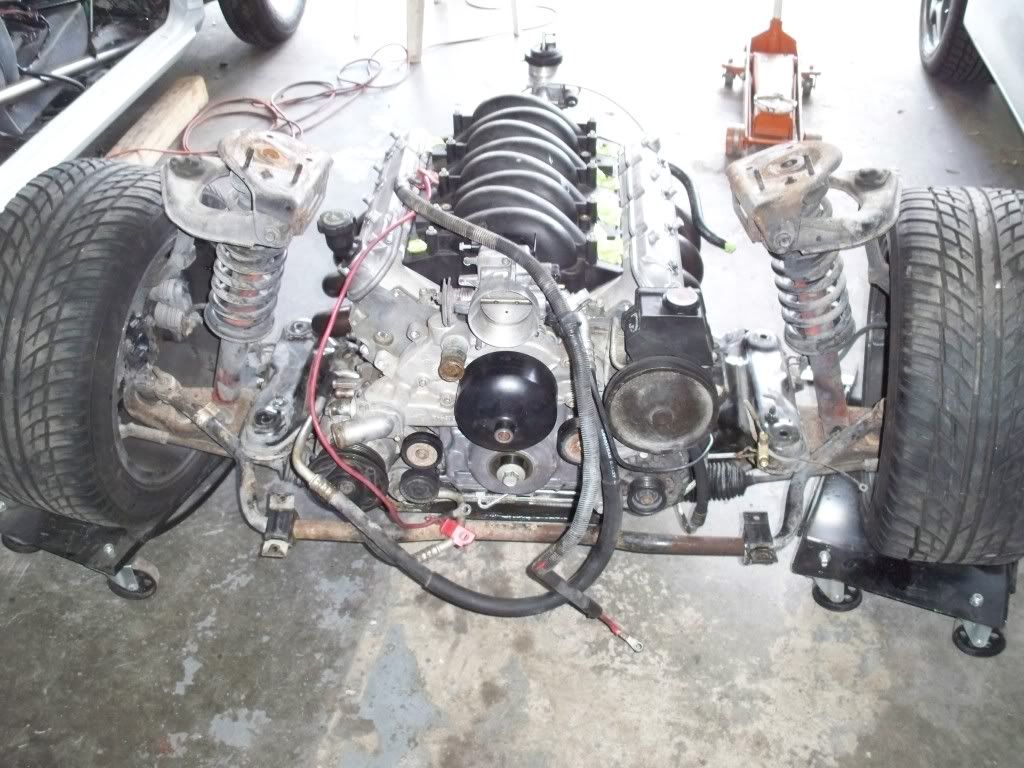
Getting oh so close. Got the engine back on the K member today using some new poly motor mounts. Also got just about everything back in place in the engine bay. Relocated passenger wires to the wheel well, moved the fuse boxes where the air pump used to be, and began running new brake lines from the linelock/proportioning valve to the frame rail. Also ran into a problem....it seems the last time I installed the tranny I pinched my slave speed bleeder between the tranny and the bellhousing. It didn't cause any leaks originally....until I unpinched it, lol. So I'm gonna see how much a local hydraulic shop can replace the braided line for vs. ordering a new one. I got a little time anyways since I needed some coil pack brackets and they won't be here until after April 11th. Here are some pics
Last edited by black00ssFL; 04-08-2011 at 09:04 PM.
 04-11-2011, 01:31 PM
#54
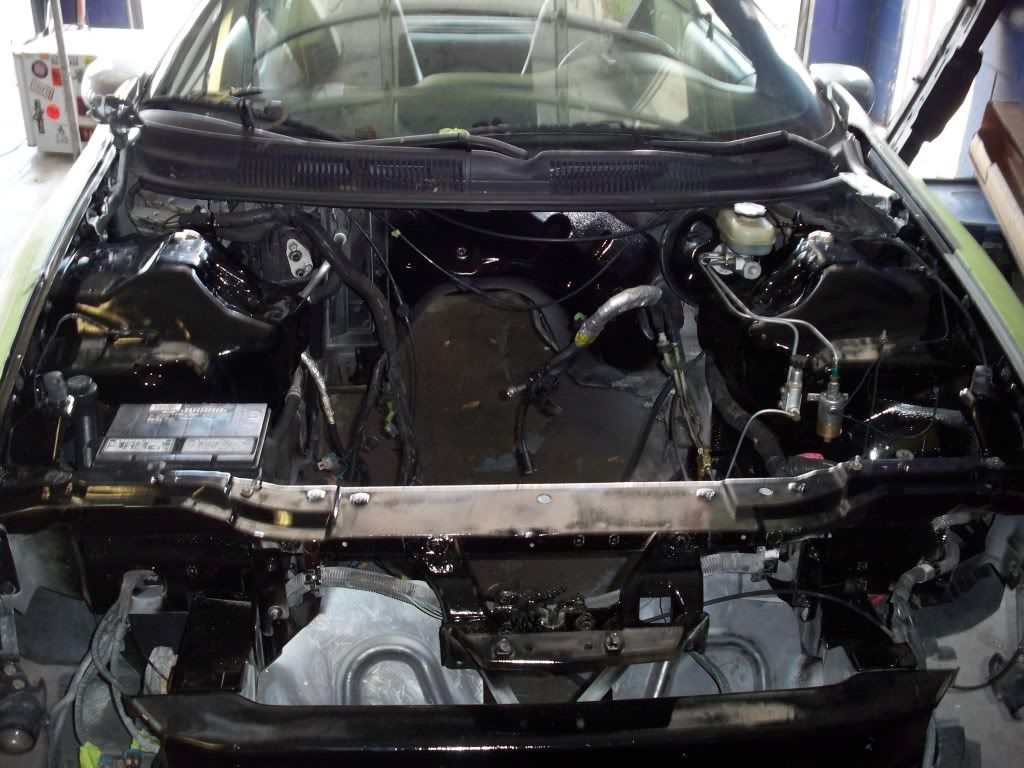
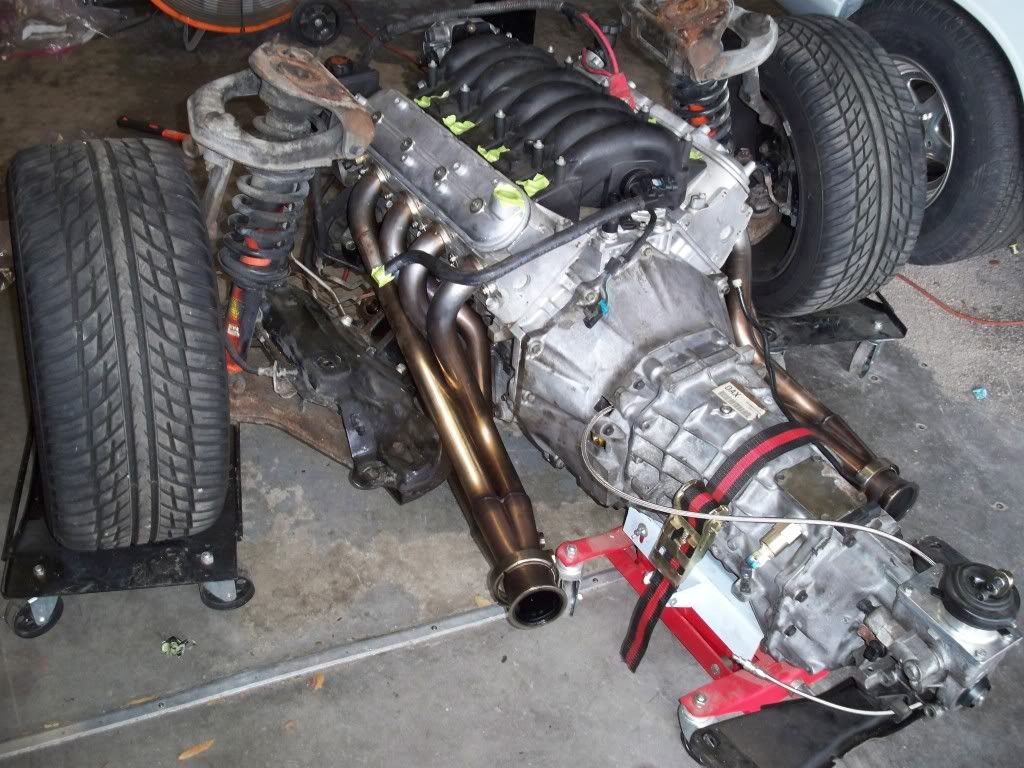
You'll be there man! I think a couple full days of work and she will be in. I cut a hole for the fuel pump the other day and just need to free up a couple hours to drop in the racetronix fuel pump. Then dropping the car on the subframe, button everything up, and filling fluids is all that's needed before first start up! Some cheapo oil w/ seafoam for an hour or so, then an oil change with some real oil, swap out to the 42lb injectors, load her on the trailer, and get her tuned!
04-14-2011, 09:07 AM
#55
Got it in yesterday. But, now I have a problem. Tried starting it for the first time and have a really loud tick and eventually developed some screeching. Could be an oiling problem and/or lifter/rocker problem. Here's the thread I made laying out the problem and a vid of the noise
https://ls1tech.com/forums/generatio...sue-video.html
https://ls1tech.com/forums/generatio...sue-video.html
04-14-2011, 05:42 PM
#56
I had a longblock screech at first startup.. I squirted some marvel mystery oil into each plug hole (it sounded like a ring squeaking) and it disappeared right away. I think the ring was rusted/stuck somehow. As for the thunk, that is scary. a lifter is more of a "tap." Check all your pushrods for straightness, by rolling them on glass. A bent pushrod makes a helluva racket. Did you check your lifter preload?
04-30-2011, 02:28 PM
#59
Update: After letting it sit for a few days and restarting it, the only noise was the loud tapping. I tore down the passenger side and everything looked normal (cam lobes, lifters, lifter rollers, rockers, pr's, etc). So I soaked the lifters in oil for a few days and reinstalled the head with the lifters in reverse order reusing the head gaskets and head bolts (just for a minute startup with no coolant). Sure enough, tapping was still there, but now coming from the front of the head. So, it's a bad lifter. Looking now for a replacement set for the one side, then I'll bolt her together again for another test run (takes me about 4-5 hours for complete disassemble/reassemble of the passenger side). Got finals the next two weeks, so it'll be a few weeks til I get to it again.
06-17-2011, 12:01 AM
#60
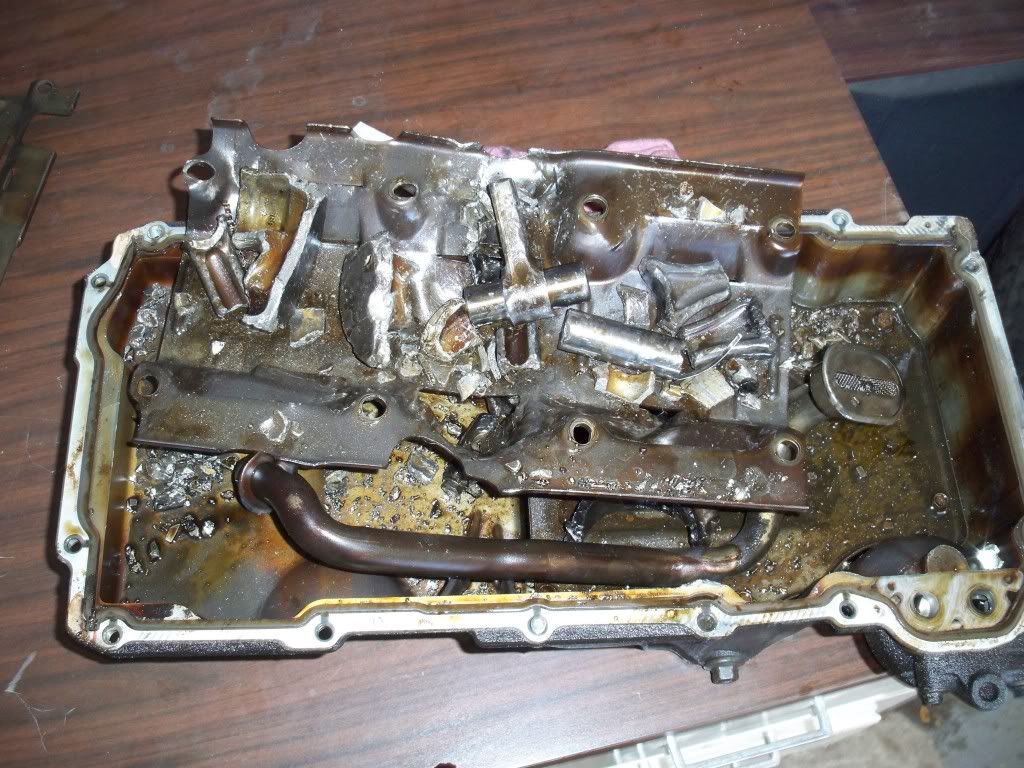
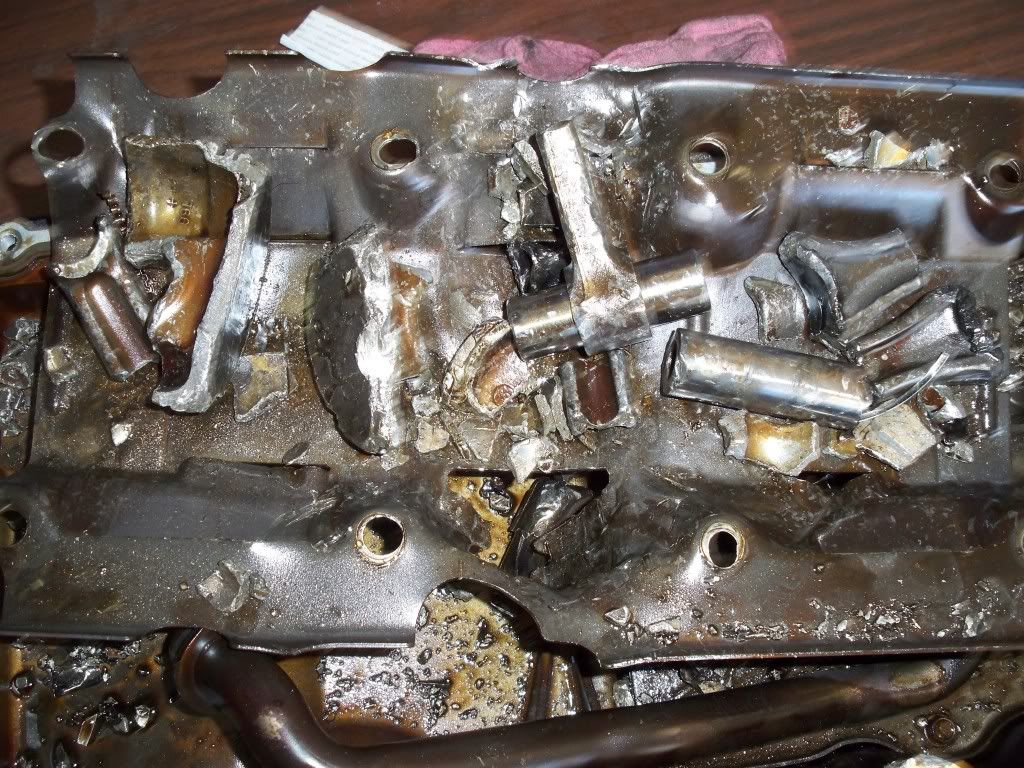
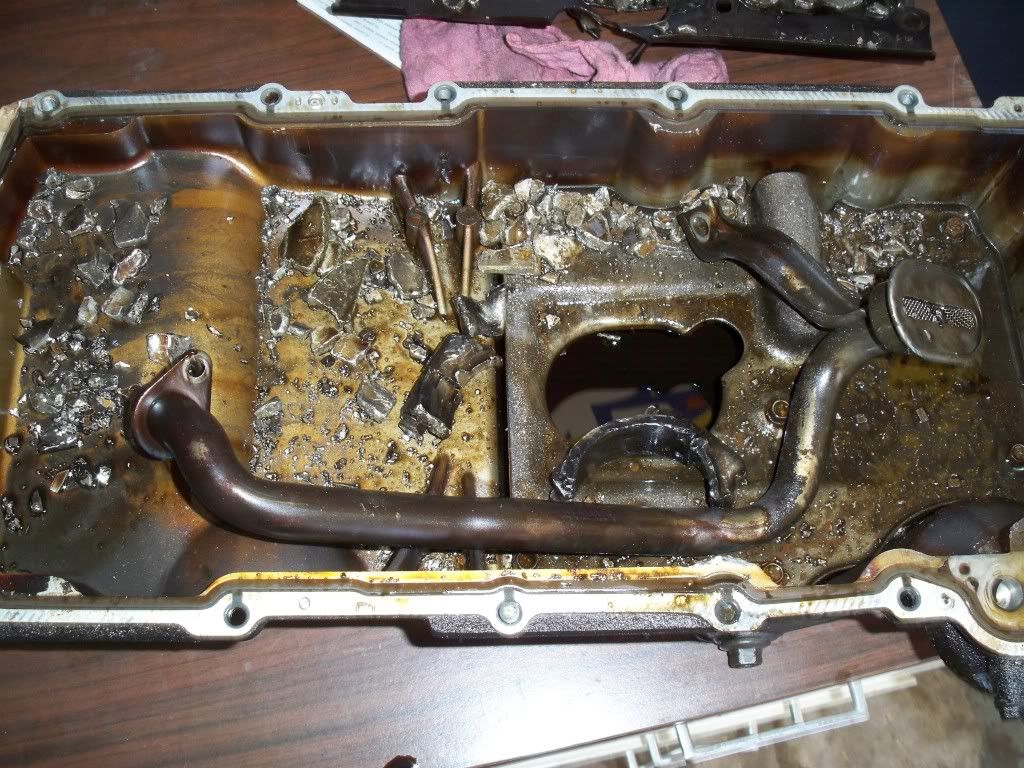
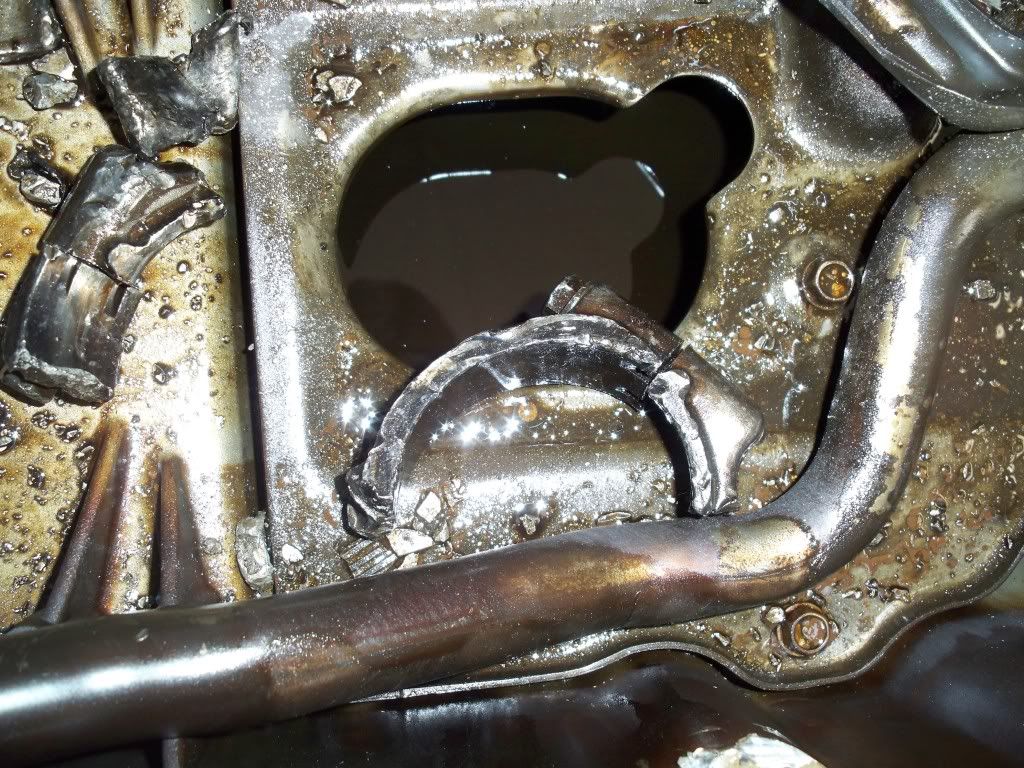
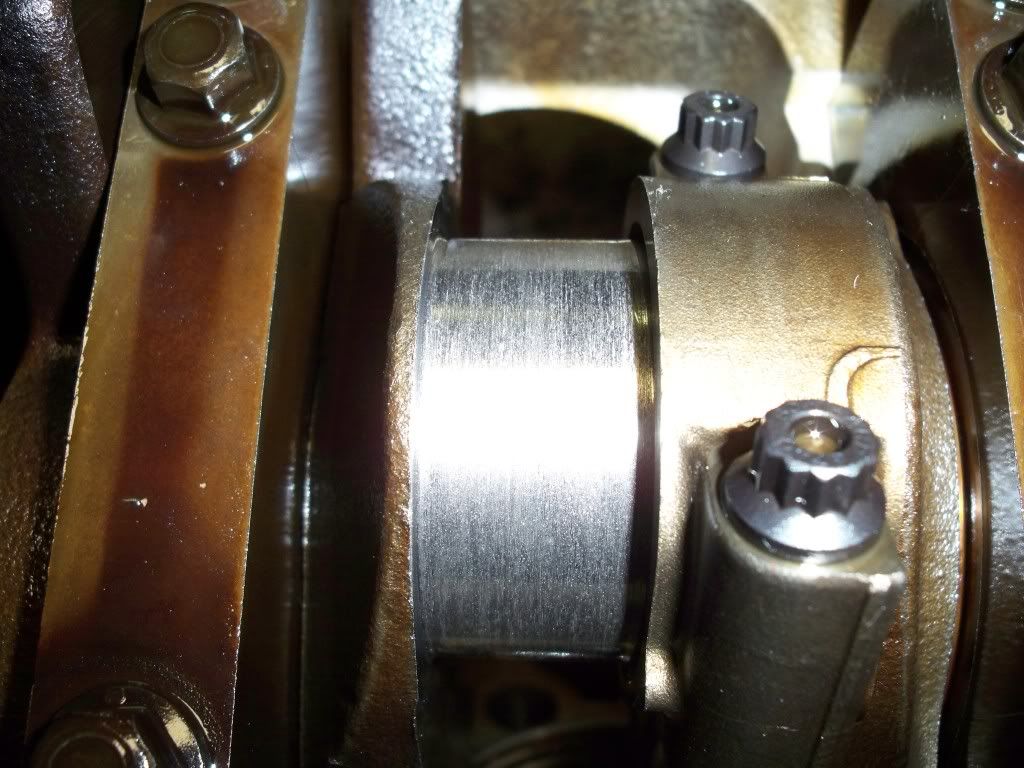
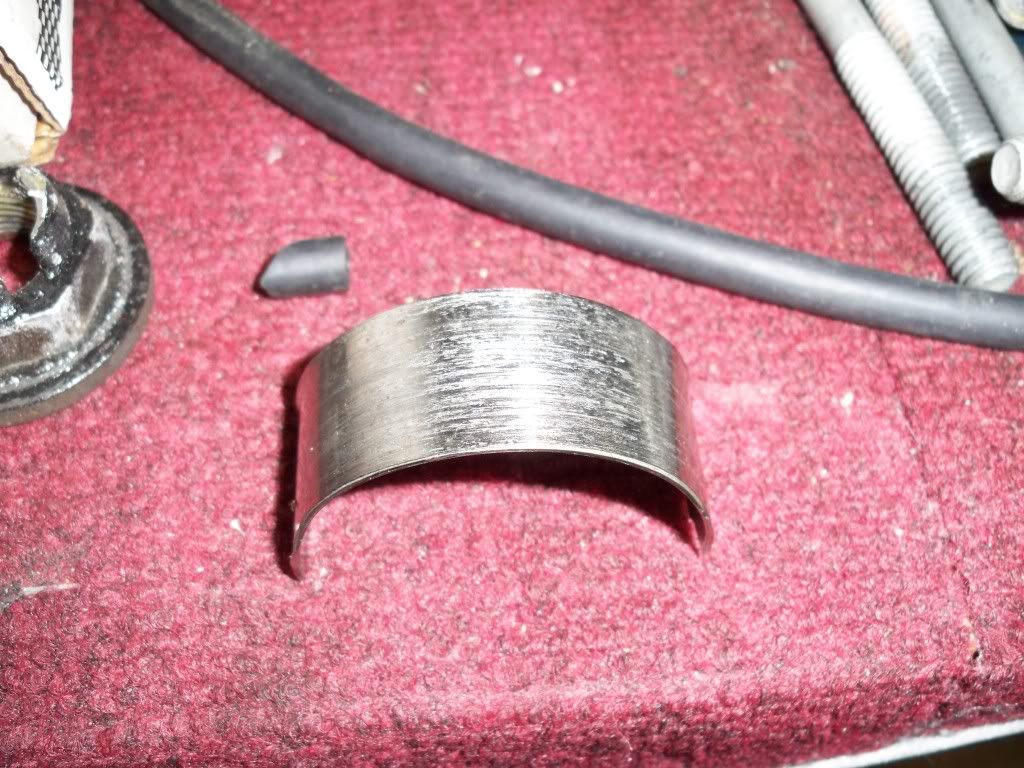
....And back to the drawing board.
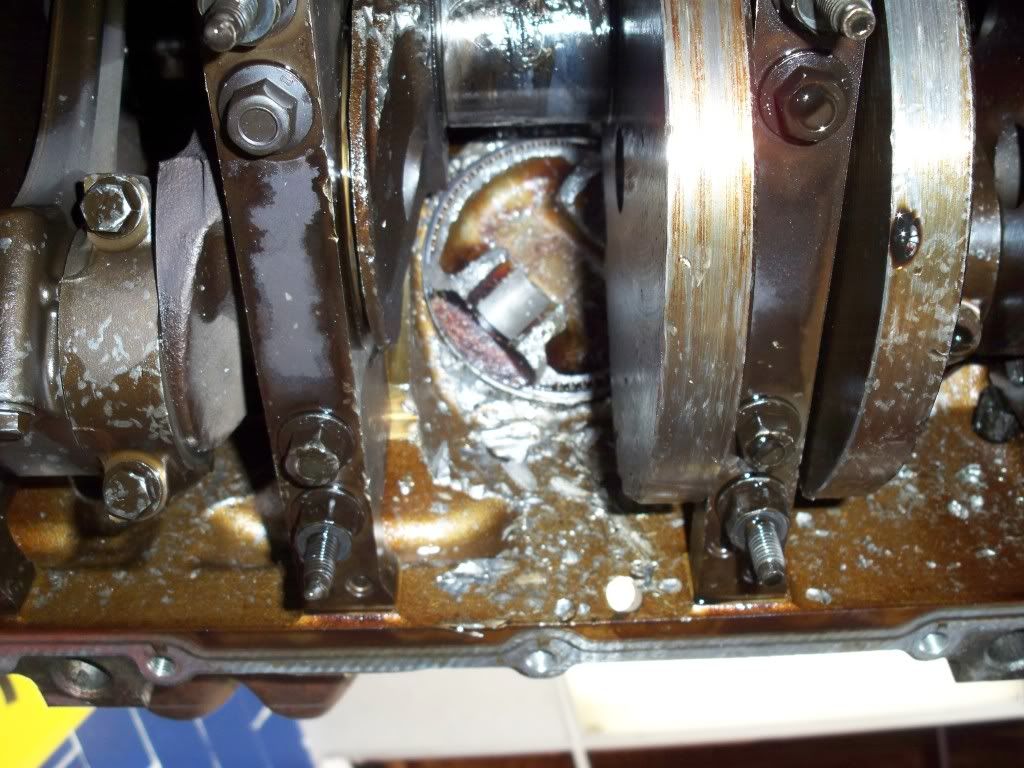
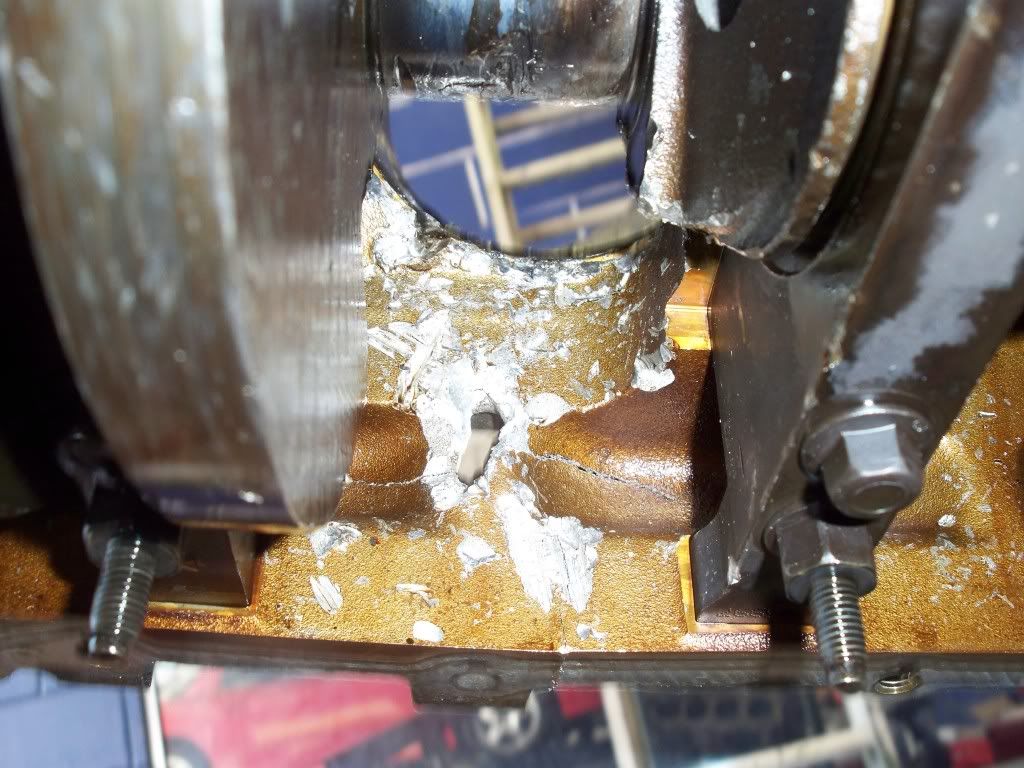
Spun bearing, obviously from before I got it and threw it in. Here are the pics
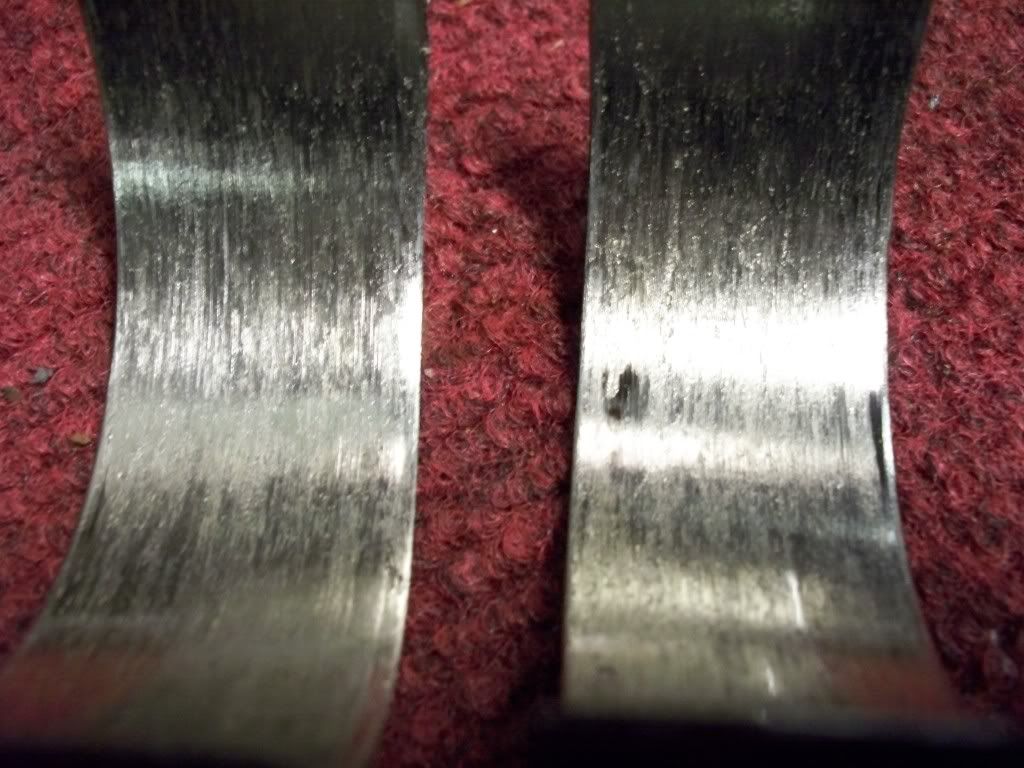
#6 journal
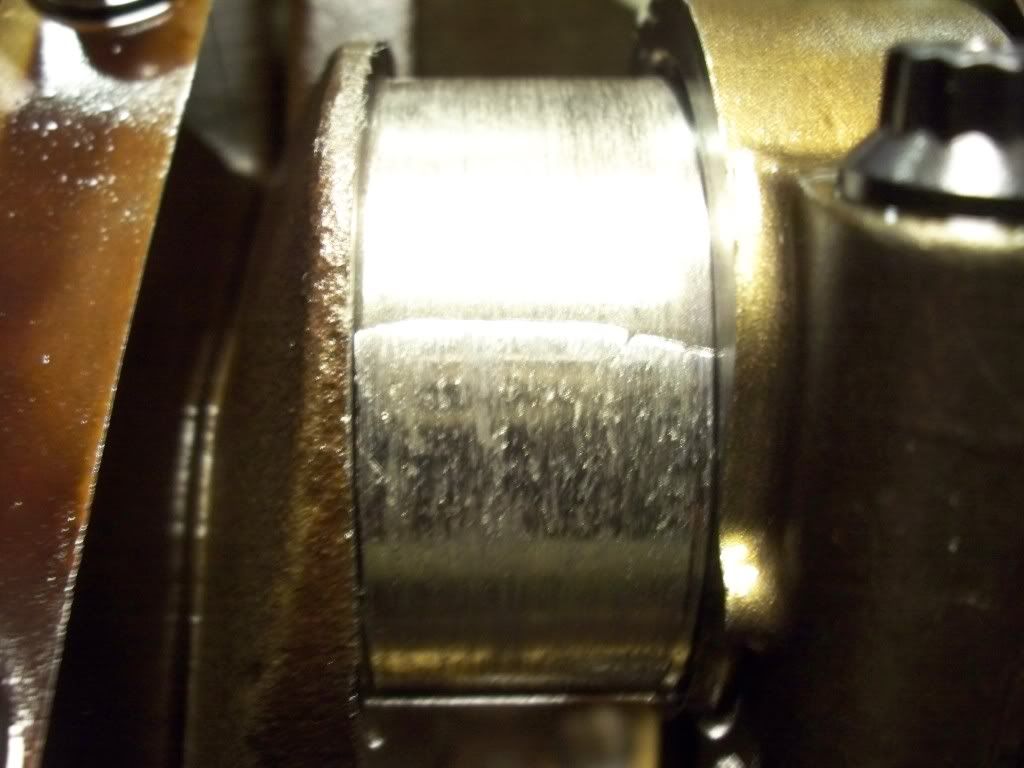
#6 rod bearings (what's left of 'em, they almost over lapped each other)
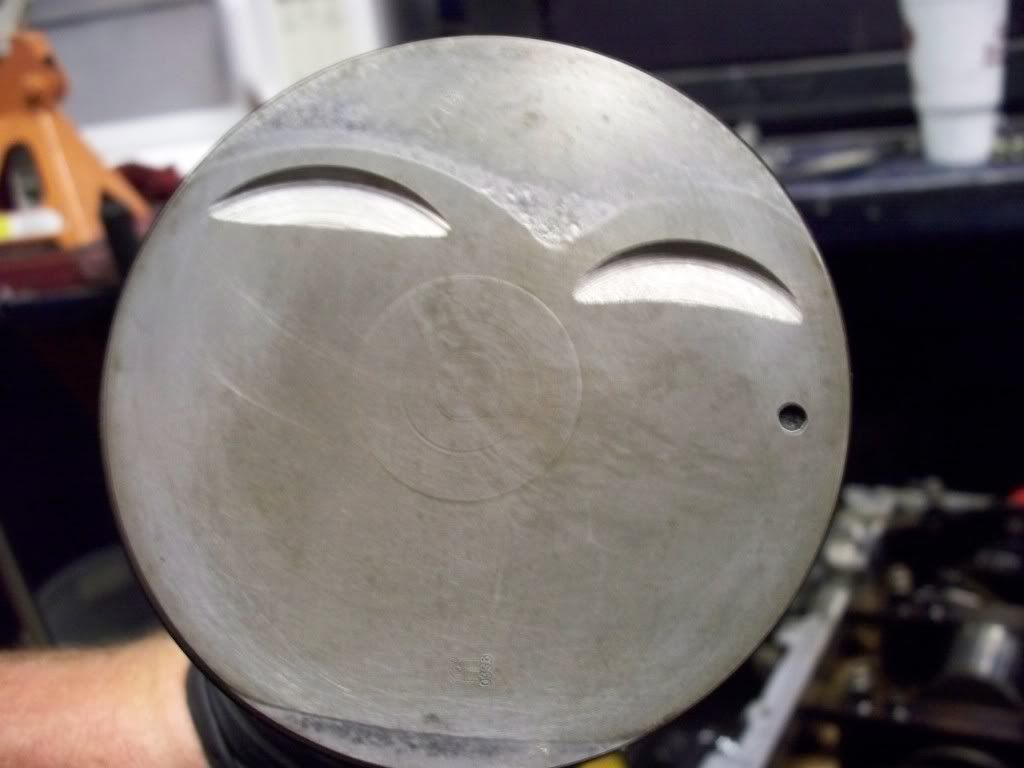
#6 piston
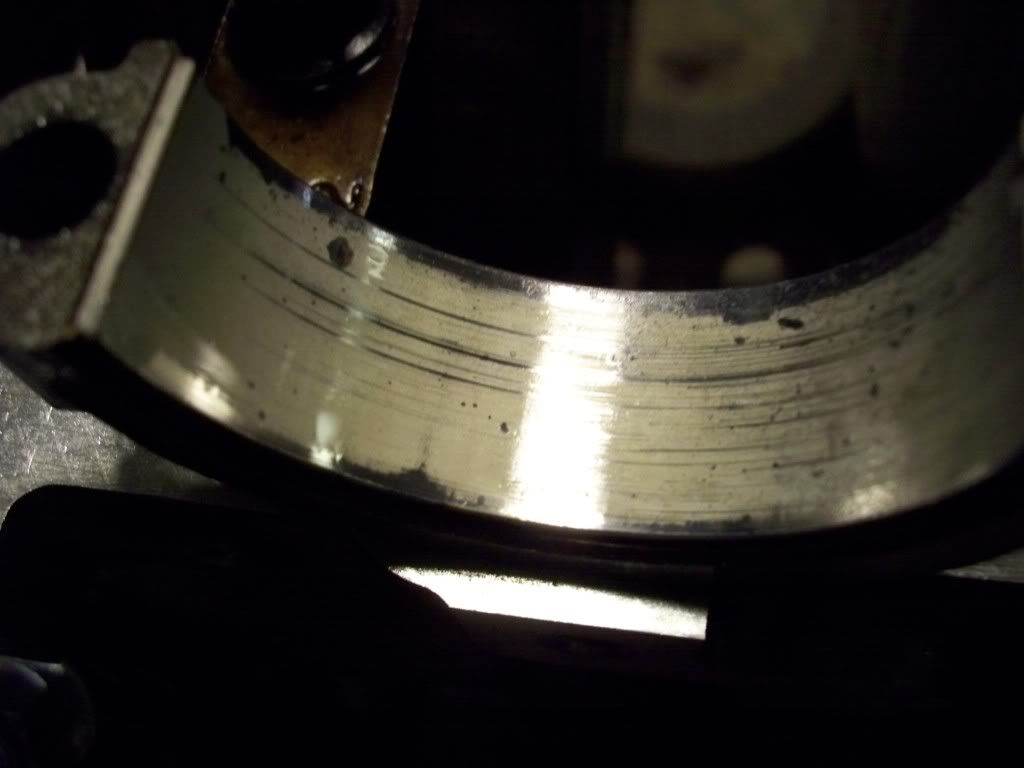
#5 bearings
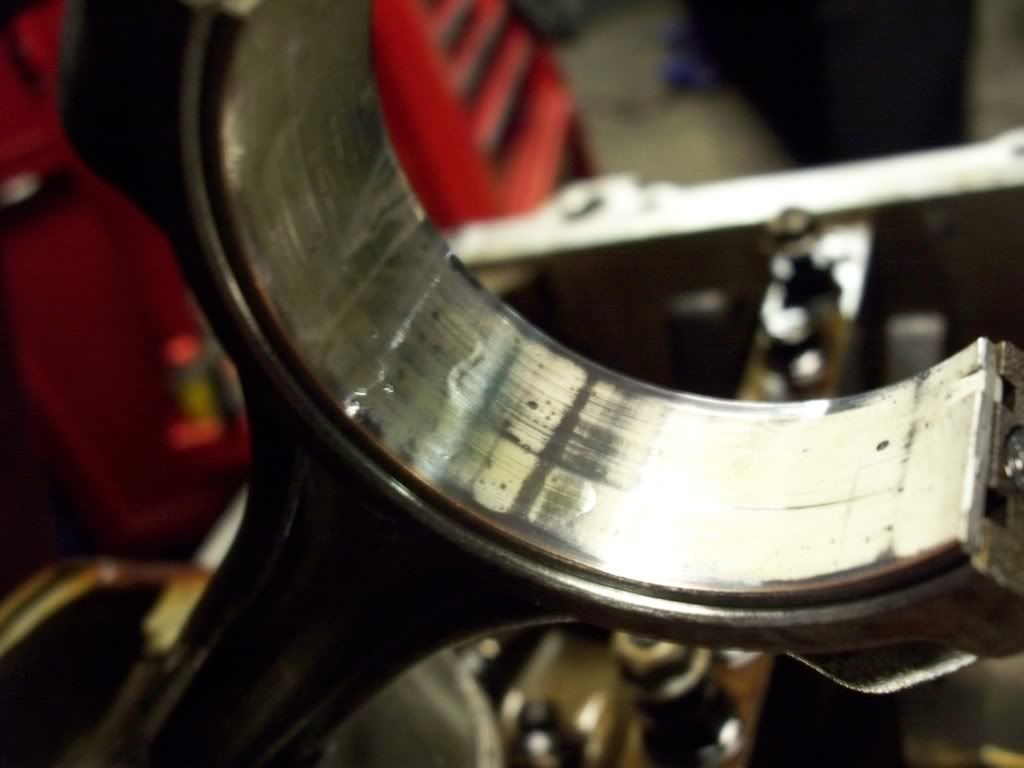
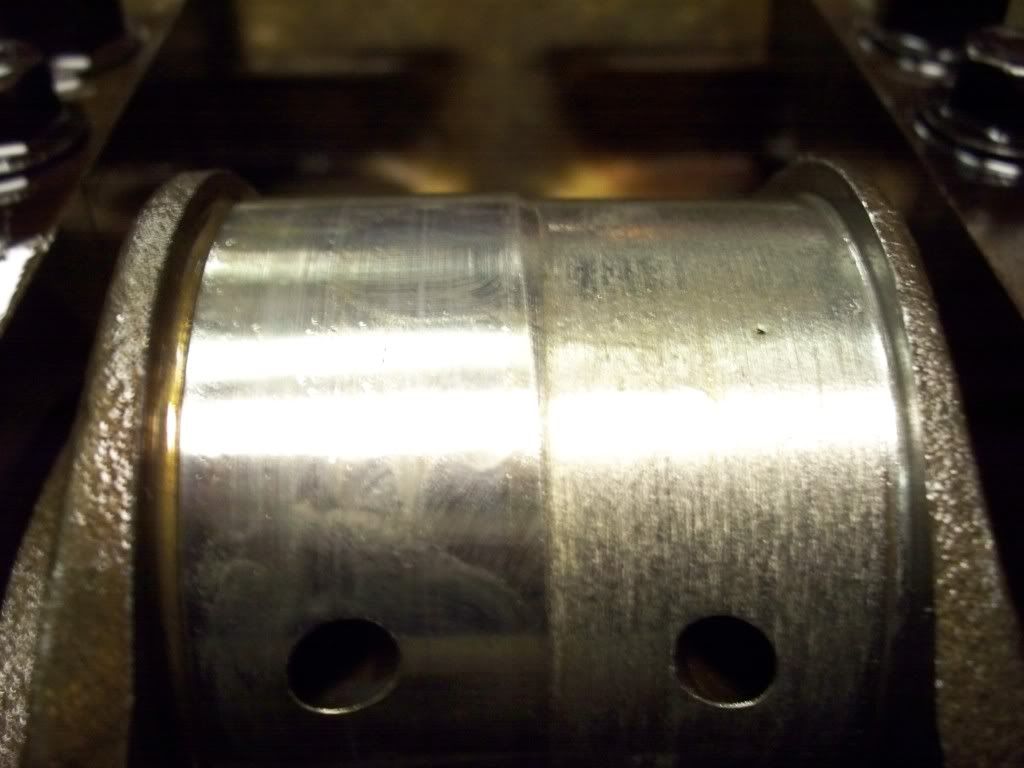
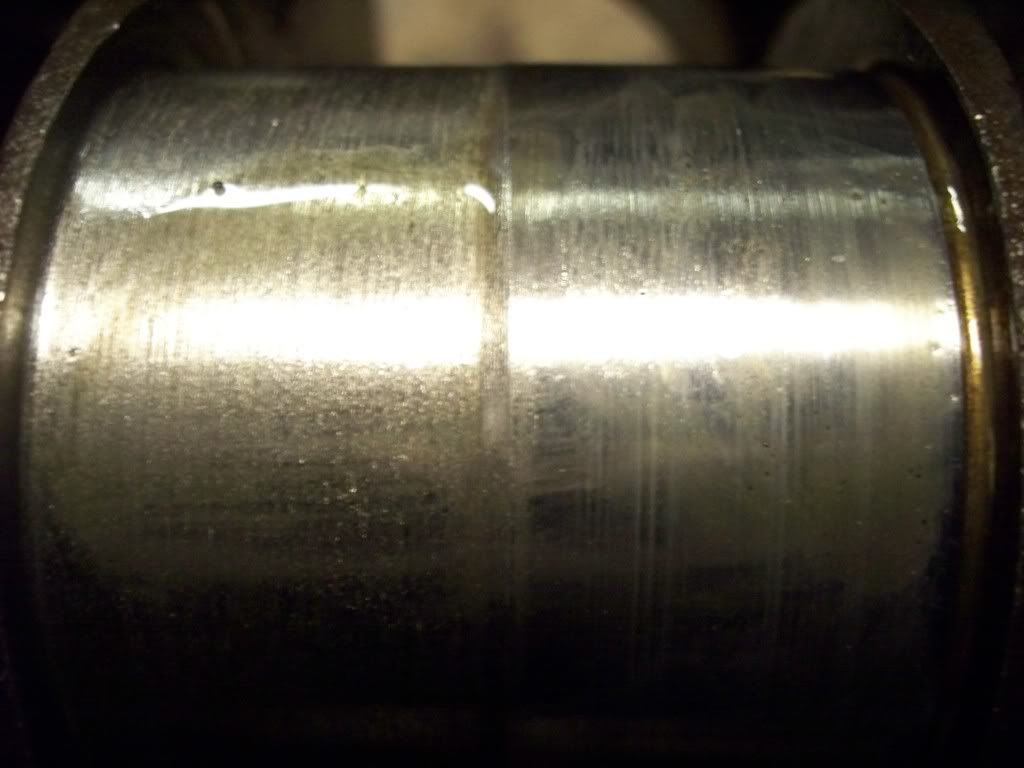
#5/6 journal
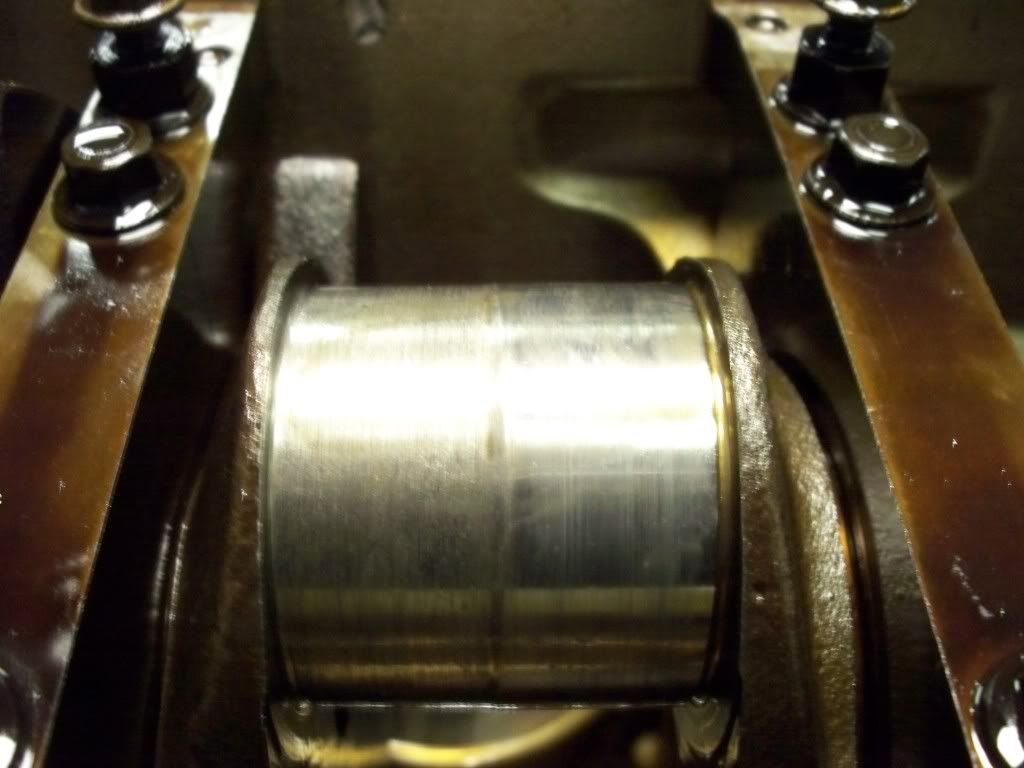
And here's #1/2 journal for comparison

Spun bearing, obviously from before I got it and threw it in. Here are the pics
#6 journal
#6 rod bearings (what's left of 'em, they almost over lapped each other)
#6 piston
#5 bearings
#5/6 journal
And here's #1/2 journal for comparison