My single frontmount build thread


 02-24-2011, 07:50 AM
#82
TECH Fanatic
Thread Starter
iTrader: (19)
Join Date: Sep 2007
Location: houston TX
Posts: 1,497
Likes: 0
Received 0 Likes
on
0 Posts
block came out good, it fits but its not all done yet. finish it up and post pics this weekend, I never though hanging those pumps on there would be such a PITA but it kinda is. waiting on delivery of the motovative solids so i can start that ordeal


 03-10-2011, 07:16 AM
#89
TECH Fanatic
Thread Starter
iTrader: (19)
Join Date: Sep 2007
Location: houston TX
Posts: 1,497
Likes: 0
Received 0 Likes
on
0 Posts
Kyle im with you, I really need to pick up the pace :/
Ping King, I like that! I wanna keep mine solid but Im definately going to borrow the shape, thanks
1badws6, he gave it to me, im working with him to get a price to make a few of em
Ping King, I like that! I wanna keep mine solid but Im definately going to borrow the shape, thanks
1badws6, he gave it to me, im working with him to get a price to make a few of em
03-13-2011, 05:18 AM
#93
TECH Fanatic
Thread Starter
iTrader: (19)
Join Date: Sep 2007
Location: houston TX
Posts: 1,497
Likes: 0
Received 0 Likes
on
0 Posts
good news and bad, good news first:
the fuel pump assembly is installed for good, hooked up etc and im building a lid for the hole i cut, both pumps work, done. A bunch of grinding and paneling off parts of the car Ive cut is 95% done, 80% of the final welding of the lower bracket is done.
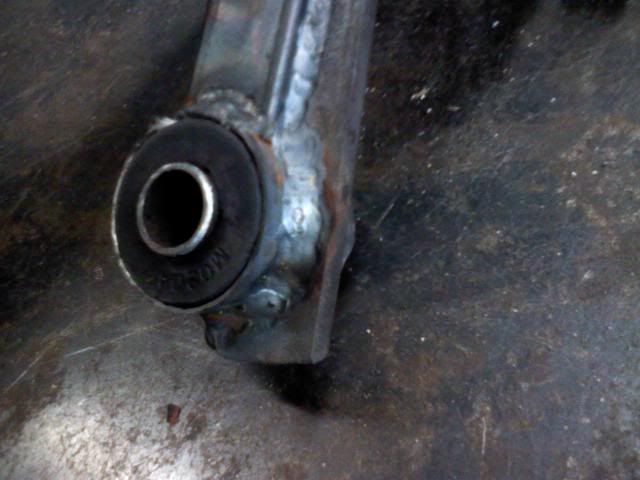
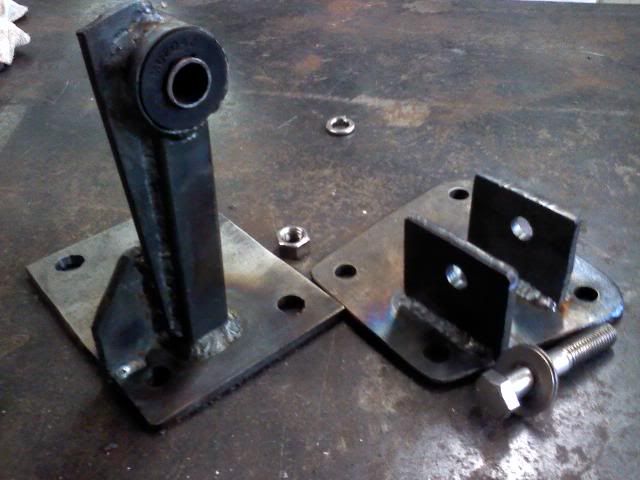
The bad news starts with good news, the Spohn solid motor mounts are out since they didnt fit right. The Motovative solid mounts are in on the factory pedastals, BUT THEY DONT FIT, UGH!!! the solid mounts have an offset bolt hole just like the factory mounts so im going to try flipping one over, right now ive got the Motovative's turned so the motor is sitting low on both sides. But it also appears that the motor is sitting crooked in the car, the crank pulley is visibly to the passenger side so im kinda bummed about what to do, this **** always happens to me
Nothing worth taking pictures of but i did get quite a bit done and enjoyed myself, I highly recommend Pandora Internet Radio in the Southern Rock Genre, its endless fun
the fuel pump assembly is installed for good, hooked up etc and im building a lid for the hole i cut, both pumps work, done. A bunch of grinding and paneling off parts of the car Ive cut is 95% done, 80% of the final welding of the lower bracket is done.
The bad news starts with good news, the Spohn solid motor mounts are out since they didnt fit right. The Motovative solid mounts are in on the factory pedastals, BUT THEY DONT FIT, UGH!!! the solid mounts have an offset bolt hole just like the factory mounts so im going to try flipping one over, right now ive got the Motovative's turned so the motor is sitting low on both sides. But it also appears that the motor is sitting crooked in the car, the crank pulley is visibly to the passenger side so im kinda bummed about what to do, this **** always happens to me
Nothing worth taking pictures of but i did get quite a bit done and enjoyed myself, I highly recommend Pandora Internet Radio in the Southern Rock Genre, its endless fun
03-13-2011, 10:17 AM
#94
FormerVendor
iTrader: (19)

Join Date: Nov 2010
Location: Lakeway, Tx
Posts: 423
Likes: 0
Received 0 Likes
on
0 Posts
The mounts install so that the bolt is offset towards the bottom, just like stock mounts.
You will see a number laser etched into the mounting plate... install the mounts so that the number is on the bottom
There is also no way for the mounts to make the motor off center or sideways. Both mounts are mirror images of eachother with the exact same offset.
Let me know if you need help!
Blake
03-13-2011, 11:17 PM
#95
TECH Fanatic
Thread Starter
iTrader: (19)
Join Date: Sep 2007
Location: houston TX
Posts: 1,497
Likes: 0
Received 0 Likes
on
0 Posts
I do need help, I need somebody to keep me away from me lol. Honestly Im glad to hear that, I was really hoping when I got home that ls1tech had a solution, since Im about to go out and work on the car and was wondering how to move forward.
Props to you Blake for being online and paying attention on Sunday, many thanks!
Props to you Blake for being online and paying attention on Sunday, many thanks!
 03-14-2011, 06:12 AM
#97
TECH Fanatic
Thread Starter
iTrader: (19)
Join Date: Sep 2007
Location: houston TX
Posts: 1,497
Likes: 0
Received 0 Likes
on
0 Posts
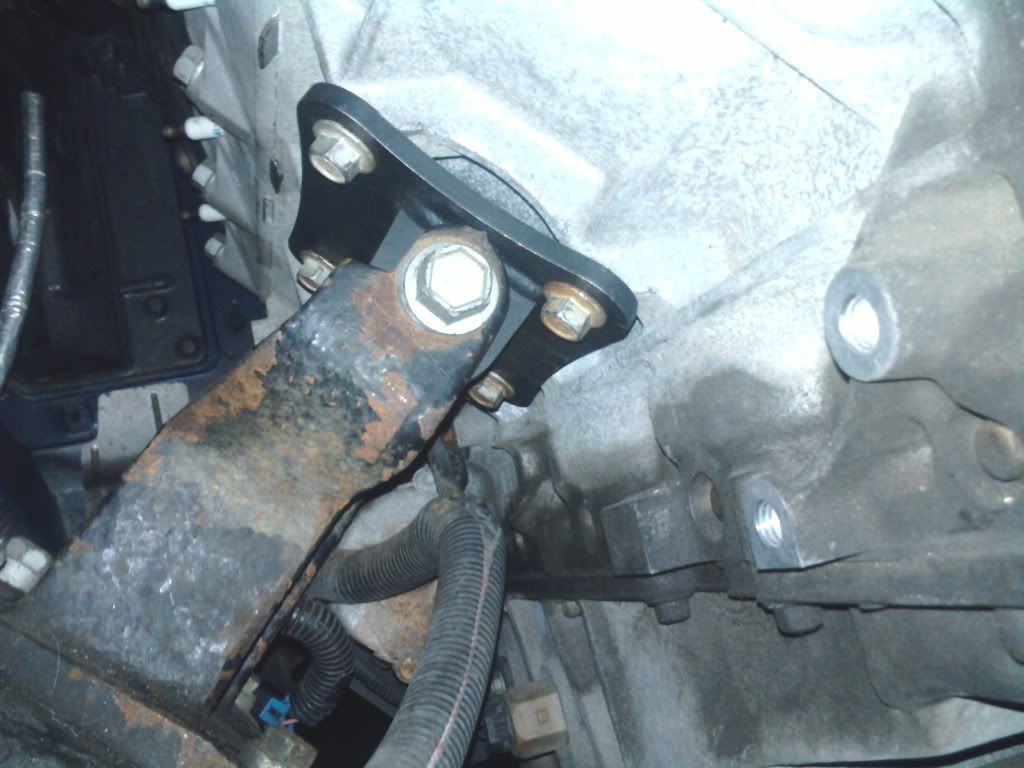
all is well, Blake got it right first shot. I flipped the solids over and it slid into place so I began dissecting the Spohn to make it work and so far so good but i cannot proceed without the tranny in place. Ive been talking to Lee @ BMR via email but the responses suddenly stopped and I haven't heard back, granted I have only sent 2 that have not received reply's.
I worked on various odds and ends for a while, I built a cradle for my 4l80e that is welded to the round part of the jack that comes off. It makes sure the transmission doesn't come toppling onto me Its also how a 165lbs man transports a 300+lbs tranny lol
I worked on various odds and ends for a while, I built a cradle for my 4l80e that is welded to the round part of the jack that comes off. It makes sure the transmission doesn't come toppling onto me
Its also how a 165lbs man transports a 300+lbs tranny lol
03-15-2011, 07:48 AM
#98
TECH Fanatic
Thread Starter
iTrader: (19)
Join Date: Sep 2007
Location: houston TX
Posts: 1,497
Likes: 0
Received 0 Likes
on
0 Posts
way easyier working on making motor mounts and dealing with them in general when you can get so close to your motor that you can lean on it and drink a beer

from R&R'ing my trannys so many times ive discovered the best way to hold it is to grab some scrap and make a tray for it, weld the tray to the swiveling part of the jack and it wont fall off.

from R&R'ing my trannys so many times ive discovered the best way to hold it is to grab some scrap and make a tray for it, weld the tray to the swiveling part of the jack and it wont fall off.
03-29-2011, 01:41 PM
#99
TECH Fanatic
Thread Starter
iTrader: (19)
Join Date: Sep 2007
Location: houston TX
Posts: 1,497
Likes: 0
Received 0 Likes
on
0 Posts
everything is on hold, Im moving. packed up most of the stuff in the garage with the car, its all now actually in the car, going to sort of install the 4l80e just to hold stuff still. Ill install the IC for the trip but not the radiator as the upper mount bracket for it isnt done.
everything is labeled but I already know theres going to be all kinds of pieces that are lost or unknown good news is ill have a lift and a shop to work on it from now on
everything is labeled but I already know theres going to be all kinds of pieces that are lost or unknown
good news is ill have a lift and a shop to work on it from now on
05-15-2011, 04:35 AM
#100
TECH Fanatic
Thread Starter
iTrader: (19)
Join Date: Sep 2007
Location: houston TX
Posts: 1,497
Likes: 0
Received 0 Likes
on
0 Posts
the moving process is taking forever! not much has changed, the 80 is in, man I dont ever want to deal with that big bastard ever again without a lift.
got the AN power steering conversion using the Sticky, havent put it on yet but im thinking about adding a small cooler to the system because I like the twisties, anybody done this?
been working my *** off, so generally not much has happened other than me ordering parts, been looking at Tbrakes and I think im gonna go with Jakes Performance. He has a brake for the autoX guys that doesnt bind on a 2 to 1 gear change, also going with a billet input shaft and rollerized forward hub with Circle D doing a full rebuild and stage 3 converter.
on the bright side, work is showing no signs of slowing so when it does Ill have lots of work to do and lots of parts ready