My custom C6 91mm turbo build thread! DYNO VIDEO ADDED!

 09-06-2011, 01:39 PM
#42
11 Second Club
iTrader: (13)

Join Date: Dec 2004
Location: NYC
Posts: 355
Likes: 0
Received 0 Likes
on
0 Posts

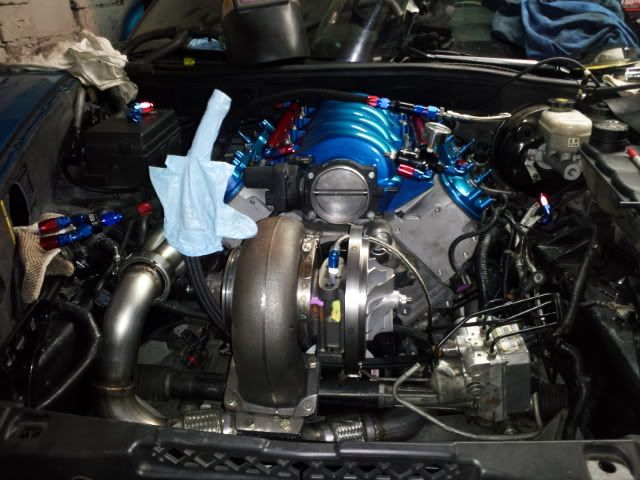
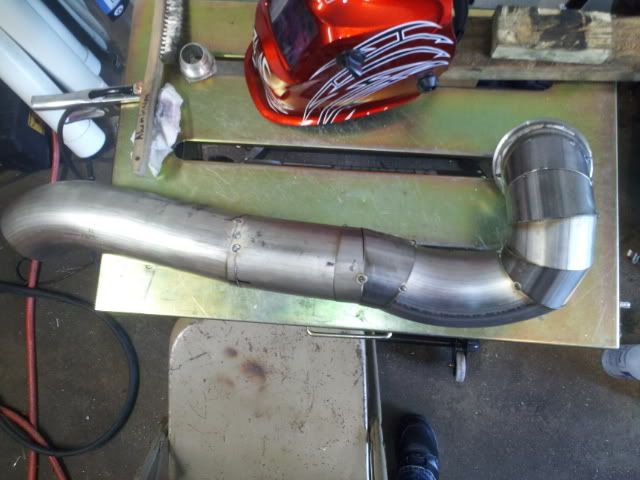
Been busy past couple weeks, but got around to buttoning all the hotside uo, installed it, ran oil lines,
Finished intercooler pipes( waiting for it to get bead rolled), and just have to make the water lines and fuel lines, so this week is gonna be a busy week....
Also has anyone deleted the maf from a car with the iat sensor integrated with it, i was thinkin i could just remove the wires from the maf pigtail and connect them to a regular gm iat pigtail, and then usre the threaded iat from a cyclone.. Anyone done this b4?, cause this car is gonna be setup on speeddensity
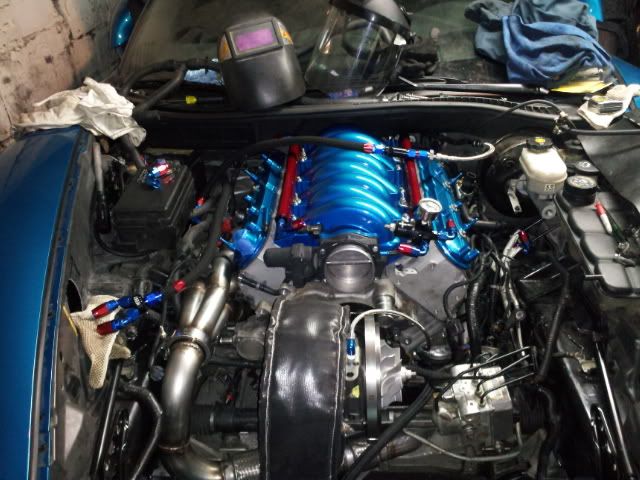
09-06-2011, 02:23 PM
#43
TECH Resident
iTrader: (22)
Join Date: Oct 2006
Location: Shreveport, Louisiana
Posts: 910
Likes: 0
Received 0 Likes
on
0 Posts
Yes, the IAT relocation can be done. I did the exact thing on my car when going to SD. Just cut and solder into the GM pigtail and choose your IAT sensor.
09-06-2011, 02:30 PM
#44
TECH Regular
iTrader: (14)

Join Date: Jan 2009
Location: Cypress TX
Posts: 422
Likes: 0
Received 0 Likes
on
0 Posts
I'm running a SD tune on my CTS-V, and you're spot on for relocating the IAT sensor. I used this sensor http://www.diyautotune.com/catalog/g...tail-p-62.html. You can also get stainless or aluminum bungs from them to weld into your charge pipe.
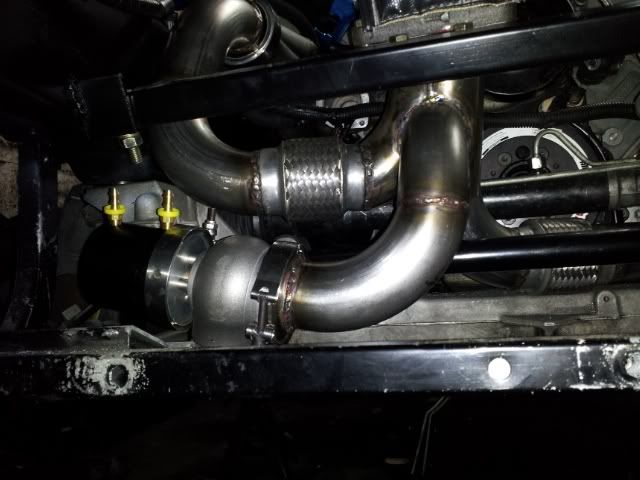
Sweet looking build, love the headers!
Sweet looking build, love the headers!


 09-21-2011, 01:10 PM
#52
Staging Lane
Thread Starter
iTrader: (3)
Join Date: Jan 2005
Posts: 61
Likes: 0
Received 0 Likes
on
0 Posts
So finally after a year of hard work the first start up! theres still a few things to button up but it really does feel amazing just to hear it after so long! I know the video is nothing special but i guess im just glad to finally hear the car again and know alot of the hard work will be paying off!
http://youtu.be/nAIaKeUGrpQ
http://youtu.be/nAIaKeUGrpQ
09-21-2011, 03:59 PM
#53
TECH Regular
iTrader: (14)
Join Date: Jan 2009
Location: Cypress TX
Posts: 422
Likes: 0
Received 0 Likes
on
0 Posts
Congrats! Be sure to update us when you get some dyno numbers.
I just ordered the same intercooler you have for my CTS-V and I'm curious as to how well they flow.
I just ordered the same intercooler you have for my CTS-V and I'm curious as to how well they flow.
09-22-2011, 01:39 PM
#54
Congrats on the build. Only problem I see will be that airfilter. WAY to small to feed that monster. It will start puking oil once you turn it up. Cause a big vacuum.
09-22-2011, 03:53 PM
#56
11 Second Club
iTrader: (13)
Join Date: Dec 2004
Location: NYC
Posts: 355
Likes: 0
Received 0 Likes
on
0 Posts
And i made some adjustments on the tune and wallah its stays running lol
http://static.photobucket.com/player...2-12-57-44.mp4
http://static.photobucket.com/player...2-12-57-44.mp4
09-22-2011, 04:59 PM
#57
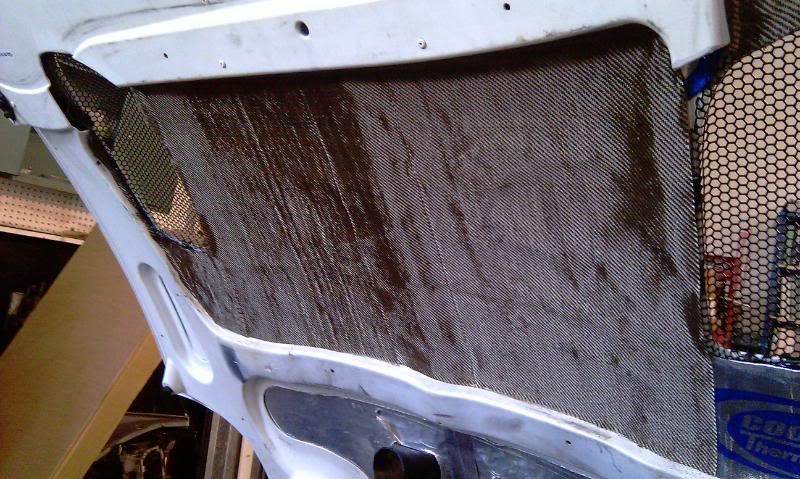
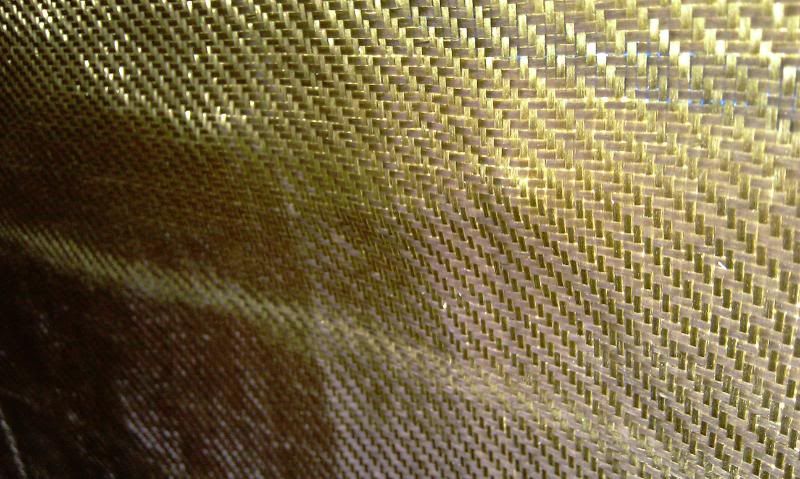
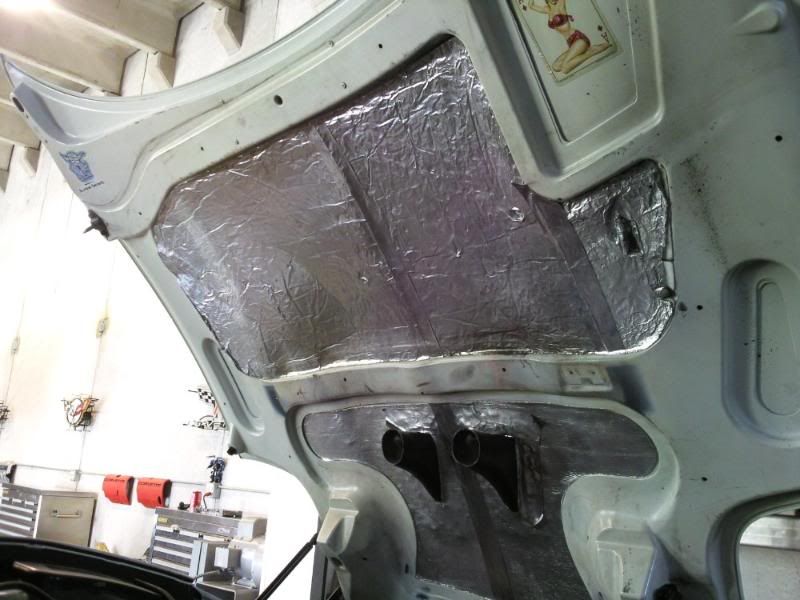
Sick. If it was me, for the filter issue, i'd leave the filter like that for the street, unless a larger one can be fitted(bigger the filter the better, in every case)...but I would install a NACA duct into the driver side lower area of the hood, to give it direct intake of cool air. Your IAT's would thank you I think. Also, with the turbo that close to the hood, you may want to consider insulating whatever hood your going to use, as even a turb with a blanket and wrap, is enough to discolor or damage your hood. On my car, I took every percaution before I drove it,..still, the hood started to turn slightly yellow(only short time of having the kit on the car)...then wrapped the inside of hood with heat treatment,...no more issue, and discoloring buffed out.
Lookin and sounding good man.
Lookin and sounding good man.
09-22-2011, 06:17 PM
#59
11 Second Club
iTrader: (13)
Join Date: Dec 2004
Location: NYC
Posts: 355
Likes: 0
Received 0 Likes
on
0 Posts
And we wrapped the downpipe and have some more heat wrap on order to do the crossover pipes and a blanket wrap for the passenger side collector
btw is anyone goin to the shootout
btw is anyone goin to the shootout