Holden WH Statesman, 390ci + S400 build


 04-22-2013, 09:47 AM
#82
Launching!
Thread Starter
Ok, now I have some progress to talk about 
Got the block back from the machine shop, was a bit disappointed they hadn't touched the mains as I specified I wanted them line honed. The guy at the machine shop was confident that I wouldn't need to as they measured up good and suggested I do a pre-assembly and bring the block back if it isn't right. I'd need to bring the block back to do the deck as it also hasn't been cut yet. This is because I need to measure piston height before I know how much of the deck to cut back.
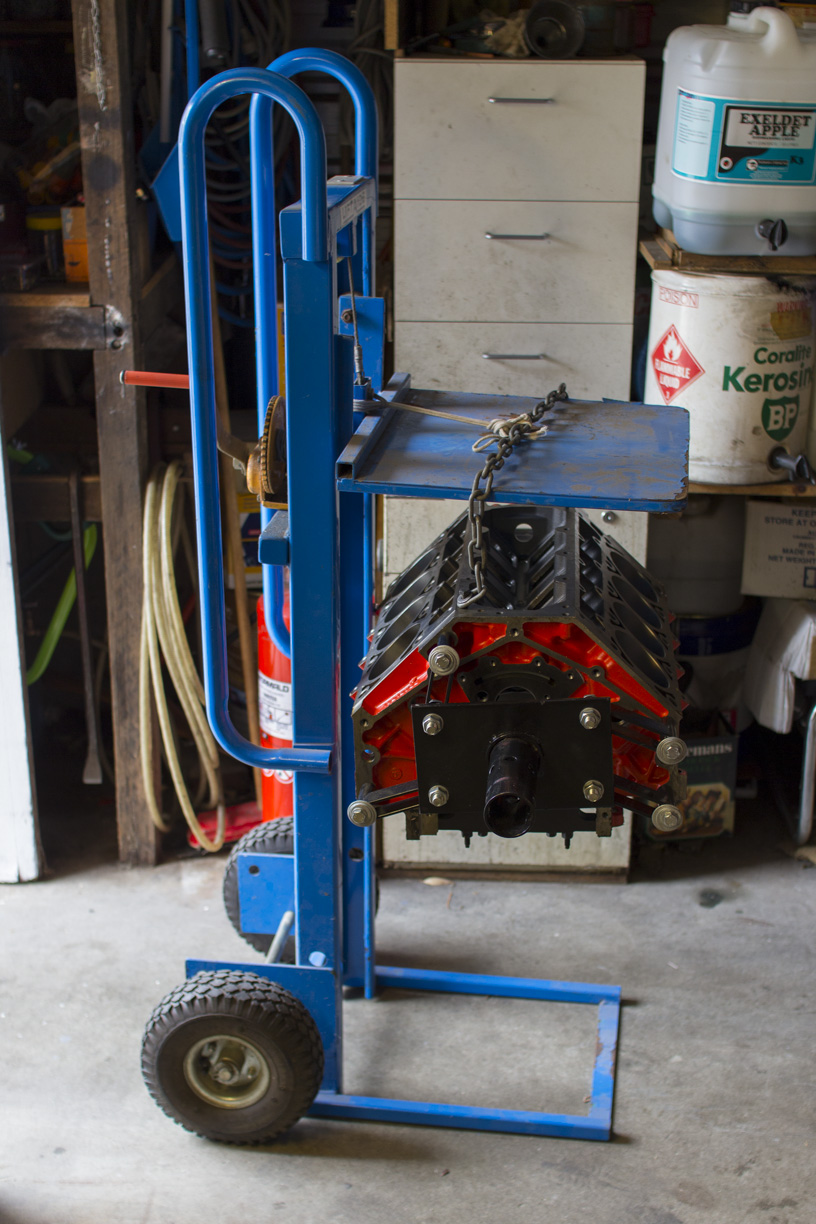
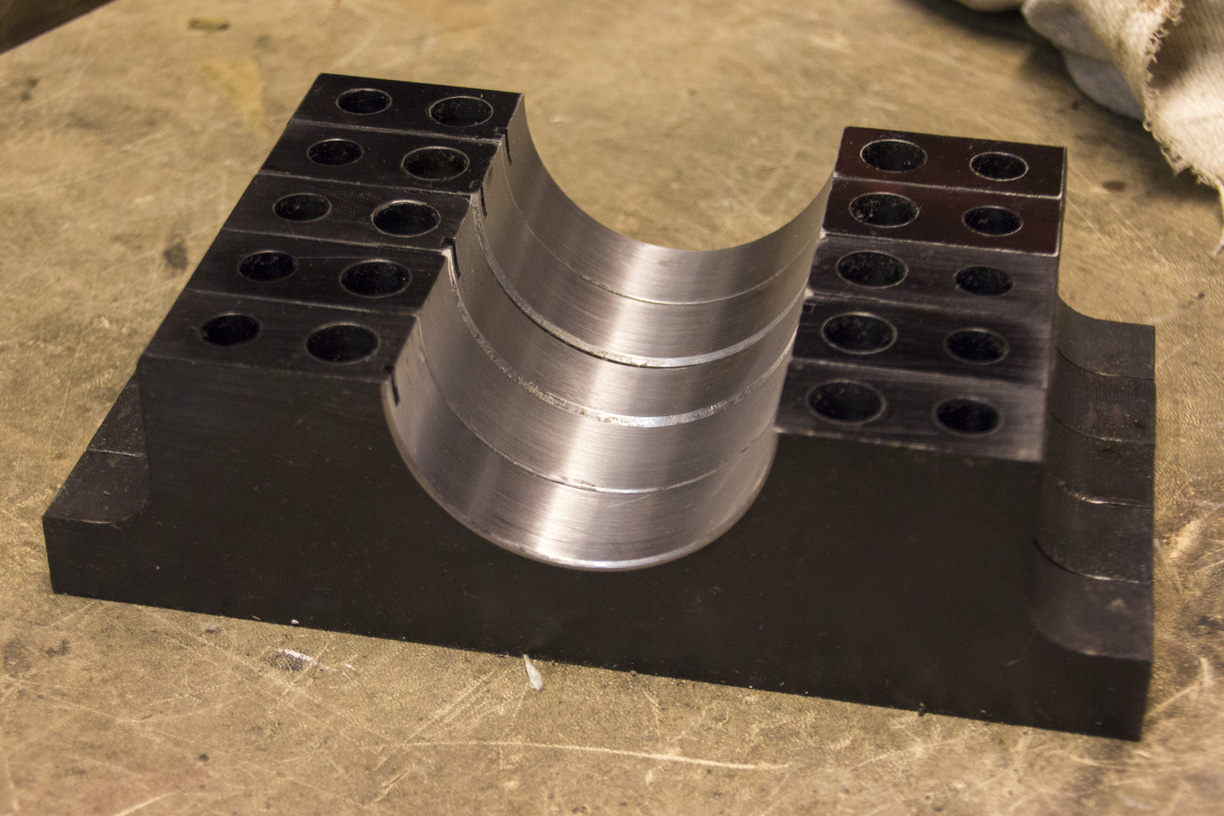
So, first things first I need to get the heavy bastard out of the crate and onto the engine stand. This little gizmo made the job easy.
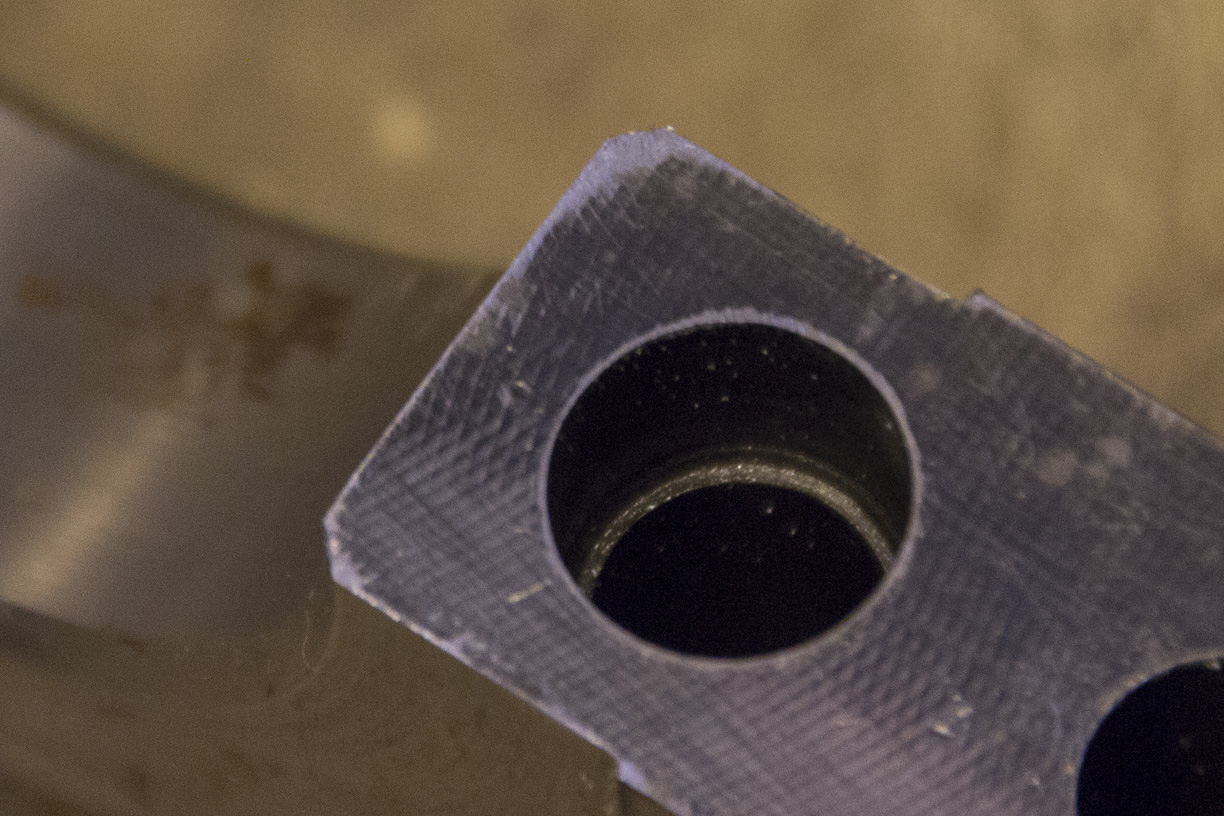
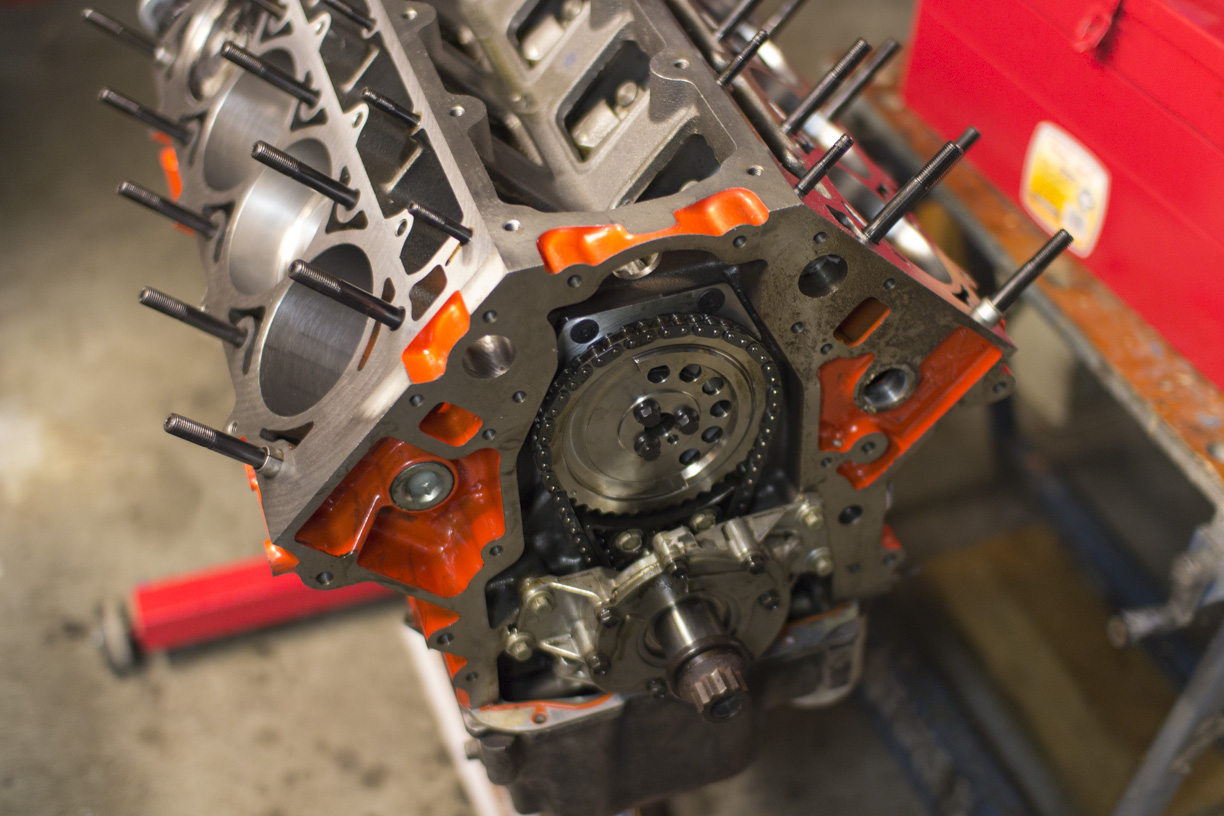
Done! Ready to put the crank in. Flipped the block and removed the factory main bolts and caps.
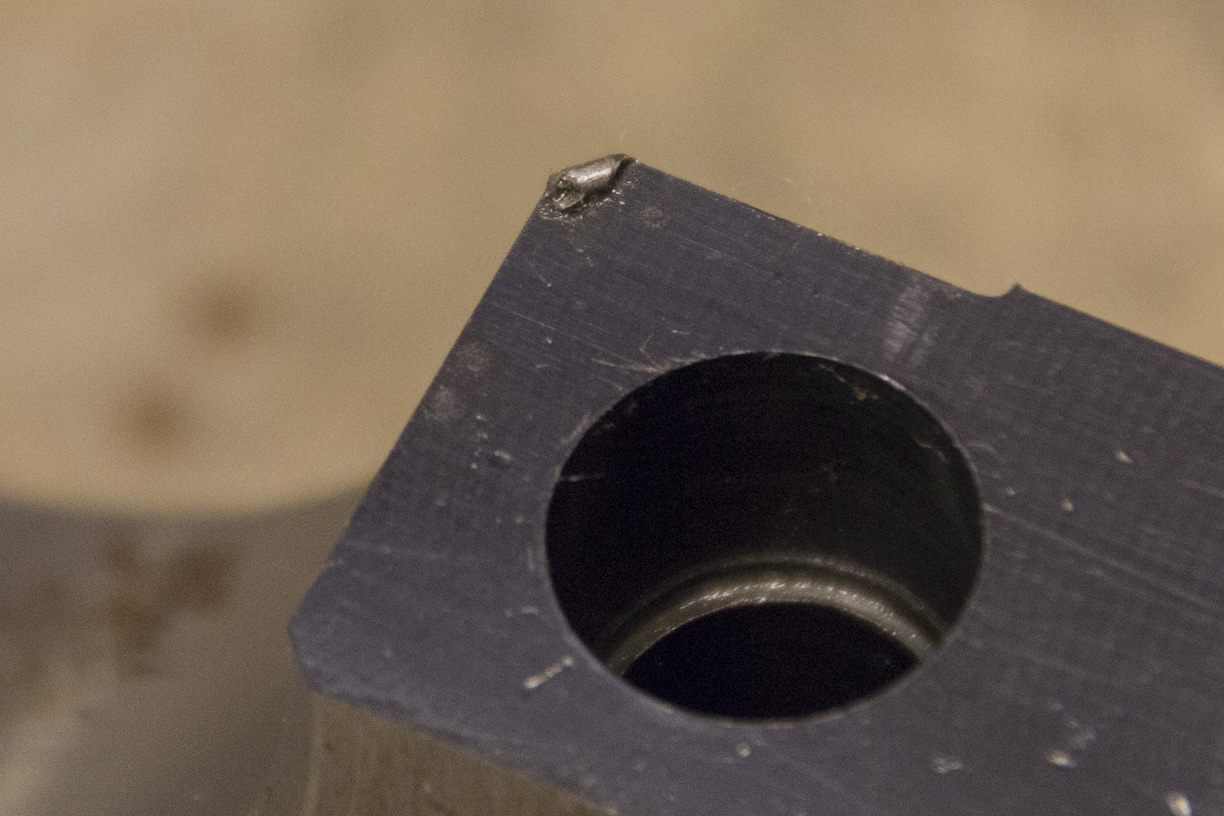
Mmmm dowels...
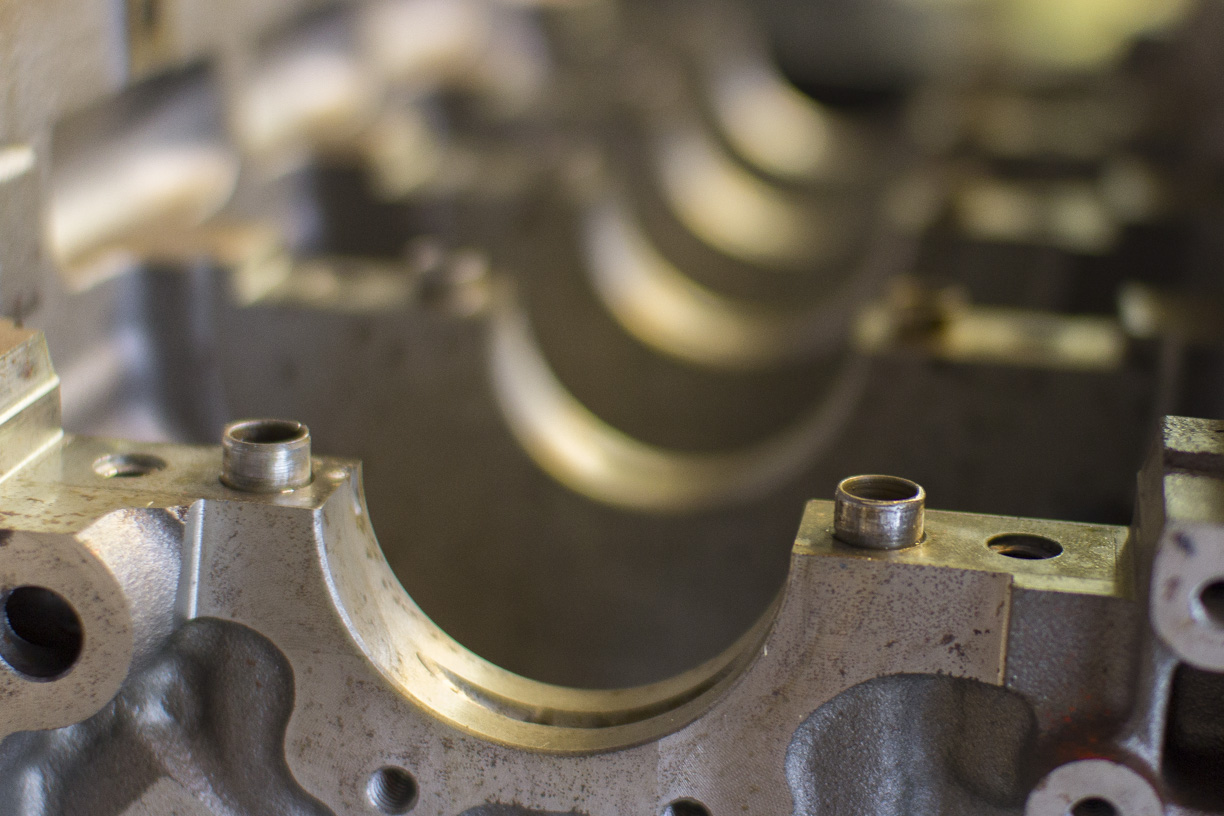
3 of 5 the caps had burs on them which would stop them seating correctly, all in the same position. A little work with the diamond file cleaned these up.
Then I went over the surface area with some emery paper to remove any little specs of rust which had formed.
Mmmm billet...
Put the bearings in. Cleaned and rested the crank in dry and added some Plastiguage. Measured the clearances and found about 0.0008" for all. This is wayyy too tight, so will need to be machined out to achieve the desired 0.0025-0.0030" clearance I'd like.
Removed the Plastiguage, cleaned the bearings and added some assembly lube. Put the crank back and torqued down the caps to spec. When torqued, the clearance is too tight to allow the crank to turn by hand, which won't help me with the next stage. Loosened off all of the mains to just over finger tight, which allowed me to turn the crank.
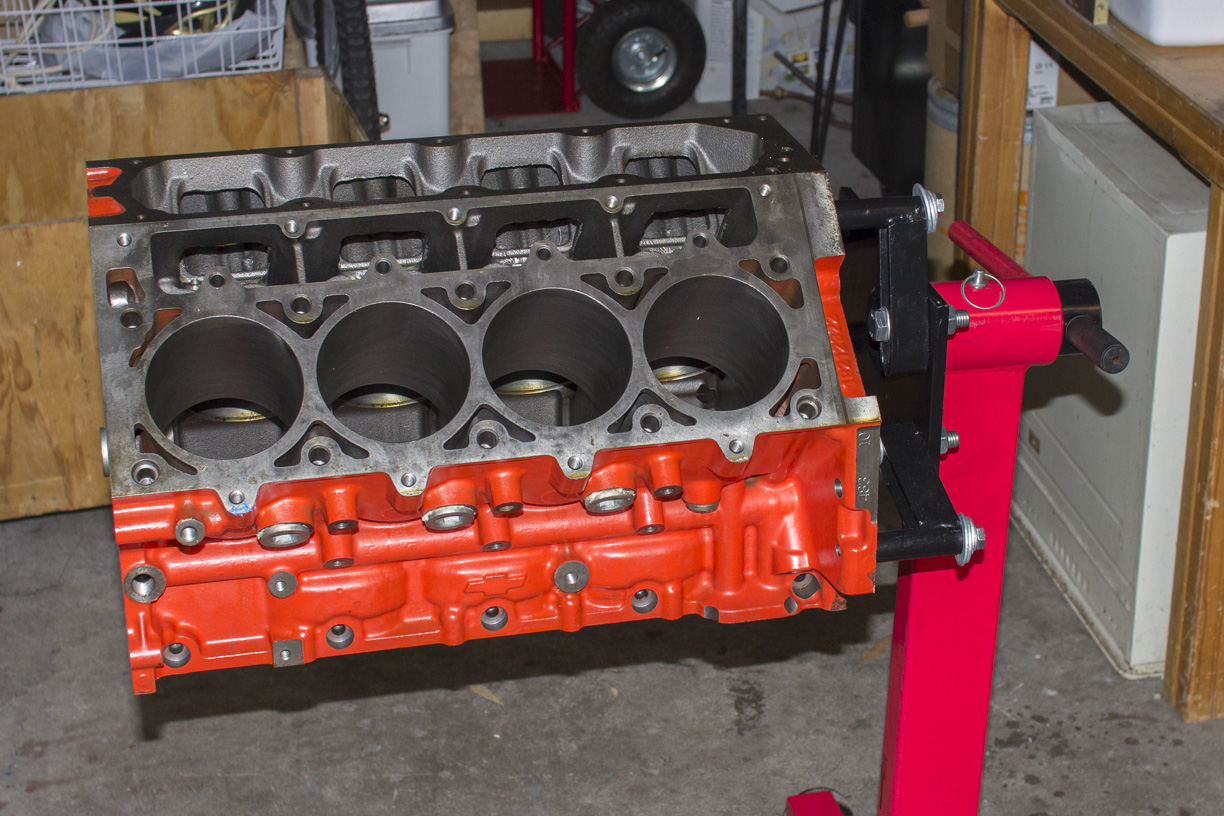
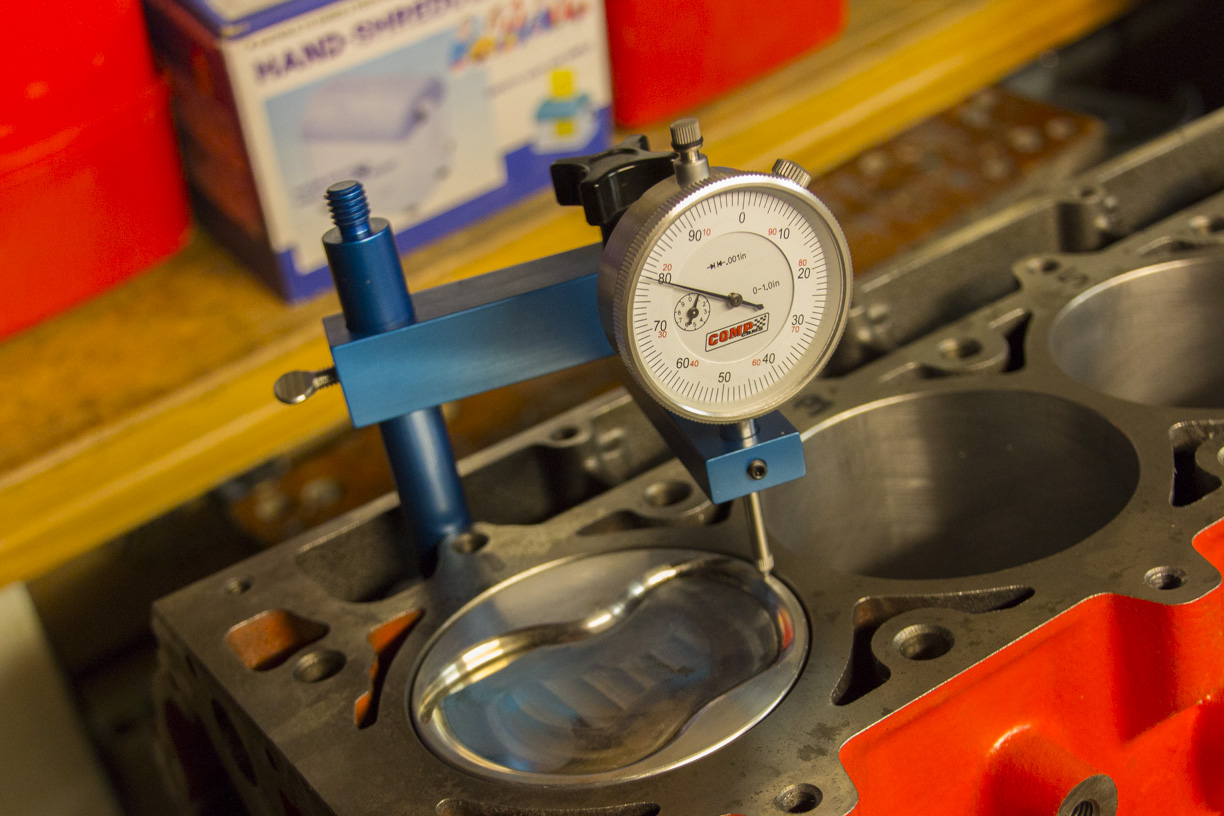
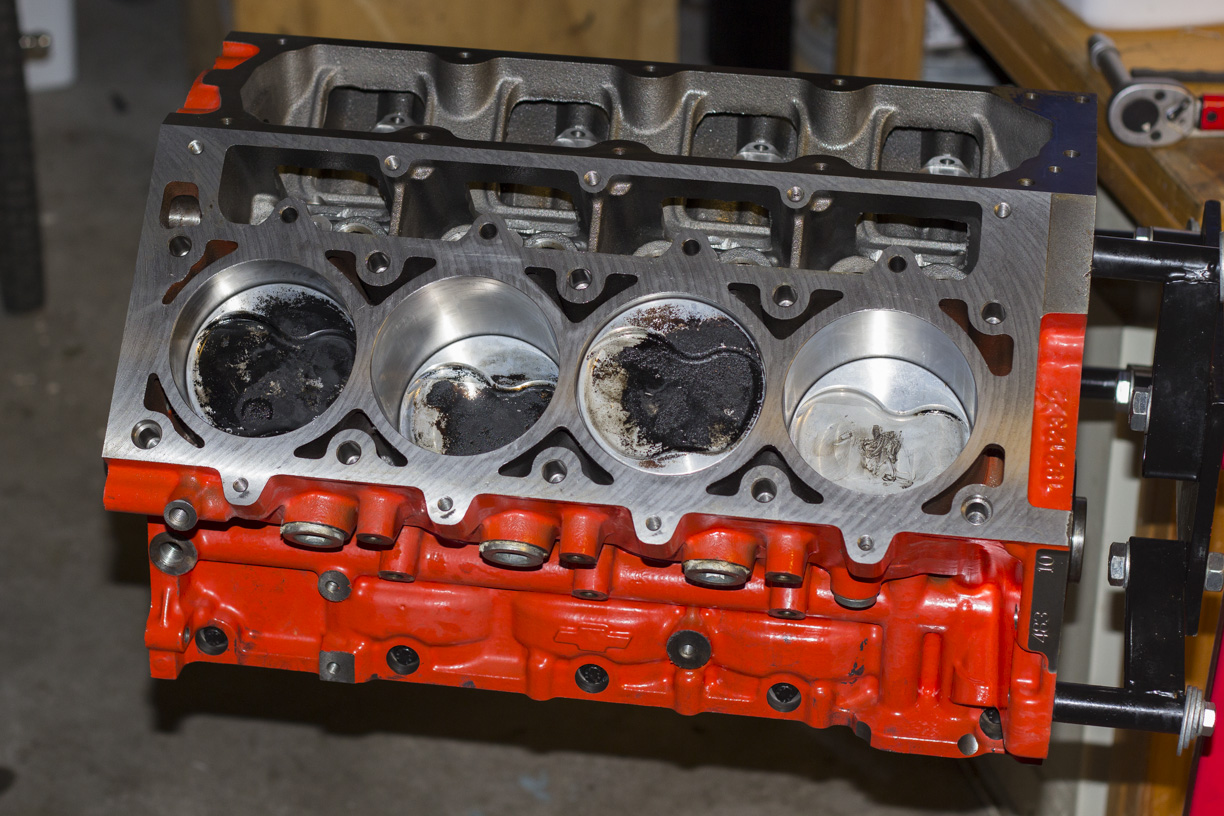
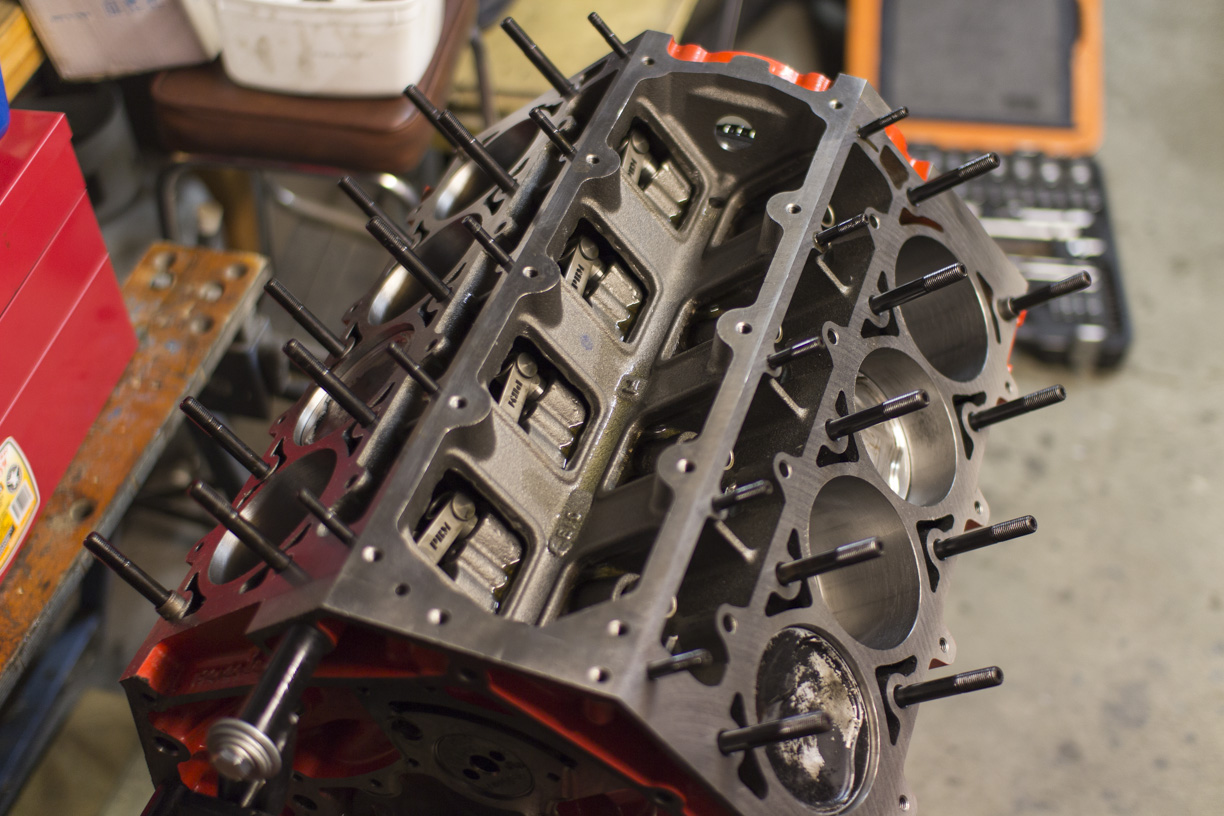
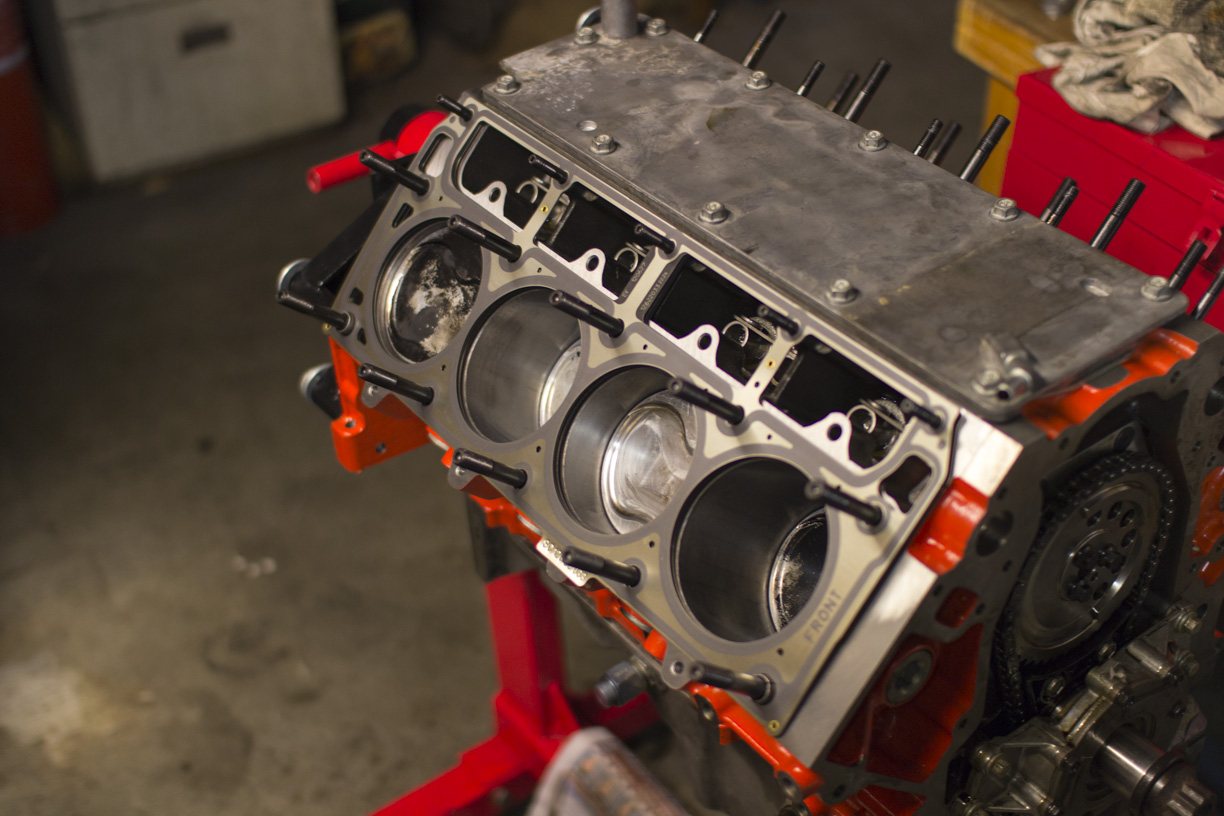
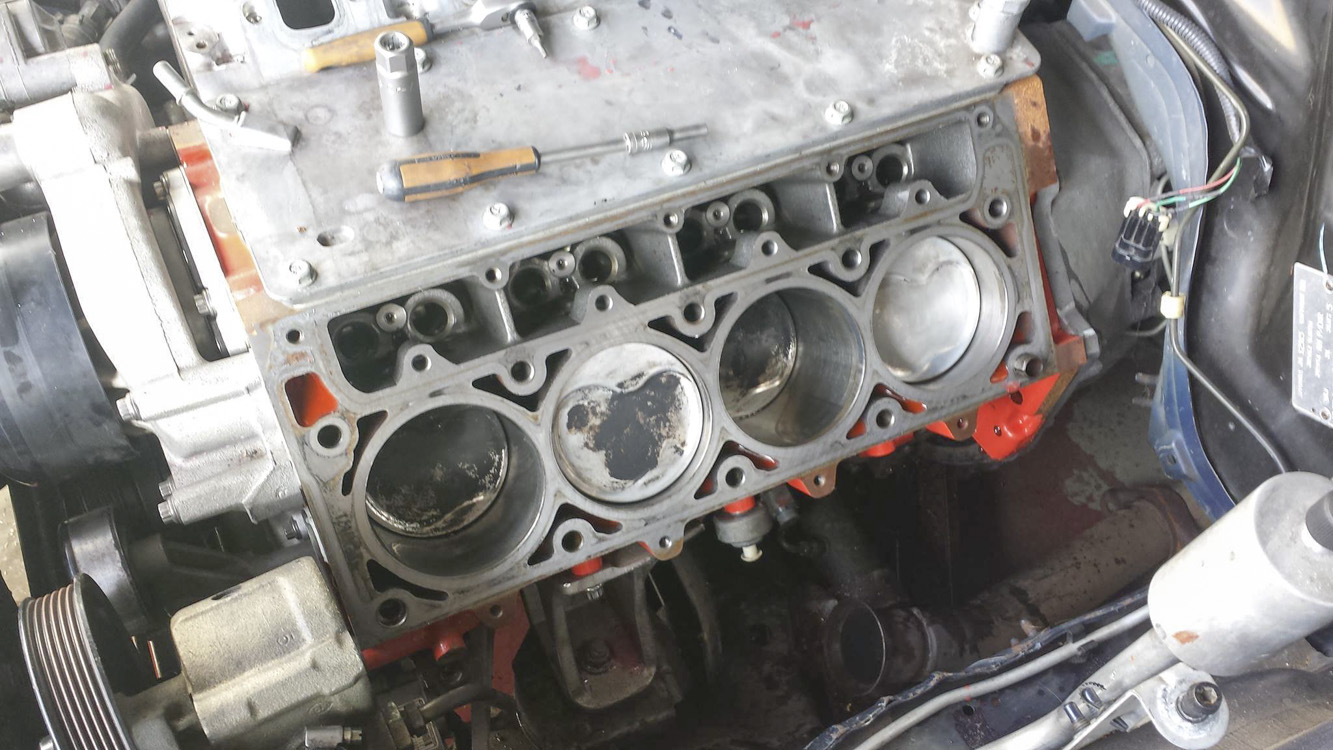
Cleaned up a couple of pistons and installed. Measured the deck to piston clearance which appears to be about 0.0021-0.0022".
Also went through and gapped all of the rings to suit. 0.0022" for the top ring, 0.0014" for the bottom ring, as per Total Seal recommendations.
Tomorrow I'm going to try getting the block back to the machine shop to do the rest of the job. Hopefully it wont take too long!
Got the block back from the machine shop, was a bit disappointed they hadn't touched the mains as I specified I wanted them line honed. The guy at the machine shop was confident that I wouldn't need to as they measured up good and suggested I do a pre-assembly and bring the block back if it isn't right. I'd need to bring the block back to do the deck as it also hasn't been cut yet. This is because I need to measure piston height before I know how much of the deck to cut back.
So, first things first I need to get the heavy bastard out of the crate and onto the engine stand. This little gizmo made the job easy.
Done! Ready to put the crank in. Flipped the block and removed the factory main bolts and caps.
Mmmm dowels...
3 of 5 the caps had burs on them which would stop them seating correctly, all in the same position. A little work with the diamond file cleaned these up.
Then I went over the surface area with some emery paper to remove any little specs of rust which had formed.
Mmmm billet...
Put the bearings in. Cleaned and rested the crank in dry and added some Plastiguage. Measured the clearances and found about 0.0008" for all. This is wayyy too tight, so will need to be machined out to achieve the desired 0.0025-0.0030" clearance I'd like.
Removed the Plastiguage, cleaned the bearings and added some assembly lube. Put the crank back and torqued down the caps to spec. When torqued, the clearance is too tight to allow the crank to turn by hand, which won't help me with the next stage. Loosened off all of the mains to just over finger tight, which allowed me to turn the crank.
Cleaned up a couple of pistons and installed. Measured the deck to piston clearance which appears to be about 0.0021-0.0022".
Also went through and gapped all of the rings to suit. 0.0022" for the top ring, 0.0014" for the bottom ring, as per Total Seal recommendations.
Tomorrow I'm going to try getting the block back to the machine shop to do the rest of the job. Hopefully it wont take too long!
04-22-2013, 11:02 AM
#83
Staging Lane
iTrader: (1)

Join Date: Feb 2009
Location: England, UK
Posts: 93
Likes: 0
Received 0 Likes
on
0 Posts
So, I've been doing some playing with the water/vapour ports in the head. Late model engines had these rear ports blocked off, which for NA engines isn't a problem, but apparently can cause a lot of excessive heat on the rear of the heads when playing with boost. This is something that I want to avoid, and I've heard of a lot of people who play with boost opening them up and venting them to the radiator. The problem is, the early engine has a different manifold with clearance underneath to run the lines. I don't have this clearance, so I needed to get a bit creative.
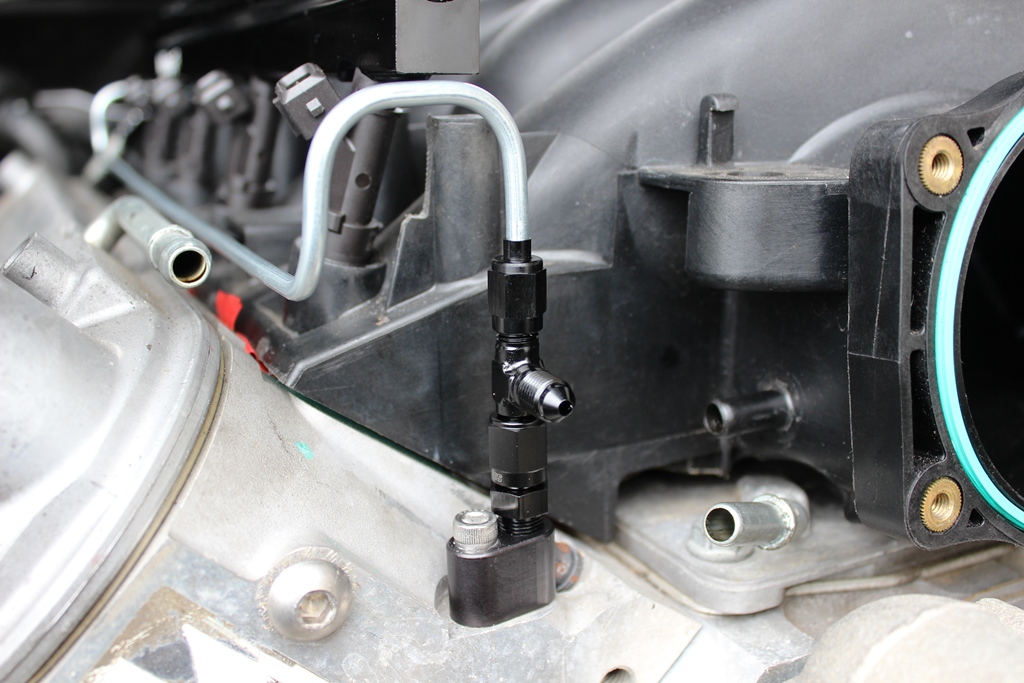
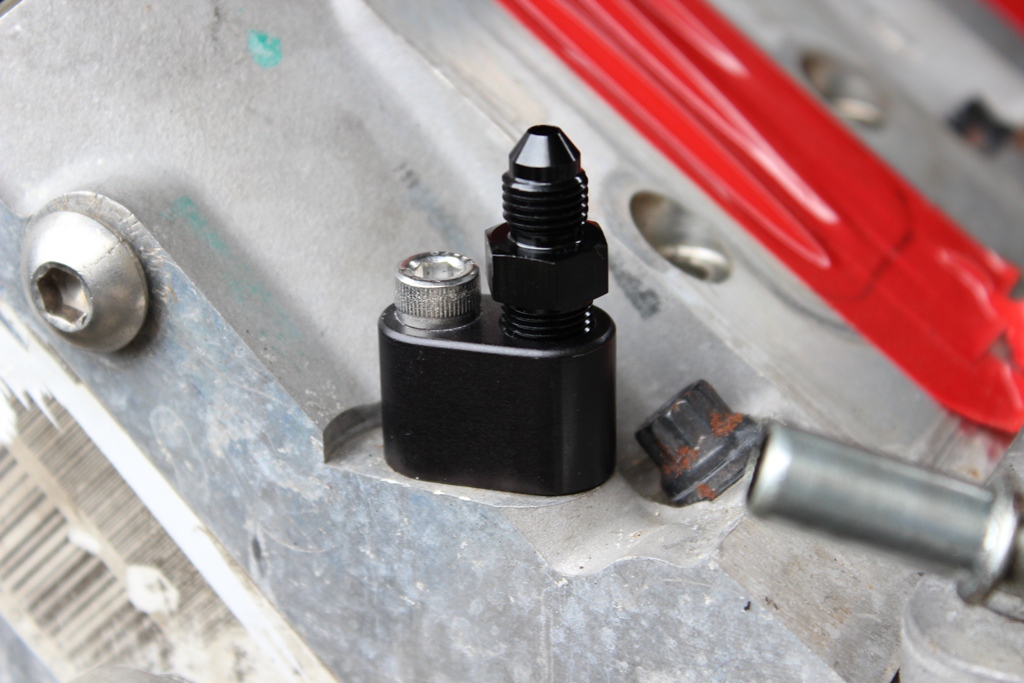
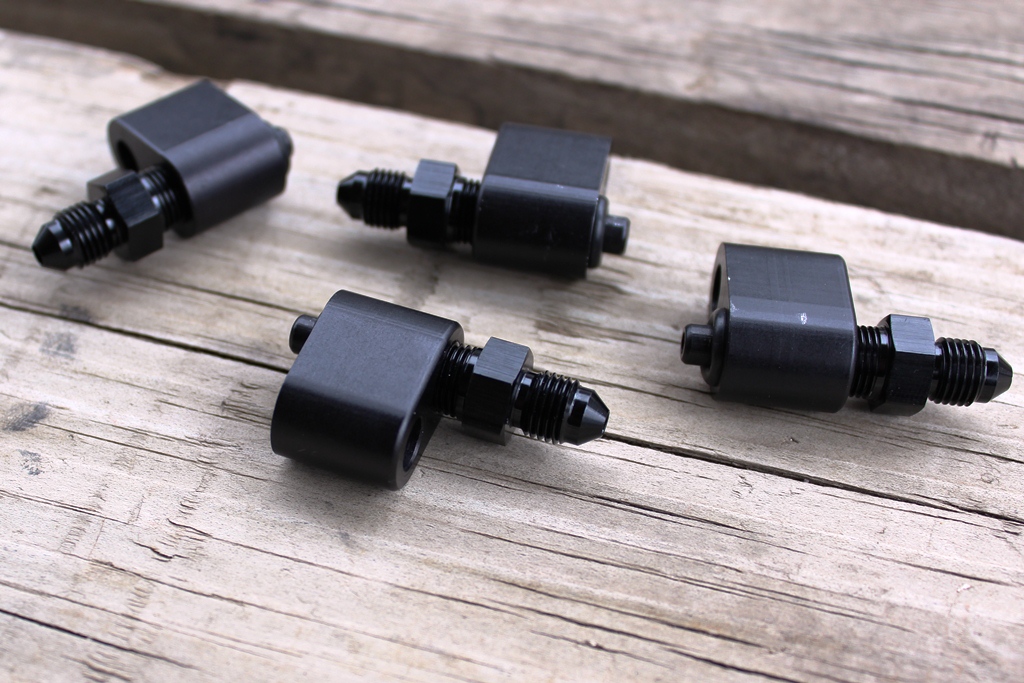
I would love to hear some opinions from anyone who has researched this before, or feels that my idea will or won't work. Don't be scared, I can handle a bit of criticism.
I would love to hear some opinions from anyone who has researched this before, or feels that my idea will or won't work. Don't be scared, I can handle a bit of criticism.
04-22-2013, 08:21 PM
#84
Launching!
Thread Starter
 05-07-2013, 06:04 AM
#86
Launching!
Thread Starter
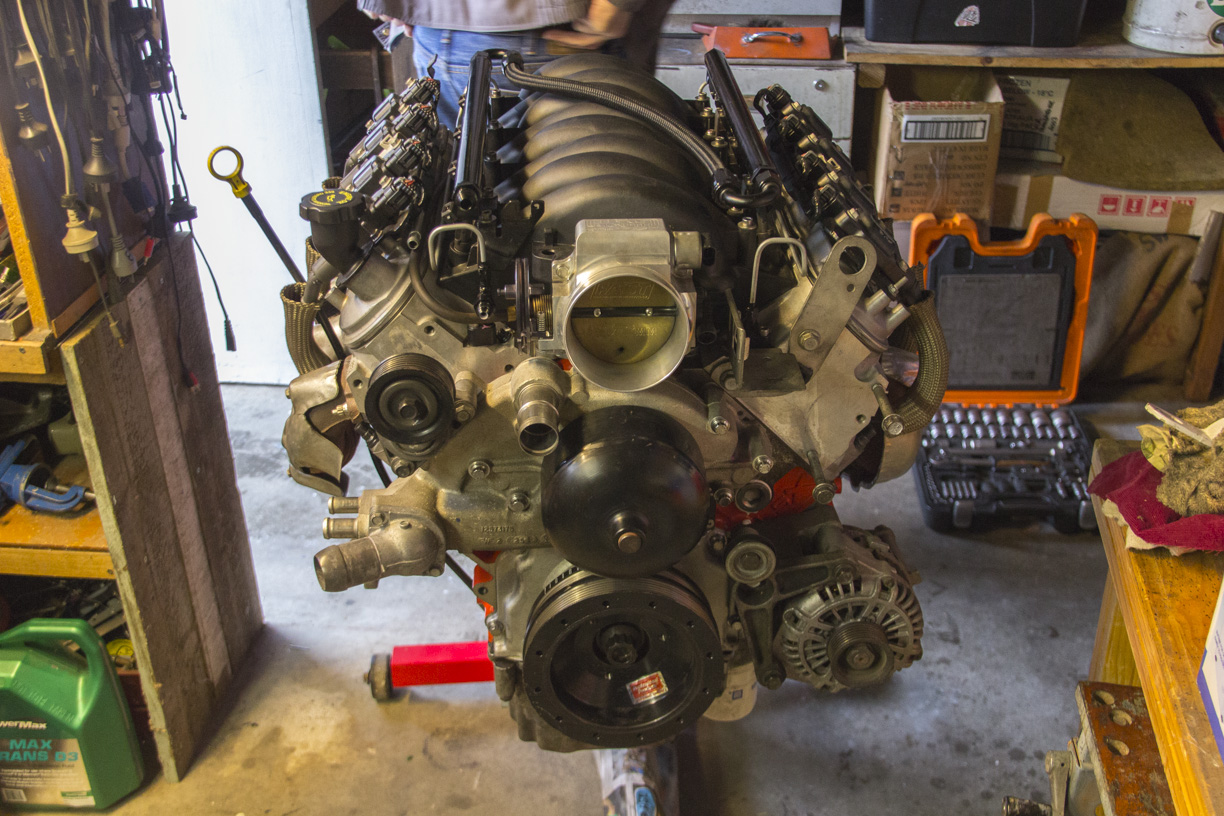
Not much progress tonight. I installed the cam and the windage tray...
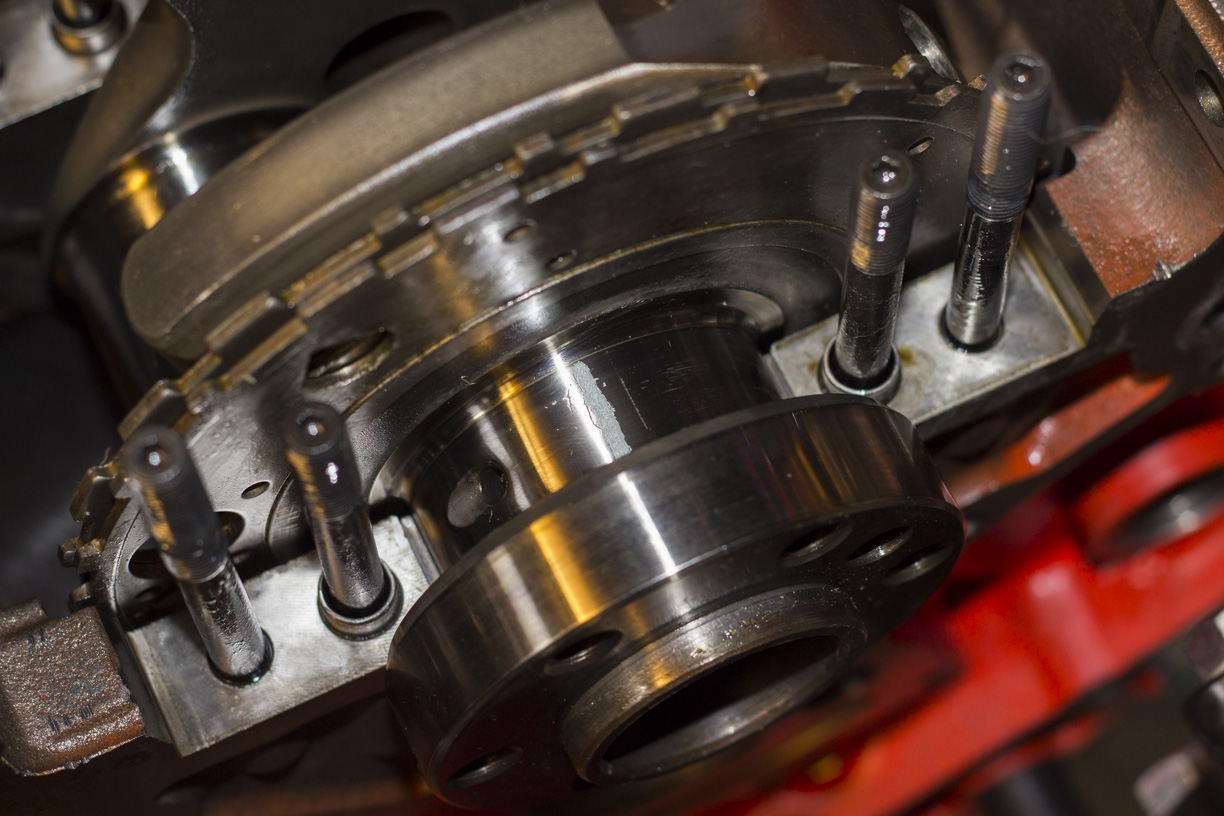
But then I noticed a few holes in this block. I've never worked with a brand new block before, so no doubt this is normal and I just need to get the bits.
Q&A time...
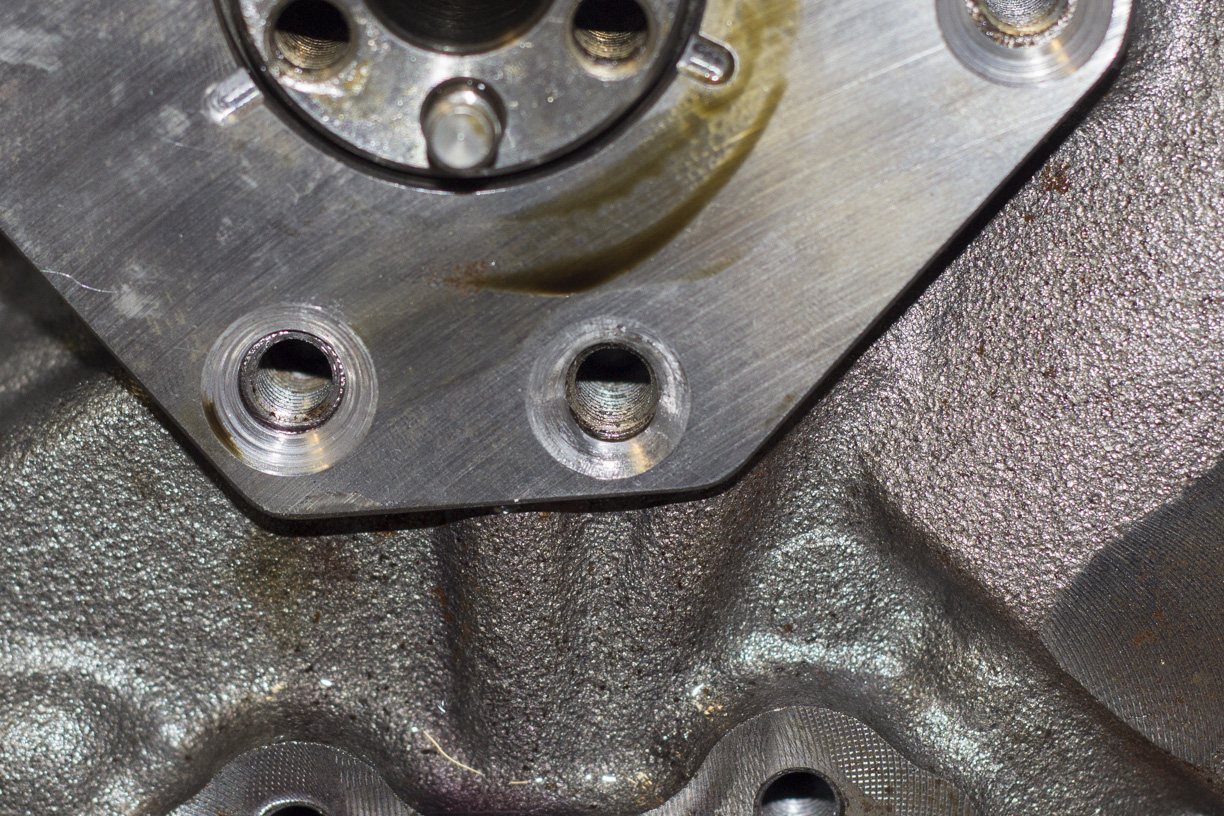
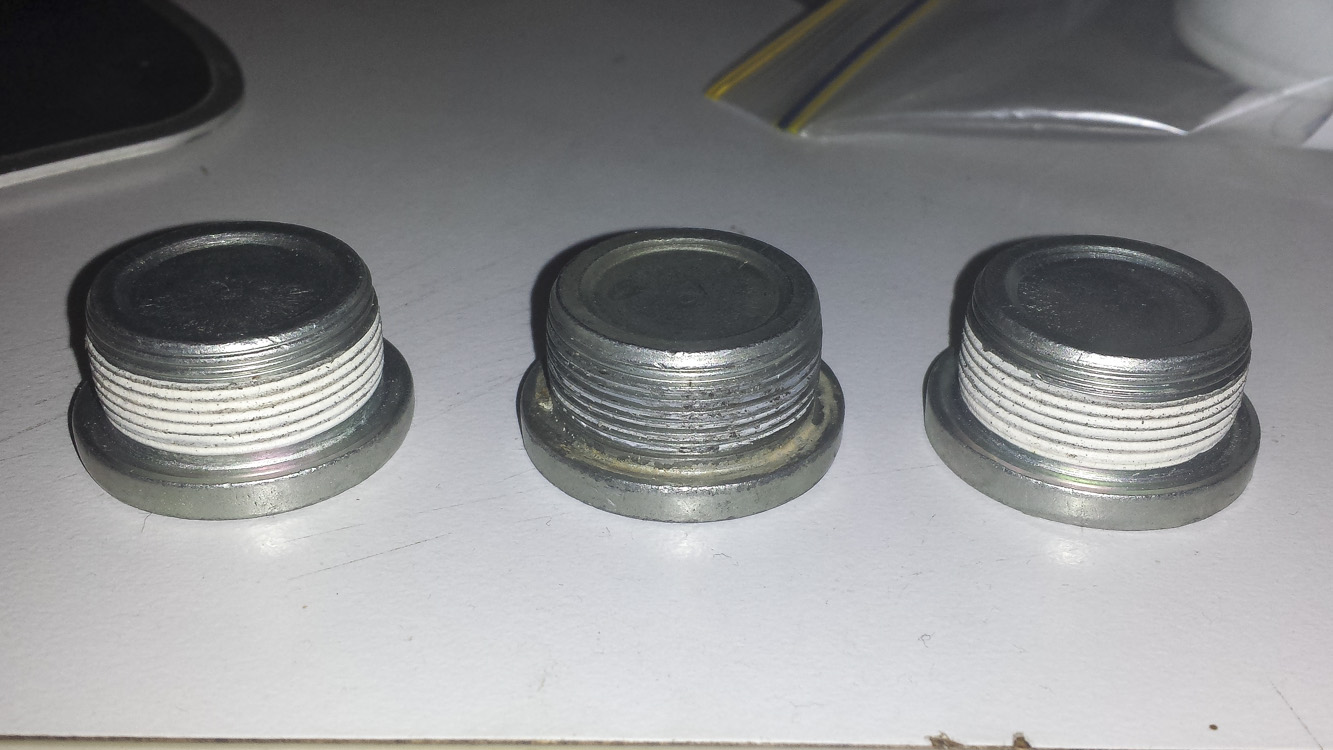
#1 What goes in here? Is this where the barbell restrictor goes? Does it just sit in there or do I need a cap to keep it in place? Can I reuse the one from my LS2 block? Are they the same? Should I buy a new one?
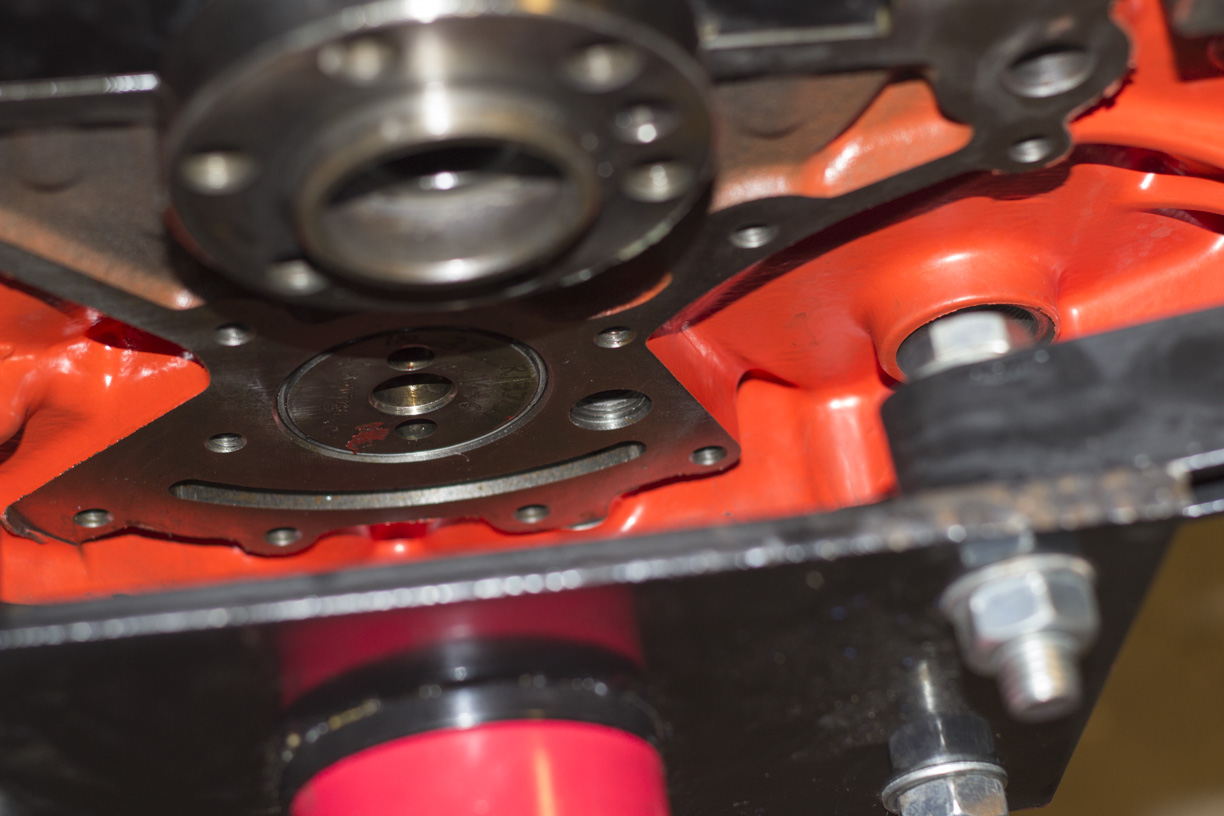
#2 Does something go in this hole? This is on the rear of the block (upside down in the photo) and is threaded.
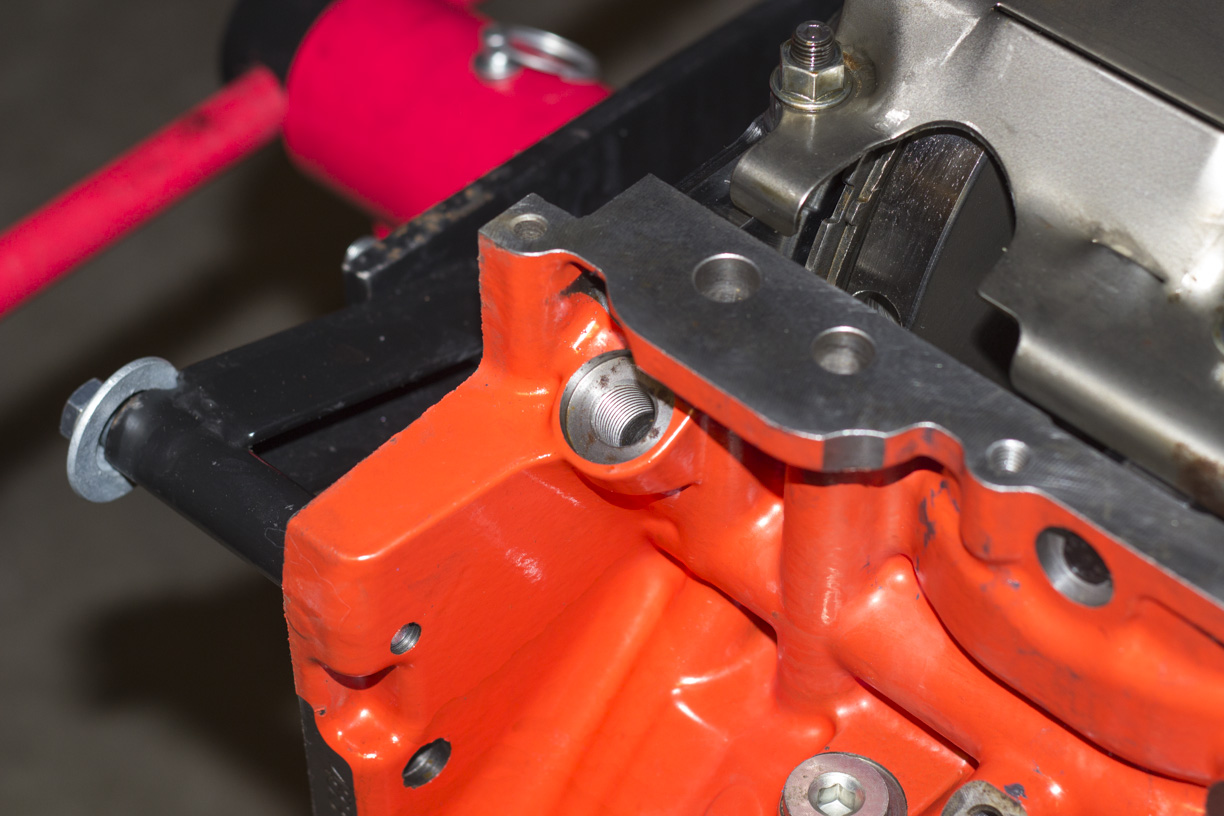
#3 What about this hole? This is at the rear of the block (upside down again). I assume something goes in here? What is it? Is it just a plug? Does anyone know the part number(s) for these bits?
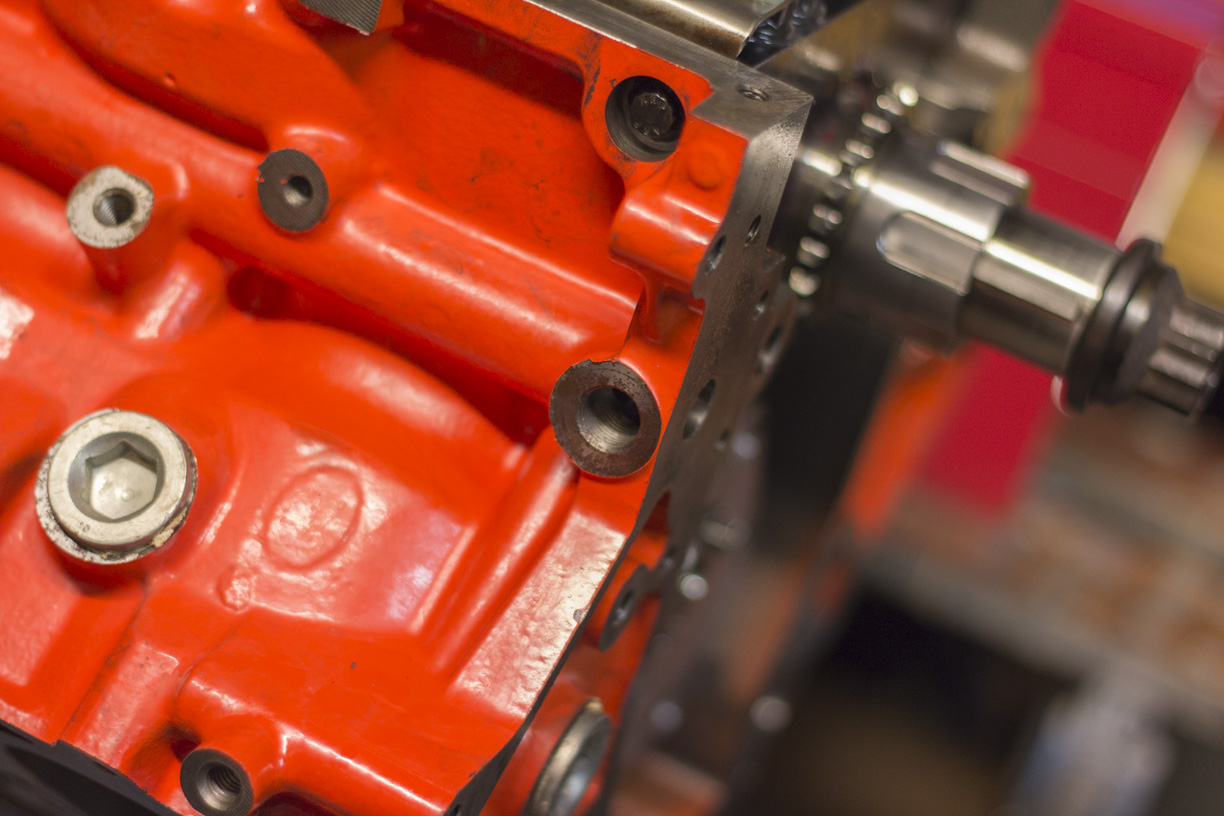
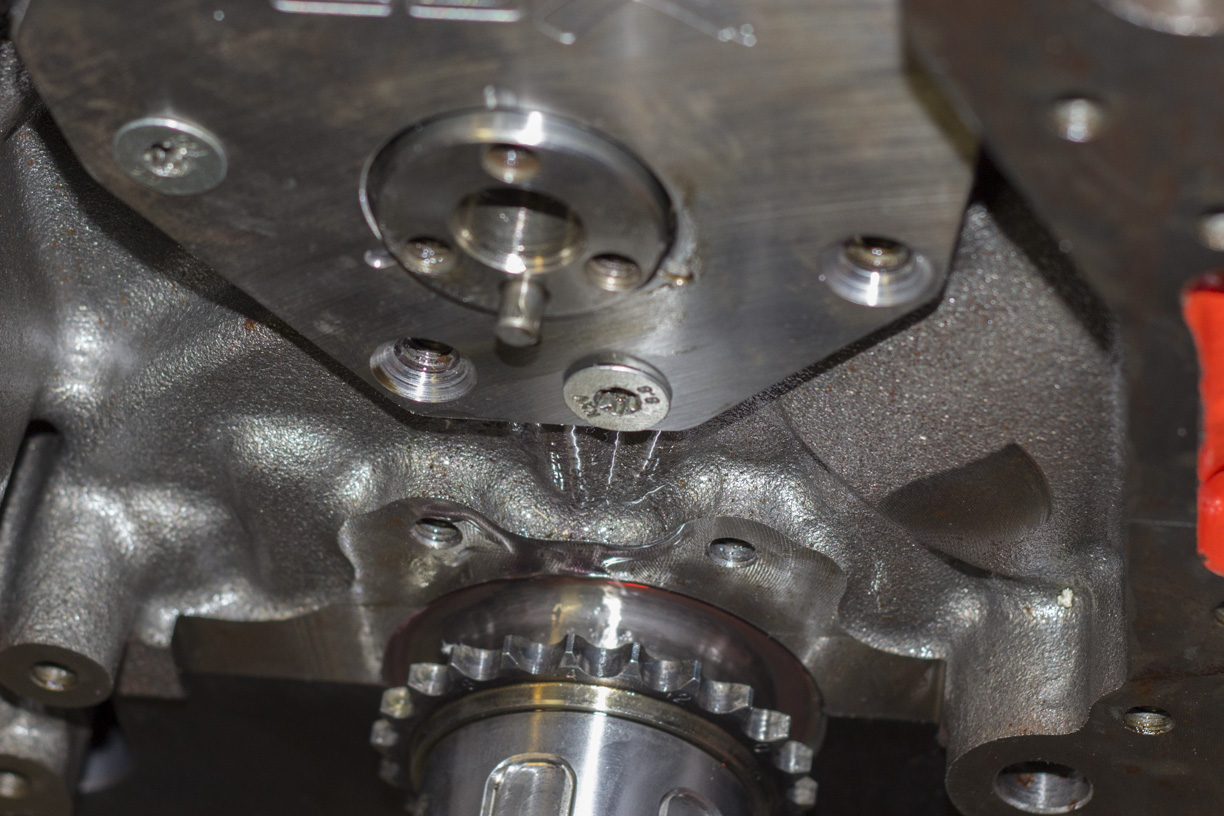
#4 What about this one? This is at the front of the block near the oil pump outlet (upside down block).
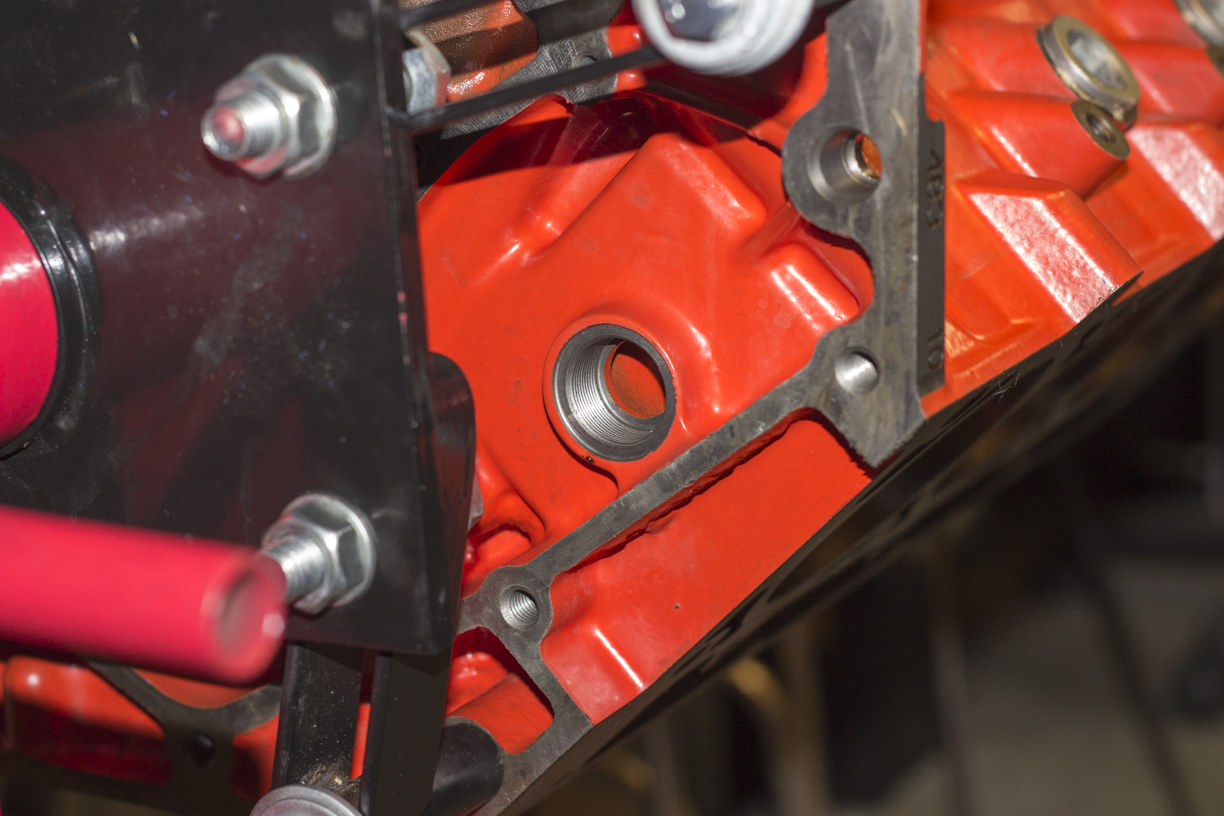
#5 And these? These are on the rear on the block outside the rear plate. This are in the coolant galleries and there's 1 on each side of the rear of the block. The front appears to have them as well, but the front ones are already plugged?
#6 What about the one on the right here? The left is the outlet of the oil pump, but I'm not sure what goes in the right hole (if anything). It kinda lines up with a flat part of the front cover, but I imagine something needs to be pressed in here first?
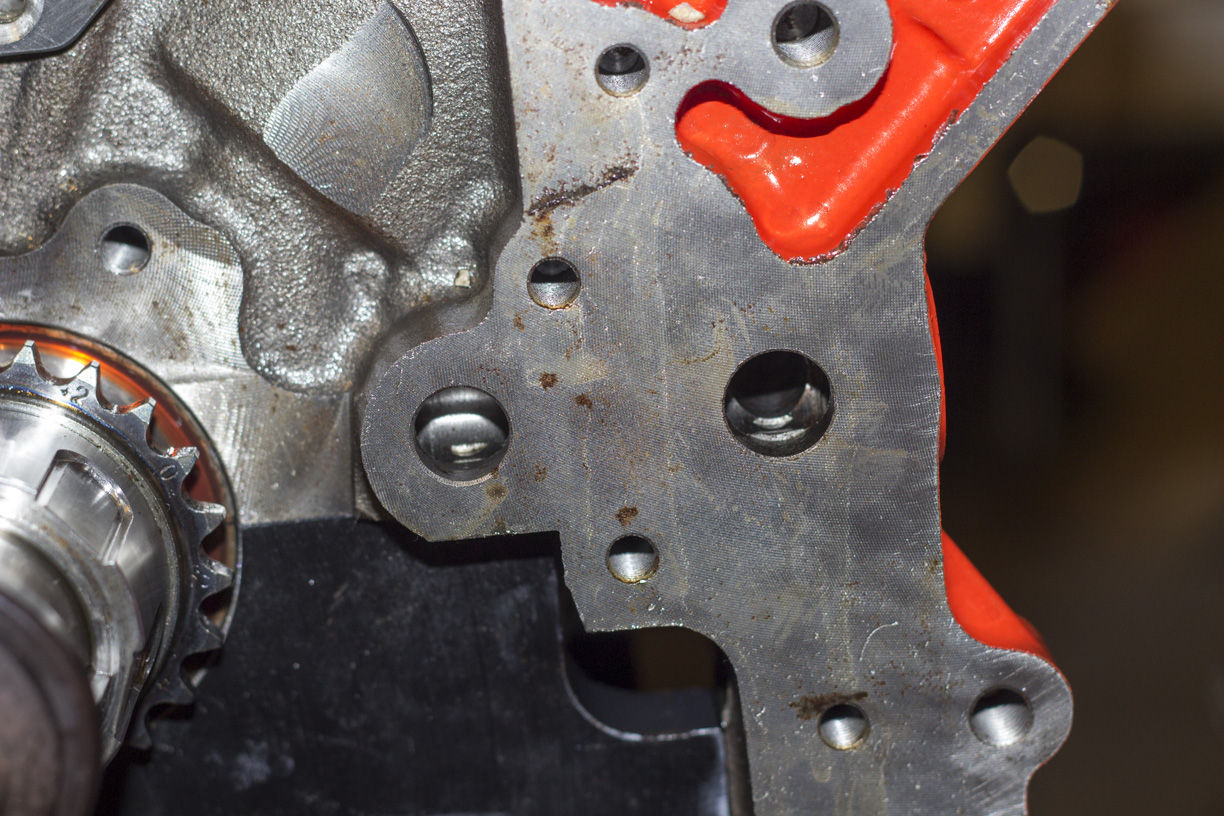
#7 This hole in the cam retainer plate (upside down photo) isn't round like the others. I've done some googling and it appears to be normal, but it means the tapered bolt doesn't sit flush with the plate like the others do. Should I cut the taper deeper and make it round? Doesn't seem to cause any problems, but I don't really understand why its odd.
The block didn't come with bolts for this plate so I'm using the one from my LS2/L76. The problem is the LS2/L76 only has 4 where the LSX has 6. I assume they are the right thing? If so, I'll buy some more tomorrow.
That's all I've got to show for now. Hopefully someone who's played with these blocks before can help with the questions
But then I noticed a few holes in this block. I've never worked with a brand new block before, so no doubt this is normal and I just need to get the bits.
Q&A time...
#1 What goes in here? Is this where the barbell restrictor goes? Does it just sit in there or do I need a cap to keep it in place? Can I reuse the one from my LS2 block? Are they the same? Should I buy a new one?
#2 Does something go in this hole? This is on the rear of the block (upside down in the photo) and is threaded.
#3 What about this hole? This is at the rear of the block (upside down again). I assume something goes in here? What is it? Is it just a plug? Does anyone know the part number(s) for these bits?
#4 What about this one? This is at the front of the block near the oil pump outlet (upside down block).
#5 And these? These are on the rear on the block outside the rear plate. This are in the coolant galleries and there's 1 on each side of the rear of the block. The front appears to have them as well, but the front ones are already plugged?
#6 What about the one on the right here? The left is the outlet of the oil pump, but I'm not sure what goes in the right hole (if anything). It kinda lines up with a flat part of the front cover, but I imagine something needs to be pressed in here first?
#7 This hole in the cam retainer plate (upside down photo) isn't round like the others. I've done some googling and it appears to be normal, but it means the tapered bolt doesn't sit flush with the plate like the others do. Should I cut the taper deeper and make it round? Doesn't seem to cause any problems, but I don't really understand why its odd.
The block didn't come with bolts for this plate so I'm using the one from my LS2/L76. The problem is the LS2/L76 only has 4 where the LSX has 6. I assume they are the right thing? If so, I'll buy some more tomorrow.
That's all I've got to show for now. Hopefully someone who's played with these blocks before can help with the questions
05-08-2013, 09:00 AM
#87
Launching!
Thread Starter
Ok, progress for today...
I've ordered a barbell oil restrictor for the rear of the block and got some plugs coming which should suit the big holes on the rear of the block. I also managed to get 2 of 3 plugs from my old LS2 block, stripped the 3rd one attempting to remove it, so I'll order another one of those.
Picked up 6 new cam retaining bolts today from the bolt shop. GM wanted $9each for them which I couldn't justify. The off-market ones are allen head instead of torx, and about 2mm longer, but they don't bottom out in the block and torque up fine.
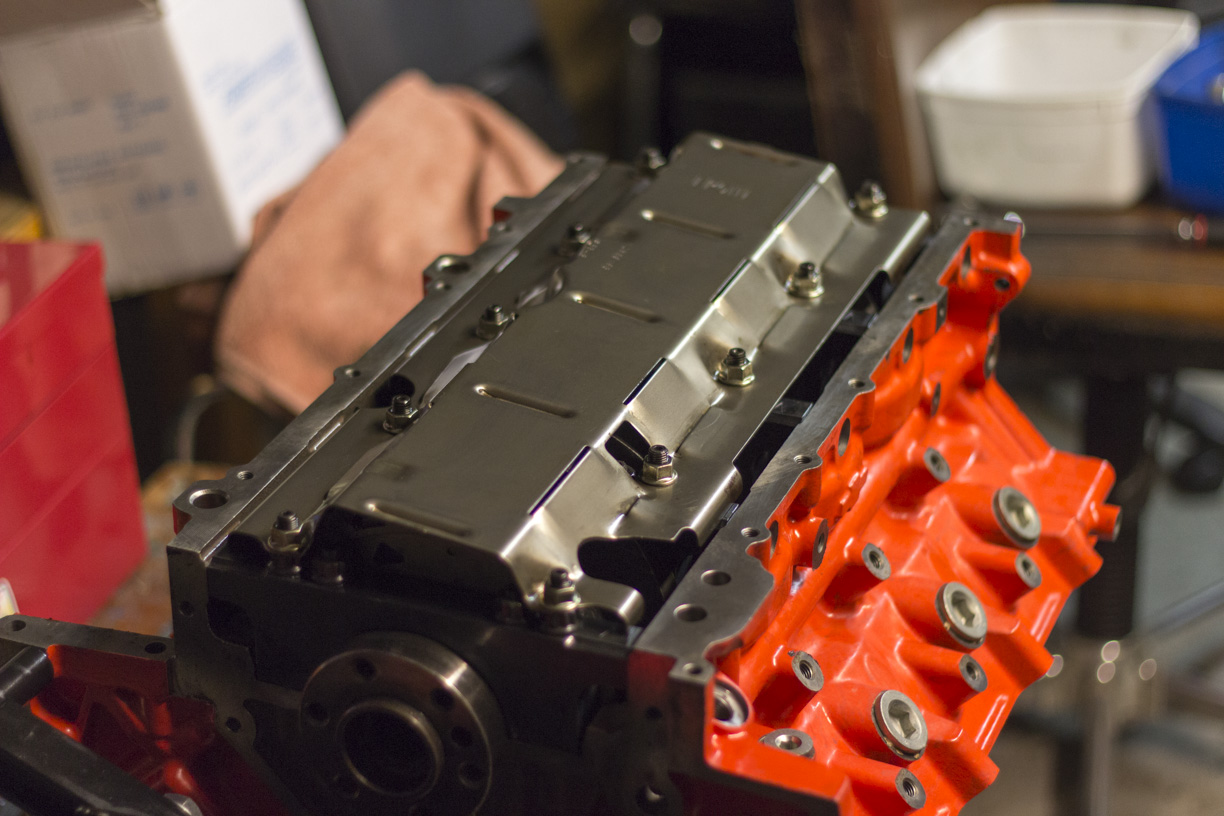
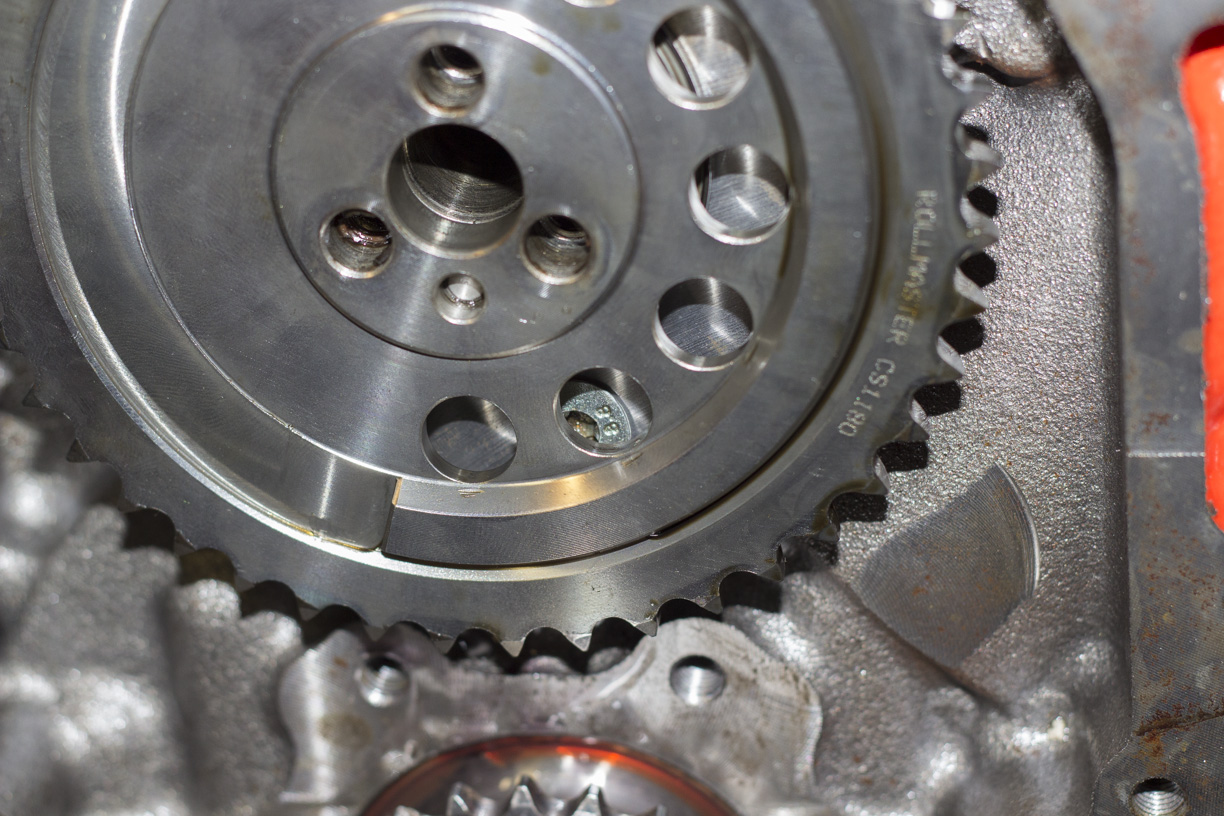
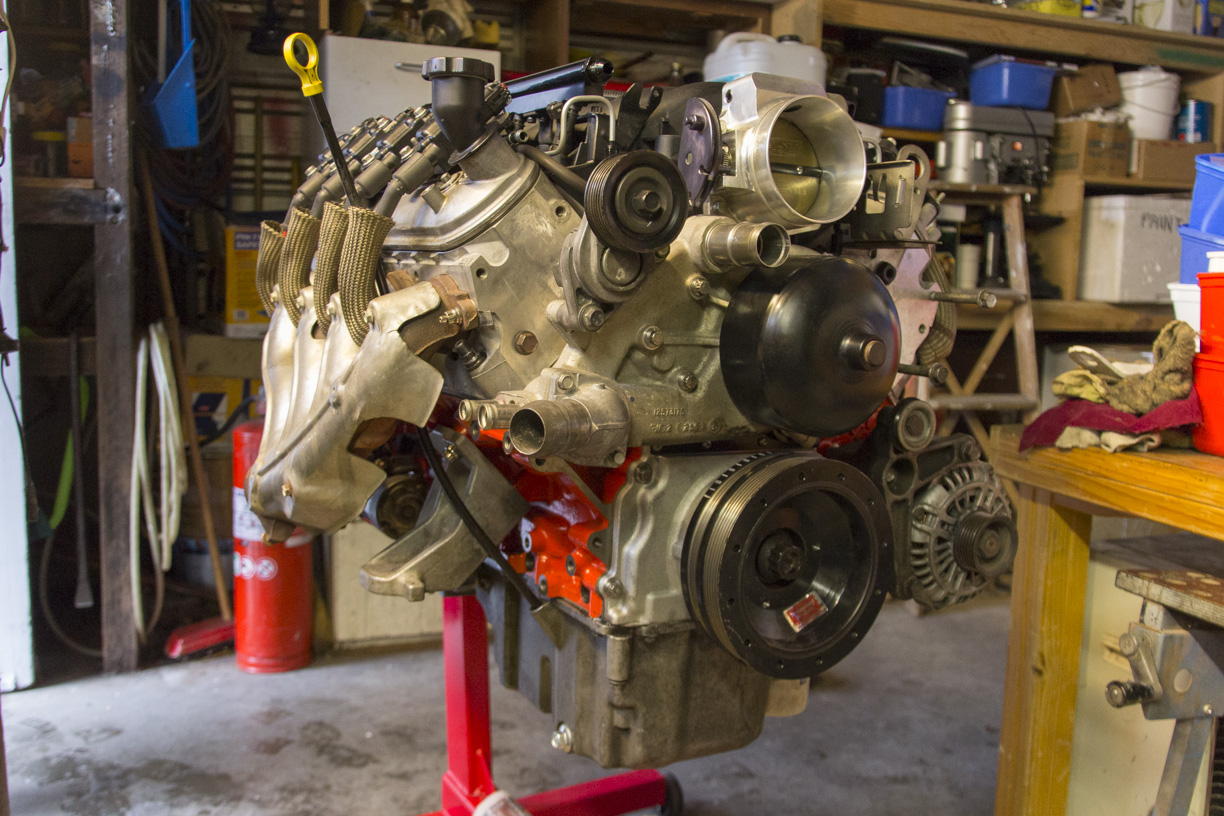
Got the timing chain on, the oil pump, pickup and sump.
Also put the lifters in, the head studs and put the head gaskets on. I still need to do some cleaning to the heads before I put them on so I'll do that tomorrow.
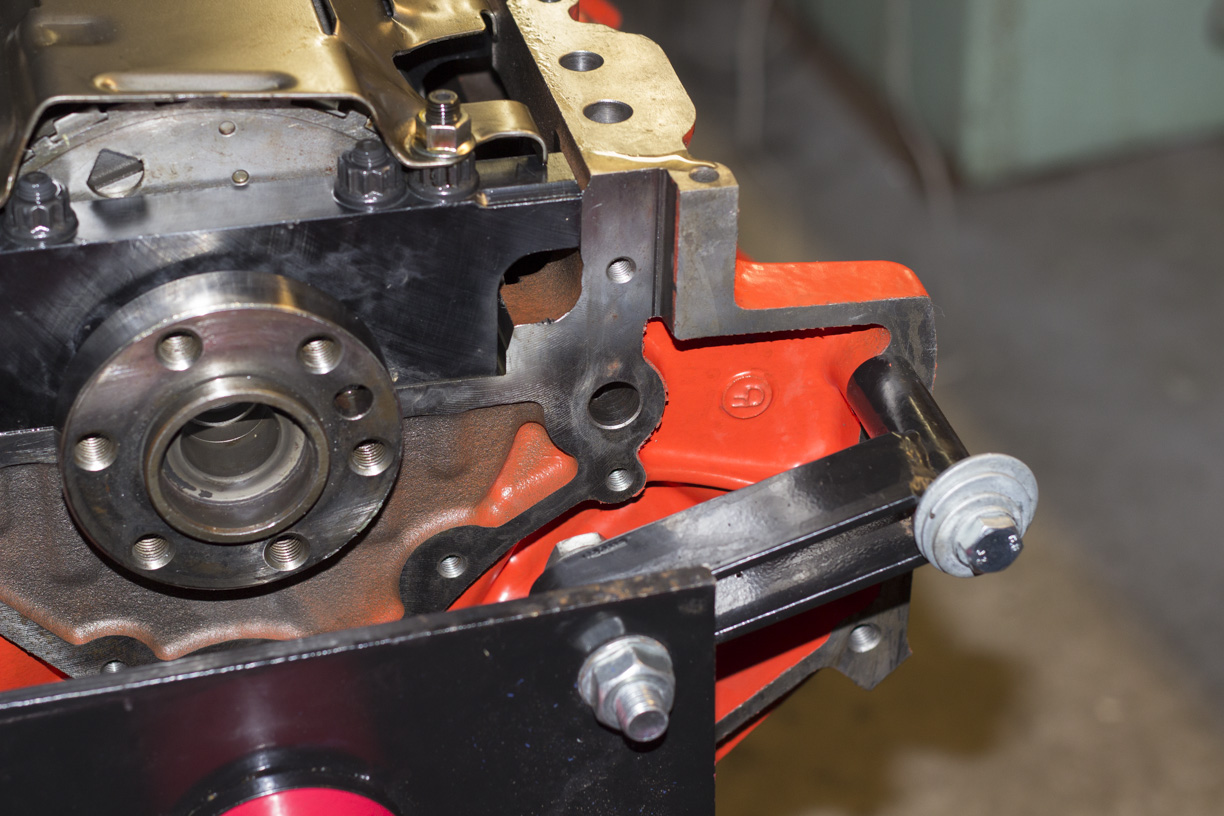
Still stuck on the plug that goes on the rear of the block, behind the rear plate next to the cam. Its the same thread as the other ones on the block, but the head of the plug doesn't fit in the hole on the block, which stops the rear plate seating properly. Not sure what to do about that yet...
I've ordered a barbell oil restrictor for the rear of the block and got some plugs coming which should suit the big holes on the rear of the block. I also managed to get 2 of 3 plugs from my old LS2 block, stripped the 3rd one attempting to remove it, so I'll order another one of those.
Picked up 6 new cam retaining bolts today from the bolt shop. GM wanted $9each for them which I couldn't justify. The off-market ones are allen head instead of torx, and about 2mm longer, but they don't bottom out in the block and torque up fine.
Got the timing chain on, the oil pump, pickup and sump.
Also put the lifters in, the head studs and put the head gaskets on. I still need to do some cleaning to the heads before I put them on so I'll do that tomorrow.
Still stuck on the plug that goes on the rear of the block, behind the rear plate next to the cam. Its the same thread as the other ones on the block, but the head of the plug doesn't fit in the hole on the block, which stops the rear plate seating properly. Not sure what to do about that yet...
 05-25-2013, 09:56 PM
#91
Launching!
Thread Starter
Cheers guys
OK, got some more minor progress to report. FINALLY found a source for the missing coolant gallery plugs, so now the engine is completely plugged and ready to go into the car. I'm going to mount the T-56 to it first and put it in together, so I'll install it once I purchase a GMM Ripshifter 'Race' for the box.
If anyone else gets stuck finding these plugs, the US GM part number is GM#12561663, however GM in Australia have this part listed as obsolete with no replacement. I've found that GM#11609289 is the exact same plug, and GM Australia had 400+ of these in stock last week.
 06-14-2013, 09:18 PM
#93
Launching!
Thread Starter
Not much to show today, weather hasn't been fantastic.
I did install and adjust the Ripshifter. I set the stops prior to installing in the car, much easier this way.

The 2nd hand T56 I bought was missing part of the slave, so I bought a new slave.
Installed and ready to go in!
Now I need to spend a few hours pulling apart the wiring loom to make it more suitable for my setup....
I did install and adjust the Ripshifter. I set the stops prior to installing in the car, much easier this way.
The 2nd hand T56 I bought was missing part of the slave, so I bought a new slave.
Installed and ready to go in!
Now I need to spend a few hours pulling apart the wiring loom to make it more suitable for my setup....
07-06-2013, 04:40 AM
#94
Launching!
Thread Starter
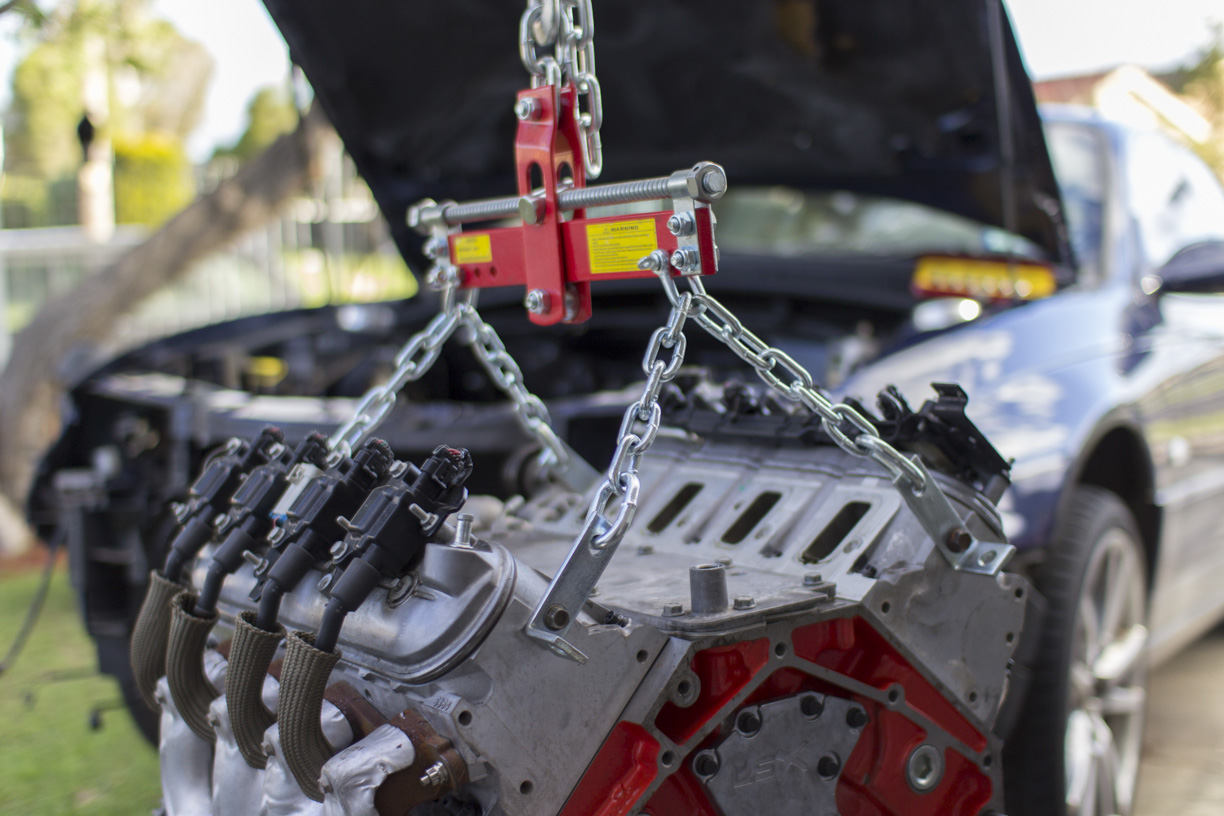
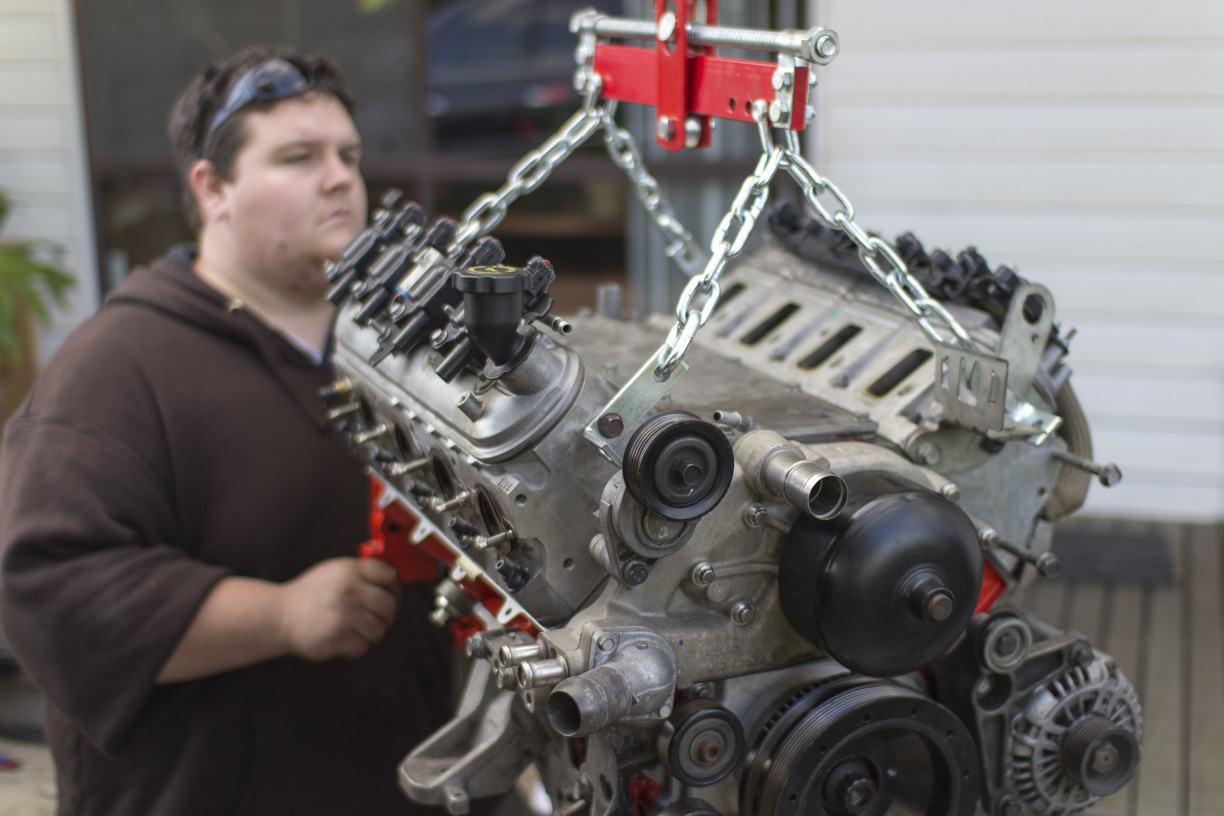
Ok, I've been slack and not done much on the car lately, so I thought I'd put up a couple of pictures to show that I'm not dead.
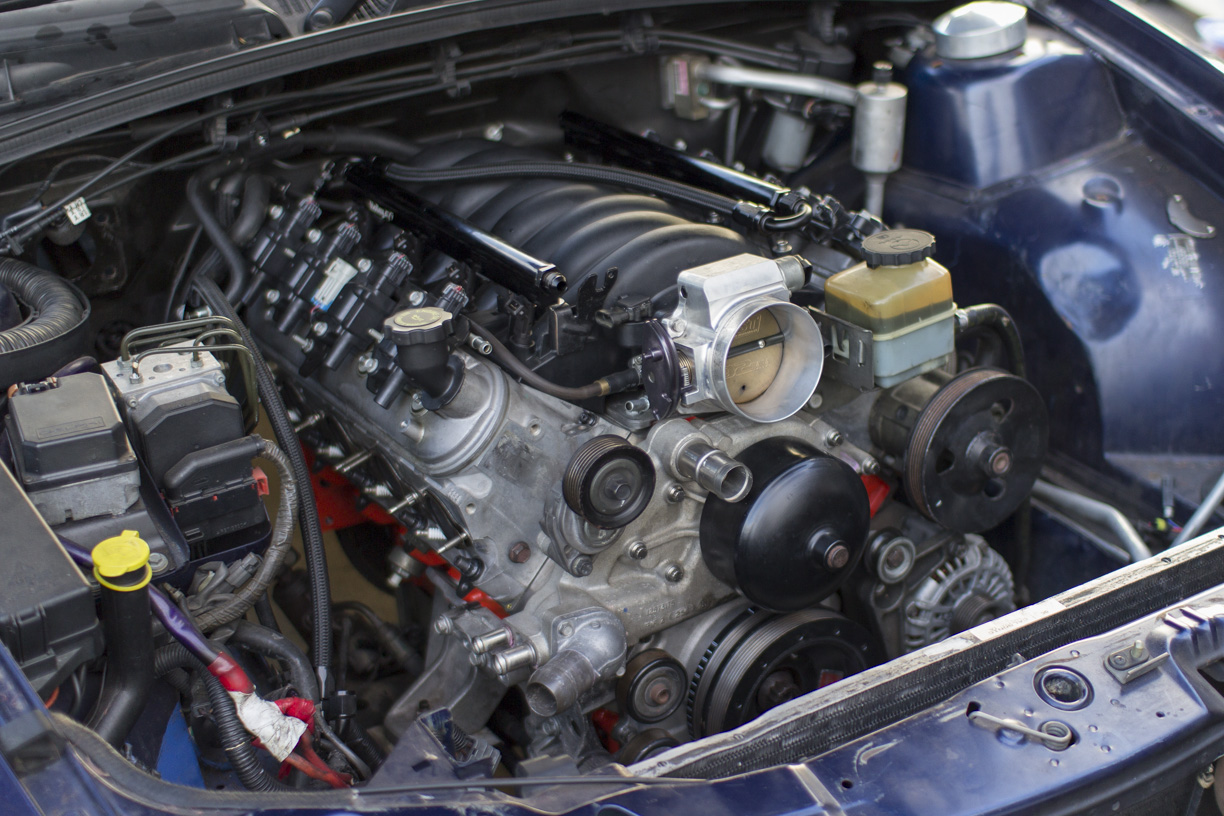
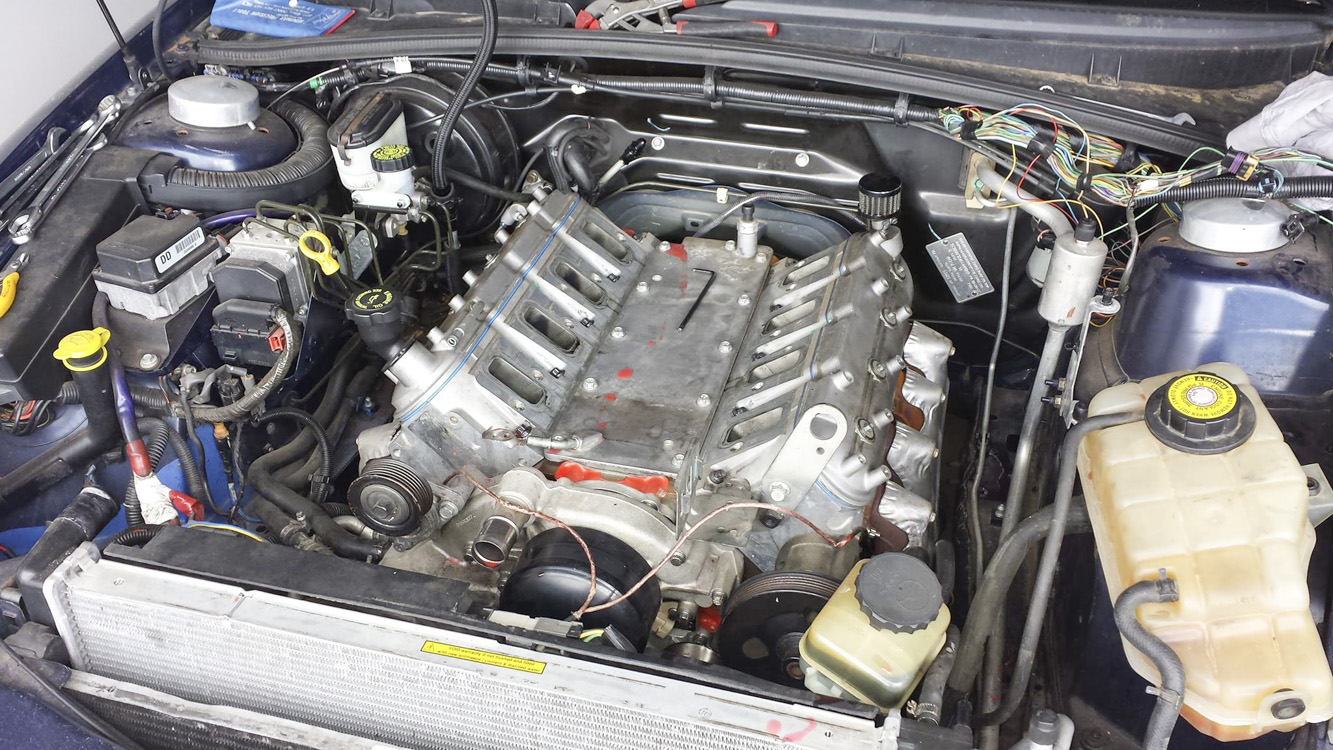
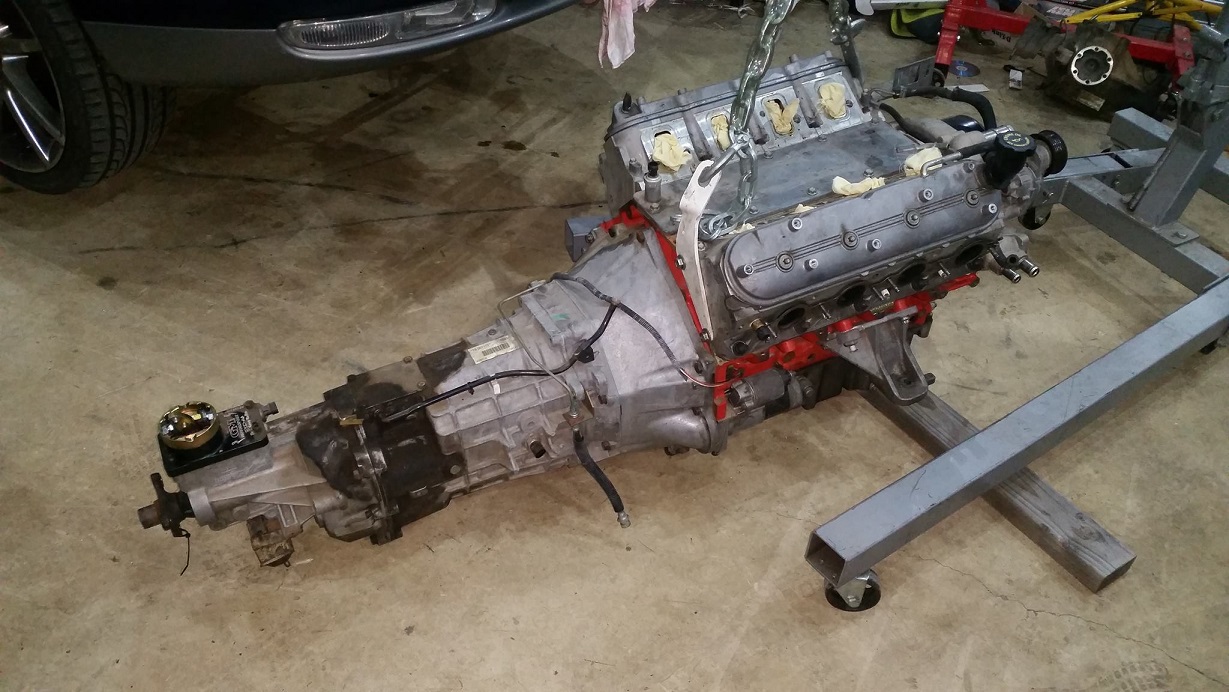
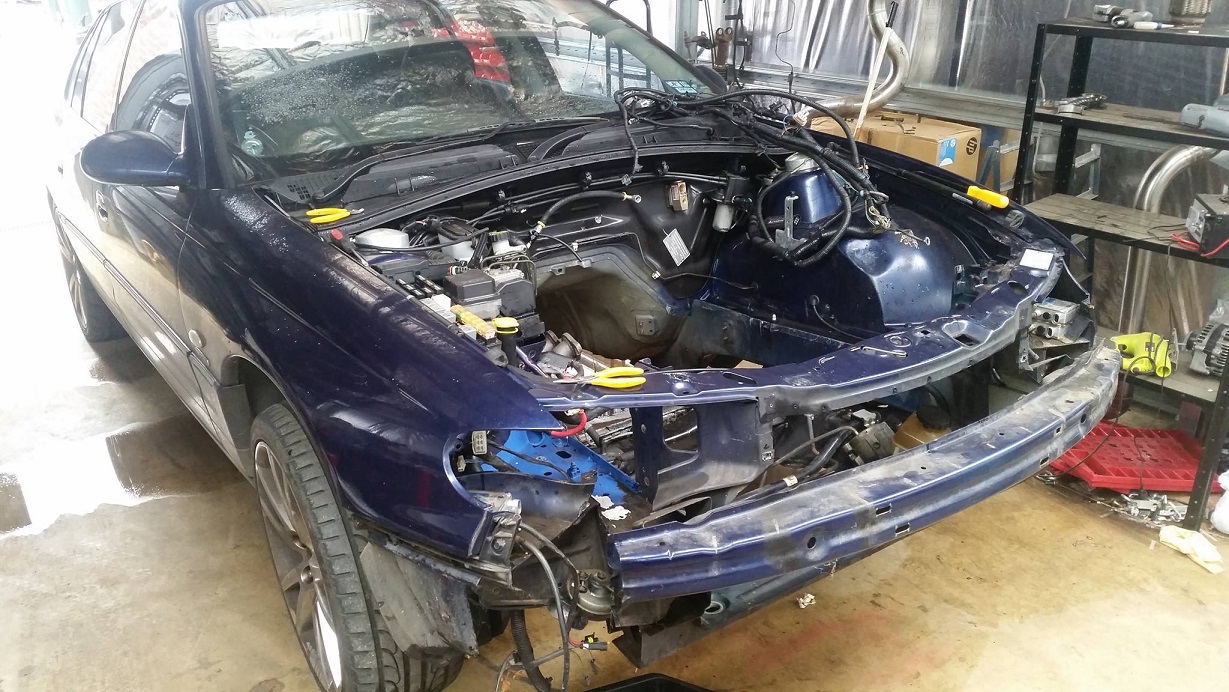
Got the engine/gearbox in the car, clutch bled, pedals in, interior back together.
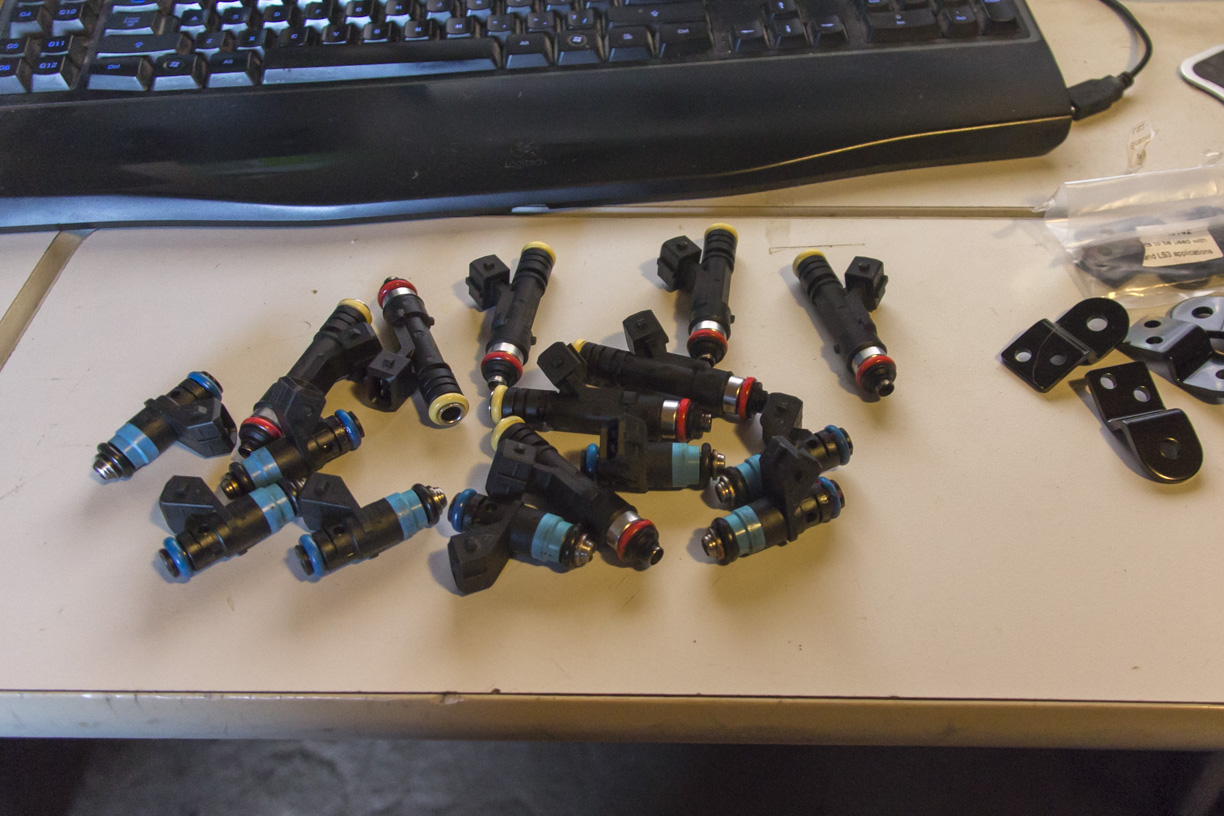
Today I plugged all the remaining holes on the engine and swapped the 160# injectors for 60# injectors. Had to swap the O-rings between the injectors because L76/L98 manifolds are slightly bigger than LS1. Want to ensure injectors have a nice tight fit.
To do list:
Install loom, remove auto stuff and add manual stuff.
Remove loom and wrap properly, then reinstall.
Install cooling system, fill with coolant.
Install factory airbox, MAF, etc.
Install factory exhaust, might need to tweak around my 1/2" fuel lines.
Fill oil and check for leaks.
Test start, tuning.
Shouldn't be long now...
Got the engine/gearbox in the car, clutch bled, pedals in, interior back together.
Today I plugged all the remaining holes on the engine and swapped the 160# injectors for 60# injectors. Had to swap the O-rings between the injectors because L76/L98 manifolds are slightly bigger than LS1. Want to ensure injectors have a nice tight fit.
To do list:
Install loom, remove auto stuff and add manual stuff.
Remove loom and wrap properly, then reinstall.
Install cooling system, fill with coolant.
Install factory airbox, MAF, etc.
Install factory exhaust, might need to tweak around my 1/2" fuel lines.
Fill oil and check for leaks.
Test start, tuning.
Shouldn't be long now...
 04-13-2014, 04:58 AM
#96
Launching!
Thread Starter
Well, I finally decided to take a look at this car again. I've been a bit put-off it due to the horrid noise the lifters make. After discussing it with some friends I decided to pull the heads off after only 22k's to swap the Morel/PBM lifters for some Howards ones instead.
Got this all pretty much done today. Heads are torqued back on, just need to finish installing the rest of the bits and pieces.
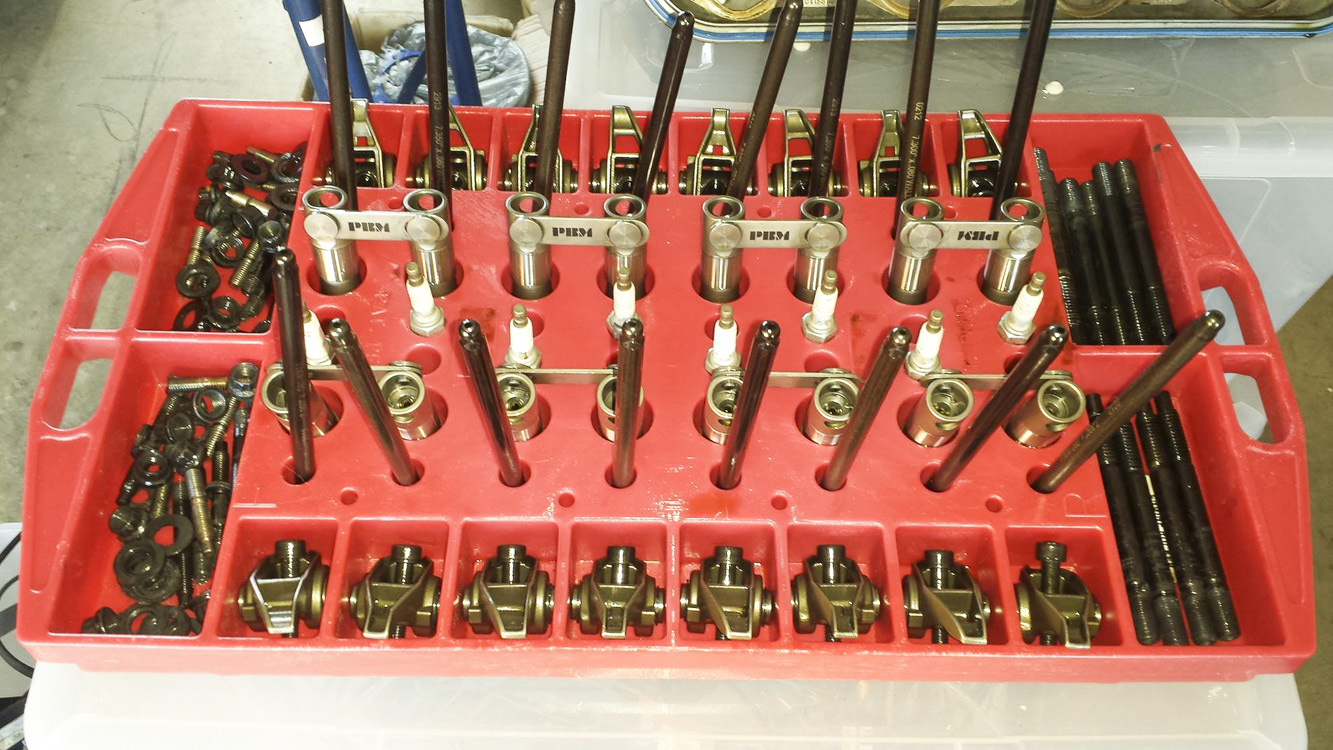
Also bought myself one of these handy organiser trays.
And, another purchase for a potential project later on down the track...
Just toying with the idea at the moment, and gathering parts. Will make it a bit more unique that's for sure...
Got this all pretty much done today. Heads are torqued back on, just need to finish installing the rest of the bits and pieces.
Also bought myself one of these handy organiser trays.
And, another purchase for a potential project later on down the track...
Just toying with the idea at the moment, and gathering parts. Will make it a bit more unique that's for sure...
07-06-2015, 11:44 PM
#97
Launching!
Thread Starter
Bringing this back from the dead! This car has actually become my daily driver, at least for the short-term and is much overdue for a bit of TLC.
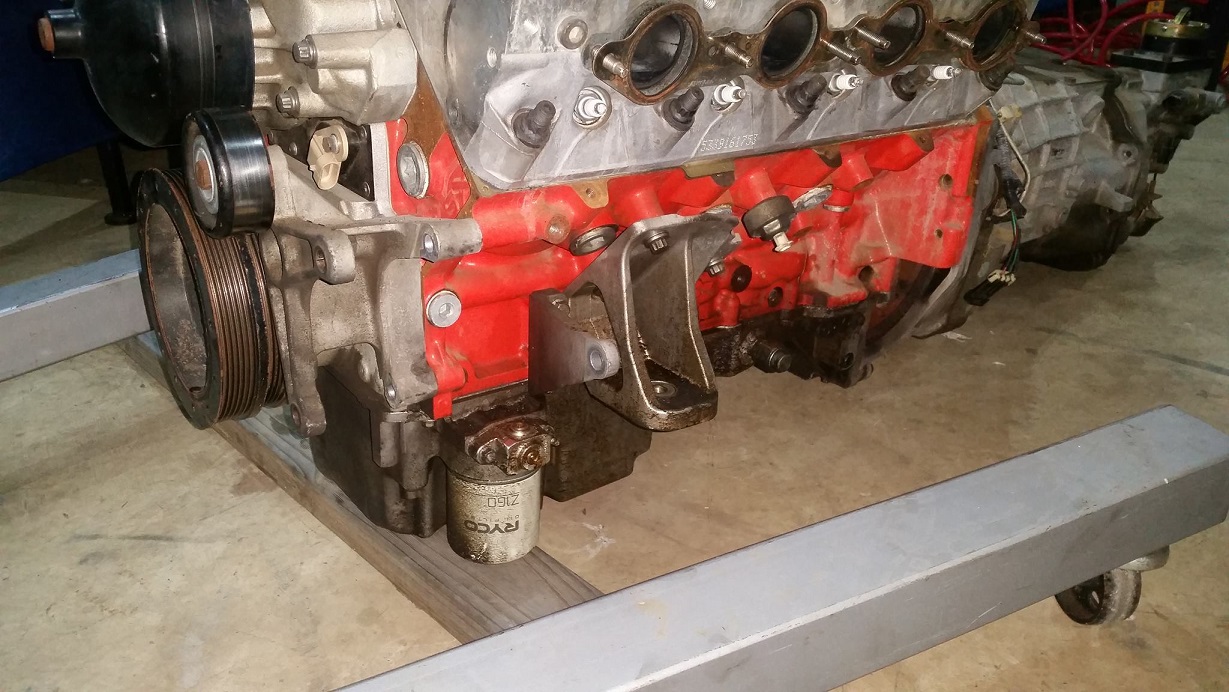
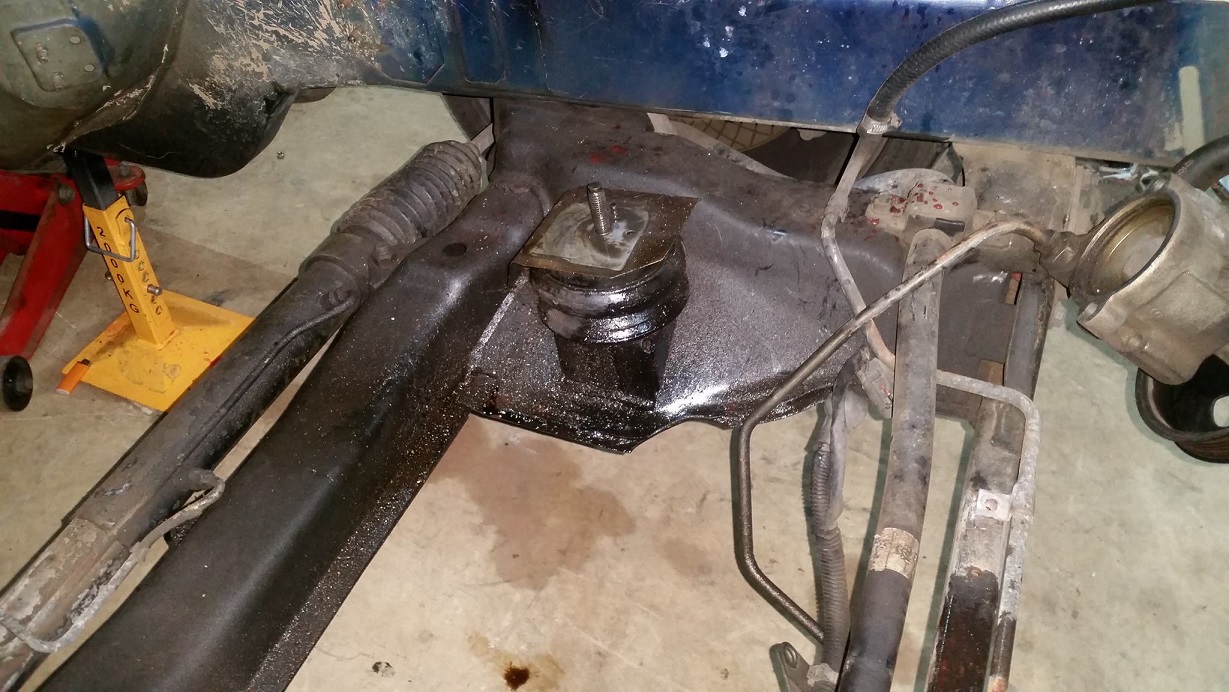
First things first, this needs to come out.
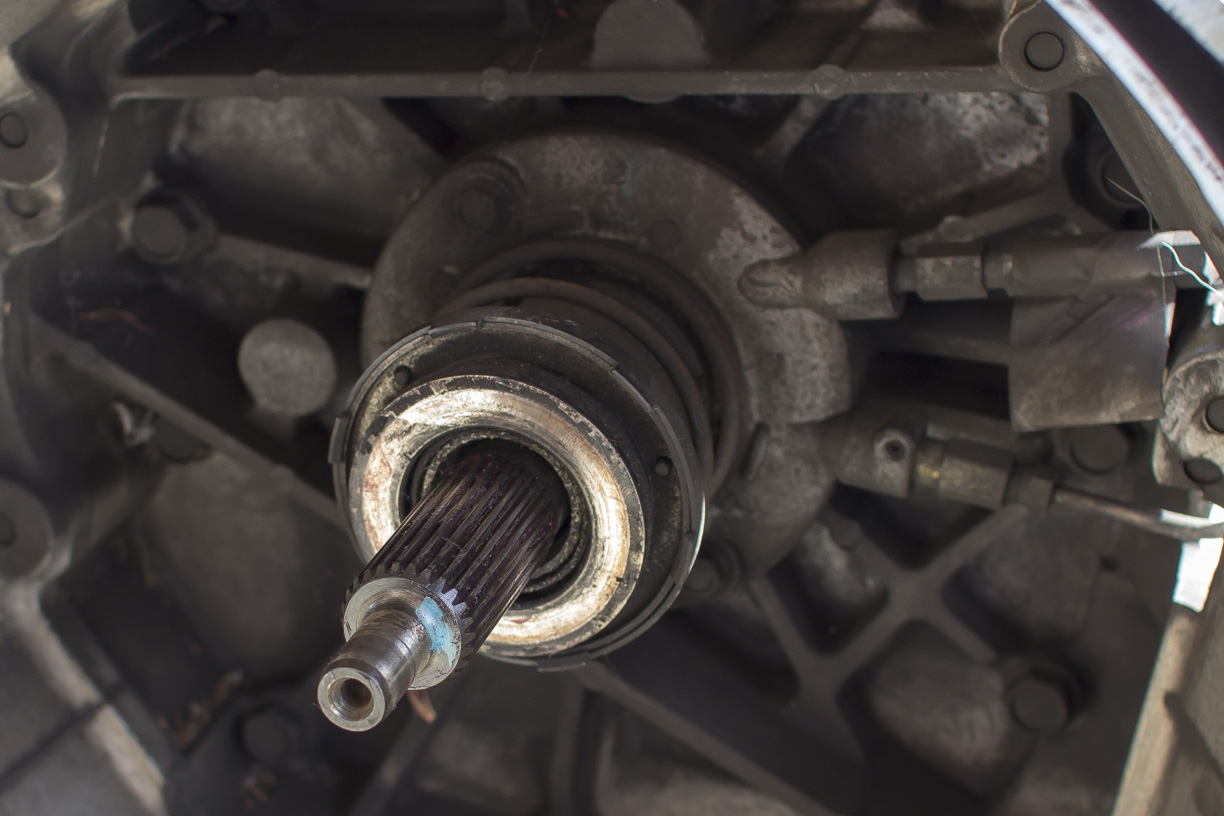
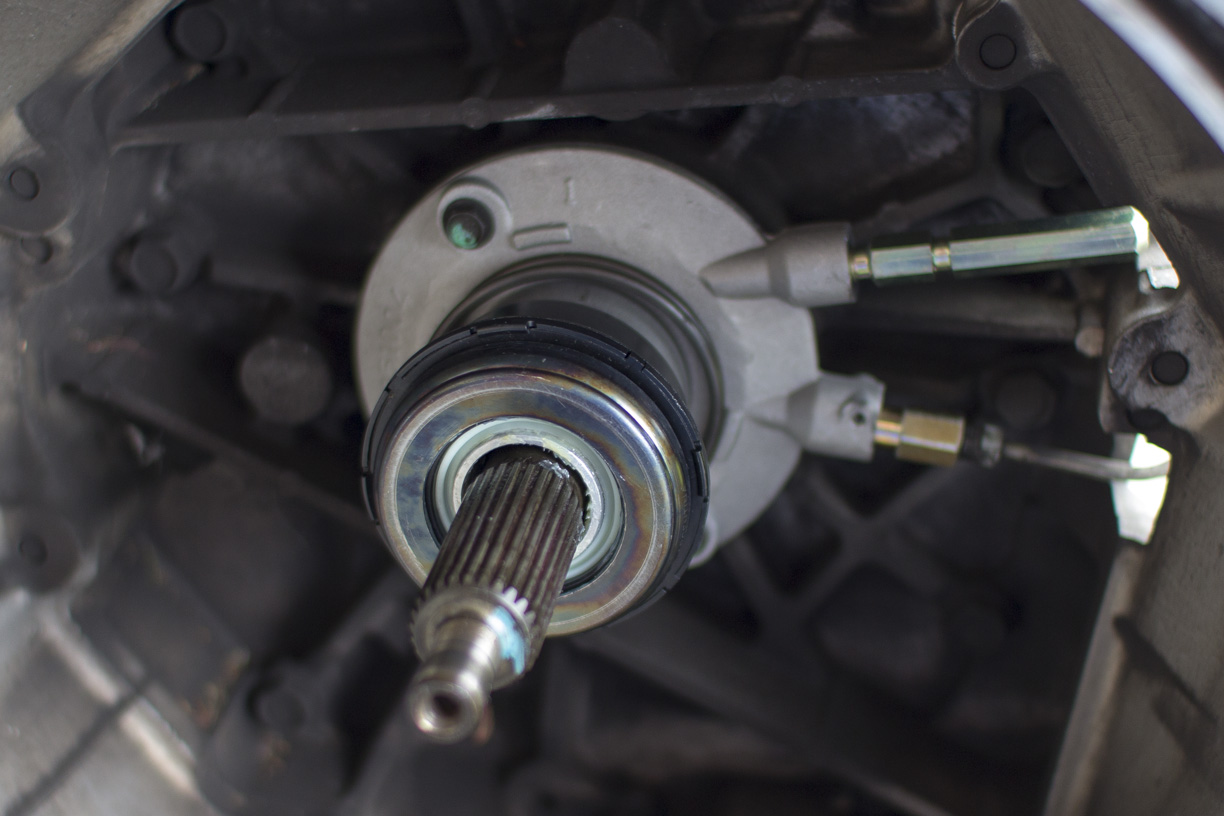
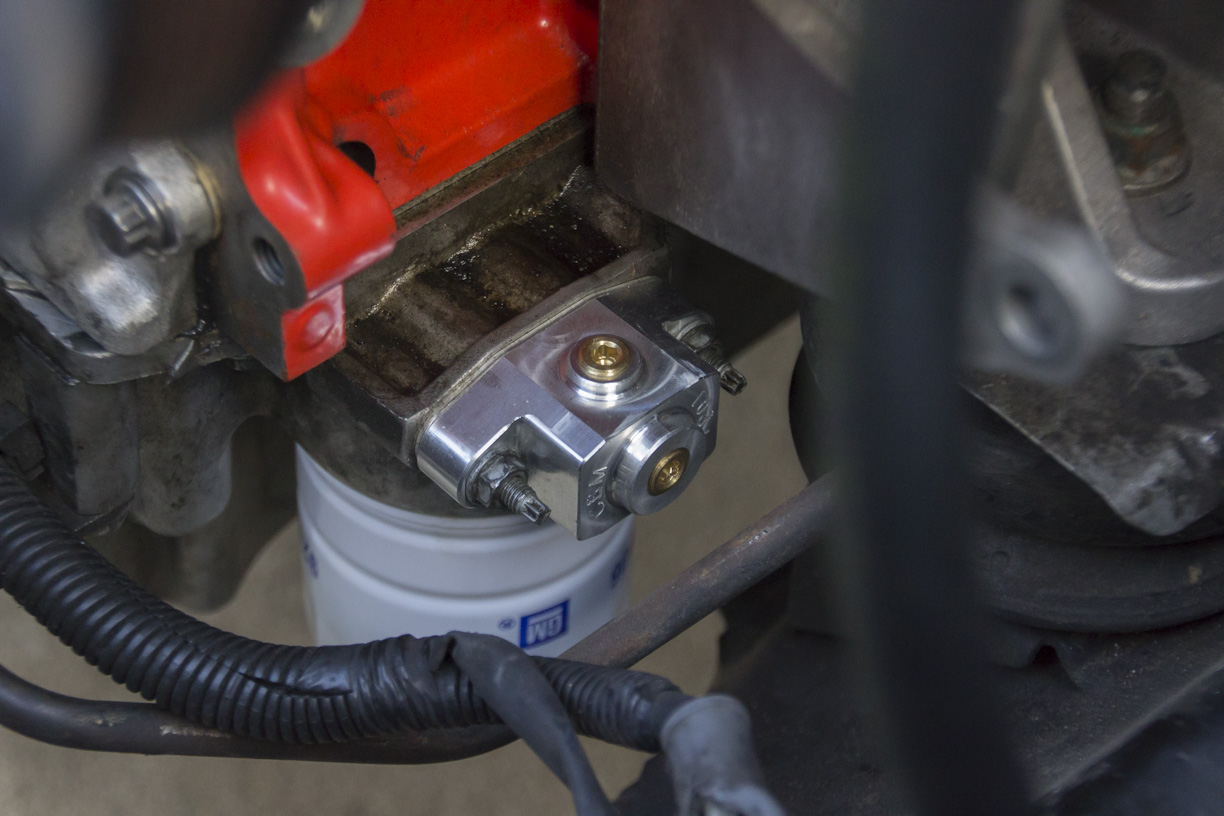
Little oil leak I need to find the source of.
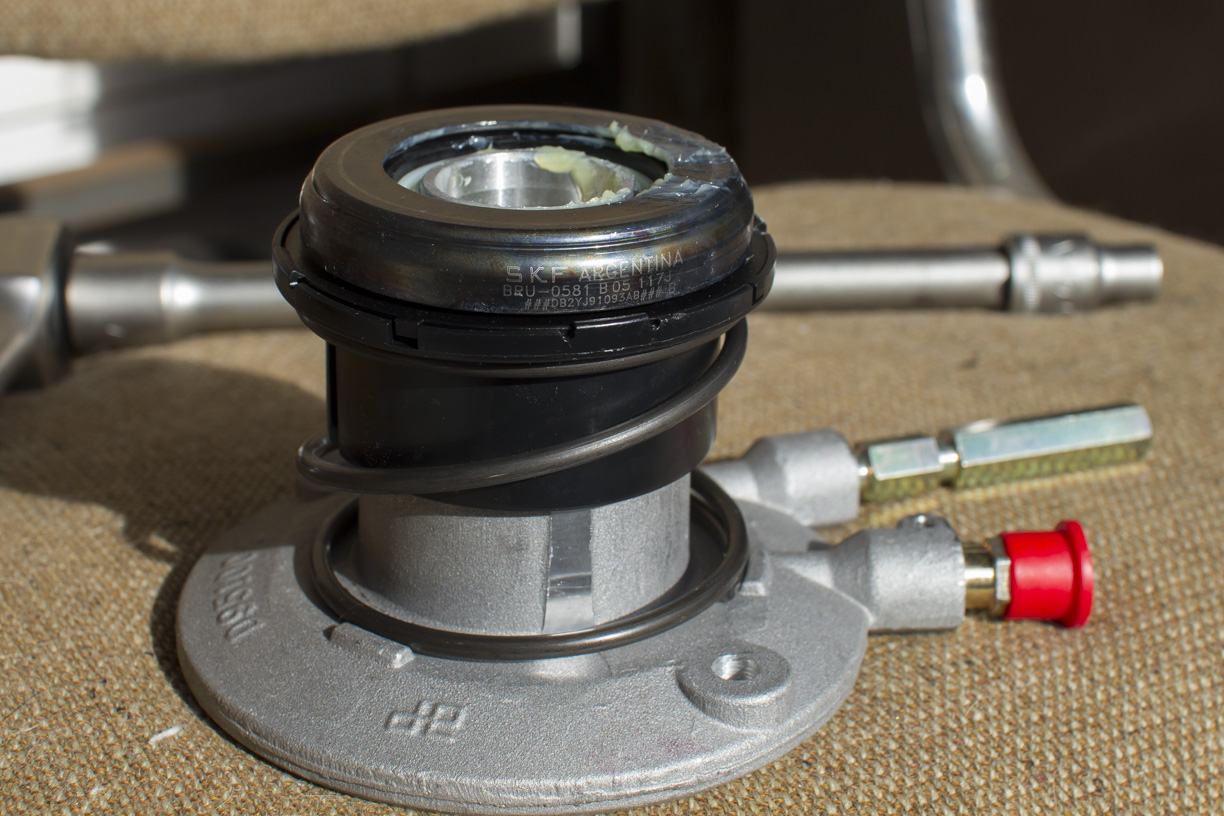
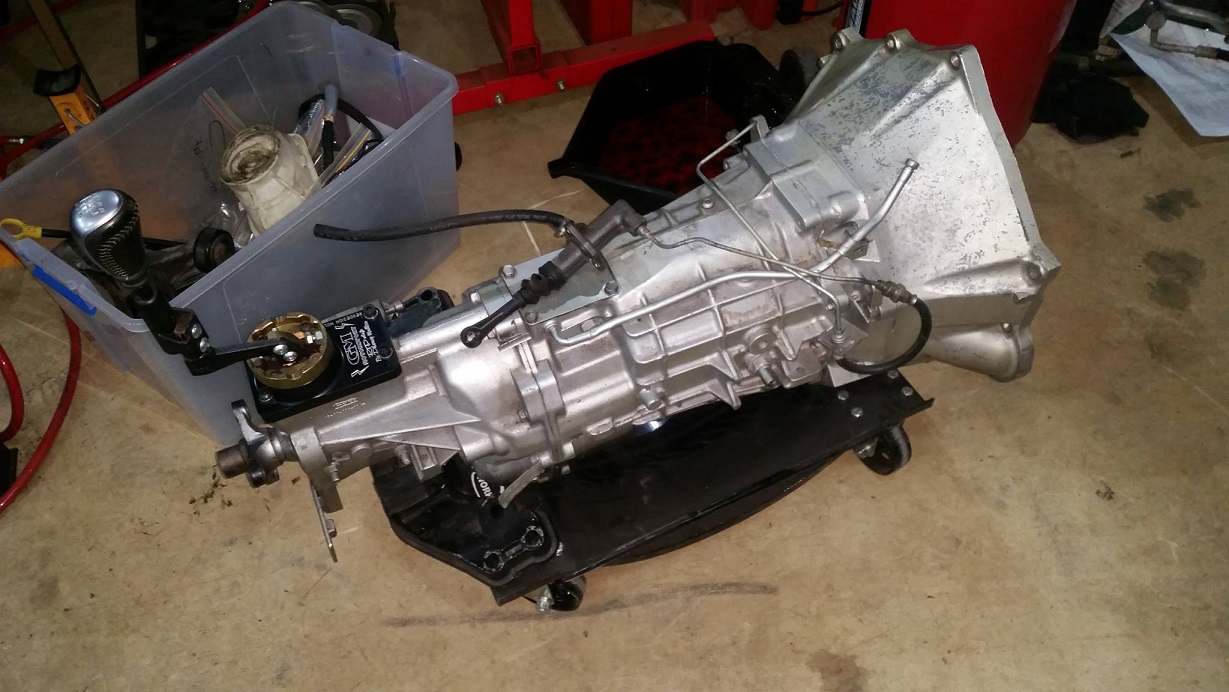
Bought another one of these. The current one is a bit noisy and makes weird turkey noises in 5th and 6th.
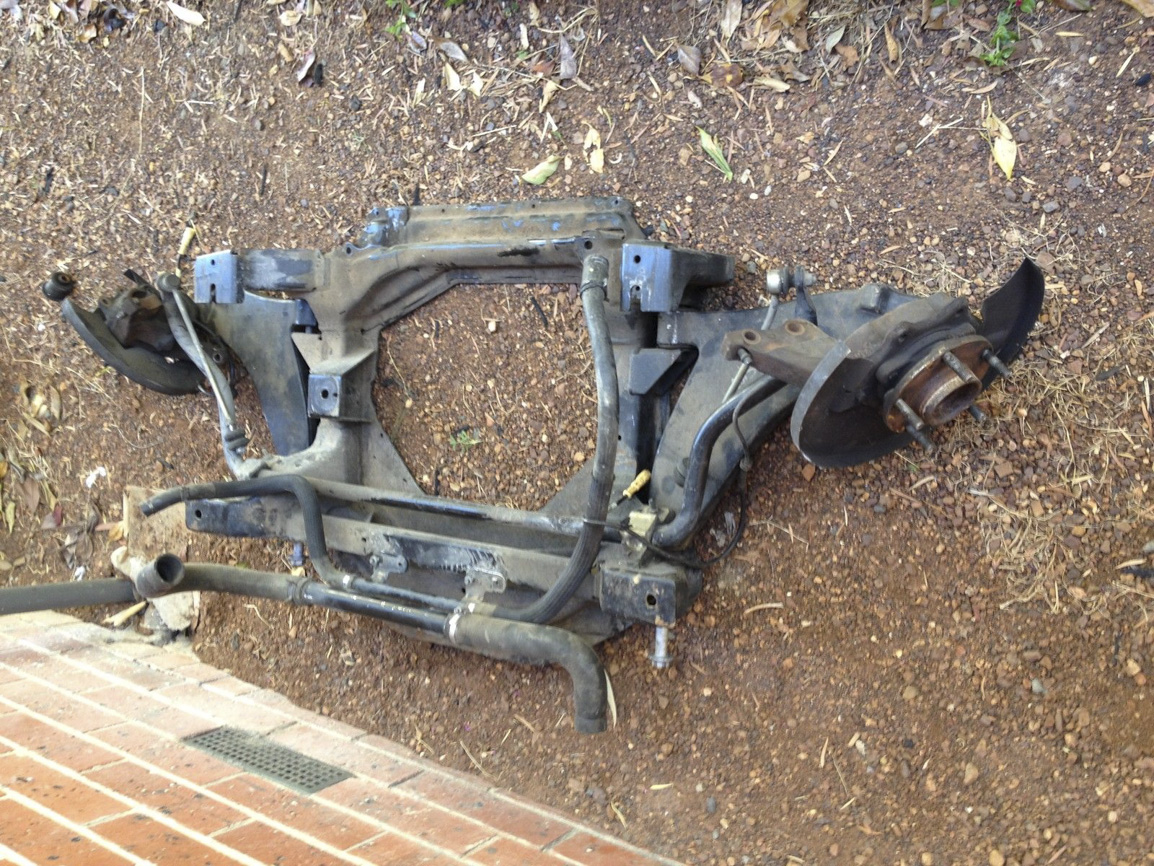
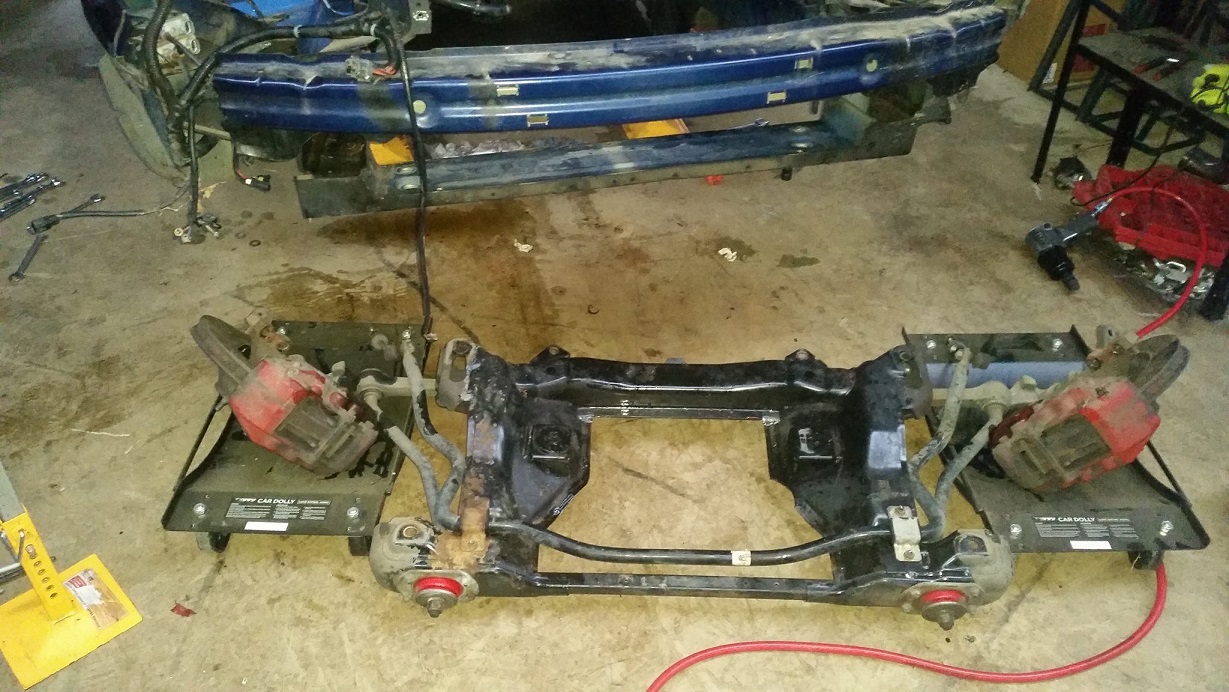
Dropped this out. Need to fix up some rust, put some new bushes in and some new paint.
Also need to fix up this colour match disaster from years ago...
And, while I'm at it, a dash upgrade from WH2 to WK. Worth the effort involved.
Will be changing the whole system across to WK, which requires the full body loom being changed, and the cooling system to keep it all neat.
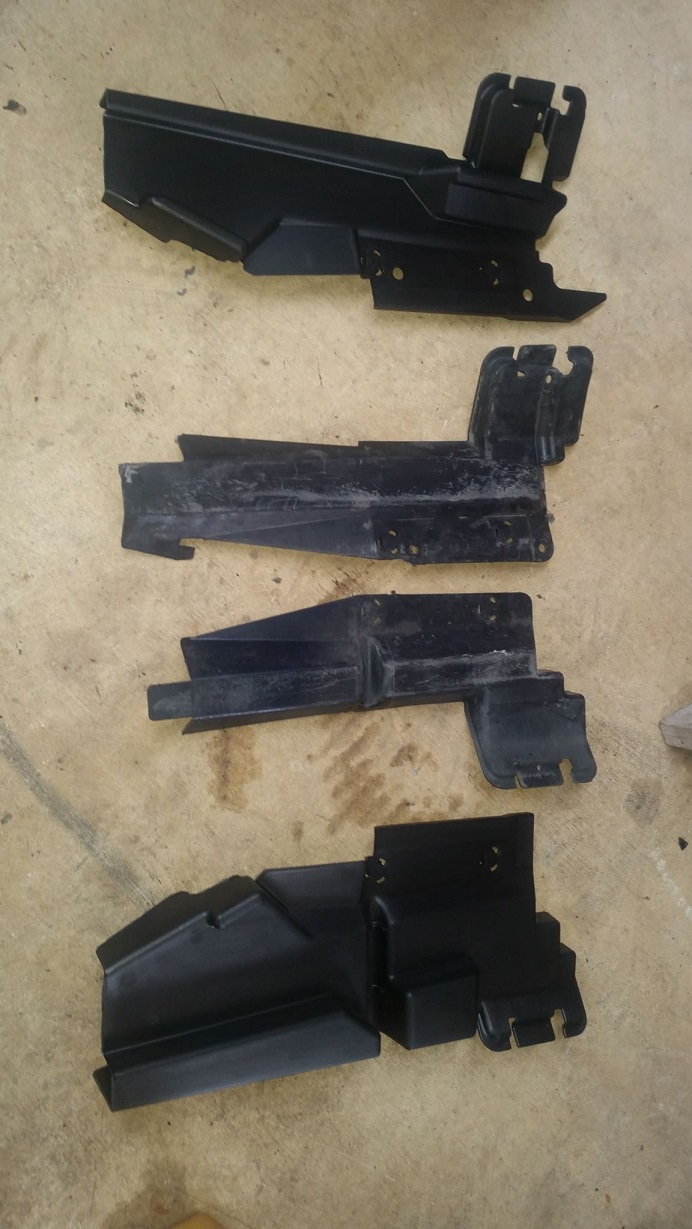
Couple of plastic brackets required to put the WK radiator/aircon into the WH2 body.
More updates coming soon!
First things first, this needs to come out.
Little oil leak I need to find the source of.
Bought another one of these. The current one is a bit noisy and makes weird turkey noises in 5th and 6th.
Dropped this out. Need to fix up some rust, put some new bushes in and some new paint.
Also need to fix up this colour match disaster from years ago...
And, while I'm at it, a dash upgrade from WH2 to WK. Worth the effort involved.
Will be changing the whole system across to WK, which requires the full body loom being changed, and the cooling system to keep it all neat.
Couple of plastic brackets required to put the WK radiator/aircon into the WH2 body.
More updates coming soon!
07-26-2015, 05:45 AM
#98
Launching!
Thread Starter
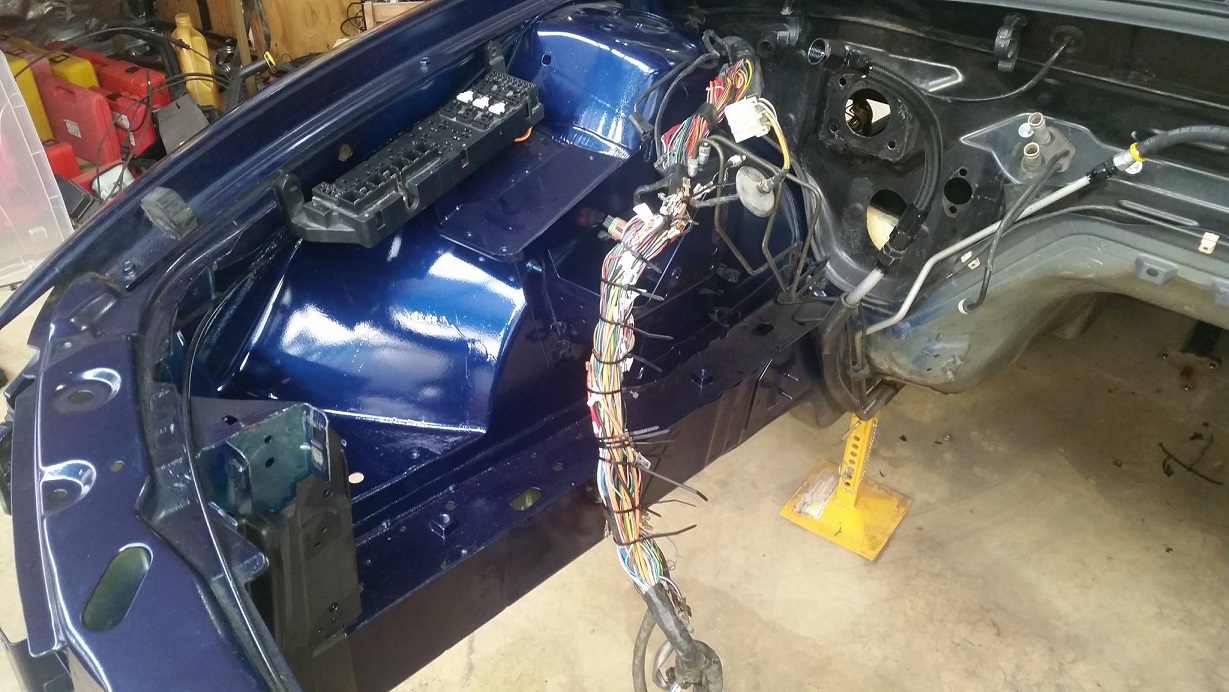
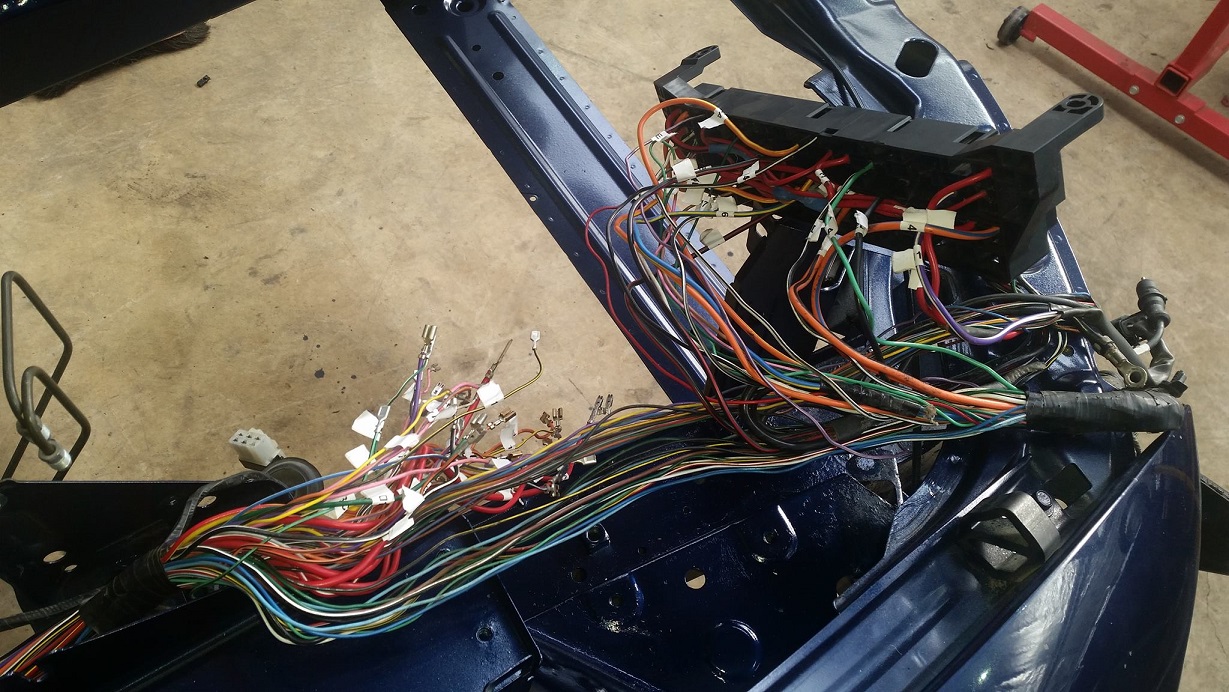
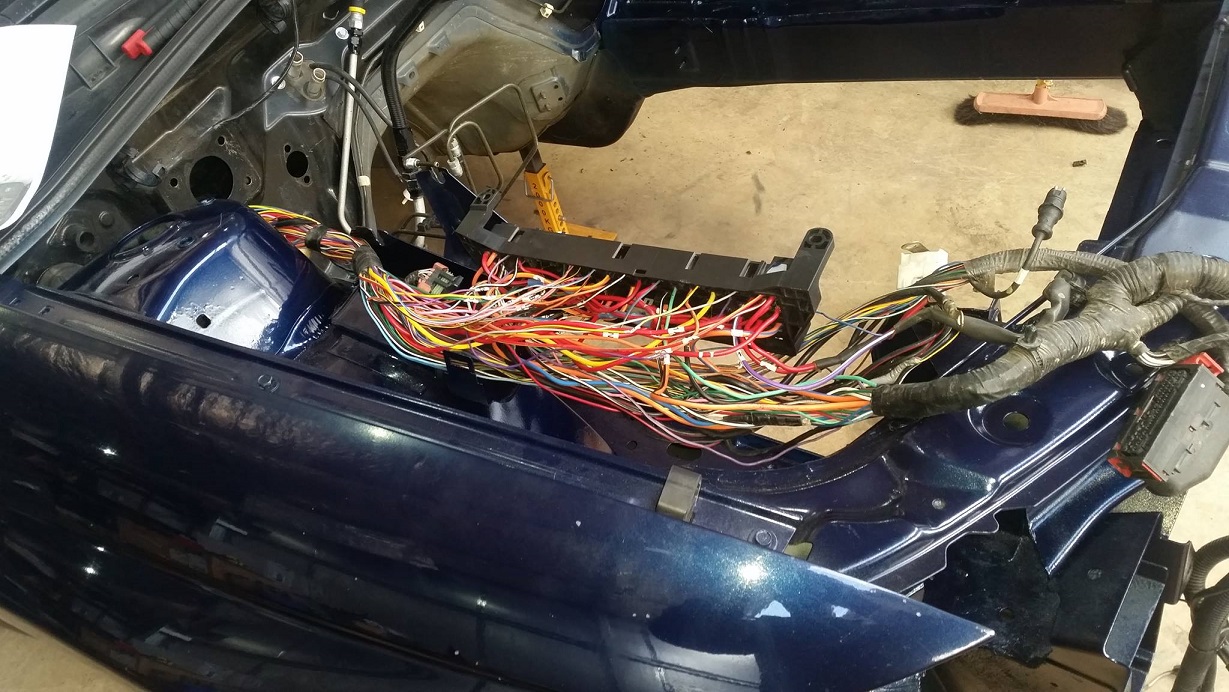
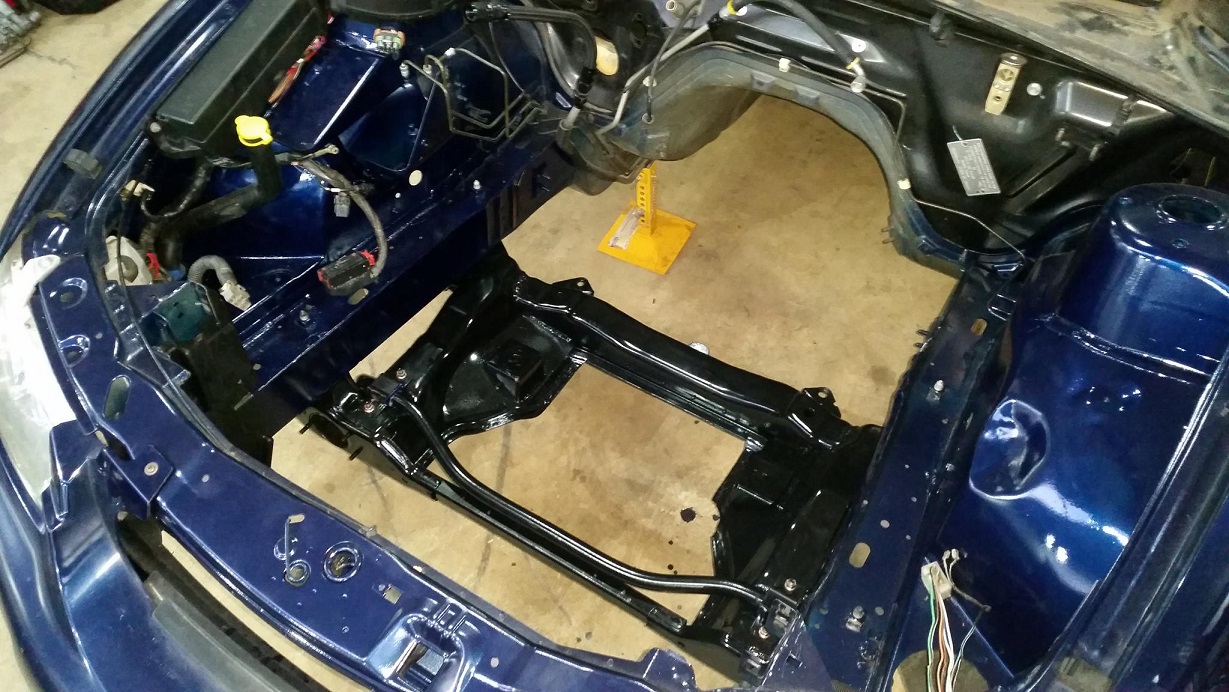
Progress shots.
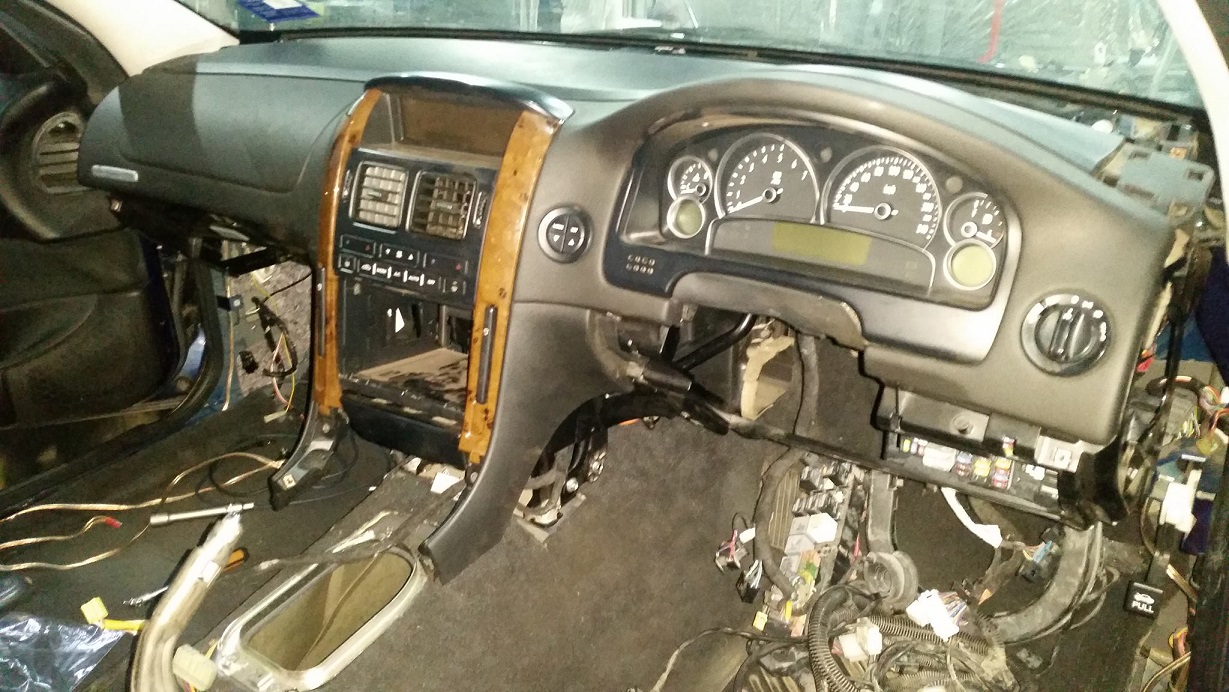
Old dash removed.
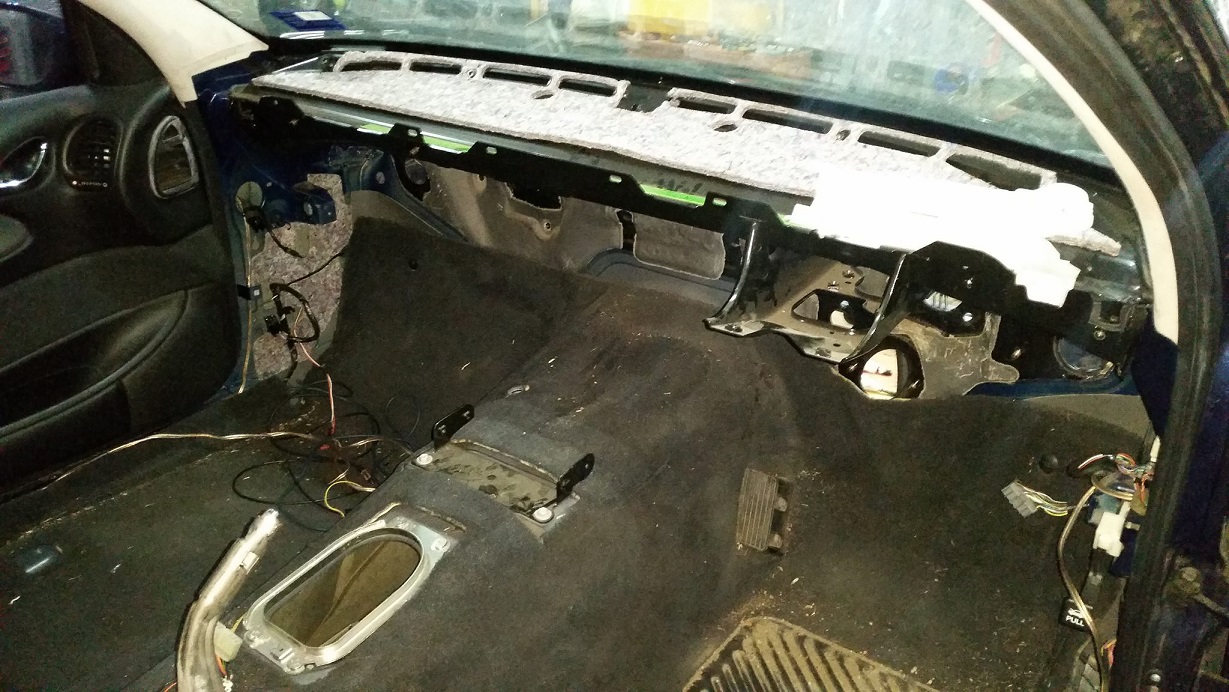
New dash in.
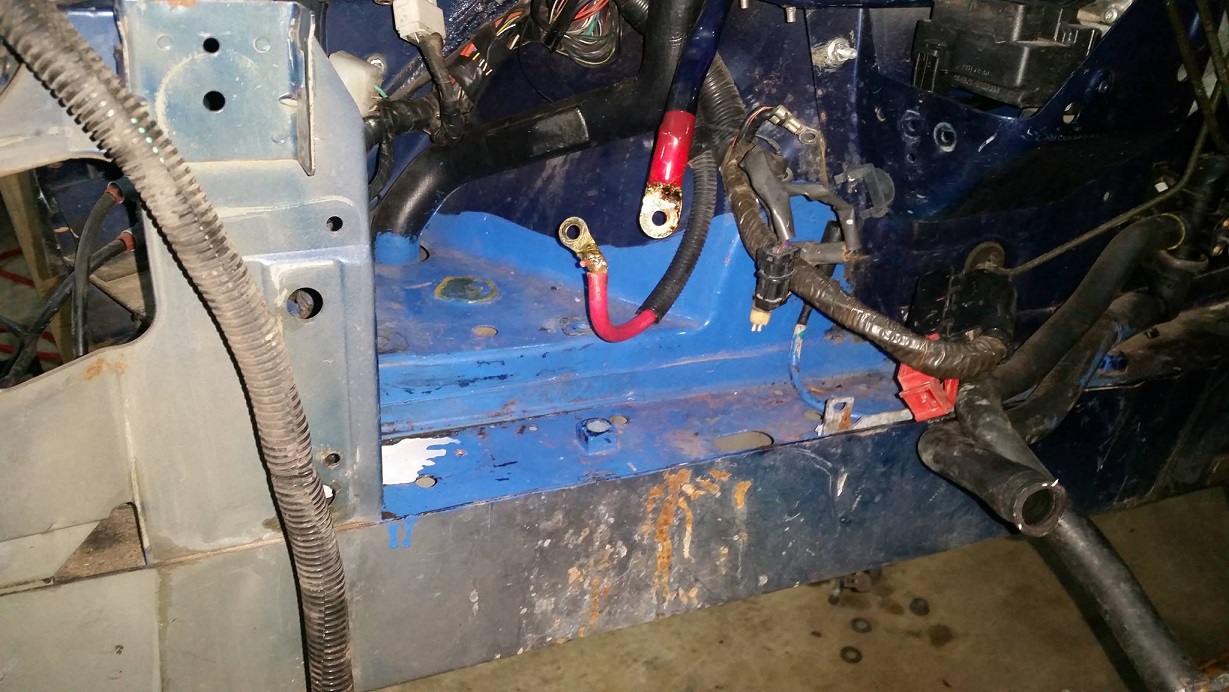
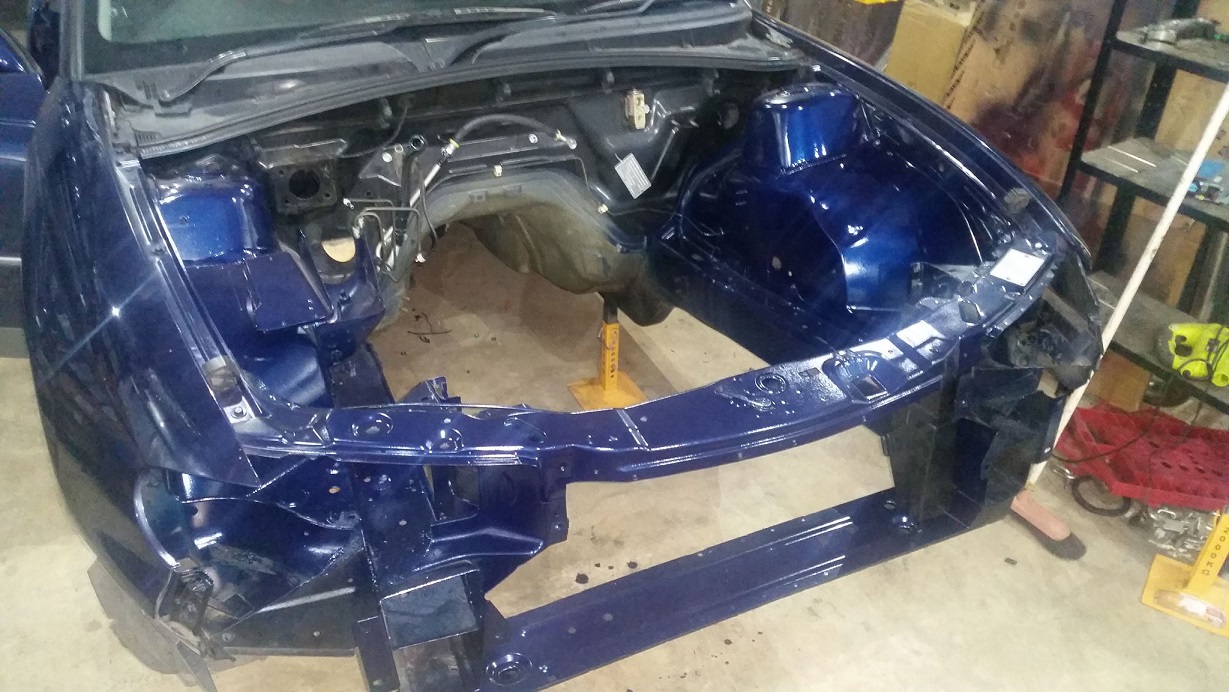
Quick coat of paint in the engine bay. $25 rattle can to the rescue.
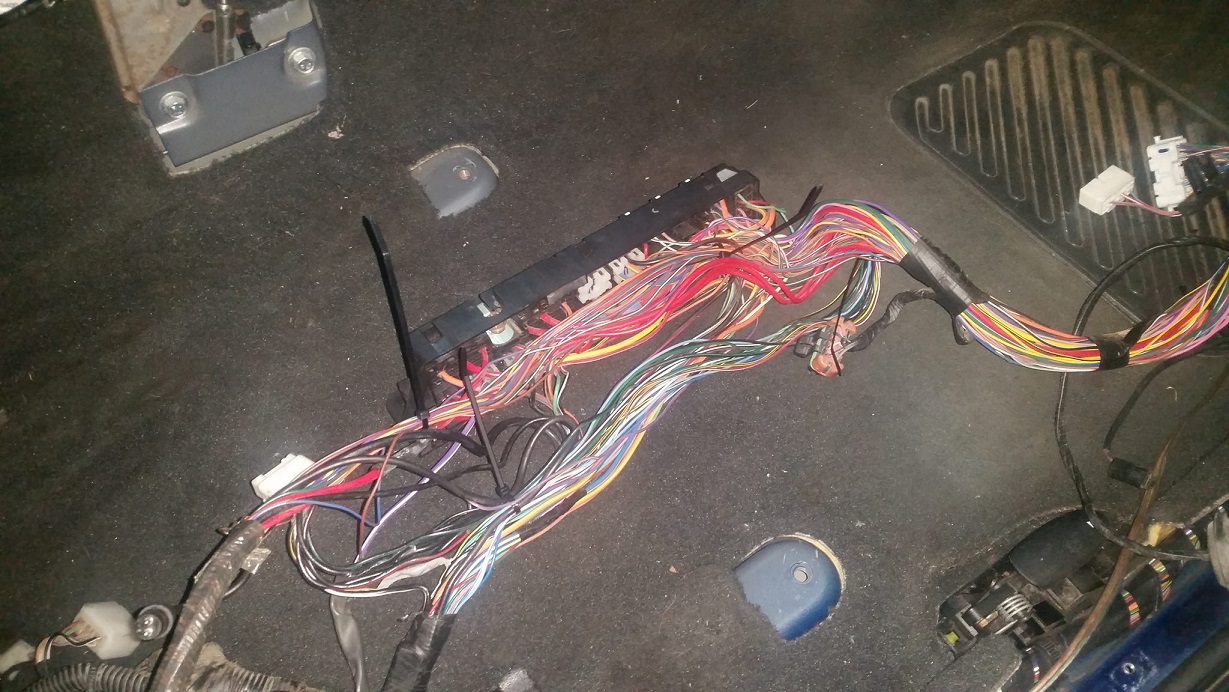
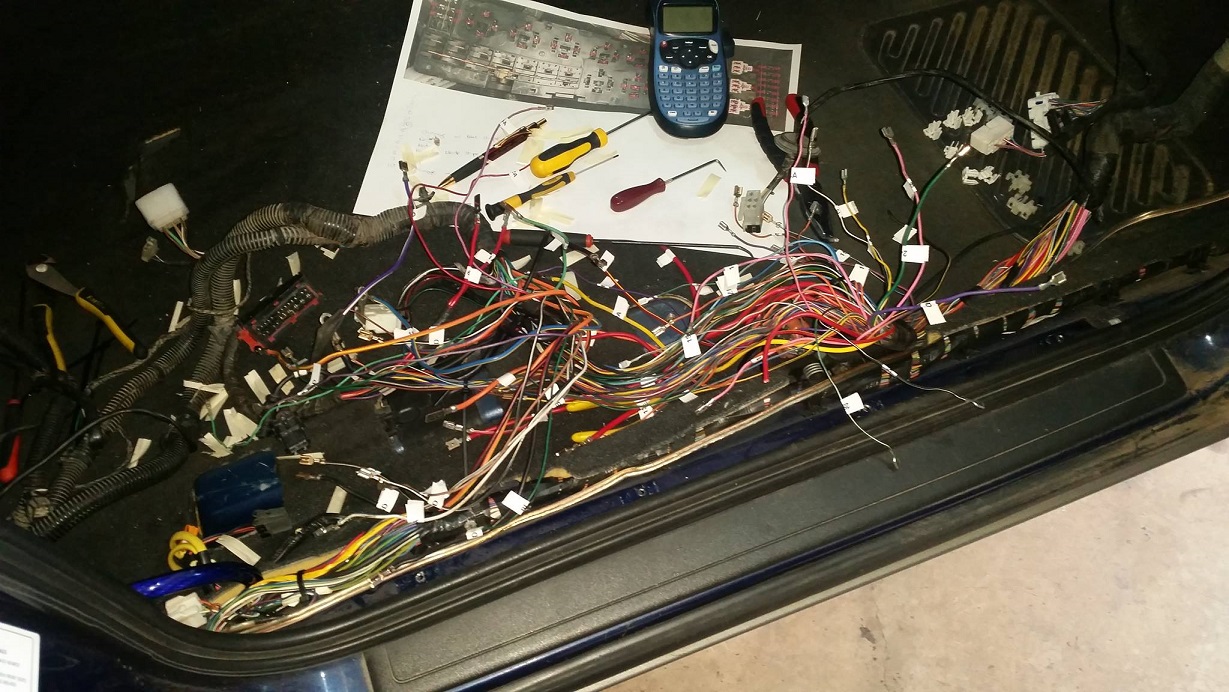
Now the hard part. 2 fuse panels, both of which are bigger than the hole in the firewall. Options are cut the firewall, or de-pin this panel. Time consuming task chosen...
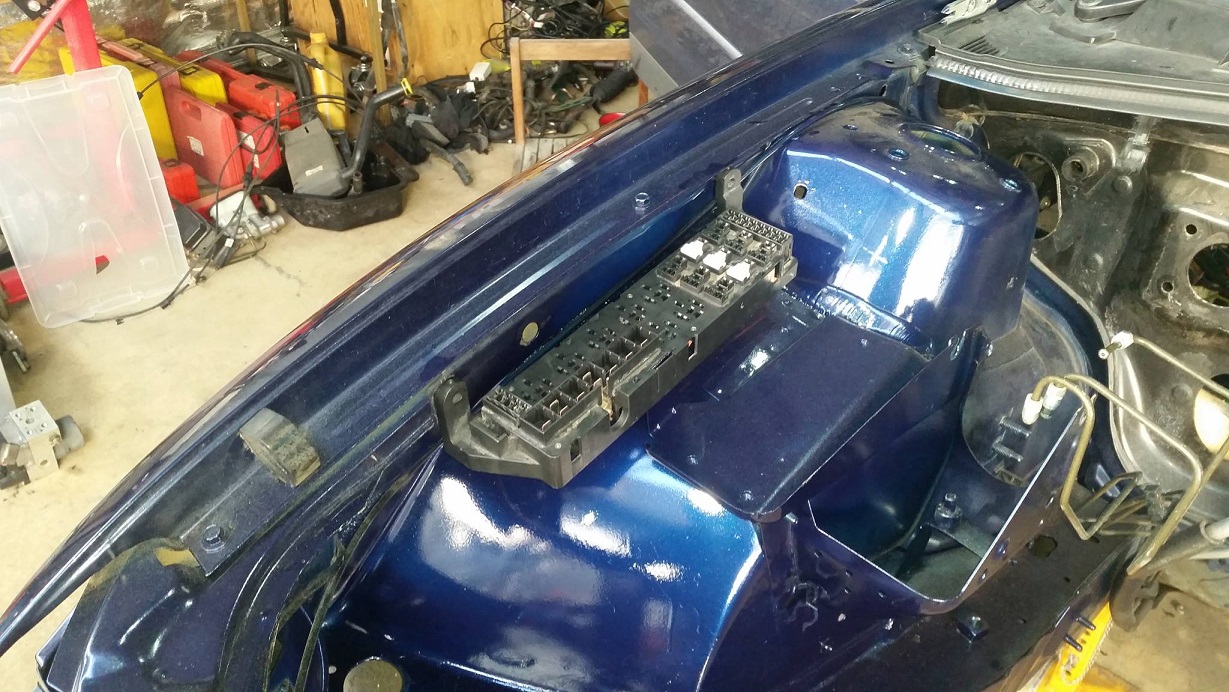
Fresh coat of paint for the k-frame. New Superpro swaybar bushes also and back in.
Old dash removed.
New dash in.
Quick coat of paint in the engine bay. $25 rattle can to the rescue.
Now the hard part. 2 fuse panels, both of which are bigger than the hole in the firewall. Options are cut the firewall, or de-pin this panel. Time consuming task chosen...
Fresh coat of paint for the k-frame. New Superpro swaybar bushes also and back in.
07-26-2015, 06:12 PM
#100
Launching!
Thread Starter
Yep that's pretty much right, although you make it sound weird putting it like that... lol