
383 Lt1 F1-r Blower build
 11-22-2011, 12:32 AM
#41
Launching!
Thread Starter
Join Date: Mar 2009
Location: Weatherford Tx 76085 corner of N. Hwy 51 and 150 Green branch Rd.
Posts: 274
Likes: 0
Received 0 Likes
on
0 Posts

 11-22-2011, 09:02 AM
#42
11 Second Club
iTrader: (4)
Join Date: Oct 2006
Location: ky
Posts: 1,029
Likes: 0
Received 0 Likes
on
0 Posts
I'm unsure if your trying to build a trans am or get a mixture between the two.
The engine and blower build is pretty sick. Not so hott on the color. But that's what makes the world go round.
The engine and blower build is pretty sick. Not so hott on the color. But that's what makes the world go round.
11-27-2011, 11:14 PM
#43
Launching!
Thread Starter
Join Date: Mar 2009
Location: Weatherford Tx 76085 corner of N. Hwy 51 and 150 Green branch Rd.
Posts: 274
Likes: 0
Received 0 Likes
on
0 Posts
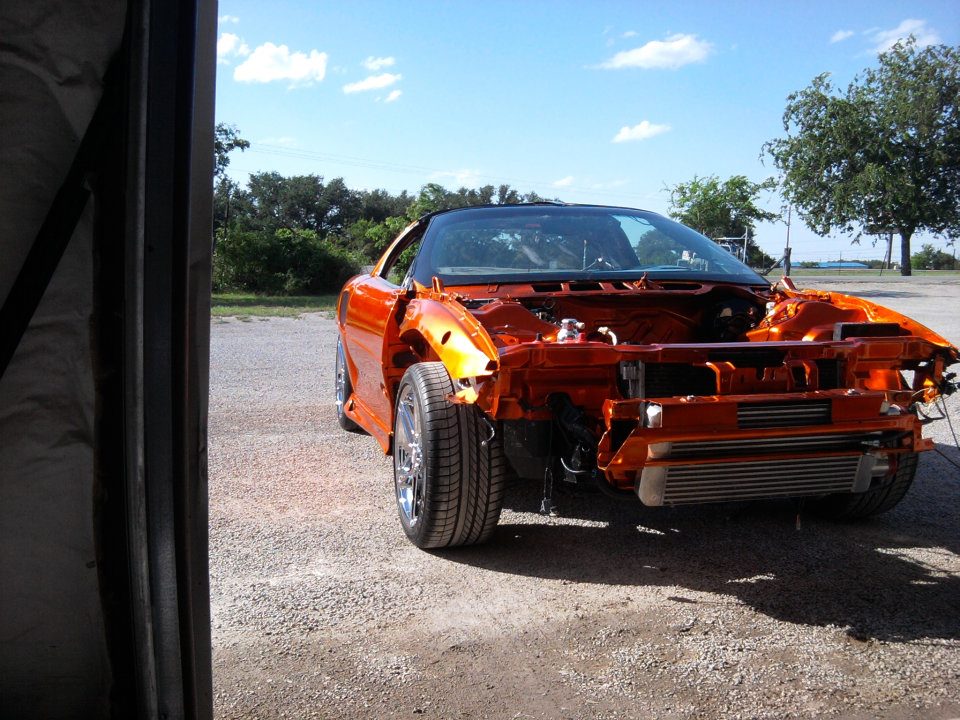
Few more pics. I thought I'd share, I'm still waiting on my fuel pumps to get here. Ernest
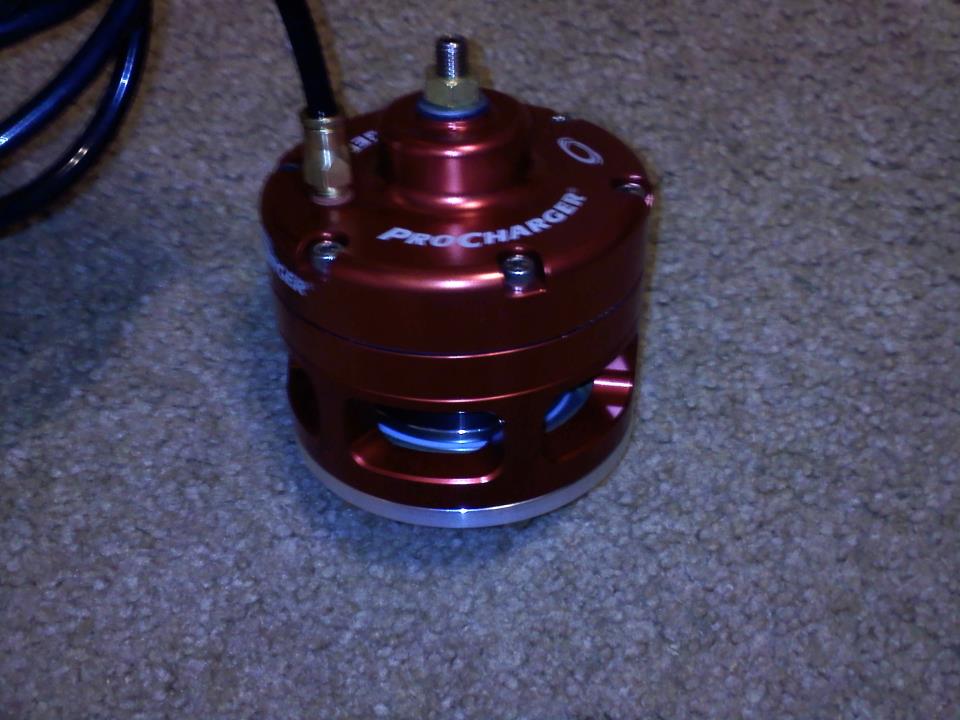


Procharger open bypass valve with aluminum flange.

Siemens high Impedance 80Lb injectors.

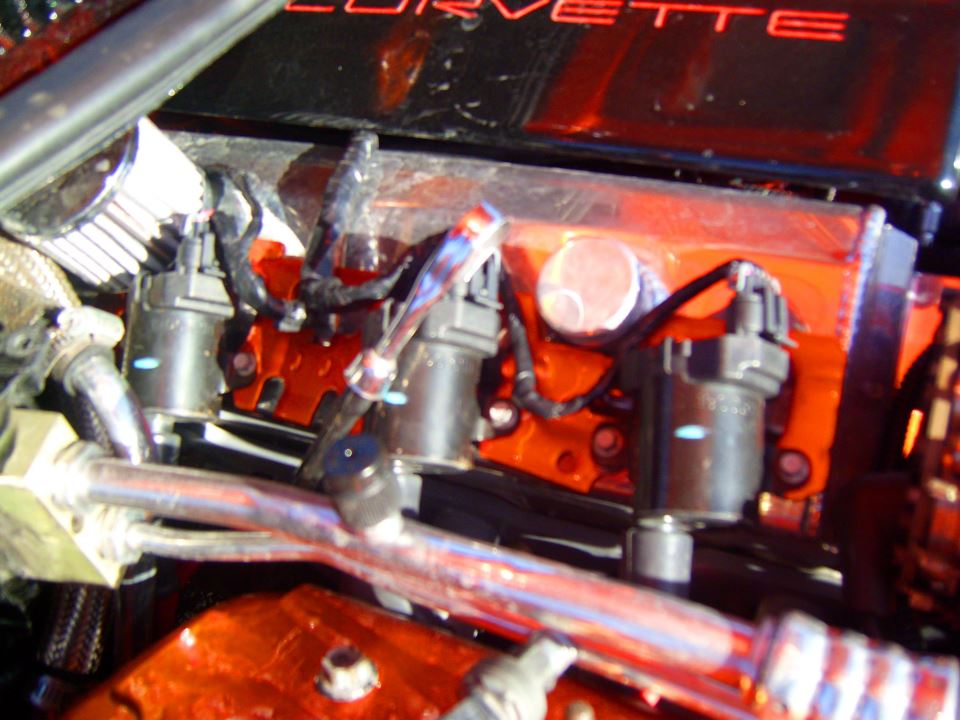
Big smile everytime! I'm running the Ls2 style (D585 heat sink pickup/truck coils) with MSD Super conductor wires.

Last edited by 96famaro; 12-25-2011 at 02:46 PM.
11-27-2011, 11:34 PM
#44
Launching!
Thread Starter
Join Date: Mar 2009
Location: Weatherford Tx 76085 corner of N. Hwy 51 and 150 Green branch Rd.
Posts: 274
Likes: 0
Received 0 Likes
on
0 Posts
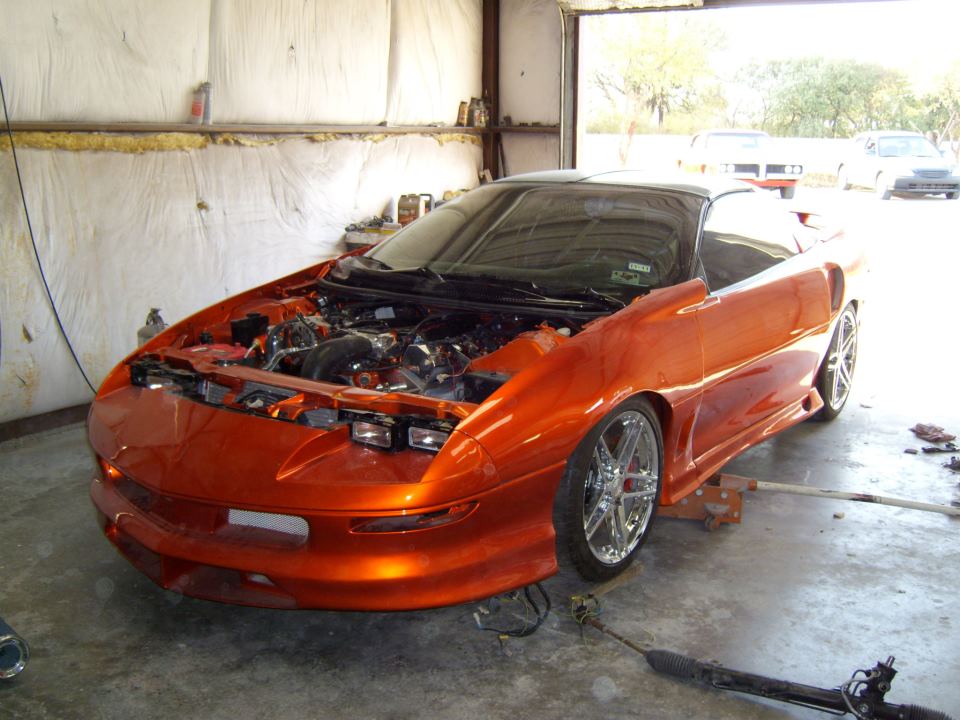
And a few more pics. of the build.

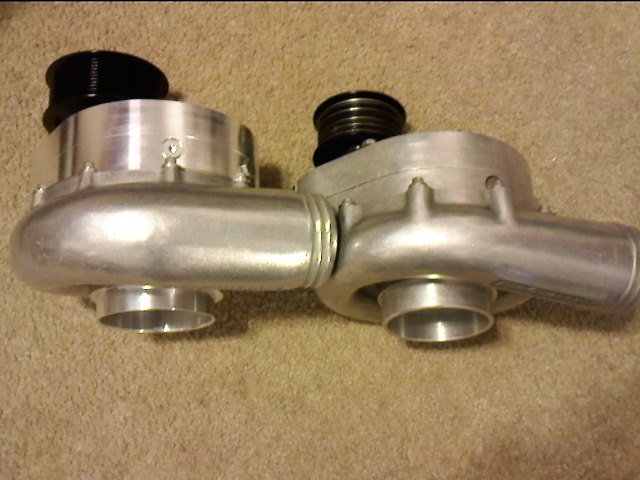
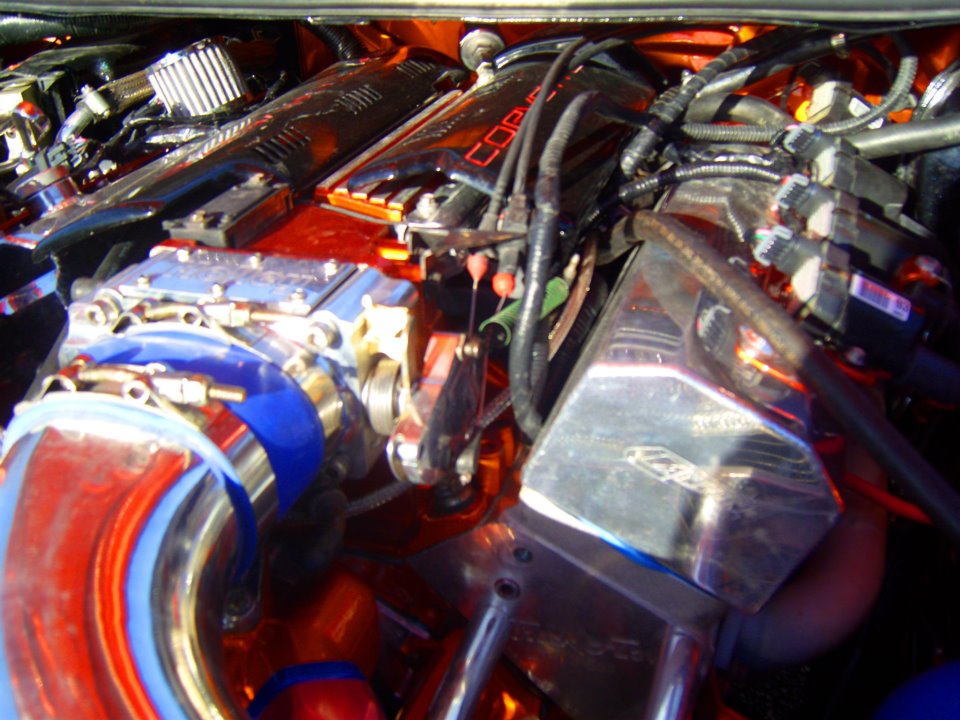
F1-R (left) P1sc (right)
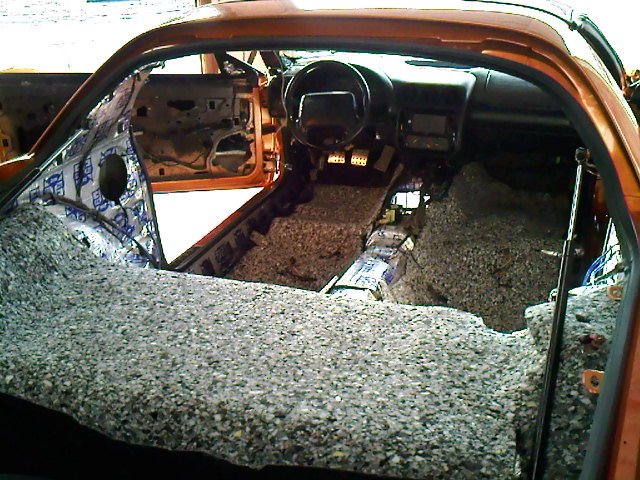
Home carpet padding to further help reduce cabin noise, seems to have worked out.
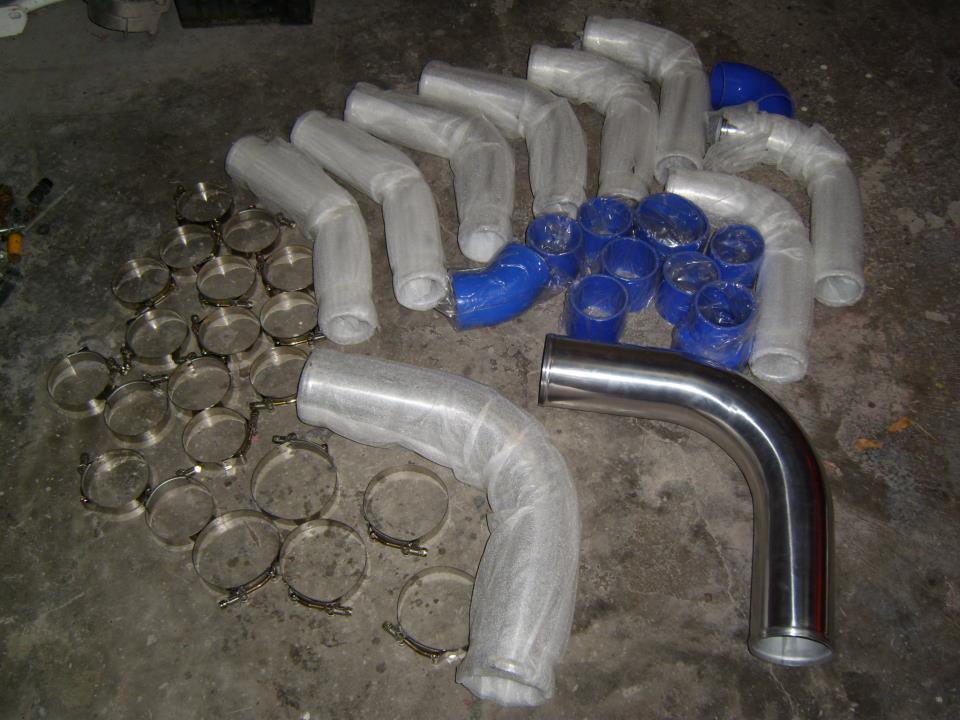
3 inch pipe from blower to intercooler, and then 3 inch quarter of the way from intercooler and then a step up 4 inch pipe to throttle body.
Fabed up these two extra support brackets for the blower, it had a lot of flex before, now it won't budge. It made a big difference.

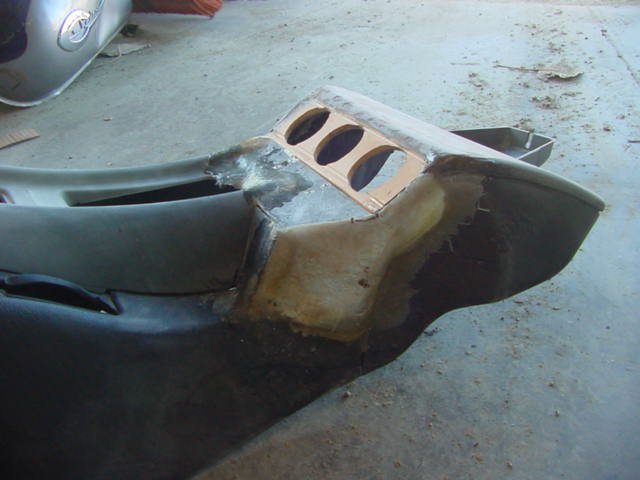
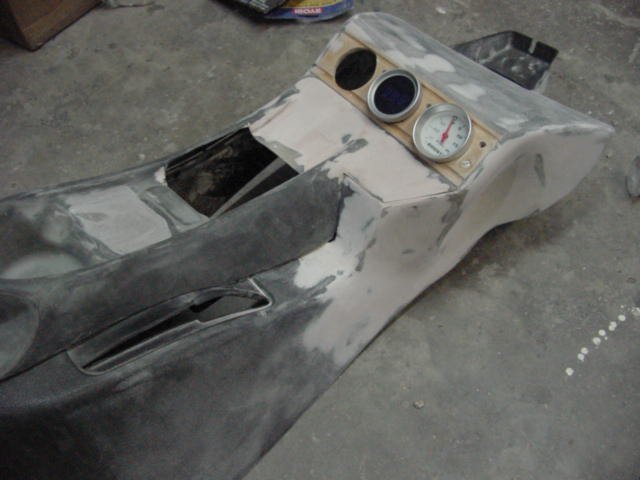
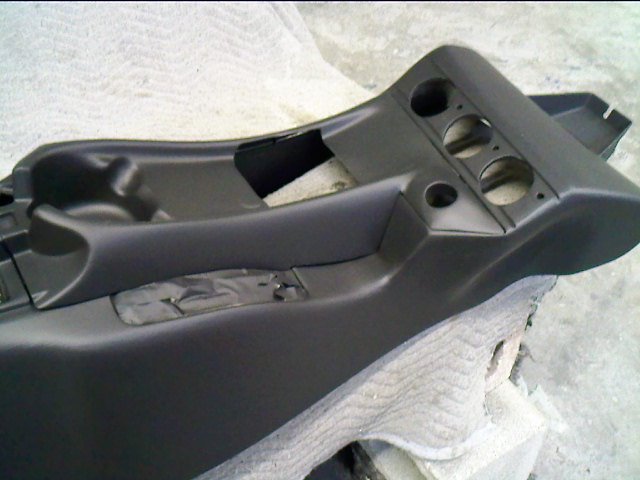
Some pics of the center console i built for my cyberdyne digital gauges and engine start button.

Nittos Invos
305/30/19 (rear)

305/30/19 (rear)
Last edited by 96famaro; 01-05-2012 at 10:12 PM.
12-10-2011, 11:51 PM
#45
Launching!
Thread Starter
Join Date: Mar 2009
Location: Weatherford Tx 76085 corner of N. Hwy 51 and 150 Green branch Rd.
Posts: 274
Likes: 0
Received 0 Likes
on
0 Posts
12/10/11
Well after a long time awaiting I finally got it running tonight! It sure feels really good to hear it running once again. I got Lonnies double fuel pumps yesterday, I finished putting all that in today. Now all is left to do is get exhaust made for it and then off to the dyno for tuning. I wanna schedule it in for this week's to do list but work is really getting swamped for us so well see what happens.
Well after a long time awaiting I finally got it running tonight!
It sure feels really good to hear it running once again. I got Lonnies double fuel pumps yesterday, I finished putting all that in today. Now all is left to do is get exhaust made for it and then off to the dyno for tuning. I wanna schedule it in for this week's to do list but work is really getting swamped for us so well see what happens.
12-12-2011, 05:27 AM
#46

Your build looks really nice, it will be interesting to see what the rwhp will be. Bob
__________________
ATI ProCharger and Moser Sales 260 672-2076
PM's disabled, please e-mail me
E-mail: brutespeed@gmail.comob@brutespeed.com
https://brutespeed.com/ Link to website

ATI ProCharger and Moser Sales 260 672-2076
PM's disabled, please e-mail me
E-mail: brutespeed@gmail.comob@brutespeed.com
https://brutespeed.com/ Link to website
 12-12-2011, 03:48 PM
#47
Looks nice. I will give u a little heads up on the 12 rib setup and the factory procharger bracket, they might give you problems if you want to make over 18 pounds of boost. I had to have a custom 3/4 inch thick bracket made to keep the belts on. I am in the process of going to cog pulleys as we speak.Let me know if you have any problems with your bracket flexing. The machine shop made an extra bracket when they made mine.
12-13-2011, 08:55 PM
#48
Launching!
Thread Starter
Join Date: Mar 2009
Location: Weatherford Tx 76085 corner of N. Hwy 51 and 150 Green branch Rd.
Posts: 274
Likes: 0
Received 0 Likes
on
0 Posts
 once I get some money together. Thanks for your help so far along my build. Ernest
 Looks nice. I will give u a little heads up on the 12 rib setup and the factory procharger bracket, they might give you problems if you want to make over 18 pounds of boost. I had to have a custom 3/4 inch thick bracket made to keep the belts on. I am in the process of going to cog pulleys as we speak.Let me know if you have any problems with your bracket flexing. The machine shop made an extra bracket when they made mine.
12-14-2011, 07:37 AM
#49
Thanks Ernest, I appreciate it! Bob
__________________
ATI ProCharger and Moser Sales 260 672-2076
PM's disabled, please e-mail me
E-mail: brutespeed@gmail.comob@brutespeed.com
https://brutespeed.com/ Link to website
ATI ProCharger and Moser Sales 260 672-2076
PM's disabled, please e-mail me
E-mail: brutespeed@gmail.comob@brutespeed.com
https://brutespeed.com/ Link to website
12-24-2011, 11:05 PM
#50
Launching!
Thread Starter
Join Date: Mar 2009
Location: Weatherford Tx 76085 corner of N. Hwy 51 and 150 Green branch Rd.
Posts: 274
Likes: 0
Received 0 Likes
on
0 Posts
Update:12/24/11 Got the exhaust made this past Friday, It came out Fantastic. I have 2.5 inch true dual exhaust, an X-pipe,and dual Slp shotgun resonators just before the tips. It all runs under the rear end, and all the way to the back of the car. I can unbolt the exhaust at two points, one at the headers, and one just before the rear end. Now all that is left is finding some time to get this thing tuned and running on the road. 
 01-04-2012, 11:32 PM
#54
Launching!
Thread Starter
Join Date: Mar 2009
Location: Weatherford Tx 76085 corner of N. Hwy 51 and 150 Green branch Rd.
Posts: 274
Likes: 0
Received 0 Likes
on
0 Posts
It is the Ls1 alternator. I hate the way the Lt1 looks like too. I'll post some more detailed pics up.
Thanks man I should be taking this thing in for some dyno tuning maybe this week maybe. I'll post some more detailed pics up. 01-05-2012, 10:53 PM
#57
Launching!
Thread Starter
Join Date: Mar 2009
Location: Weatherford Tx 76085 corner of N. Hwy 51 and 150 Green branch Rd.
Posts: 274
Likes: 0
Received 0 Likes
on
0 Posts
I still have some lines and wires just kinda hanging around I will hide them later once I get this thing running on the road.


Here you can see the High pressure line for the A/C has to still be extended a little.
01-05-2012, 11:03 PM
#58
Launching!
Thread Starter
Join Date: Mar 2009
Location: Weatherford Tx 76085 corner of N. Hwy 51 and 150 Green branch Rd.
Posts: 274
Likes: 0
Received 0 Likes
on
0 Posts
01-06-2012, 01:10 AM
#59
Launching!
Thread Starter
Join Date: Mar 2009
Location: Weatherford Tx 76085 corner of N. Hwy 51 and 150 Green branch Rd.
Posts: 274
Likes: 0
Received 0 Likes
on
0 Posts


I also modified the sway bar bracket by cutting it and relocating the bolt on tabs.

I'm also using the SJM abs delete kit. I had to bend the lines around the blower, it all worked out nicely.
01-07-2012, 12:42 PM
#60
Launching!
Thread Starter
Join Date: Mar 2009
Location: Weatherford Tx 76085 corner of N. Hwy 51 and 150 Green branch Rd.
Posts: 274
Likes: 0
Received 0 Likes
on
0 Posts