Front Mount build thread. Stock Shortblock, TC78, 6spd. Numbers/Vid on Page 3!
 10-16-2011, 07:49 PM
#21

Well i got a good amount done this weekend! Spent most of friday night painting and touching up all the bare metal that i ground down. I attempted to re-do my fan wiring but failed so i gotta wait on that till i get some more info. Got my passenger brake line out that i cut by mistake(thats an expensive oops). I relocated my horn to the driver side.
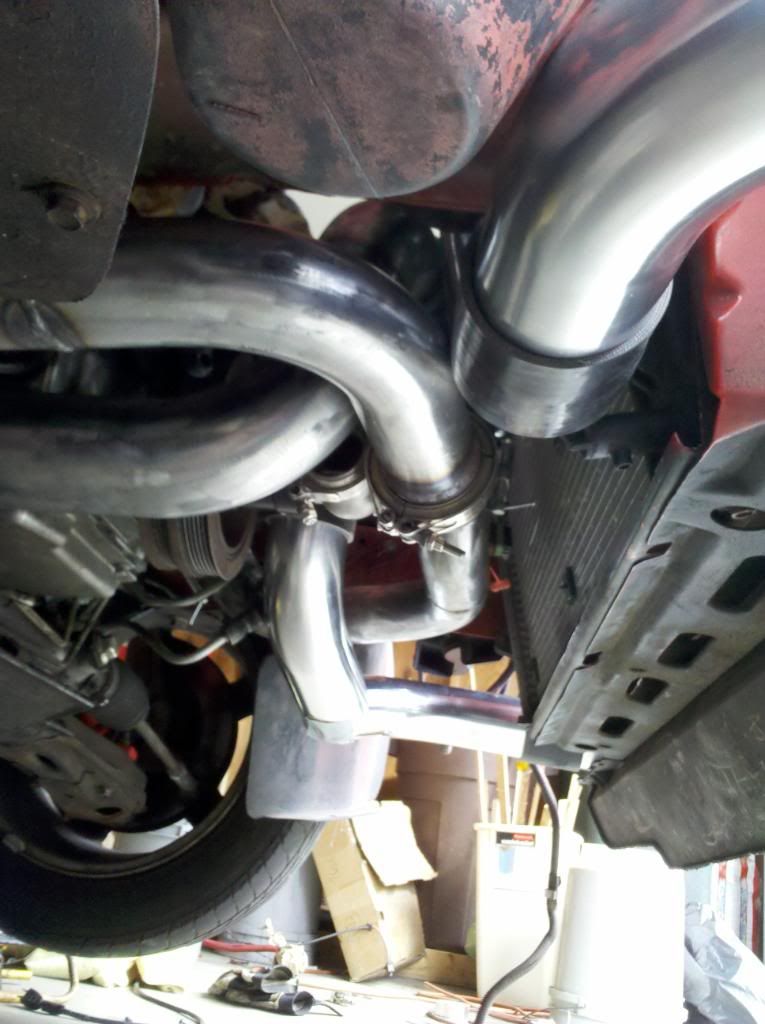
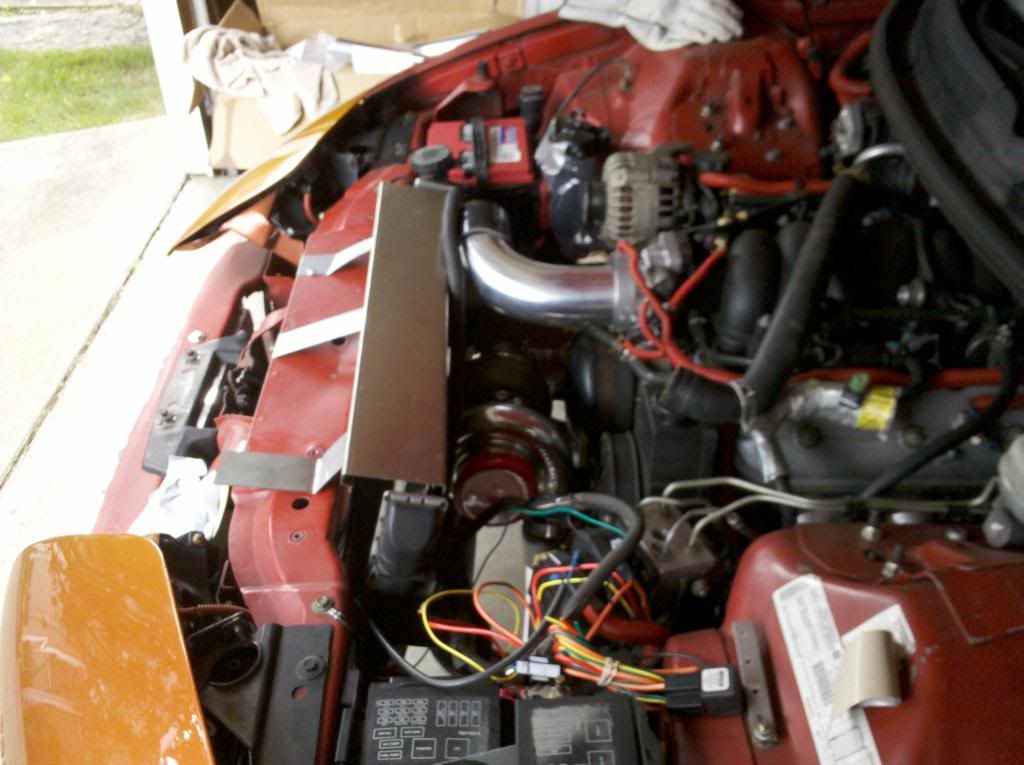
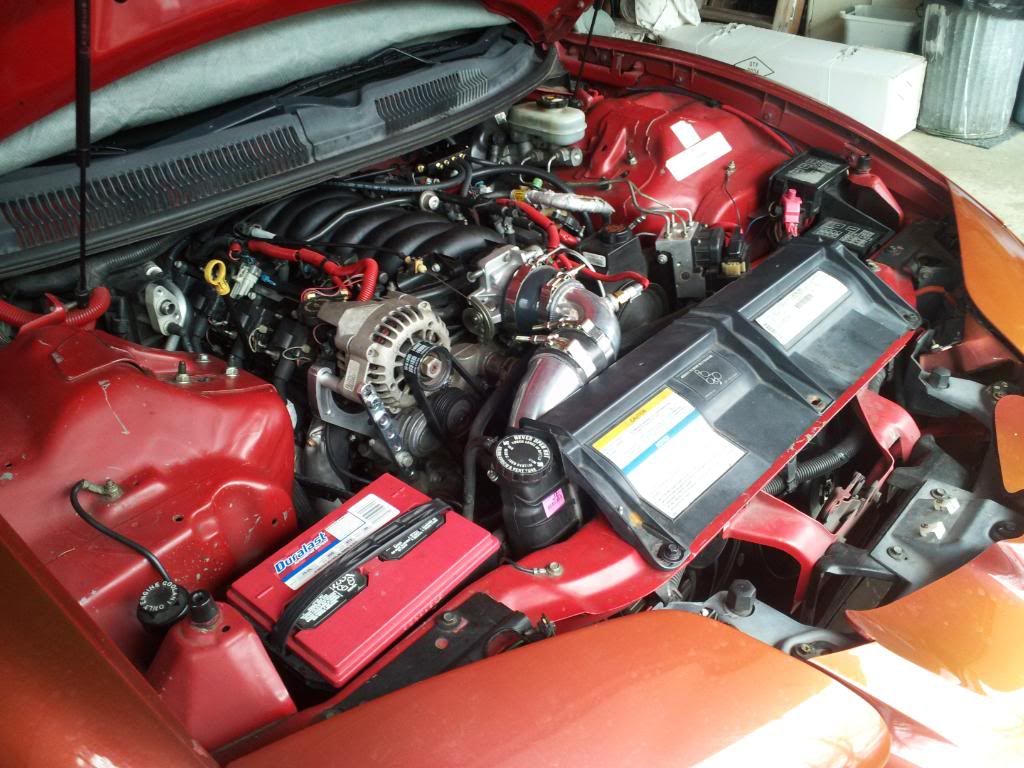
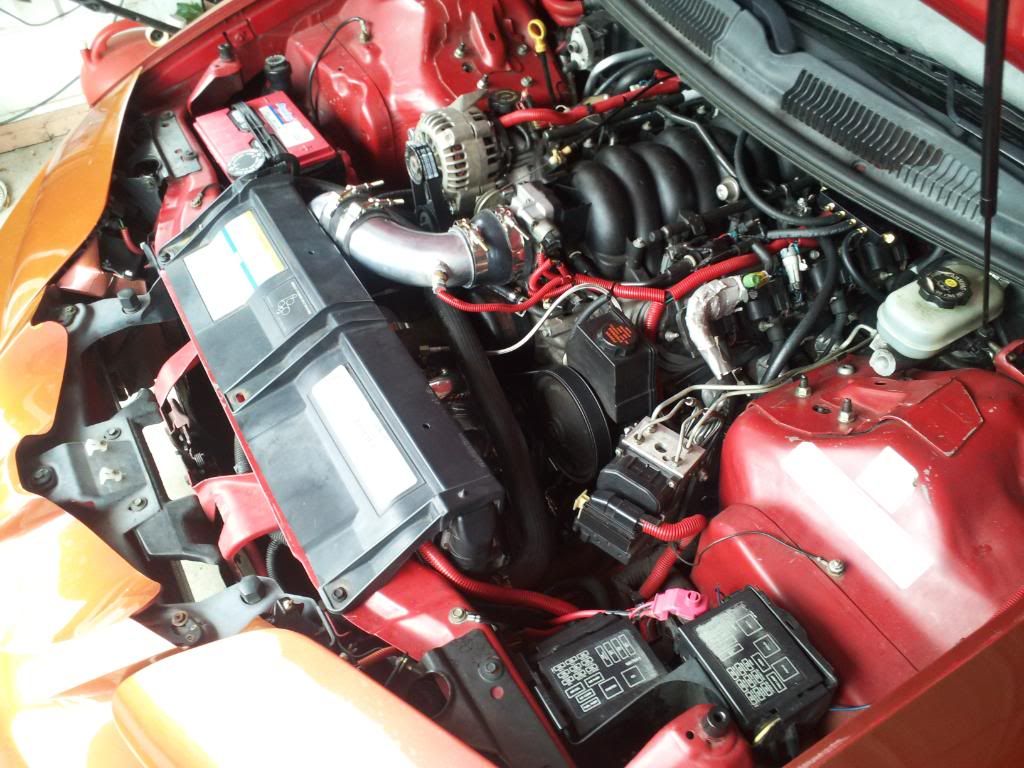
Saturday was extremely productive but i could not have done without my dad. I got all my intercooler piping done and did a full mock up so im good to go on finishing everything. Let me tell you, intercooler piping is definitely a big puzzle and not fun. Made some stainless steel brackets for my vacuum block, fan relays and radiator shroud. my dad will be taking some of the intercooler pieces to work to weld some stuff in. Ill include those on my next trip home
I also dropped the oil pan but i didnt have time to tap it- got questions on that, see the end of the post
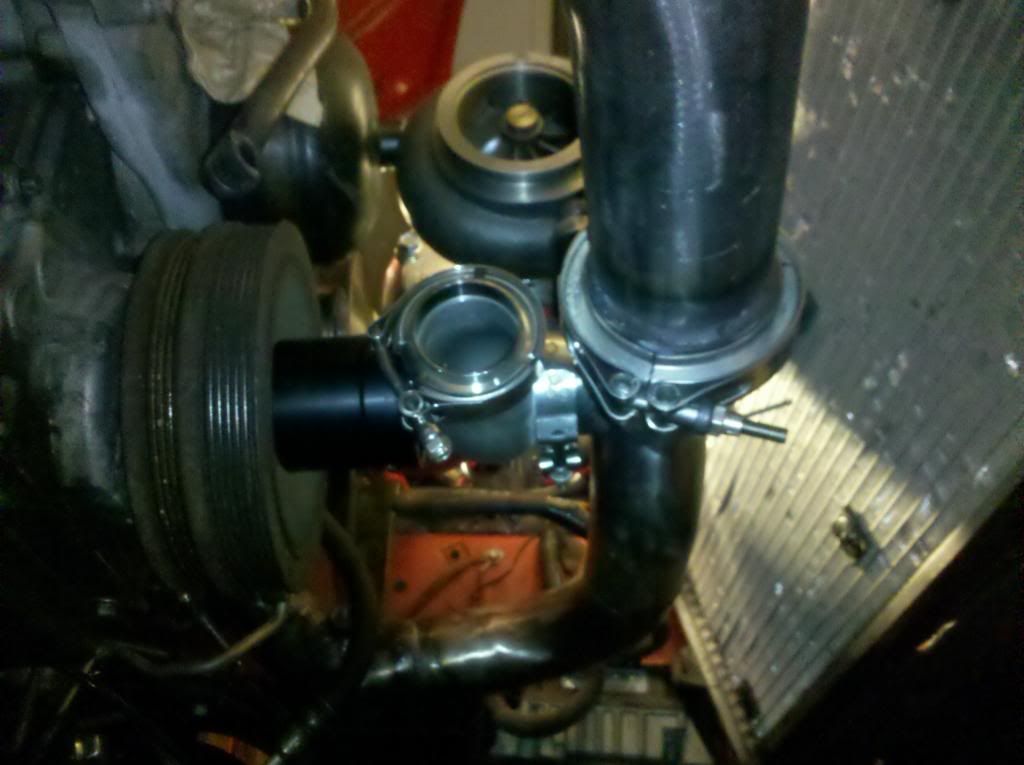
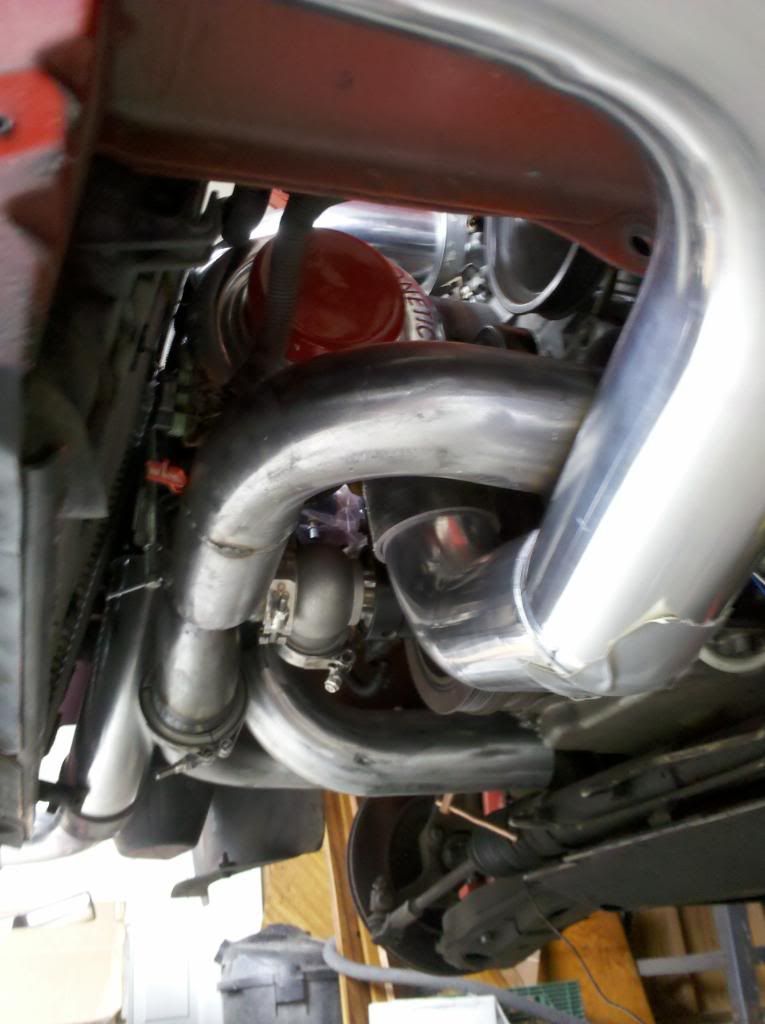
wastegate placement
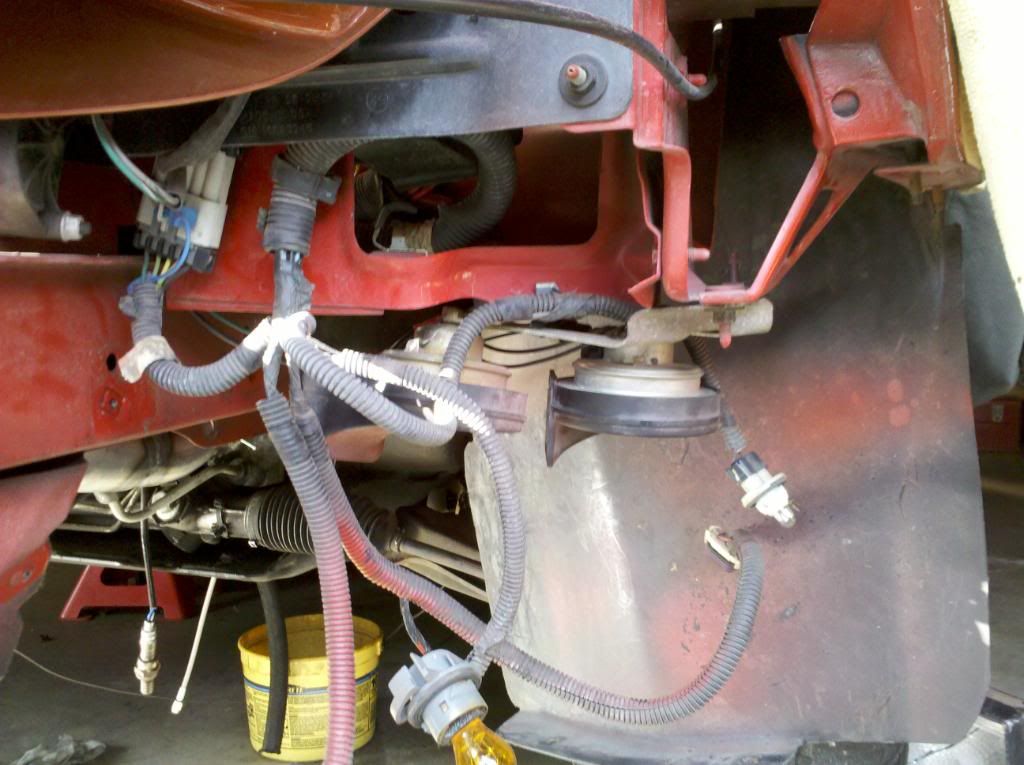
horn relocate
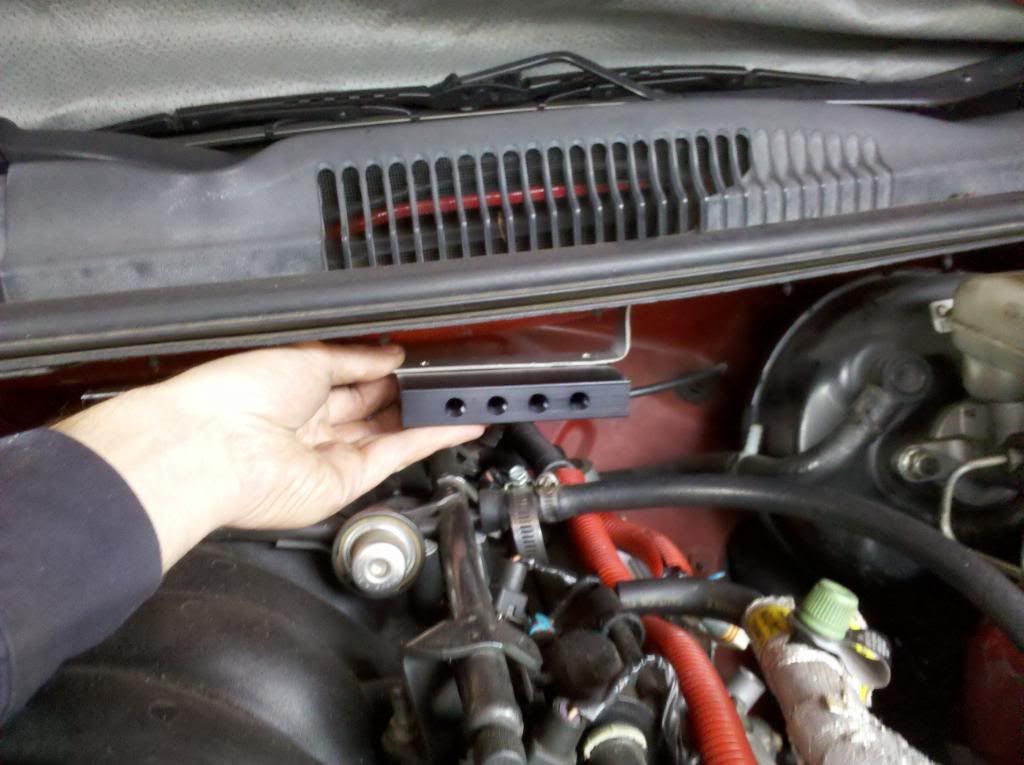
vacuum block mount i just have to cut to size.
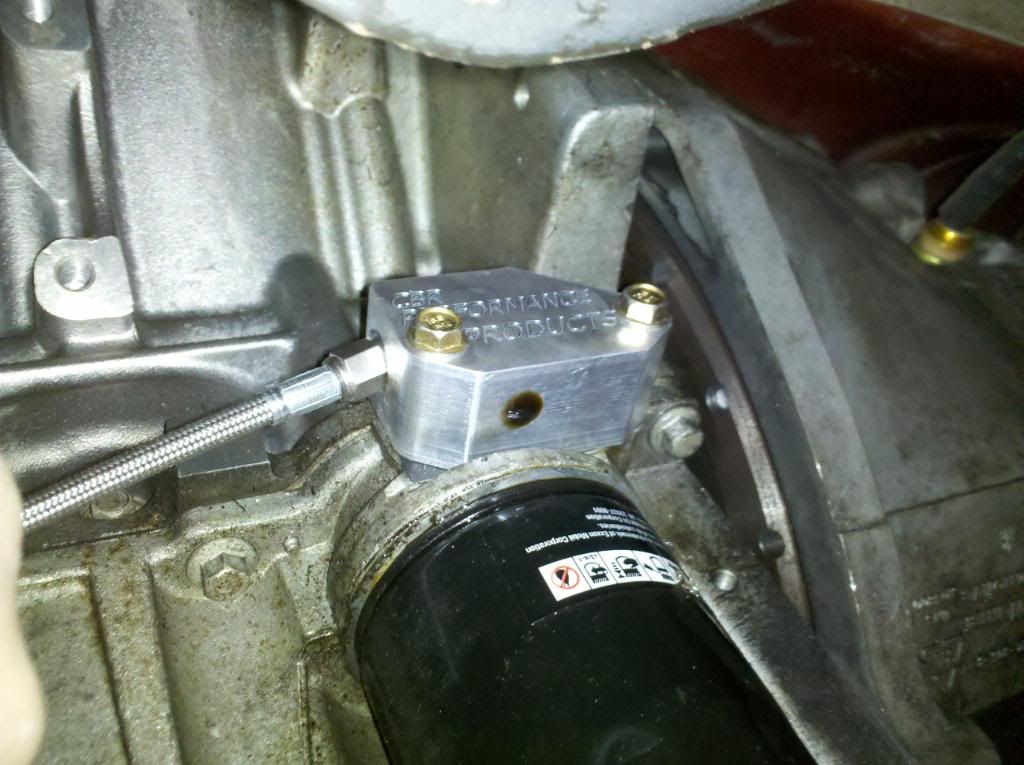
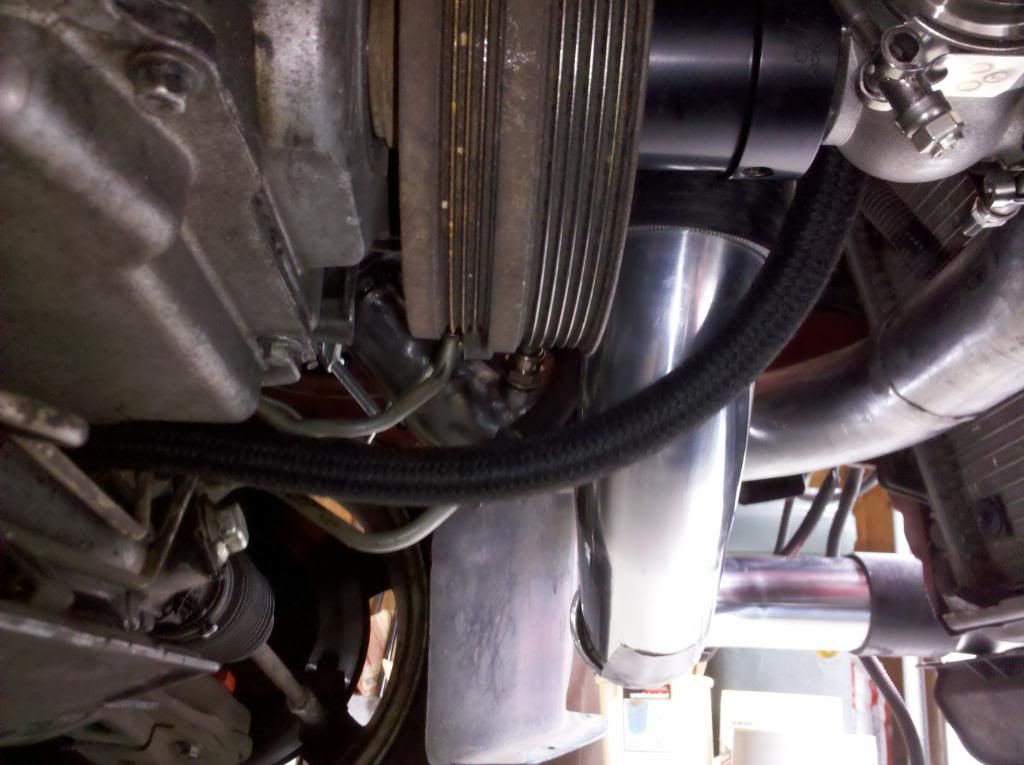
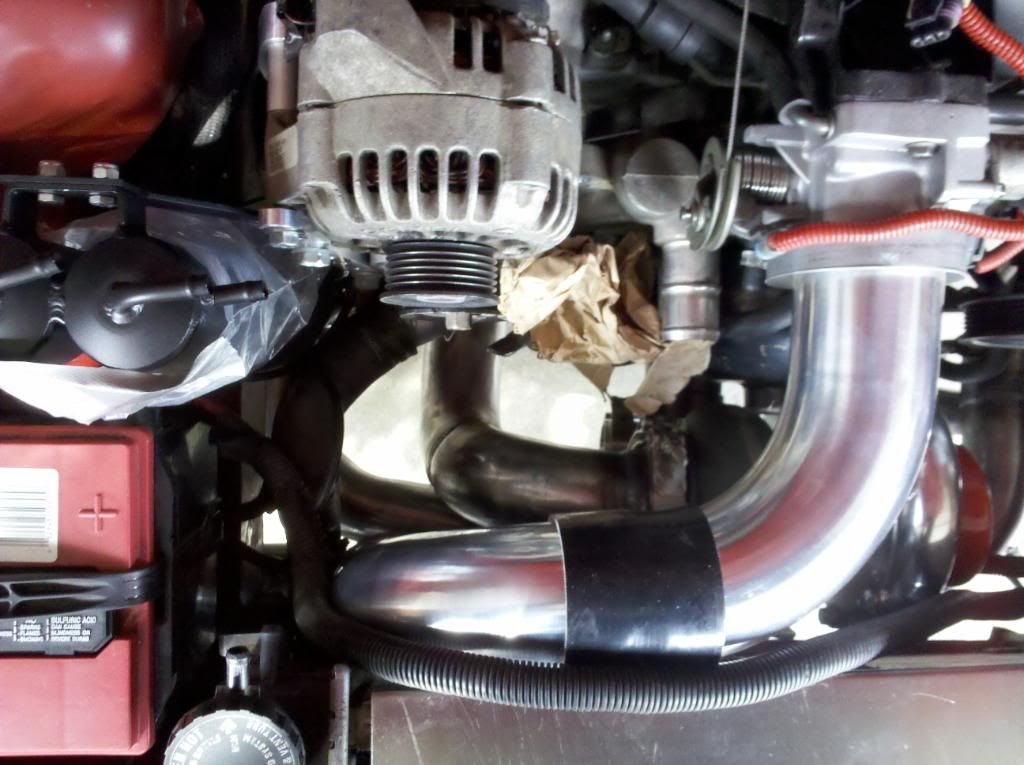
oil feed/drain(is the drain angle ok???)
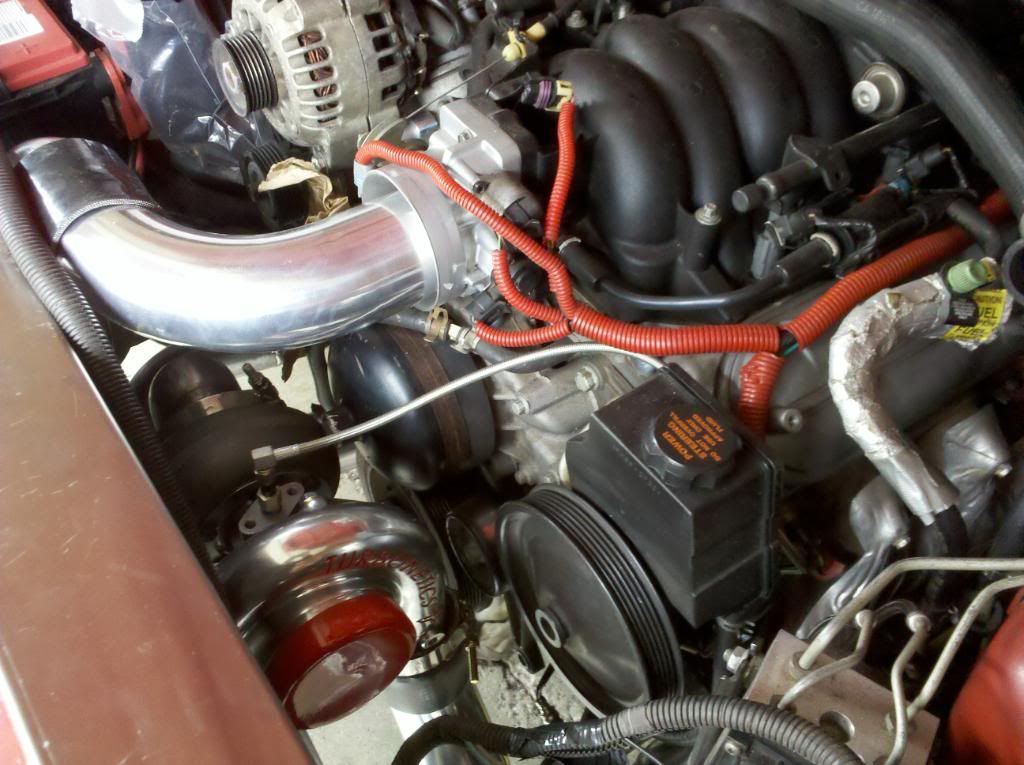
BOV placement
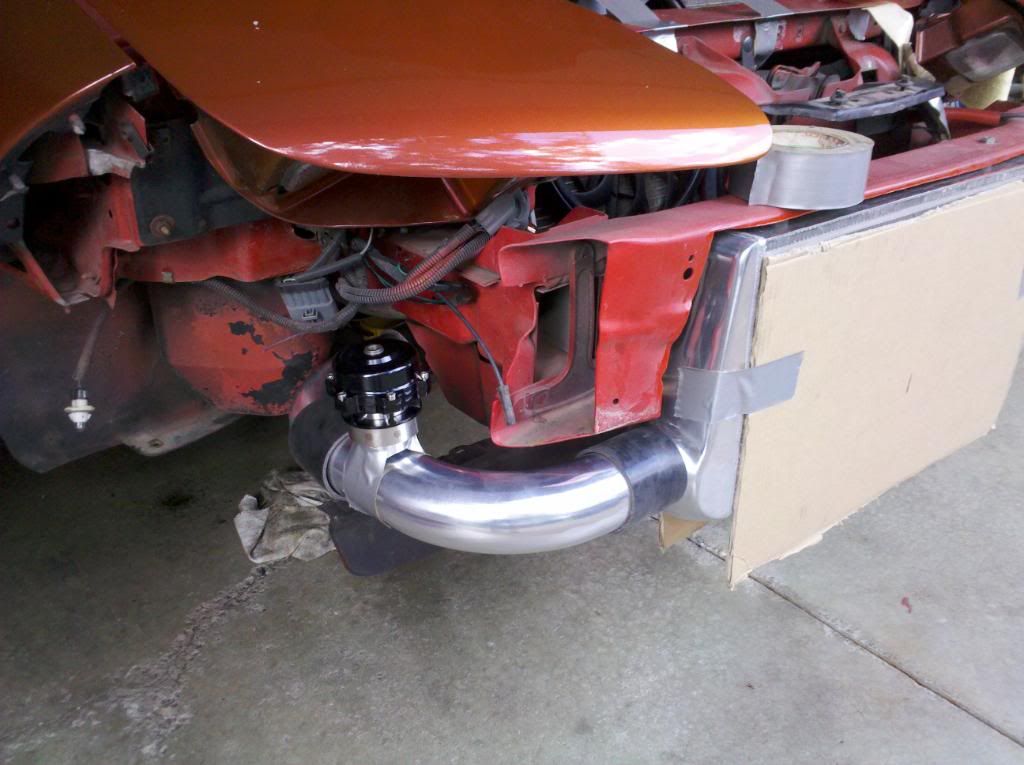
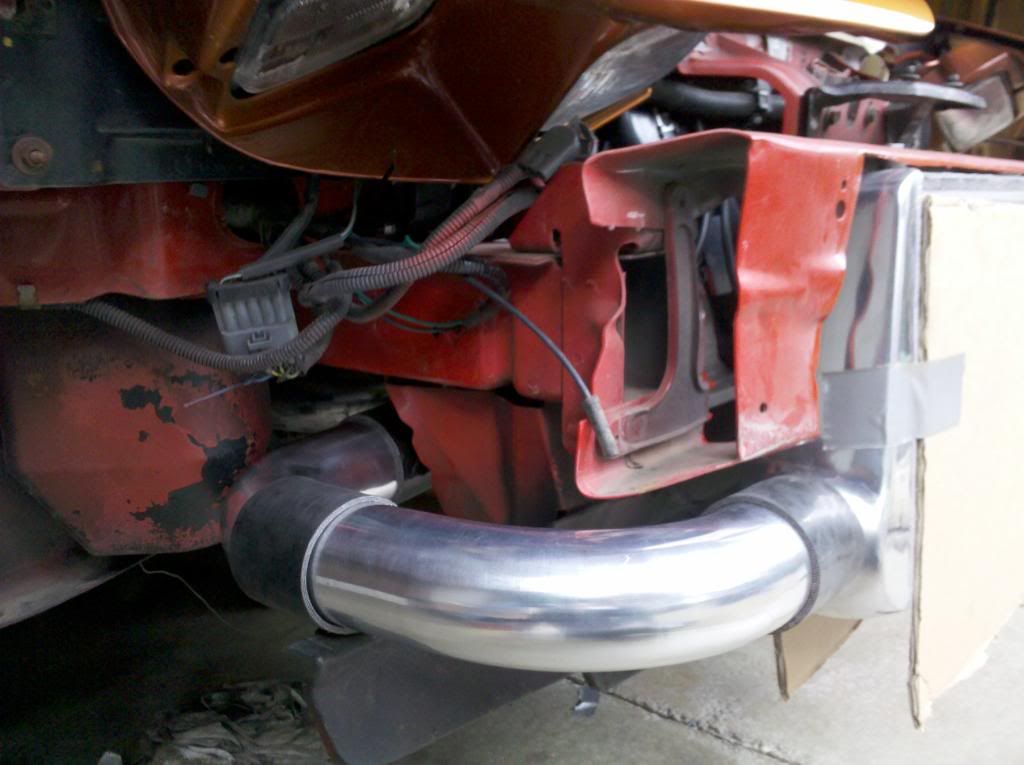
Intercooler piping route

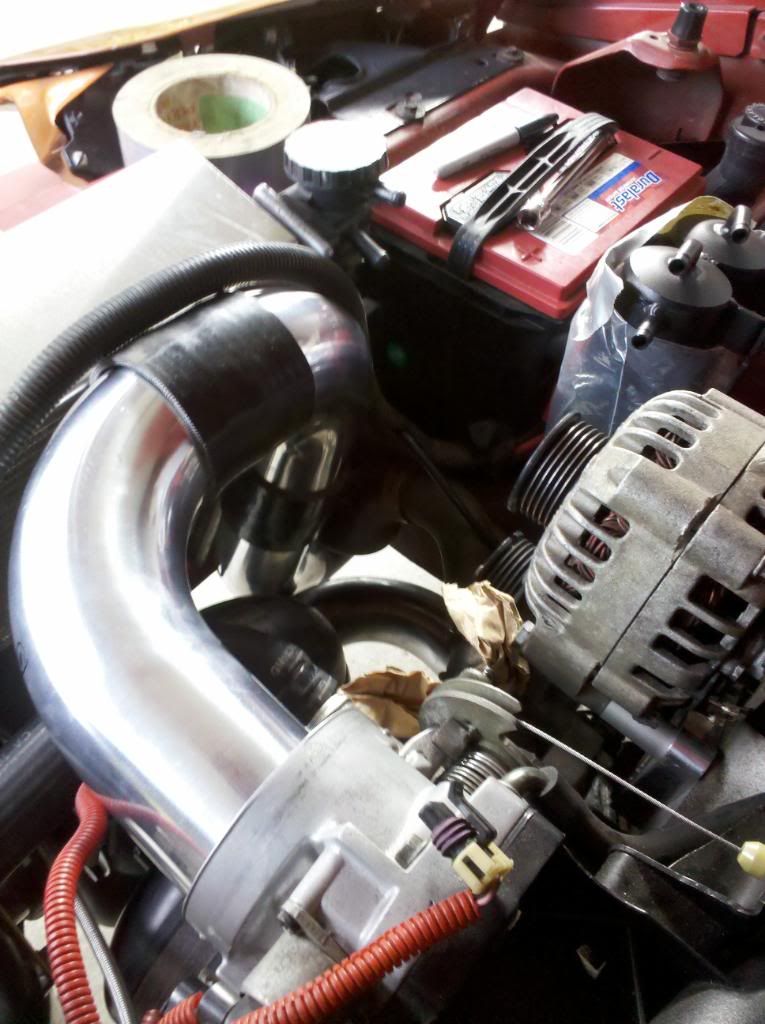
Radiator shroud out of stainless. you can see the first steel bracket i made closest to the camera. it still needs tweaked but thats essentially what it will be
whats left
-tap the oil pan
-paint/wrap everything
-put the poly motor mounts in
-wire the fans
questions
For the typical turbo drain(pretty mine is 3/8), what size drill bit do i need to before i tap the pan?
Is my drain angle ok? i know it goes straight down at first but it kinda goes back up/straight over the kmember and into the oil pan. Im worried about drain issues that will cause smoking. I will not use a restrictor.
Is there anywhere online to buy brake lines that will reach the passenger side? Local places are all out.
ill think of more.
Comments/criticism
Saturday was extremely productive but i could not have done without my dad. I got all my intercooler piping done and did a full mock up so im good to go on finishing everything. Let me tell you, intercooler piping is definitely a big puzzle and not fun. Made some stainless steel brackets for my vacuum block, fan relays and radiator shroud. my dad will be taking some of the intercooler pieces to work to weld some stuff in. Ill include those on my next trip home
I also dropped the oil pan but i didnt have time to tap it- got questions on that, see the end of the post
wastegate placement
horn relocate
vacuum block mount i just have to cut to size.
oil feed/drain(is the drain angle ok???)
BOV placement
Intercooler piping route
Radiator shroud out of stainless. you can see the first steel bracket i made closest to the camera. it still needs tweaked but thats essentially what it will be
whats left
-tap the oil pan
-paint/wrap everything
-put the poly motor mounts in
-wire the fans
questions
For the typical turbo drain(pretty mine is 3/8), what size drill bit do i need to before i tap the pan?
Is my drain angle ok? i know it goes straight down at first but it kinda goes back up/straight over the kmember and into the oil pan. Im worried about drain issues that will cause smoking. I will not use a restrictor.
Is there anywhere online to buy brake lines that will reach the passenger side? Local places are all out.
ill think of more.
Comments/criticism
 10-17-2011, 02:44 AM
#22
Teching In

Join Date: Jul 2006
Location: Houston, TX
Posts: 28
Likes: 0
Received 0 Likes
on
0 Posts
Nice build Bro. 
Keep it up.
As for the Drill bit size here is a link I found for you. Hope it helps.
http://www.thedirtforum.com/drilltapsizes.htm
Keep it up.
As for the Drill bit size here is a link I found for you. Hope it helps.
http://www.thedirtforum.com/drilltapsizes.htm
10-17-2011, 08:58 AM
#23
Nice build Bro.
Keep it up.
As for the Drill bit size here is a link I found for you. Hope it helps.
http://www.thedirtforum.com/drilltapsizes.htm
Keep it up.
As for the Drill bit size here is a link I found for you. Hope it helps.
http://www.thedirtforum.com/drilltapsizes.htm
10-21-2011, 08:58 PM
#25
Registered User
Join Date: Sep 2011
Location: Sydney AUS
Posts: 36
Likes: 0
Received 0 Likes
on
0 Posts
Cool build buddy, i'll be subscribing to this one. Im doing a TC78 on my Commodore (4 door version of your GTO) over the next few months. I got the TC78 from Blake aswell just awaiting delivery atm before i can get stuck into it
Hopefully its smooth sailing for you mate
Hopefully its smooth sailing for you mate
10-22-2011, 04:37 PM
#26
Thank you. It hasnt been too bad so far. Just waiting on all the little stuff you need gets old. But next time home i should be able to basically wrap it up for now. Just gotta do fuel after that. Good luck on your build, ill be on the lookout for updates.
10-23-2011, 06:54 AM
#28
I remember going through similar stuff last build. That chart is pretty nice. I used a 9/16" bit and it worked fine on the last build. If your downpipe is close the mounts, I'd go with solid mounts. I don't see an IAT sensor. I hope you have plans on putting on in. Also, I'd look into doing something other than stock water hoses on the lower part. Looks like it will be really close to the turbo.
10-23-2011, 11:16 AM
#29
This kit will probably get redesigned after i graduate next year. i got it dirt cheap of someone else and it needed a lot of work to get to where i could even use it.
I remember going through similar stuff last build. That chart is pretty nice. I used a 9/16" bit and it worked fine on the last build. If your downpipe is close the mounts, I'd go with solid mounts. I don't see an IAT sensor. I hope you have plans on putting on in. Also, I'd look into doing something other than stock water hoses on the lower part. Looks like it will be really close to the turbo.
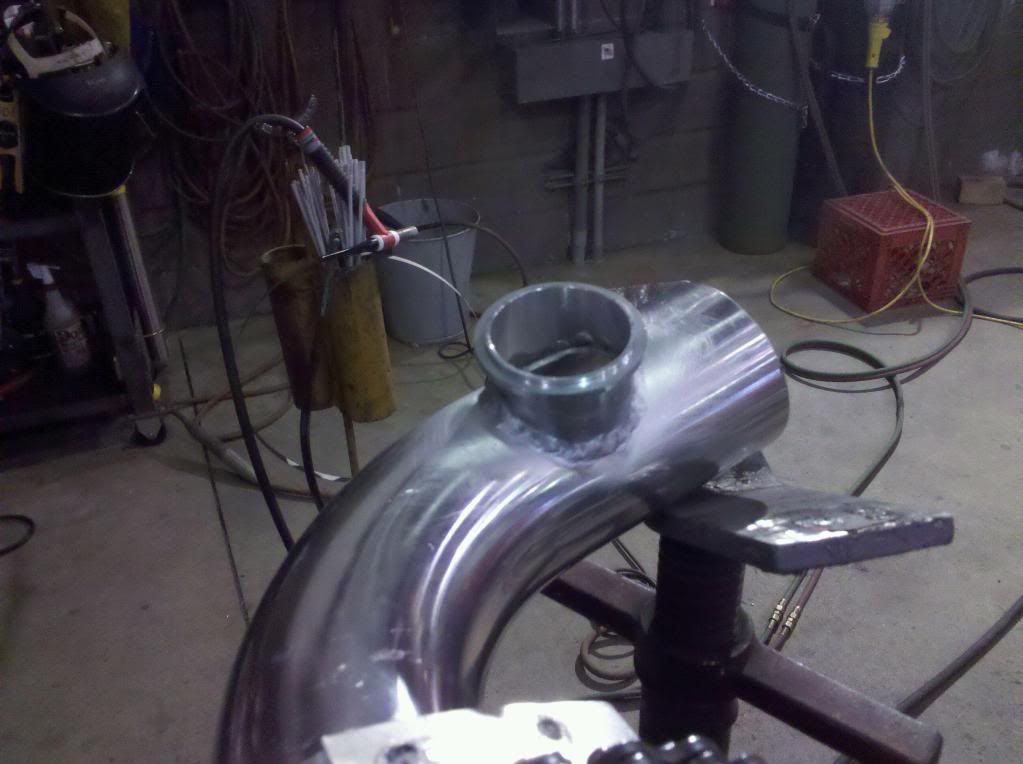
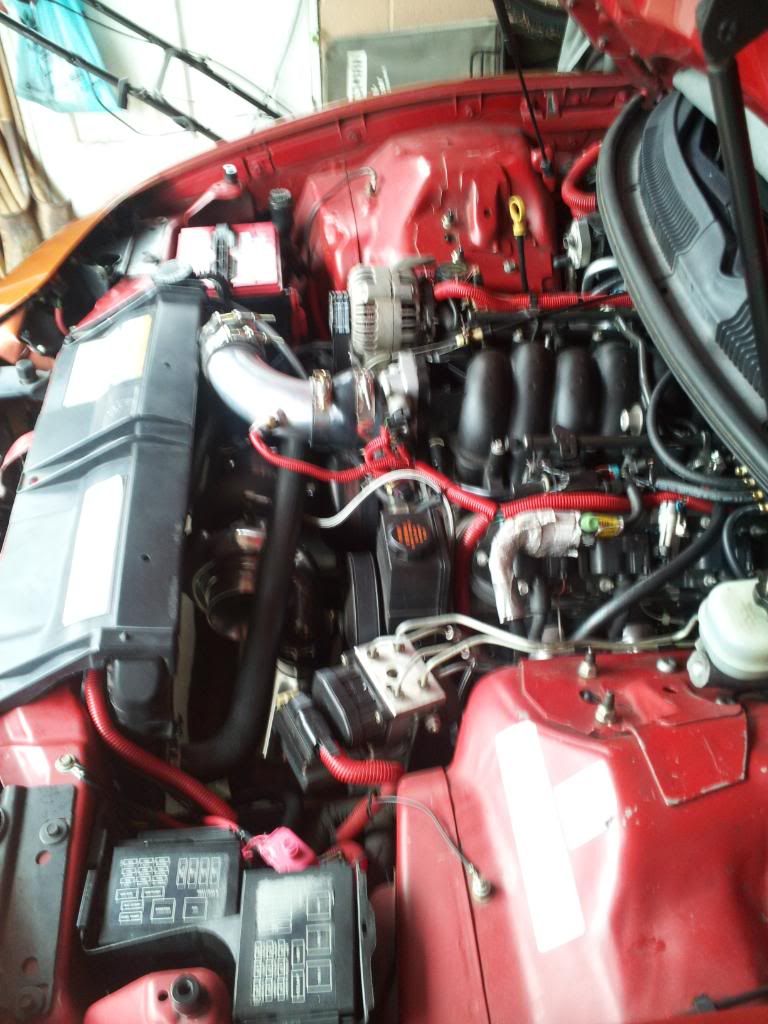
And that was just my intercooler mock up. I didnt have the bung for the IAT yet, my dad actually welded it in this week, along with the BOV mount. ill post a pic of that in a min
Downpipe will be dumped before the k-member for now, just gotta pick up a turndown. i dont have the money to run it all the way back the way i want it. Plan is to have a cutout right after the k-member that is run off a hobbs switch or something similar that opens when boost is seen. Ill make a separate thread for that though.
The coolant hose actually doesnt touch the turbo but it does touch the oil feed line.. will that cause any problems? i was gonna heat wrap the hose there or figure out a new routing plan if thats too risky
BOV Mounted, IAT bung was welded in too didnt get a pic of that.
Last edited by Ryans99ls1; 10-23-2011 at 11:29 AM.
10-28-2011, 12:31 AM
#32
Registered User
Join Date: Sep 2011
Location: Sydney AUS
Posts: 36
Likes: 0
Received 0 Likes
on
0 Posts
Thanks mate, will hit them up soon on the oil block. No need for PS lines on mine as we have steering on the other side and there's plenty of room to play with 
Just had my turbo arrive today too so time to get started i think
Just had my turbo arrive today too so time to get started i think
11-07-2011, 10:35 AM
#34
Well i figured this would happen, the car finally beat me this weekend. I got the oil pan tapped and went to put in the new motor mounts and it took me about 6 hours if not more. i could not get the motor lined back up for the life of me. I thought tapping the oil pan would be the hard part..
Then i went to put the manifolds back on and apparently with the new mounts, the motor sits just a tiny bit different than before which caused my hotside to hit the kmember so i had to take the manifold back off and do some more grinding.
I also wrapped my hotside if that counts for anything.. haha
Just an all around bad weekend. im going back this weekend to hopefully make some good progress, if not wrap 90% of it up.
Does anyone know how to put together an RPS 50mm BOV? it came with a bunch of fittings, an o-ring and a couple springs.. Im not sure how to put it together?
11-13-2011, 09:00 PM
#35
It lives! Got it all together, got the fans wired(thanks to Tally's help) and hid the wiring under the fuseboxes which turned out great. Just gotta bleed the brakes and finish my radiator shroud.
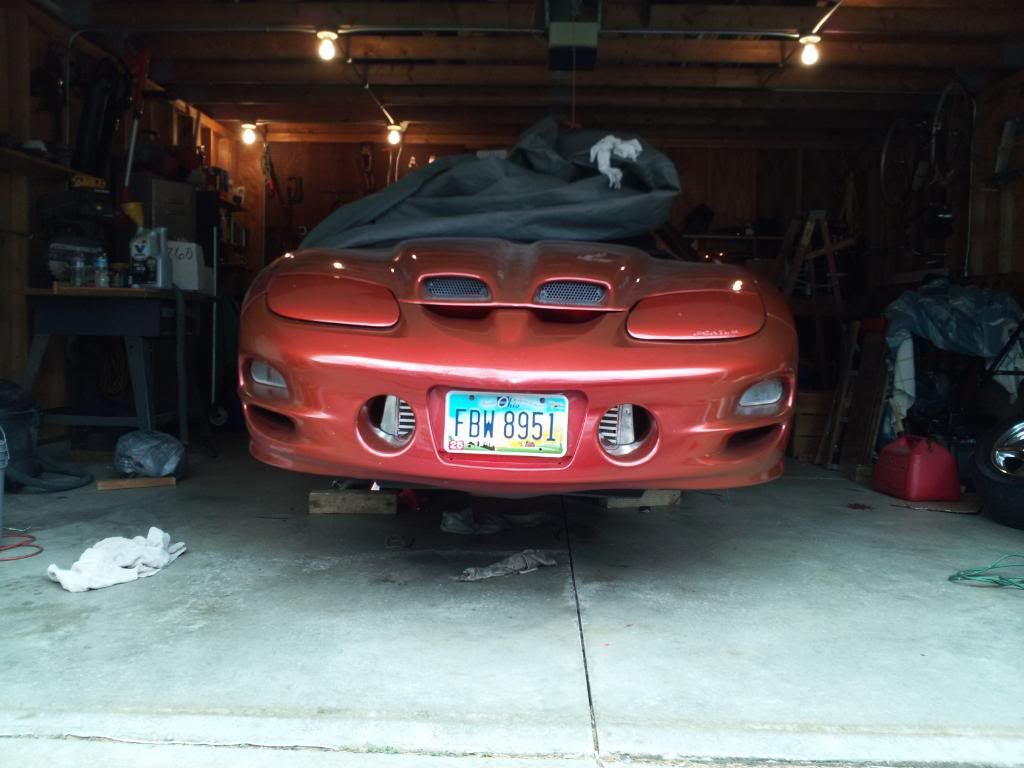
I will be trimming the front bumper when it comes time to tune it spring. Dual PCV setup still isnt hooked up, but ill do that after i get my boost controller.
picture of how it will most likely sit for winter.
Here is the video of the first start up.
I will be trimming the front bumper when it comes time to tune it spring. Dual PCV setup still isnt hooked up, but ill do that after i get my boost controller.
picture of how it will most likely sit for winter.
Here is the video of the first start up.
11-27-2011, 10:43 PM
#36
Its officially put away for winter.. but i got everything done that i wanted to do. I wanna thank everyone for the help and support! Ill be sure to update the thread come spring when i put the fuel system in and get it tuned. Some final pics right before i covered it up and left.
Ill be cutting the front bumper out some more, we are required to have a front plate here so ill come up with something better but this was just to see how it would look before i cut it all out, if i choose to.
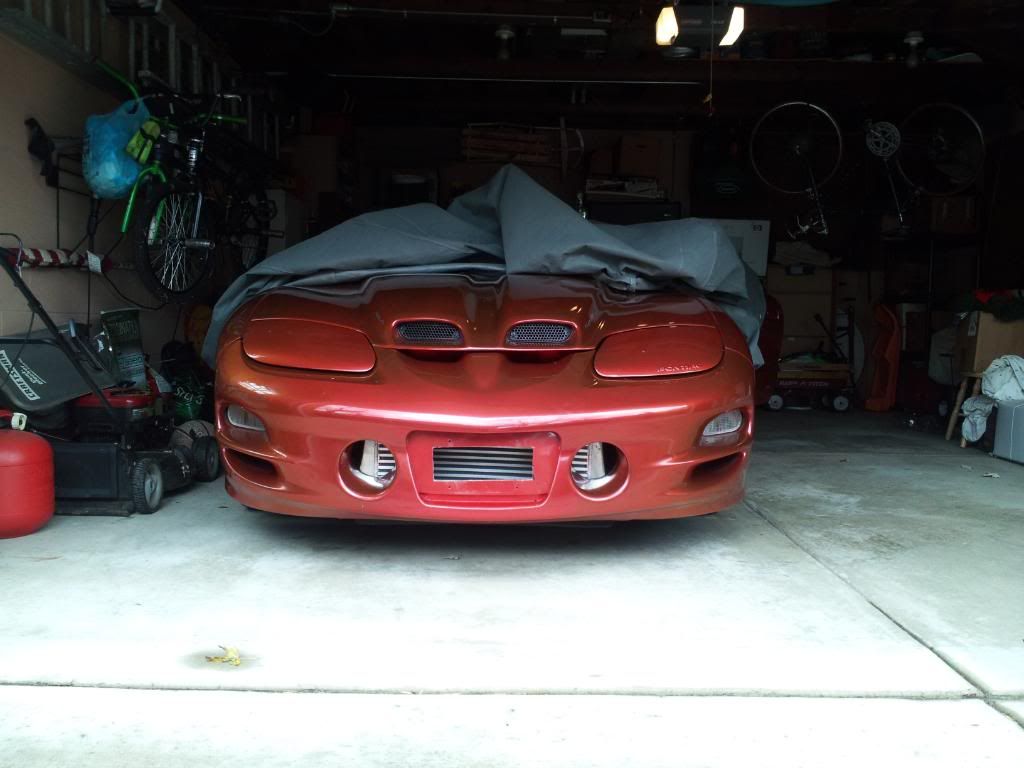
Ill be cutting the front bumper out some more, we are required to have a front plate here so ill come up with something better but this was just to see how it would look before i cut it all out, if i choose to.
 11-28-2011, 10:36 AM
#38
Seriously could not have done without my dad. He's a pipefitter by trade so he really helped on the welding and a lot of that little stuff.
No joke, the hardest part was those damn motor mounts. That was so aggravating. The biggest thing lesson i learned was that A LOT of time goes into something like this. It really made me realize why buying turbo setups can be so expensive. The work may not be all that challenging, its just extremely time consuming if you want to do things a certain way. And there are still things id like to go back and do differently, but due to resources and the time i had left to finish this, im ok with how everything turned out.
Theres also the fact that no one is lying when they say all the little **** adds up quick. You need at least $500 to cover all the lil stuff that pops during the build. Its stuff you simply cannot plan for as everyone will need different stuff.
 11-28-2011, 11:48 PM
#40
Thanks i appreciate it.
How are your IAT's? i went back and looked at your thread and noticed we ran the intercooler piping the same, or maybe i sub-consciously copied you.. haha but either way im wondering if the hotside/radiator are affecting your IAT's any?
How are your IAT's? i went back and looked at your thread and noticed we ran the intercooler piping the same, or maybe i sub-consciously copied you.. haha but either way im wondering if the hotside/radiator are affecting your IAT's any?