Turbonetics 6665 Twin Turbo build, Fab process started Post #71! finally!
 12-31-2012, 01:06 PM
#81
thanks man, and no kidding, its good to see more and more twin setups! Its definitively A LOT of work... holy cow...
Ill see what i can come up with. I seen where a guy made the hole under the fuse boxes larger, and stuffed them down. then he made a plate to cover them. Ill look into it more when i get to that part. My main focus right now is getting the turbos mounted and the cold side done so i can pull the motor and start doing the tedious things like that.
Ill see what i can come up with. I seen where a guy made the hole under the fuse boxes larger, and stuffed them down. then he made a plate to cover them. Ill look into it more when i get to that part. My main focus right now is getting the turbos mounted and the cold side done so i can pull the motor and start doing the tedious things like that.
 12-31-2012, 07:54 PM
#82
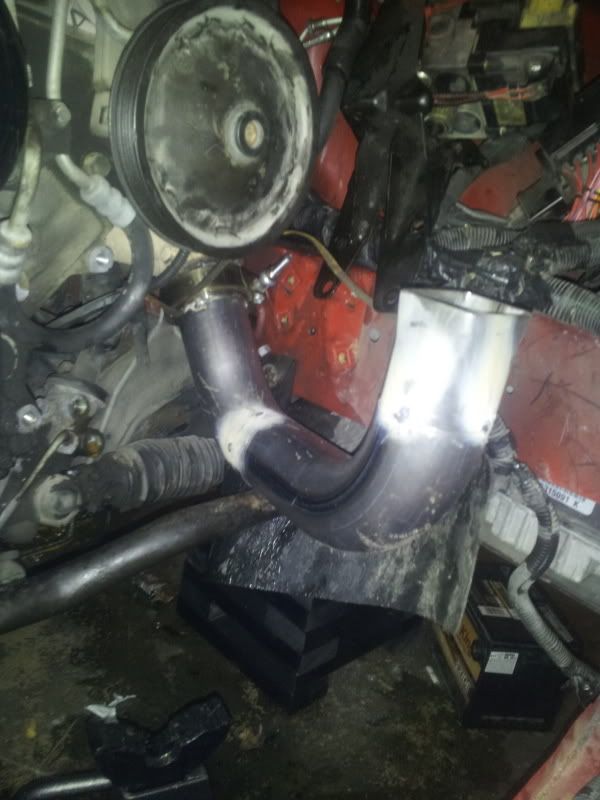
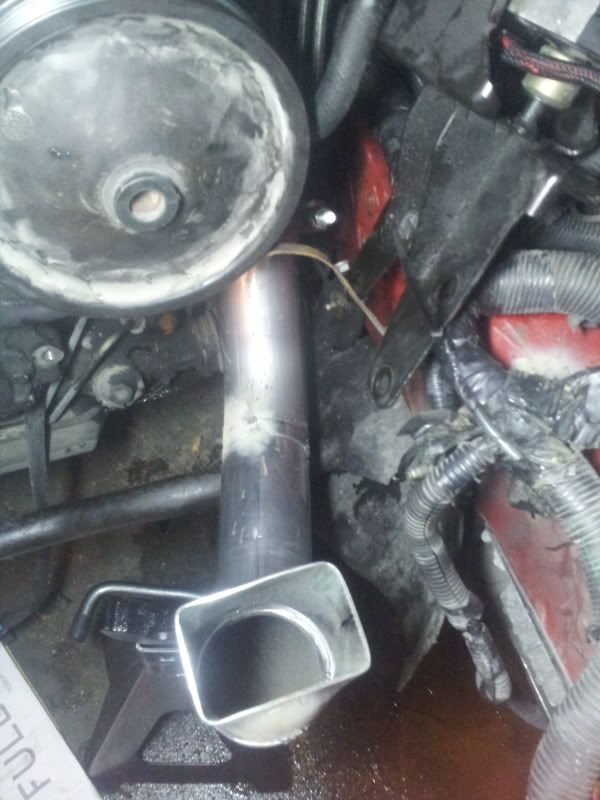
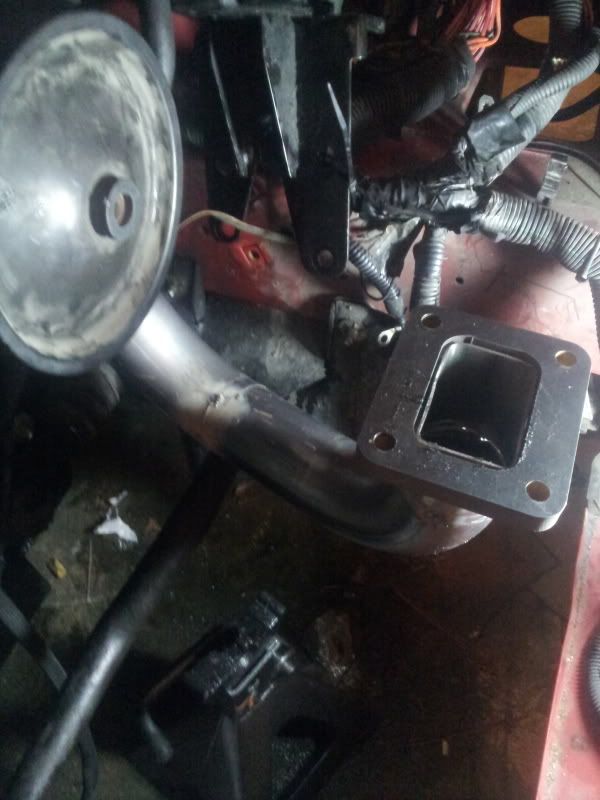
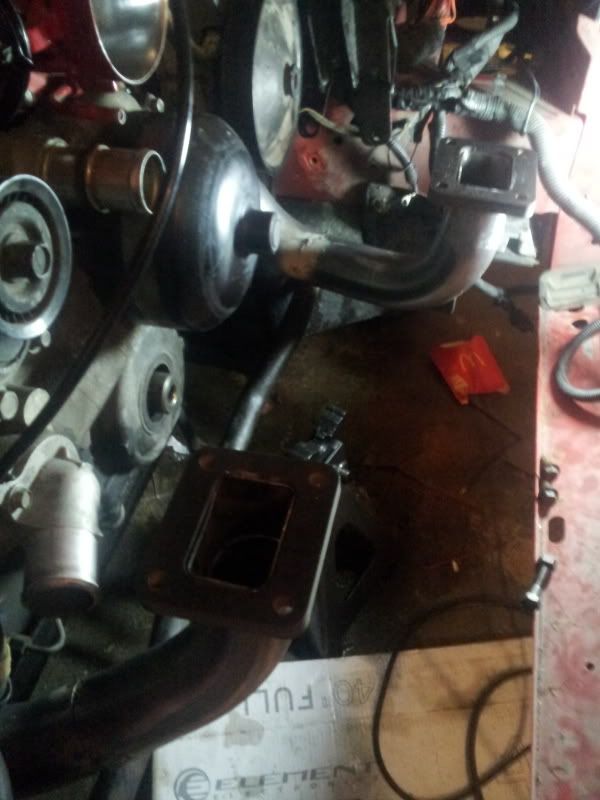
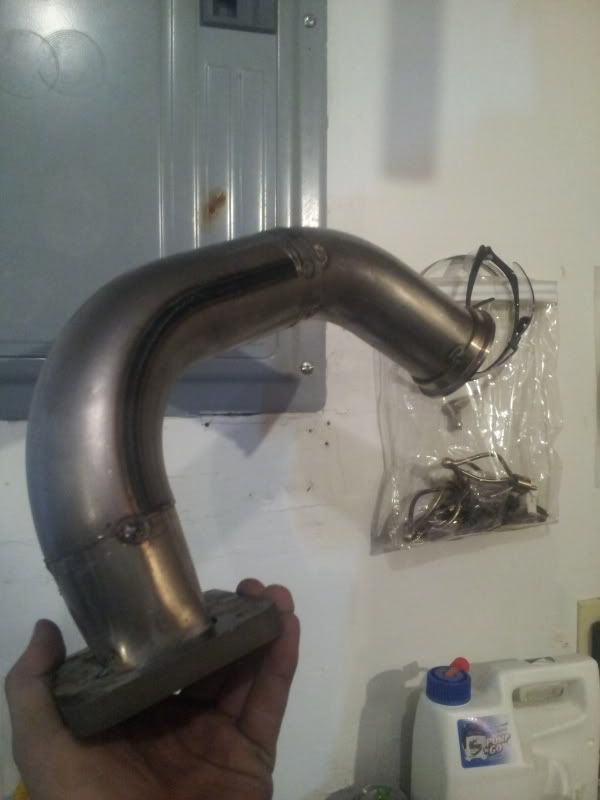
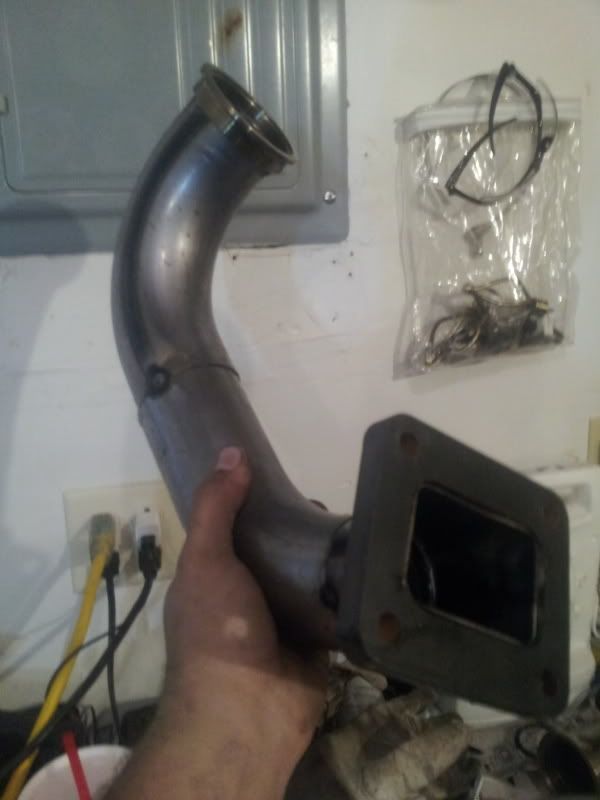
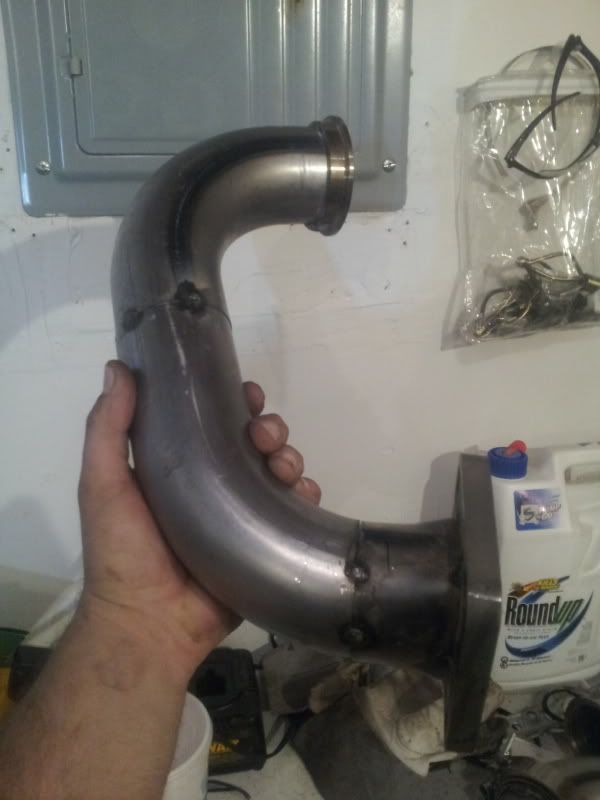
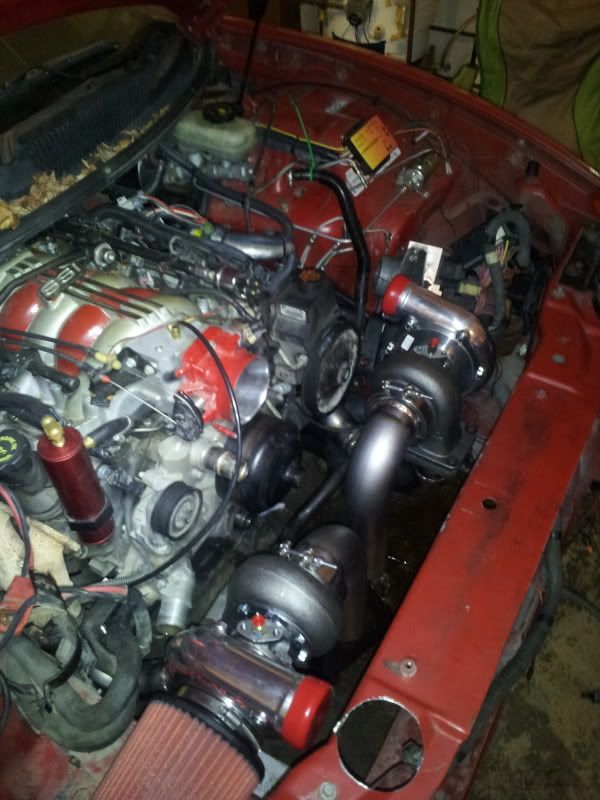
Made some more progress tonight. Got the drivers side piping done from the manifold to the turbo. Now i just gotta find a good TIG welder. Theres a few places in town, but i want to make sure its professional looking. Not just some monkey in muffler shop who thinks he can weld.. Ill move on getting my wastegates mounted next, then fab the cold side, then the motor should be read to be pulled out.

01-08-2013, 08:44 PM
#83
Another update.
Got my hotside all TIG welded and got my turbos positioned. Everything came out pretty nicely. I gotta get my wastegates mounted then start on the cold side. Its moving slowly, im in the process of moving so....itll get there eventually. heres a couple pics. excuse the dirty engine bay and garage. its all getting painted n e way.
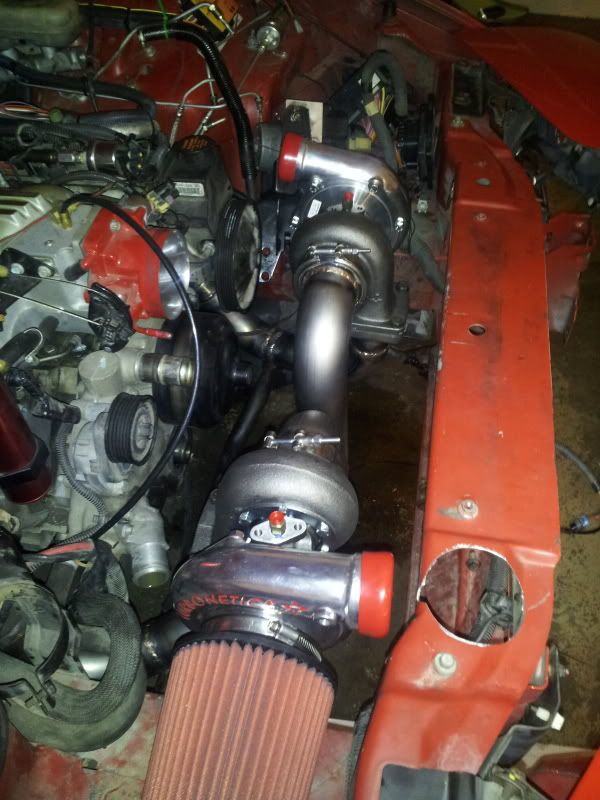
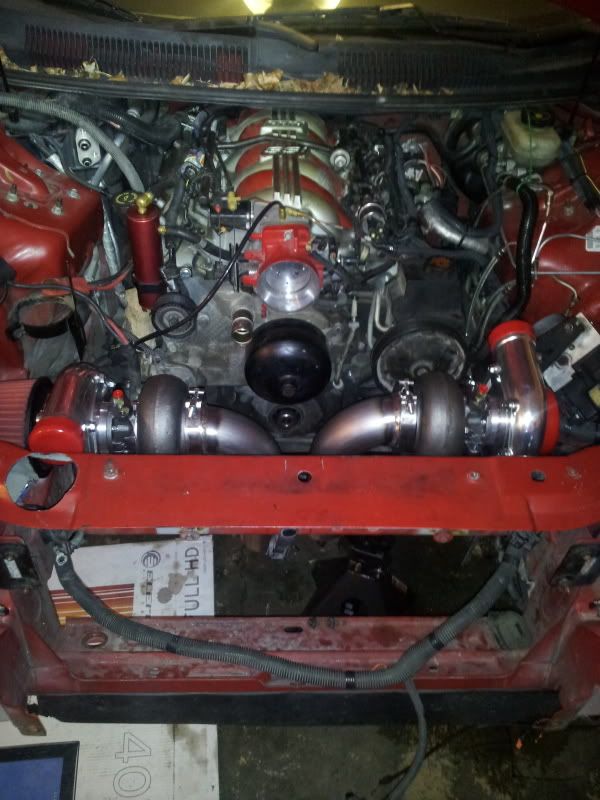
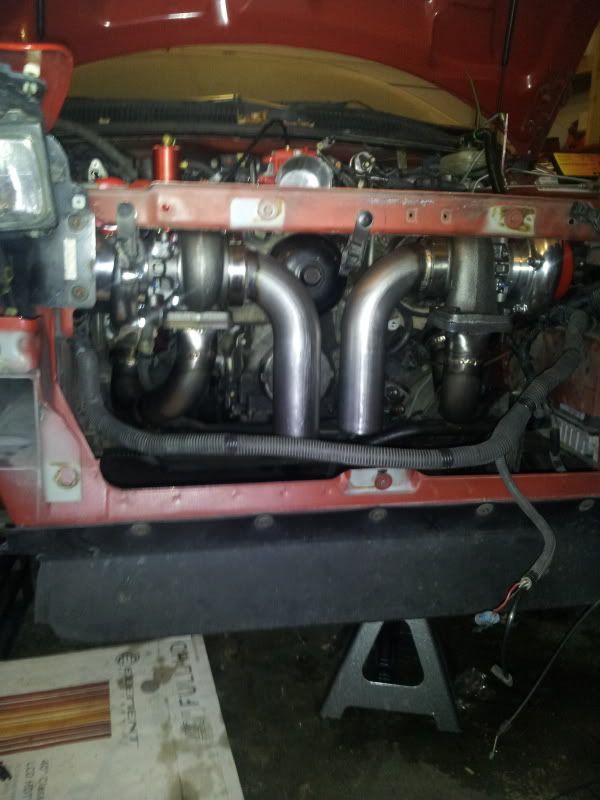
Got my hotside all TIG welded and got my turbos positioned. Everything came out pretty nicely. I gotta get my wastegates mounted then start on the cold side. Its moving slowly, im in the process of moving so....itll get there eventually. heres a couple pics. excuse the dirty engine bay and garage. its all getting painted n e way.
01-08-2013, 10:10 PM
#84
Coming along nicely! 
__________________

Featuring 6 different turbo kits for your F-body!
Check us out on Facebook at: www.facebook.com/HuronSpeed
Featuring 6 different turbo kits for your F-body!
Check us out on Facebook at: www.facebook.com/HuronSpeed
 01-10-2013, 03:11 PM
#87
ya i am, degreased, cleaned, then painted. Ive been lookin at the SJM ABS delete, i have their line lock. Still on the fence on deleting it. I have the drivers side mocked up to where i can keep it if i need to. I need to figure out what to do with my fuse boxes. i really really dont wanna cut the wires and re-route those damn things. i found a thread on here where a guy relocated them without cutting anything, wish i could find it again.
01-13-2013, 12:02 PM
#88
Here's how I moved my fuse boxes and headlight relay thingamajigger. https://ls1tech.com/forums/13618135-post278.html I ended up cutting the hole larger later on to make it easier to get them back out.
Id rather do it that way then to cut the wires and extend them. That seems like a nightmare. i may cut the top of the frame and go a step further and hide the main harness then make a sheet metal cover to go over it. I dunno, ill worry about it when the motor is out. Im at a stand still right now until i get into this house. I have to do the cold side and position my wastegates then the motor can come out. But i cant spend n e money until im in this house, i NEED this place so i have my own garage. I appreciate the help!
01-13-2013, 10:19 PM
#89
Id rather do it that way then to cut the wires and extend them. That seems like a nightmare. i may cut the top of the frame and go a step further and hide the main harness then make a sheet metal cover to go over it. I dunno, ill worry about it when the motor is out. Im at a stand still right now until i get into this house. I have to do the cold side and position my wastegates then the motor can come out. But i cant spend n e money until im in this house, i NEED this place so i have my own garage. I appreciate the help!
01-14-2013, 07:00 PM
#93
04-01-2013, 07:18 PM
#95
Dude i just now seen your post, the subscriptions arent working right for some reason. to answer your question... unfortunately no.. not yet. i ended up buying a house that a guy was in the middle of rebuilding, and get to move in (finally) on saturday, so im hoping to have the engine out in the next 2 weeks. I do have the AES390 PAID OFF finally lol. Going April 20th to assemble it myself. then I'll be working on it as much as money/time allow me to. My plans are to have everything good to go by june minus a transmission. I will probably end up making a new thread when i get the engine pulled, since this one is kinda scatter brained and old..... Work is up and down here lately so, like i said, its all about time/money. Itd be awesome if i could drive it this fall..we will see. Heres a few pics of my new surgery room though  Im STOKED to have my own garage for the first time to work on my car when i want.
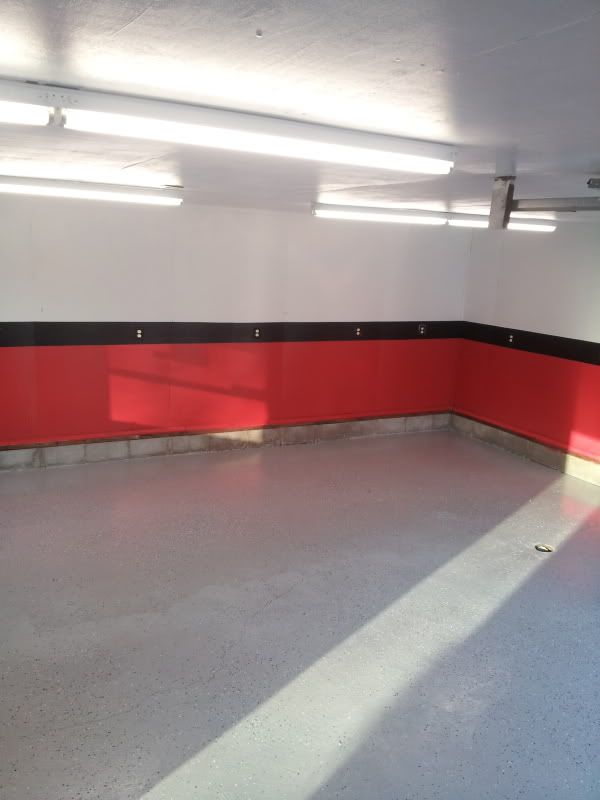
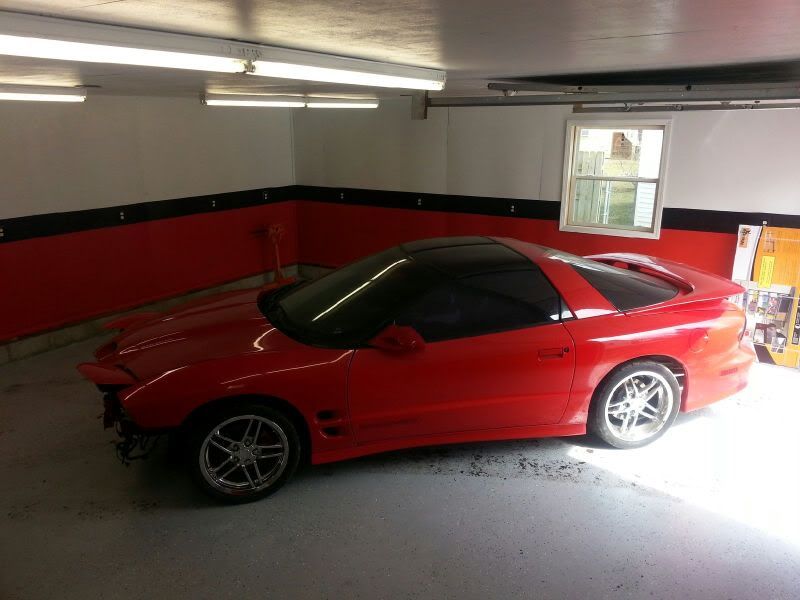
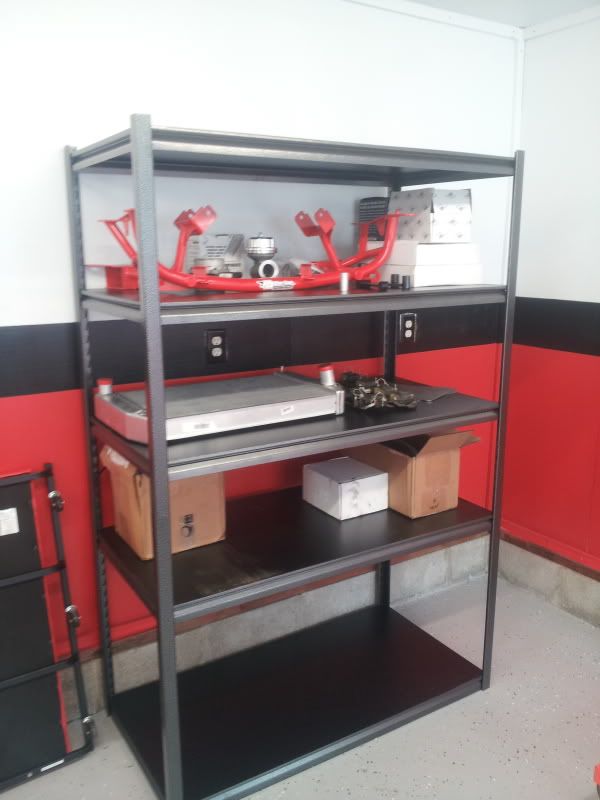
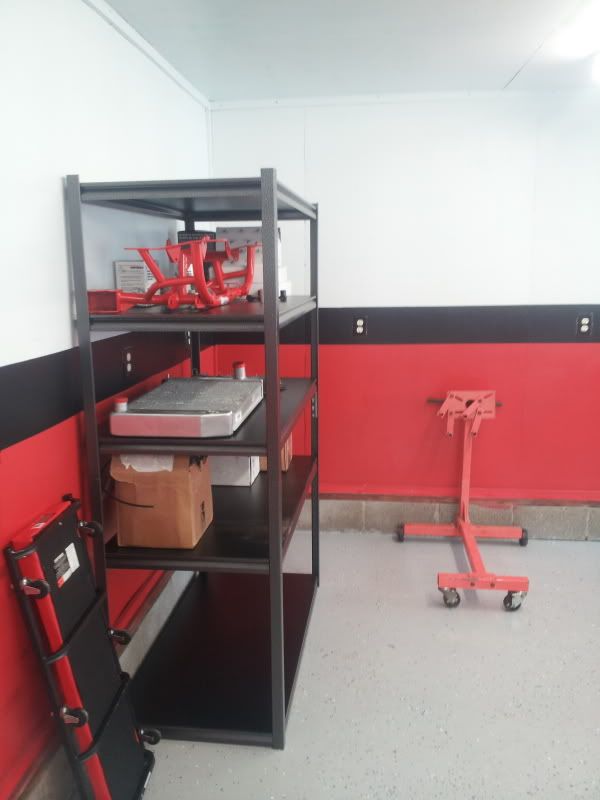

It'll get there!!!
Im STOKED to have my own garage for the first time to work on my car when i want.It'll get there!!!
04-01-2013, 07:34 PM
#98
TECH Veteran
iTrader: (17)
Join Date: Mar 2009
Location: Indy
Posts: 4,220
Likes: 0
Received 0 Likes
on
0 Posts

Congrats bro! I like you am in the middle of a build, buying a house and once thats done, building a garage! lol.
Congrats on the purchase and the garage looks nice man! **** man, didnt even realize you are about an hour away from me either! When that thing is done, it must come down to Indy on the south side!
Congrats on the purchase and the garage looks nice man! **** man, didnt even realize you are about an hour away from me either! When that thing is done, it must come down to Indy on the south side!
04-01-2013, 07:57 PM
#99

Congrats bro! I like you am in the middle of a build, buying a house and once thats done, building a garage! lol.
Congrats on the purchase and the garage looks nice man! **** man, didnt even realize you are about an hour away from me either! When that thing is done, it must come down to Indy on the south side!
Congrats on the purchase and the garage looks nice man! **** man, didnt even realize you are about an hour away from me either! When that thing is done, it must come down to Indy on the south side!
I'll def bring it down! Ive never been down to indy for a car gathering. just lame *** kokomo and **** box 4 cylinders with fart cans... :-/. You on facebook?