


~Procharger Build Write up~
Figured this would help people out a lot on the future. This is a write up on all the parts you will need to piece together a procharger kit & pics and info on how to install it. Might take a few months to get this write up done...
I'll start with the complete parts list of things you will need and include info on why you need each part. A lot of the parts you will need will depend on the HP you are looking for!
#1 Head unit- There are 3 main head units from procharger. The p1sc (usually good to 500-550rwhp), The D1sc (usually good to 700-750hp), And the F1-F3 series (good from 1000hp-2100hp!) How much power you are wanting to make will be the deciding factor in which head unit you will need. If you want to buy new I suggest looking at Brute speed! If used search the parts classified's on here tell you find one that pops up. I paid $1300 for my D1sc with 3k miles!

#2 J-bracket You need a J-bracket with the mounting hardware to mount the Procharger to your engine. What hardware you need to mount your head unit will depend if you have a p1sc, D1sc, or F series procharger and also depend if you plan to run a 6-rib or 8 rib belt setup. I bought my J-bracket in the parts classifieds for $225 shipped!
.jpg)
#3 Bypass Valve This can depend on if you want loud noise and also depend on your power level. On 12 Psi and above a Big Red bypass valve is usually recommended and on anything lower you can use a proflow bypass. The bypass valve allows boost pressure to escape when your throttle blade shuts so you don't put that pressure that is built up back into your procharger head unit. If you didn't have a bypass valve you would likely tear up your head unit. I plan to run boost under 12 Psi so I went with the proflow bypass valve and got it for $125 shipped on ls1tech.

#4 ATI Super Damper harmonic balancer # 918853- You need to purchase an ATI balancer if you plan to run an 8 rib setup.

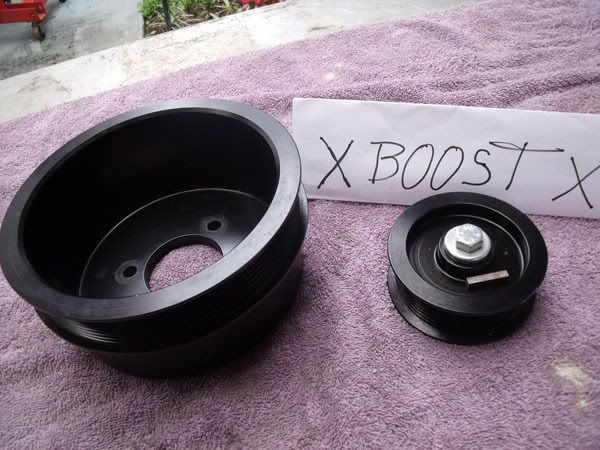
#5 Procharger Belt driven Pulleys- You need a head unit pulley and a crank pulley.. The crank pulley will be bolted to your harmonic balancer and will be atached to your head unit pulley with a procharger supplied belt. If you have an 8 Rib setup you will need an 8 rib head unit pulley, crank pulley, and 8 rib belt. 8 rib setups require you to buy an ATI harmonic balancer. 6 rib setups bolt on to your stock balancer... The amount of boost your procharger will make will depend on what size head unit pulley you get. I recomend calling Bob at brute speed and ask what size pulley to get for the boost level you want.
#6 Intercooler kit- There are 2 different types of intercooler kits you can put on your procharged f-body. Either a FMIC (front mounted intercooler) or you can use prochargers Twin Intercooler kit which will mount the intercoolers on the right and left side of the car tucked up where you splash guards are now. You can get an ebay fmic and custom mount it all yourself or procharger makes a FMIC kit that should bolt up directly with very little custom work needed.
Twin intercooler kit
.jpg)
Front mount kit
.jpg)
# 7 Fan Setup- You have to ditch the stock fans because the procharger sets on the drivers side of your engine and won't fit with stock fans. First you need a new fan bracket for your new fan. I recommend buying the procharger fan mounting bracket from Brute Speed. You will need a 16" fan to go with your procharger fan mount bracket. People have had problems with there cars overheating with the supplied 16" procharger fan so most just use a 16" spal fan part #30102082. It can be bought here at a1electric https://www.a1electric.com/Merchant2..._Code=30102082
Procharger fan mount bracket

#8 Air inlet & Filter- You need a procharger ait inlet hat and filter to mount on the intake side of your procharger head unit. You can either use the inlet assembly designed for the f-body or use the bigger and bettery truck inlet hat. The trucket inlet hat and filter flows better and is cheaper! People have had trouble with the truck inlet hat staying on the procharger so it is recomended you clamp it on with a t-bolt clamp!
Air inlet hat

#9 Boost Gauge- There are many different types of boost gauges you can get. This is pretty basic and people usually just mount them with a 2-3 pillar mount in the car. I bought the procharger boost gauge from Brute Speed for a great price.

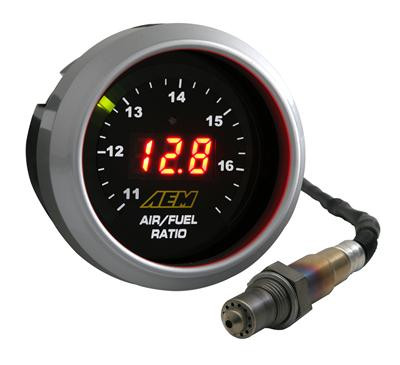
#10 A/F ratio Gauge- I have an AEM gauge. You will want to install the bung end of the gauge in your drivers side y-pipe just after the header and have it pointing at a slight downward angle in the exhaust. This is the spot it will read most accurate. Installing the A/F gauge will help you tuner out a lot and make sure you have the proper a/f ratio for your tune!
#11 crank pin kit- You need a crank pin kit to pin the harmonic balancer to your crankshaft so you don't spin the balancer on the crankshaft and damage it. I got my crank pin kit from Brute speed!
.... Pic of crank pinned with balancer....

#12 Procharger Oil- Prochargers are great because you don't have to cut a hole in your oil pan for oil feed. Procharger has it's own special oil you can buy from Brute speed or from procharger directly and you just poor it in your head unit and go!! It needs to be changed regularly. Most change at the same time they change engine oil I believe.

#13 Fuel system- Your stock fuel pump and injectors likely won't keep up if you're over 400hp so you need to swap them out! I am using a racetronix pump that is good to around 600hp. If you plan on going over the 600hp mark you probably need a dual pump system. What injector you get depends on the boost level you plan to run. You will likely need atleast 60lb injectors...
#14 Spark plugs- I am using Br7ef spark plugs. Once your boosted you need a colder plug. A br7ef works well because it is a colder non projected tip plug. You need to gap them at about .022-.028 or so.
#15 Tune- I recommend getting the car dyno tuned or street tuned immediately. If you don't get a good tune your engine will blow up. Getting a good tune is one of the most important things you need to keep your engine together once you're boosted! Do not skimp out with a crappy tune you will pay big time in the end!!!!
# 16 Stock parts that might need built and how to make them last a little longer! (Transmission, Engine, Rearend)
Transmission- If you have a stock auto and you want it to last awhile so you can save for a built tranny you need to run a lower boost level to start, set your shift points low, and have the tranny tunned for quick hard shifts! Once you are have the $ I recommend going with FLT or RPM to rebuild your transmission. They are both proven company's and sponsor this site! I haven't decided on which I will use, but I hear great things about both of them!
Engine- Now if you're running low boost and you have a good tune it is likely your engine will last a good while without a problem, but from what I hear boost is addicting and you will eventually want to push it harder! The ls1 doesn't usually like to hold together to long once you go past the 10psi mark, but if you plan to push it you can add meth, get a good tune, and hope for the best! I don't recommend doing this unless you have the extra $ to spring for a new engine! As far as what engine builder and what engine parts to get I can't recommend because there are just sooo many options out there and that's one thing I haven't looked into a whole lot. If you don't have the $ to build another engine just do what everyone else does and get a junkyard 5.3 or 6.0, swap them over the weekend, and start racing again!
Rearend- This is a part you can make last a long time if you stay away from doing hard launches. Auto's are wayyyy easier on the rear than a manual, so if you have a 6-speed and don't have the $ for a rear I recommend staying away from hard launches on sticky tires. Either way with the new found power it is another week point that could break so be prepared to build it as well!
__________________________________________________ __________________________________________________ _________
Here are some threads that may help you also.
Procharged cars 1/4 mile times
https://ls1tech.com/forums/forced-in...ile-times.html
I'll start with the complete parts list of things you will need and include info on why you need each part. A lot of the parts you will need will depend on the HP you are looking for!
#1 Head unit- There are 3 main head units from procharger. The p1sc (usually good to 500-550rwhp), The D1sc (usually good to 700-750hp), And the F1-F3 series (good from 1000hp-2100hp!) How much power you are wanting to make will be the deciding factor in which head unit you will need. If you want to buy new I suggest looking at Brute speed! If used search the parts classified's on here tell you find one that pops up. I paid $1300 for my D1sc with 3k miles!
#2 J-bracket You need a J-bracket with the mounting hardware to mount the Procharger to your engine. What hardware you need to mount your head unit will depend if you have a p1sc, D1sc, or F series procharger and also depend if you plan to run a 6-rib or 8 rib belt setup. I bought my J-bracket in the parts classifieds for $225 shipped!
#3 Bypass Valve This can depend on if you want loud noise and also depend on your power level. On 12 Psi and above a Big Red bypass valve is usually recommended and on anything lower you can use a proflow bypass. The bypass valve allows boost pressure to escape when your throttle blade shuts so you don't put that pressure that is built up back into your procharger head unit. If you didn't have a bypass valve you would likely tear up your head unit. I plan to run boost under 12 Psi so I went with the proflow bypass valve and got it for $125 shipped on ls1tech.
#4 ATI Super Damper harmonic balancer # 918853- You need to purchase an ATI balancer if you plan to run an 8 rib setup.
#5 Procharger Belt driven Pulleys- You need a head unit pulley and a crank pulley.. The crank pulley will be bolted to your harmonic balancer and will be atached to your head unit pulley with a procharger supplied belt. If you have an 8 Rib setup you will need an 8 rib head unit pulley, crank pulley, and 8 rib belt. 8 rib setups require you to buy an ATI harmonic balancer. 6 rib setups bolt on to your stock balancer... The amount of boost your procharger will make will depend on what size head unit pulley you get. I recomend calling Bob at brute speed and ask what size pulley to get for the boost level you want.
#6 Intercooler kit- There are 2 different types of intercooler kits you can put on your procharged f-body. Either a FMIC (front mounted intercooler) or you can use prochargers Twin Intercooler kit which will mount the intercoolers on the right and left side of the car tucked up where you splash guards are now. You can get an ebay fmic and custom mount it all yourself or procharger makes a FMIC kit that should bolt up directly with very little custom work needed.
Twin intercooler kit
Front mount kit
# 7 Fan Setup- You have to ditch the stock fans because the procharger sets on the drivers side of your engine and won't fit with stock fans. First you need a new fan bracket for your new fan. I recommend buying the procharger fan mounting bracket from Brute Speed. You will need a 16" fan to go with your procharger fan mount bracket. People have had problems with there cars overheating with the supplied 16" procharger fan so most just use a 16" spal fan part #30102082. It can be bought here at a1electric https://www.a1electric.com/Merchant2..._Code=30102082
Procharger fan mount bracket
#8 Air inlet & Filter- You need a procharger ait inlet hat and filter to mount on the intake side of your procharger head unit. You can either use the inlet assembly designed for the f-body or use the bigger and bettery truck inlet hat. The trucket inlet hat and filter flows better and is cheaper! People have had trouble with the truck inlet hat staying on the procharger so it is recomended you clamp it on with a t-bolt clamp!
Air inlet hat
#9 Boost Gauge- There are many different types of boost gauges you can get. This is pretty basic and people usually just mount them with a 2-3 pillar mount in the car. I bought the procharger boost gauge from Brute Speed for a great price.
#10 A/F ratio Gauge- I have an AEM gauge. You will want to install the bung end of the gauge in your drivers side y-pipe just after the header and have it pointing at a slight downward angle in the exhaust. This is the spot it will read most accurate. Installing the A/F gauge will help you tuner out a lot and make sure you have the proper a/f ratio for your tune!
#11 crank pin kit- You need a crank pin kit to pin the harmonic balancer to your crankshaft so you don't spin the balancer on the crankshaft and damage it. I got my crank pin kit from Brute speed!
.... Pic of crank pinned with balancer....
#12 Procharger Oil- Prochargers are great because you don't have to cut a hole in your oil pan for oil feed. Procharger has it's own special oil you can buy from Brute speed or from procharger directly and you just poor it in your head unit and go!! It needs to be changed regularly. Most change at the same time they change engine oil I believe.
#13 Fuel system- Your stock fuel pump and injectors likely won't keep up if you're over 400hp so you need to swap them out! I am using a racetronix pump that is good to around 600hp. If you plan on going over the 600hp mark you probably need a dual pump system. What injector you get depends on the boost level you plan to run. You will likely need atleast 60lb injectors...
#14 Spark plugs- I am using Br7ef spark plugs. Once your boosted you need a colder plug. A br7ef works well because it is a colder non projected tip plug. You need to gap them at about .022-.028 or so.
#15 Tune- I recommend getting the car dyno tuned or street tuned immediately. If you don't get a good tune your engine will blow up. Getting a good tune is one of the most important things you need to keep your engine together once you're boosted! Do not skimp out with a crappy tune you will pay big time in the end!!!!
# 16 Stock parts that might need built and how to make them last a little longer! (Transmission, Engine, Rearend)
Transmission- If you have a stock auto and you want it to last awhile so you can save for a built tranny you need to run a lower boost level to start, set your shift points low, and have the tranny tunned for quick hard shifts! Once you are have the $ I recommend going with FLT or RPM to rebuild your transmission. They are both proven company's and sponsor this site! I haven't decided on which I will use, but I hear great things about both of them!
Engine- Now if you're running low boost and you have a good tune it is likely your engine will last a good while without a problem, but from what I hear boost is addicting and you will eventually want to push it harder! The ls1 doesn't usually like to hold together to long once you go past the 10psi mark, but if you plan to push it you can add meth, get a good tune, and hope for the best! I don't recommend doing this unless you have the extra $ to spring for a new engine! As far as what engine builder and what engine parts to get I can't recommend because there are just sooo many options out there and that's one thing I haven't looked into a whole lot. If you don't have the $ to build another engine just do what everyone else does and get a junkyard 5.3 or 6.0, swap them over the weekend, and start racing again!
Rearend- This is a part you can make last a long time if you stay away from doing hard launches. Auto's are wayyyy easier on the rear than a manual, so if you have a 6-speed and don't have the $ for a rear I recommend staying away from hard launches on sticky tires. Either way with the new found power it is another week point that could break so be prepared to build it as well!
__________________________________________________ __________________________________________________ _________
Here are some threads that may help you also.
Procharged cars 1/4 mile times
https://ls1tech.com/forums/forced-in...ile-times.html
Last edited by sweet99ss; Mar 12, 2013 at 12:05 AM.
Alright well all the parts needed are above. Now I will start adding pics and details about all the parts I'M installing on MY car.
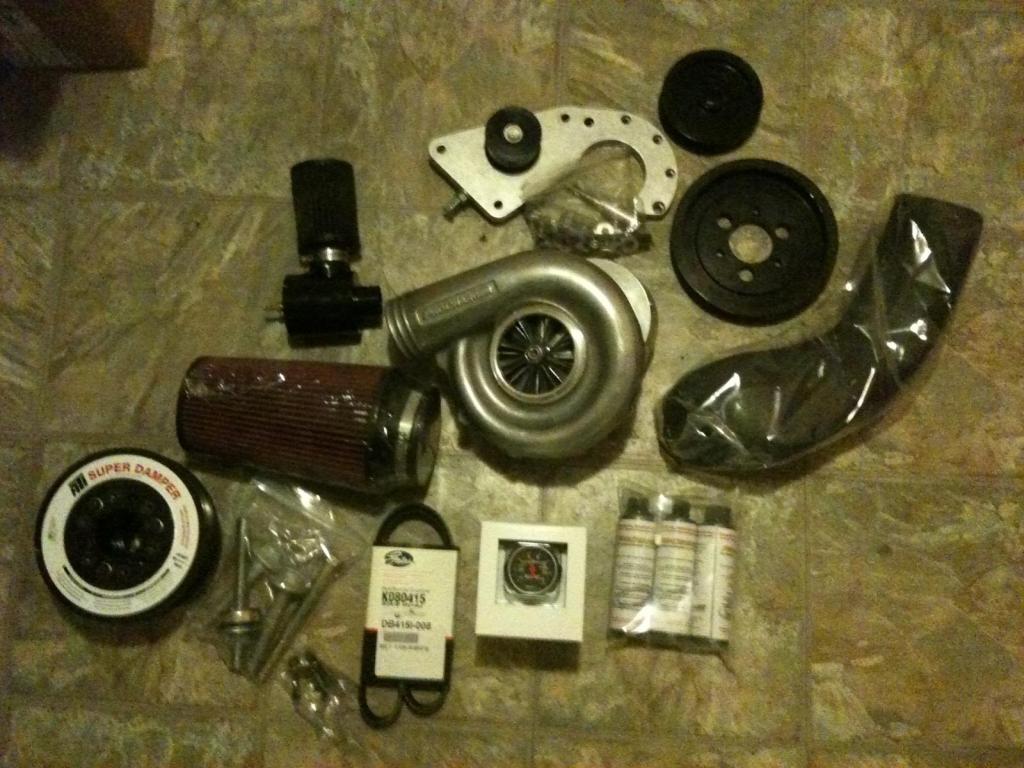
Here is all the parts I have. Pretty much all of it except the FMIC and the Fan. I haven't bought the Fmic yet and the fan is already on the car.
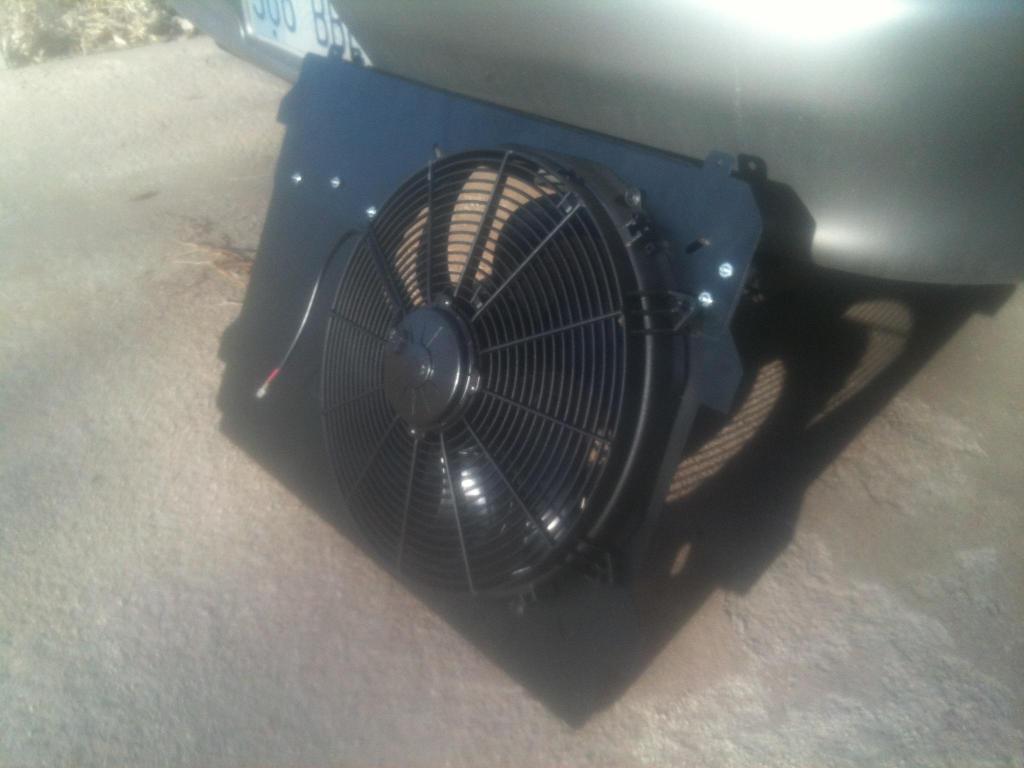
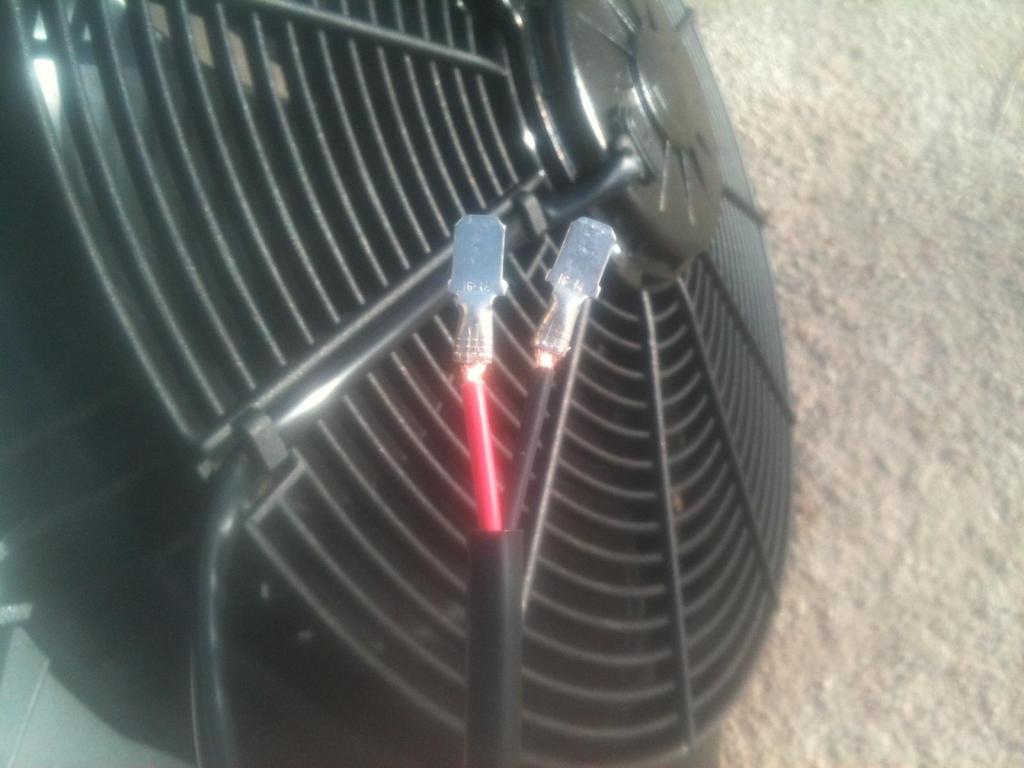
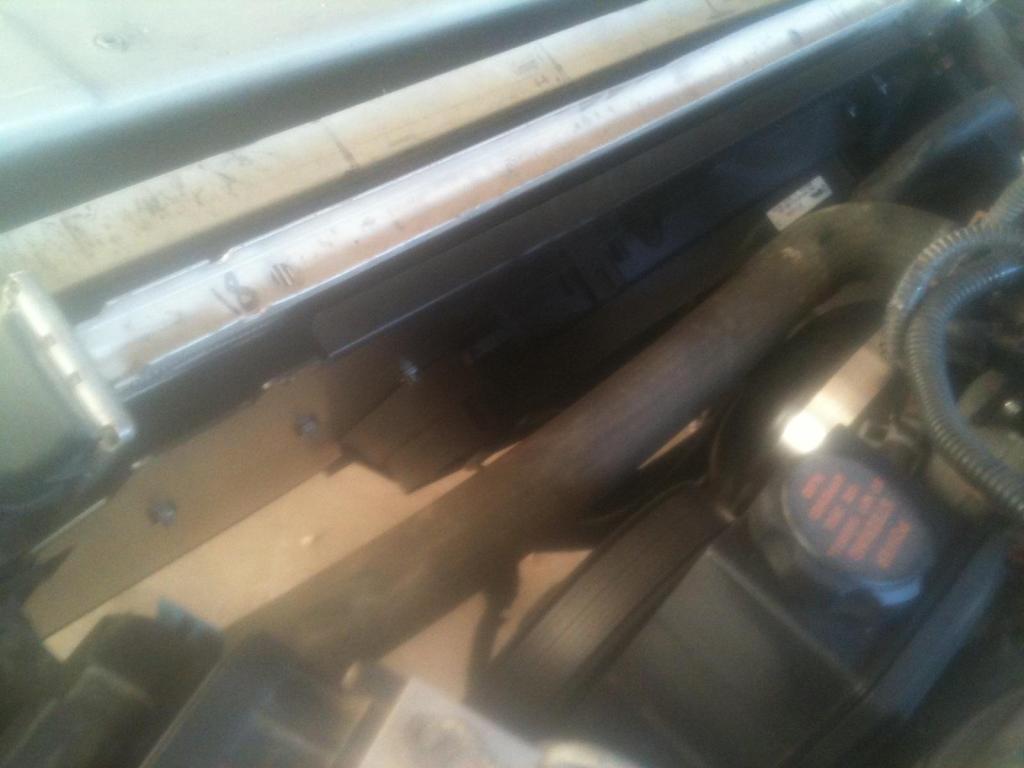
The only part I have installed so far is the Procharger fan shroud and the spal 16" fan. I bolted the spal fan on the procharger fan shroud. Then on the spal fan I spliced the wires and added male connectors that would fit in the stock wiring connection so I could leave the factory wiring all stock. Taped it all up with electrical tape and it was done. Only took about 20-30 mins to do it all including pulling the fan and adding in the new one.
Fan
Male connectors
Installed with plenty of room for the procharger to fit on the drivers side.
Here is all the parts I have. Pretty much all of it except the FMIC and the Fan. I haven't bought the Fmic yet and the fan is already on the car.
The only part I have installed so far is the Procharger fan shroud and the spal 16" fan. I bolted the spal fan on the procharger fan shroud. Then on the spal fan I spliced the wires and added male connectors that would fit in the stock wiring connection so I could leave the factory wiring all stock. Taped it all up with electrical tape and it was done. Only took about 20-30 mins to do it all including pulling the fan and adding in the new one.
Fan
Male connectors
Installed with plenty of room for the procharger to fit on the drivers side.
Last edited by sweet99ss; Jul 6, 2013 at 02:11 PM.
Yes I was. I figured it would be good to start a thread on putting together a procharger build how you want. You see so many turbo builds, but never any info on putting a procharger kit together.
Looking good, this will be a lot of help to many people. Bob
__________________
ATI ProCharger and Moser Sales 260 672-2076
PM's disabled, please e-mail me
E-mail: brutespeed@gmail.comob@brutespeed.com
https://brutespeed.com/ Link to website

ATI ProCharger and Moser Sales 260 672-2076
PM's disabled, please e-mail me
E-mail: brutespeed@gmail.comob@brutespeed.com
https://brutespeed.com/ Link to website
Trending Topics
LS1 Tech Stories
The Best V8 Stories One Small Block at Time

Topdon ONE vs. Artidiag 800 BT2: Which is the Diagnostic Tablet For You?
Pouria Savadkouei
Gas Monkey Built a 6-Wheel Ferrari Testarossa With a Corvette LT4 Engine
Verdad Gallardo
7 Most Reliable High-Performance Engines GM Has Ever Built
Verdad Gallardo
Amazing '71 Camaro Restomod Is Modern Muscle Car Under the Skin
Verdad Gallardo
6 Common C5 Corvette Failures and What's Involved In Repairing Them
Pouria Savadkouei
Retro Modern Bandit Pontiac Trans AM Comes With Burt Reynolds' Autograph
Verdad Gallardo
Top 10 Greatest Cadillac V Series Performance Models Ever, Ranked
Pouria Savadkouei
Top 10 Most Powerful Chevy Trucks Ever Made!

Hennessey's New Supercharged Silverado ZR2 Has 700 HP
Verdad Gallardo
Thanks!
Appreciate it! Maybe once it's all finished it could be made a sticky!
Thanks Bob! I hope you don't mind I borrowed a lot of pics and info from you!
That's what I'm going for.. I think you would see more guys going procharger if they understood how easy it is to piece a kit together. A lot of stickies on turbo stuff, but not much for the procharger guys.
I think some have had success with it. I just wanted to do it right the first time. It's really one of the only draw backs of the intire kit. With FI you create heat. You can always sell your procharger fan and buy the spal fan for $140. Not to big of a deal IMO
I hate to tell you this but I didn't receive a tracking number last night for it, which means they are out of stock on the crank pinning kits. ATI Performance Products 918993 will work, and you should be able to get one in a day or so. I can refund you for the one from ProCharger. I only had one in stock at the shop and it is on it's way to Guam. Bob
__________________
ATI ProCharger and Moser Sales 260 672-2076
PM's disabled, please e-mail me
E-mail: brutespeed@gmail.comob@brutespeed.com
https://brutespeed.com/ Link to website
ATI ProCharger and Moser Sales 260 672-2076
PM's disabled, please e-mail me
E-mail: brutespeed@gmail.comob@brutespeed.com
https://brutespeed.com/ Link to website


Just an FYI, the supplied 16" procharger fan works fine for me. I run the stock t-stat, and in the hottest days of the summer, with the a/c on, I never saw temps go above 205-207 degrees, which is perfectly fine.
It doesn't hurt to run a SPAL, but it's also not neccesary either. I think part of my success is I completely evacuated all air pockets out of my coolant system with a specific vacum pump setup.
I used this setup, which completely removes any trapped air in the system, which I highly reccomend people do.
http://vimeo.com/40361575

The ATI balancer has a key way and requires the use of their pinning kit which inserts the pin 90deg to the crank. You will have to remove the balancer to do that. The pic you have is for pinning a stock balancer. Also no mention of pcv modifications to avoid pressurizing the crankcase. Otherwise good info!
The ATI balancer has a key way and requires the use of their pinning kit which inserts the pin 90deg to the crank. You will have to remove the balancer to do that. The pic you have is for pinning a stock balancer. Also no mention of pcv modifications to avoid pressurizing the crankcase. Otherwise good info!
I hate to tell you this but I didn't receive a tracking number last night for it, which means they are out of stock on the crank pinning kits. ATI Performance Products 918993 will work, and you should be able to get one in a day or so. I can refund you for the one from ProCharger. I only had one in stock at the shop and it is on it's way to Guam. Bob
The ATI balancer has a key way and requires the use of their pinning kit which inserts the pin 90deg to the crank. You will have to remove the balancer to do that. The pic you have is for pinning a stock balancer. Also no mention of pcv modifications to avoid pressurizing the crankcase. Otherwise good info!