My Redhead: "Victoria" - Iron 402 TT
 06-08-2014, 10:16 PM
#1

Kinda nervous to post because it's no where near as nice as some builds on here, but here goes! Pictures start in post 2 since i know that's what we all care about 
Motor:
402 cu in LQ-based
Callies Dragonslayer 4.000"
Callies Compstar H-Beams 6.125"
Wiseco -10cc
ARP head+main studs
TSP MS3 cam
Lunati 0.660 lift valvesprings
2.02/1.60 valves
Harland Sharp 1.8 roller rockers
Comp hardened 7.400" pushrods
LS7 lifters
FAST 102/102 (ditching for Holley Hi-Ram)
Truck coils
NGK TR6 spark plugs
2x Turbonetics 76/68mm .81AR turbos
2x XSPower 44mm blow-offs
2x Turbosmart 45mm wastegates
Fuel:
Twin Walbro 255's (ditching for triple AEM 340's)
-10 feed and return (overkill, yolo)
Aeromotive adjustable FPR
ID 1300/2000 (need to buy)
Drivetrain:
Stock T56 from a GTO (Will upgrade when money allows)
Monster Stage 3 (will upgrade when money allows)
Strange S60
S-Trac
35 spline axles
3.54 gear
5/8" studs
PST driveshaft
Wheels + tires:
Nitto NT555R 245/45/17 fronts 325/50/15 rears
Weld RTS 17x8 and 15x10.33
Exterior:
Planning on matte red vinyl wrap (hate all you want!) with a gloss black Berger panel, not sure to keep or get rid of the blacked out tails
Shoutouts (in no particular order):
John @ Huron Speed
Carl @ CRP
Bob @ Speed Industry
Story:
It all started in the summer of 2011 with my 99 V6. I get to thinking and finally convinced myself to find an LS1 and swap out the V6. I was working for Advance Auto Parts at the time, so i asked a few regulars if they knew about anything local. Found myself a complete motor, minus accessories, for $1200, and bought some odds and ends through the store. After reading through the Tech, i decided i wanted more, before i even began - figuring if i'm going to go through the trouble of swapping, i'd want more power than a stock LS1. So i scavenge my local junkyards and find an LQ4 out of a truck that had 120k on it, pop the heads off, find the cylinder walls look great! Perfect, a good way to start this build! I start buying parts through Tech, find some parts local, and finally have enough to get started. Summer of 2012, and i start tearing out the V6, and i get to thinking again... maybe a should get a turbo and really get myself into trouble. Since i had picked up a second job in February 2012, i had the extra cash so sure enough, i grabbed an On3Performance turbo, some stainless tubing, and bought all the necessary bits to rebuild the motor - so i could start with a fresh motor. Got everything ready to go and got the motor in, then the weather changes enough that i can no longer work on the car, since i'm keeping it at my mother's under a portable garage. In the meantime, i get a raise at my second job, enough to quit Advance, and yet again....i got to thinking. With all the newfound cash, why not put my big boy pants on and go big?! That's when some real cash starts magically flowing out of my wallet - forged 402 rotating assembly from TSP, twin Turbonetic 76/68's from Huron Speed, Strange S60 from CRP, FAST 102/102 found locally...Hot damn! Clearly, i really need to stop thinking so damn much, it's expensive! So with all that said, it's time to dive into the build, i hope you enjoy it as much as i have thus far, and i will continue to update the thread until it's completed.
Plan/Goals:
I want to hit north of 1000rwhp with the real target being breaking into standing mile racing, and hopefully putting up some good numbers! It'll be a weekend warrior because i live ~20 minutes away from Woodward where we do weekly car meets on Fridays and Saturdays. I do plan on going to the 1/4 mile drag strip more than a few times! However, i will NOT go until i have a cage and upgrade my trans.
To Do list:
Mostly hot/cold side and wiring harness. Lots of little stuff, of course. Gotta order the Hi-Ram, injectors, and pumps so i can get the fuel wrapped up, then just order wheels and dyno.
Current projected completion date: End of July 2014
TLDR: I'm gun go fast, updates will be slow. Working midnights sucks


 06-08-2014, 10:17 PM
#3
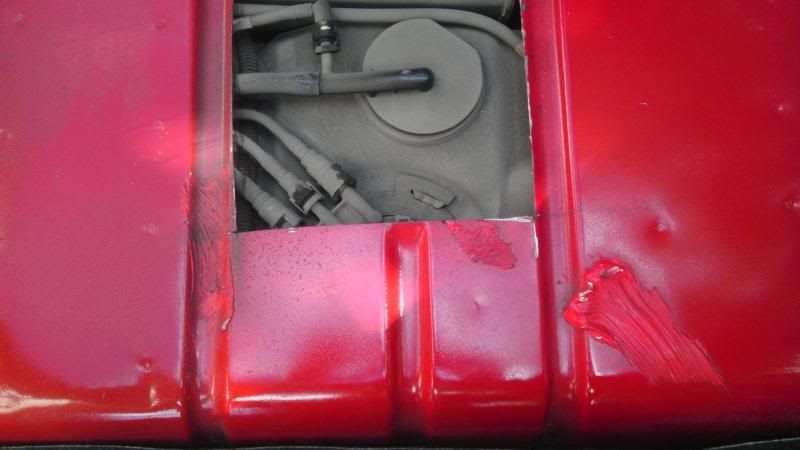
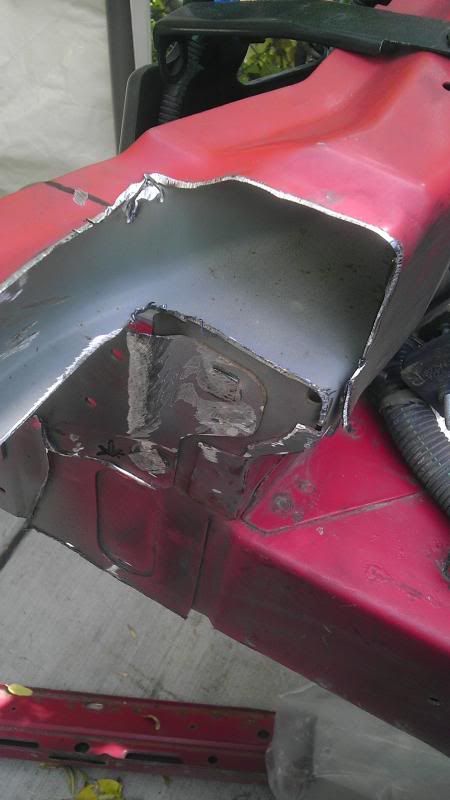
Cutting the access hole for the fuel pump, I MISSED. DAMN IT!

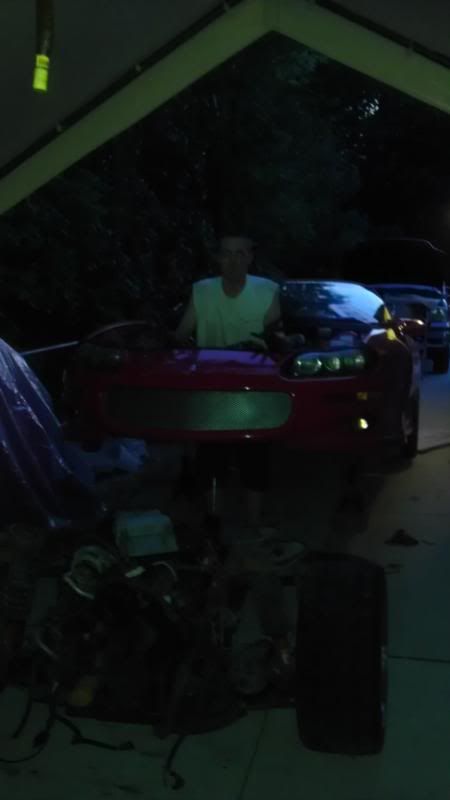
Obligatory standing in the empty engine bay pic, i finished late that night
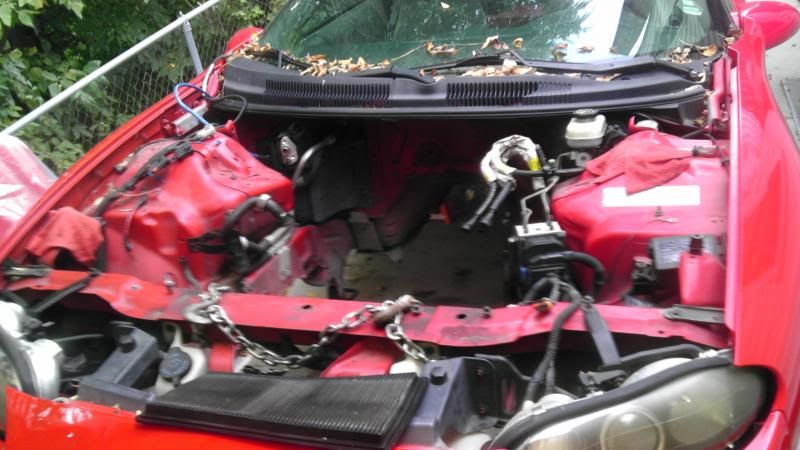
And the gaping hole left
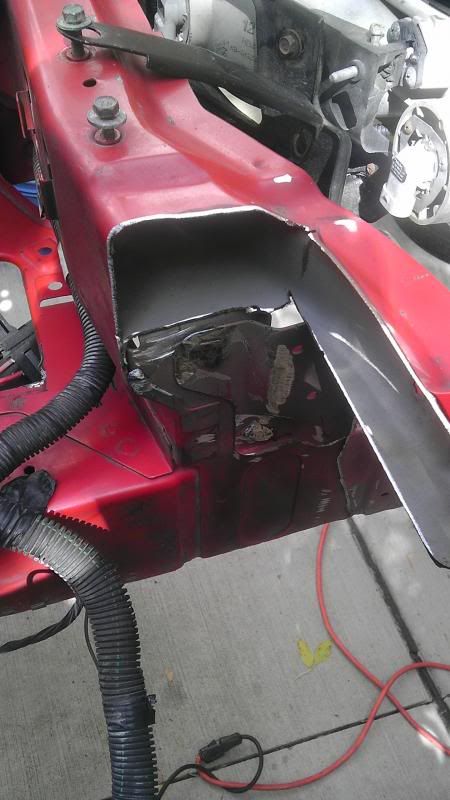
Started cutting for standing up my radiator, showing both sides how much i cut off. Then cut off the tabs on the frame horns and smoothed them out

Obligatory my little helper picture, my niece! She was super cranky because i was making so much noise with all the grinding and cutting


Obligatory standing in the empty engine bay pic, i finished late that night

And the gaping hole left

Started cutting for standing up my radiator, showing both sides how much i cut off. Then cut off the tabs on the frame horns and smoothed them out


Obligatory my little helper picture, my niece! She was super cranky because i was making so much noise with all the grinding and cutting
 06-08-2014, 10:18 PM
#4
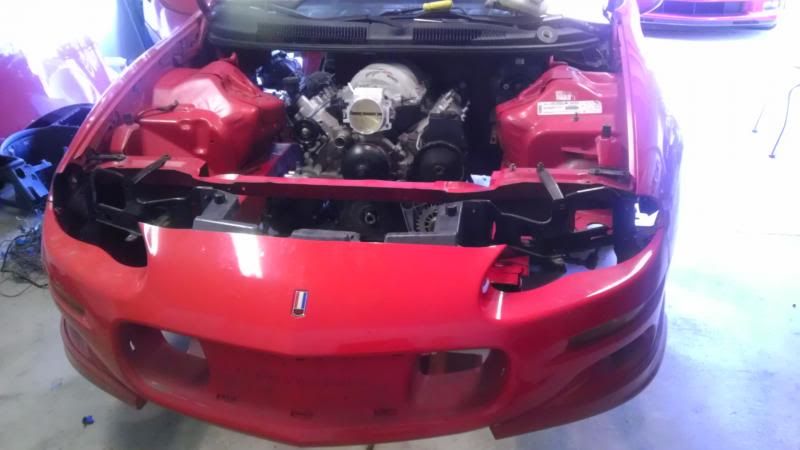
Tossed some paint over things to make it look a LITTLE better. Will eventually weld a cover over that area

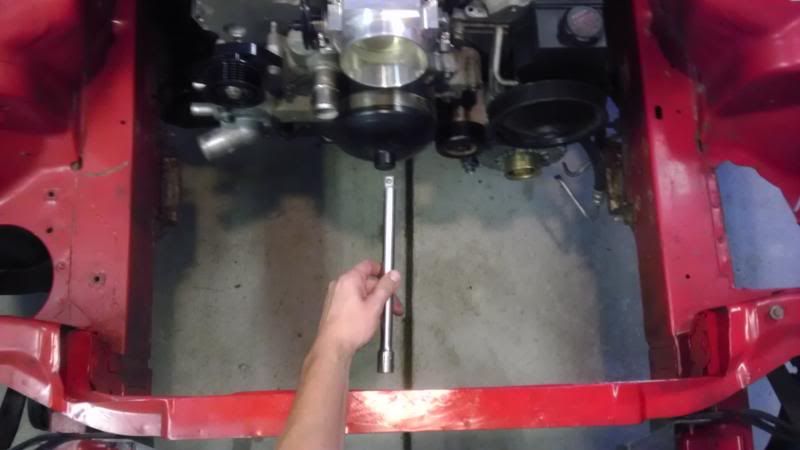
Footlong extension showing a test fit of the motor (taken after i put the motor in, obvs) and how much room i have before shoving a radiator, two turbos and a bunch of piping in there
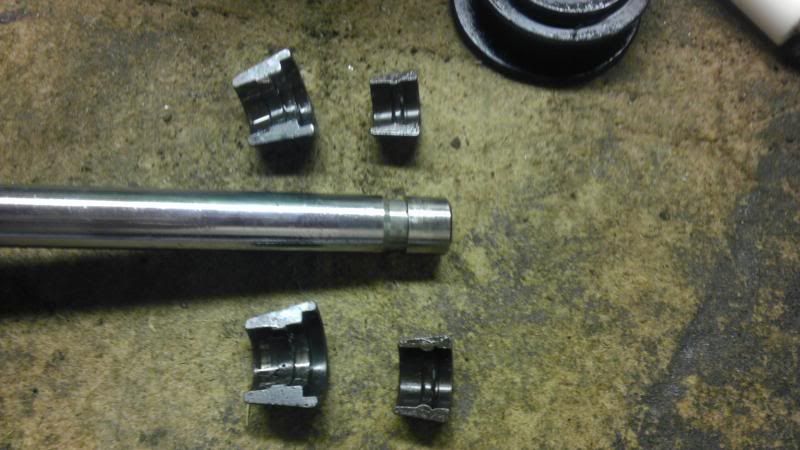
Here comes a short story. When i first bought the LS1 block, it came with two sets of heads. One was stockers from a C5, don't remember the casting #, and one set the guy claimed were 5.3 heads that were P&P'd by D'Agostin racing, with K-Motion 750 valvesprings, 2.02/1.60 valves. Turns out they are an aftermarket casting, 5.7 heads, and whoever put them together used SBC valves. SBC valves are 3/8" diameter, LS are 11mm (thanks to the guys at Lunati when i ordered my springs, we were able to figure that out!) You can imagine my surprise when i was trying to assemble my Lunati springs and the locks wouldn't work
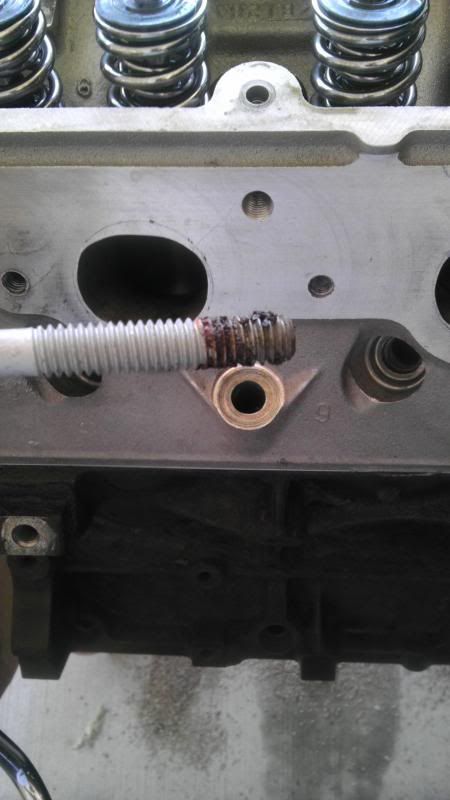
Next hassle; the machine shop i took my block to, i will never return to. Rather unprofessional, and not very thorough. Gave me a bunch of parts back in a box and said "Here ya go!" And after running down some stock headbolts, find all this dirt and grime still left in the threads. They also installed the rearmost cam bearing clocked wrong. It was turned ~45* and only one oil hole was open. Had to borrow a cam bearing tool and fix it.
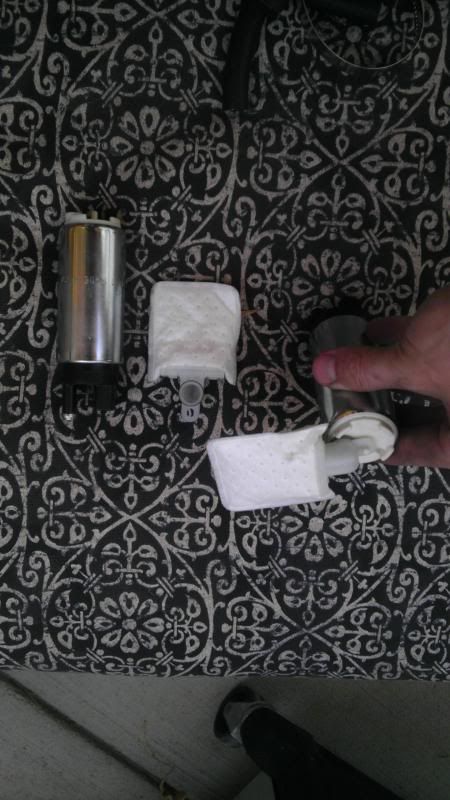
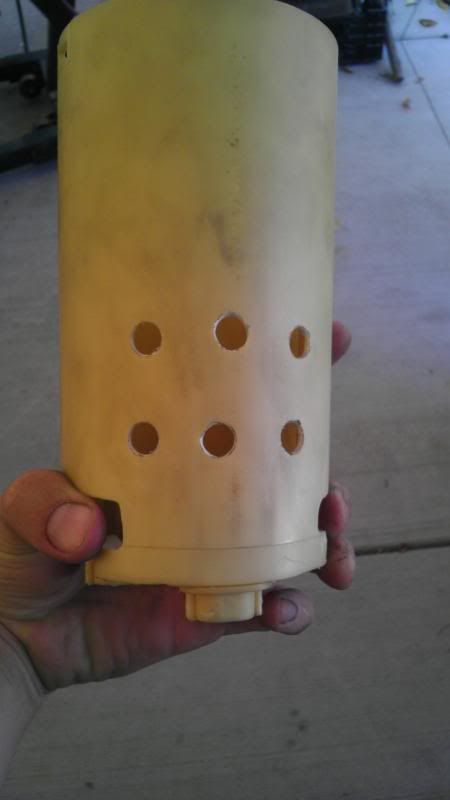
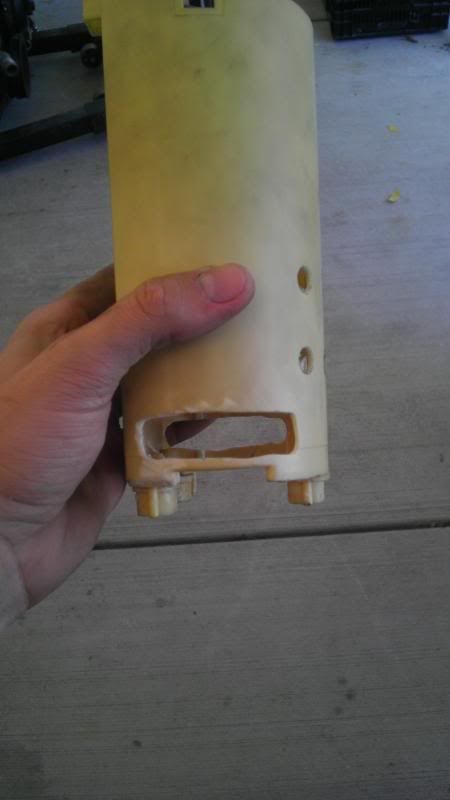
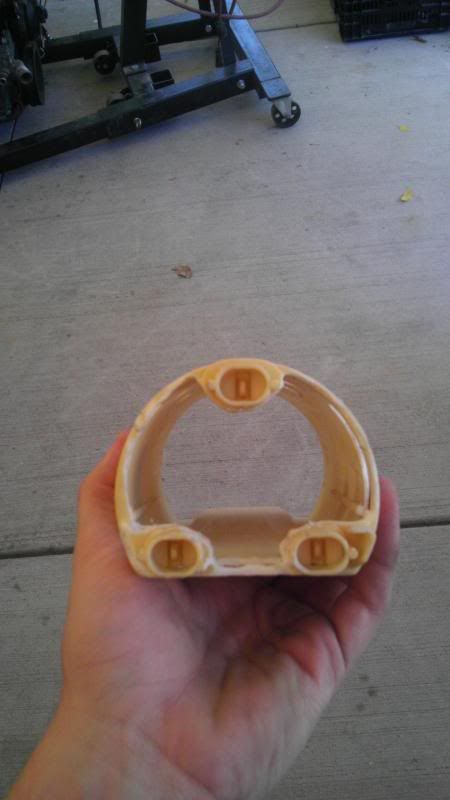
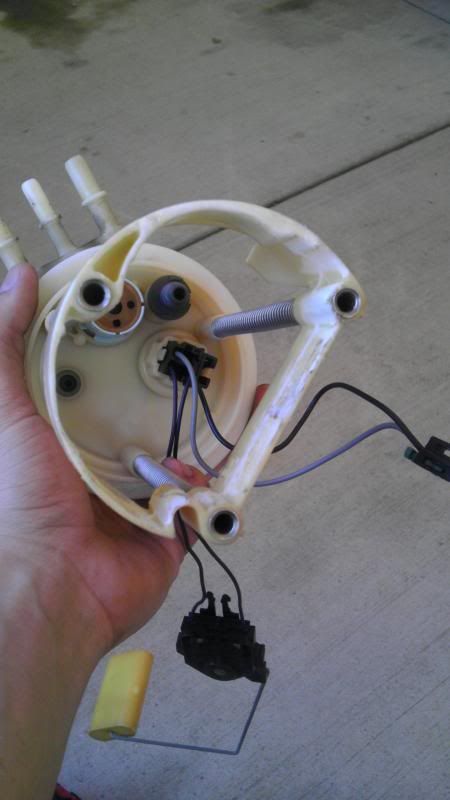
First variation of the fuel pumps, i got a little hack-happy. Turns out i bought the biggest and most obnoxious filters for the Walbros, so i tried cutting the wide ovals to fit the filters through the sides. Didn't work, but it don't matter, cuz i'm switching them up anyway. So my bucket looks like it went through hell lol. Should i get a new one?

Footlong extension showing a test fit of the motor (taken after i put the motor in, obvs) and how much room i have before shoving a radiator, two turbos and a bunch of piping in there

Here comes a short story. When i first bought the LS1 block, it came with two sets of heads. One was stockers from a C5, don't remember the casting #, and one set the guy claimed were 5.3 heads that were P&P'd by D'Agostin racing, with K-Motion 750 valvesprings, 2.02/1.60 valves. Turns out they are an aftermarket casting, 5.7 heads, and whoever put them together used SBC valves. SBC valves are 3/8" diameter, LS are 11mm (thanks to the guys at Lunati when i ordered my springs, we were able to figure that out!) You can imagine my surprise when i was trying to assemble my Lunati springs and the locks wouldn't work

Next hassle; the machine shop i took my block to, i will never return to. Rather unprofessional, and not very thorough. Gave me a bunch of parts back in a box and said "Here ya go!" And after running down some stock headbolts, find all this dirt and grime still left in the threads. They also installed the rearmost cam bearing clocked wrong. It was turned ~45* and only one oil hole was open. Had to borrow a cam bearing tool and fix it.

First variation of the fuel pumps, i got a little hack-happy. Turns out i bought the biggest and most obnoxious filters for the Walbros, so i tried cutting the wide ovals to fit the filters through the sides. Didn't work, but it don't matter, cuz i'm switching them up anyway. So my bucket looks like it went through hell lol. Should i get a new one?


 06-08-2014, 10:18 PM
#5
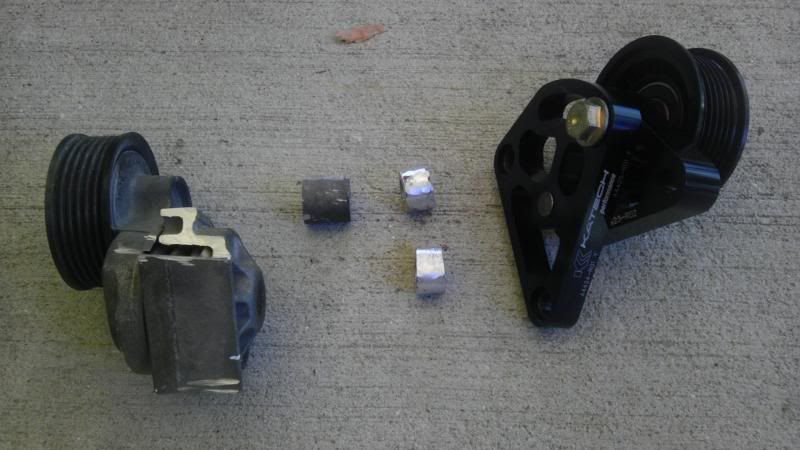
I bought a Katech manual tensioner off a friend, and didn't know it was going to need spacers. Made my own by hacking up a stock tensioner!

Starting to put the motor together. Snapped the first picture to show how much assembly lube i used. Overkill or the right amount? I figured more couldn't hurt and had plenty for both the top and bottom end.
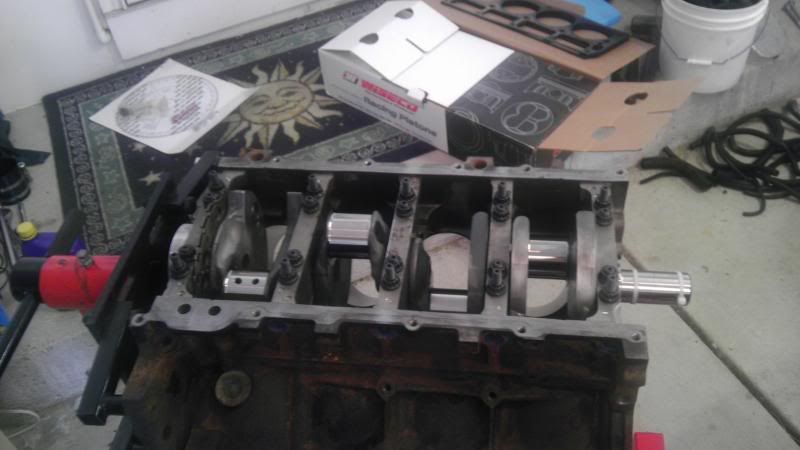
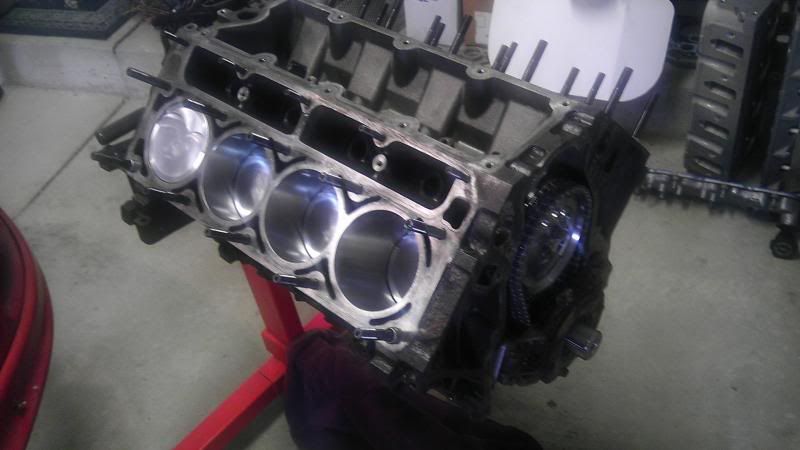
Got the motor fully assembled and resting in it's home.
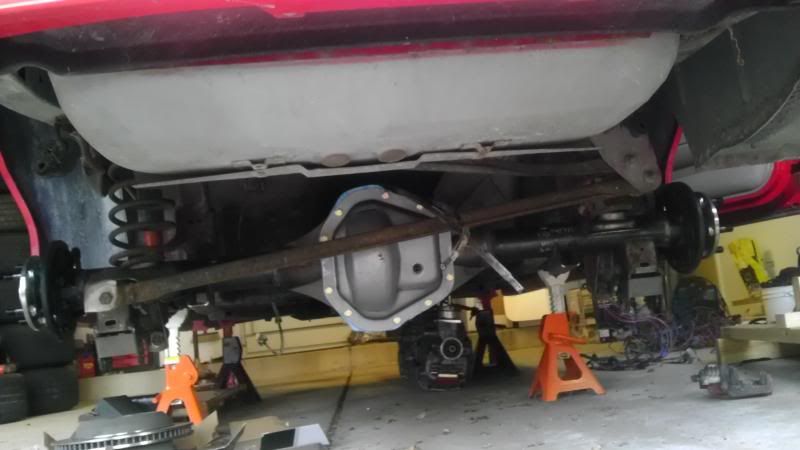
And the rear installed.


Starting to put the motor together. Snapped the first picture to show how much assembly lube i used. Overkill or the right amount? I figured more couldn't hurt and had plenty for both the top and bottom end.


Got the motor fully assembled and resting in it's home.

And the rear installed.
 06-08-2014, 10:19 PM
#6
And the biggest headache about this whole project; wiring. I should've just left it stock but noooo i had to cut out all the **** i'm not using and tuck everything...
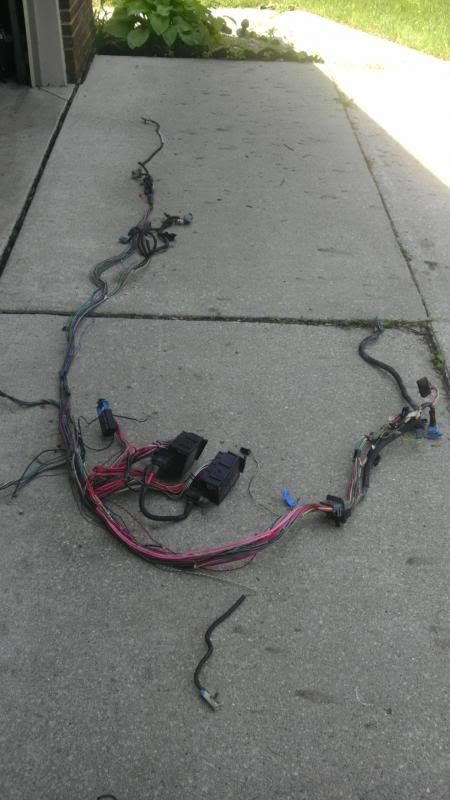
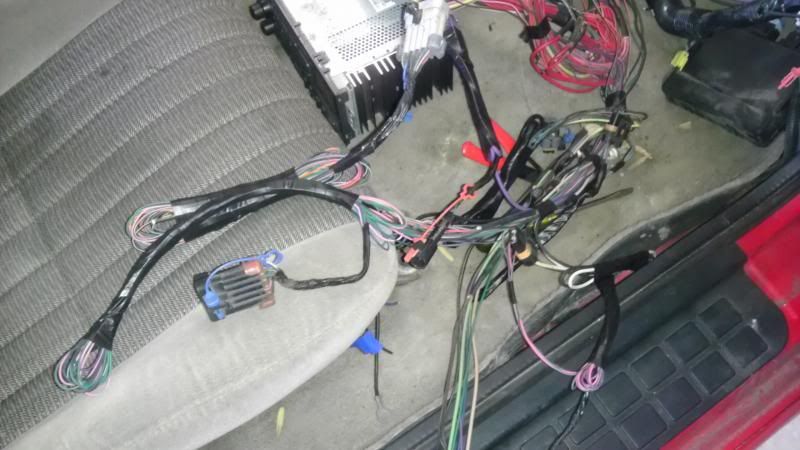
All separated out by connector
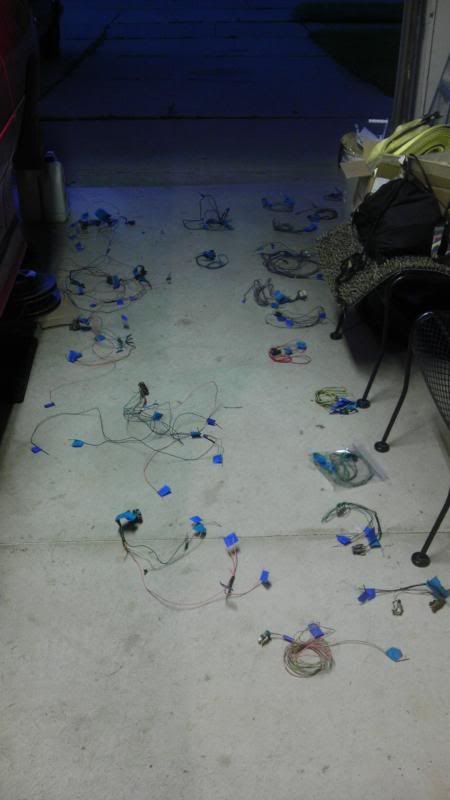
Bagged and tagged! Highly important
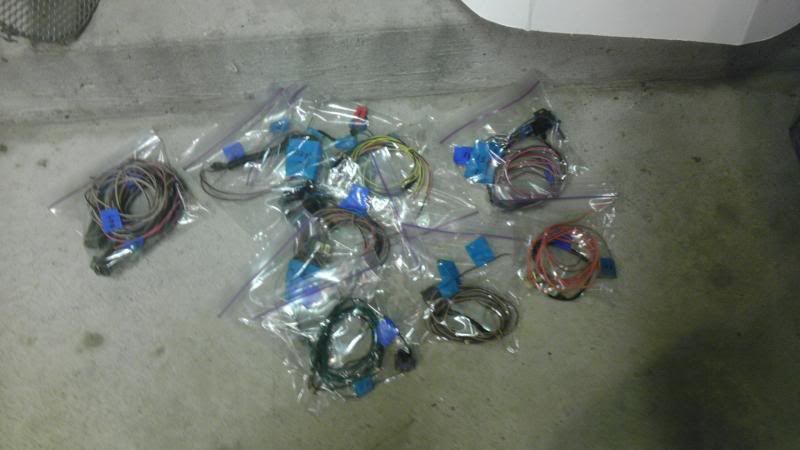
Pulled the fuse boxes in through the firewall. You can see what i'll call the "bulkhead connector" where it passes through the firewall. Thankfully no extending wires here, maybe shortening some, we'll see.
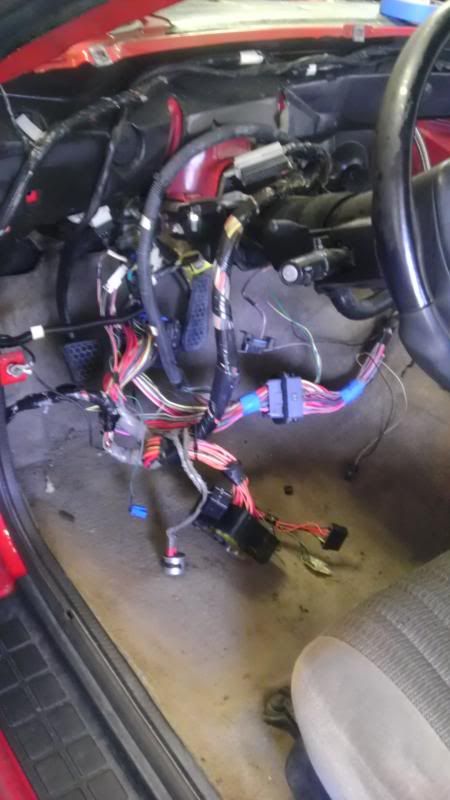
Seriously, tearing apart the dash is a hell i will never wish on someone.
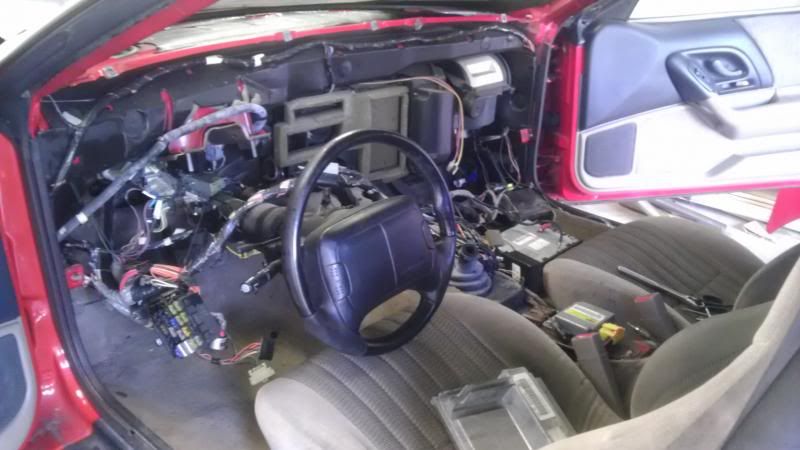
Will be locating the PCM and fuseboxes in the glovebox, so it's easy access by flipping open the glovebox.
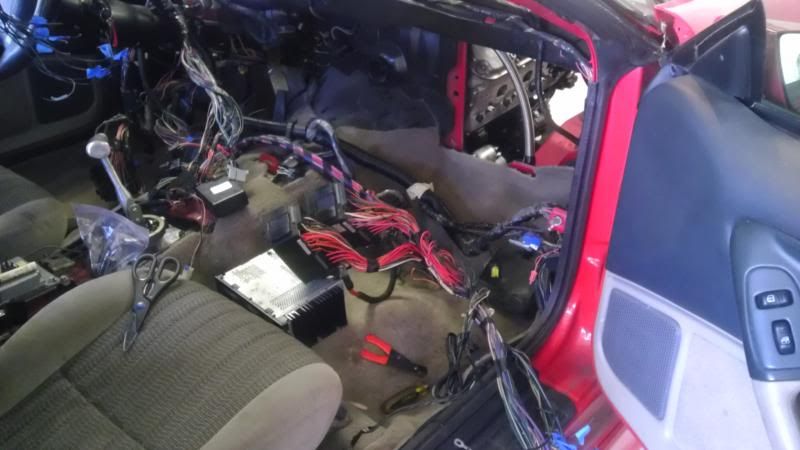
Here's what i mean, not sure if i want to just tuck this **** away or actually shorten it.
 06-08-2014, 10:25 PM
#7
And i'm at 100 posts! Lol. Plans for the hot/cold side are going to be completely fabbing from scratch. Not sure if i should just grab truck mani's/shorty headers and call it a day or not. Same with relocating the alt. Stock K-member so i should probably relocate the alt just for pure convenience. Pretty much out of cash so i can't just grab a tubular K 
I refuse to give up on this project, but it's been 2 years in the making and i'm on the verge every single day to just give up and sell it all just because i'm at my wallet's end. I didn't plan my budget at all and it's biting me in the *** HARD!
I refuse to give up on this project, but it's been 2 years in the making and i'm on the verge every single day to just give up and sell it all just because i'm at my wallet's end. I didn't plan my budget at all and it's biting me in the *** HARD!
Trending Topics
06-09-2014, 12:01 AM
#8
Man, I love watching people do their own thing! Yours is looking a lot like mine! I relocated my fuse box under the dash also....I know what a pain in the *** that is...trust me! That took me over a month because I kept getting aggravated at it...Once I finally got it put together, I still had a few hiccups, mainly with the turn signals or bad grounds, didn't blow any fuses though. Looks good man and I commend you for sticking with it, I know how hard it is, and I'm not made of money either. I did have to pay someone to weld all my hot side and cold side up though. I'm not a welder...Again, looks awesome bro, keep up the good work and keep posting pics.
06-09-2014, 12:10 AM
#9
Launching!
iTrader: (18)

Join Date: Aug 2005
Location: Stockton CA
Posts: 203
Likes: 0
Received 0 Likes
on
0 Posts

I know it'll delay your project well you come up with the cash, but since you have the dash out, now would be a good time to install a roll cage, which you will probably need for your intended goals. Just a thought.

 06-09-2014, 08:52 AM
#11
I have a friend who's doing all the finish welding, as he does it for a living, i just gotta buy him lunch! I'm going to tack it together with a POS HF welder
Yeah i completely agree, and it would save me from pulling the dash again. Definitely already planning on a cage anyway, so i think you're right, i should just do it now
06-09-2014, 11:47 AM
#13
TECH Enthusiast
I agree man, keep at it! You're doing good work, and doing it on your own which is awesome!
Couple of things, the Harland Sharpe Rockers are known to break, and they are heavy. A better option would be factory rockers with Comp Trunion Upgrades. Also, your fuel bucket, I think it should be fine.
Couple of things, the Harland Sharpe Rockers are known to break, and they are heavy. A better option would be factory rockers with Comp Trunion Upgrades. Also, your fuel bucket, I think it should be fine.
06-09-2014, 12:30 PM
#14
I agree man, keep at it! You're doing good work, and doing it on your own which is awesome!
Couple of things, the Harland Sharpe Rockers are known to break, and they are heavy. A better option would be factory rockers with Comp Trunion Upgrades. Also, your fuel bucket, I think it should be fine.
Couple of things, the Harland Sharpe Rockers are known to break, and they are heavy. A better option would be factory rockers with Comp Trunion Upgrades. Also, your fuel bucket, I think it should be fine.
 06-09-2014, 08:44 PM
#17
Nice looking build, I look forward to seeing it take shape 
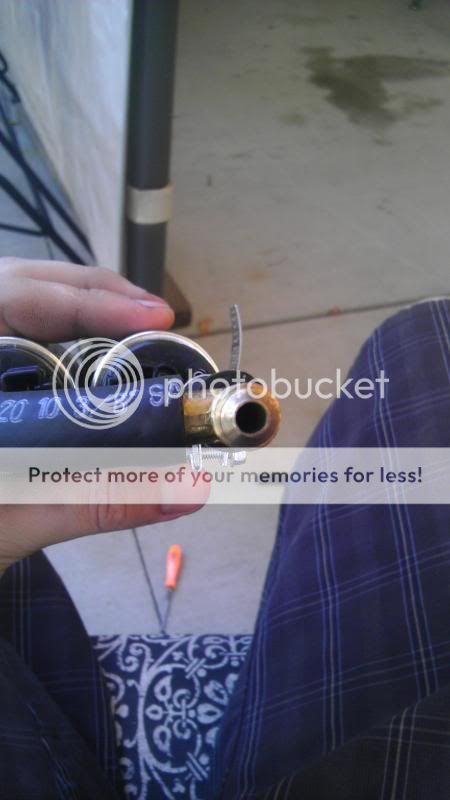
Quick question that I'm sure you already thought of. That fuel hose is rated to be submersible, right?
Just making sure because I was uninformed and make that mistake once. What a PITA that was lol.
Anyway, congrats on starting the build
Quick question that I'm sure you already thought of. That fuel hose is rated to be submersible, right?
Just making sure because I was uninformed and make that mistake once. What a PITA that was lol.
 [/URL]
Anyway, congrats on starting the build
06-10-2014, 12:38 PM
#18
Yes it is
Nice looking build, I look forward to seeing it take shape
Quick question that I'm sure you already thought of. That fuel hose is rated to be submersible, right?
Just making sure because I was uninformed and make that mistake once. What a PITA that was lol.
Anyway, congrats on starting the build
Quick question that I'm sure you already thought of. That fuel hose is rated to be submersible, right?
Just making sure because I was uninformed and make that mistake once. What a PITA that was lol.
Anyway, congrats on starting the build
06-10-2014, 02:28 PM
#20
For your own sanity, double check