
First turbo build, 70 GTO...

 12-01-2022 | 02:46 PM
#202
Thread Starter
Joined: Mar 2003
Posts: 10,244
Likes: 1,531
From: The City of Fountains
Andrew
12-02-2022 | 02:22 PM
#203

On The Tree
Joined: Jan 2015
Posts: 123
Likes: 83
From: Middleriver MD
Great looking GTO and great build you have going on here!
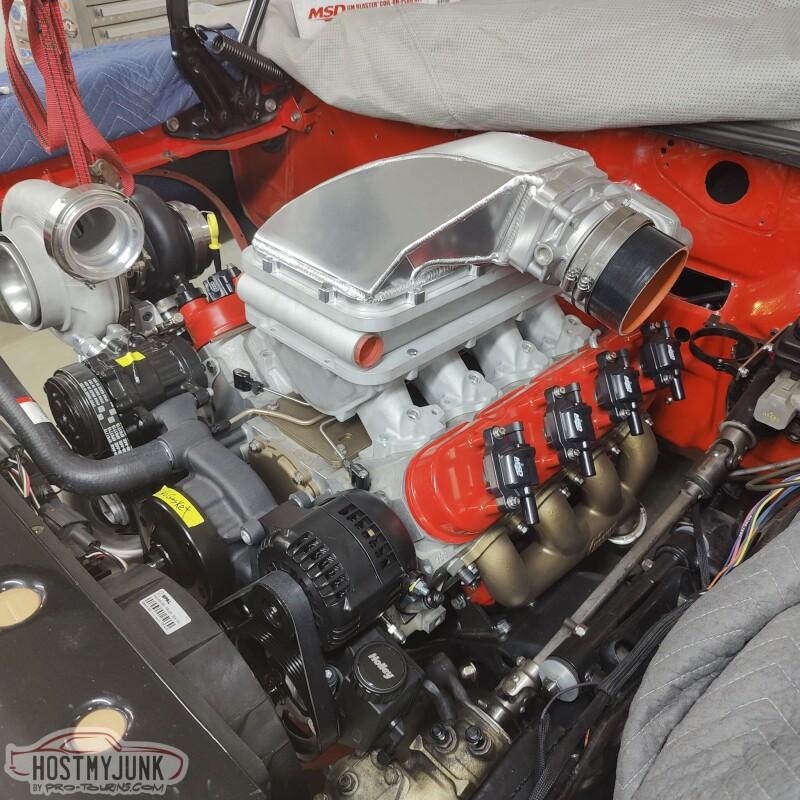
Any chance you can clock the compressor housing to the passenger side fender, then come out of the compressor housing with an elbow pointed at the fire wall and then turn in to the intake manifold?
Any chance you can clock the compressor housing to the passenger side fender, then come out of the compressor housing with an elbow pointed at the fire wall and then turn in to the intake manifold?
The following users liked this post:
Project GatTagO (12-03-2022)
12-04-2022 | 05:02 PM
#204
Thread Starter
Joined: Mar 2003
Posts: 10,244
Likes: 1,531
From: The City of Fountains
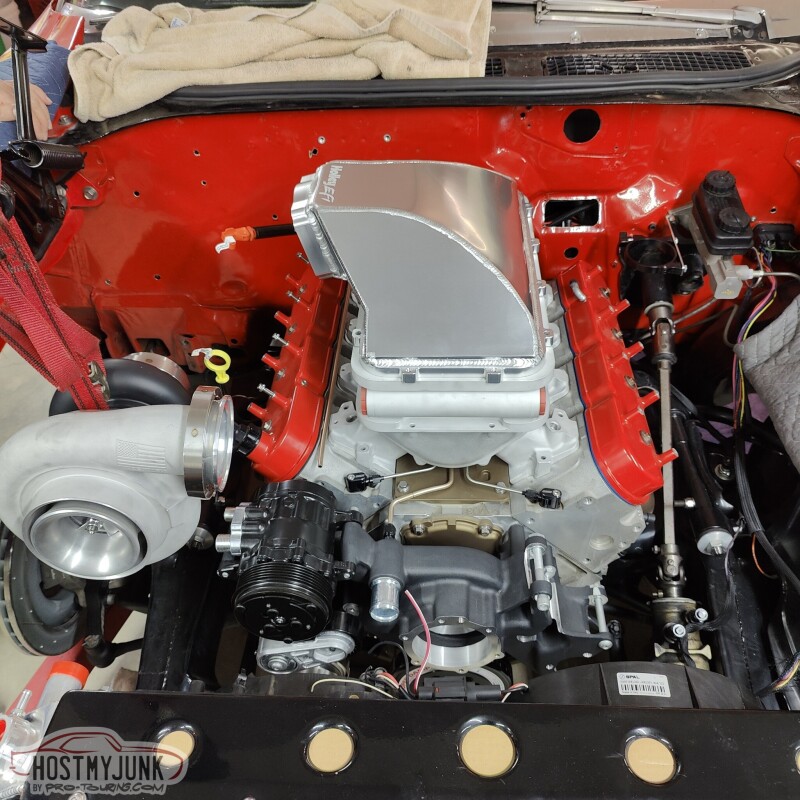
Made some baby steps today...
We chose to do this intake orientation, just to make the plumbing path not so arduous. There will be a simple silicone coupler at the throttle body. The rest will be fitted and welded together, with the V-band at the compressor discharge. Still unsure about the hood clearance, but that is a problem for future me.
You can also see the pump for the A2W intercooler mounted to the fan. The Volt actually had a little water pump mounted in that location.
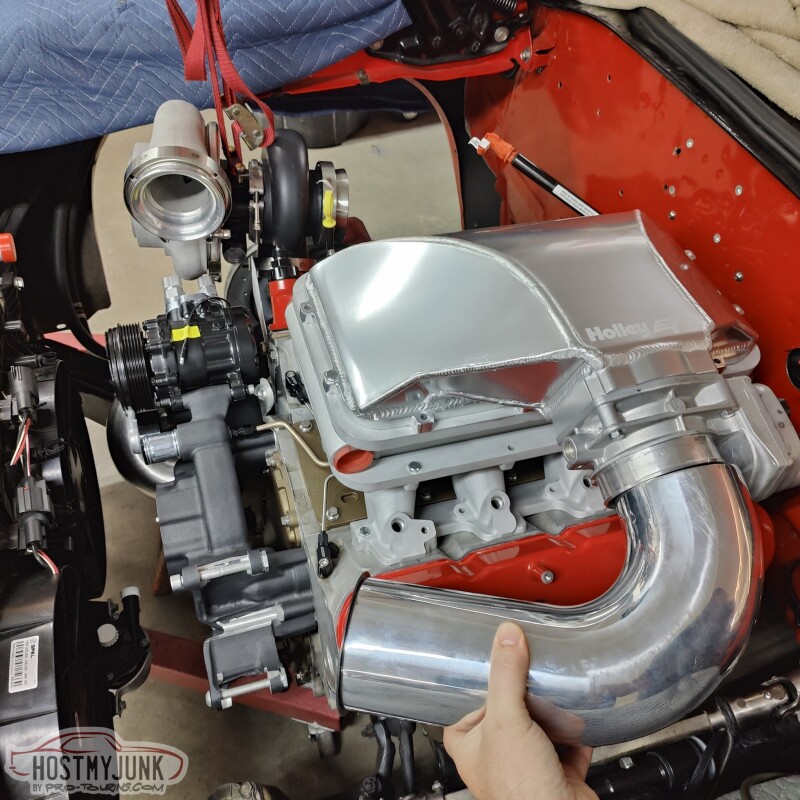
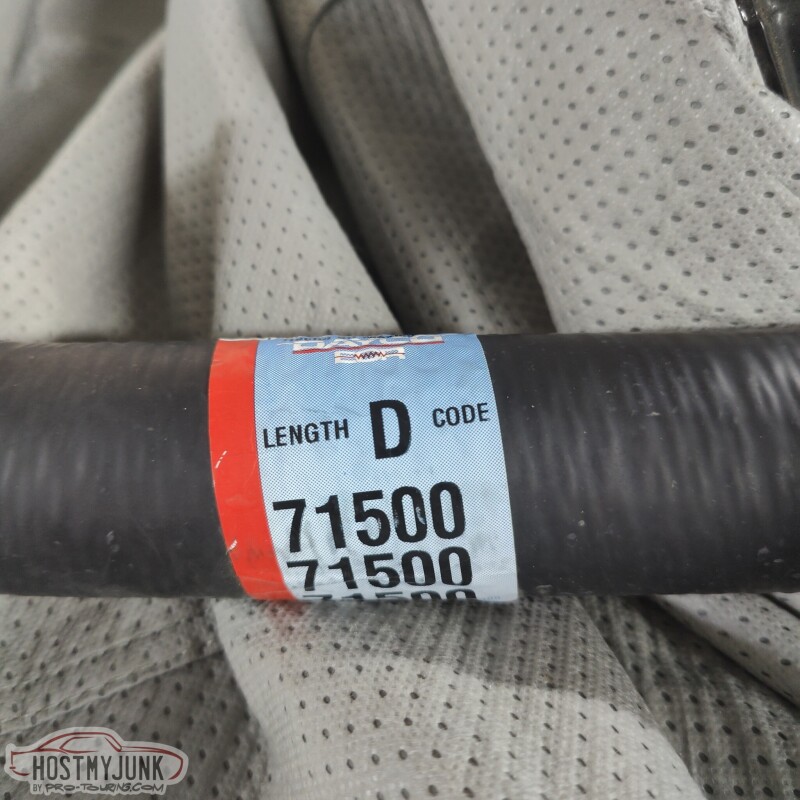
I also got and installed the 90 degree fittings from Vintage Air. These will allow us to go straight down with the AC hoses and keep it neat and tidy. We also got the upper radiator hose sorted out with a Dayco D71576.
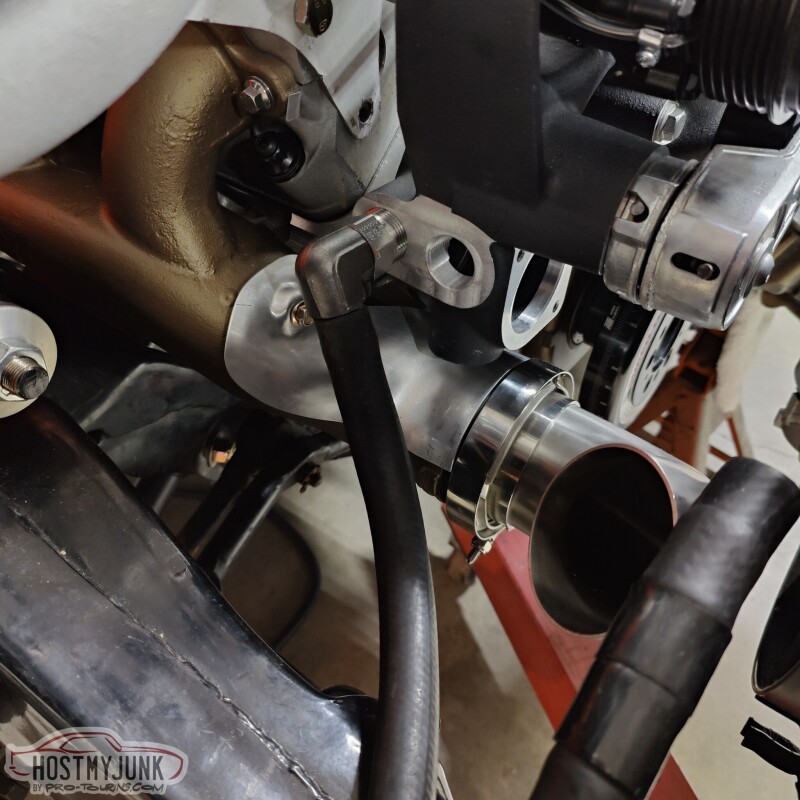
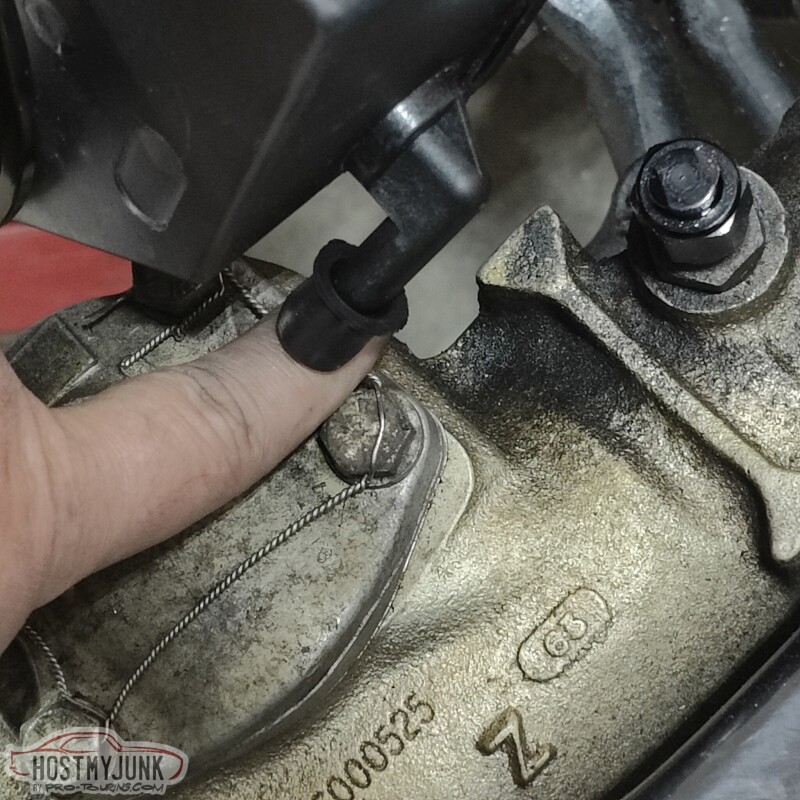
One of the Earl's 90 degree swivel heater hose adapters showed up. These will route the hater hoses away from the up-pipe to the turbo. I will probably add high heat sleeving over both of the heater hoses, just in case.
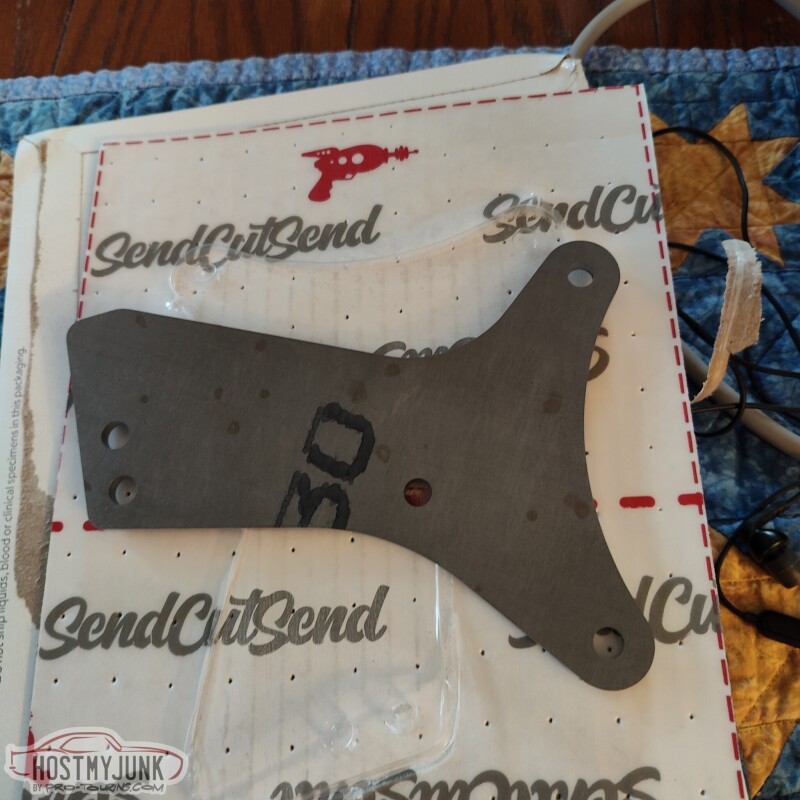
Lastly, Vic and I finalized the design of the turbo support bracket and it was uploaded to Send Cut Send to be cut out. It will be made from .190" 4130 steel.
Andrew
We chose to do this intake orientation, just to make the plumbing path not so arduous. There will be a simple silicone coupler at the throttle body. The rest will be fitted and welded together, with the V-band at the compressor discharge. Still unsure about the hood clearance, but that is a problem for future me.
You can also see the pump for the A2W intercooler mounted to the fan. The Volt actually had a little water pump mounted in that location.
I also got and installed the 90 degree fittings from Vintage Air. These will allow us to go straight down with the AC hoses and keep it neat and tidy. We also got the upper radiator hose sorted out with a Dayco D71576.
One of the Earl's 90 degree swivel heater hose adapters showed up. These will route the hater hoses away from the up-pipe to the turbo. I will probably add high heat sleeving over both of the heater hoses, just in case.
Lastly, Vic and I finalized the design of the turbo support bracket and it was uploaded to Send Cut Send to be cut out. It will be made from .190" 4130 steel.
Andrew
The following 4 users liked this post by Project GatTagO:

The following users liked this post:
Project GatTagO (12-04-2022)
12-10-2022 | 07:16 AM
#206

Without reading thru it, I thought you used the Holley 302-3 pan, you may know this already, but an ACDelco PF-63 oil filter fits, I think a little extra cap. than others. Kind of hard to find them, I just got a couple from Summit last time I ordered something with free shipping.
The following users liked this post:
Project GatTagO (12-10-2022)
12-10-2022 | 09:37 PM
#207
Thread Starter
Joined: Mar 2003
Posts: 10,244
Likes: 1,531
From: The City of Fountains
Without reading thru it, I thought you used the Holley 302-3 pan, you may know this already, but an ACDelco PF-63 oil filter fits, I think a little extra cap. than others. Kind of hard to find them, I just got a couple from Summit last time I ordered something with free shipping.
Andrew
12-11-2022 | 10:02 PM
#208
Thread Starter
Joined: Mar 2003
Posts: 10,244
Likes: 1,531
From: The City of Fountains
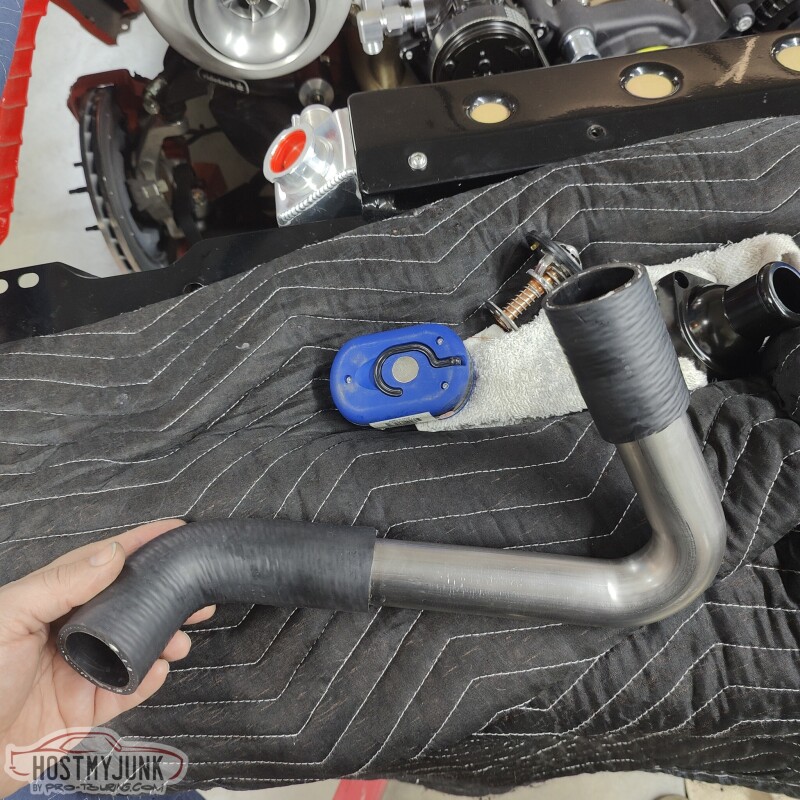
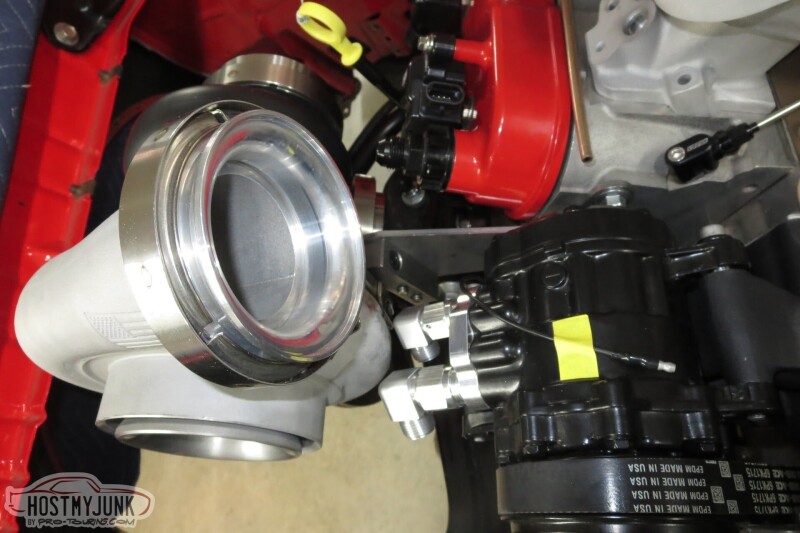
Had another, fairly productive day with Vic today. We started putting the rest of the Holley mid-mount system on the front of the engine, so that we didn't have any surprises down the road. Everything went together pretty well, but this power steering return might become a problem. That's a problem for Future Me...
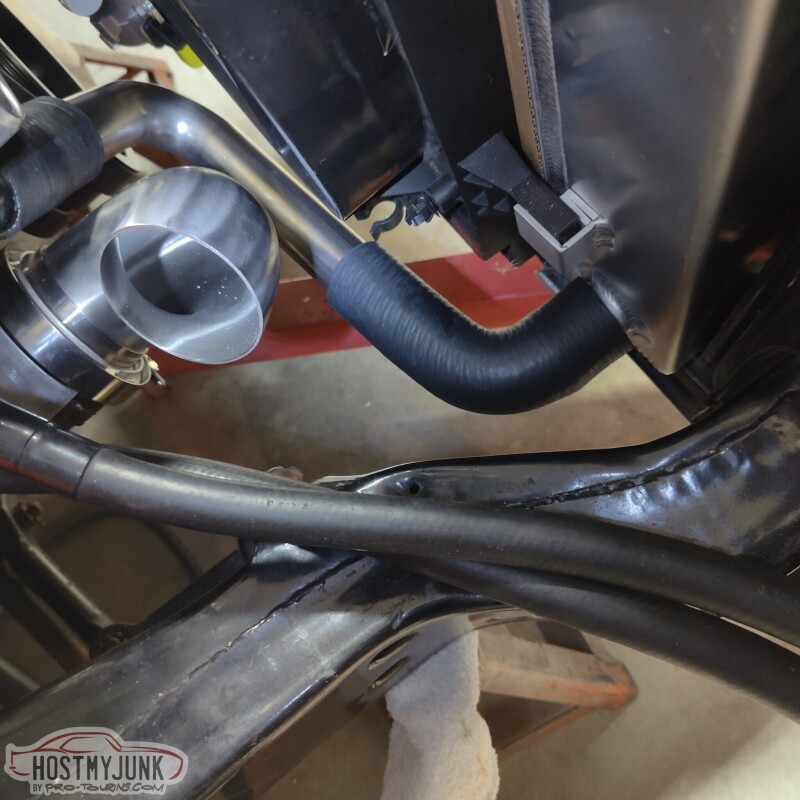
I am not sure where Vic got it, but he has the whole Dayco radiator hose catalog as a PDF. I sat down and looked up hoses that were 1.5" I.D. which matches the lower radiator and the thermostat housing hose size. I found this gem. It has 3 usable, tight 90 degree bends and plenty of straight section, and all of it is 1.5" I.D..
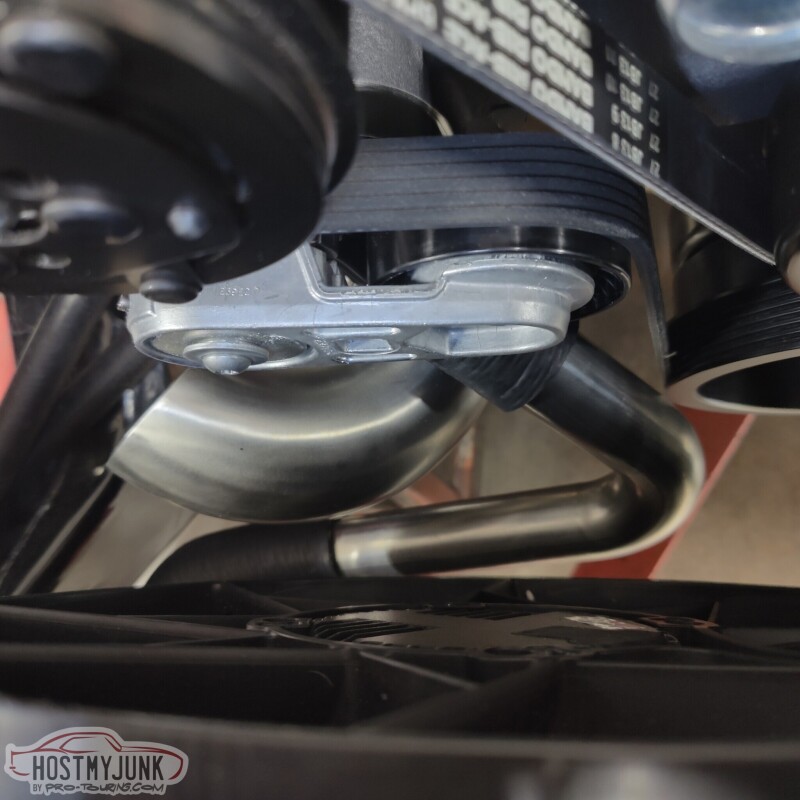
I had also ordered some 1.5" stainless, tight bend J-pipes, one with a 90 degree bend and the other with a 120 degree bend. Both were from Vibrant performance.
This is the configuration that we chose to do, in conjunction with a swivel thermostat housing.
In each picture it looks like it is tight in certain areas, but in reality, there is a solid 3/4" of clearance between all critical areas.

Vic had this nifty, home-made bead rolling tool.
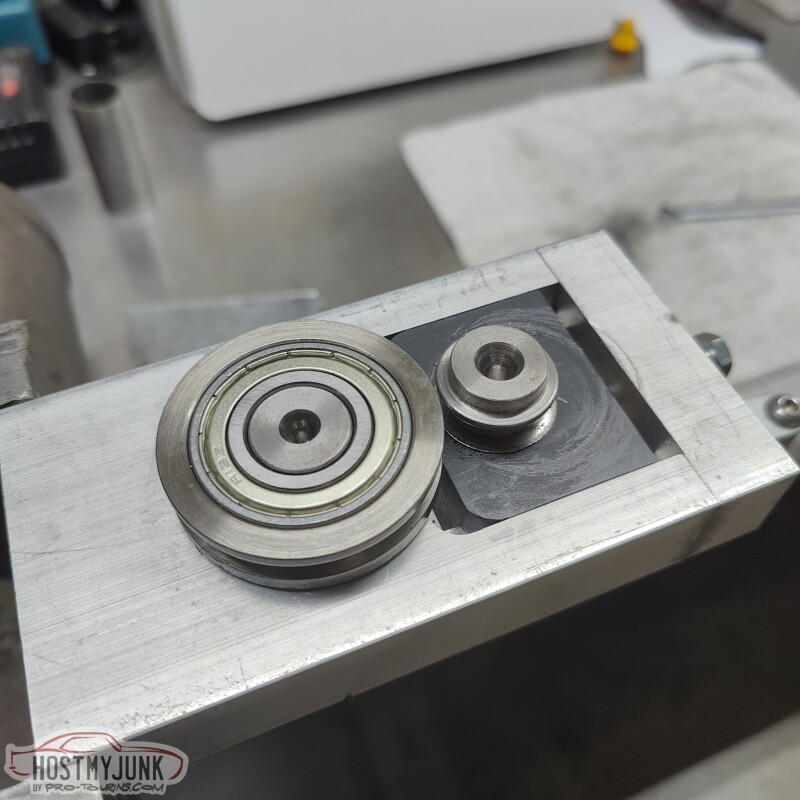
It took a little effort, but we got a nice bead at each end of the tube.
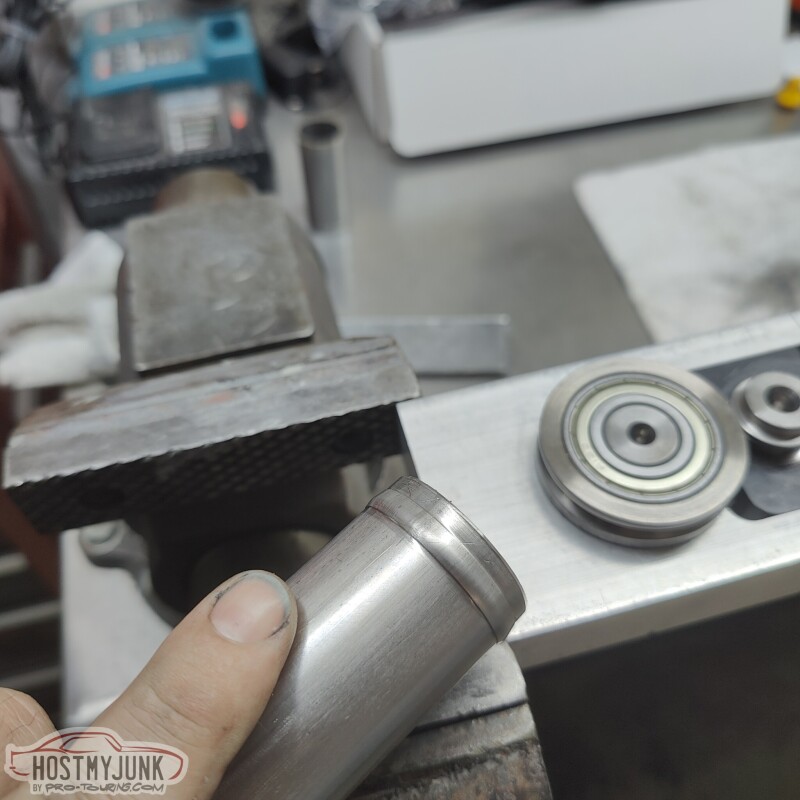
This is the final shape of the lower radiator hose. Murray clamps will be used everywhere on the engine.
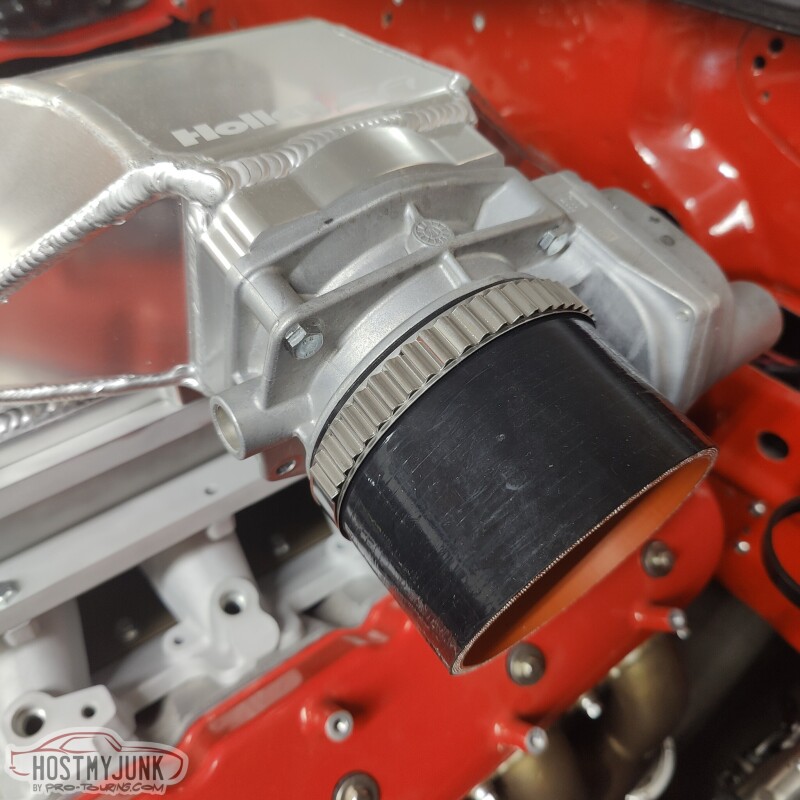
Like this one that I got for the intake pipe.
It is finally starting to look like something...
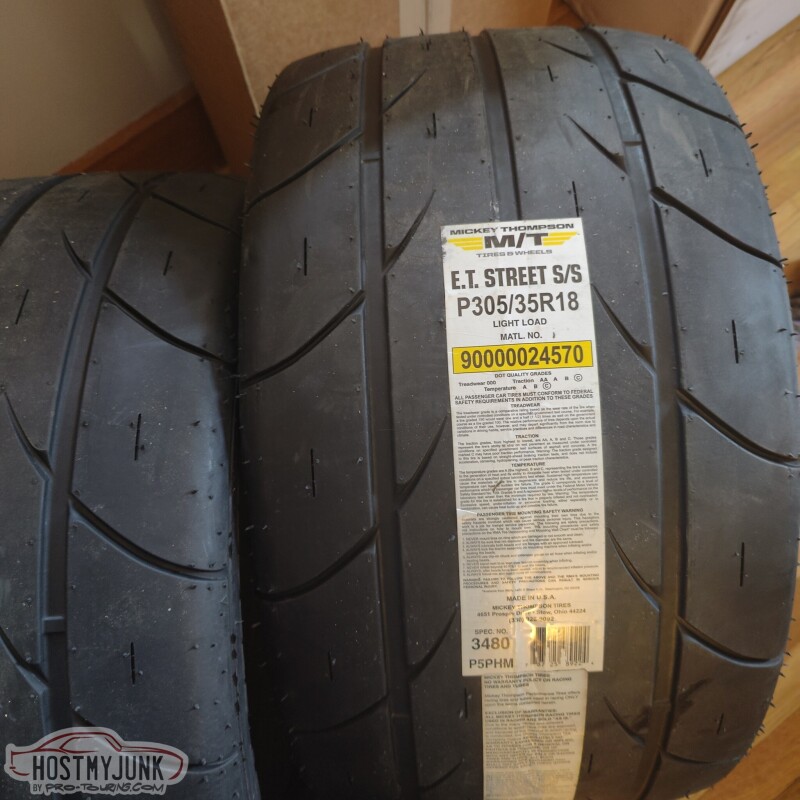
The turbo bracket that was made by Send Cut Send should be here on Wednesday. My friend Tom is also coming for a visit from Alabama and our mission is to get the new Ford 9" from Quick Performance installed. I will also get my new rear tires on Wednesday. Should be interesting!
Andrew
I am not sure where Vic got it, but he has the whole Dayco radiator hose catalog as a PDF. I sat down and looked up hoses that were 1.5" I.D. which matches the lower radiator and the thermostat housing hose size. I found this gem. It has 3 usable, tight 90 degree bends and plenty of straight section, and all of it is 1.5" I.D..
I had also ordered some 1.5" stainless, tight bend J-pipes, one with a 90 degree bend and the other with a 120 degree bend. Both were from Vibrant performance.
This is the configuration that we chose to do, in conjunction with a swivel thermostat housing.
In each picture it looks like it is tight in certain areas, but in reality, there is a solid 3/4" of clearance between all critical areas.
Vic had this nifty, home-made bead rolling tool.
It took a little effort, but we got a nice bead at each end of the tube.
This is the final shape of the lower radiator hose. Murray clamps will be used everywhere on the engine.
Like this one that I got for the intake pipe.
It is finally starting to look like something...
The turbo bracket that was made by Send Cut Send should be here on Wednesday. My friend Tom is also coming for a visit from Alabama and our mission is to get the new Ford 9" from Quick Performance installed. I will also get my new rear tires on Wednesday. Should be interesting!
Andrew
The following 2 users liked this post by Project GatTagO:
C5_Pete (12-13-2022), The BallSS (12-12-2022)
The following 2 users liked this post by Pro Stock John:
Jimbo1367 (12-13-2022), Project GatTagO (12-13-2022)
The following users liked this post:
Project GatTagO (12-13-2022)
12-13-2022 | 09:55 AM
#211
Thread Starter
Joined: Mar 2003
Posts: 10,244
Likes: 1,531
From: The City of Fountains
12-14-2022 | 09:48 PM
#212
Thread Starter
Joined: Mar 2003
Posts: 10,244
Likes: 1,531
From: The City of Fountains
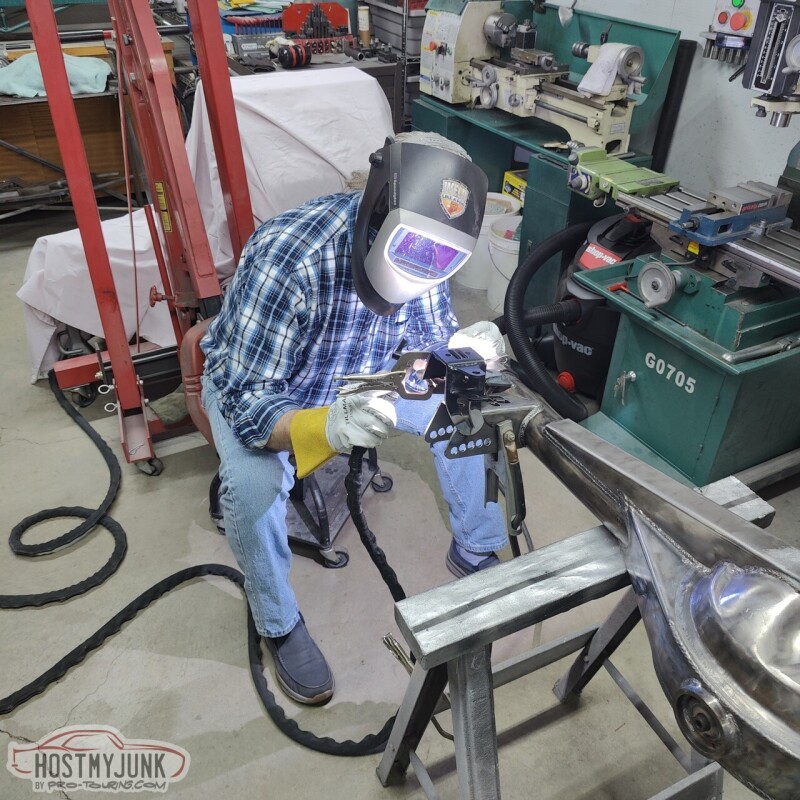
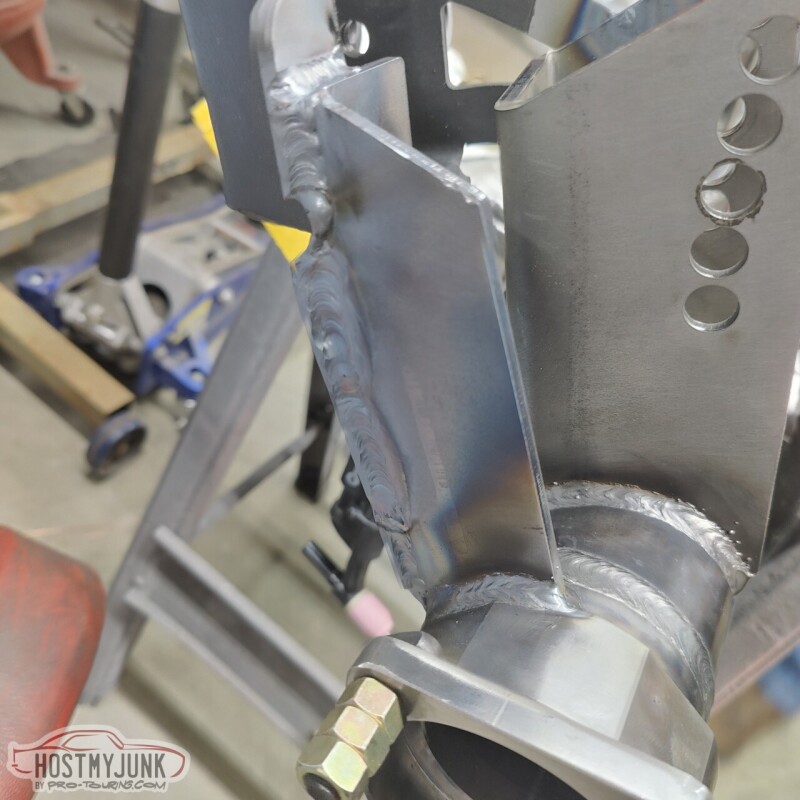
My friend Blake is a Solid Works wizard and we designed this bracket to support the turbo. I uploaded the file to Send Cut Send and less and a week later I have the part. The holes were left a little undersized on purpose.
Today the tires showed up. Hopefully they fit (they should according to my calculations).
I took the bracket to Vic and today he sent me these pictures.
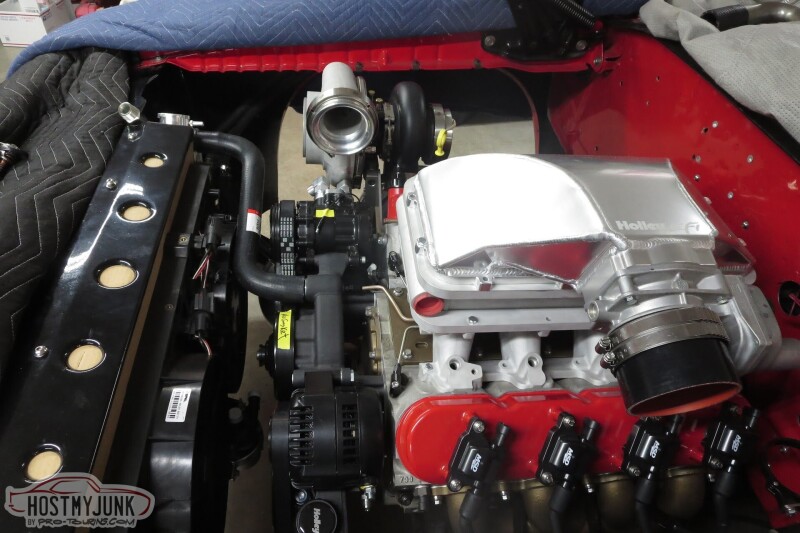
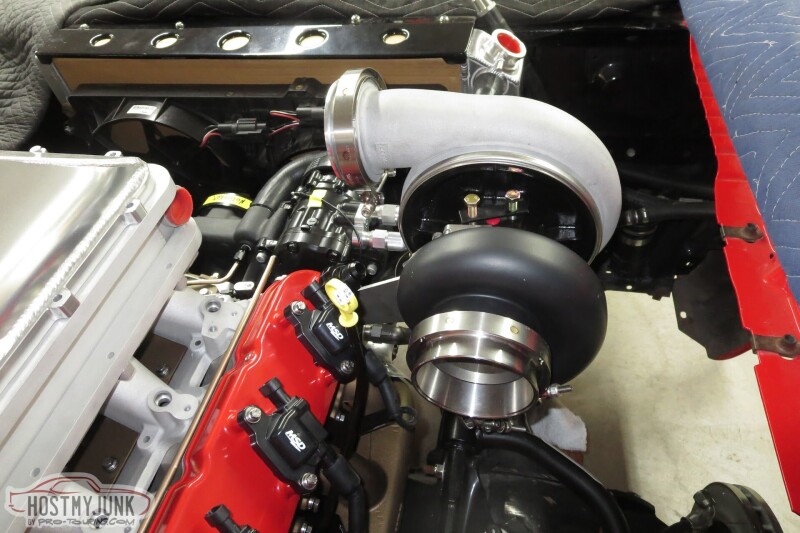
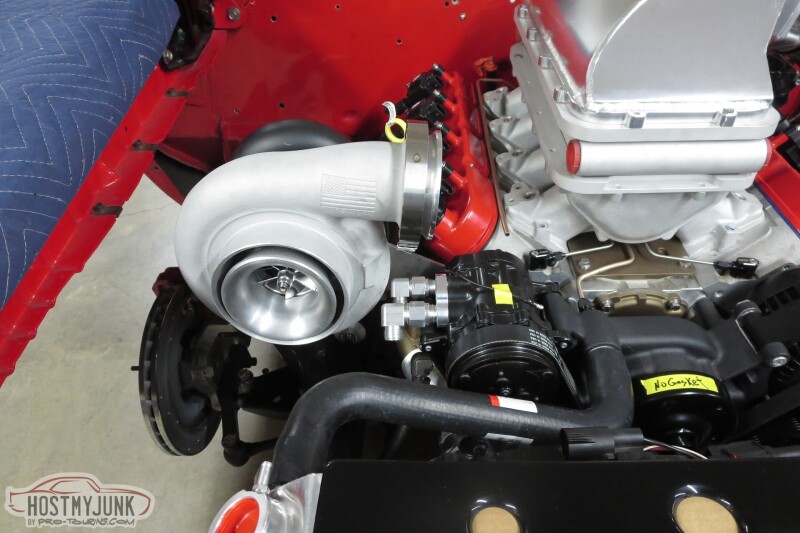
Pretty excited to finally see the turbo installed without an engine hoist holding it up!
Andrew
Today the tires showed up. Hopefully they fit (they should according to my calculations).
I took the bracket to Vic and today he sent me these pictures.
Pretty excited to finally see the turbo installed without an engine hoist holding it up!
Andrew
12-17-2022 | 10:04 PM
#213
Thread Starter
Joined: Mar 2003
Posts: 10,244
Likes: 1,531
From: The City of Fountains
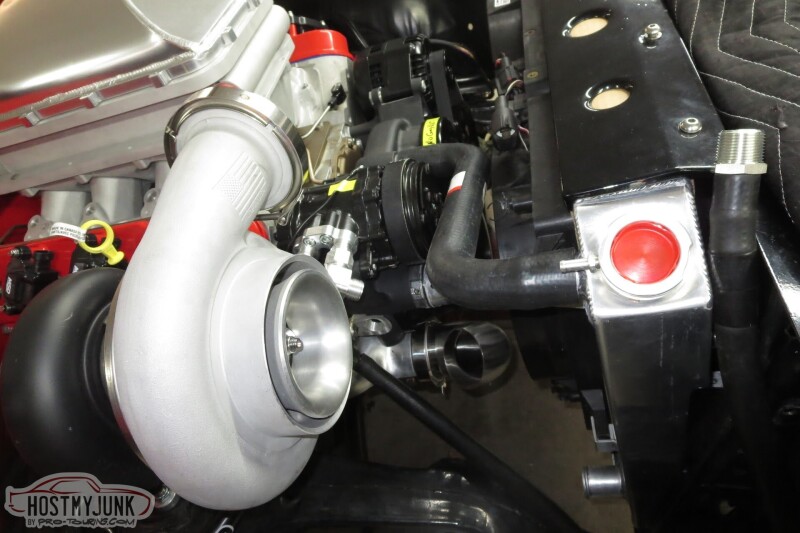
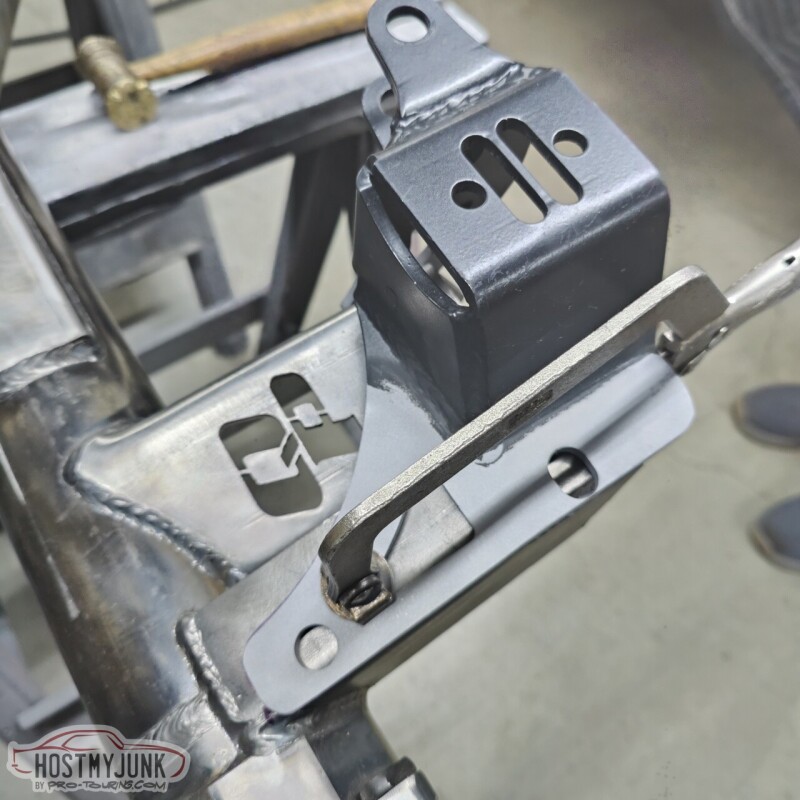
I consulted with Todd, who works for Holley and is a great engineer, and he suggested that the poly mount may no do well being so close to the exhaust manifold. So I got these billet aluminum mounts from ICT.
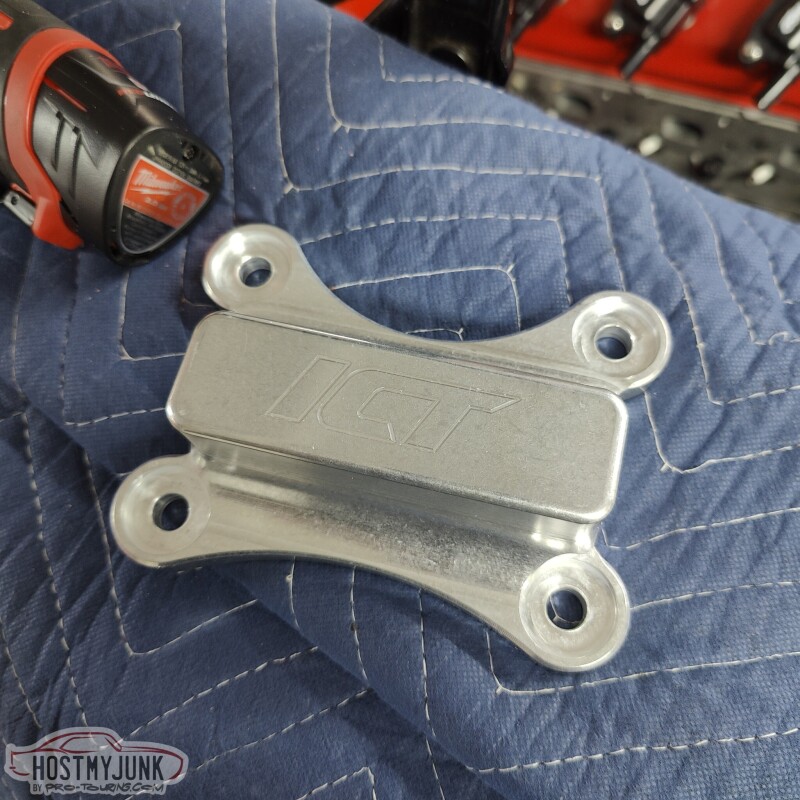
I got a pair, but I only used one on the passenger side, and it fit perfectly, after we milled .050" off each end to give them enough wiggle room between the ear of the frame stands.
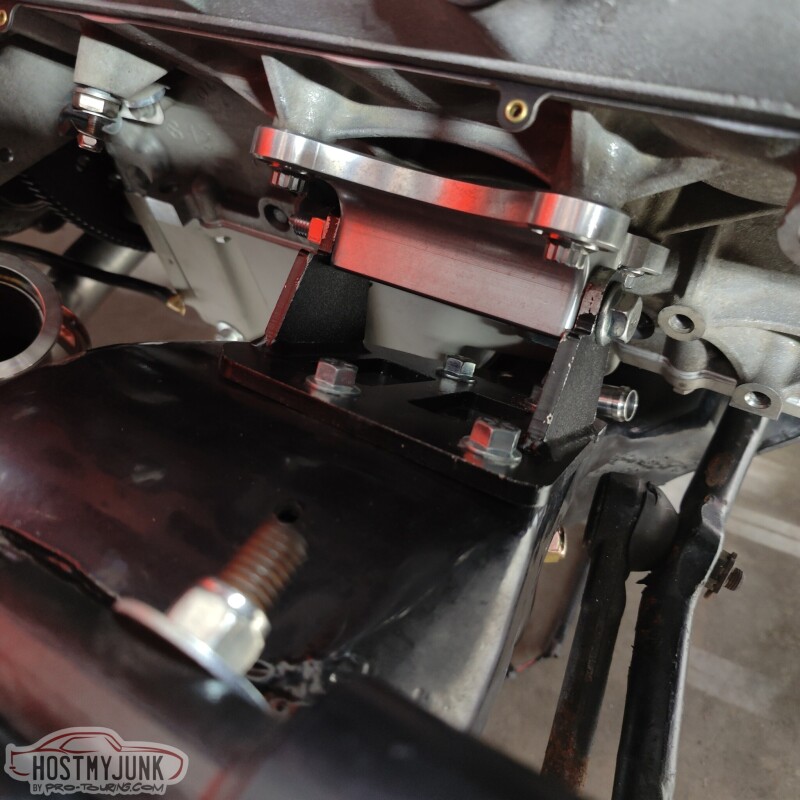
Good to go now! More updates coming really soon.
Andrew
I got a pair, but I only used one on the passenger side, and it fit perfectly, after we milled .050" off each end to give them enough wiggle room between the ear of the frame stands.
Good to go now! More updates coming really soon.
Andrew
The following 3 users liked this post by Project GatTagO:
12-18-2022 | 05:43 AM
#214
Now you have me more worried than before about my poly mounts, lol. At this point a PITA to change, mine mount to the frame, you know what that's like with the lower control arm in place, lol. Todds def a good guy.
The following users liked this post:
Project GatTagO (12-18-2022)
12-18-2022 | 11:19 AM
#215
Thread Starter
Joined: Mar 2003
Posts: 10,244
Likes: 1,531
From: The City of Fountains
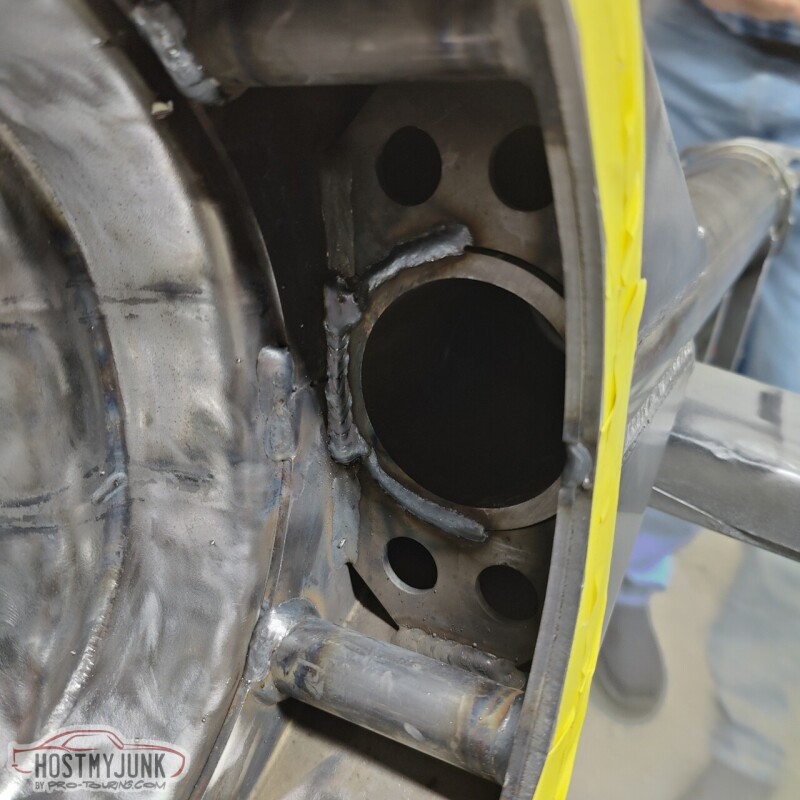
My friend Tom visited me from Alabama and our goal for his visit was to mock up and ultimately install the Quick Performance 9" rear end. I knew that things were not going to just bolt together because the brackets on the QP rear are not exactly the same as an original 12 bolt, plus I ordered mine with multiple holes on the lower control arm bracket.
You can see in this picture how the Ridetech coilover bracket is designed to bolt to the original shock mount and then a tab comes around and gets bolted with the lower control arm bolt.
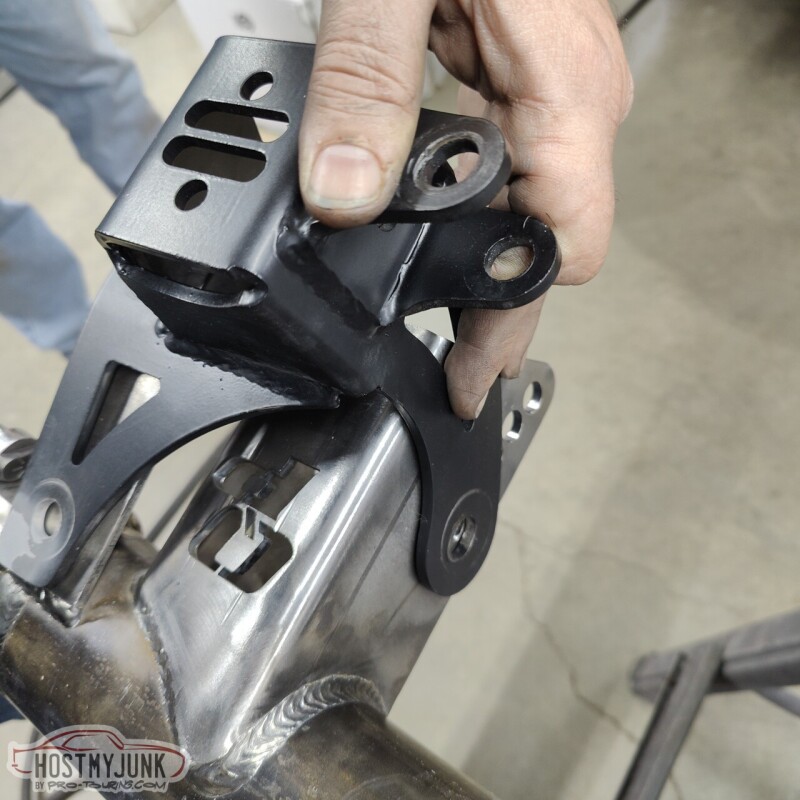
The bracket was trimmed to allow the use of all the holes on the lower control arm bracket.
The bracket was also trimmed on the side to remove a little excess material where it rests against the shock mount on the QP housing.
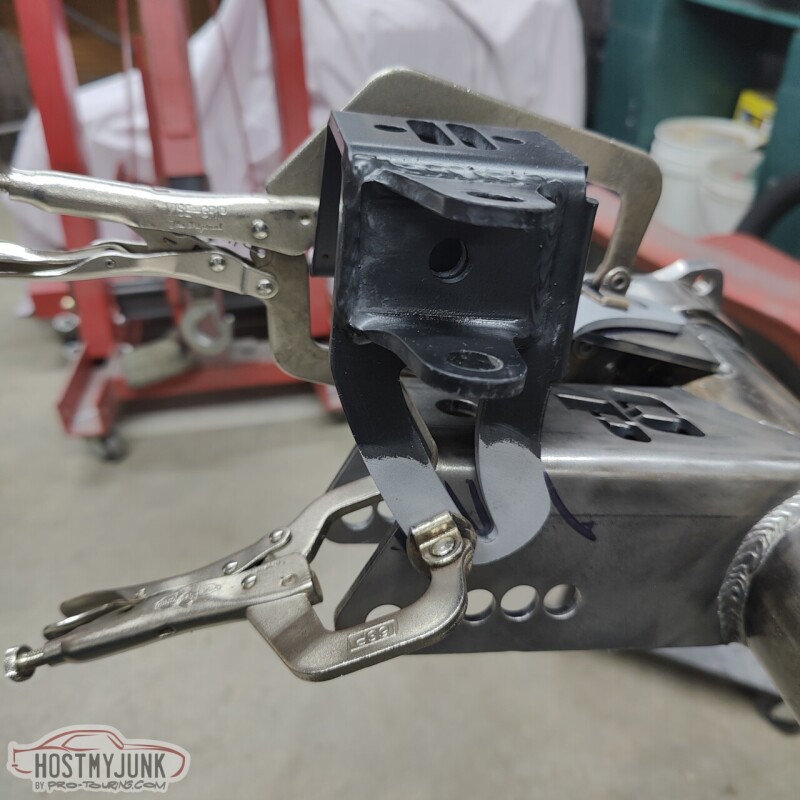
Then Vic went to work doing his thing...
Here is the final result, with the Ridetech coilover bracket fully welded to the QP housing.
We also pressed the Ridetech R-joints out of the old 12 bolt and into the QP upper control arm ears. Ridetech included a tool to make this process very straightforward.
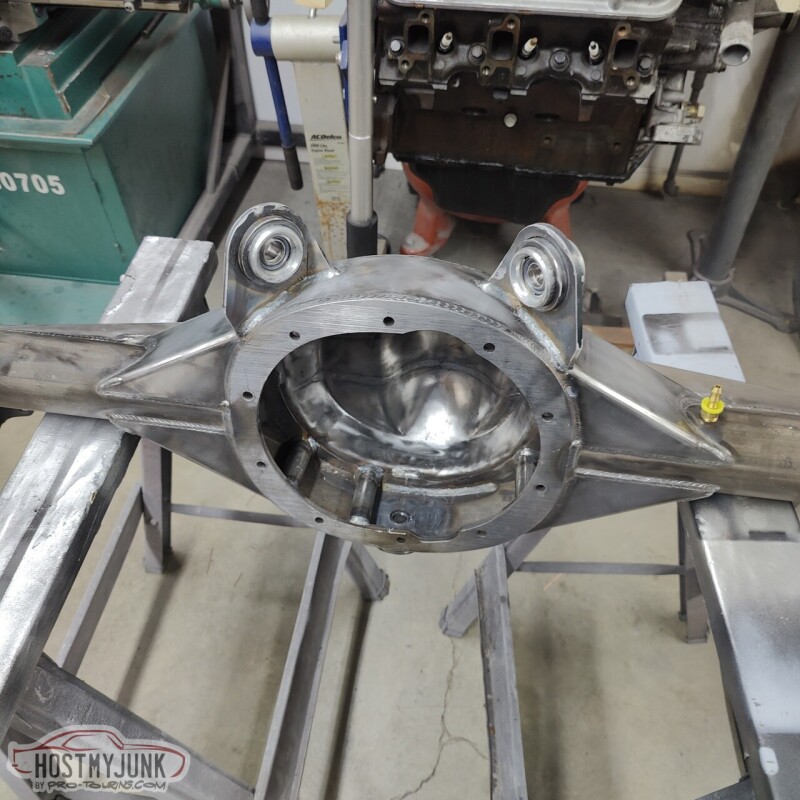
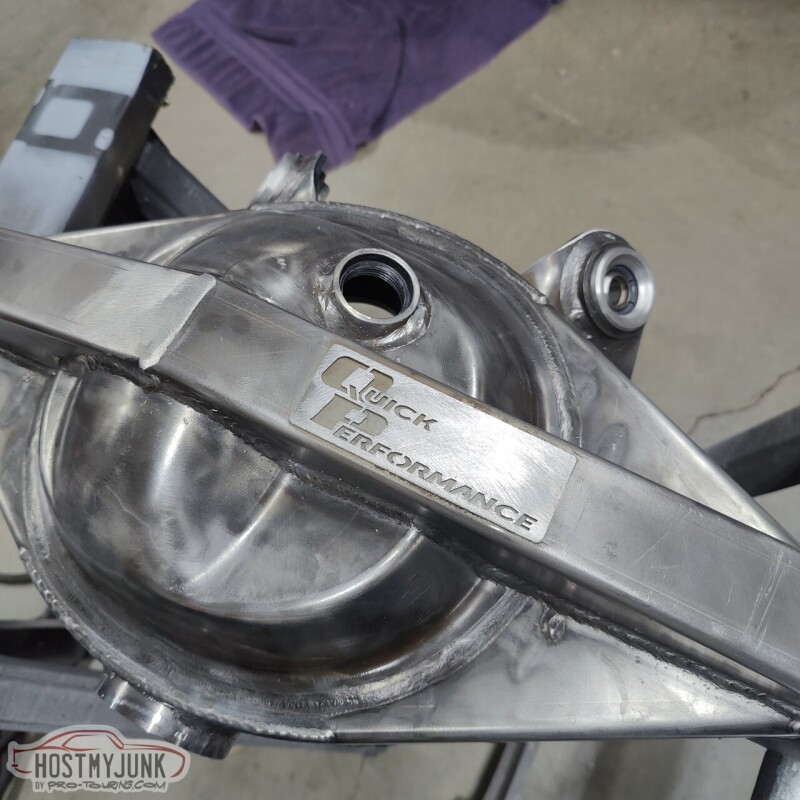
When I ordered the QP housing I checked all the boxes for the extra internal gussets...
..and the back brace. I also chose the fill and the drain option.
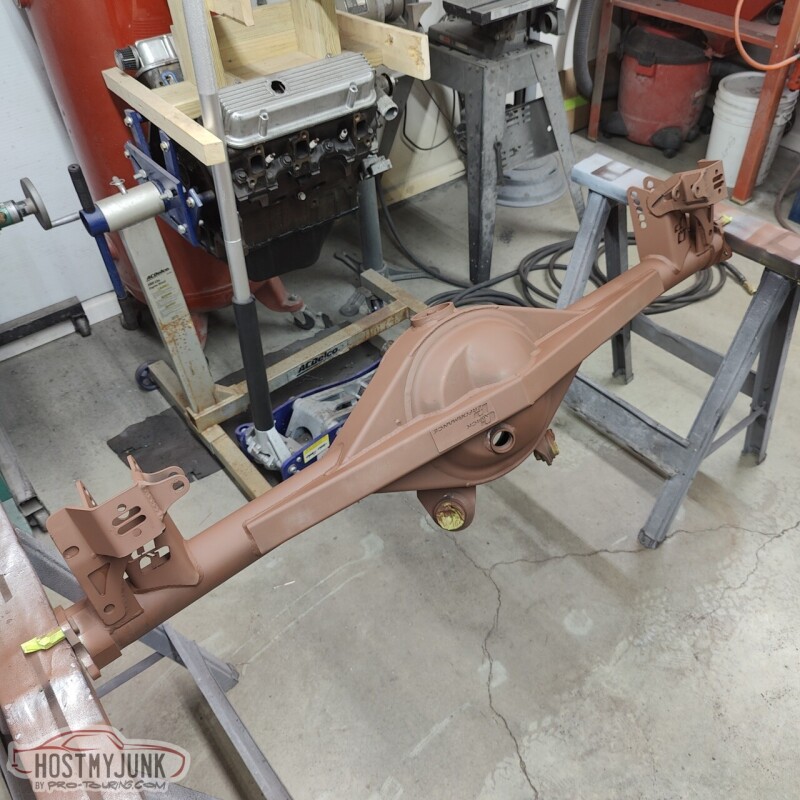
After the Ridetech coilover brackets were welded, I went over the whole housing and softened up all of the hard edges on the brackets and Tom shot a coat of Rustoleum primer.
..followed by a couple of coats of Rustoleum semi gloss black.
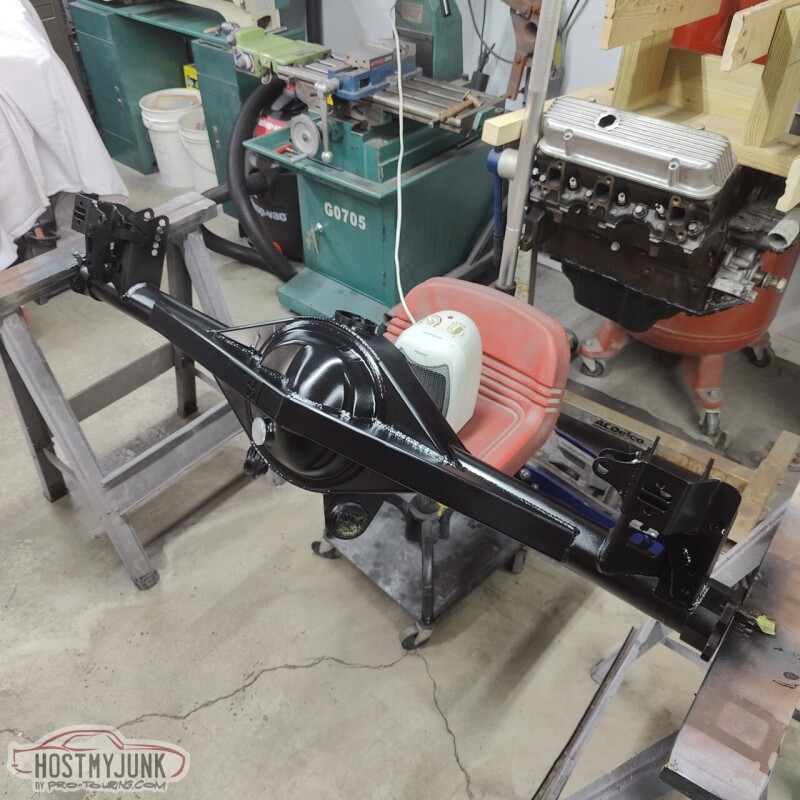
More to come...
Andrew
You can see in this picture how the Ridetech coilover bracket is designed to bolt to the original shock mount and then a tab comes around and gets bolted with the lower control arm bolt.
The bracket was trimmed to allow the use of all the holes on the lower control arm bracket.
The bracket was also trimmed on the side to remove a little excess material where it rests against the shock mount on the QP housing.
Then Vic went to work doing his thing...
Here is the final result, with the Ridetech coilover bracket fully welded to the QP housing.
We also pressed the Ridetech R-joints out of the old 12 bolt and into the QP upper control arm ears. Ridetech included a tool to make this process very straightforward.
When I ordered the QP housing I checked all the boxes for the extra internal gussets...
..and the back brace. I also chose the fill and the drain option.
After the Ridetech coilover brackets were welded, I went over the whole housing and softened up all of the hard edges on the brackets and Tom shot a coat of Rustoleum primer.
..followed by a couple of coats of Rustoleum semi gloss black.
More to come...
Andrew
The following 5 users liked this post by Project GatTagO:
C5_Pete (12-18-2022), forcd ind (12-18-2022), n2xlr8n66 (12-18-2022), Pro Stock John (12-18-2022), ryeguy2006a (12-19-2022)
12-19-2022 | 10:29 AM
#216
Thread Starter
Joined: Mar 2003
Posts: 10,244
Likes: 1,531
From: The City of Fountains
The most expensive tires I have ever purchased showed up as well. If I can get two seasons out of these I'll be happy.

Had them mounted and balanced at my local Discount Tire. They have taken good care of me with the tires for the Cougar.
The fit in the wheel wells is pretty good. This rear end was ordered to be 1/2" narrower on each side, but it almost feels like they narrowed it 1" per side. I have not compared the width to my 12 bolt yet. Using a 1/2" spacer will put the tire dead center in the wheel wells.
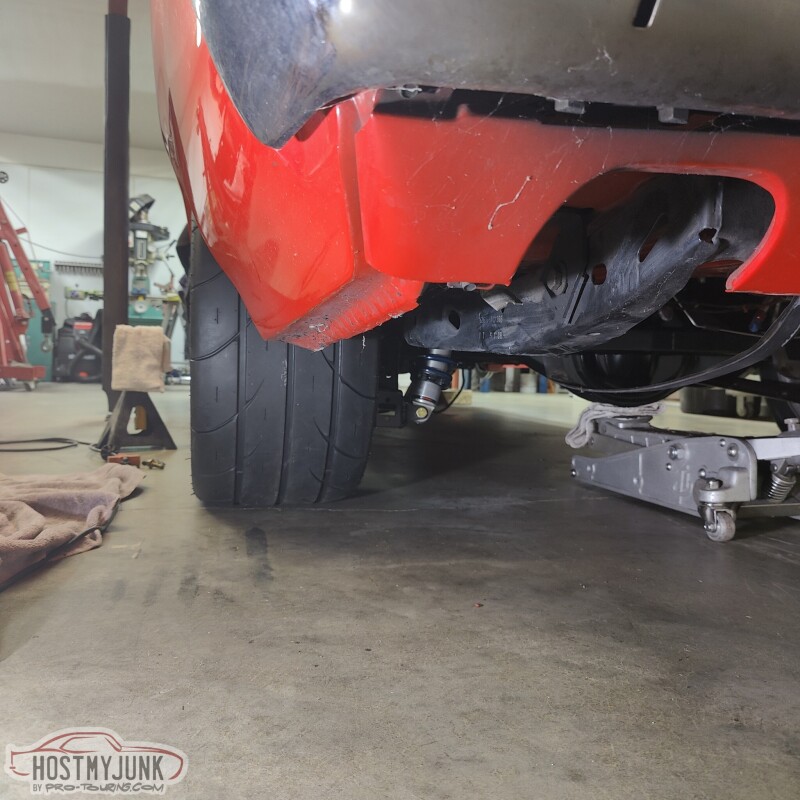
This is with the 1/2" spacer, so the new tires are good to go.
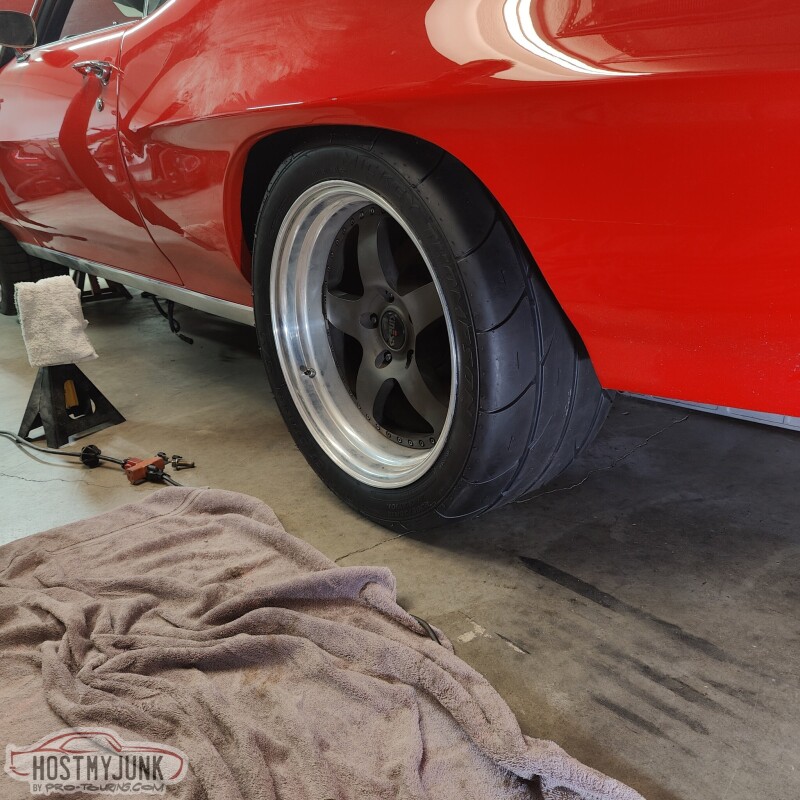
The same can't be said for the hood.
Doh!!!
Andrew
Had them mounted and balanced at my local Discount Tire. They have taken good care of me with the tires for the Cougar.
The fit in the wheel wells is pretty good. This rear end was ordered to be 1/2" narrower on each side, but it almost feels like they narrowed it 1" per side. I have not compared the width to my 12 bolt yet. Using a 1/2" spacer will put the tire dead center in the wheel wells.
This is with the 1/2" spacer, so the new tires are good to go.
The same can't be said for the hood.
Doh!!!
Andrew
The following 2 users liked this post by Project GatTagO:
C5_Pete (12-19-2022), Pro Stock John (12-19-2022)
12-19-2022 | 12:33 PM
#217
I have those tires on my car, 315/35/17. I've driven them on the street for a couple years now, probably less than 2k miles and still have a lot of tread left. I don't launch the car hard(stock 10 bolt problems,  ) or do burnouts (they are expensive).
It has to be my suspension setup, because the car never really hooks up, at the top of 3rd gear at 80mph it is still blows the tires off. That's the only reason my rear end hasn't exploded yet.
) or do burnouts (they are expensive). It has to be my suspension setup, because the car never really hooks up, at the top of 3rd gear at 80mph it is still blows the tires off. That's the only reason my rear end hasn't exploded yet.
The following users liked this post:
Project GatTagO (12-19-2022)
The following users liked this post:
Project GatTagO (12-19-2022)
12-19-2022 | 09:32 PM
#219
Thread Starter
Joined: Mar 2003
Posts: 10,244
Likes: 1,531
From: The City of Fountains
I have those tires on my car, 315/35/17. I've driven them on the street for a couple years now, probably less than 2k miles and still have a lot of tread left. I don't launch the car hard(stock 10 bolt problems, ) or do burnouts (they are expensive).
It has to be my suspension setup, because the car never really hooks up, at the top of 3rd gear at 80mph it is still blows the tires off. That's the only reason my rear end hasn't exploded yet.
) or do burnouts (they are expensive).It has to be my suspension setup, because the car never really hooks up, at the top of 3rd gear at 80mph it is still blows the tires off. That's the only reason my rear end hasn't exploded yet.
Solution of last resort is getting a GlassTek 70 GTO hood with a 2" raised center section.
Andrew
Last edited by Project GatTagO; 12-20-2022 at 10:23 AM.
The following users liked this post:
Pro Stock John (12-19-2022)

The following users liked this post:
Project GatTagO (12-20-2022)