Horizontal FMIC project
 12-20-2007, 11:25 PM
#21

I gotta admit, you were my inspiration on this Bryan  I was going to copy yours exactly, but my foglights would interfere with the brace you made for your camaro. I'm in the process right now of modeling up a support. Hopefully I'll be done in a couple days with the concept then I can start cutting and welding
I was going to copy yours exactly, but my foglights would interfere with the brace you made for your camaro. I'm in the process right now of modeling up a support. Hopefully I'll be done in a couple days with the concept then I can start cutting and welding  12-20-2007, 11:29 PM
#22

I mounted the hiflo intercoolers to the lower core support. the ic's sat below this, directly under it... i just welded two pieces of aluminum L brackets to the sides of the core and used existing bolt holes on the core support.. all the strength you need.
12-20-2007, 11:47 PM
#23
TECH Enthusiast
iTrader: (33)

Join Date: Jul 2002
Location: Ok
Posts: 609
Likes: 0
Received 0 Likes
on
0 Posts

I gotta admit, you were my inspiration on this Bryan I was going to copy yours exactly, but my foglights would interfere with the brace you made for your camaro. I'm in the process right now of modeling up a support. Hopefully I'll be done in a couple days with the concept then I can start cutting and welding
I was going to copy yours exactly, but my foglights would interfere with the brace you made for your camaro. I'm in the process right now of modeling up a support. Hopefully I'll be done in a couple days with the concept then I can start cutting and welding
12-21-2007, 01:15 AM
#24
Closed Sponsor Account
iTrader: (3)

Join Date: Jun 2007
Location: Boca Raton
Posts: 235
Likes: 0
Received 0 Likes
on
0 Posts
Sweet! That helps a little  Thanks Is there any way of getting the one side of that tubing going from the TB to the IC? I love the polished look
Yes, I was looking at his and koji777's. They both run it that way. But neither of them have a MAF to worry about. And that is my problem...
Thanks Is there any way of getting the one side of that tubing going from the TB to the IC? I love the polished look Yes, I was looking at his and koji777's. They both run it that way. But neither of them have a MAF to worry about. And that is my problem...
12-24-2007, 06:45 PM
#26
Made a little progress on the project over the weekend. Here's the latest...
Preparing to make the cut on the bottom of the bumper for the IC clearance:
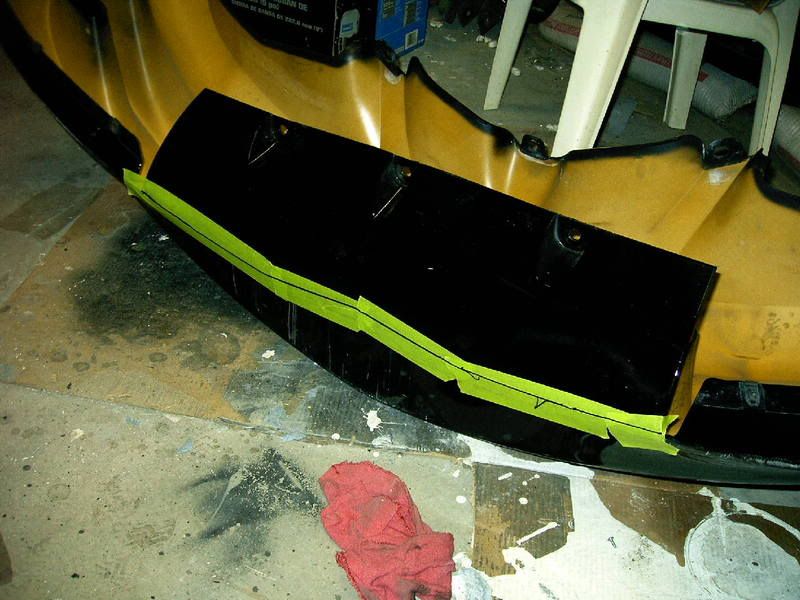
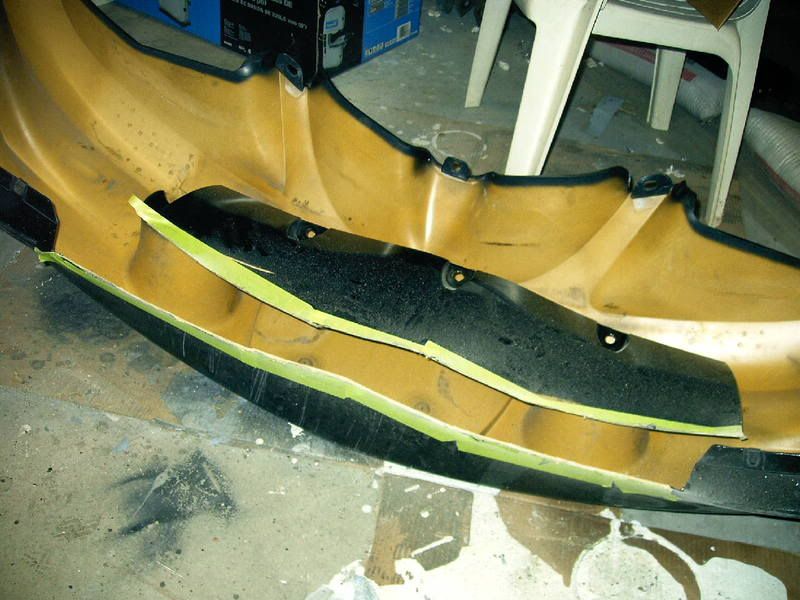
And it is cut! Point of no return now right! BTW- had to make a few more cuts after trial fitting it a few times. I sure am getting very good at putting the bumper on and taking it off now thats for sure!
I decided to have an optional air scoop where the front plate cover is for track use, but still be able to put the cover on for the street. So I cut a little bit of the plate area out also. Made my line:
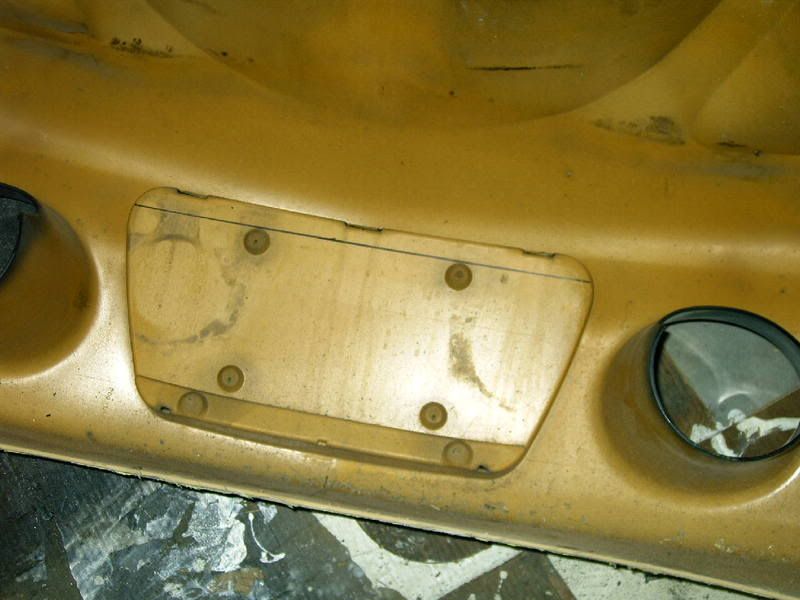
And Cut it out!
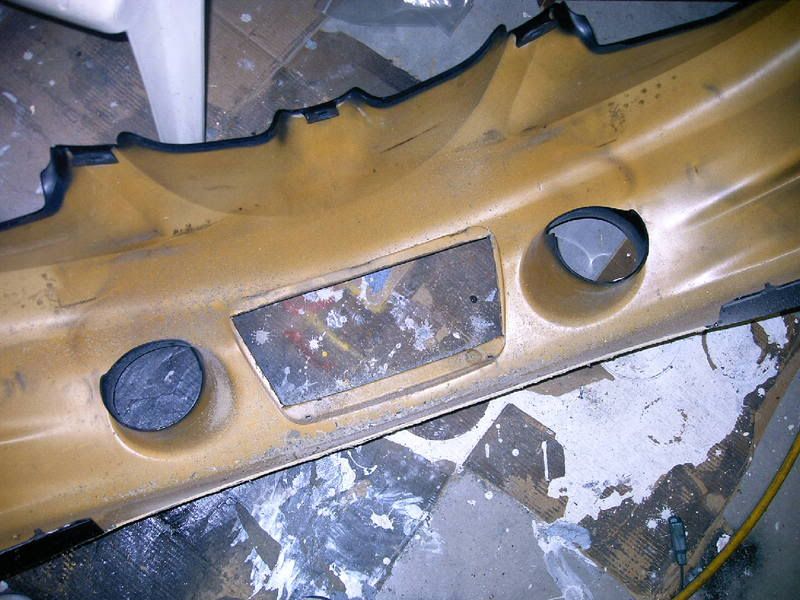
Now there is really no going back
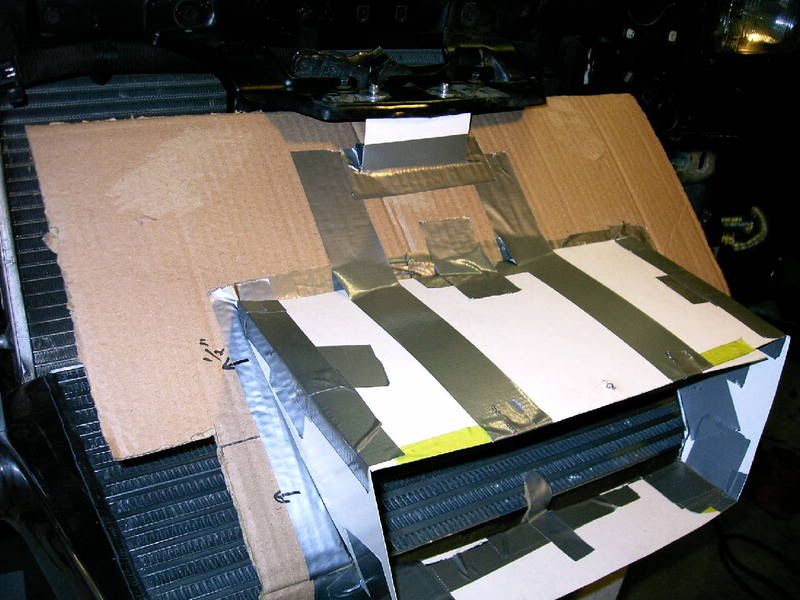
So I wanted a shroud to direct all incoming air from the IC into the condenser/ radiator. And I just had to have that bright idea about having the optional front plate cover removal. That made the shroud even more complex and way harder to mock up But here it is so far. It is a work in progress- I still need to do the sides.
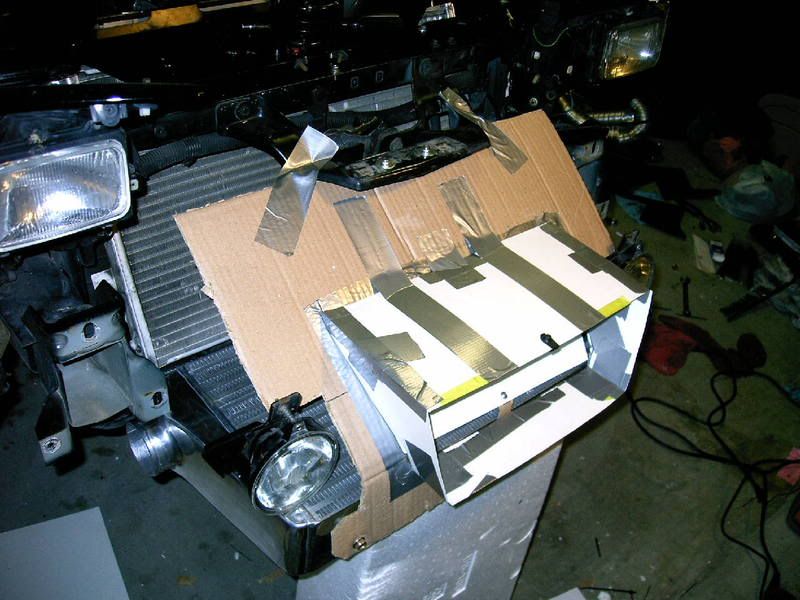
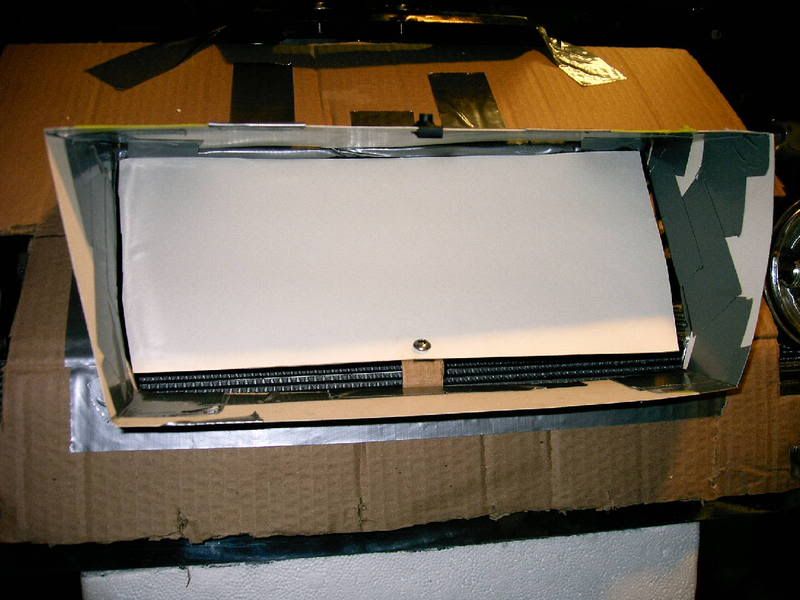
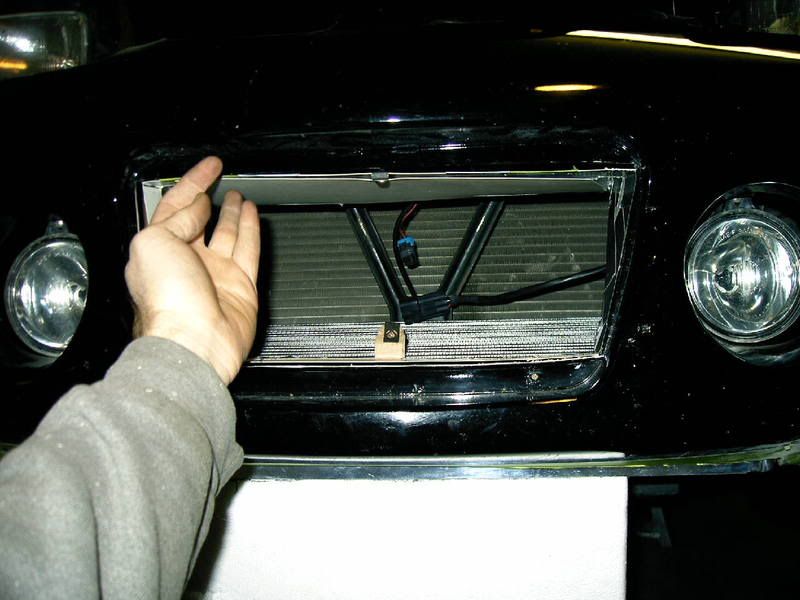
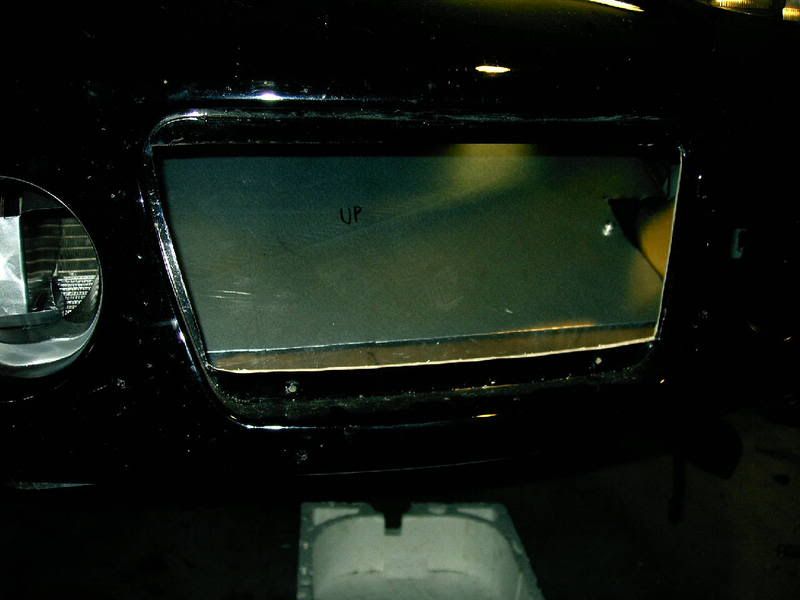
I wanted the incoming air to have a direct path to the condenser and radiator with the plate cover on, so I am going to make a hinged flap that will open and close depending on if the plate cover is on or off. Here is a view with the flap closed for when the plate cover is on:

A close up look with it closed. You can see how I am going to secure it closed in this picture- with a little screw that screws into a tab that will be behind it on the bottom:
And now opening up the flap for track use:
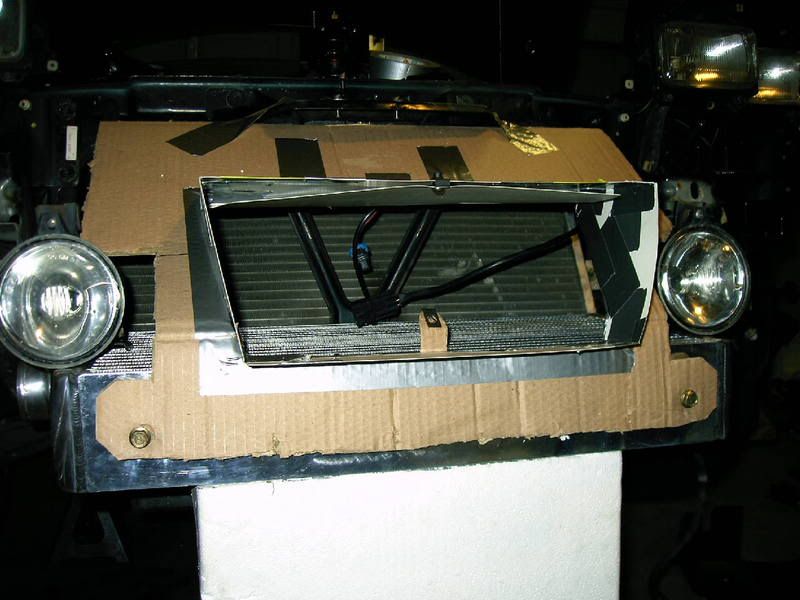
The same screw will go thru the same hole in the flap in the up position, just turned up now and screws into the upper support:

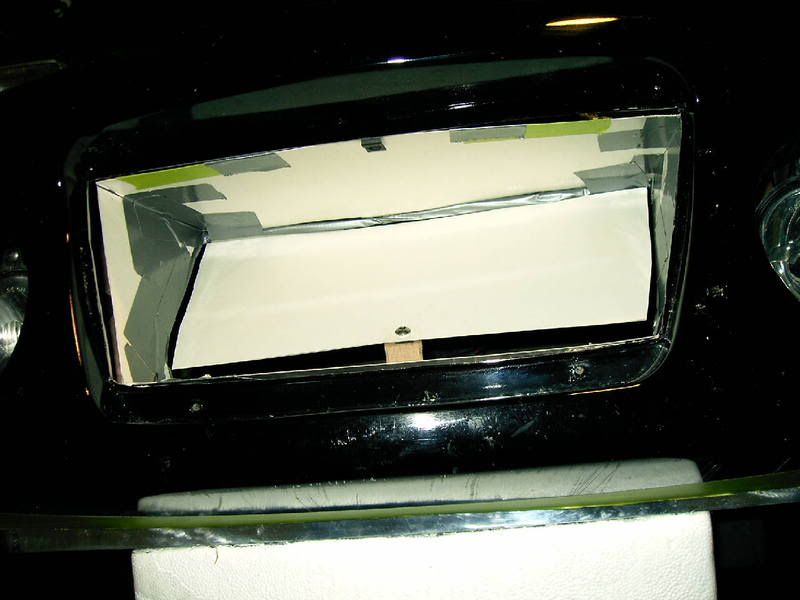
And here it is opened with the bumper on:
Stupid paper flap sagging! It should look more like this when that piece is made from aluminum
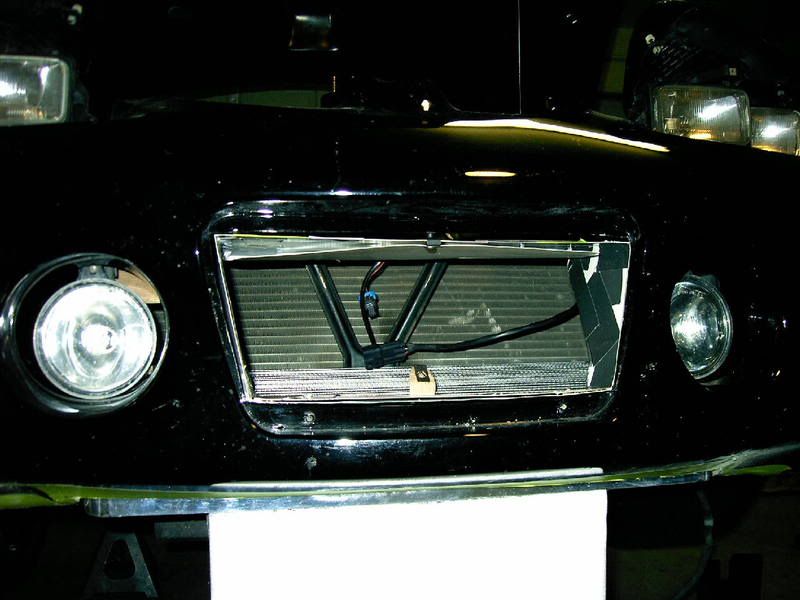
And then closed with the bumper on:

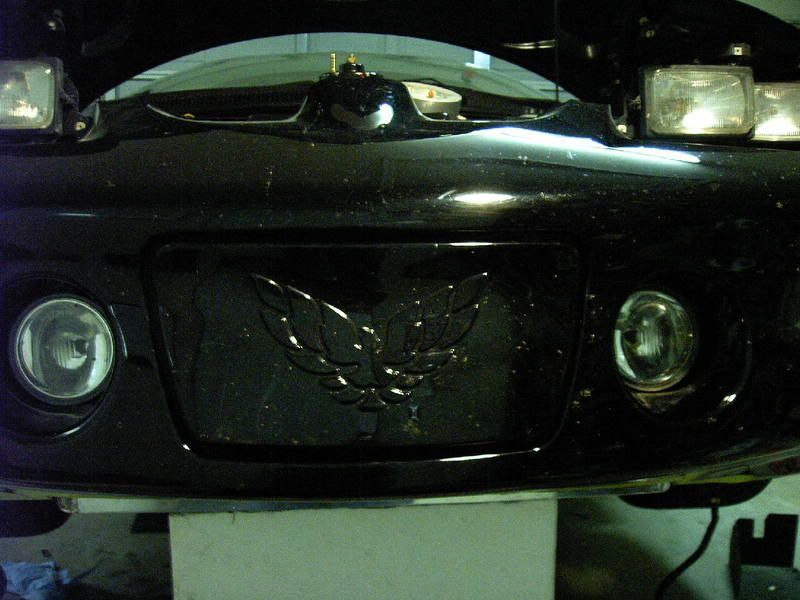
And finally with the plate cover installed you'd never guess there was anything hiding behind there
Preparing to make the cut on the bottom of the bumper for the IC clearance:
And it is cut! Point of no return now right! BTW- had to make a few more cuts after trial fitting it a few times. I sure am getting very good at putting the bumper on and taking it off now thats for sure!
I decided to have an optional air scoop where the front plate cover is for track use, but still be able to put the cover on for the street. So I cut a little bit of the plate area out also. Made my line:
And Cut it out!
Now there is really no going back
So I wanted a shroud to direct all incoming air from the IC into the condenser/ radiator. And I just had to have that bright idea about having the optional front plate cover removal. That made the shroud even more complex and way harder to mock up
But here it is so far. It is a work in progress- I still need to do the sides.I wanted the incoming air to have a direct path to the condenser and radiator with the plate cover on, so I am going to make a hinged flap that will open and close depending on if the plate cover is on or off. Here is a view with the flap closed for when the plate cover is on:
A close up look with it closed. You can see how I am going to secure it closed in this picture- with a little screw that screws into a tab that will be behind it on the bottom:
And now opening up the flap for track use:
The same screw will go thru the same hole in the flap in the up position, just turned up now and screws into the upper support:
And here it is opened with the bumper on:
Stupid paper flap sagging! It should look more like this when that piece is made from aluminum
And then closed with the bumper on:
And finally with the plate cover installed you'd never guess there was anything hiding behind there
Last edited by ChevyChad; 12-24-2007 at 07:17 PM.
 12-25-2007, 01:16 AM
#31
If the flap wasn't there, the airflow wouldn't have a direct path to where I want it to go into the condenser/ radiator. Sure it would get there, but it'd probably create a vertex in there and that doesn't flow as efficiently as a straight path. At least thats my thinking- I could be way wrong...  But it can't hurt
But it can't hurt
12-25-2007, 06:55 AM
#32
7 Second Club
iTrader: (18)
Join Date: Mar 2004
Location: Cincinnati, Ohio
Posts: 790
Likes: 0
Received 0 Likes
on
0 Posts
That's a very nice fab job you have and an excellent idea for a front mount. I may get rid of those damn ATI twins some day and I even have the 4.5"s. But right now I can't hook on the street as it is, it would be just more of a fun project.
I think your efforts with the flap may be in vain, make the shroud that routes the air towards the radiator and and just make it easier on yourself. It's more important to force the air through the IC first. By using the front cover and a "tunnel" you will be essesntially "block off" some, if not alot of the flow through the IC. As the air passes through (remember straight thru the fans towards the front of the block) it will create a "wall" of air that will impede the air trying to come up from the bottom. As for the air going towards the radiator, I seriously doubt you will ever overheat and knocking off 10-15 degrees on the ECT is not nearly is as effective as knocking off 10-15 degrees off your IAT when at the track.
Just something to think about.
Mark
12-25-2007, 05:30 PM
#33
I had thought of that, but I would think that the same amount of air would still come up, but then join in the 'extra' air coming from the front. And about your point of ECT vs IAT, I think I could use all the help I can get with the ECT running A/C on a hot day here in OK, so it could benefit there too. Plus, with the meth, IAT's are not a huge concern. I think it will be interesting to test out just to see. I'm not saying it will work the way I'm hoping for it to, but I'd like to try it and see the effects. I can monitor ECT and IAT both ways in all sorts of conditions, and see if it helps at all or not. Only time will tell, but I'm still gonna try. Its worth it to me to give it a shot. I'll be the first one to admit I was wrong if it doesn't work.
I think it will be interesting to test out just to see. I'm not saying it will work the way I'm hoping for it to, but I'd like to try it and see the effects. I can monitor ECT and IAT both ways in all sorts of conditions, and see if it helps at all or not. Only time will tell, but I'm still gonna try. Its worth it to me to give it a shot. I'll be the first one to admit I was wrong if it doesn't work.
12-25-2007, 07:32 PM
#35
this is looking great Chad! I admire your fab skills and this is going to be a cool set up for sure! Cant wait to see it finished up
__________________

Featuring 6 different turbo kits for your F-body!
Check us out on Facebook at: www.facebook.com/HuronSpeed
Featuring 6 different turbo kits for your F-body!
Check us out on Facebook at: www.facebook.com/HuronSpeed
12-26-2007, 05:09 PM
#36
7 Second Club
iTrader: (18)
Join Date: Mar 2004
Location: Cincinnati, Ohio
Posts: 790
Likes: 0
Received 0 Likes
on
0 Posts
I had thought of that, but I would think that the same amount of air would still come up, but then join in the 'extra' air coming from the front. And about your point of ECT vs IAT, I think I could use all the help I can get with the ECT running A/C on a hot day here in OK, so it could benefit there too. Plus, with the meth, IAT's are not a huge concern. I think it will be interesting to test out just to see. I'm not saying it will work the way I'm hoping for it to, but I'd like to try it and see the effects. I can monitor ECT and IAT both ways in all sorts of conditions, and see if it helps at all or not. Only time will tell, but I'm still gonna try. Its worth it to me to give it a shot. I'll be the first one to admit I was wrong if it doesn't work.
I think it will be interesting to test out just to see. I'm not saying it will work the way I'm hoping for it to, but I'd like to try it and see the effects. I can monitor ECT and IAT both ways in all sorts of conditions, and see if it helps at all or not. Only time will tell, but I'm still gonna try. Its worth it to me to give it a shot. I'll be the first one to admit I was wrong if it doesn't work.Just as a friendly and somewhat experienced debate, I'll give you a couple more things to think about.
The air "joining" is a concern because the air flow will go straight thru the radiator forming a horizontal wall blocking the up flow from the bottom which will have less velocity than the straight thru flow. It's really not going to be a huge deal but just consider it.
Secondly, I was not refering to detonation on the IAT front, your right, the meth with help that. But the HP gained from lower IAT's is why I said cooling your intake charge is more important than running at 220 vs 210 on your ECT. You refered to a concern that with your AC you would run hot, I was under the impression that the flap would only open at the track. If so, running your AC with definitely scrub off ET, lol...of course there have been many times I wish I was running my AC at the track instead of sweating my *** off, lol.
Keep your course, make sure to get a good air dam forcing that air up through the IC. Maybe with your fab skills you could come up with a wide, low profile scoop to maximize the air passing thru the max surface area on the IC instead of just the back section (closest to the core support).
Good luck!
Mark
12-26-2007, 05:33 PM
#37
LOL no no no, I don't run the A/C at the track, I was actually just talking about keeping the possibility to open it up on the street in the hot summer temps. I didn't specify that, sorry I am going to put a fan (or 2 if I can fit them) on top of the IC that will pull air up thru it, so that will help too. I am not saying you are wrong about the 'wall' of air being forced in from the front... I'm just not completely sold that it will totally impede air coming up from underneath all together. It is an experiment, and right or wrong, I'm actually having fun with the project, and I haven't seen anyone else do this, so I'm gonna press forward with it. If I find that the front opening is worthless I'll take it off, but at least I'll know for sure instead of wondering what if...
I am going to put a fan (or 2 if I can fit them) on top of the IC that will pull air up thru it, so that will help too. I am not saying you are wrong about the 'wall' of air being forced in from the front... I'm just not completely sold that it will totally impede air coming up from underneath all together. It is an experiment, and right or wrong, I'm actually having fun with the project, and I haven't seen anyone else do this, so I'm gonna press forward with it. If I find that the front opening is worthless I'll take it off, but at least I'll know for sure instead of wondering what if...  01-01-2008, 10:29 PM
#40
Alright, here is the latest progress report:
I was trying to figure out how to support the front of the IC, and had this idea to make the shroud double as a support using a couple existing holes in the bumper support bracket.
Then I came up with a different approach and wanted to see how well these metal straps could hold it up. Turns out, they do an awesome job and hold it in place solid!

You can also see in the above pic I relocated my meth pump onto the condenser using some of those radiator fan mounts. They worked perfect, and now I have a lot more room on top of the IC for some fans.
And here is the meth tank installed (previously known as the washer fluid tank )

And after that, I decided to make a whole new shroud based on the metal straps. The straps acted as a base structure for the new shroud, and very conveniently provided lots of mounting holes as an added bonus. I didn't get any pictures of the new shroud being mocked up, but yall already saw one mock up, so no need to go thru that rain dance again in this thread. But I did the sides and even incorporated the foglight mounting brackets into it. Then layed it all out flat onto some stainless sheet metal:
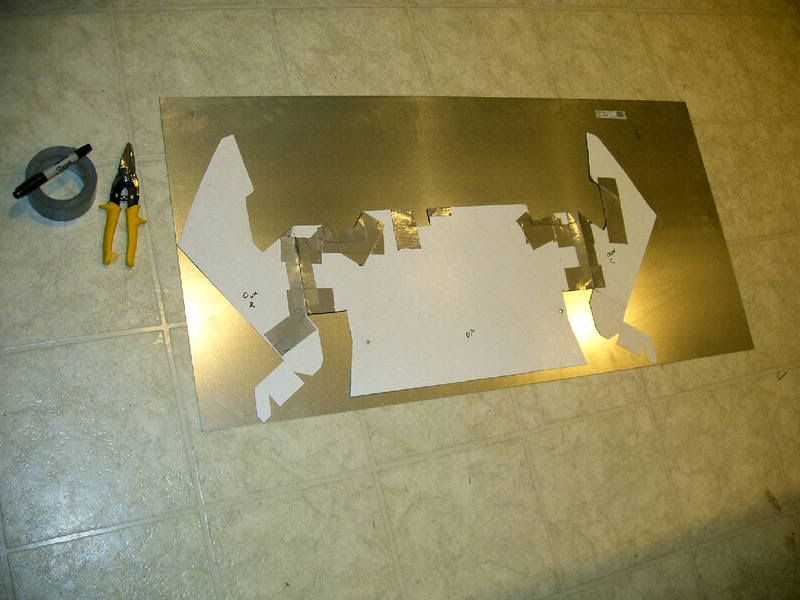
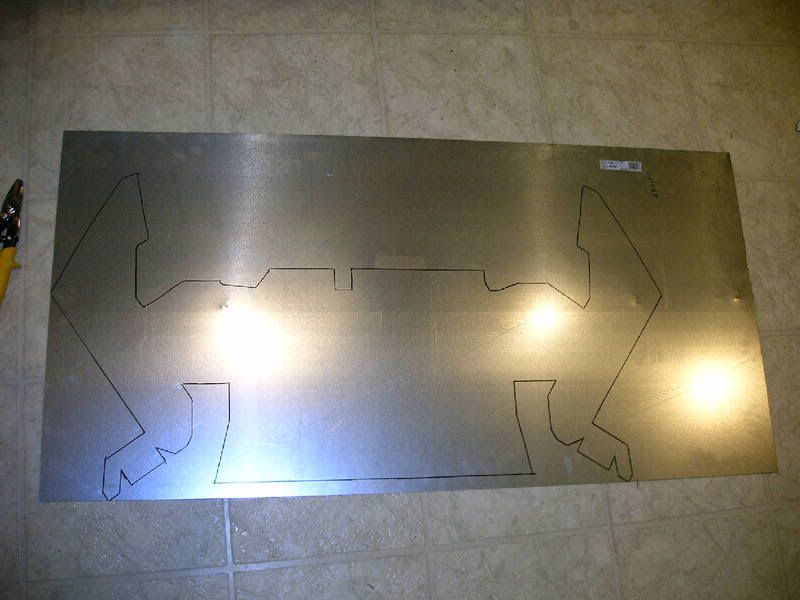
Traced it out:
Then a couple hours, a few cuts on my hands, a few choice words, and 3 dr peppers later I have a shroud:
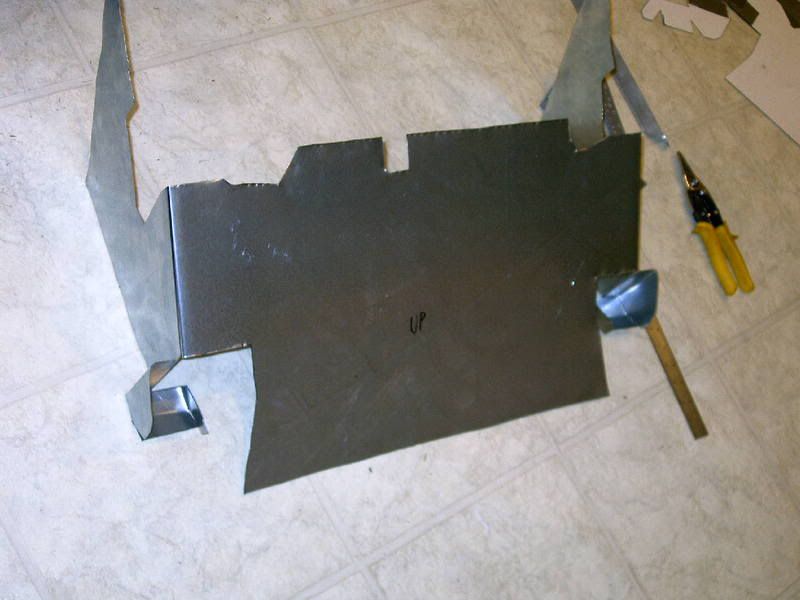
It is still rough around the edges, and I need to find a place to get some rubber stripping to go around it on the bottom and the back so it doesn't rub up against the IC or condenser. Then I gotta get a couple places welded. Mainly just in the foglight bucket mounts, but you get the idea.
Installed:

With the bumper back on, clearance is tightest here by the foglight surrounds in the bumper, but there it about 3/8". Should be pleanty.
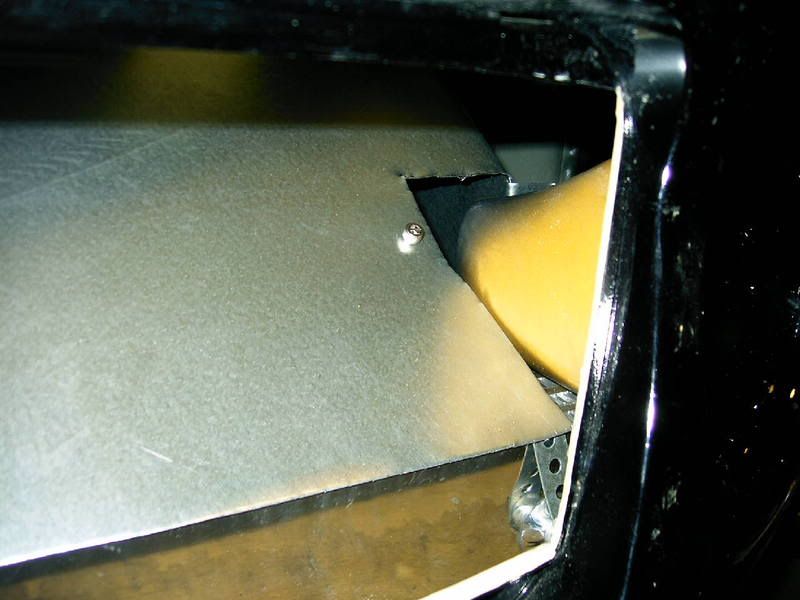
And a view looking into the nose hole:
Yes, I do plan on still adding in the tunnel so it will have ability to get some air from the front, but that will come later.
I was trying to figure out how to support the front of the IC, and had this idea to make the shroud double as a support using a couple existing holes in the bumper support bracket.
Then I came up with a different approach and wanted to see how well these metal straps could hold it up. Turns out, they do an awesome job and hold it in place solid!
You can also see in the above pic I relocated my meth pump onto the condenser using some of those radiator fan mounts. They worked perfect, and now I have a lot more room on top of the IC for some fans.
And here is the meth tank installed (previously known as the washer fluid tank
)And after that, I decided to make a whole new shroud based on the metal straps. The straps acted as a base structure for the new shroud, and very conveniently provided lots of mounting holes as an added bonus.
I didn't get any pictures of the new shroud being mocked up, but yall already saw one mock up, so no need to go thru that rain dance again in this thread. But I did the sides and even incorporated the foglight mounting brackets into it. Then layed it all out flat onto some stainless sheet metal:Traced it out:
Then a couple hours, a few cuts on my hands, a few choice words, and 3 dr peppers later I have a shroud:
It is still rough around the edges, and I need to find a place to get some rubber stripping to go around it on the bottom and the back so it doesn't rub up against the IC or condenser. Then I gotta get a couple places welded. Mainly just in the foglight bucket mounts, but you get the idea.
Installed:
With the bumper back on, clearance is tightest here by the foglight surrounds in the bumper, but there it about 3/8". Should be pleanty.
And a view looking into the nose hole:
Yes, I do plan on still adding in the tunnel so it will have ability to get some air from the front, but that will come later.