
Horizontal FMIC project
 01-02-2008, 01:13 AM
#41
Launching!
iTrader: (9)
Join Date: Jan 2004
Location: Santa Clara, CA
Posts: 216
Likes: 0
Received 0 Likes
on
0 Posts

The key is to not heat and, more importantly, NOT RESTRICT airflow to the radiator.
ChevyChad: I agree that with the front tunnel open the IC would see very little flow through it. Air will move to a lower pressure area and I'm not sure which will be lower with it open. If anything you could check it and do what works best. I think the shroud as is (w/o the tunnel) will be good enough but if not, try setting the plate so that bottom fed air is forced through half the radiator and front fed is cooling the top half and not mixing.
Arnel

 01-02-2008, 06:45 AM
#44

IC is now horizontal and right below the hood (mounted high) so it's a little different than the poster's setup. IAT's recover just fine and ECT differences are huge.
The key is to not heat and, more importantly, NOT RESTRICT airflow to the radiator.
ChevyChad: I agree that with the front tunnel open the IC would see very little flow through it. Air will move to a lower pressure area and I'm not sure which will be lower with it open. If anything you could check it and do what works best. I think the shroud as is (w/o the tunnel) will be good enough but if not, try setting the plate so that bottom fed air is forced through half the radiator and front fed is cooling the top half and not mixing.
Arnel
Chris.
01-02-2008, 08:01 AM
#45
Yes  I have access to a large cutter, but didn't at the time of night I was working on it so I just decided to go for it. Was a bit frustrating at times, but I was anxious to get it done. Definitely took longer and was a lot harder, but I was 'in the zone'
I may just leave it how it is without the tunnel and do some testing. I'm getting antsy now being so close to having it drivable again. So I'll try it out how it is and if the results are good with IAT's and ECT's, I may just decide to leave it
Arnel- I agree, it would be ideal not to restrict air going into the radiator, but the stock opening on the f-bodies for it to scoop in air is about 5" wide. I am opening that window up to 12" and adding over 2000 cfm worth of fans on top of it, so it should flow way more volume of air into the radiator than before
I have access to a large cutter, but didn't at the time of night I was working on it so I just decided to go for it. Was a bit frustrating at times, but I was anxious to get it done. Definitely took longer and was a lot harder, but I was 'in the zone' I may just leave it how it is without the tunnel and do some testing. I'm getting antsy now being so close to having it drivable again. So I'll try it out how it is and if the results are good with IAT's and ECT's, I may just decide to leave it
Arnel- I agree, it would be ideal not to restrict air going into the radiator, but the stock opening on the f-bodies for it to scoop in air is about 5" wide. I am opening that window up to 12" and adding over 2000 cfm worth of fans on top of it, so it should flow way more volume of air into the radiator than before
01-02-2008, 12:43 PM
#46
Launching!
iTrader: (9)
Join Date: Jan 2004
Location: Santa Clara, CA
Posts: 216
Likes: 0
Received 0 Likes
on
0 Posts
Arnel- I agree, it would be ideal not to restrict air going into the radiator, but the stock opening on the f-bodies for it to scoop in air is about 5" wide. I am opening that window up to 12" and adding over 2000 cfm worth of fans on top of it, so it should flow way more volume of air into the radiator than before
especially, because the IC will still restrict some. My issue was an IC that basically had an 8x20" window/area for flow and one that was very restrictive. Plus I had to have it survive up to 25 minutes of torture. Move it out of the way while still keeping flow through and problem fixed. As mentioned, I think your setup will be good. For you, the strip/street will be fine... and the good thing is, if you need even better, I think you can squeeze out a little more cooling.
Chris: I've already shared it w/ Nick and Kevin
 Unless Nick starts playing on a roadcourse and gets rid of his beautiful, bad ***, shroud, it ain't happening
Last edited by AVB; 01-03-2008 at 10:26 AM.
01-02-2008, 06:33 PM
#47
I'm working on a FMIC for my T/A and thought I'd share incase anyone else wanted to see how it can be done for a T/A and keep the stock appearance of the front bumper with the license plate filler and even the fog lights and all. Requirements for this install include retaining stock front bumper appearance with working fog lights, keep license plate filler panel, keep washer fluid tank (this is my meth reservoir), keep battery in the stock location, need ATI race BPV in location where water can't get to it (harder than usual with a Mecham hood- was the cause of the ultimate demise of my stock shortblock), and lastly- gotta keep MAF sensor (altho this will most likely be ditched in the future in favor of an SD tune, but for now MAF needs to stay for my tuner). I'm also going to add a couple puller fans on top of the IC to help with airflow across the entire surface because the air dam is only going to tend to shovel air into the back half or so.
Okay, so I think I've covered all my intentions. Now onto the mock up!
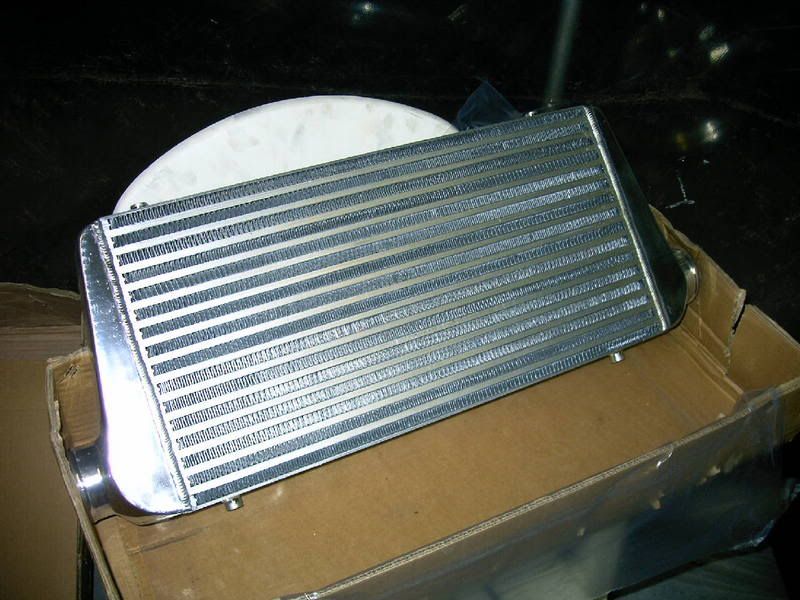
Here is the intercooler I went with. Just a cheap eBay unit, but I'm hoping it will be less of a restriction than the dual 3.5" smaller intercoolers. With a core size of 24x12x4 I think that should be an easy task to accomplish. I am aware that it probably won't be as efficient at cooling as a brand name unit would, but as I mentioned above, I have meth, and I ain't afraid to use it
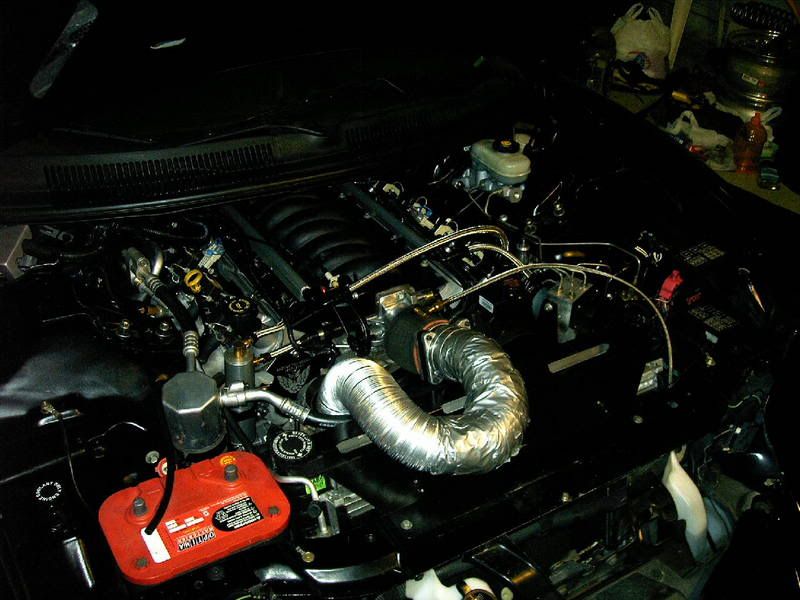
Now onto the placement of the MAF. After LOTS of messing around and trying to figure out the best place to put that stupid thing to where I could actually route the pipe and it would fit, I finally came to the conclusion that the stock location would work best for me.
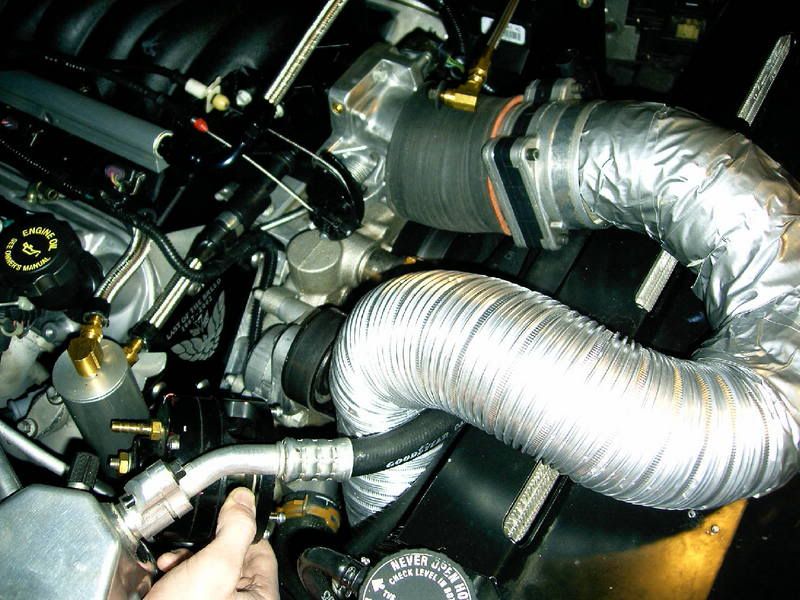
Planning to put the humongous ATI race BPV here:
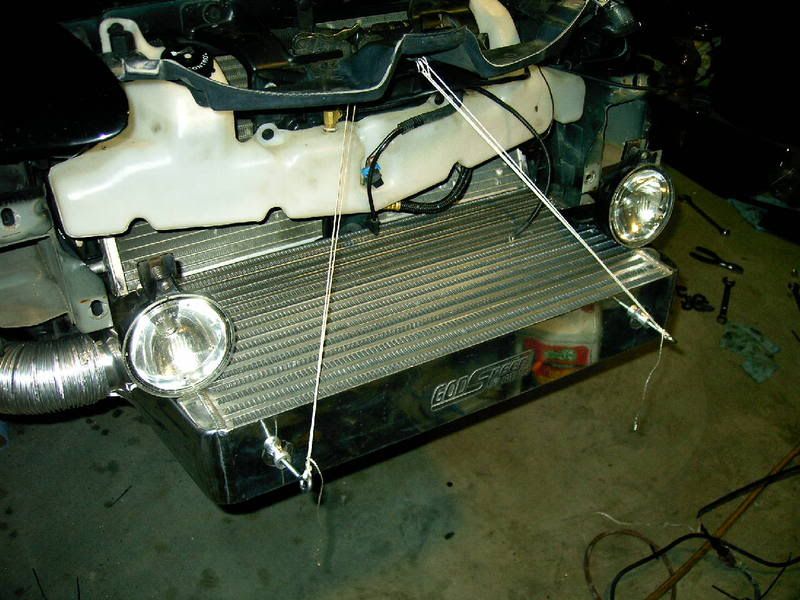
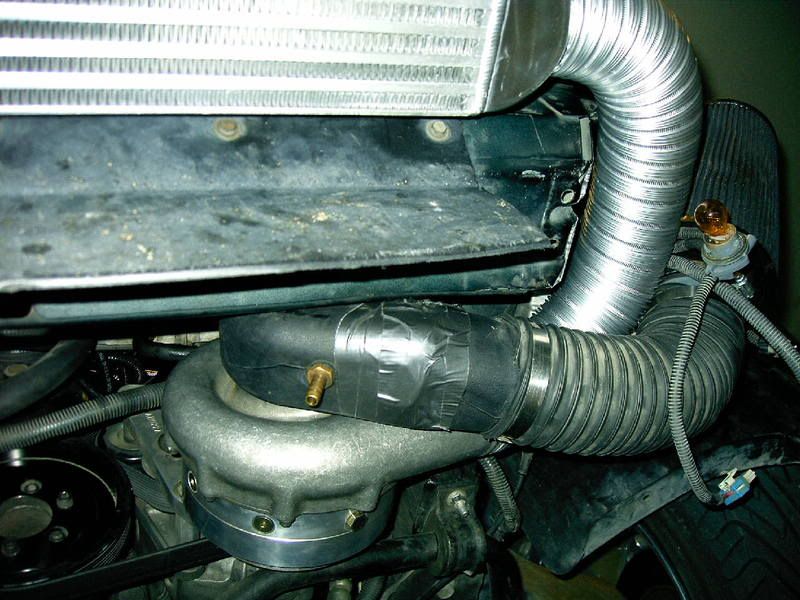
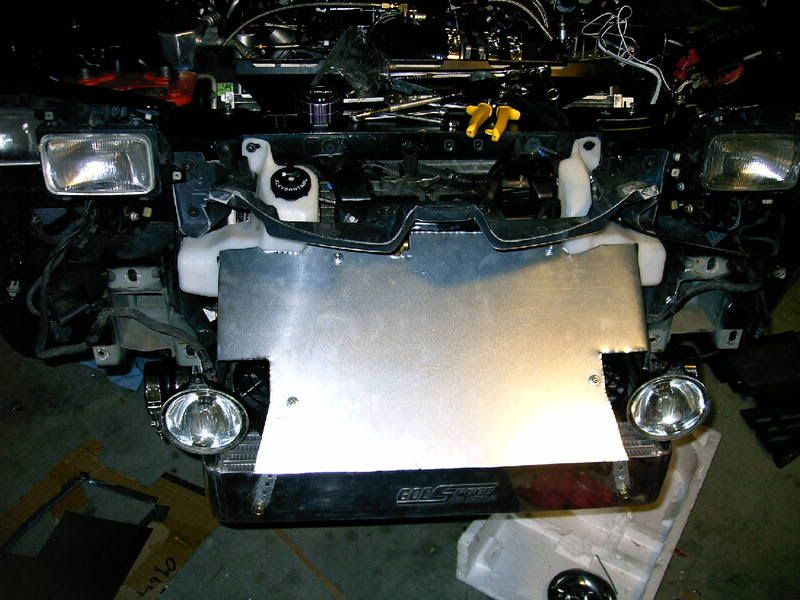
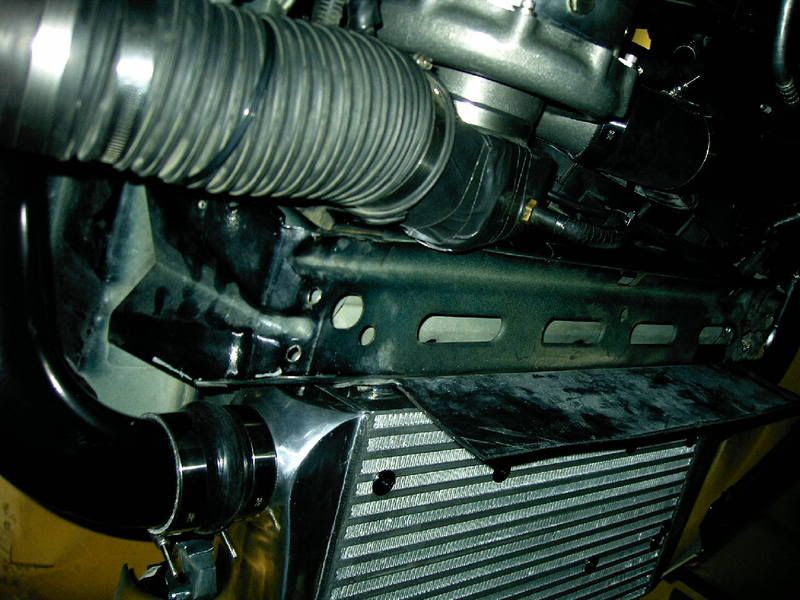
Got the bumper off and hung the IC up temporarily with some string so I could mock up the pipe and see what all I'll need to order and go ahead and get it on the way while I finish the rest of the stuff. You can also see where the fog lights in this pic in their stock location. (BTW- If you were wondering, I'm using some 3" dryer ducting to do the mockup of the pipe.)
Another pic from the front:

Here is a view looking up from the bottom of the passenger side:
And a few from the driver's side:
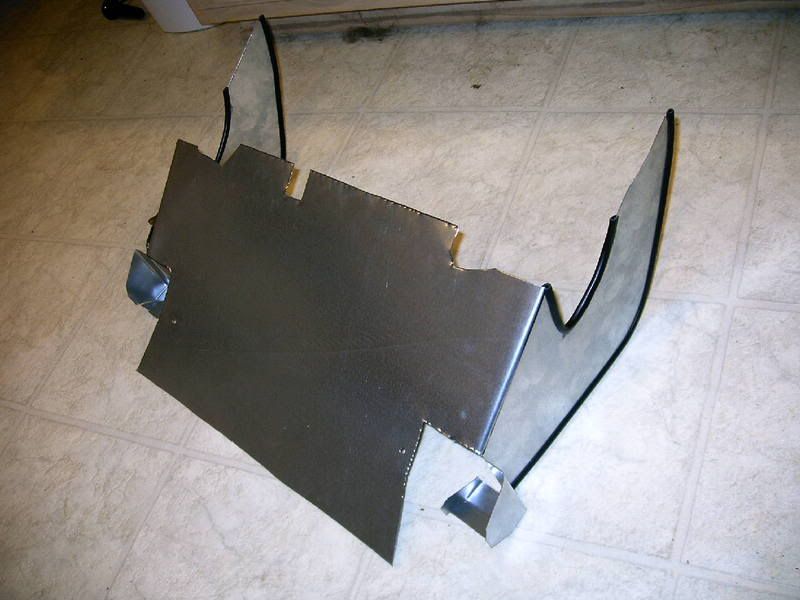
Next up is to make a frame to replace the stock front cross brace that holds the fog lights and foam bumper support. That part is gonna be tricky because it needs to have provisions to mount the fog lights, a bracket for the meth pump, and allow clearance for the cooling fans. Should take some creative engineering. But hey- I'm good at cramming 10 pounds of **** into a 5 pound bag! I do it every day at work designing airplanes!
Okay, so I think I've covered all my intentions. Now onto the mock up!
Here is the intercooler I went with. Just a cheap eBay unit, but I'm hoping it will be less of a restriction than the dual 3.5" smaller intercoolers. With a core size of 24x12x4 I think that should be an easy task to accomplish. I am aware that it probably won't be as efficient at cooling as a brand name unit would, but as I mentioned above, I have meth, and I ain't afraid to use it
Now onto the placement of the MAF. After LOTS of messing around and trying to figure out the best place to put that stupid thing to where I could actually route the pipe and it would fit, I finally came to the conclusion that the stock location would work best for me.
Planning to put the humongous ATI race BPV here:
Got the bumper off and hung the IC up temporarily with some string so I could mock up the pipe and see what all I'll need to order and go ahead and get it on the way while I finish the rest of the stuff. You can also see where the fog lights in this pic in their stock location. (BTW- If you were wondering, I'm using some 3" dryer ducting to do the mockup of the pipe.)
Another pic from the front:
Here is a view looking up from the bottom of the passenger side:
And a few from the driver's side:
Next up is to make a frame to replace the stock front cross brace that holds the fog lights and foam bumper support. That part is gonna be tricky because it needs to have provisions to mount the fog lights, a bracket for the meth pump, and allow clearance for the cooling fans. Should take some creative engineering. But hey- I'm good at cramming 10 pounds of **** into a 5 pound bag! I do it every day at work designing airplanes!
 01-03-2008, 01:44 AM
#50
Cheers
Chris.
01-03-2008, 07:02 AM
#51
 01-07-2008, 11:09 PM
#53
Been a while- time for an update...
Got all the piping cut and welded up and mocked up into place:
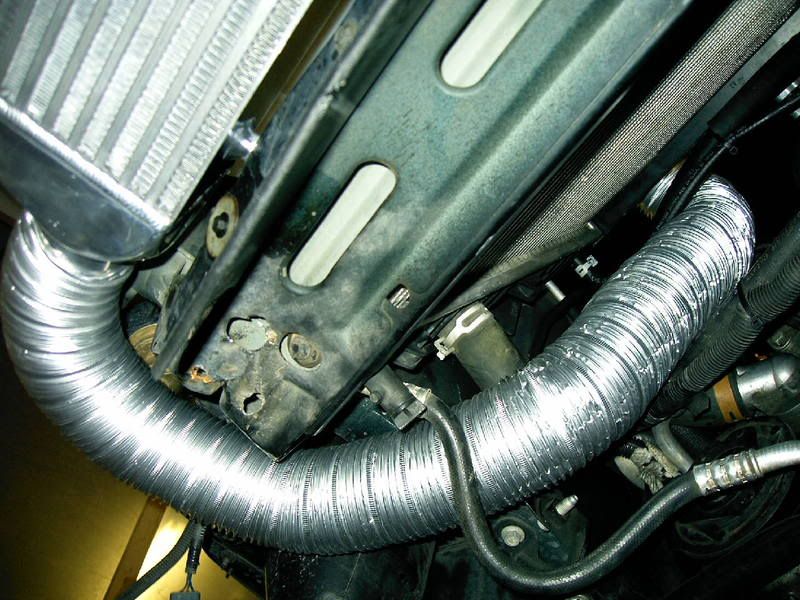
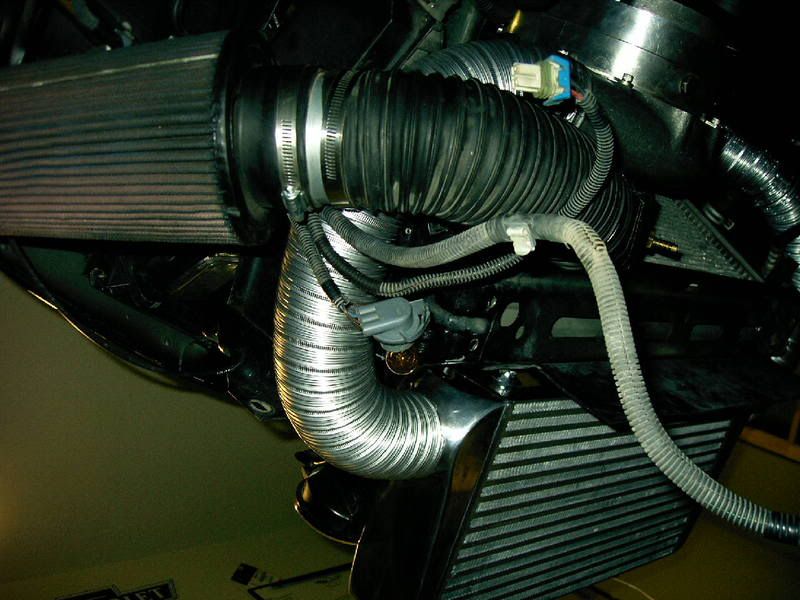
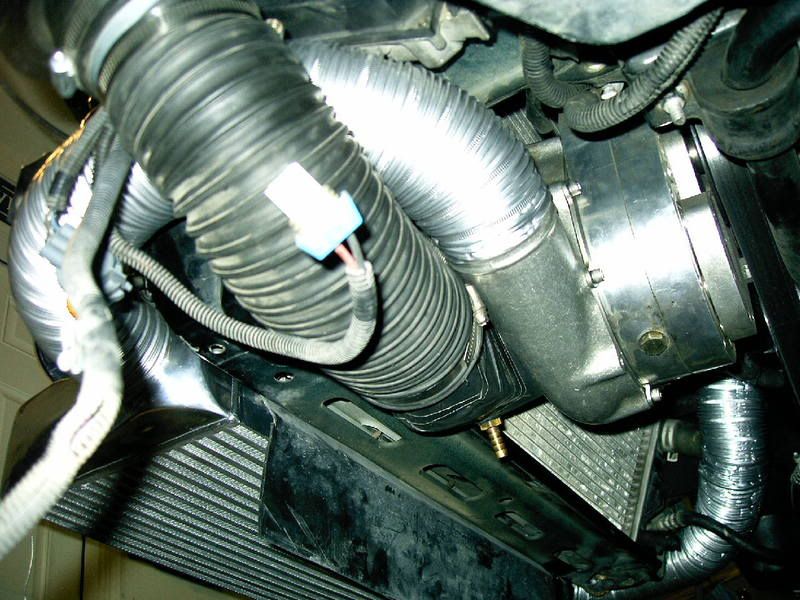
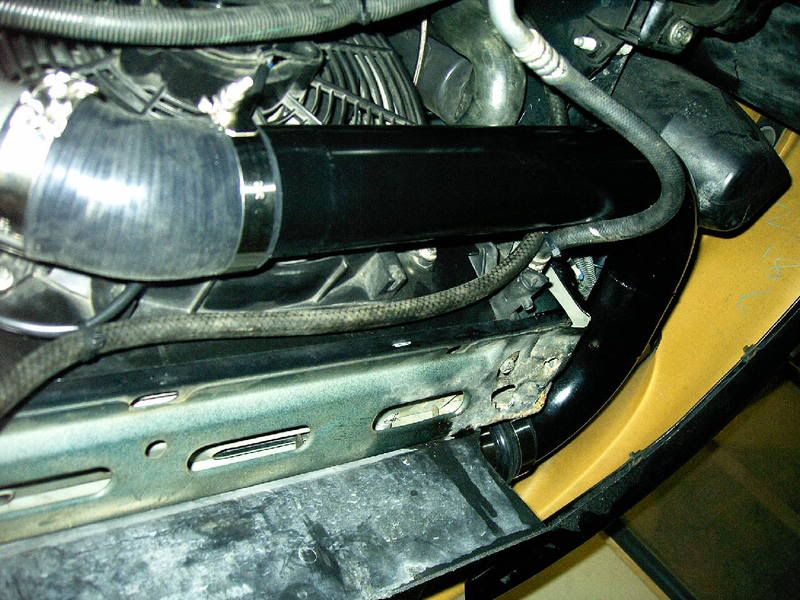
Here is the d/s bottom:

p/s bottom:
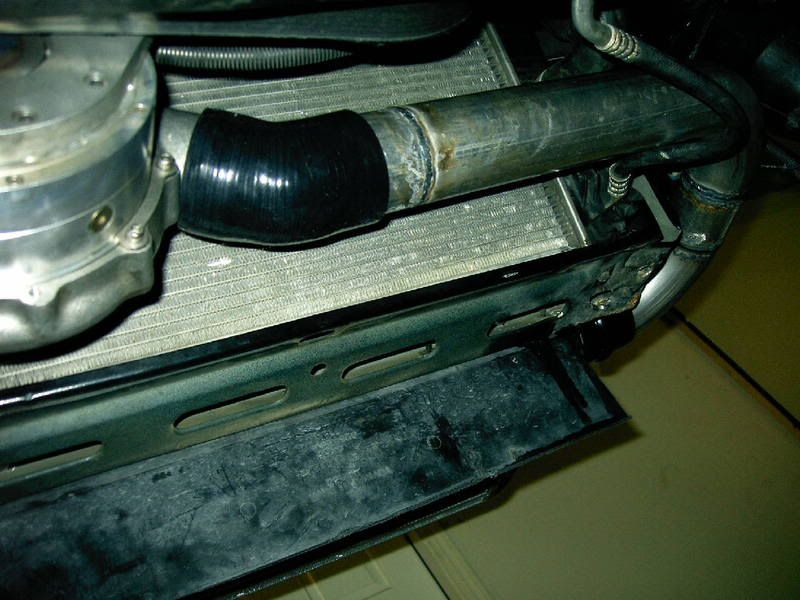
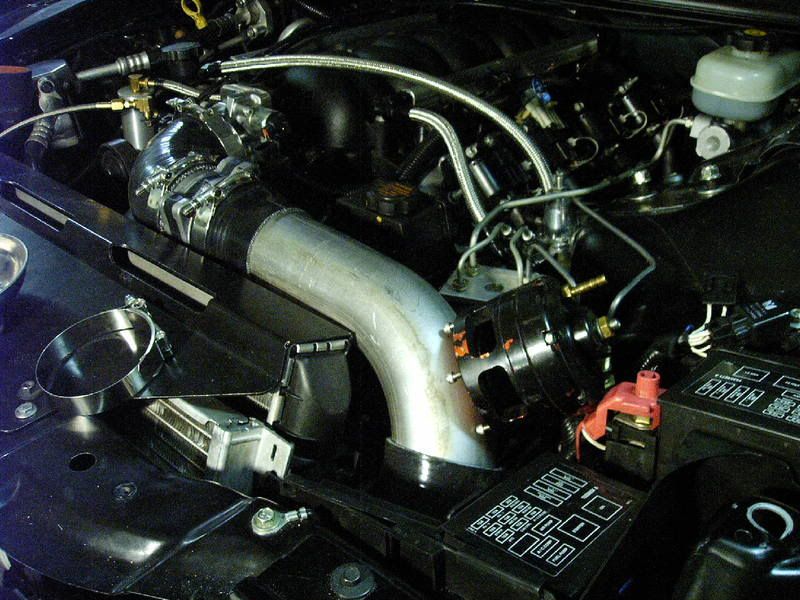
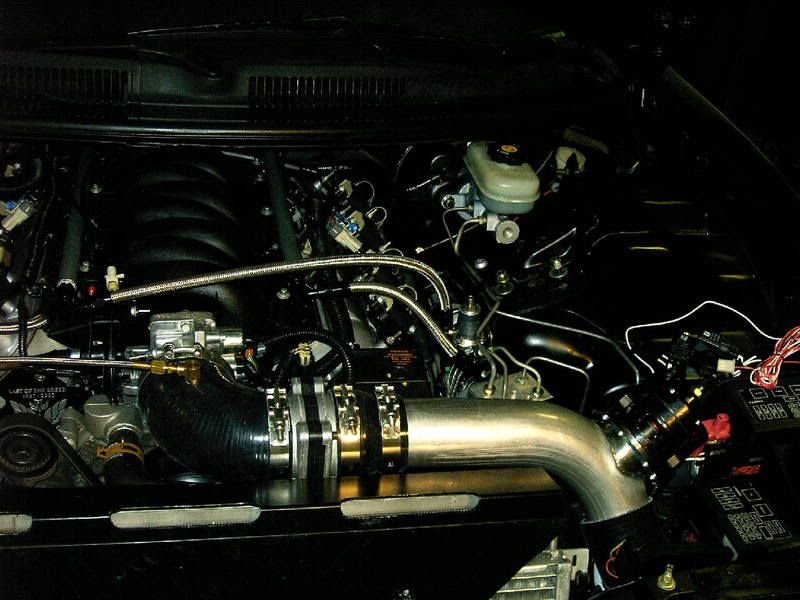
And the top:
You can see where the BPV is going to be located once I get the flange for it in (which has been on order for over 3 weeks now) But hopefully it will arive tomorrow and I can get it welded on and driveable. It is the only thing I am waiting on right now really.
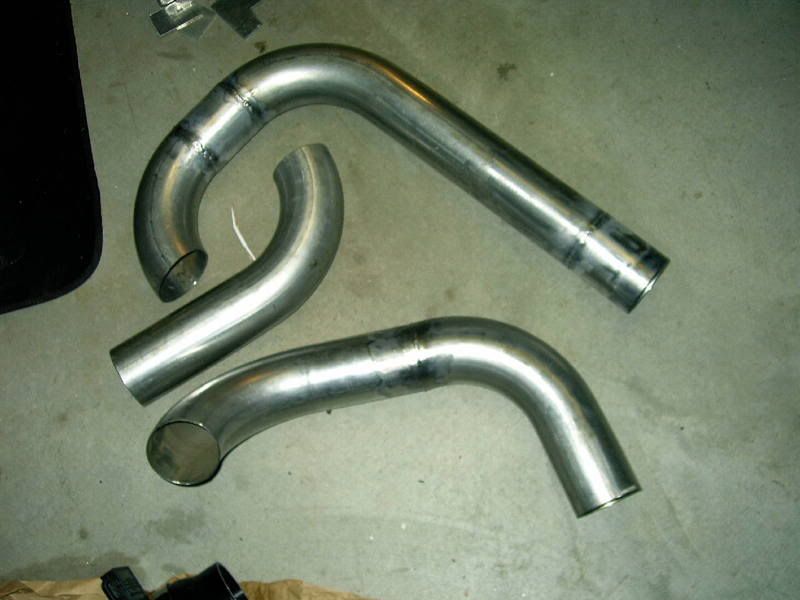
Anyways, moving on, here is a shot of all the piping:
Got the fans installed:
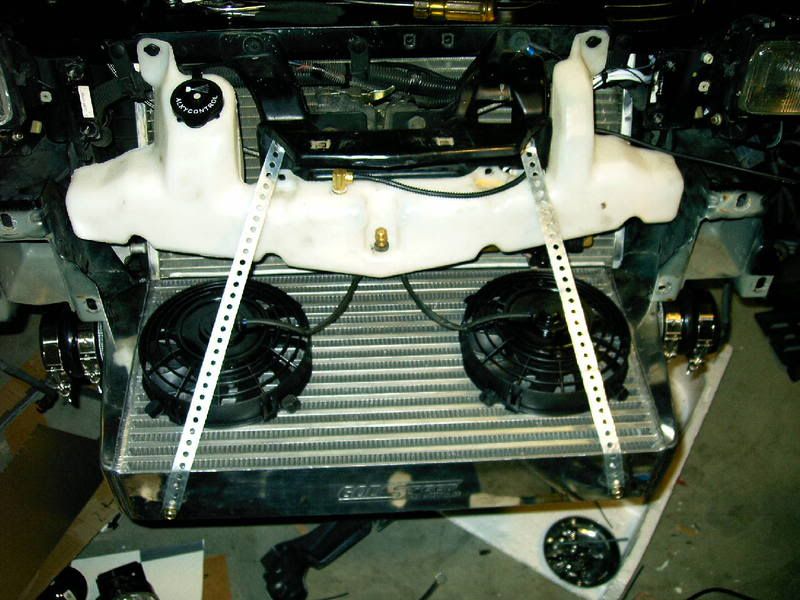
And I figured I'd put some stripping on the shroud to stop it from rubbing on the IC and condenser so after lots of searching, I finally found something that worked perfect- some door molding made to go on the edge of doors to stop from door dings. $2.86 price was awesome I also put some on the edges that would come into contact with the meth tank.
And here it is installed for the final time with the foglights and everything
And here is just a pic I thought was cool. While I was reclocking the blower and had the front cover off just thought I'd take a pic of the impeller on the F1. That thing looks wicked!

Painted the pipes that I could- the lower ones which all the welding is done on them.
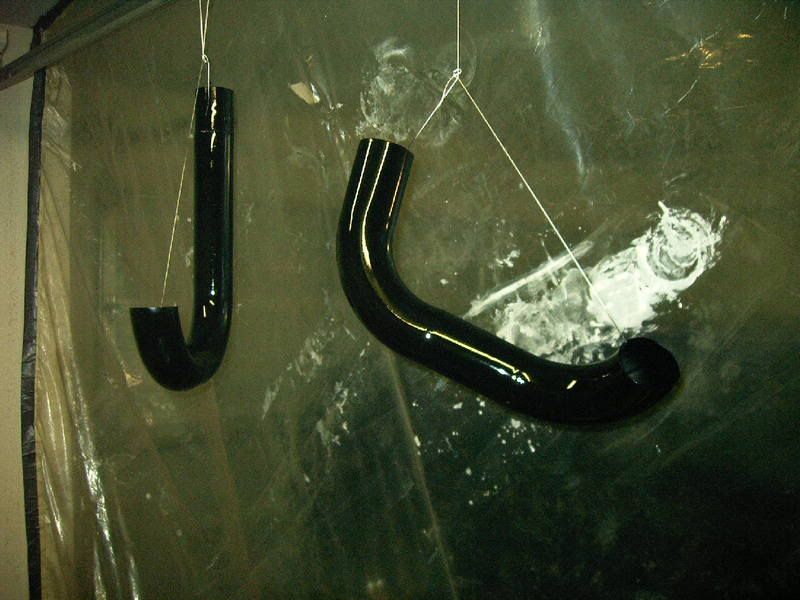
And here they are on final install.
And one more shot of the top with everything in place as it will be once the flange is welded on:

I actually did start it up tonight with that top pipe off. First time since the AFR heads have been installed. It sounds so incredibly sweet My mic doesn't work on my camera, so trying to take videos with it is worthless. I did take a short vid with my phone, but I guess it only will take 10 second videos at a time
  So I'll have to get a vid once I can get a camera that works. In the mean time, enjoy the pics
Got all the piping cut and welded up and mocked up into place:
Here is the d/s bottom:
p/s bottom:
And the top:
You can see where the BPV is going to be located once I get the flange for it in (which has been on order for over 3 weeks now)
But hopefully it will arive tomorrow and I can get it welded on and driveable. It is the only thing I am waiting on right now really.Anyways, moving on, here is a shot of all the piping:
Got the fans installed:
And I figured I'd put some stripping on the shroud to stop it from rubbing on the IC and condenser so after lots of searching, I finally found something that worked perfect- some door molding made to go on the edge of doors to stop from door dings. $2.86 price was awesome
I also put some on the edges that would come into contact with the meth tank.And here it is installed for the final time with the foglights and everything
And here is just a pic I thought was cool. While I was reclocking the blower and had the front cover off just thought I'd take a pic of the impeller on the F1. That thing looks wicked!
Painted the pipes that I could- the lower ones which all the welding is done on them.
And here they are on final install.
And one more shot of the top with everything in place as it will be once the flange is welded on:
I actually did start it up tonight with that top pipe off. First time since the AFR heads have been installed. It sounds so incredibly sweet
My mic doesn't work on my camera, so trying to take videos with it is worthless. I did take a short vid with my phone, but I guess it only will take 10 second videos at a time So I'll have to get a vid once I can get a camera that works. In the mean time, enjoy the pics Last edited by ChevyChad; 01-12-2008 at 04:50 PM.
01-08-2008, 12:21 AM
#54
Great work Chad! Looks great and big props for straying from the norm, should be exactly what your looking for.
__________________

Featuring 6 different turbo kits for your F-body!
Check us out on Facebook at: www.facebook.com/HuronSpeed
Featuring 6 different turbo kits for your F-body!
Check us out on Facebook at: www.facebook.com/HuronSpeed
01-08-2008, 02:54 PM
#55
Thanks man, I sure hope it all works as planned After idling for about 18 minutes last night coolant temps were at 181 and climbing. I turned the IC fans on for less than 2 minutes and ECT's were down to 169, so I know those fans are helping a lot. True test will come in about 6 months when its 100�+ outside. If they don't completely eliminate the heating issue with running A/C in the summer I will then go with the becool radiator.
After idling for about 18 minutes last night coolant temps were at 181 and climbing. I turned the IC fans on for less than 2 minutes and ECT's were down to 169, so I know those fans are helping a lot. True test will come in about 6 months when its 100�+ outside. If they don't completely eliminate the heating issue with running A/C in the summer I will then go with the becool radiator.  01-09-2008, 11:18 PM
#57
Thanks. Just got the flange in tonight. Got it cut and had my buddy weld it. I was planning on finishing it all up tonight and driving it tomorrow, but it got to be too late too fast on us. I still have to cut the hole in the pipe in the middle of the flange and paint it. But at least we got it all welded up and I was able to check clearances to the hood when closed. Turns out there is plenty of clearance Here is a pic in its final location with the flange welded on. I should have it all finished up by tomorrow
Here is a pic in its final location with the flange welded on. I should have it all finished up by tomorrow
01-10-2008, 08:48 AM
#59
Thanks. Ya, I have never welded before, so I left that to someone who has done a ton of welding. I did make all the cuts on the pipe tho and did literally everything else myself tho. That saddle cut on the BPV flange was very fun to make lemme tell ya! Took about an hour of grinding away on my belt sander just to get it to fit right on the pipe!
