1dirtyZ V3.2 build (F2 procharger , 427, etc. )
 06-30-2008, 05:46 PM
#61
8 Second Club
Thread Starter
iTrader: (1)
Join Date: Nov 2001
Location: the not so stock tribe
Posts: 3,697
Likes: 0
Received 0 Likes
on
0 Posts

so , i got some stuff in today , mainly the alternator relocation bracket , k&n filter , and other assorted doodads.
i also got the tensioner back from the machine shop, and now its adjustable
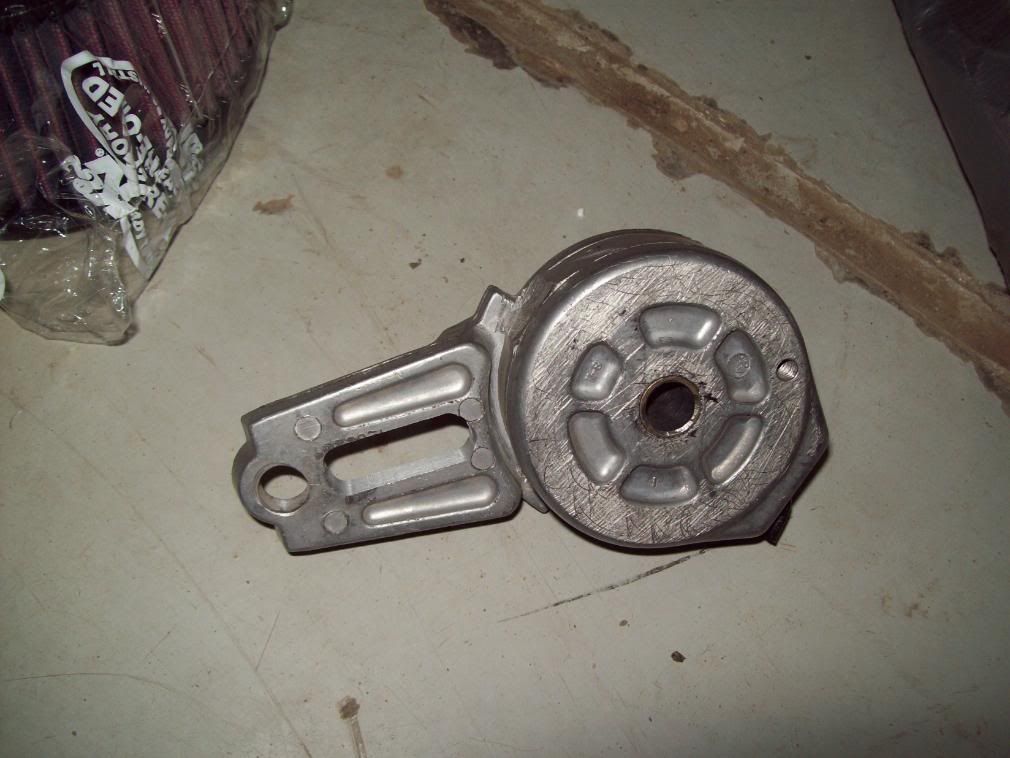
the new bracket and brace should be done tomorow. i also had them make new spacers to go inplace of the alternator in its bracket. ( so the bracket won't break)
funny thing happened when i was removing the alternator, i tried to spin it but it was seized! i couldn't figure out why it was like that , but when i tryed to twist it with a bit of force it made some grinding noises and a buttload of sand came pouring out . so i took out the alt. and blew air through it and cleaned it . now it spins freely ! ( stupid sand storm )
)
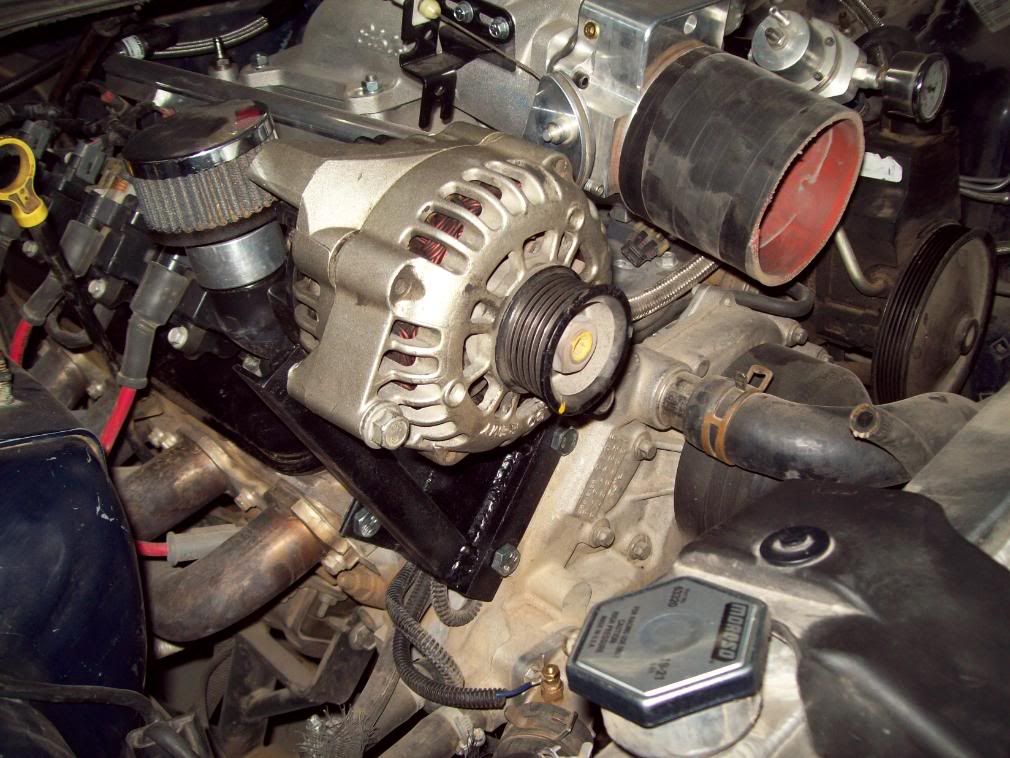
i also installed the smokn' hawk alternator relocation bracket loosely to test fit the alternator ( i need to get new bolts and a tensioner - mine is a billet non-sprung one).
happy to report it clears the fuel rail . i used another ls1 alternator to test fit , but i will check final fitment tomorow with the f-body one to make 100% sure.
i also ended up rerouting the alternator wires , which came out quite neat in my opinion
the biggest bummer of the day is that i finally got the super pulley back from the machine shop ( after narrowing it down by 12 mm ), and when i take the F2 out to put the superpulley on it , i find out i was sent the wrong shaft diameter pulley !! the pulley is for the large shaft blower , while mine is the small one - like the F1-r and D1-sc.
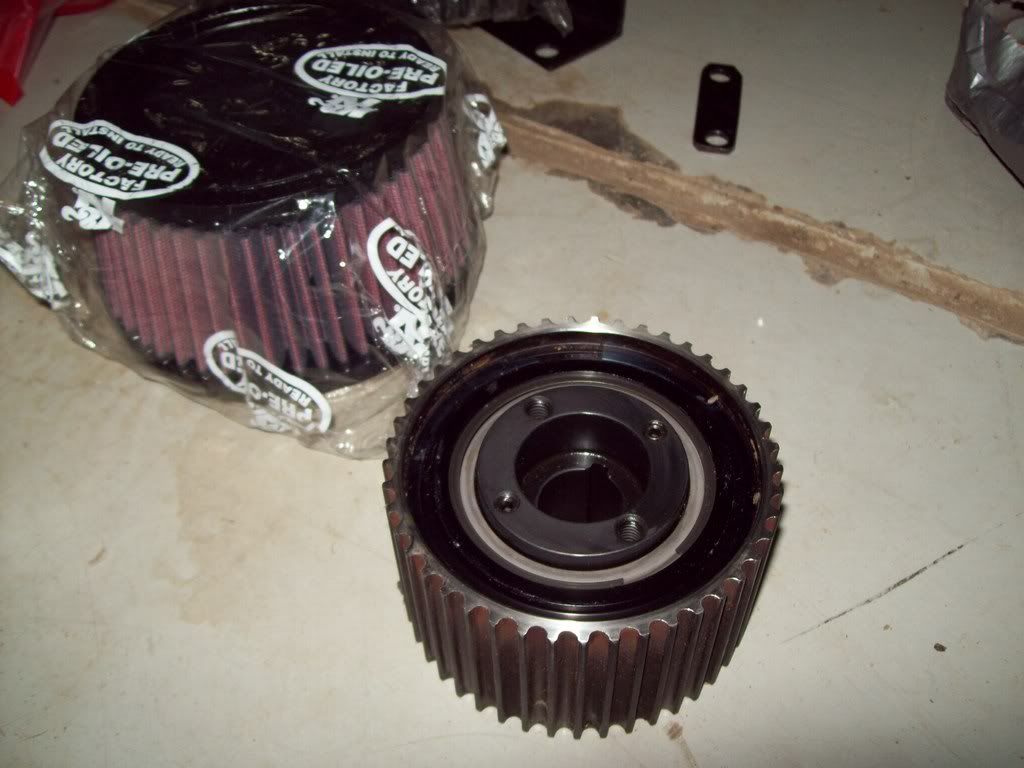
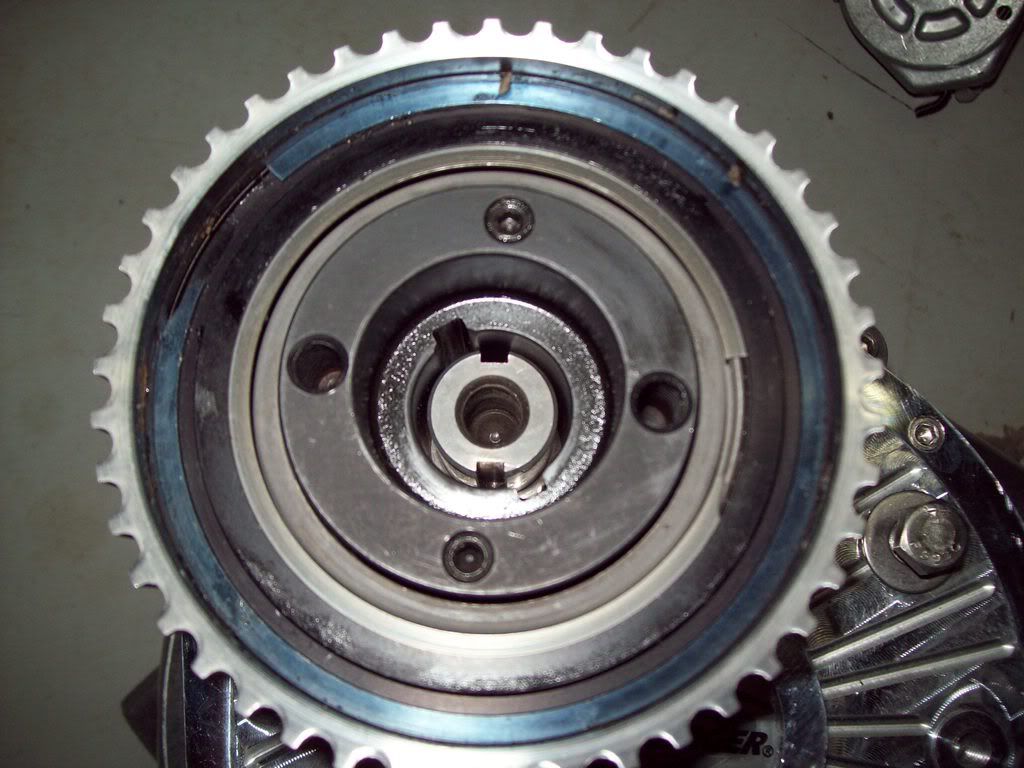
the good news is that i will take it to the machine shop tomorow to have them make an adapter if you may call it that . i already talked to the guy there and he said no problem they do this kind of stuff all the time.
another no go was my plan on running a sump in the rear plastic tank. i was hoping it would have a flat enough spot to cut a hole big enough for the sump and epoxy it in place. i checked and it seems like it wouldnot work. guess i will just stick with what i have now: a bulk head fitting in the bottom of the tank with a -10 hose connected to it . i'm also planning on drilling another hole somewhere in the corner of the tank and install another bulkhead connector and cap to work as a drain for when ever i need to drain my tank.
what i have planned for tomorow :
- drop off the pulley and have the machine shop make an adapter.
- pick up the new blower bracket and alternator spacers
- install vaccum block and route vaccum hoses
- install the alternator and its bracket
- install the blower bracket and tensioner
- most likely buy a battery for putting in the rear.
on a side note, i just ordered an intercooler for the stang ,, which should be here in a couple of weeks ,which means all my parts will be accounted for and then , the stang build thread commences
i also got the tensioner back from the machine shop, and now its adjustable
the new bracket and brace should be done tomorow. i also had them make new spacers to go inplace of the alternator in its bracket. ( so the bracket won't break)
funny thing happened when i was removing the alternator, i tried to spin it but it was seized! i couldn't figure out why it was like that , but when i tryed to twist it with a bit of force it made some grinding noises and a buttload of sand came pouring out . so i took out the alt. and blew air through it and cleaned it . now it spins freely ! ( stupid sand storm
)i also installed the smokn' hawk alternator relocation bracket loosely to test fit the alternator ( i need to get new bolts and a tensioner - mine is a billet non-sprung one).
happy to report it clears the fuel rail . i used another ls1 alternator to test fit , but i will check final fitment tomorow with the f-body one to make 100% sure.
i also ended up rerouting the alternator wires , which came out quite neat in my opinion
the biggest bummer of the day is that i finally got the super pulley back from the machine shop ( after narrowing it down by 12 mm ), and when i take the F2 out to put the superpulley on it , i find out i was sent the wrong shaft diameter pulley !! the pulley is for the large shaft blower , while mine is the small one - like the F1-r and D1-sc.
the good news is that i will take it to the machine shop tomorow to have them make an adapter if you may call it that . i already talked to the guy there and he said no problem
they do this kind of stuff all the time.another no go was my plan on running a sump in the rear plastic tank. i was hoping it would have a flat enough spot to cut a hole big enough for the sump and epoxy it in place. i checked and it seems like it wouldnot work. guess i will just stick with what i have now: a bulk head fitting in the bottom of the tank with a -10 hose connected to it . i'm also planning on drilling another hole somewhere in the corner of the tank and install another bulkhead connector and cap to work as a drain for when ever i need to drain my tank.
what i have planned for tomorow :
- drop off the pulley and have the machine shop make an adapter.
- pick up the new blower bracket and alternator spacers
- install vaccum block and route vaccum hoses
- install the alternator and its bracket
- install the blower bracket and tensioner
- most likely buy a battery for putting in the rear.
on a side note, i just ordered an intercooler for the stang ,, which should be here in a couple of weeks ,which means all my parts will be accounted for and then , the stang build thread commences
Last edited by 1dirtyZ; 06-30-2008 at 06:07 PM.
 07-01-2008, 04:31 PM
#62
8 Second Club
Thread Starter
iTrader: (1)
Join Date: Nov 2001
Location: the not so stock tribe
Posts: 3,697
Likes: 0
Received 0 Likes
on
0 Posts
nothing much happened today ( it would help if i was actually in the garage doing work )
bracket, spacer , and brace are still not done, should be done tommorow ( again )
i also dropped off the super pulley to get it "fixed" , so we'll see how that comes out . it might be done tomorow or thursday.
( it would help if i was actually in the garage doing work )bracket, spacer , and brace are still not done, should be done tommorow ( again
)i also dropped off the super pulley to get it "fixed" , so we'll see how that comes out . it might be done tomorow or thursday.
07-05-2008, 05:49 PM
#63
8 Second Club
Thread Starter
iTrader: (1)
Join Date: Nov 2001
Location: the not so stock tribe
Posts: 3,697
Likes: 0
Received 0 Likes
on
0 Posts
time for some updates:
the super pulley is a no go - just ordered a new one , but i will try another machine shop !)
got a battery ( yay! )
finished wiring the fans , they now come on with the ignition on , and i have a swith to kill them if i need to .
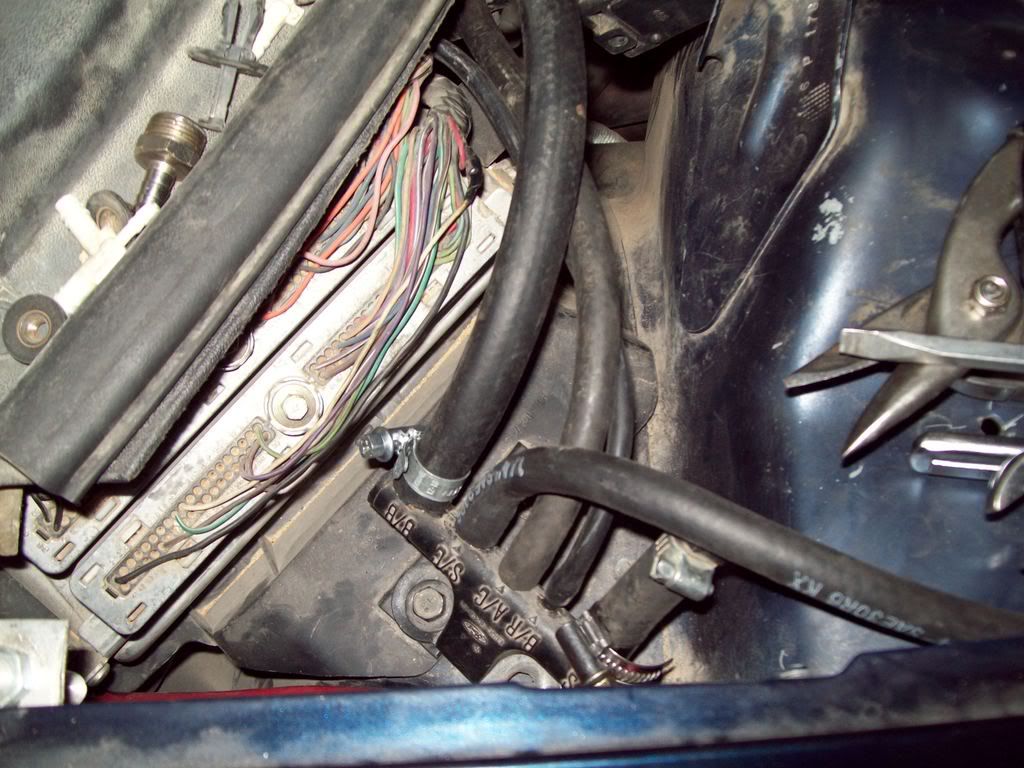
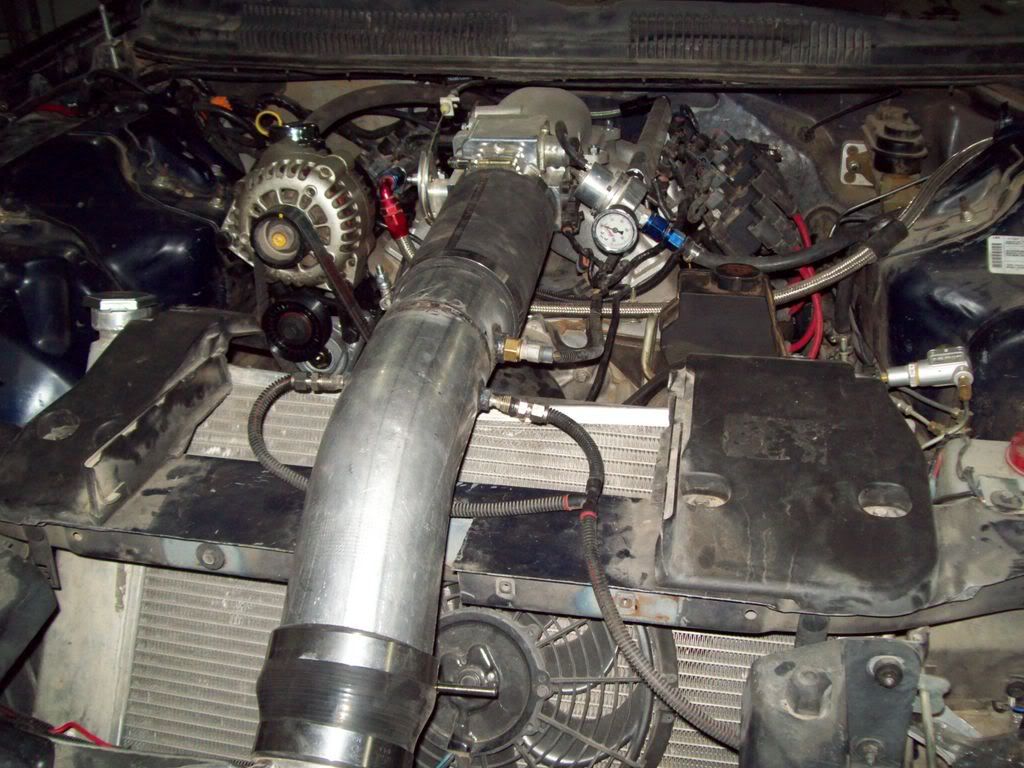
i also finally finished all the vaccum lines , i used a vacuum block i took off my stang a while back ( who said fords are useless ) and routed the main line from the manifolt to it , then from the block to various other thingys :
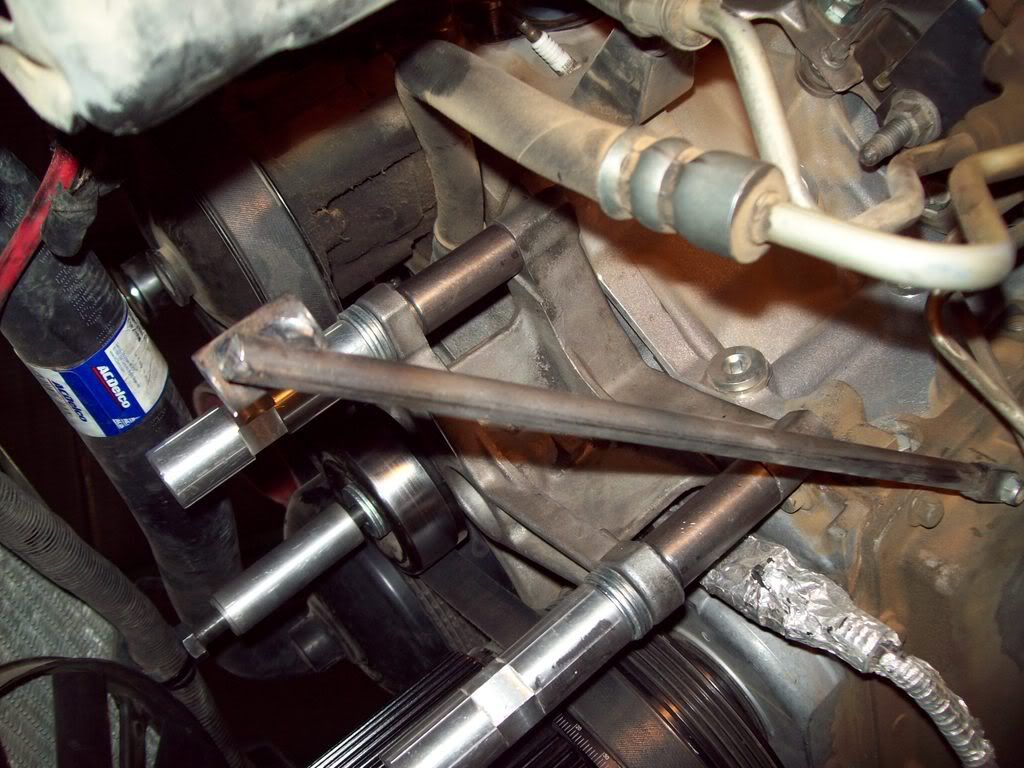
got the alternator and tensioner mounted for the last time :

also got the alternator bracket spacers done and installed :the brace (the bar sticking diagonally ) is the old one , i didn't like how the new one turned out , so i'm building a totally "redesigned" brace . the tensioner now clears the crank cog and has sufficient travel::
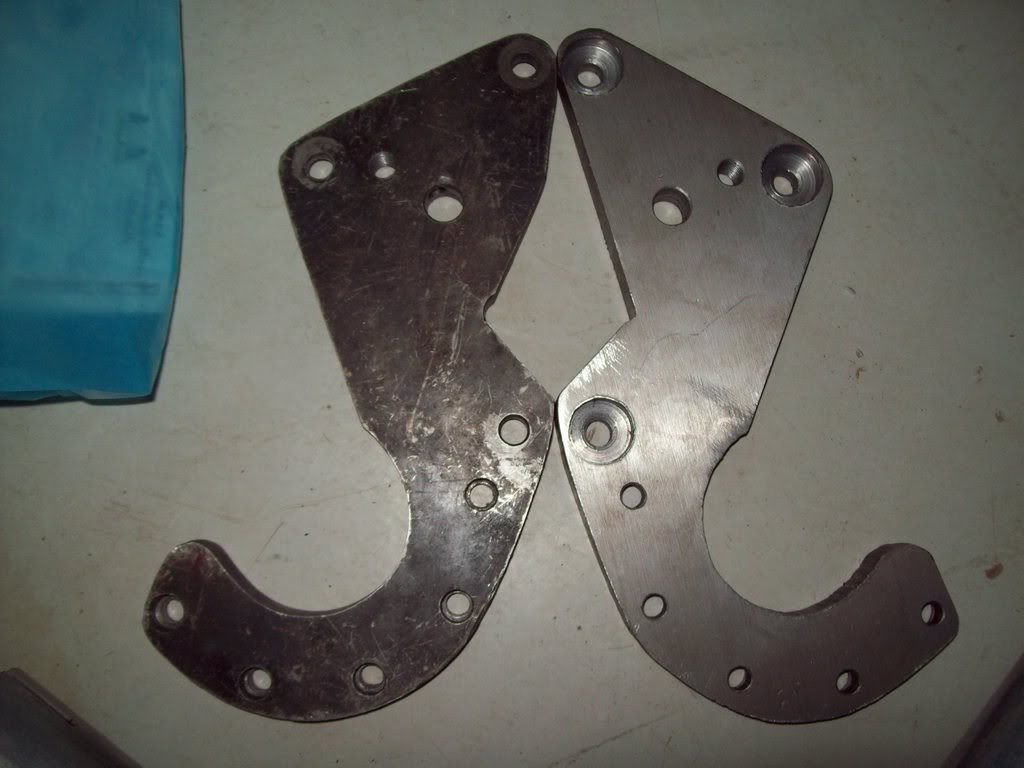
here is a side by side shot showing how i notched the new bracket :
also almost finished the tube going from the intercooler to the TB, i welded a bung on it to thread in the IAT sensor, and will be welding two nuts to hold the methanol nozzles on there too.
so , up next is the following:
-lable the switches on the dash ( just two lables )
-plumb the oil accumilator from the block to the canister.
-remove the passenger side header extension to weld the crankcase evac. thingy
-travel limiter
-put driver side header back on
-remove tranny for rebuild and maybe , just maybe , swap out the oil pan gasket .
-wire the alternator light and the AFR warning light from the dynojet commander
the super pulley is a no go
- just ordered a new one , but i will try another machine shop !)got a battery ( yay!
)finished wiring the fans , they now come on with the ignition on , and i have a swith to kill them if i need to .
i also finally finished all the vaccum lines , i used a vacuum block i took off my stang a while back ( who said fords are useless
) and routed the main line from the manifolt to it , then from the block to various other thingys :got the alternator and tensioner mounted for the last time :
also got the alternator bracket spacers done and installed :the brace (the bar sticking diagonally ) is the old one , i didn't like how the new one turned out , so i'm building a totally "redesigned" brace . the tensioner now clears the crank cog and has sufficient travel::
here is a side by side shot showing how i notched the new bracket :
also almost finished the tube going from the intercooler to the TB, i welded a bung on it to thread in the IAT sensor, and will be welding two nuts to hold the methanol nozzles on there too.
so , up next is the following:
-lable the switches on the dash ( just two lables
)-plumb the oil accumilator from the block to the canister.
-remove the passenger side header extension to weld the crankcase evac. thingy
-travel limiter
-put driver side header back on
-remove tranny for rebuild and maybe , just maybe , swap out the oil pan gasket .
-wire the alternator light and the AFR warning light from the dynojet commander
07-09-2008, 02:42 AM
#65
8 Second Club
Thread Starter
iTrader: (1)
Join Date: Nov 2001
Location: the not so stock tribe
Posts: 3,697
Likes: 0
Received 0 Likes
on
0 Posts
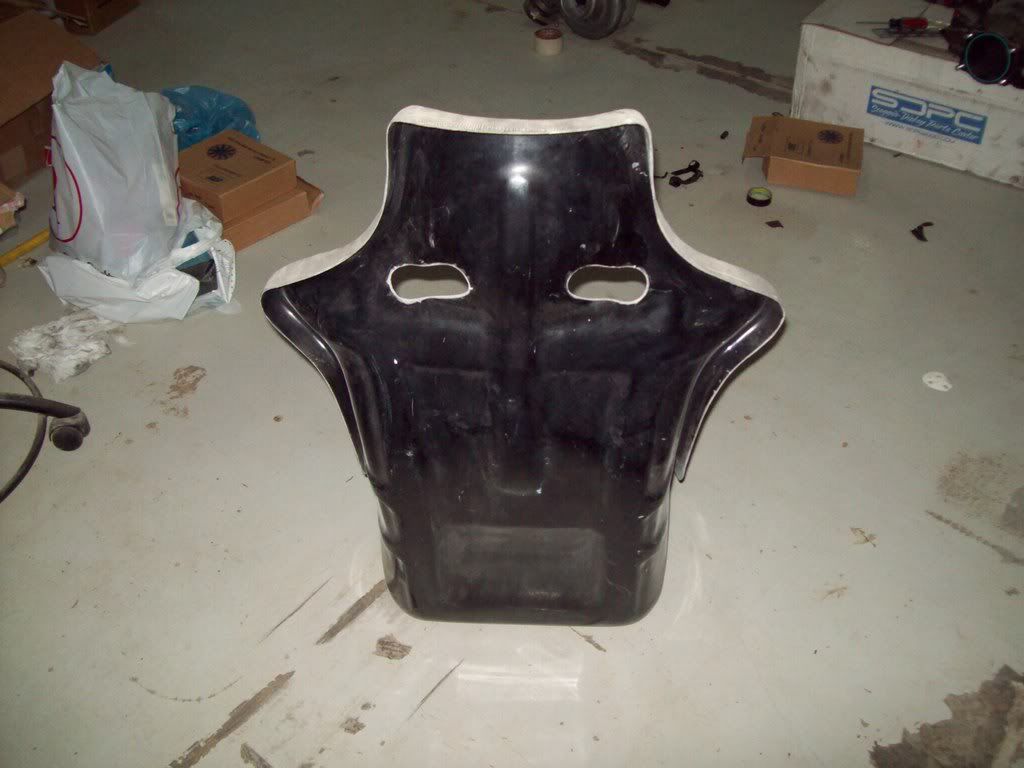
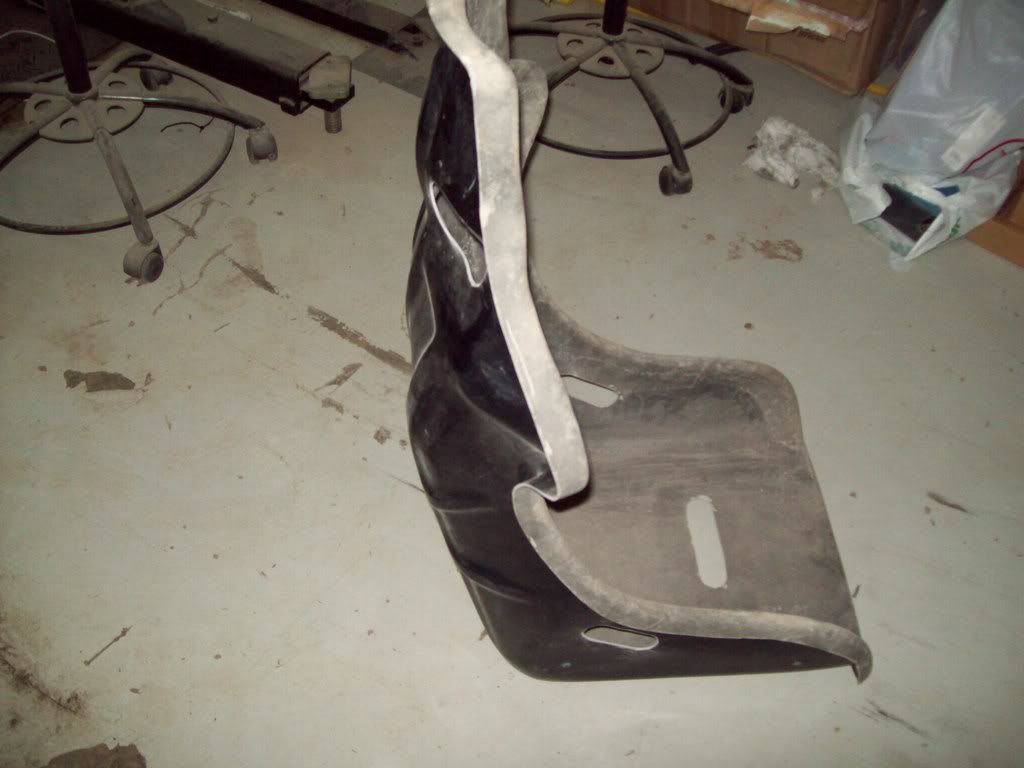
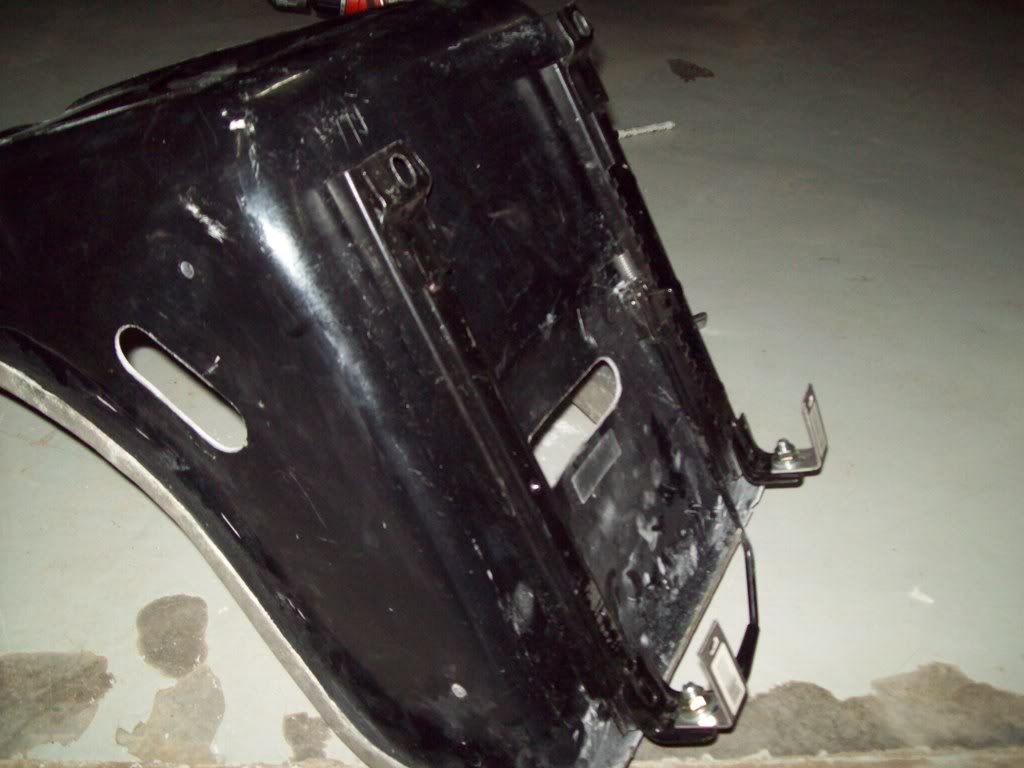
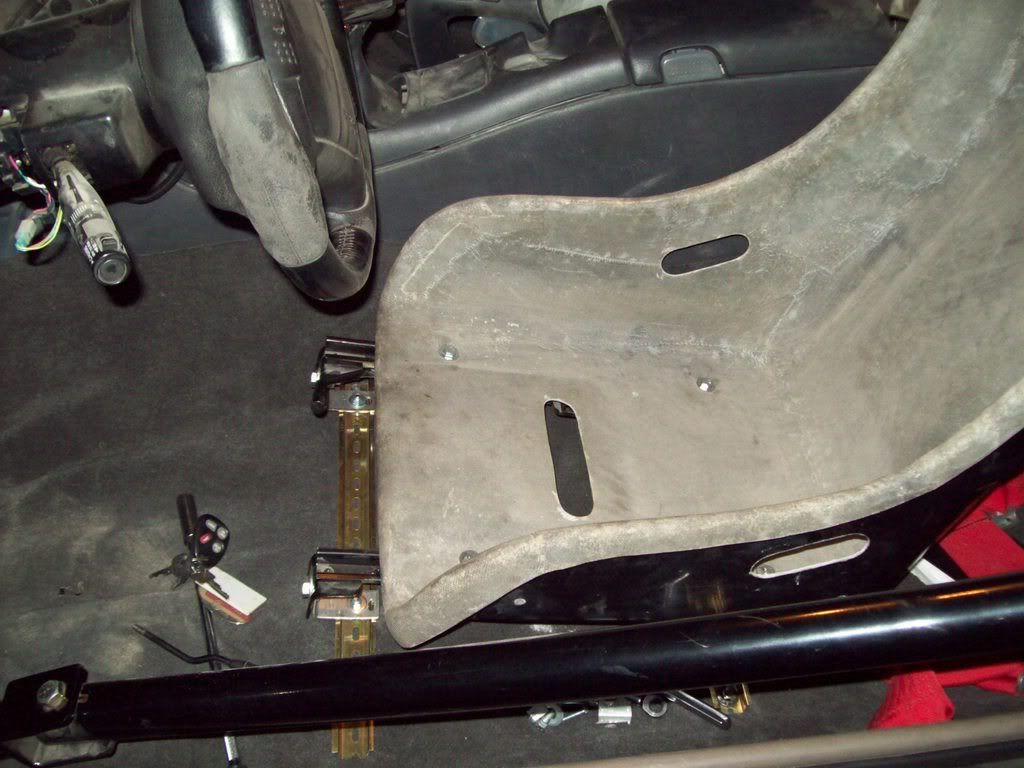
i got some stuff done in the last few days. i also managed to get a new fiberglass hood for my stang and this lightweight seat ( also fiberglass), all i need to it is upholster it and fabricate a mounting bracket/ base for it.:

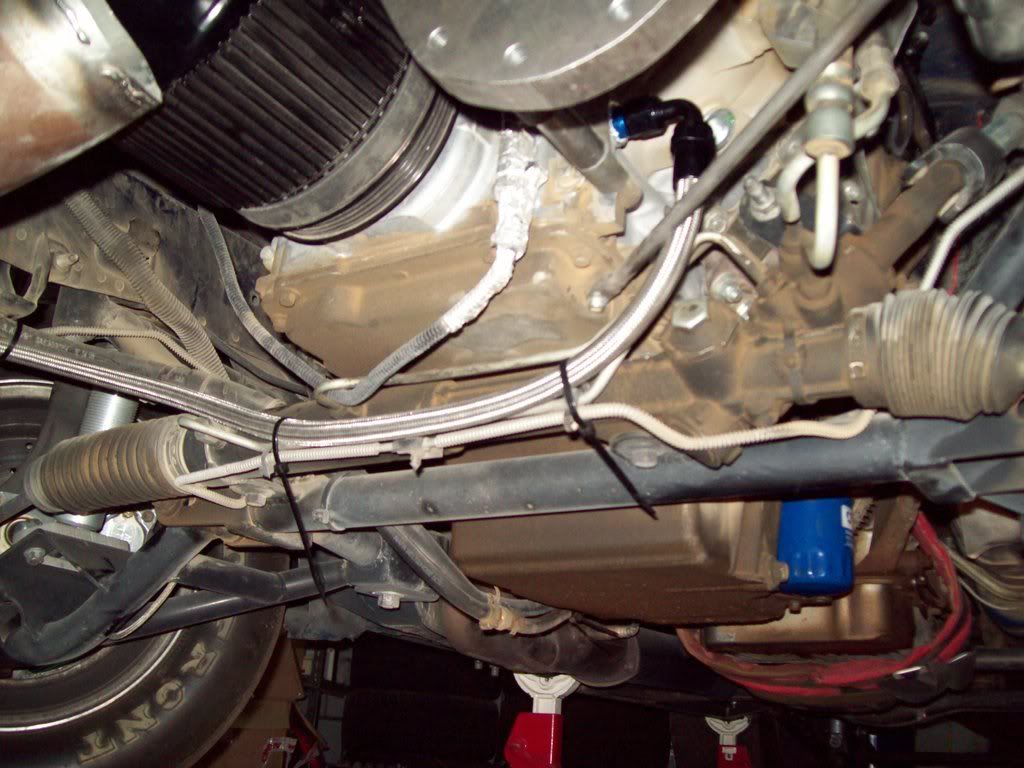
also managed to finish up plubming the oil accumilator:
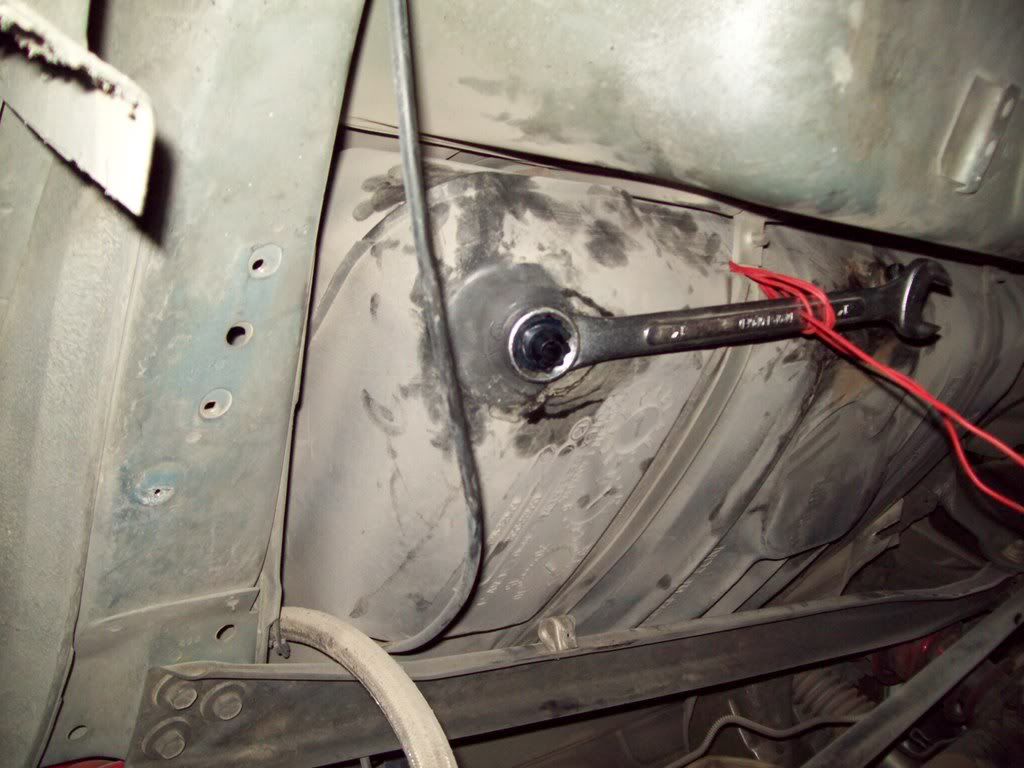
i finally got around to installing a drain on the gas tank, it basically a bulkhead fitting with a cap.
( what do you do when you need some one to hold a wrench on one side of the car while you are on the other side, but no one is around??? )
according to my all knowing excell sheet, i finished 40% of the items on my list
so hopefully tomorow i will finish cleaning the inside of the tank and button it up.
i should have the methanol injection nozzle bungs welded in on my intake tube , i already welded the AIT sensor bung on there. i might even paint the tube black.
and from the list i posted in the post above, i will be putting the header back in so i can fire the car up to see if there are any leaks and what not.
after that , the tranny comes out and we see what kind of damage we have
also managed to finish up plubming the oil accumilator:
i finally got around to installing a drain on the gas tank, it basically a bulkhead fitting with a cap.
( what do you do when you need some one to hold a wrench on one side of the car while you are on the other side, but no one is around??? )
according to my all knowing excell sheet, i finished 40% of the items on my list
so hopefully tomorow i will finish cleaning the inside of the tank and button it up.
i should have the methanol injection nozzle bungs welded in on my intake tube , i already welded the AIT sensor bung on there. i might even paint the tube black.
and from the list i posted in the post above, i will be putting the header back in so i can fire the car up to see if there are any leaks and what not.
after that , the tranny comes out and we see what kind of damage we have
07-09-2008, 04:38 AM
#66
Teching In

Join Date: Aug 2007
Posts: 9
Likes: 0
Received 0 Likes
on
0 Posts
Nice job SAM, and this season we really missed the camaro, and its a good thing to get started with the car and get all the needed parts.
Cant wait till the T&T to check Bassam's camaro on the track and see how it does.
What about Wajdi any news?
Wish you and Wajdi all the best bro.
Mo
Cant wait till the T&T to check Bassam's camaro on the track and see how it does.
What about Wajdi any news?
Wish you and Wajdi all the best bro.
Mo
 07-10-2008, 06:43 AM
#68
8 Second Club
Thread Starter
iTrader: (1)
Join Date: Nov 2001
Location: the not so stock tribe
Posts: 3,697
Likes: 0
Received 0 Likes
on
0 Posts
thanks mo , bassam's car has soo much potential!
bob, don't remind me
loool , its not as bad as you think. i use a freight forwading company that provides me with a u.s mailbox, which i send stuff to , they then send it ( twice a week) over here . i ordered a bunch of stuff from you a while back if you remeber , it was sent to a funky address in springfield gardens. the company charges about $5 per LB to ship to here, and it takes about 7 bussiness days.
07-13-2008, 05:15 PM
#70
8 Second Club
Thread Starter
iTrader: (1)
Join Date: Nov 2001
Location: the not so stock tribe
Posts: 3,697
Likes: 0
Received 0 Likes
on
0 Posts
finally got to work on the car again ( now that we crossd the " getting the engine started" milestone with the stang) .
i managed to finally finish the intake tube from the intercooler to the tb, i welded a bung for the IAT and two bungs for the methanol injection.

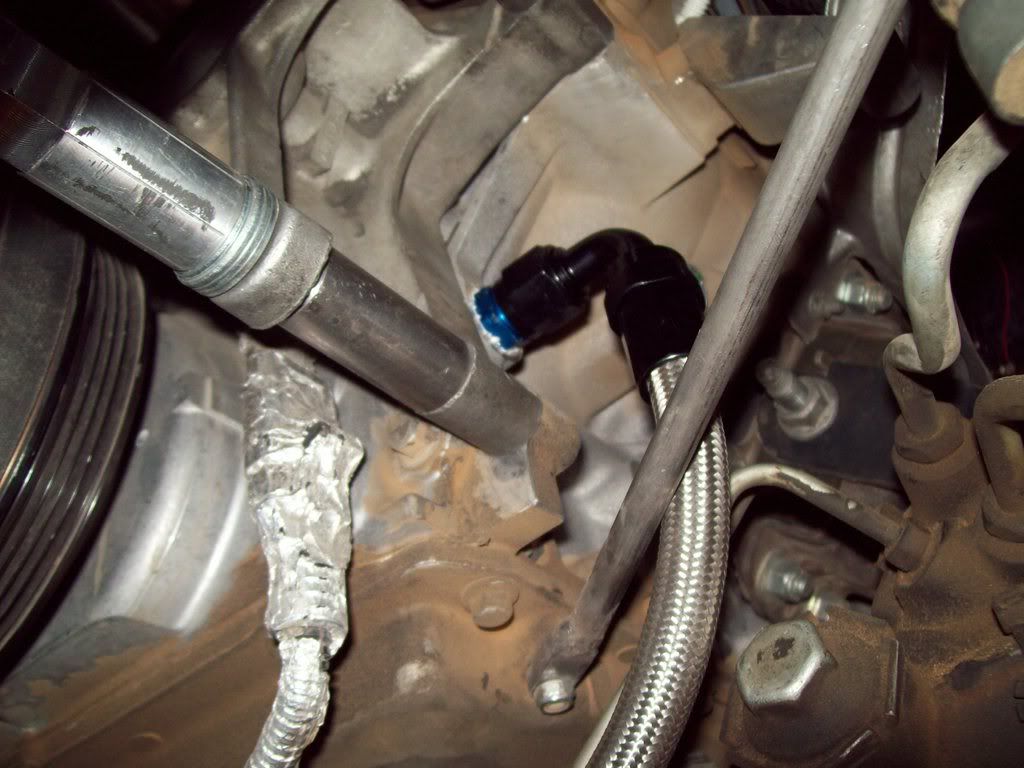
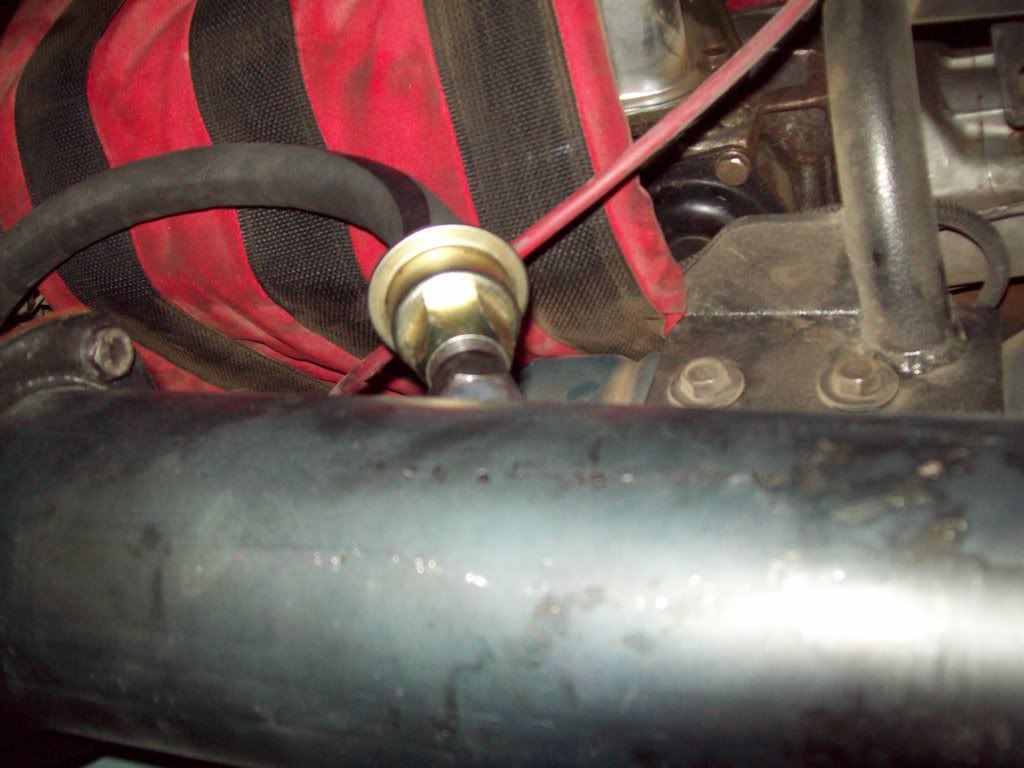
i also finished the crank case evac thing. i welded the bung on the header extension and routed the big'ol hose . off course there had to be some action , after welding the bung on the extension - and laying down some of the finest tig weld beads i have done - i come to find out i welded the bung so that it faced upstream of the exhaust ( it needed to be like the pic below so the siphon effect takes place). so out came the grinder and bye bye welds ... pure genius
i also started on the new seat , i mounted the floor brackets ( thanks rufretic for the idea)
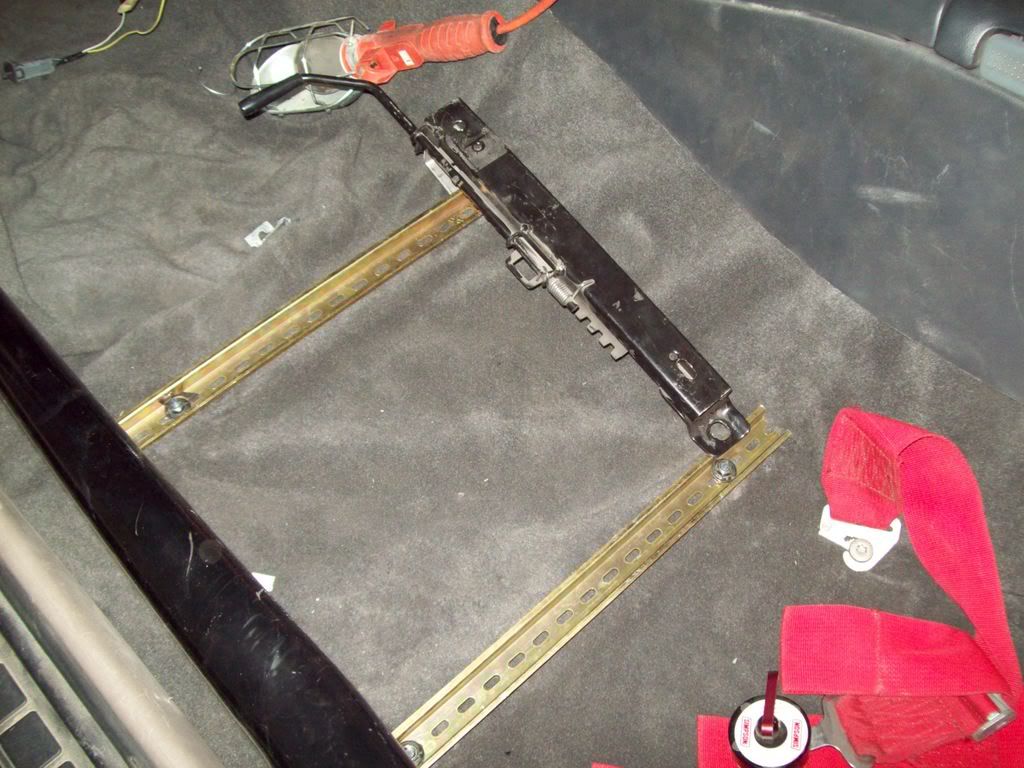
and mounted the old seat brakets i had to the seat ( they're adjustable)
i just have to finalize the position of the where both brackets meet and then its off to the upholsterer for some padding on the seat. might i also add that using a file to grind away on a fiberglass part is always fun, especially when you are not wearing a mask or long sleeves and gloves
i also managed to kill two spiders and one huge Mf'n ant
i'm hoping to go to the garage tomorow to finishup the seat, wire the alternator warning light and the AFR warning light, and then start her up and put her on the lift so i can get the tranny out. if i'm lucky ( or feel like it ) that should all be done tomorow
i managed to finally finish the intake tube from the intercooler to the tb, i welded a bung for the IAT and two bungs for the methanol injection.
i also finished the crank case evac thing. i welded the bung on the header extension and routed the big'ol hose . off course there had to be some action , after welding the bung on the extension - and laying down some of the finest tig weld beads i have done - i come to find out i welded the bung so that it faced upstream of the exhaust ( it needed to be like the pic below so the siphon effect takes place). so out came the grinder and bye bye welds
... pure genius i also started on the new seat , i mounted the floor brackets ( thanks rufretic for the idea)
and mounted the old seat brakets i had to the seat ( they're adjustable)
i just have to finalize the position of the where both brackets meet and then its off to the upholsterer for some padding on the seat. might i also add that using a file to grind away on a fiberglass part is always fun, especially when you are not wearing a mask or long sleeves and gloves
i also managed to kill two spiders and one huge Mf'n ant
i'm hoping to go to the garage tomorow to finishup the seat, wire the alternator warning light and the AFR warning light, and then start her up and put her on the lift so i can get the tranny out. if i'm lucky ( or feel like it ) that should all be done tomorow
07-15-2008, 04:34 PM
#71
8 Second Club
Thread Starter
iTrader: (1)
Join Date: Nov 2001
Location: the not so stock tribe
Posts: 3,697
Likes: 0
Received 0 Likes
on
0 Posts
well the seat is done, all i have to do now is make an adjustable brace for the back.
i also ( finally) wired the AFR warning light as well as the alternator charging light ( i put that one in the dash cluster).
minor setback though, i primed the fuel system to see if i had any leaks, and sure enough , i had guisers couming out from the injectors and fuel rail
i guess i have to redo the bracket that holds the rail inplace and maybe even get bigger orings for the injectors.
also pushed the car on the lift and started unbolting the tranny. i also managed to sell my mild steel sphon torque arm , so i can now order ( already did ) a chrommolly one
i'm also debaiting weather i should get a CSI trans shield to replace the flexplate shield and tranny blanket i have now. but i guess my wallet side of the brain is currently winning this debate
so for tomorow , i 'm hoping to :
- pull tranny out
- pull torque arm out
- see if i can pull the oil pan gasket out without yanking the engine out ( i just said see, not try )
i also ( finally) wired the AFR warning light as well as the alternator charging light ( i put that one in the dash cluster).
minor setback though, i primed the fuel system to see if i had any leaks, and sure enough , i had guisers couming out from the injectors and fuel rail
i guess i have to redo the bracket that holds the rail inplace and maybe even get bigger orings for the injectors.
also pushed the car on the lift and started unbolting the tranny. i also managed to sell my mild steel sphon torque arm , so i can now order ( already did ) a chrommolly one
i'm also debaiting weather i should get a CSI trans shield to replace the flexplate shield and tranny blanket i have now. but i guess my wallet side of the brain is currently winning this debate
so for tomorow , i 'm hoping to :
- pull tranny out
- pull torque arm out
- see if i can pull the oil pan gasket out without yanking the engine out ( i just said see, not try
)
07-17-2008, 03:55 AM
#72
8 Second Club
Thread Starter
iTrader: (1)
Join Date: Nov 2001
Location: the not so stock tribe
Posts: 3,697
Likes: 0
Received 0 Likes
on
0 Posts
tranny is out, and so is the torque arm .
i also removed the intake manifold to see if i can make a better set of brackets to hold the fuel rail down better. if not , guess i'll have to order a new set of rails
i also removed the intake manifold to see if i can make a better set of brackets to hold the fuel rail down better. if not , guess i'll have to order a new set of rails
07-17-2008, 07:26 AM
#73
Did you use a turbo style blow-off instead of a by-pass valve? Any reason why?
That intercooler looks beefy
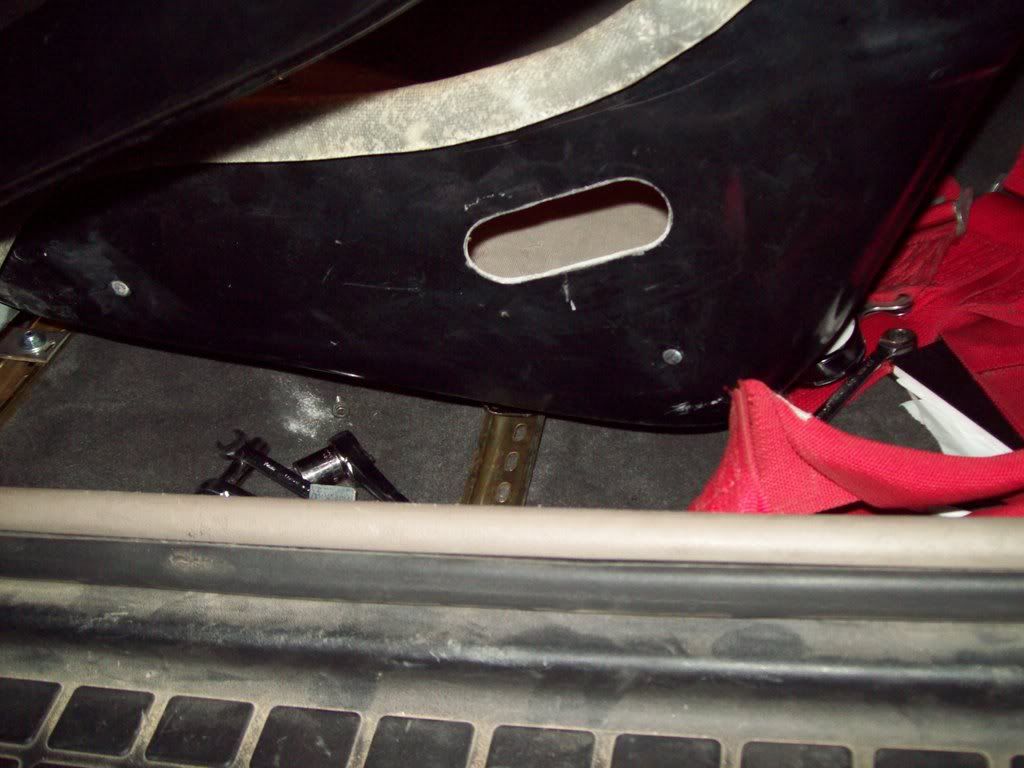
I hope those tabs you mounted the seat with are steel? They look aluminum and I don't think I'd trust a piece of aluminum that thin to hold the seat.
That intercooler looks beefy
I hope those tabs you mounted the seat with are steel? They look aluminum and I don't think I'd trust a piece of aluminum that thin to hold the seat.
 07-19-2008, 03:05 AM
#76
8 Second Club
Thread Starter
iTrader: (1)
Join Date: Nov 2001
Location: the not so stock tribe
Posts: 3,697
Likes: 0
Received 0 Likes
on
0 Posts
venom, thanks!
ruf, the blow off valve if a godzilla one , i used to have a vortech mondo one on there but took it off back when i was having boost issues ( turned out to be a broken supercharger ) this one has a bit more spring pressure. with the vortech , at idle it would open , but withthe low vacuum of this engine the godzilla stays shut at idle untill you give it gas and let off ( basically as soon as it sees a bit more vacuum ).
the hose you are talking about is the feed line to and from the oil accumilator ( acusump) on the side. helps keep things oily
like i said before , i took the tranny out inorder to see what was going on with it . it was not shifting from 2nd into 3rd fast enough ( would take about 1 to 2 seconds) , even though i had a manual valve body on it. plus the trans temps were reaching the sky
( i wonder where all that sand came from )
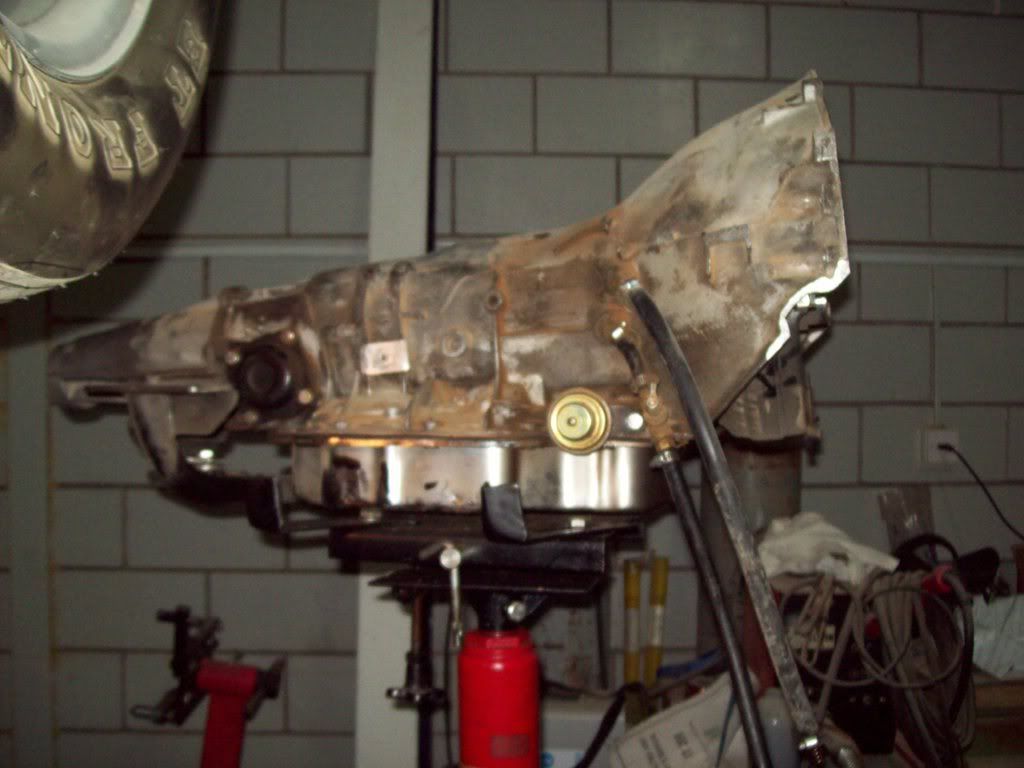
the transmission was built be tristar over here (big tranny company here ), i specifically told them to use borg warner clutches in the tranny and that it would be used strictly for racing and the what kind of abuse it would see. they said no problem , we know what we are doing .
well after taking the tranny appart , i find out they only used borgwarner clutches in 1st gear ! the second and 3rd gears had cheap raybestos junk in them! , they also used a cheap plastic washer instead of the brass ones that are supposed to be used on the input shaft . apparently they used the cheapest rebuild kit out there and charged me for premium everything .
here's how the clutches looked like after 8 dyno pulls and 3 track runs:


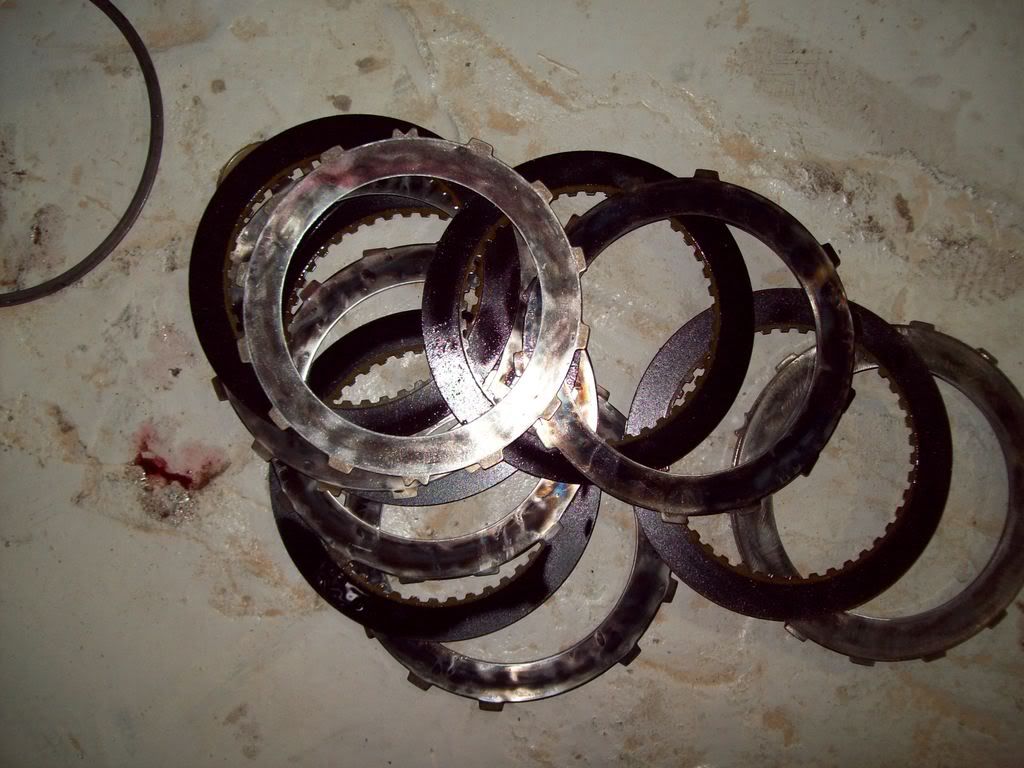
freak'n a$$holes
ruf, the blow off valve if a godzilla one , i used to have a vortech mondo one on there but took it off back when i was having boost issues ( turned out to be a broken supercharger
) this one has a bit more spring pressure. with the vortech , at idle it would open , but withthe low vacuum of this engine the godzilla stays shut at idle untill you give it gas and let off ( basically as soon as it sees a bit more vacuum ).the hose you are talking about is the feed line to and from the oil accumilator ( acusump) on the side. helps keep things oily
like i said before , i took the tranny out inorder to see what was going on with it . it was not shifting from 2nd into 3rd fast enough ( would take about 1 to 2 seconds) , even though i had a manual valve body on it. plus the trans temps were reaching the sky
( i wonder where all that sand came from
)the transmission was built be tristar over here (big tranny company here ), i specifically told them to use borg warner clutches in the tranny and that it would be used strictly for racing and the what kind of abuse it would see. they said no problem , we know what we are doing .
well after taking the tranny appart , i find out they only used borgwarner clutches in 1st gear ! the second and 3rd gears had cheap raybestos junk in them! , they also used a cheap plastic washer instead of the brass ones that are supposed to be used on the input shaft . apparently they used the cheapest rebuild kit out there and charged me for premium everything .
here's how the clutches looked like after 8 dyno pulls and 3 track runs:
freak'n a$$holes
07-19-2008, 06:42 PM
#77
8 Second Club
Thread Starter
iTrader: (1)
Join Date: Nov 2001
Location: the not so stock tribe
Posts: 3,697
Likes: 0
Received 0 Likes
on
0 Posts
got the intake back on the car after fixing the leaking injector situation
snug and dry now
i just need the tranny to be here so i could put it bacck in the car and then i could start it and see if the accumilator works . so far its been holding the air charge that i put in there before 4 days .
super pulley should be here by next week , and then its F2 time
snug and dry now
i just need the tranny to be here so i could put it bacck in the car and then i could start it and see if the accumilator works . so far its been holding the air charge that i put in there before 4 days .
super pulley should be here by next week , and then its F2 time
 07-29-2008, 05:15 AM
#80
8 Second Club
Thread Starter
iTrader: (1)
Join Date: Nov 2001
Location: the not so stock tribe
Posts: 3,697
Likes: 0
Received 0 Likes
on
0 Posts
so , back in town and i got parts
the torque arm arrived ! so that's hopefully going in tonight.
some other stuff arrived as well , but no sign of the super pulley
tranny should be done too.
hopefully i'll get the tranny tomorow and have it in as soon as the CSI shield shows up.
another to do item is the new dipstick, i'm tired of the fixed metal tube one , so i ordered a lokar blingy one it even has a disconnect and plug on the tranny side so you don't need to remove the whole dipstick off the car every time.
i'm also considering using quick connect fittings on the tranny cooler lines. i had them on there before , but they seemed to restrict flow . what do you guys think? should i use them or keep the setup as is?
the torque arm arrived ! so that's hopefully going in tonight.
some other stuff arrived as well , but no sign of the super pulley
tranny should be done too.
hopefully i'll get the tranny tomorow and have it in as soon as the CSI shield shows up.
another to do item is the new dipstick, i'm tired of the fixed metal tube one , so i ordered a lokar blingy one
it even has a disconnect and plug on the tranny side so you don't need to remove the whole dipstick off the car every time.i'm also considering using quick connect fittings on the tranny cooler lines. i had them on there before , but they seemed to restrict flow . what do you guys think? should i use them or keep the setup as is?