
LS Swap From The Top !
 04-02-2010, 12:34 AM
#1
TECH Regular
Thread Starter
iTrader: (3)
Join Date: Jul 2005
Location: So. CAli
Posts: 419
Likes: 0
Received 0 Likes
on
0 Posts

First, I am not trying to start a “which way is best” thread in regards to pulling the engine from a 4th Gen Fbody from the top or bottom, you can best decide that for yourself, I am simply doing a write up on what I did to get my LS1 out to replace it with an LS6 – ATTEMPT AT YOUR OWN RISK!
Now, I live in an apartment and rent 2 small garages in my complex, no matter how I looked at the “out the bottom” method, I just could not find the space to needed to do the engine pull this way so, I decided to pull the engine from the top and the tranny from the bottom.
Background
Flattend # 7 & 8 Cam lobes in my 1999, 167k mi. LS1 Z28 so I decided to;
Buy a crate LS6 long block
Install a stall TQ
Have my 4L60E rebuilt.
Going to run BBK’s
Intake
Throttle body
Fuel rails
Shorty headers
ARP Rod bolts
Cat SFI flexplate
Cat SFI 10% under drive harmonic bal
Scorpion roller rockers
Manton push rods
Before everyone lambaste me for not running long tubes, I live in the smog test capitol state of CA. Yes they actually have rolling smog compliance stations, with the CHP waiving you down. Since there is no chance of just driving on bye the rolling compliance station, I will be staying totally legal with the BBK products.
Current tool list
1 ton hoist
Happy hooker LS engine lift plate
2 hoisting slings
Trans jack
4+ jack stands
4 wheel dollies
Hitachi 18v � in. drive mini impact
Kobalt � in. drive 430 ft.lb electric impact.
More tools
Preparation is probably 80% of the job, I’ve already given a partial list of some of the tools I’ll be using but I want to go over some of the safety gear we as mechanics all should have in our garage, and I’ll be using;
• A good fire extinguisher – once the fire is started it’s too late to run and get one, oil, gas, plastics, electrical, rags AND YOU, all can burn so keep a working extinguisher handy.
• Safety glasses and goggles - compressed air, spraying chemicals, blowing, flying & falling dirt, rust, metal, fluids etc. protect your eyes!
• Latex gloves – hell, most of the chemicals I deal with have some sort of cancer disclaimer plus the ladies don’t like greasy nails! So keep a box.
• Working/Mechanics gloves – can save you a trip to get stitches.
And if you have long hair tie it up. Button up loose clothing, and if you’re using any chemicals remember to ventilate the area-Huffing and mechanical work don’t mix.
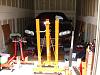
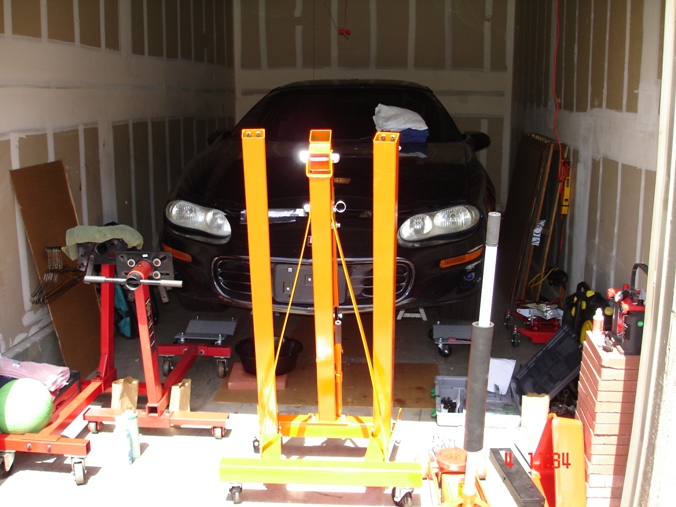
Flat bricks = 6 for the floor jack, the only way I could get the car high enough to remove the tranny from below with the jack stands already maxed out was to put the floor jack up 2 flat bricks high- see them on the right side of the Pic 1. 2 under the rear Big wheels and 2 under each small wheel, then remove one front wheel, jack the car up making sure not to run the jack off of the bricks and you can roll or slide the tranny out.
Small set of picks for removing small clips, retainers etc.
Plenty of spray penetrating oil.
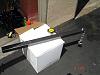
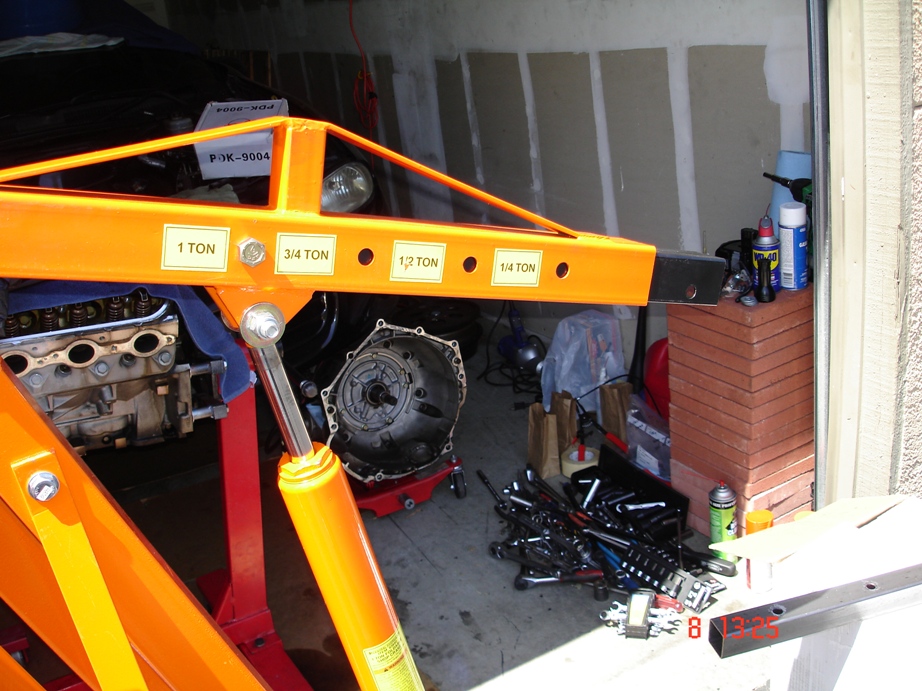
Fabbed up a boom extension for the engine hoist, The LS1 only weighs about 300 lbs. stripped with heads so there should be a good safety margin as long as I don’t go too far extended.
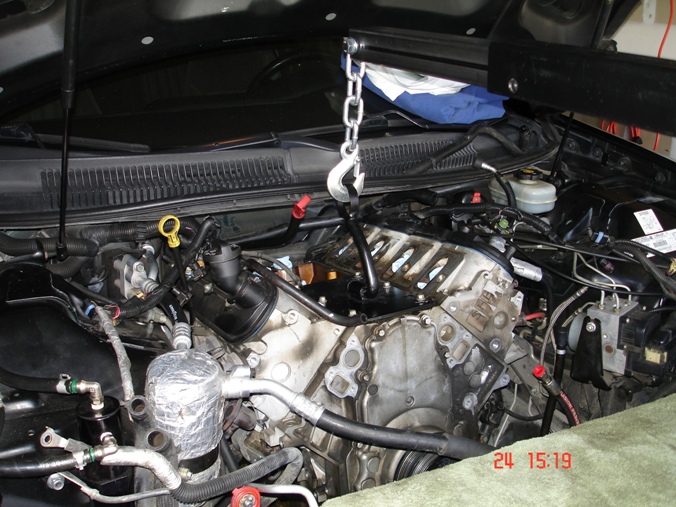
I am removing all of the accessory drives and ancillary equipment (fuel injectors & Rail sensors etc.) plenty of good write ups covering the removal of those items, and I am not trying to re-invent the wheel here.
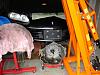
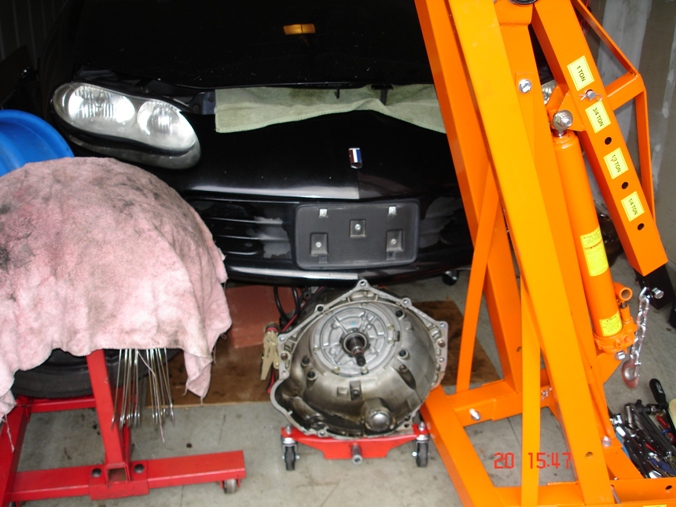
Once I have removed all of the accessories the tranny will be next, coming out from under the car since it is only supported by the engine and 1 mount, then the LS1 will come out the top.
Accessories removed
WP
Radiator
Alt
AC comp relocated
PS pump
Starter, be sure to remove the ground from the starter wire harness to the block
I spent most of the weekend putting the hoist together, removing the accessories I have an old truck 700R4 pan I am going to use while removing and transporting the trans, so if it gets dented or scratched coming out of the bottom, it’s no biggie.Trannys out
Lessons learned
I disconnected all of the electrical connectors and left the ECM and harness in the engine bay, all but the AC, starter, O2 and tranny connectors are accessible from the top.
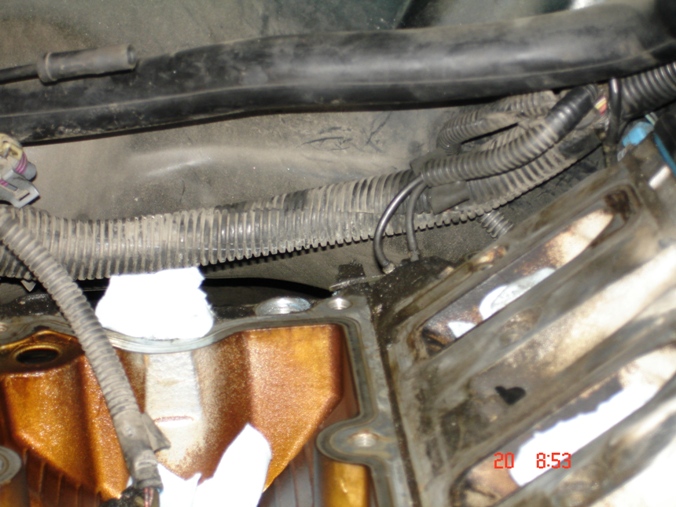
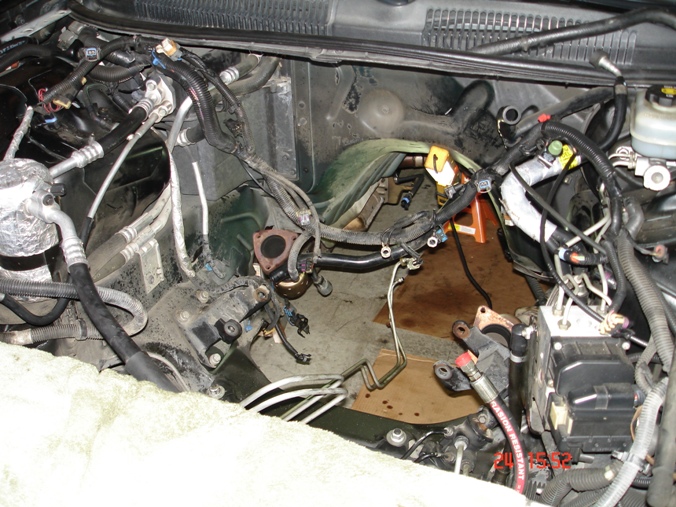
The 2 grounds on the back of the engine are much easier to get at from inside the trans tunnel once the trans is out.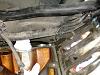
Remove the O2 sensors as early in the job as possible, my exhaust is stock so removing the O2 sensors gave me a little more wiggle room in getting the tranny out.
Bag and tag every nut, bolt (even the ones you will be replacing) and bracket, GM is starting the eliminate parts for the gen 4 Fbody so if you have to go to the hardware store to replace hardware it’s always good to have a example.
Got an adjustable engine sling by Oberg that will allow me to elevate the front of the engine up to 45 deg. alone. It’s a nice piece and rated @ 2000 lbs. lifting cap. But looking at the way the happy hooker will mount on top of the engine I may not need it, I figure I can hook to the hooker and use the Oberg as a block and tackle if necessary.
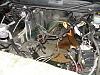
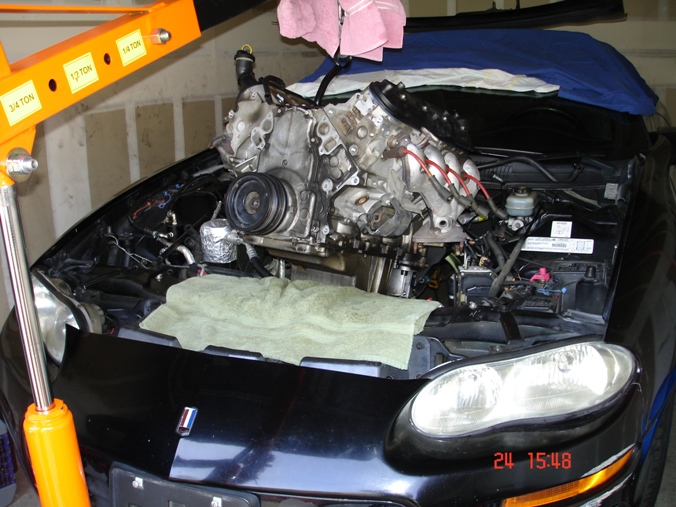
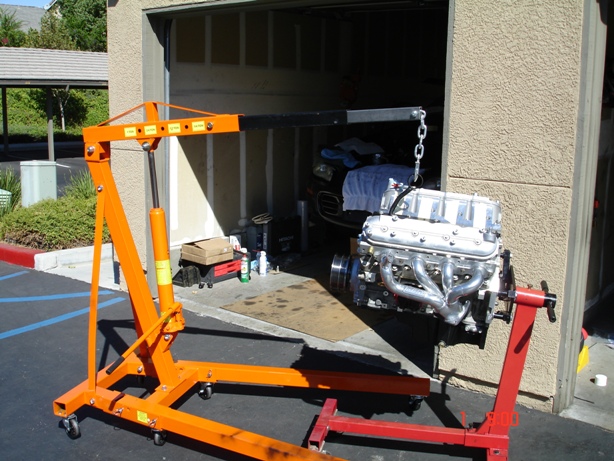
Once the tranny is out and the accessories removed and the exhaust disconnected at the manifolds, (let them soak overnight after a shot of penetrating oil) the LS is a breeze to get out. Basically just remove the 2 motor mounts and start slowly lifting.
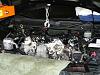
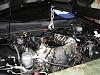
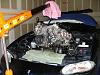
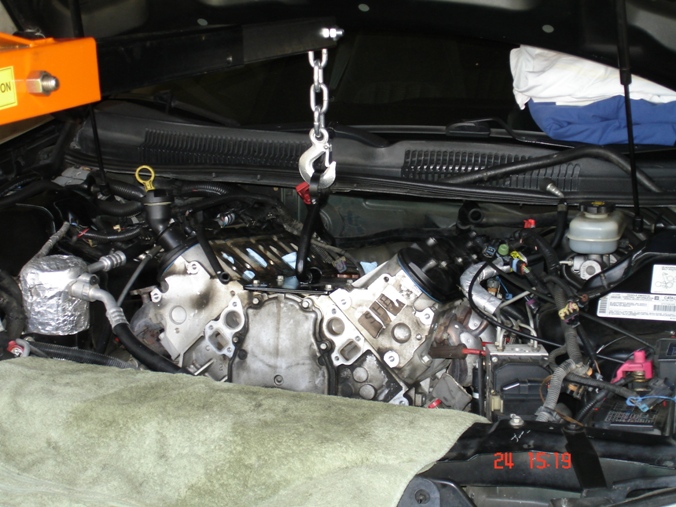
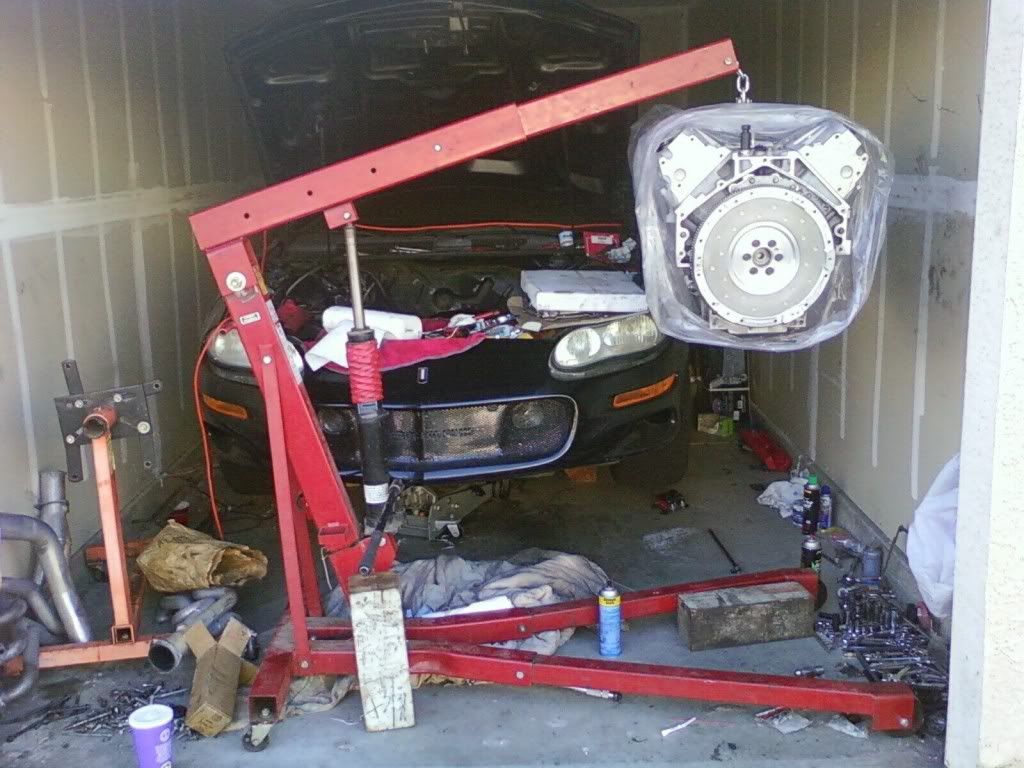
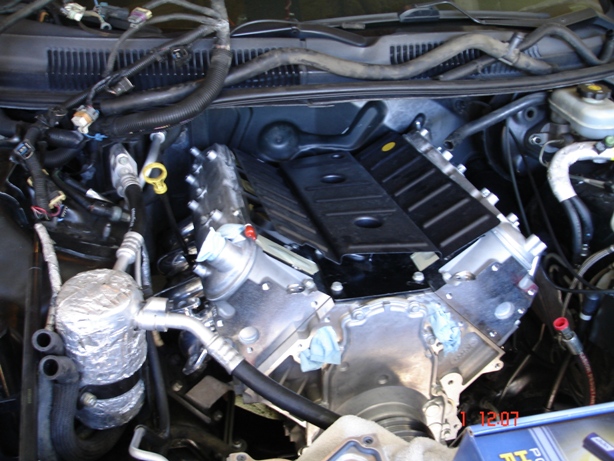
I actually started pulling with the hood on but my buddy said let just take it off. A good shot of my boom extension. I just let the tranny dipstick hang until it fell to the ground, got to remember to put it there when the LS6 goes in.
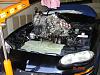
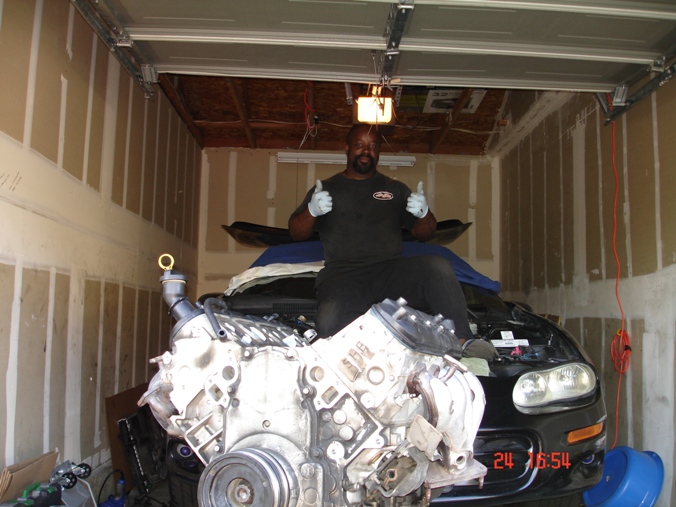
THE MONEY SHOT !!!
This is not nearly as hard as it looks, I honestly cannot see how pulling from the bottom could be easier, the only reason it has taken so long is;
I’ve had the transmission burn up in my truck on the way to Vegas – had to rent a truck to drive me and some appliances back to Cali then rent another truck to drive back to Vegas with a new 700R4 and my tools, repair the truck and drive back to Cali.
Lost 2 family members.
Had 1 family member start chemotherapy.
Work a job.
I had to get the tools and parts together.
Comments
The Happy Hooker from TPIS is truly a great tool and a must have for anyone contemplating doing this type of work, it with the boom extension I fabbed actually made the engine come forward as you lift. You jack the lift and 1 buddy tilts the engine up by the crank pulley and out it comes. I didn’t need ANY of the other implements I purchased, but better to have and not need, than to need and not have!
Putting it all back together I feel will be even easier.

Now, I live in an apartment and rent 2 small garages in my complex, no matter how I looked at the “out the bottom” method, I just could not find the space to needed to do the engine pull this way so, I decided to pull the engine from the top and the tranny from the bottom.
Background
Flattend # 7 & 8 Cam lobes in my 1999, 167k mi. LS1 Z28 so I decided to;
Buy a crate LS6 long block
Install a stall TQ
Have my 4L60E rebuilt.
Going to run BBK’s
Intake
Throttle body
Fuel rails
Shorty headers
ARP Rod bolts
Cat SFI flexplate
Cat SFI 10% under drive harmonic bal
Scorpion roller rockers
Manton push rods
Before everyone lambaste me for not running long tubes, I live in the smog test capitol state of CA. Yes they actually have rolling smog compliance stations, with the CHP waiving you down. Since there is no chance of just driving on bye the rolling compliance station, I will be staying totally legal with the BBK products.
Current tool list
1 ton hoist
Happy hooker LS engine lift plate
2 hoisting slings
Trans jack
4+ jack stands
4 wheel dollies
Hitachi 18v � in. drive mini impact
Kobalt � in. drive 430 ft.lb electric impact.
More tools
Preparation is probably 80% of the job, I’ve already given a partial list of some of the tools I’ll be using but I want to go over some of the safety gear we as mechanics all should have in our garage, and I’ll be using;
• A good fire extinguisher – once the fire is started it’s too late to run and get one, oil, gas, plastics, electrical, rags AND YOU, all can burn so keep a working extinguisher handy.
• Safety glasses and goggles - compressed air, spraying chemicals, blowing, flying & falling dirt, rust, metal, fluids etc. protect your eyes!
• Latex gloves – hell, most of the chemicals I deal with have some sort of cancer disclaimer plus the ladies don’t like greasy nails! So keep a box.
• Working/Mechanics gloves – can save you a trip to get stitches.
And if you have long hair tie it up. Button up loose clothing, and if you’re using any chemicals remember to ventilate the area-Huffing and mechanical work don’t mix.
Flat bricks = 6 for the floor jack, the only way I could get the car high enough to remove the tranny from below with the jack stands already maxed out was to put the floor jack up 2 flat bricks high- see them on the right side of the Pic 1. 2 under the rear Big wheels and 2 under each small wheel, then remove one front wheel, jack the car up making sure not to run the jack off of the bricks and you can roll or slide the tranny out.
Small set of picks for removing small clips, retainers etc.
Plenty of spray penetrating oil.
Fabbed up a boom extension for the engine hoist, The LS1 only weighs about 300 lbs. stripped with heads so there should be a good safety margin as long as I don’t go too far extended.
I am removing all of the accessory drives and ancillary equipment (fuel injectors & Rail sensors etc.) plenty of good write ups covering the removal of those items, and I am not trying to re-invent the wheel here.
Once I have removed all of the accessories the tranny will be next, coming out from under the car since it is only supported by the engine and 1 mount, then the LS1 will come out the top.
Accessories removed
WP
Radiator
Alt
AC comp relocated
PS pump
Starter, be sure to remove the ground from the starter wire harness to the block
I spent most of the weekend putting the hoist together, removing the accessories I have an old truck 700R4 pan I am going to use while removing and transporting the trans, so if it gets dented or scratched coming out of the bottom, it’s no biggie.Trannys out
Lessons learned
I disconnected all of the electrical connectors and left the ECM and harness in the engine bay, all but the AC, starter, O2 and tranny connectors are accessible from the top.
The 2 grounds on the back of the engine are much easier to get at from inside the trans tunnel once the trans is out.
Remove the O2 sensors as early in the job as possible, my exhaust is stock so removing the O2 sensors gave me a little more wiggle room in getting the tranny out.
Bag and tag every nut, bolt (even the ones you will be replacing) and bracket, GM is starting the eliminate parts for the gen 4 Fbody so if you have to go to the hardware store to replace hardware it’s always good to have a example.
Got an adjustable engine sling by Oberg that will allow me to elevate the front of the engine up to 45 deg. alone. It’s a nice piece and rated @ 2000 lbs. lifting cap. But looking at the way the happy hooker will mount on top of the engine I may not need it, I figure I can hook to the hooker and use the Oberg as a block and tackle if necessary.
Once the tranny is out and the accessories removed and the exhaust disconnected at the manifolds, (let them soak overnight after a shot of penetrating oil) the LS is a breeze to get out. Basically just remove the 2 motor mounts and start slowly lifting.

I actually started pulling with the hood on but my buddy said let just take it off. A good shot of my boom extension. I just let the tranny dipstick hang until it fell to the ground, got to remember to put it there when the LS6 goes in.
THE MONEY SHOT !!!
This is not nearly as hard as it looks, I honestly cannot see how pulling from the bottom could be easier, the only reason it has taken so long is;
I’ve had the transmission burn up in my truck on the way to Vegas – had to rent a truck to drive me and some appliances back to Cali then rent another truck to drive back to Vegas with a new 700R4 and my tools, repair the truck and drive back to Cali.
Lost 2 family members.
Had 1 family member start chemotherapy.
Work a job.
I had to get the tools and parts together.
Comments
The Happy Hooker from TPIS is truly a great tool and a must have for anyone contemplating doing this type of work, it with the boom extension I fabbed actually made the engine come forward as you lift. You jack the lift and 1 buddy tilts the engine up by the crank pulley and out it comes. I didn’t need ANY of the other implements I purchased, but better to have and not need, than to need and not have!
Putting it all back together I feel will be even easier.
Last edited by Anthony Williams; 10-11-2011 at 11:50 PM. Reason: Updated


 04-02-2010, 12:36 PM
#3
TECH Regular
Thread Starter
iTrader: (3)
Join Date: Jul 2005
Location: So. CAli
Posts: 419
Likes: 0
Received 0 Likes
on
0 Posts
All I used was the happy hooker from TPIS, as I slowly jacked the engine once the engine cleared the mounts a buddy (the one who took the pic's) lifted the crank pulley over the radiator core support, and out the LS1 came.
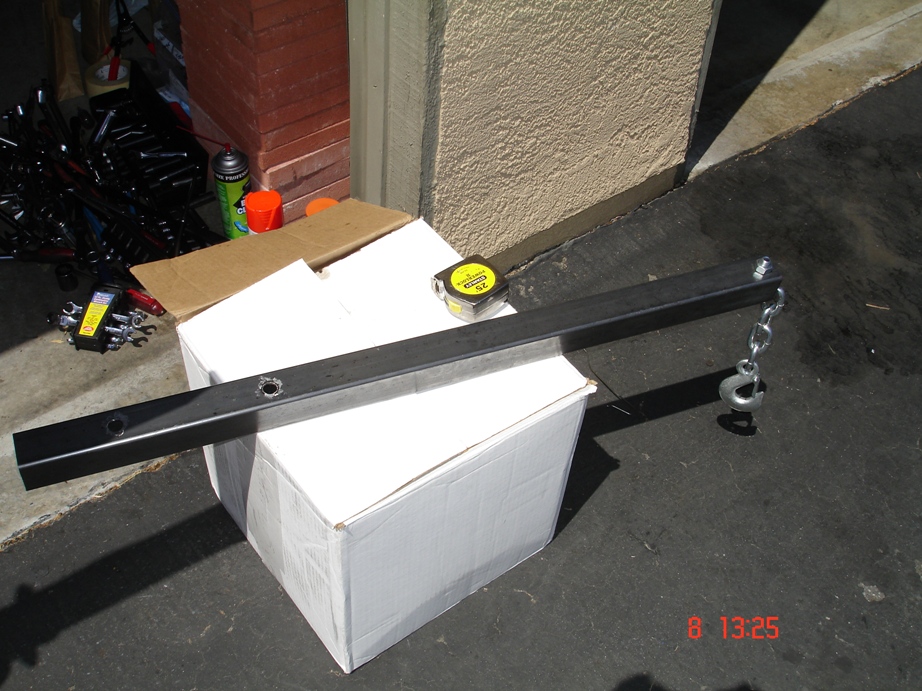
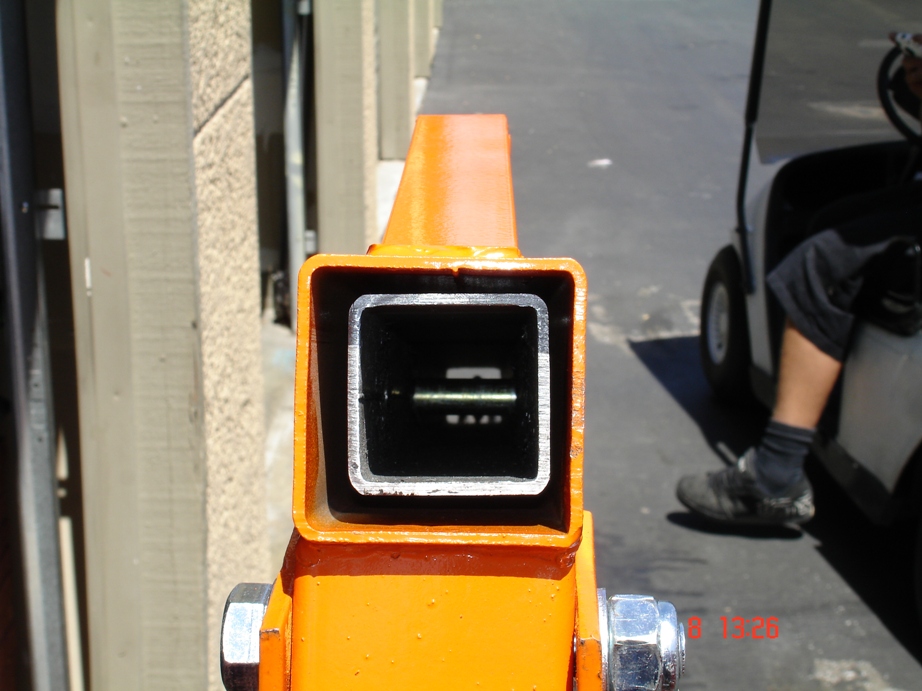
For the boom exstension I used a 2in x 2in, 3.5ft long piece of steel that fit inside of the booms exstension, I drilled a hole in one end for the hoist chain and hook-this hole was centerd, and then 3 more holes along the 3.5ft lenght in line with the boom locking holes this give me about a foot more boom exstension..


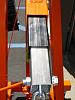
For the boom exstension I used a 2in x 2in, 3.5ft long piece of steel that fit inside of the booms exstension, I drilled a hole in one end for the hoist chain and hook-this hole was centerd, and then 3 more holes along the 3.5ft lenght in line with the boom locking holes this give me about a foot more boom exstension..

Last edited by Anthony Williams; 05-08-2010 at 05:54 PM. Reason: Hoist mod
04-02-2010, 04:04 PM
#5
TECH Apprentice
iTrader: (8)
Join Date: Dec 2005
Location: Morris, IL
Posts: 395
Likes: 0
Received 0 Likes
on
0 Posts
I did mine from the top as well - me, myself, and I - it was not bad at all.
-intake mist come off. Heads can stay on. Pull your oil pressure sending unit off. Valve covers can stay on, but take coils/brackets off
-You WILL need a level adjuster/tilt thing for your cherry picker. The lift plate you have is nice, but you will have to tilt the engine about 45 degrees to get it to clear the cowl. You may be able to do it if you have two strong friends help.
-Pull ALL accessories AND crank pulley. I left the ASP on there when I pulled mine, but it made things more difficult than they should have been.
-I have heard of people leaving the tranny on, I pulled mine, along with the flywheel.
-obviously radiator/fans etc must come out
Other than that it really is like pulling an engine from any other vehicle, just a much more cramped area to work. If you need pics, shoot me a pm w/ your email - but I think you'll be alright. Good luck man
04-02-2010, 04:12 PM
#6
TECH Apprentice
iTrader: (8)
Join Date: Dec 2005
Location: Morris, IL
Posts: 395
Likes: 0
Received 0 Likes
on
0 Posts
Also forgot to mention that the cherry picker will want to rub the nose of your car - it's probably best to pull the front bumper. I used a towel as a means to prevent it from tearing up my paint - it worked pretty good, but my car is no where close to a show car either.
Also, being that you have emmisions, take your time when removing stuff. Take as many "before" pictures as you need for reference, and do your best to label or sort your bolts and other misc hardware to make reassembly easier.
Take note of all of your grounds as well.
When you are installing the new engine, you can preplace your headers prior to dropping in the engine as well.
04-04-2010, 05:09 PM
#7
Registered User

Join Date: Apr 2010
Posts: 1
Likes: 0
Received 0 Likes
on
0 Posts
im replacing my ls1 for an ls6 out the top but i noticed it has another vent tube coming from the lifter valley cover and where would it go and the ls1 has cooling tubes under the intake from the front to the back and the ls6 doesnt so does the ls6 require them also?thanks
Trending Topics
05-05-2010, 03:06 PM
#11
TECH Regular
Join Date: Jun 2004
Location: Houston, Tx
Posts: 418
Likes: 0
Received 0 Likes
on
0 Posts
The happy hooker looks like a nice lift plate - stated it can be used for LT1s as well. Also, I have a kwiklift and have used to remove the trans. The kwiklift elevates the car 20" from floor (bottom of tires) - I'm wondering if this is too high for the crane.... Thanks for the pics!
Last edited by MrEddie; 05-05-2010 at 07:40 PM.
08-26-2010, 01:02 AM
#12
TECH Regular
Thread Starter
iTrader: (3)
Join Date: Jul 2005
Location: So. CAli
Posts: 419
Likes: 0
Received 0 Likes
on
0 Posts
Been a long time but the LS elves have been very good to me..
LS6 Long block from Scoggin Dickey (Thanks Tim and Jesse)
BBK SSI intake (Thanks New ERA)
BBK Shortys (Thanks Reuben)
Manton pushrods (Thanks Terry and Al)
FTP Lid
Vigilante TC (Thanks Jeff)
Mufflex "4 single out exhaust
Xstream Performance level 2 4L60E (Thanks Johnny)
Fuel pump (Thanks Thunder Racing and Racetronics)
And some other odds and ends.
Time to start getting it back together.
Last edited by Anthony Williams; 10-11-2011 at 11:54 PM.

 project coming along though
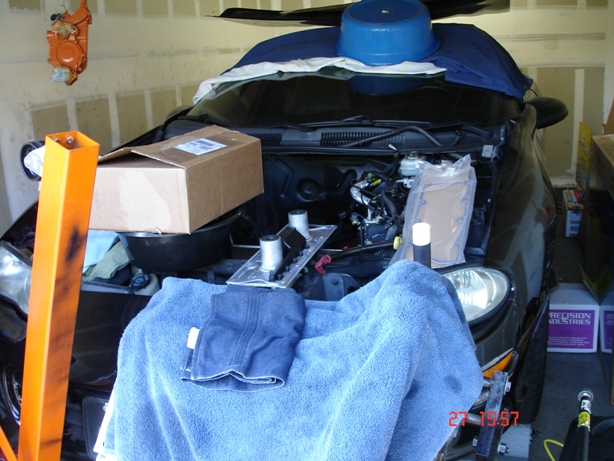

 09-01-2010, 11:30 PM
#19
TECH Regular
Thread Starter
iTrader: (3)
Join Date: Jul 2005
Location: So. CAli
Posts: 419
Likes: 0
Received 0 Likes
on
0 Posts
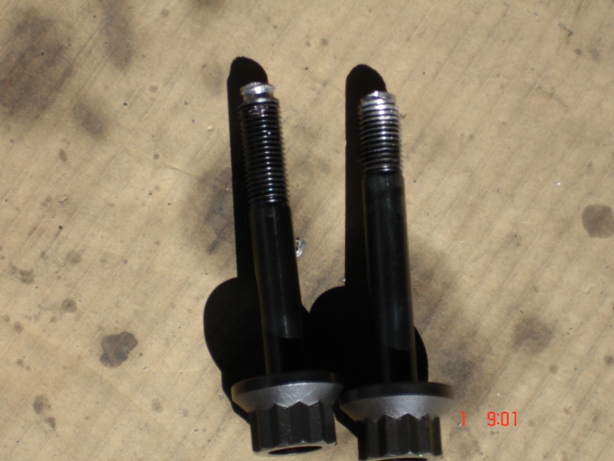
Well I buuggerd up my crank and 2 ARP bolts following th GM balancer pulley install instructions.
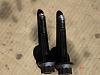
ended up rethreading to 3/8-16 and useing the all thread method of pushing the HB pulley on.
The funny thing is the ARP bolts seemed to have different threads piches and counts from one another even though they were both supposed to be for LS1-6 engines??
I just used a grade 12 allen torqued to 175 with red loctite. and opened up the ARP washer to 3/8 on my shops lathe.
Last edited by Anthony Williams; 12-28-2013 at 09:13 AM.
09-01-2010, 11:32 PM
#20
TECH Regular
Thread Starter
iTrader: (3)
Join Date: Jul 2005
Location: So. CAli
Posts: 419
Likes: 0
Received 0 Likes
on
0 Posts
im replacing my ls1 for an ls6 out the top but i noticed it has another vent tube coming from the lifter valley cover and where would it go and the ls1 has cooling tubes under the intake from the front to the back and the ls6 doesnt so does the ls6 require them also?thanks
the lifter valley tube is your new PCV breather pick up there is also on on the back of the driver side valve cover, both need to be tee'd into the vacuum line on your intake. I have not gotten that far yet but when I do I'll post pic's.
Last edited by Anthony Williams; 09-01-2010 at 11:43 PM.