

ported throttle body PICS
 05-14-2010, 04:27 PM
#1
TECH Enthusiast
Thread Starter
iTrader: (4)
Join Date: Apr 2005
Location: Salinas/ San Diego, CA
Posts: 644
Likes: 0
Received 0 Likes
on
0 Posts

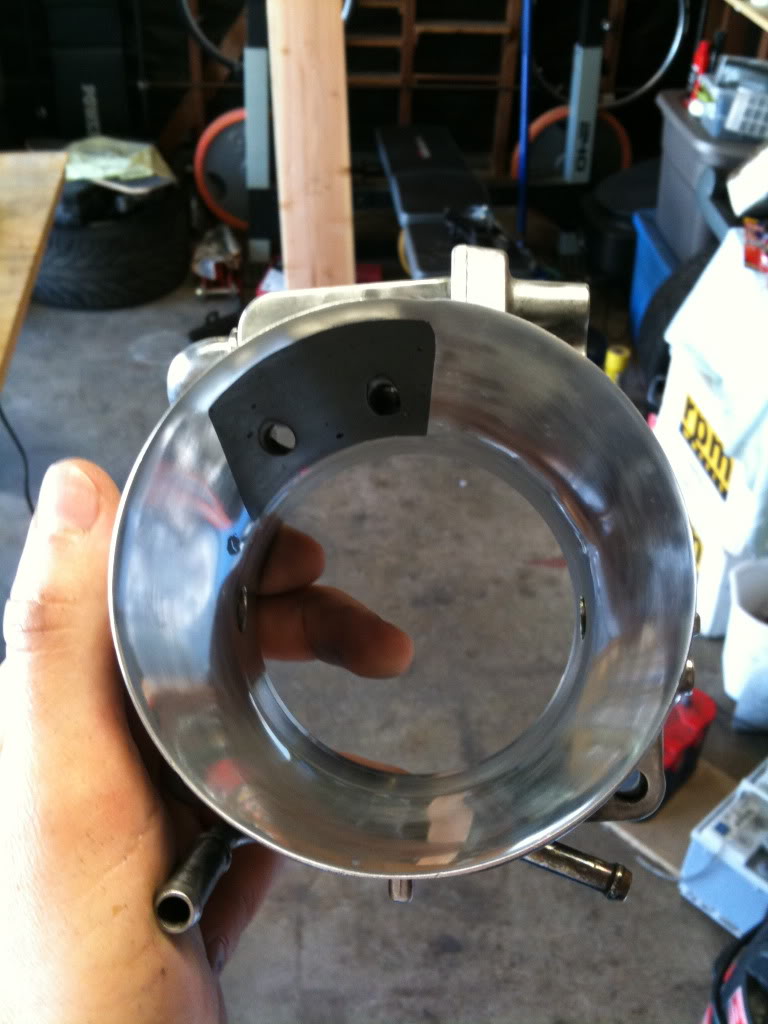
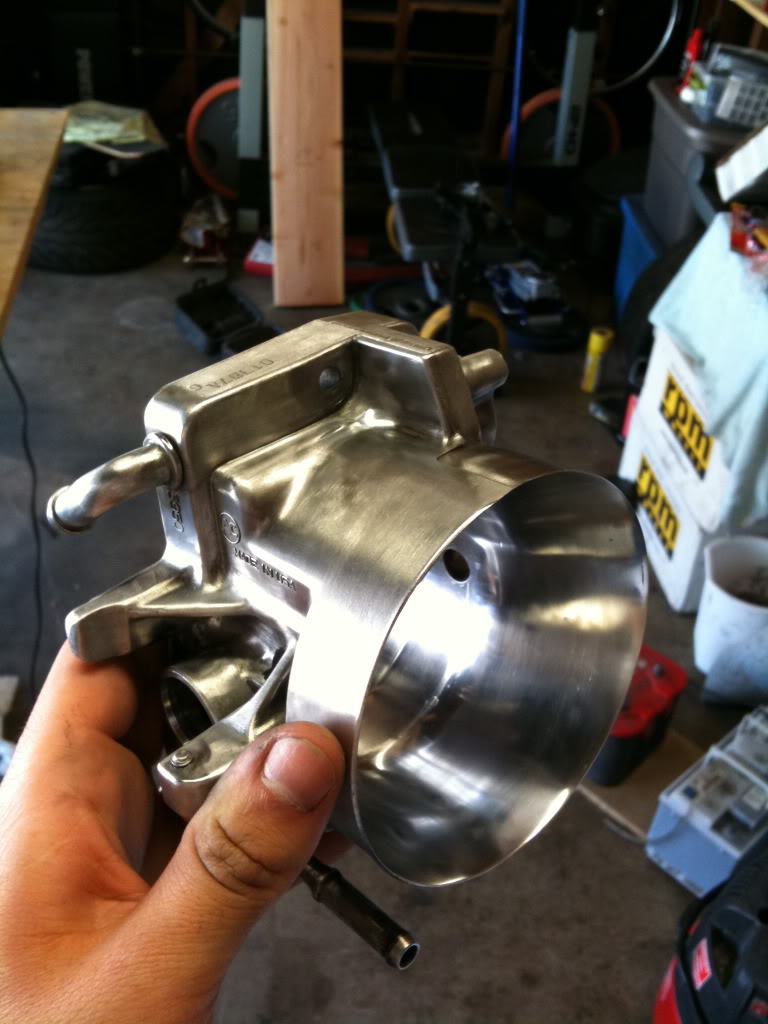
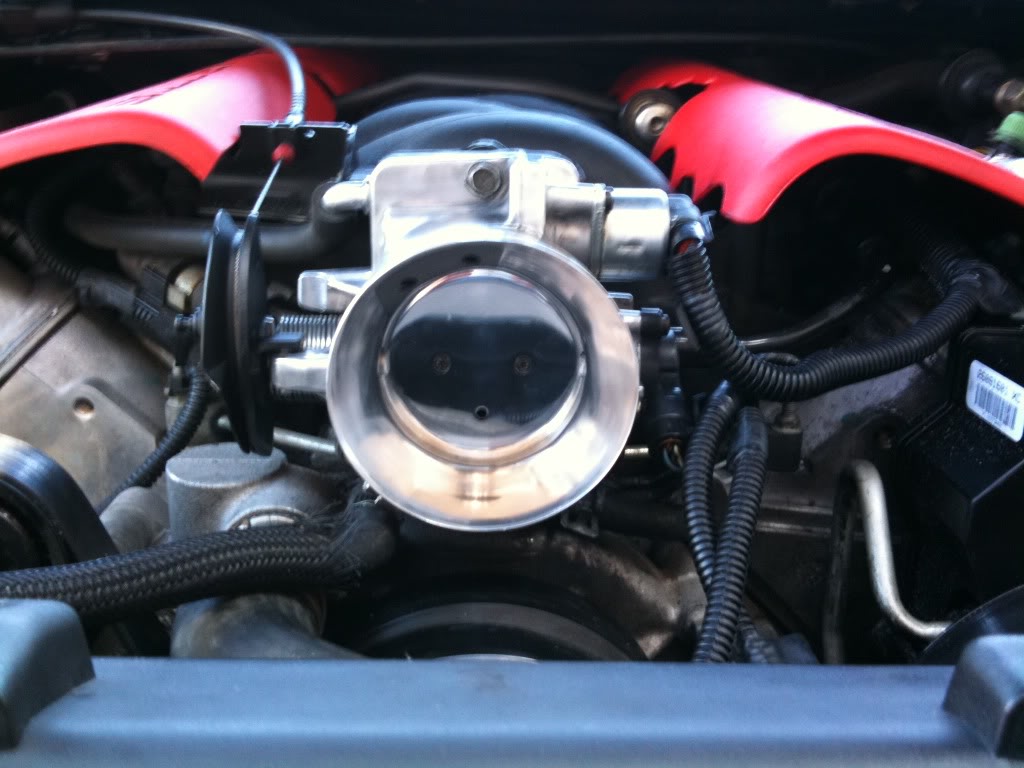
This is my first time porting anything. let me know what you guys think? I used two different file bits on my dremel. I can take pics of what they looked like if anyone cares. I followed with 220 grit sanding drums. last I sanded by hand using 220 > 800 > 2000. Then mothers aluminum polish by hand.


Trending Topics
 05-14-2010, 09:55 PM
#14
Restricted User
iTrader: (207)
Join Date: Aug 2005
Location: jacksonville, fl.
Posts: 555
Likes: 0
Received 0 Likes
on
0 Posts
my (and this is only mine) experience with the epoxy mod is that it sometimes (and i did say sometimes not always) seperates from the housing as the metal constantly heats and cools. i have repaired several t/b's where i had to remove the epoxy entirely. could it have been a bad mix, of course. bad application, of course. does it happen to every throttle body that i have seen with the mod, nope not even close. i, me, and only my opinion is that i would rather not give anything the opportunity to be inhaled into my motor if i dont have to.
now back to giving this guy props. the port job looks great, the polishing looks awesome and it appears that the epoxy is seated nice and tight. job well done in my opinion.....
 05-15-2010, 06:40 AM
#15
TECH Resident
iTrader: (13)
Join Date: Mar 2008
Location: On the coast of somewhere
Posts: 779
Likes: 0
Received 1 Like
on
1 Post
i always say that to each his/her own and what works for some is not always tried by others. like fishing... i like to use fresh shrimp and my brother like to use frozen. we both catch fish, but go about it a different way.
my (and this is only mine) experience with the epoxy mod is that it sometimes (and i did say sometimes not always) seperates from the housing as the metal constantly heats and cools. i have repaired several t/b's where i had to remove the epoxy entirely. could it have been a bad mix, of course. bad application, of course. does it happen to every throttle body that i have seen with the mod, nope not even close. i, me, and only my opinion is that i would rather not give anything the opportunity to be inhaled into my motor if i dont have to.
now back to giving this guy props. the port job looks great, the polishing looks awesome and it appears that the epoxy is seated nice and tight. job well done in my opinion.....
05-15-2010, 02:38 PM
#17
dude, how have you not done the TB Bypass mod yet living in CA lol?
http://www.installuniversity.com/ins.../tb_bypass.htm
You don't need to buy the BMR kit to do it, just go to Lowe's and find a fitting that will slide in the 2 hoses and make sure its tight and ur done. Easy power lol
http://www.installuniversity.com/ins.../tb_bypass.htm
You don't need to buy the BMR kit to do it, just go to Lowe's and find a fitting that will slide in the 2 hoses and make sure its tight and ur done. Easy power lol
05-16-2010, 02:07 AM
#19
TECH Enthusiast
Thread Starter
iTrader: (4)
Join Date: Apr 2005
Location: Salinas/ San Diego, CA
Posts: 644
Likes: 0
Received 0 Likes
on
0 Posts
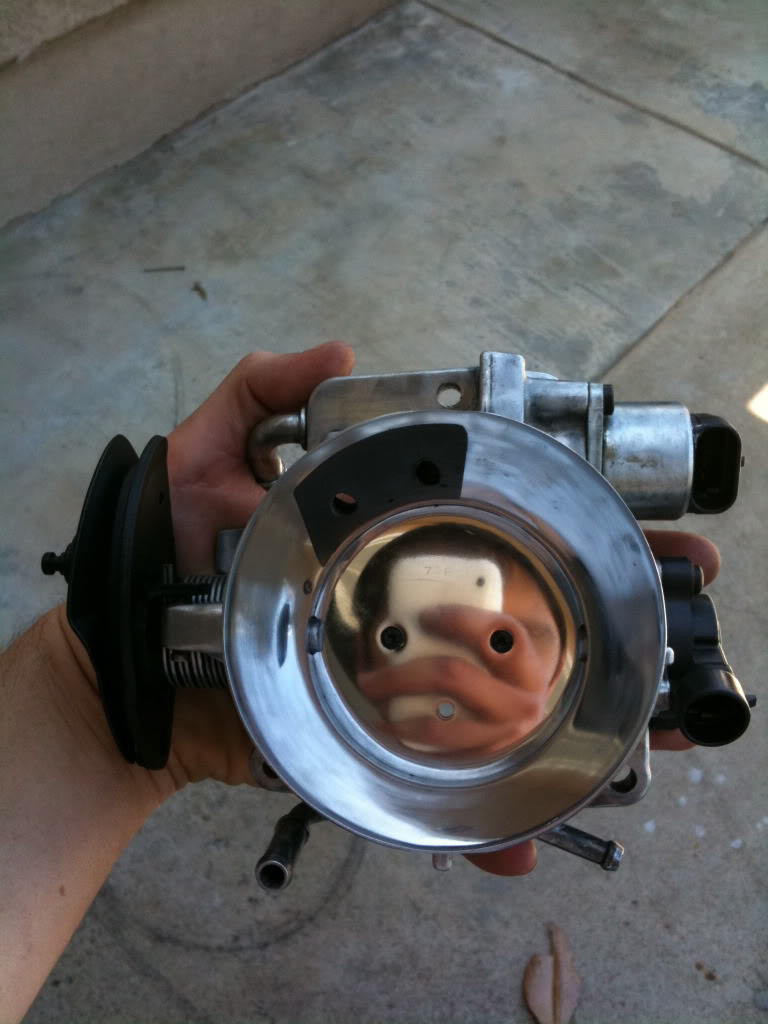
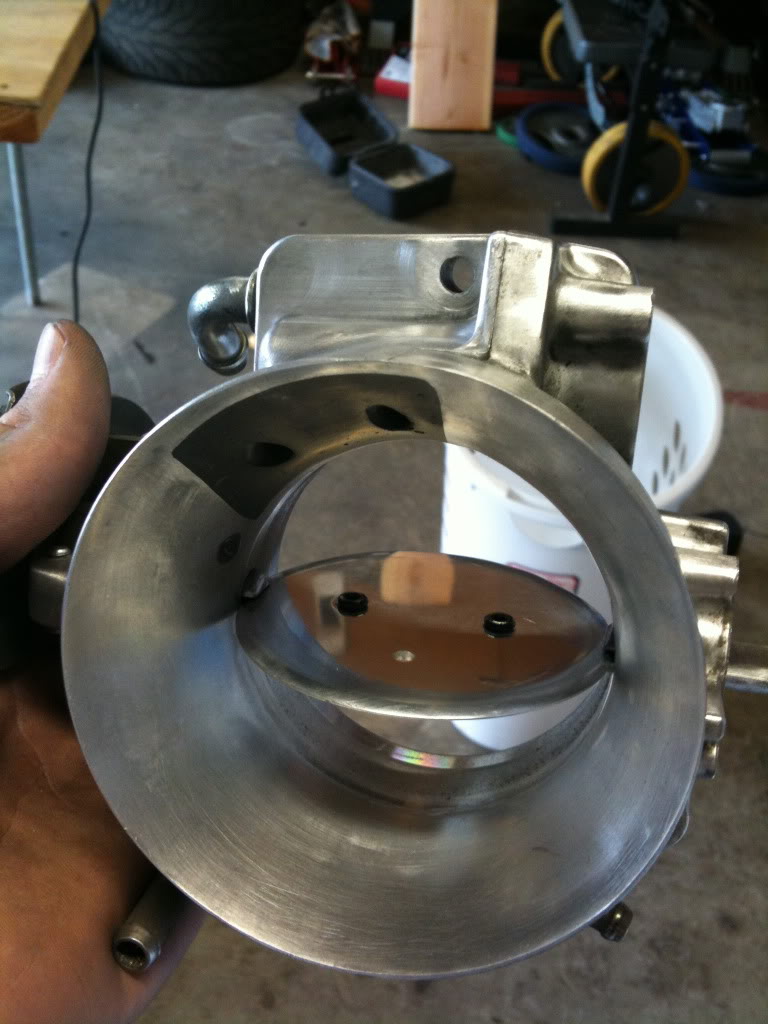
Here are some pics before I cleaned up grooves and polished it. You can see the knifed edge and trimmed shaft tho, I finished that first.
05-16-2010, 02:37 AM
#20
TECH Enthusiast
Thread Starter
iTrader: (4)
Join Date: Apr 2005
Location: Salinas/ San Diego, CA
Posts: 644
Likes: 0
Received 0 Likes
on
0 Posts
first of all I want to say thank you for all the nice comments as they mean a lot! I try to take pride in the work I do and really hate when people do modifications the shitty way.
Lol I posted that pic b/c I thought that looked cool. Thought it could prove the polish job!
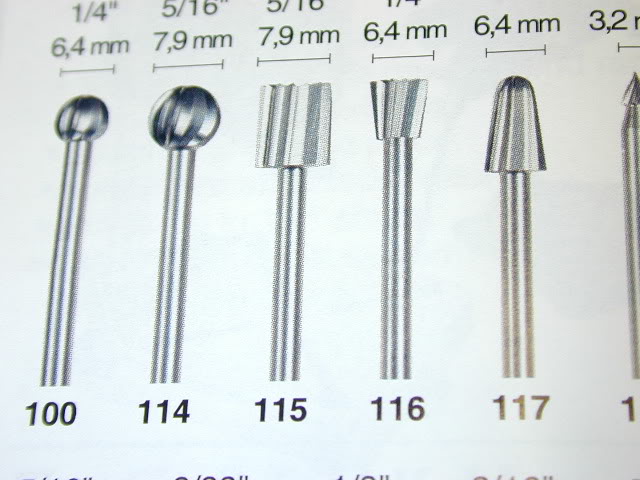
I used number 115 and 117 in the pics. not sure if these are the same dremel brand ones I used but they looked just like that!
I did go through the sidewall on the left just a tiny bit. By bit got stuck in a small groove just barely too long and it grinded through. It sucks, but it was an easy fix and was very small. The epoxy I used was metal / concrete epoxy from home depot.
see above post.
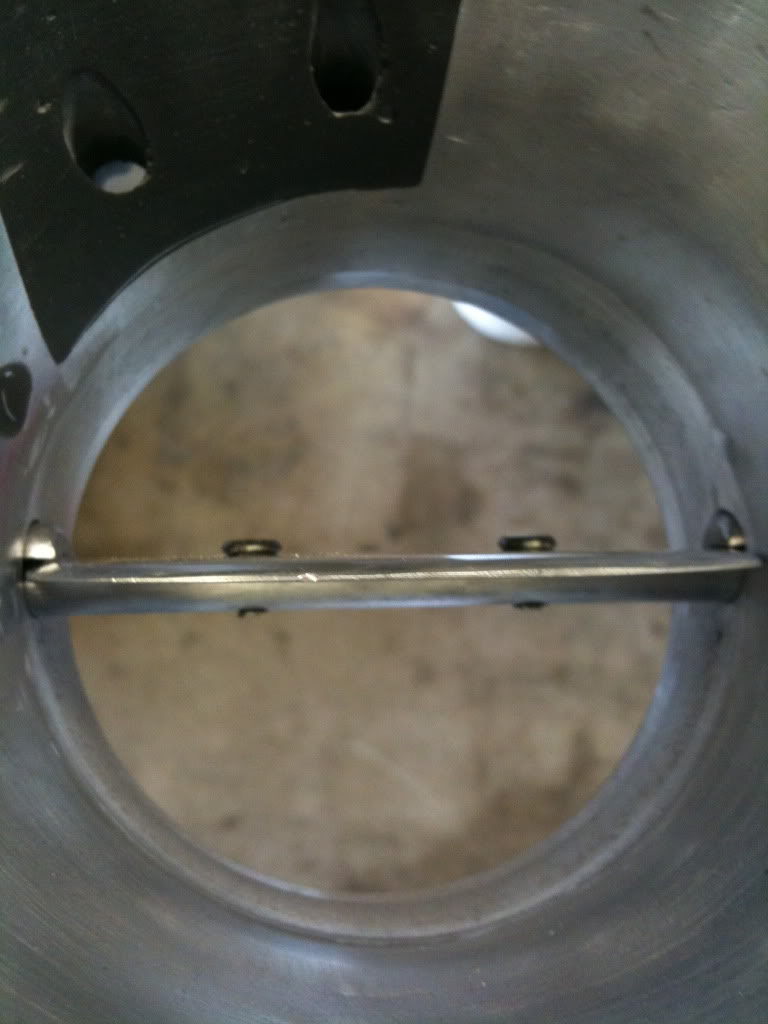
Yes, its still the stock blade. I knifed the edges and polished the cross hatched grooves off of both sides.
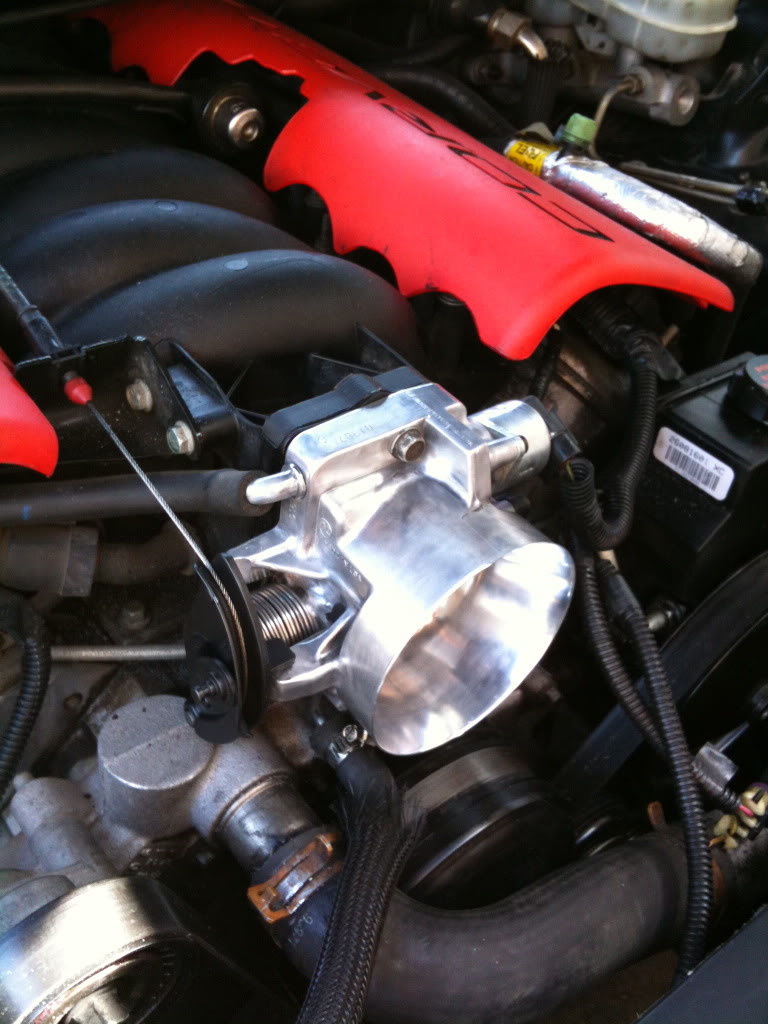
I have not been able to drive the car after the port and polish [I am waiting for my Midwest fabricated 9, in the meantime the car is supported by jack stands with a blown rear  ], but I may have some credibility being an engineering student. I passed fluid dynamics last semester ( flowing intake air can be treated as a fluid) and believe the epoxy greatly reduces turbulence the cutout creates. I also believe the intake air temp. sensor ( Correct on type of sensor?) would not be affected by the mod in my case. When the intake valves open you want as much air/fuel mixture to fill the cylinders as possible in that brief amount of time the intake valve is open. The epoxy lowers the overall drag force of the intake channel which can make the air travel faster, maximizing the amount of air in the cylinder. Again this is my opinion.
I really spent my time on the project working on it over a couple days.
I would say about 6-7 hours.
thanks for props man. I totally respect your comment. Like I said some people do things the shitty way. I took my time and sanded the material well so that the epoxy would stick and stay. The epoxy is rated with a max temp of around 500 *F I believe. I dont think Intake air would ever reach that with a fast toys ram air kit. I hope the epoxy would be stable enough to not contract and expand with that high of a temp. :twocents: What do you fish for? :-)
I could try to make one, but dont have pictures of the complete process. Would maybe need someone to take some pics of a stocker. I was a little disappointed seeing the sticky for this mod had deleted pics.
Lol thanks for the reminder. I did this mod a while back but returned it back to stock because the hose was rubbing a pulley one day. I will do it!!!
hope this helps someone!
Lol I posted that pic b/c I thought that looked cool. Thought it could prove the polish job!
I used number 115 and 117 in the pics. not sure if these are the same dremel brand ones I used but they looked just like that!
see above post.
Yes, its still the stock blade. I knifed the edges and polished the cross hatched grooves off of both sides.
], but I may have some credibility being an engineering student. I passed fluid dynamics last semester ( flowing intake air can be treated as a fluid) and believe the epoxy greatly reduces turbulence the cutout creates. I also believe the intake air temp. sensor ( Correct on type of sensor?) would not be affected by the mod in my case. When the intake valves open you want as much air/fuel mixture to fill the cylinders as possible in that brief amount of time the intake valve is open. The epoxy lowers the overall drag force of the intake channel which can make the air travel faster, maximizing the amount of air in the cylinder. Again this is my opinion. I really spent my time on the project working on it over a couple days.
I would say about 6-7 hours.
i always say that to each his/her own and what works for some is not always tried by others. like fishing... i like to use fresh shrimp and my brother like to use frozen. we both catch fish, but go about it a different way.
my (and this is only mine) experience with the epoxy mod is that it sometimes (and i did say sometimes not always) seperates from the housing as the metal constantly heats and cools. i have repaired several t/b's where i had to remove the epoxy entirely. could it have been a bad mix, of course. bad application, of course. does it happen to every throttle body that i have seen with the mod, nope not even close. i, me, and only my opinion is that i would rather not give anything the opportunity to be inhaled into my motor if i dont have to.
now back to giving this guy props. the port job looks great, the polishing looks awesome and it appears that the epoxy is seated nice and tight. job well done in my opinion.....
my (and this is only mine) experience with the epoxy mod is that it sometimes (and i did say sometimes not always) seperates from the housing as the metal constantly heats and cools. i have repaired several t/b's where i had to remove the epoxy entirely. could it have been a bad mix, of course. bad application, of course. does it happen to every throttle body that i have seen with the mod, nope not even close. i, me, and only my opinion is that i would rather not give anything the opportunity to be inhaled into my motor if i dont have to.
now back to giving this guy props. the port job looks great, the polishing looks awesome and it appears that the epoxy is seated nice and tight. job well done in my opinion.....
I could try to make one, but dont have pictures of the complete process. Would maybe need someone to take some pics of a stocker. I was a little disappointed seeing the sticky for this mod had deleted pics.
dude, how have you not done the TB Bypass mod yet living in CA lol?
http://www.installuniversity.com/ins.../tb_bypass.htm
You don't need to buy the BMR kit to do it, just go to Lowe's and find a fitting that will slide in the 2 hoses and make sure its tight and ur done. Easy power lol
http://www.installuniversity.com/ins.../tb_bypass.htm
You don't need to buy the BMR kit to do it, just go to Lowe's and find a fitting that will slide in the 2 hoses and make sure its tight and ur done. Easy power lol
hope this helps someone!