


Lt header+ory install/review Speed Engineering
Thread Starter
Joined: Oct 2011
Posts: 175
Likes: 21
From: Eastern PA --> Southwest VA
First of all, when getting ready to install headers and ory, read up as much as possible; the last thing you want to do is get halfway through and get stuck. Read through this and other guides, in their entirety, for any info you may need. This is also by no means a "step by step" tutorial, it is more a guide bringing together many, normally, separate ideas into one post and giving a review of a product. I have also cited very helpful external links for specific things. Enjoy.
For reference this was done on my 99 z28.
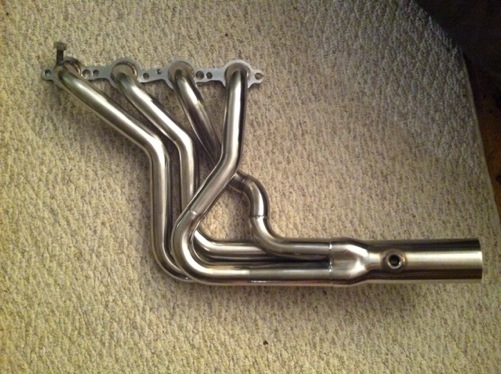
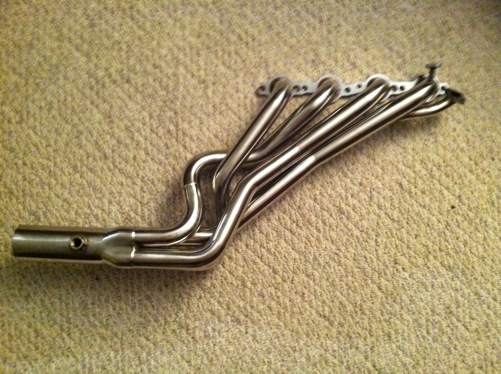
My headers and ory came in on Friday. The overall quality was surprising. The welds on the flanges and pipes were far better than I expected and the included band clamps were actually pretty nice. The only problems with the headers were that they came with both air and egr pipes and they had the o2 sensor bungs on the wrong side. SE made these two problems clear on their site so these problems were expected.
More Pics a few posts down
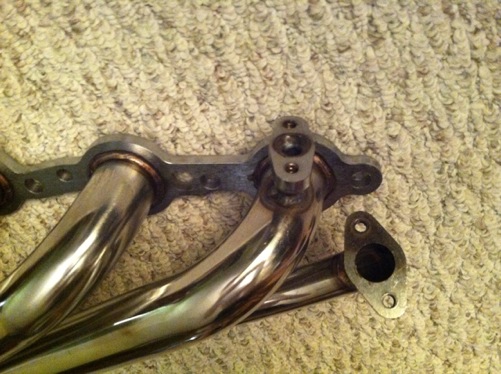
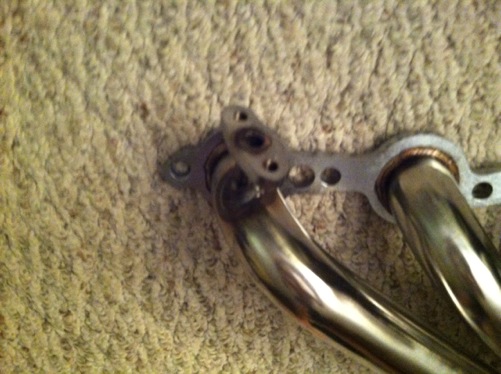
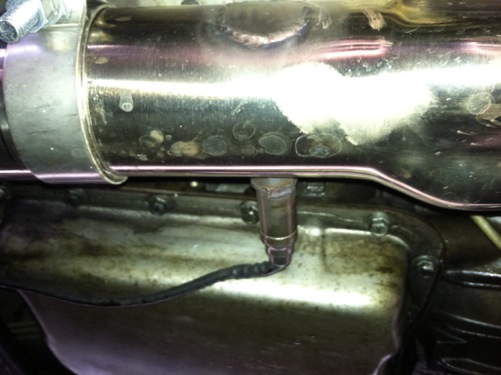
I cut the egr and air pipes off and welded up the holes. I also cut the bungs off and put them on the direct opposite (180*) side of the headers. This gave plenty of room for the o2s to clear the trans pan.

To start you are going to want to have a friend or two to help you out; It is very very difficult to both feed the header and get the gasket and bolts in place. Its also nice to have someone there to help you when you get fed up and start throwing wrenches. I also highly recommend you have a number of tools on hand to make life quicker and easier; 1,3, and 10 in extensions, air ratchet, deep and short sockets, wrenches, a breaker bar, a drill, and most important a swivel (if you don't have one go get it now). Metric ratcheting wrenches are optional but also recommended. Also lots of WD-40 or similar products.
Friday and Saturday consisted of mm install and egr, air, manifold and cat/ypipe removal. If installing any header I recommend doing poly mm as the stock mounts will be heavily damaged and if your tearing your car apart this much you might as well do some preventative maintenance. Also be sure to use oem gm gaskets; anything else can be prone to leaking, and you don't want to have to do this again.
Here is a great guide for poly mm
https://ls1tech.com/forums/generation-iii-external-engine/492703-best-poly-motor-mount-write-up-ever-written.html
I, however, didn't go by this guide. I also used an engine hoist rather than a jack, but it will work without one. I, already having removed the exhaust, air, and egr systems, was able to remove the bolts to the block and the pedestal bolts. You can remove the pedestal/clamshell combo as a whole. Going in this way allows you to remove the mounts without needing to remove the alternator or ac compressor. These two items need to traditionally be removed because the long bolts mating the clamshell to the pedestal cannot be taken out with the alternator and compressor in the way. This saves both time and frustration. With the mounts out, use the rest of that guide for help. Installation of the mounts goes the same way in reverse, and make sure the long bolts go in the same way!
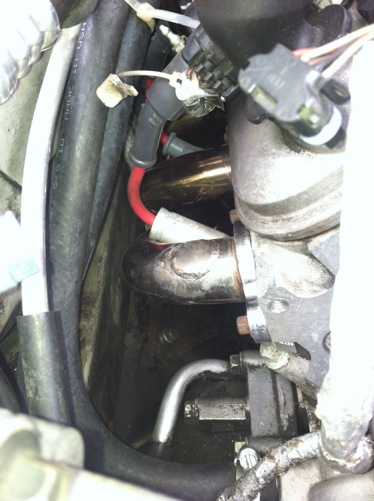
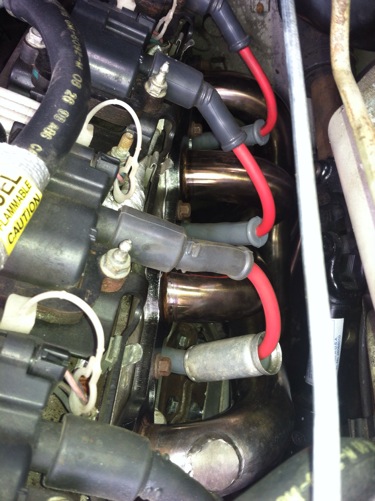
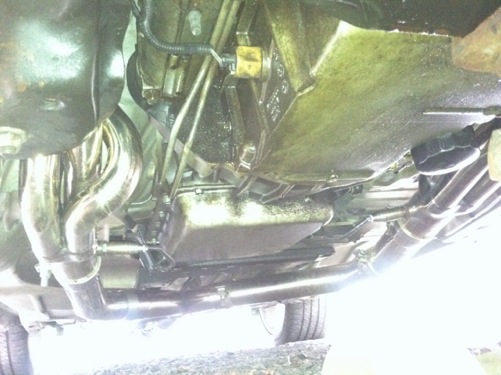
With the mm done and the motor sitting nicely its now time for the headers. BTW!! Now is a great opportunity to change your plugs and wires. I recommend ngk tr55 plugs and msd superconductor wires. All header brands install differently, but these speed engineering headers went in very nicely. I didn't need to remove anything except the dipstick. I didn't need to remove the steering linkage, grind the block, notch the k frame, or any other nonsense. I had my car on ramps in the front and on stands in the rear and they still went in easily. The driver side slid in instantly and the passenger side took about a minute of readjusting before it popped in. Once up in place put the gasket on, the right way, and put a bolt in the middle of the header through the gasket and into the head. Putting the middle bolt in first will make the gasket less prone to moving around on you. Also I ran the bolts through a 8x1.25 die to clear them of any rust or previous sealer put on them. Continue to put all the bolts in, hand tight, then go on over to the y pipe.
While fitting the SE y pipe one major issue became apparent; the drivers side wouldn't line up. After much deliberation I ended up cutting a 2.5-3.0 inch section out of the back of the small pipe behind the driver header. This fixed the problem and everything seemed to fit well. I also cut two 1.5 inch slits into the larger flange end of each pipe so the clamps could grip and seal better. Doing this gave a much better seal and the pipes wouldn't budge an inch when attempting to move around. You can now connect your cat back to the new y pipe and snug everything, including the headers, up.
Now with everything set and snug, torque the header bolts to spec and tighten up the rest of your exhaust. Remember to come back in a few days, after a number of heating and cooling cycles, and tighten everything up again on the exhaust. Do not, I repeat do not over tighten your header bolts. The heads are aluminum and can easily strip. Beleive me, you don't want to try to fix this. If, when going in, your bolts become tight or start to bind take them out and go buy yourself a 8x1.25 tap. It's an 8 dollars well spent.
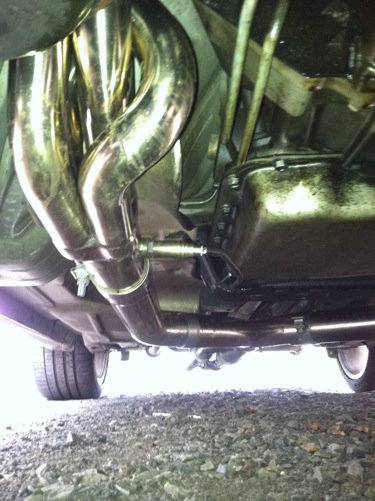
Here are some pics of it all together
The o2 sensors are the last point of confusion for most people. The way I see it you have 4 options.
1. Cut and splice new wire into your stock o2's to make them long enough, plug them into the front locations, and either get the rears tuned out or get o2 sims (I do not recommend sims because they have a history of being problematic)
2. Buy corvette rear o2 sensors and put them in the front. The are longer and will fit into the stock location. Also then get the rears tuned out.
3. Purchase o2 sensor extensions and plug them into the front. Then tune out the rears.
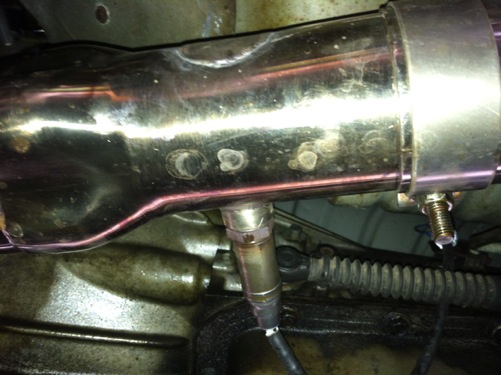
4. Do what I did and use the rear o2 sensor plugs as your fronts. Either have the fronts and rears switched with a tune or follow this guide
https://ls1tech.com/forums/generation-iii-external-engine/1425078-lt-header-guys-no-more-extensions-corvette-o2s.html
It works great and the stock o2 sensors just fit. You still have to get the rears tuned out, but they are technically the fronts now.
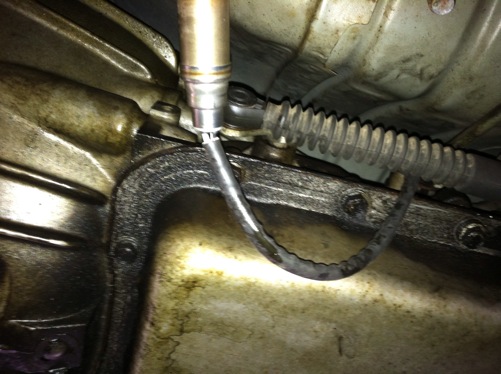
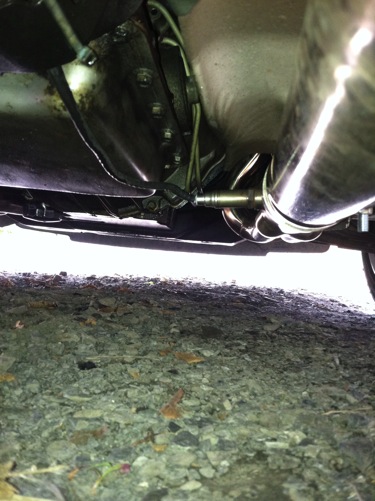
More O2 clearance from the back

Overall I spent 3 half days for motor mounts, headers, y pipe and air/egr delete. The speed engineering headers and ory are a great buy for the price, and to top it all off they are stainless too. They just require a small amount of modification that you can either do yourself or have done for fairly cheap.
More good reading in header installs
https://ls1tech.com/forums/generation-iii-external-engine/1285416-poly-motor-mounts-pacesetter-headers-tsp-y-install-dummies-lotsa-pics.html
If you have any questions feel free to ask in the comments I'll try to answer them all.
For reference this was done on my 99 z28.
My headers and ory came in on Friday. The overall quality was surprising. The welds on the flanges and pipes were far better than I expected and the included band clamps were actually pretty nice. The only problems with the headers were that they came with both air and egr pipes and they had the o2 sensor bungs on the wrong side. SE made these two problems clear on their site so these problems were expected.
More Pics a few posts down


I cut the egr and air pipes off and welded up the holes. I also cut the bungs off and put them on the direct opposite (180*) side of the headers. This gave plenty of room for the o2s to clear the trans pan.


To start you are going to want to have a friend or two to help you out; It is very very difficult to both feed the header and get the gasket and bolts in place. Its also nice to have someone there to help you when you get fed up and start throwing wrenches. I also highly recommend you have a number of tools on hand to make life quicker and easier; 1,3, and 10 in extensions, air ratchet, deep and short sockets, wrenches, a breaker bar, a drill, and most important a swivel (if you don't have one go get it now). Metric ratcheting wrenches are optional but also recommended. Also lots of WD-40 or similar products.
Friday and Saturday consisted of mm install and egr, air, manifold and cat/ypipe removal. If installing any header I recommend doing poly mm as the stock mounts will be heavily damaged and if your tearing your car apart this much you might as well do some preventative maintenance. Also be sure to use oem gm gaskets; anything else can be prone to leaking, and you don't want to have to do this again.
Here is a great guide for poly mm
https://ls1tech.com/forums/generation-iii-external-engine/492703-best-poly-motor-mount-write-up-ever-written.html
I, however, didn't go by this guide. I also used an engine hoist rather than a jack, but it will work without one. I, already having removed the exhaust, air, and egr systems, was able to remove the bolts to the block and the pedestal bolts. You can remove the pedestal/clamshell combo as a whole. Going in this way allows you to remove the mounts without needing to remove the alternator or ac compressor. These two items need to traditionally be removed because the long bolts mating the clamshell to the pedestal cannot be taken out with the alternator and compressor in the way. This saves both time and frustration. With the mounts out, use the rest of that guide for help. Installation of the mounts goes the same way in reverse, and make sure the long bolts go in the same way!
With the mm done and the motor sitting nicely its now time for the headers. BTW!! Now is a great opportunity to change your plugs and wires. I recommend ngk tr55 plugs and msd superconductor wires. All header brands install differently, but these speed engineering headers went in very nicely. I didn't need to remove anything except the dipstick. I didn't need to remove the steering linkage, grind the block, notch the k frame, or any other nonsense. I had my car on ramps in the front and on stands in the rear and they still went in easily. The driver side slid in instantly and the passenger side took about a minute of readjusting before it popped in. Once up in place put the gasket on, the right way, and put a bolt in the middle of the header through the gasket and into the head. Putting the middle bolt in first will make the gasket less prone to moving around on you. Also I ran the bolts through a 8x1.25 die to clear them of any rust or previous sealer put on them. Continue to put all the bolts in, hand tight, then go on over to the y pipe.
While fitting the SE y pipe one major issue became apparent; the drivers side wouldn't line up. After much deliberation I ended up cutting a 2.5-3.0 inch section out of the back of the small pipe behind the driver header. This fixed the problem and everything seemed to fit well. I also cut two 1.5 inch slits into the larger flange end of each pipe so the clamps could grip and seal better. Doing this gave a much better seal and the pipes wouldn't budge an inch when attempting to move around. You can now connect your cat back to the new y pipe and snug everything, including the headers, up.
Now with everything set and snug, torque the header bolts to spec and tighten up the rest of your exhaust. Remember to come back in a few days, after a number of heating and cooling cycles, and tighten everything up again on the exhaust. Do not, I repeat do not over tighten your header bolts. The heads are aluminum and can easily strip. Beleive me, you don't want to try to fix this. If, when going in, your bolts become tight or start to bind take them out and go buy yourself a 8x1.25 tap. It's an 8 dollars well spent.
Here are some pics of it all together


The o2 sensors are the last point of confusion for most people. The way I see it you have 4 options.
1. Cut and splice new wire into your stock o2's to make them long enough, plug them into the front locations, and either get the rears tuned out or get o2 sims (I do not recommend sims because they have a history of being problematic)
2. Buy corvette rear o2 sensors and put them in the front. The are longer and will fit into the stock location. Also then get the rears tuned out.
3. Purchase o2 sensor extensions and plug them into the front. Then tune out the rears.
4. Do what I did and use the rear o2 sensor plugs as your fronts. Either have the fronts and rears switched with a tune or follow this guide
https://ls1tech.com/forums/generation-iii-external-engine/1425078-lt-header-guys-no-more-extensions-corvette-o2s.html
It works great and the stock o2 sensors just fit. You still have to get the rears tuned out, but they are technically the fronts now.
More O2 clearance from the back


Overall I spent 3 half days for motor mounts, headers, y pipe and air/egr delete. The speed engineering headers and ory are a great buy for the price, and to top it all off they are stainless too. They just require a small amount of modification that you can either do yourself or have done for fairly cheap.
More good reading in header installs
https://ls1tech.com/forums/generation-iii-external-engine/1285416-poly-motor-mounts-pacesetter-headers-tsp-y-install-dummies-lotsa-pics.html
If you have any questions feel free to ask in the comments I'll try to answer them all.
Last edited by GtoProject; Sep 27, 2013 at 03:04 PM.
Thread Starter
Joined: Oct 2011
Posts: 175
Likes: 21
From: Eastern PA --> Southwest VA
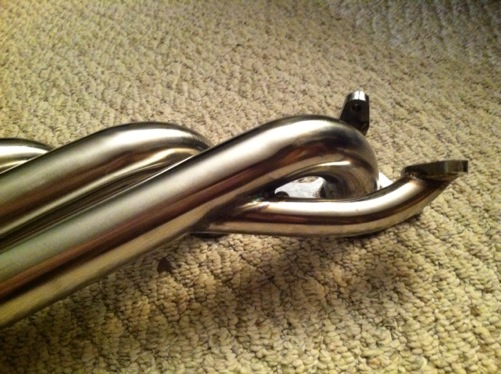
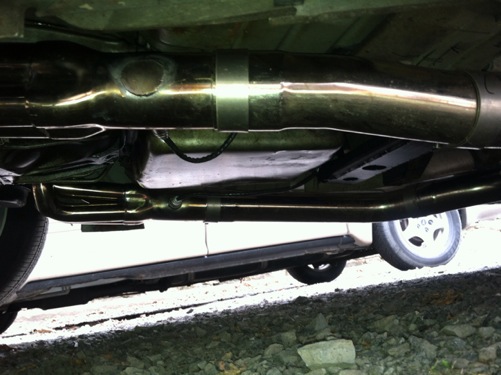
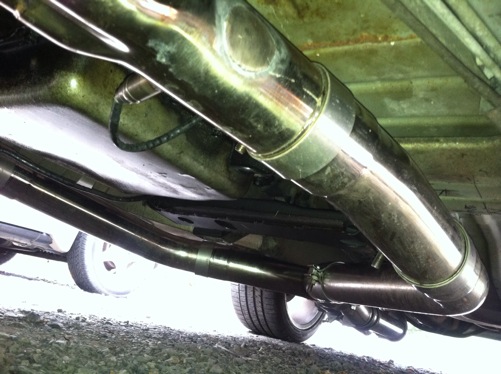
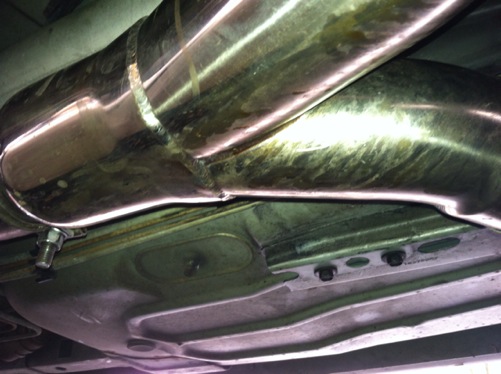
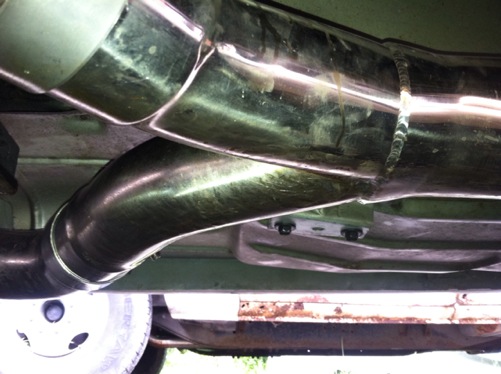
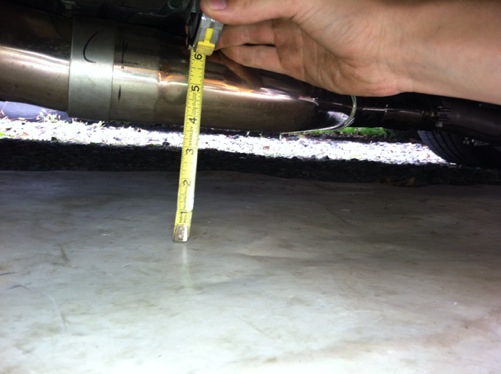
Y pipe merge pics
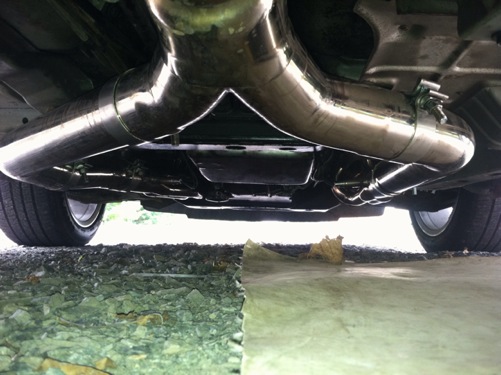
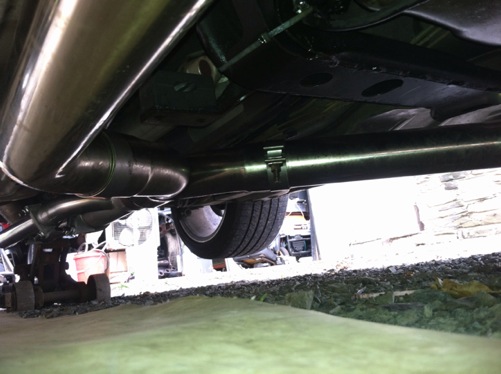

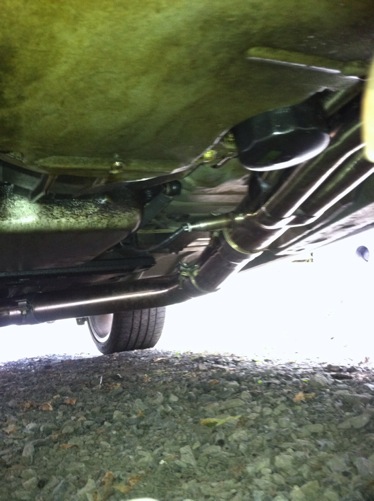
This is the lowest part the whole exhaust, this was taken on an uneven gravel driveway so the real measurement is probably around 4.5".


This is the lowest part the whole exhaust, this was taken on an uneven gravel driveway so the real measurement is probably around 4.5".


Staging Lane
Joined: May 2011
Posts: 91
Likes: 0
From: JAX Florida
Damn those look pretty damn good, I have the bbk lt with ory in chrome, and after a year of dd the car, there looking in bad shape, really considering picking some of the up!! Thanks for the pics
Trending Topics
Thread Starter
Joined: Oct 2011
Posts: 175
Likes: 21
From: Eastern PA --> Southwest VA
They really are a great buy and the quality for the price is amazing (Stainless lt's, stainless ory, and gm gaskets for less than the cost of any other good quality header). The only thing you need to do that is absolutely necessary is the o2 bung relocation and like I said above you can cut off the ones on there and use them again. Just put them on the direct opposite side of the header and weld a patch onto the hole.
LS1 Tech Stories
The Best V8 Stories One Small Block at Time

6 Common C5 Corvette Failures and What's Involved In Repairing Them
Pouria Savadkouei
Retro Modern Bandit Pontiac Trans AM Comes With Burt Reynolds' Autograph
Verdad Gallardo
Top 10 Greatest Cadillac V Series Performance Models Ever, Ranked
Pouria Savadkouei
Top 10 Most Powerful Chevy Trucks Ever Made!

Hennessey's New Supercharged Silverado ZR2 Has 700 HP
Verdad Gallardo
Coachbuilt N2A Anteros Is an LS2-Powered C6 Corvette In Italian Clothes
Verdad Gallardo
Awesome K5 Blazer Restomod Comes With C7 Corvette Power
Verdad Gallardo
10 Camaros You Should Never Buy

10 LS Engine Myths That Refuse to Die
Verdad Gallardo11 Second Club
Joined: Aug 2012
Posts: 730
Likes: 0
From: Middletown, DE
Aw man OP you should have gone with the off road headers without that stupid EGR (unless you live in a super strict DMV state).
You should be fine. My cutout is lower than the Y pipe and it still has about 2.5-3 inches. I cut the ears off my trans crossmember because it kept on rubbing the Y pipe and annoying the **** out of me. 
The angle you welded the O2 bungs at is a little low. Ideally, they should be slightly above level to keep condensation from collecting on the sensor. In your case, it's only very slightly below so you're probably fine, but I would keep that in mind if there's a "next time".
Thread Starter
Joined: Oct 2011
Posts: 175
Likes: 21
From: Eastern PA --> Southwest VA
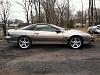
Sorry, haven't been on in a while. I went with the emission provisions because thats all they had out at the time, no race version yet, and it wasn't to bad cutting and welding a few things. As for the o2's, yea I probably should have put them up a little higher but I never had them on the car and wasn't too sure of the angles, I just put them 180 degrees from original and hoped for the best. As for lowering, I only went heater hose on the back, no other mods. Here are some ride height pictures, before the headers went on. Same as it looks now. 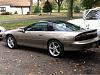
 Also I'll try to get a sound clip up soon; I made a pair of custom 16in long x 5in diameter 304 stainless through mufflers. Inside they're a 2.25 id of hand rolled stainless perf that I rolled in high temp ceramic mat and tigged up. I'll grab a pic of them too. It has a nice idle and is completely streetable, it doesn't start screaming until a little over 2600 rpm. I also put in a 26in j-pipe a little after the y to get rid of the annoying 15-1700 rpm drone. This was all done to a loudmouth catback, I removed the "resonator" and replaced with a straight piece of stainless.

 Also I'll try to get a sound clip up soon; I made a pair of custom 16in long x 5in diameter 304 stainless through mufflers. Inside they're a 2.25 id of hand rolled stainless perf that I rolled in high temp ceramic mat and tigged up. I'll grab a pic of them too. It has a nice idle and is completely streetable, it doesn't start screaming until a little over 2600 rpm. I also put in a 26in j-pipe a little after the y to get rid of the annoying 15-1700 rpm drone. This was all done to a loudmouth catback, I removed the "resonator" and replaced with a straight piece of stainless.