


Radical Radiator Relocation?
Thread Starter
Joined: Sep 2004
Posts: 6,814
Likes: 3
From: Hou. TX.
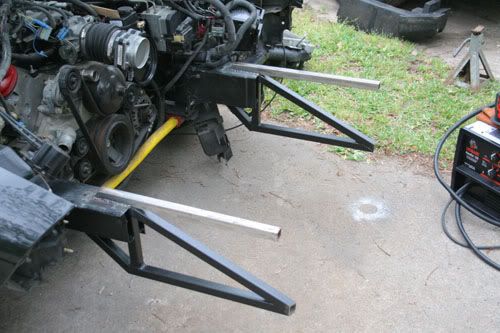
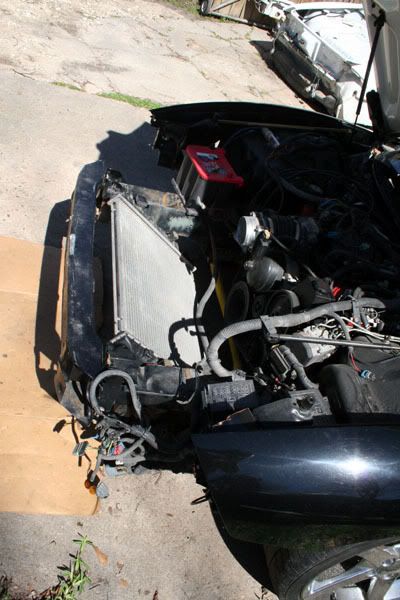
A few more.
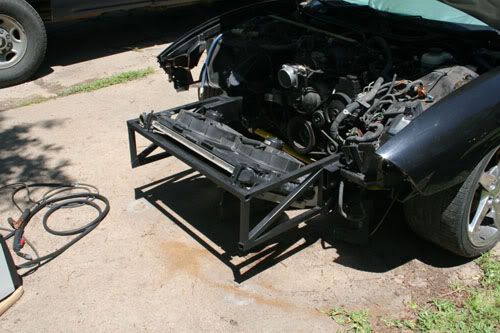
Next:
Lower rad mount
Bumper cover supports
Hoses
Expansion tank
Hood latches (as in 2)
Hide all underhood wiring
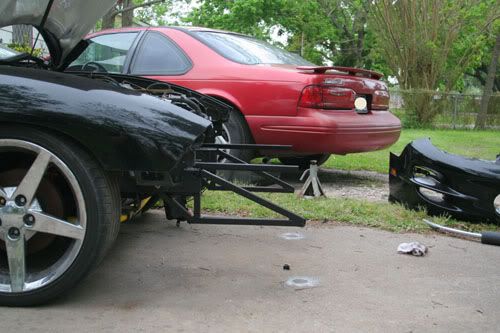
Add beefy lower front bar for lifting and towing
More bracing
etc...
Next:
Lower rad mount
Bumper cover supports
Hoses
Expansion tank
Hood latches (as in 2)
Hide all underhood wiring
Add beefy lower front bar for lifting and towing
More bracing
etc...
Last edited by JasonWW; Apr 22, 2009 at 11:06 PM.
Thread Starter
Joined: Sep 2004
Posts: 6,814
Likes: 3
From: Hou. TX.
Next:
Make lower rad mount - Done
Make bumper cover supports
Hoses - Done
Add expansion tank - Got it, not installed yet
Hood latches (as in 2) - Got it, not installed yet
Hide all underhood wiring - In process
Add beefy lower front bar for lifting and towing
Add more bracing
etc...
Move battery to rear - In process
Hide TCS motor - In process
Filled in holes on shocktowers - Done
Relocated vacuum tank near PCM - Done
Last edited by JasonWW; Apr 27, 2009 at 02:35 AM.
I hope you dont get involve in a head on crash.you just have way too much free time to be doing this.you are hardcore mang chopping the front end of a street car like that.
LS1 Tech Stories
The Best V8 Stories One Small Block at Time

Gas Monkey Built a 6-Wheel Ferrari Testarossa With a Corvette LT4 Engine
Verdad Gallardo
7 Most Reliable High-Performance Engines GM Has Ever Built
Verdad Gallardo
Amazing '71 Camaro Restomod Is Modern Muscle Car Under the Skin
Verdad Gallardo
6 Common C5 Corvette Failures and What's Involved In Repairing Them
Pouria Savadkouei
Retro Modern Bandit Pontiac Trans AM Comes With Burt Reynolds' Autograph
Verdad Gallardo
Top 10 Greatest Cadillac V Series Performance Models Ever, Ranked
Pouria Savadkouei
Top 10 Most Powerful Chevy Trucks Ever Made!

Hennessey's New Supercharged Silverado ZR2 Has 700 HP
Verdad Gallardo
Coachbuilt N2A Anteros Is an LS2-Powered C6 Corvette In Italian Clothes
Verdad Gallardo Thread Starter
Joined: Sep 2004
Posts: 6,814
Likes: 3
From: Hou. TX.


Joined: Aug 2007
Posts: 24,241
Likes: 89
From: Turnin' Wrenches Infractions: 005
great work so far, i completely understand the project bc i think the front of f bodies have a lot of wasted space that could be utilized better. but, i have to ask, how do you ever get to drive your car if its always torn apart??
Thread Starter
Joined: Sep 2004
Posts: 6,814
Likes: 3
From: Hou. TX.
Well, when I daily drove it I was very limited as far as the mods I could do. Everything I did had about a 24-48 hour time limit to get finished. I drove it 5 years straight and now that I have a dependable 2nd car, I'm taking the time to do the stuff I always wanted to do.
I also threw a rod through the block a while back so it sat for a while. I wish I had the time and money back then to do a bunch of mods, but all I could do was just some cutting. I got the engine replaced, but it still sat there cut up. Then 2 weeks ago I stopped working on my big project car to focus on getting the black one back on the road.
I think I'm rambling now. I hope that answers your question.
One more thing. I should have the front end done very soon and be back on the road with it. I'll be installing an airbag suspension, but that will take only a day. The next big tear down will be for the IRS and tank relocation. As my skills improve the work goes along faster.
Last edited by JasonWW; Apr 27, 2009 at 04:59 PM.
Keep it up Jason. Great work. Looks like a HELL of a lot of work, thinking and planning. It's different and unique for sure. I admire you about that. I love to fabricate and be different as well. Please keep up the thread with pics and progress. Looking good so far.
Joined: Aug 2007
Posts: 24,241
Likes: 89
From: Turnin' Wrenches Infractions: 005
i think the airflow should be sufficient with the route you have chosen, but are you planning on channeling the air directly into the front of the radiator or after it leaves the radiator?? i ask that bc most all factory systems are somewhat channeled before and of course to a water pump driven fan and such after the radiator. i can only assume this is to maintain air velocity and speed with air direction sort of being a byproduct.

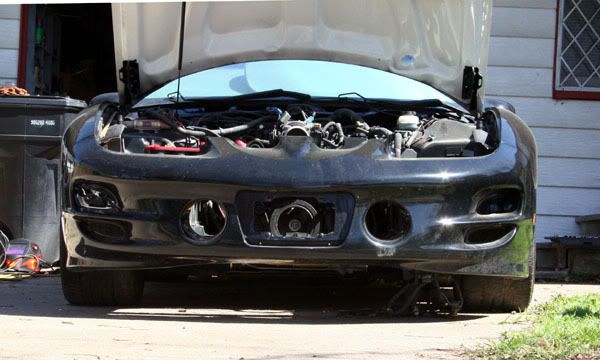
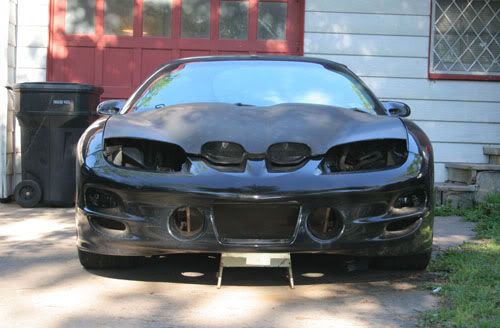
But I don't think you're going to get much air slamming into the radiator in that position. The front bumper pushes air away from its frontal areas. I don't think that hole is going to matter.

Thread Starter
Joined: Sep 2004
Posts: 6,814
Likes: 3
From: Hou. TX.
Keep it up Jason. Great work. Looks like a HELL of a lot of work, thinking and planning. It's different and unique for sure. I admire you about that. I love to fabricate and be different as well. Please keep up the thread with pics and progress. Looking good so far.
i think the airflow should be sufficient with the route you have chosen, but are you planning on channeling the air directly into the front of the radiator or after it leaves the radiator?? i ask that bc most all factory systems are somewhat channeled before and of course to a water pump driven fan and such after the radiator. i can only assume this is to maintain air velocity and speed with air direction sort of being a byproduct.
All air will be channelled into the A/C condensor/radiator through the 3 holes in the nose. I actually have more air inlet size than stock so cooling won't be a problem.
Last edited by JasonWW; Apr 27, 2009 at 10:28 PM.
Thread Starter
Joined: Sep 2004
Posts: 6,814
Likes: 3
From: Hou. TX.
I'm all for new cool changes. I have one of my own for the back of the cooling fans.
But I don't think you're going to get much air slamming into the radiator in that position. The front bumper pushes air away from its frontal areas. I don't think that hole is going to matter.
But I don't think you're going to get much air slamming into the radiator in that position. The front bumper pushes air away from its frontal areas. I don't think that hole is going to matter.
The exhaust air will circulate around the engine much more than the stock setup which pushes it down right away. I may also swap to one of my steel hoods and fab up an air extractor in it to reduce air flow under the car. I could also make a scoop under the hood to help vent it. Exact air flow routing under the hood can be looked at and altered later. I'm not worried about it right now.
Thread Starter
Joined: Sep 2004
Posts: 6,814
Likes: 3
From: Hou. TX.
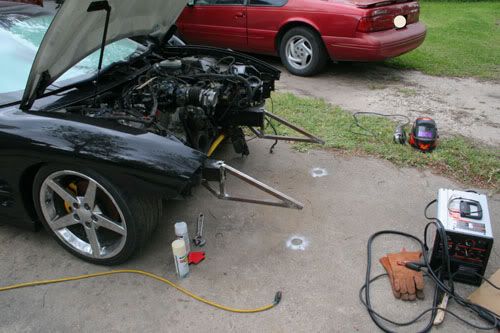
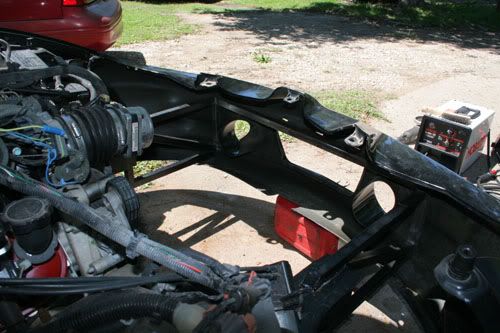
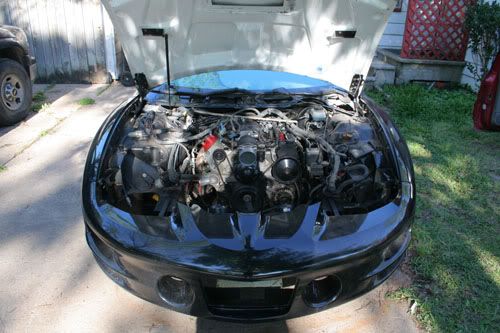
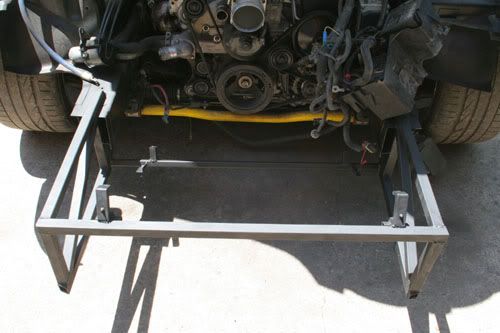
So I shaved off all remains of the upper crossmember. There's a lot of misc crap there. Both sides are now smooth, but I left the hood posts for now.
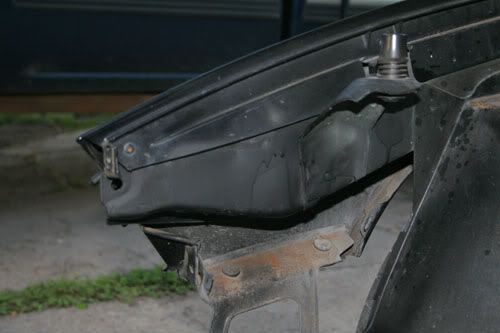
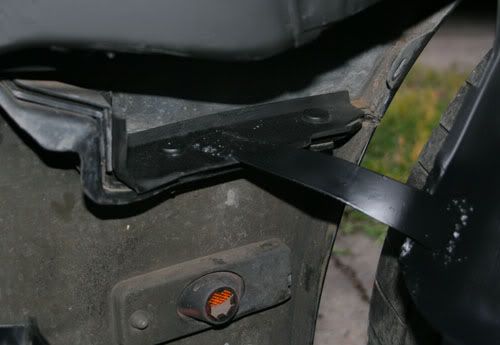
I made a simple steel support for the fender to nose bracket.
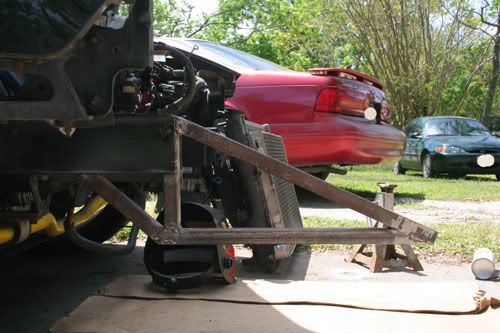
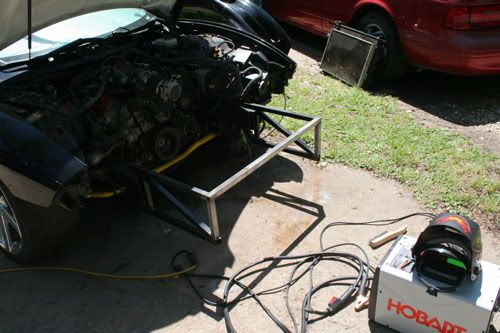
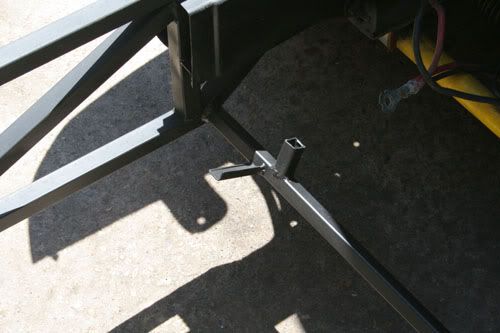
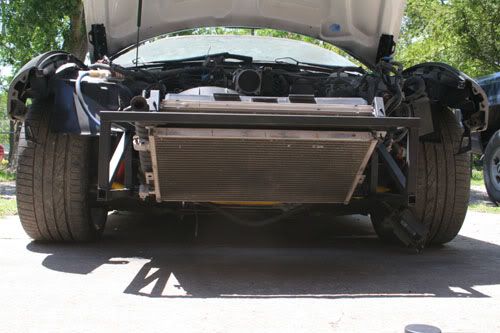
Figuring out the lower radiator support was the most difficult because you can't weld to the radiator at all. Eventually I came up with this.
The square nub sticking up is to lock the radiator down. I'll come up with something simple later.
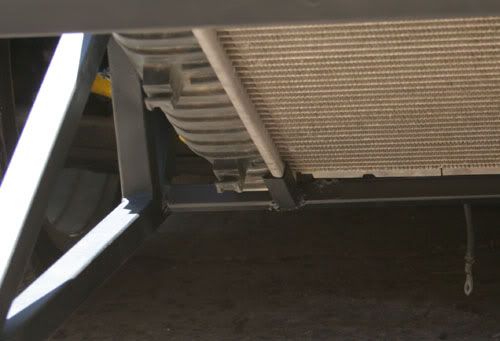
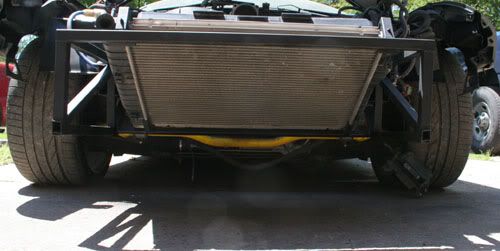
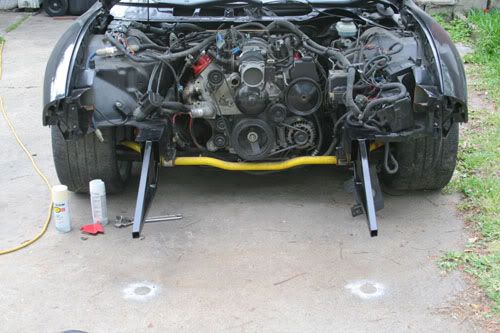
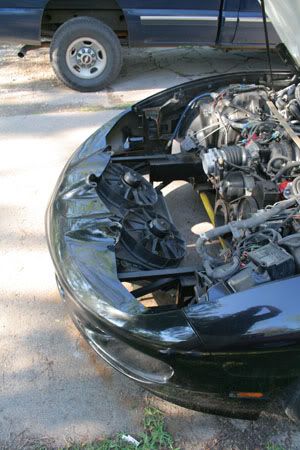
This setup has one small drawback, you have to slide the A/C condensor off before you can swing the radiator up and out. Here is the condensor mounted.
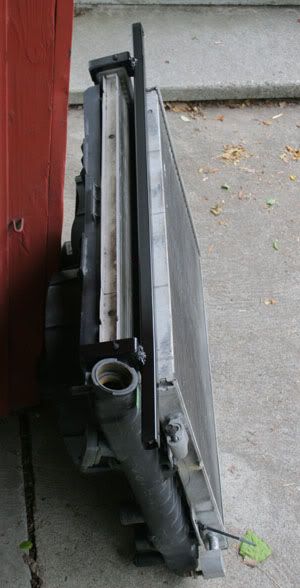
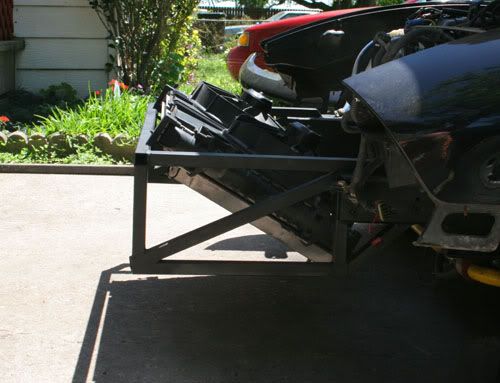
From the side.
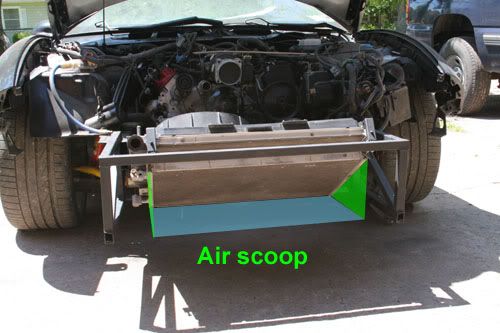
The air scoop will be 3 sided and made from aluminum sheet probably. Like so:
I made a simple steel support for the fender to nose bracket.
Figuring out the lower radiator support was the most difficult because you can't weld to the radiator at all. Eventually I came up with this.
The square nub sticking up is to lock the radiator down. I'll come up with something simple later.
This setup has one small drawback, you have to slide the A/C condensor off before you can swing the radiator up and out. Here is the condensor mounted.
From the side.
The air scoop will be 3 sided and made from aluminum sheet probably. Like so:
Last edited by JasonWW; Apr 27, 2009 at 10:56 PM.