


Radical Radiator Relocation?
Thread Starter
Joined: Sep 2004
Posts: 6,814
Likes: 3
From: Hou. TX.
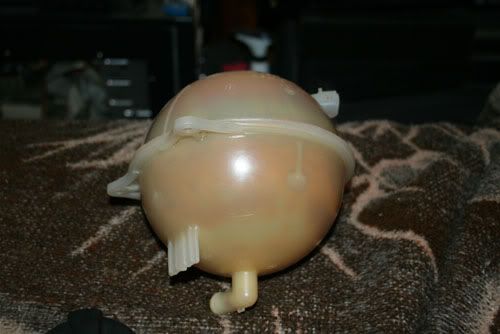
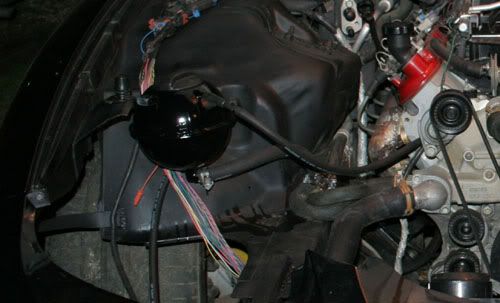
Next is my kooky little expansion tank. Some may recognize it, most won't. It cost me 6 bucks so it will do for now. I turned this dank little sphere -
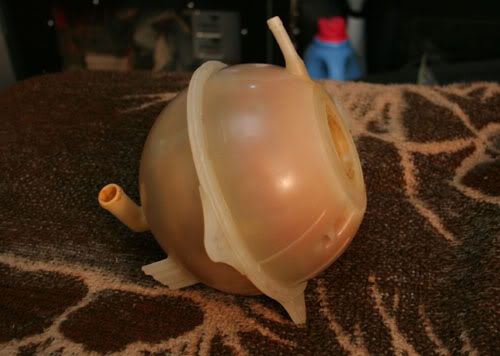
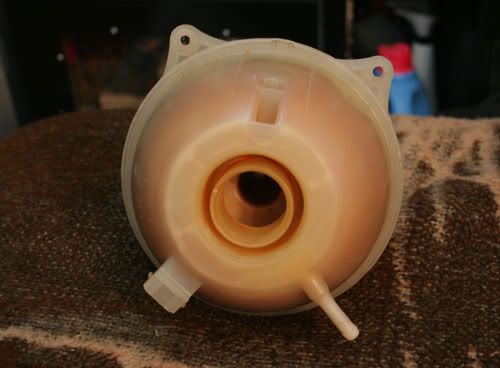
Into this!
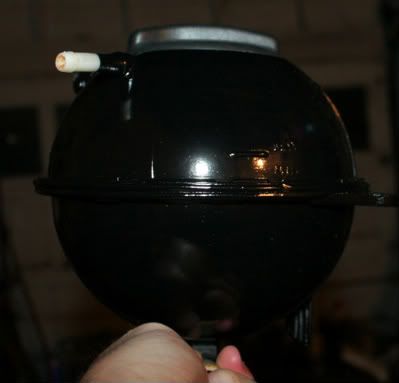
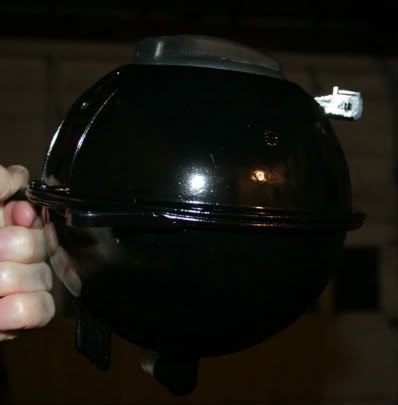
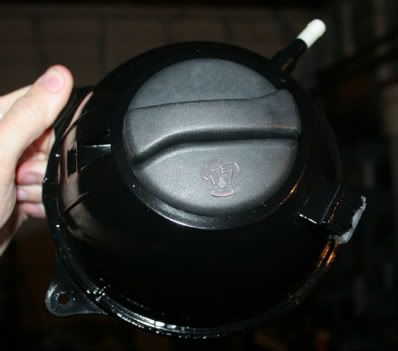
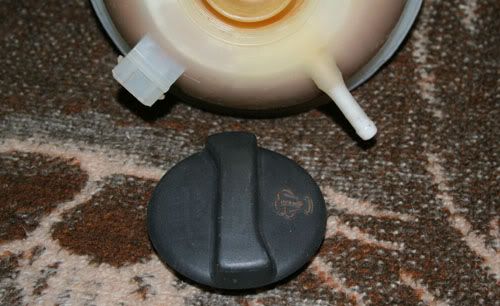
The cold line is halfway, so it should be easy to check just by taking the cap off and looking inside. It has a built in water lever switch just like our radiators, but I haven't looked into how they work yet. The glossy black should look good in the flat black engine bay. This will mount where the battery used to be.
Into this!
The cold line is halfway, so it should be easy to check just by taking the cap off and looking inside. It has a built in water lever switch just like our radiators, but I haven't looked into how they work yet. The glossy black should look good in the flat black engine bay. This will mount where the battery used to be.
Thread Starter
Joined: Sep 2004
Posts: 6,814
Likes: 3
From: Hou. TX.
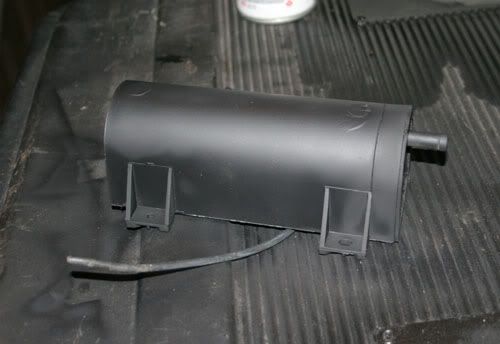
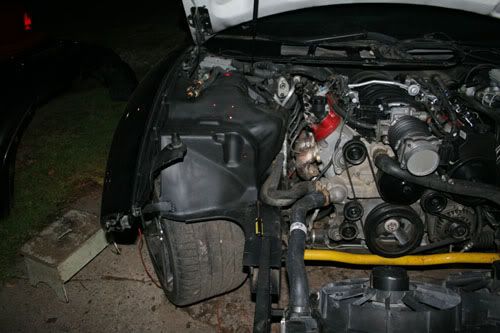
Here is the factory vacuum reservoir that we all have near the horn. I moved it under the cowl and right above the PCM. It dissappears there. No worries from that any more.
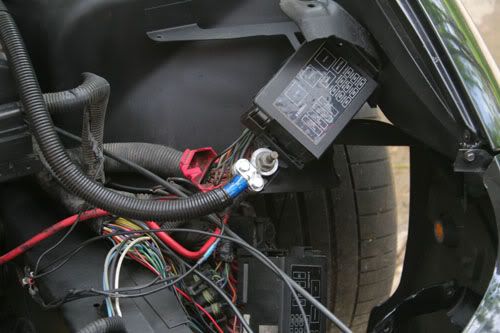
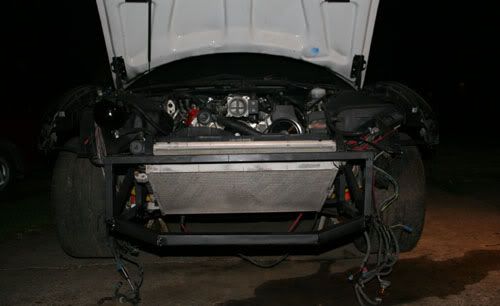
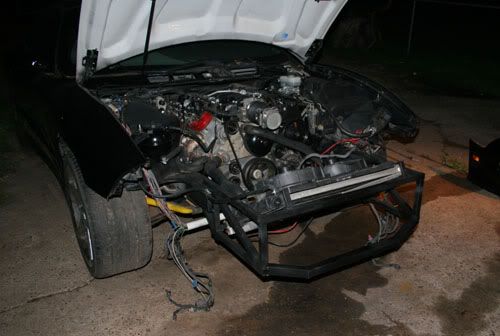
Here is the wiring harness which will disappear soon. You can also see the upper radiator hose.

In this pic you can see the lower hose. Once I take a wider shot you will see that both radiator hoses travel along the frame rails in a symetrical way. I can still stand in front of the engine to easily reach the back spark plugs, etc... BTW, you can tell this is before I filled in the holes on the shock tower.
I also replaced the block to battery ground. Since the battery is being moved, I grounded the block to the K-member. I think it's well connected electrically to the chassis so there should be no worries.
This is the layout I have in my head.
I'll take some more pics soon to get you up to date.
Later.
Here is the wiring harness which will disappear soon. You can also see the upper radiator hose.
In this pic you can see the lower hose. Once I take a wider shot you will see that both radiator hoses travel along the frame rails in a symetrical way. I can still stand in front of the engine to easily reach the back spark plugs, etc... BTW, you can tell this is before I filled in the holes on the shock tower.
I also replaced the block to battery ground. Since the battery is being moved, I grounded the block to the K-member. I think it's well connected electrically to the chassis so there should be no worries.
This is the layout I have in my head.
I'll take some more pics soon to get you up to date.
Later.
Last edited by JasonWW; Apr 28, 2009 at 12:28 AM.
Thread Starter
Joined: Sep 2004
Posts: 6,814
Likes: 3
From: Hou. TX.
Next:
Make lower rad mount - Done
Make bumper cover supports
Hoses - Done
Add expansion tank - Got it, not installed yet
Hood latches (as in 2) - Got it, not installed yet
Hide all underhood wiring - In process
Add beefy lower front bar for lifting and towing
Add more bracing
etc...
Move battery to rear - In process
Hide TCS motor - In process
Filled in holes on shocktowers - Done
Relocated vacuum tank near PCM - Done
Expansion tank is mounted and plumbed into system. Cooling system is done. The vent lines could look better, though.
No wires can be seen from the left shocktower to the right one. Now I need to reroute the ones on the passenger side. I can't go under the shock tower due to tire clearance. I'm going to have to get creative.

Holy ***** this was cool..
Did it save any weight? Love that you make it happen and dont feel like you need the forums permission.
Very good fab work on those mounts. That definitely took some time and measuring.
Did it save any weight? Love that you make it happen and dont feel like you need the forums permission.
Very good fab work on those mounts. That definitely took some time and measuring.
Thread Starter
Joined: Sep 2004
Posts: 6,814
Likes: 3
From: Hou. TX.
More update pics:
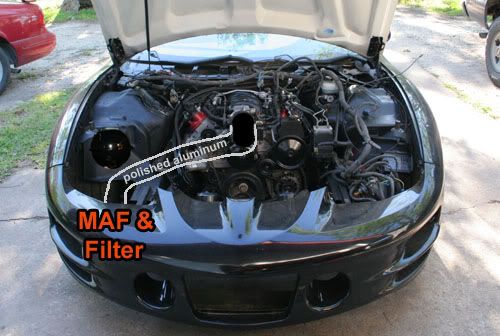
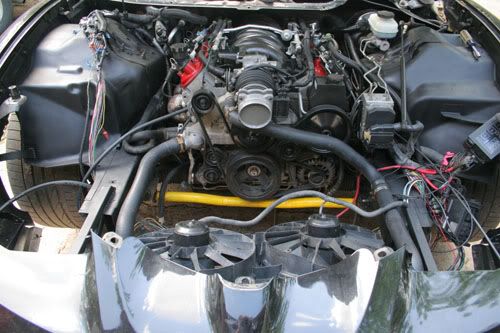
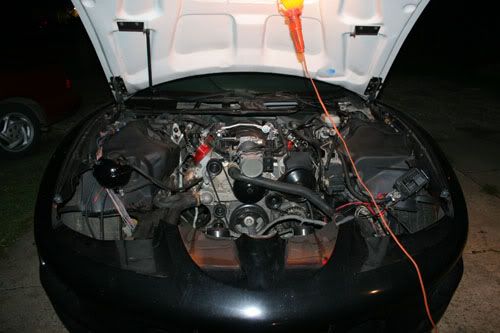
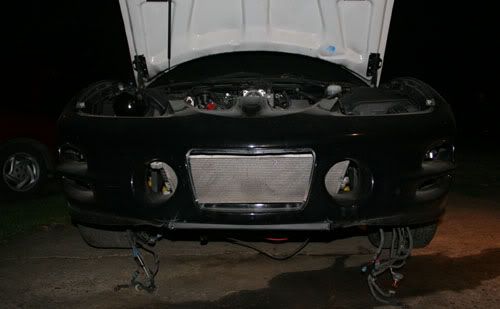
Here's a nice beauty shot. Notice the filled holes in the shocktower and the symetry in the radiator hoses. I also straighted out the ABS unit. The crooked mounting of that always did bother me.
Here is the new battery location. It's not perfect, but will do for now. I welded a bolt to the car for the ground wire to bolt to. I scraped away some of the sound deadner on the floor and welded some threaded rods to the metal. The cables are pretty much out of the way. I'm running a 250 amp fuse for protection.
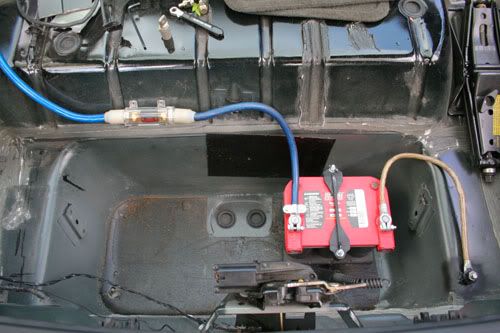
On the front end I routed the cable to the lug on the fuse box. Pretty straight forward. It's a zero gauge cable and I plan to run some fancy connectors, but these will work for now.
I made a bracket for the expansion tank out of 16 gauge sheet metal.
Here's a shot with the tank mounted and hooked up.
A closer look.
Here's a nice beauty shot. Notice the filled holes in the shocktower and the symetry in the radiator hoses. I also straighted out the ABS unit. The crooked mounting of that always did bother me.
Here is the new battery location. It's not perfect, but will do for now. I welded a bolt to the car for the ground wire to bolt to. I scraped away some of the sound deadner on the floor and welded some threaded rods to the metal. The cables are pretty much out of the way. I'm running a 250 amp fuse for protection.
On the front end I routed the cable to the lug on the fuse box. Pretty straight forward. It's a zero gauge cable and I plan to run some fancy connectors, but these will work for now.
I made a bracket for the expansion tank out of 16 gauge sheet metal.
Here's a shot with the tank mounted and hooked up.
A closer look.
Last edited by JasonWW; May 1, 2009 at 01:14 AM.
Thread Starter
Joined: Sep 2004
Posts: 6,814
Likes: 3
From: Hou. TX.
Here's what I did today.
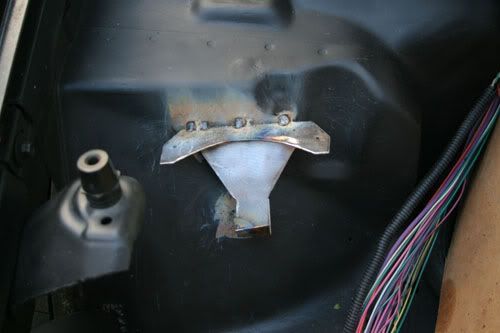
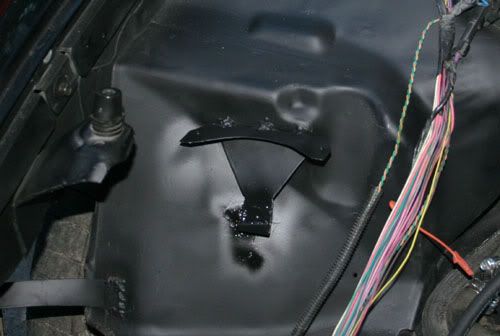
I cut out a pair of these reinforcements from some heavy plate. About 1/4" thick.
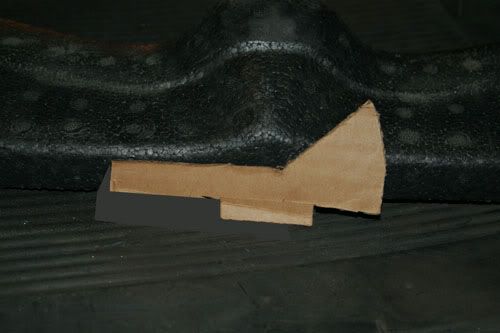
I then welded them to this area which I thought was a little weak. The bottom is designed to fit my small headed jack. A larger jack will also fit it. These are jacking points for when I need to lift only the left or right wheel.
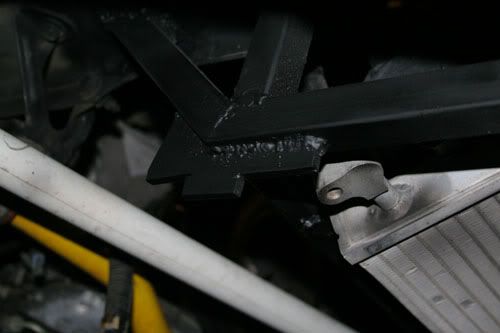
Here's the heavy duty lower bar. It's 1.5" square tube (thicker gauge as well) that serves as the main front jacking point. I can lift the whole car from here. I can also mount rollers on it to keep from damaging the nose on steep driveways.
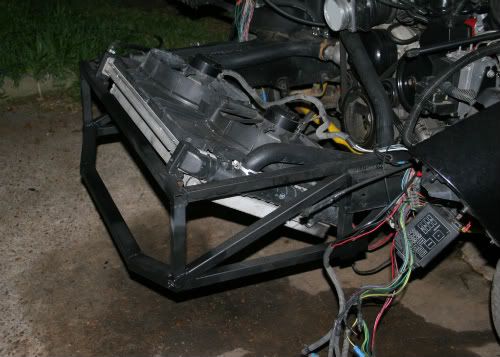
I don't know if I made the right decision here, but I choose to have the bottom bar hang down below the bumper line. Ah, I guess it's fine.
I cut out a pair of these reinforcements from some heavy plate. About 1/4" thick.
I then welded them to this area which I thought was a little weak. The bottom is designed to fit my small headed jack. A larger jack will also fit it. These are jacking points for when I need to lift only the left or right wheel.
Here's the heavy duty lower bar. It's 1.5" square tube (thicker gauge as well) that serves as the main front jacking point. I can lift the whole car from here. I can also mount rollers on it to keep from damaging the nose on steep driveways.
I don't know if I made the right decision here, but I choose to have the bottom bar hang down below the bumper line. Ah, I guess it's fine.
Last edited by JasonWW; May 1, 2009 at 01:18 AM.
LS1 Tech Stories
The Best V8 Stories One Small Block at Time

Topdon ONE vs. Artidiag 800 BT2: Which is the Diagnostic Tablet For You?
Pouria Savadkouei
Gas Monkey Built a 6-Wheel Ferrari Testarossa With a Corvette LT4 Engine
Verdad Gallardo
7 Most Reliable High-Performance Engines GM Has Ever Built
Verdad Gallardo
Amazing '71 Camaro Restomod Is Modern Muscle Car Under the Skin
Verdad Gallardo
6 Common C5 Corvette Failures and What's Involved In Repairing Them
Pouria Savadkouei
Retro Modern Bandit Pontiac Trans AM Comes With Burt Reynolds' Autograph
Verdad Gallardo
Top 10 Greatest Cadillac V Series Performance Models Ever, Ranked
Pouria Savadkouei
Top 10 Most Powerful Chevy Trucks Ever Made!

Hennessey's New Supercharged Silverado ZR2 Has 700 HP
Verdad Gallardo
Look SICK man; I like your way of thinking!
Question - Why did you just not go with a full tubular front end? I am looking into that right now; I don't like all that sheet metal, lol.
I am looking forward to your other reads! I am hunting down all your threads now
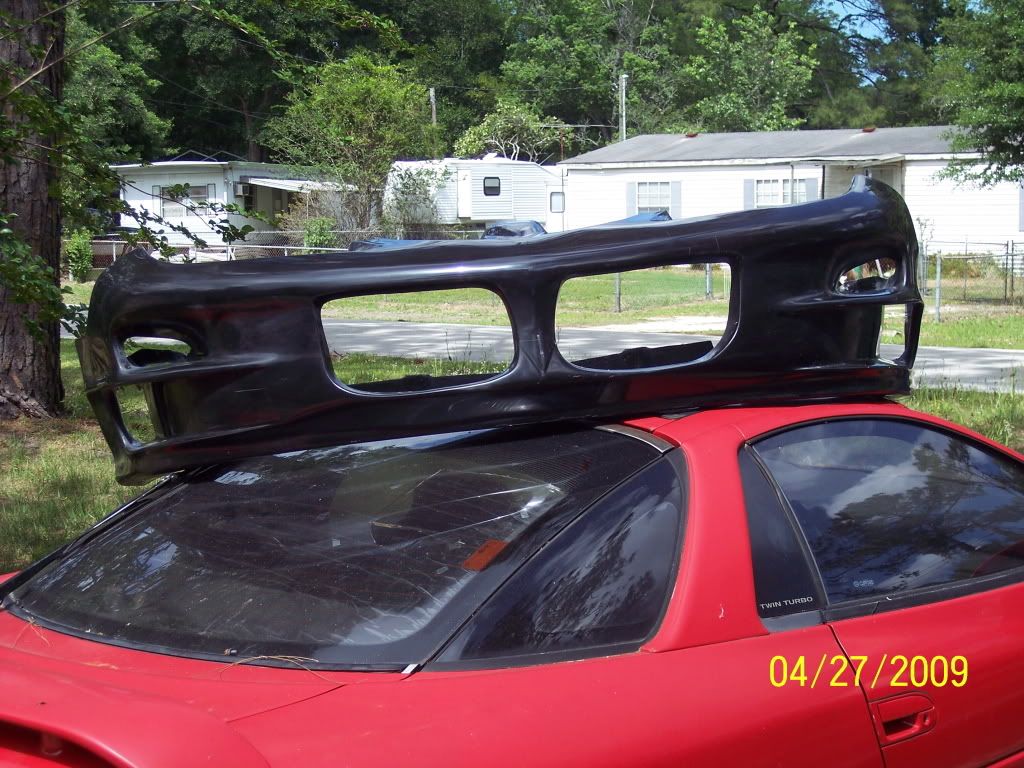
BTW - I just picked up the E-1 bumper; it looks SICK in person!
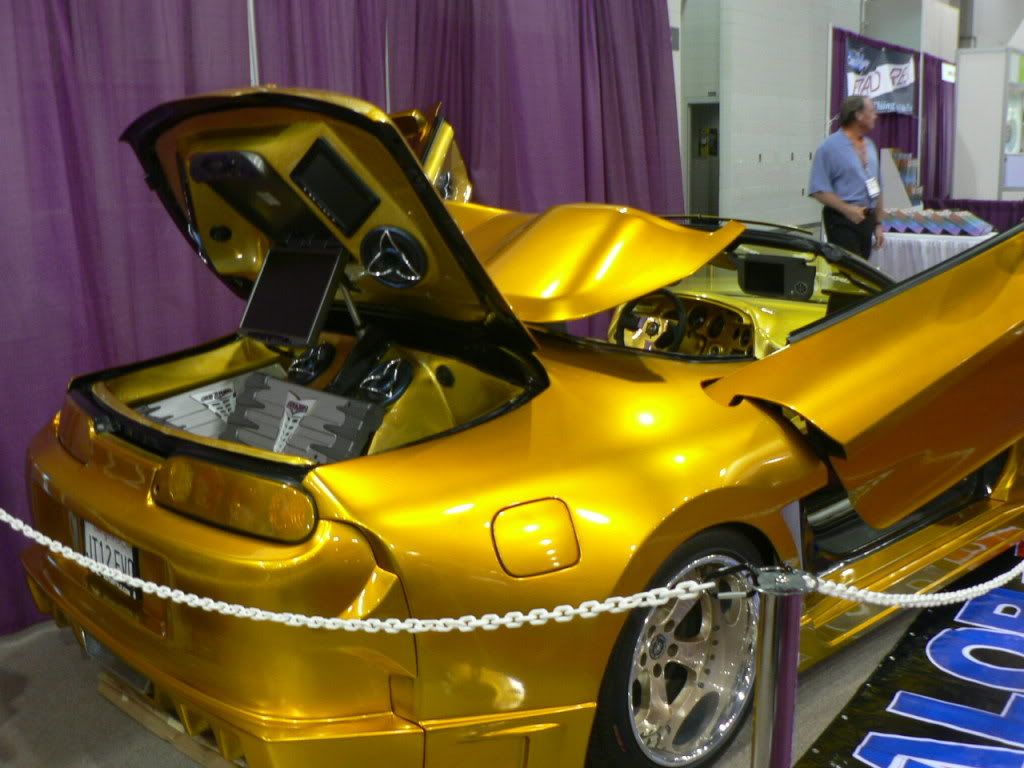
You may get a kick out of this since your into extreme modding. This is one of my ventures now. I have my buddy designing the hinges right now. The idea is to allow you to open the doors in a normal suicide mod as well as in a vertical suicide position.
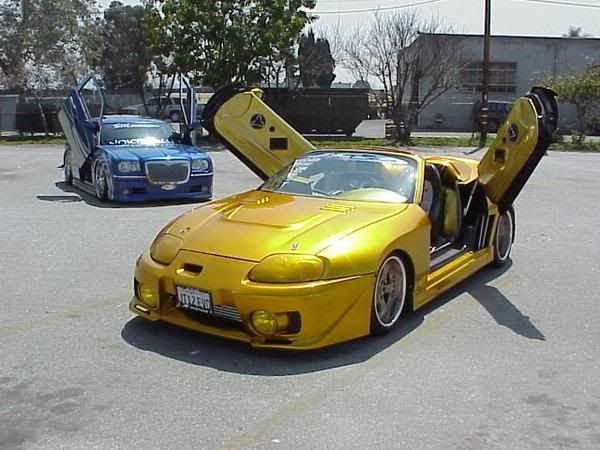
Sorry for the Jacking, but it is cool to find a kindred spirit that is into modding something other than Hondas
DM
Question - Why did you just not go with a full tubular front end? I am looking into that right now; I don't like all that sheet metal, lol.
I am looking forward to your other reads! I am hunting down all your threads now
BTW - I just picked up the E-1 bumper; it looks SICK in person!
You may get a kick out of this since your into extreme modding. This is one of my ventures now. I have my buddy designing the hinges right now. The idea is to allow you to open the doors in a normal suicide mod as well as in a vertical suicide position.
Sorry for the Jacking, but it is cool to find a kindred spirit that is into modding something other than Hondas
DM
Last edited by Devils Mentor; May 1, 2009 at 09:03 PM.

A man who can weld can make anything. Awesome! What type of welder are you using for your fab work? I somehow talk myself out of doing "new" things to my car that havent been done before. You don't seem to have that issue. I'm interested to see the end result.
You know, if you could somehow fab up a remote waterpump... then with a two piece timing cover you could make a cam change as simple as taking the pushrods out... just thought I'd throw that out there...
You know, if you could somehow fab up a remote waterpump... then with a two piece timing cover you could make a cam change as simple as taking the pushrods out... just thought I'd throw that out there...

Just an idea if you wanna beat me to the punch.
Thread Starter
Joined: Sep 2004
Posts: 6,814
Likes: 3
From: Hou. TX.
On the exhaust tips, there are 2 things I should have done. Instead of polishing and clearcoating them I should have chromed them. Second, I should have added a rock guard to keep stones from being kicked up and hitting the tips. I'll do that if I put them back on.
Thread Starter
Joined: Sep 2004
Posts: 6,814
Likes: 3
From: Hou. TX.
Question - Why did you just not go with a full tubular front end? I am looking into that right now; I don't like all that sheet metal, lol.
You may get a kick out of this since your into extreme modding. This is one of my ventures now. I have my buddy designing the hinges right now. The idea is to allow you to open the doors in a normal suicide mod as well as in a vertical suicide position.
You may get a kick out of this since your into extreme modding. This is one of my ventures now. I have my buddy designing the hinges right now. The idea is to allow you to open the doors in a normal suicide mod as well as in a vertical suicide position.
I'm familiar with that Supra. I think it was built by JT? Maybe? It used to be silver. Not only is it hinged like that, but it's opened by linear actuator. I was thinking about that for the white car. My biggest concern with flip up hinges is that they open in one motion. I don't like swinging the door out a few inches and then lifting it. That's 2 motions and I won't have it. Right now I'm focused on the black cars front end, then I need to make my HID fixed projector lights, get it inspected and then do up the air suspension. Down the line I want to install an IRS, then I have plenty to do to the white car so I'll be busy for a while. So im not going to consider custom doors for a long time. Keep me informed on your progress, though. I'm very interesting in it.
Last edited by JasonWW; May 2, 2009 at 09:02 AM.
Thread Starter
Joined: Sep 2004
Posts: 6,814
Likes: 3
From: Hou. TX.
A 2lb spool of wire is about $15.
You can get an auto tinting helmet for about $50. (I highly recommend it for beginners)
A pair of leather welding gloves $10-$15.
MIG pliers come in real handy as well $10.
A wire brush. That's about all you need. That and lots of practice.
I love welding. You can sit there and focus on that puddle making sure you get good penetration without putting a hole in the metal. It's like sharp shooting. You just have to focus and practice, develop techniques alone the way and you'll get better and better at it. It's a personal challenge. I see guys welding with TIGs and it comes out looking amazing. I want one eventually but they are big bucks. MIGs are much more affordable. If you've been thinking about getting one, go out and do it!
Eventually I'll get me a tubing bender and a notcher. Then look out!
Last edited by JasonWW; May 2, 2009 at 08:40 AM.
Thread Starter
Joined: Sep 2004
Posts: 6,814
Likes: 3
From: Hou. TX.
I am working on exactly the same thing right now. My plan is to run the right side harness through the inside of the driver side framerail. I am planning on drilling a hole in it near the firewall. Then route the wire through to another hole in the front.
Just an idea if you wanna beat me to the punch.
Just an idea if you wanna beat me to the punch.
Hmmm, I might be able to run both the wires and the air through there. Or maybe have the wires exit through the bottom of the frame before it gets to the air duct part. The main thing is to keep the heat away from them. I'm going to have to do some measuring and looking to see what's possible. Thanks for getting my gears turning on this idea.
Did you say your doing this on the drivers side? I'm leaving that side as is becuase they are pretty much already hidden over there. I'm mainly focused on the passenger side. Why are doing the drivers side? Do you have any pics you can post? Go ahead, I want to see.
Ps. Hey, you know SRZ. I remember him, he would tell me about his autobahn runs and such. Small world. Have you ran into Ragtop Rat? He's over there with a killer candy apple maroon TA. His car is amazing as well.
Last edited by JasonWW; May 2, 2009 at 08:58 AM.
What do you mean "a full tubular front end"? Do you mean from the firewall forward? I'm planning on doing a full tubular frame on my white car Project XTA in my sig. This car doesn't need it. Plus I want to get it back on the road quickly.
I'm familiar with that Supra. I think it was built by JT? Maybe? It used to be silver. Not only is it hinged like that, but it's opened by linear actuator. I was thinking about that for the white car. My biggest concern with flip up hinges is that they open in one motion. I don't like swinging the door out a few inches and then lifting it. That's 2 motions and I won't have it. Right now I'm focused on the black cars front end, then I need to make my HID fixed projector lights, get it inspected and then do up the air suspension. Down the line I want to install an IRS, then I have plenty to do to the white car so I'll be busy for a while. So im not going to consider custom doors for a long time. Keep me informed on your progress, though. It's very interesting in it.
I'm familiar with that Supra. I think it was built by JT? Maybe? It used to be silver. Not only is it hinged like that, but it's opened by linear actuator. I was thinking about that for the white car. My biggest concern with flip up hinges is that they open in one motion. I don't like swinging the door out a few inches and then lifting it. That's 2 motions and I won't have it. Right now I'm focused on the black cars front end, then I need to make my HID fixed projector lights, get it inspected and then do up the air suspension. Down the line I want to install an IRS, then I have plenty to do to the white car so I'll be busy for a while. So im not going to consider custom doors for a long time. Keep me informed on your progress, though. It's very interesting in it.
Yeah I am talking firewall forward and maybe extending it to accept the fiberglass front end that VFN sells as well as making it tilt.
Yep JT in Cal. did the mod. I have a few pics of it, including pics of it when it was silver. What info do you have on it?!? I have been trying to find some video on it as well as pics of the doors and the hinge mechanism. I was told that it is 100% automated. So do you know the owner? This is the only pic I have showing how the part of the hinging works. Please let me know what info you have on it
Fell free to PM me to discuss so we don't derail your thread, unless you want to talk here
DM
I'm a manager at harbor freight tools in Knoxville, and I sell the crap out of the 110 mig welders. We also have a book by haynes (the car book people) thats all about welding with all the different types of setups. We sell 220v TIG welders from $199 to $500, and I've never seen someone bring one back or have any trouble with them (im pretty sure all our stuff could interchange with lincoln parts... if you know what I mean 
I'm a manager at harbor freight tools in Knoxville, and I sell the crap out of the 110 mig welders. We also have a book by haynes (the car book people) thats all about welding with all the different types of setups. We sell 220v TIG welders from $199 to $500, and I've never seen someone bring one back or have any trouble with them (im pretty sure all our stuff could interchange with lincoln parts... if you know what I mean
What about their paint gun setups? I want to paint my bird when I am done with all the body issues.
DM
Without trying to hijack this thread...
Our paint guns are okay. $15 gets you a $15 paint gun, while $59 gets something decent... something worth cleaning instead of throwing it away and buying a new one because the cleaner costs more than the gun Our 110v flux only wire welders are usually around $99. Guys who just want to try it come in all the time.
As far as other fab work, we've got a tubing notcher for less than $50, hydraulic pipe benders, planishing hammers, english wheels, plasma cutters, etc. If anyone has any questions just PM me... this thread doesnt need my advertisement, lol.
But anyway... I don't know how you feel about the remote waterpump, but the ol' LT1 style electric waterpump can be had for about $100, which all it needs is the stock LT1 housing, minus all the guts. Could be cool...
Our paint guns are okay. $15 gets you a $15 paint gun, while $59 gets something decent... something worth cleaning instead of throwing it away and buying a new one because the cleaner costs more than the gun
Our 110v flux only wire welders are usually around $99. Guys who just want to try it come in all the time. As far as other fab work, we've got a tubing notcher for less than $50, hydraulic pipe benders, planishing hammers, english wheels, plasma cutters, etc. If anyone has any questions just PM me... this thread doesnt need my advertisement, lol.
But anyway... I don't know how you feel about the remote waterpump, but the ol' LT1 style electric waterpump can be had for about $100, which all it needs is the stock LT1 housing, minus all the guts. Could be cool...
Thread Starter
Joined: Sep 2004
Posts: 6,814
Likes: 3
From: Hou. TX.
I really don't have any issues with the water pump. I may ditch the power steering pump, though. That way you can see more of the engine. I'd convert over to an electro-hydraulic unit which can be remote mounted. Even to the back of the car. You can even ditch the big power brake booster as well. That remote pump can power both.
I'm trying to decide which hood I want to run. I have a Raptor and a steel one. The Raptors pretty nice, but if I fill on the nose area flush with the steel hood you can get a really unique and exotic look. Plus I can do a shaker scoop as well.
Actually, I like the look of the engine bay so much I'm trying to figure out a way to go hoodless. Hotrod style! That would be bitchin. :-)