


Cam install - few pics, Video added.
After talking to Texas Speed about the potential purchase of their 233/239 cam, they steered me toward their torquer V.2. They said the cams are nearly identical except the 233/239 has a higher exhaust valve lift to specifically maximize nitrous usage. Since I'm not planning on using any serious nitrous, I went with the V.2. With no immediate plans on doing anything more than maybe some 243 heads, this cam fit the bill perfectly.
I also picked up PRC .650 dual springs w/ the Ti seats and retainers.
Ported and shimmed LS6 oil pump.
LS2 HD timing chain.
Edelbrock 4254 two piece timing cover.
I got everything torn down and the cam was ready to be pulled in around 6-7 hours. I used 5/16th's steel rod that I flattened out on one side to hold up the lifters, which did a marginal job at best. I kept hearing a lifter hit the cam while spinning it. I left the push rods in and spun the cam to see which lifters were going to stay up in the trays and which weren't. I found one problematic lifter that fell even with the rods in and used a pen magnet to hold it up.
Everything went pretty well, the oil pump was easy, the tube and O ring slid right in as I made sure it was very well lubed.
I heated the balancer up in the oven for 20 minutes or so at 250 degrees, and it slid right on. I used a piece of 2x4 and a hammer to set it pretty far in and pulled it in the rest of the way with the old bolt, by hand. It was pretty easy as well. Torquing the bolt was a PITA. I think I almost got the whole 140 degrees on the new bolt thanks to my 1/2 breaker bar and jack handle.
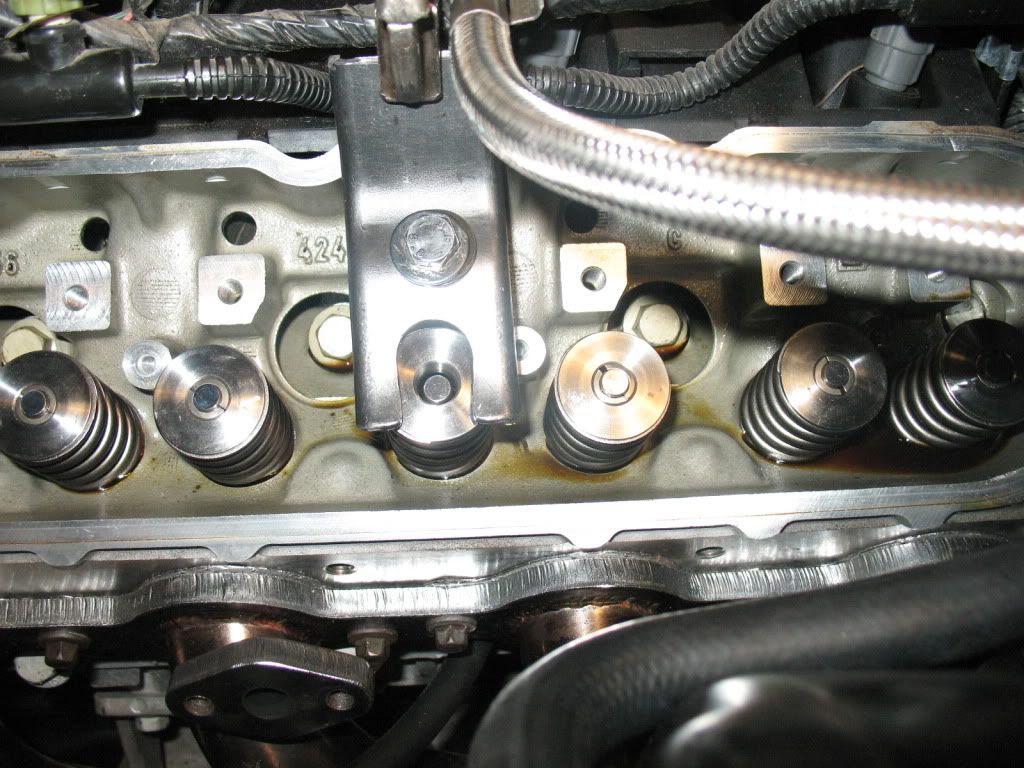
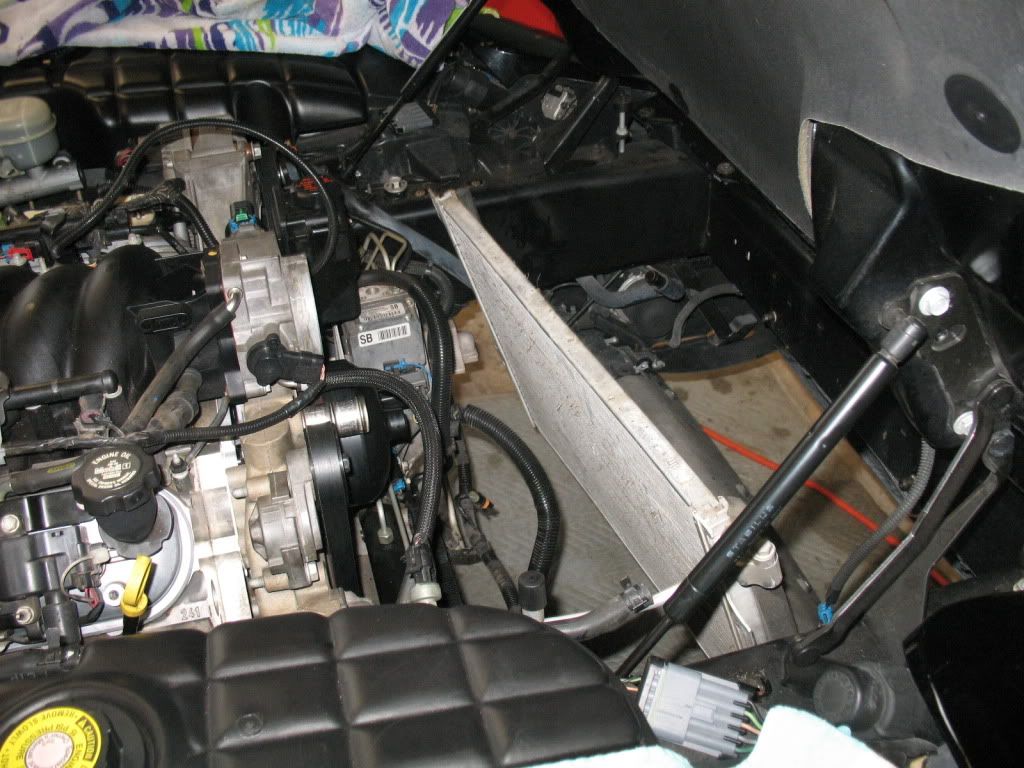
Everything is almost done, I have to put the radiator and shroud back in, which is the only thing I expect to be a pain. I have one valve spring yet to change that is blocked by the fuel pressure line. I have to trim my tool to fit, I'll do that tomorrow.
I didn't go to nuts with the pics, hopefully I will have a video and idle clip soon.
On to the pics:
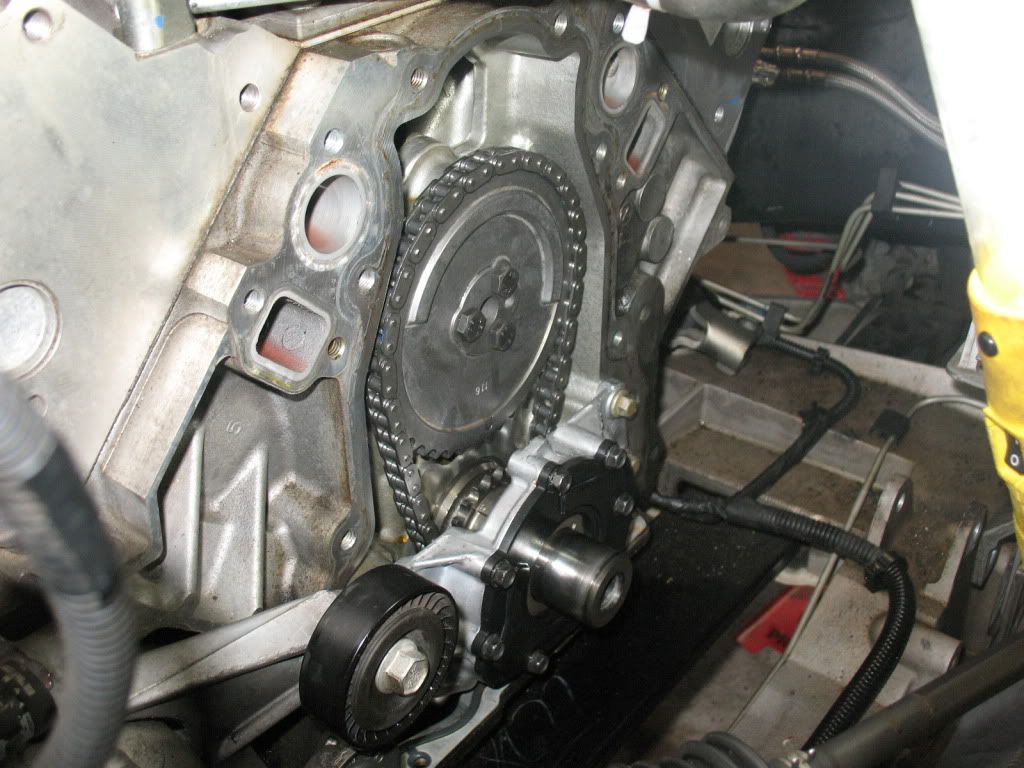
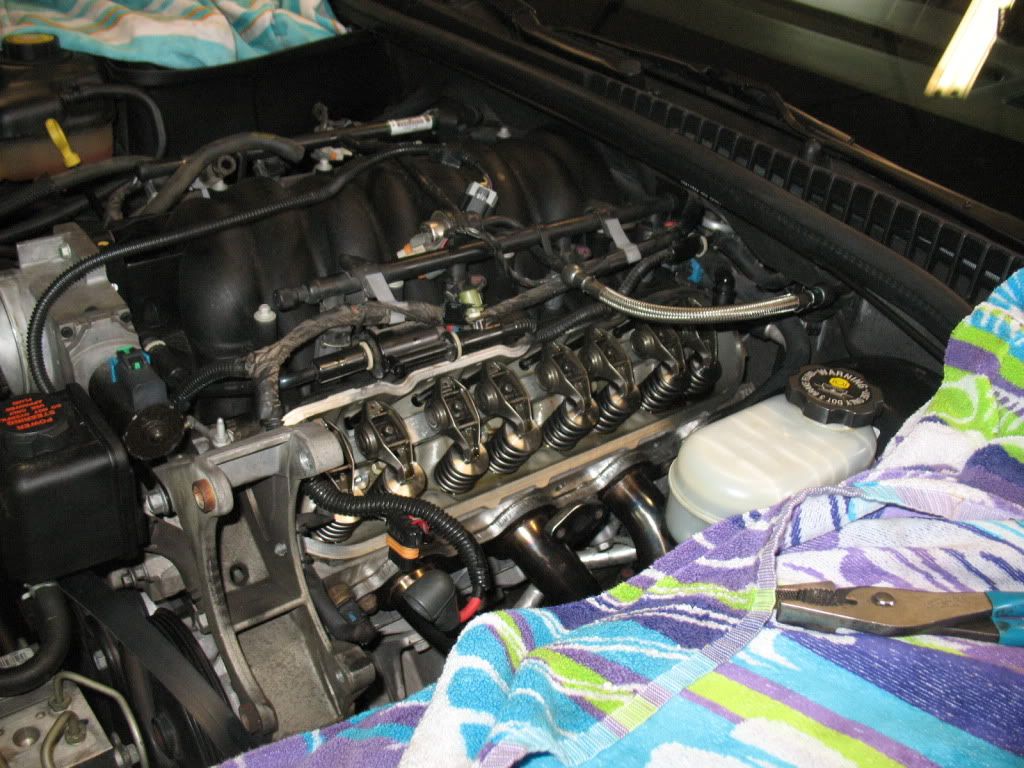
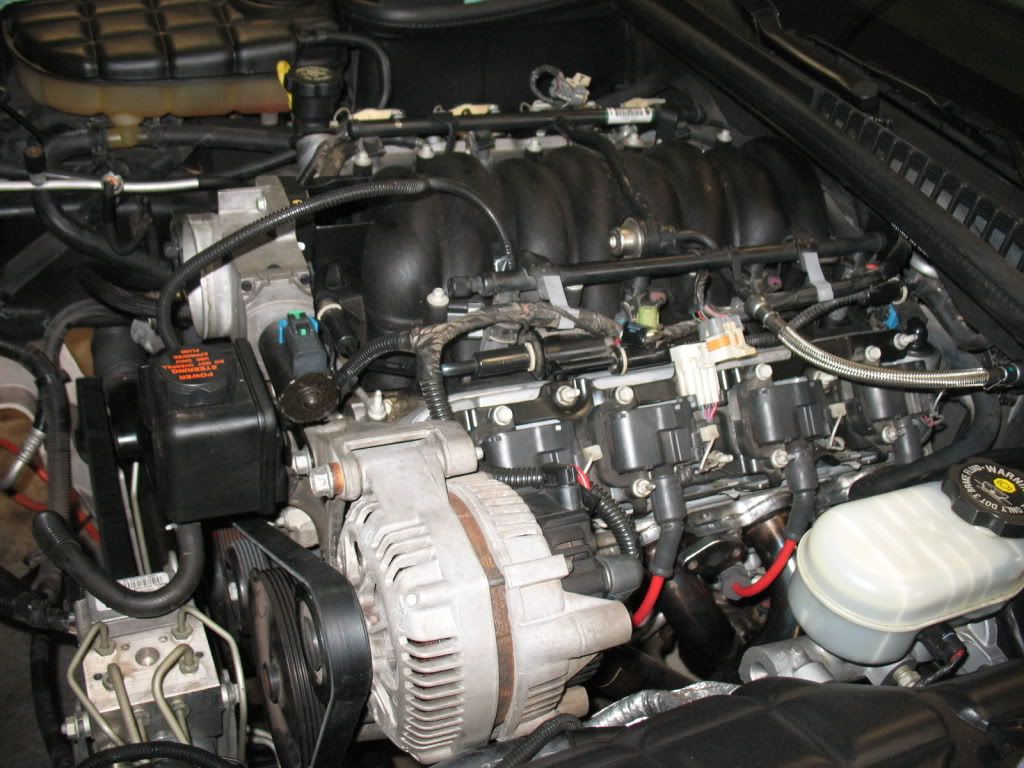
Cam in, LS2 chain on and LS6 ported/shimmed pump in place. The motor was spotless inside, real clean.
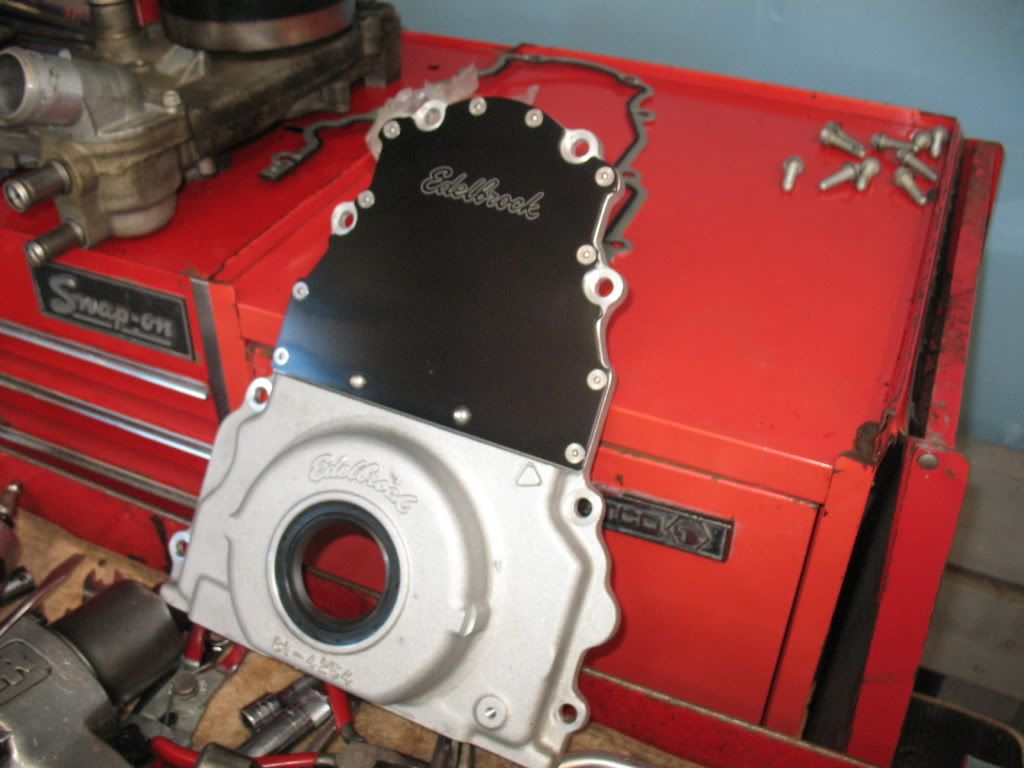
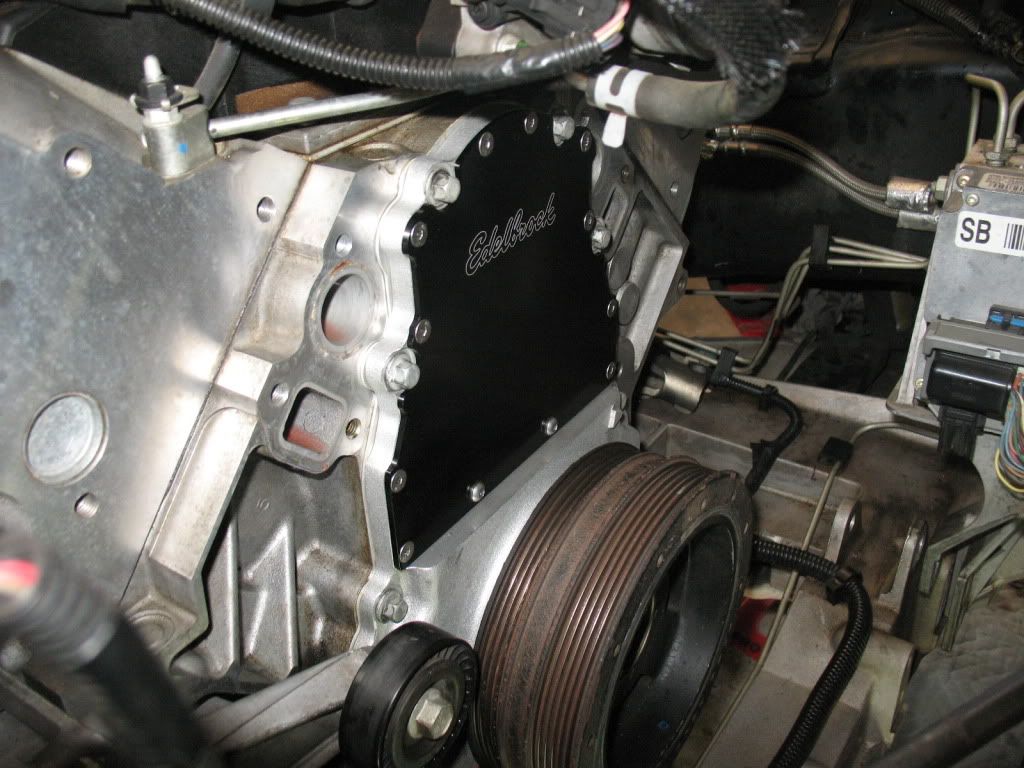
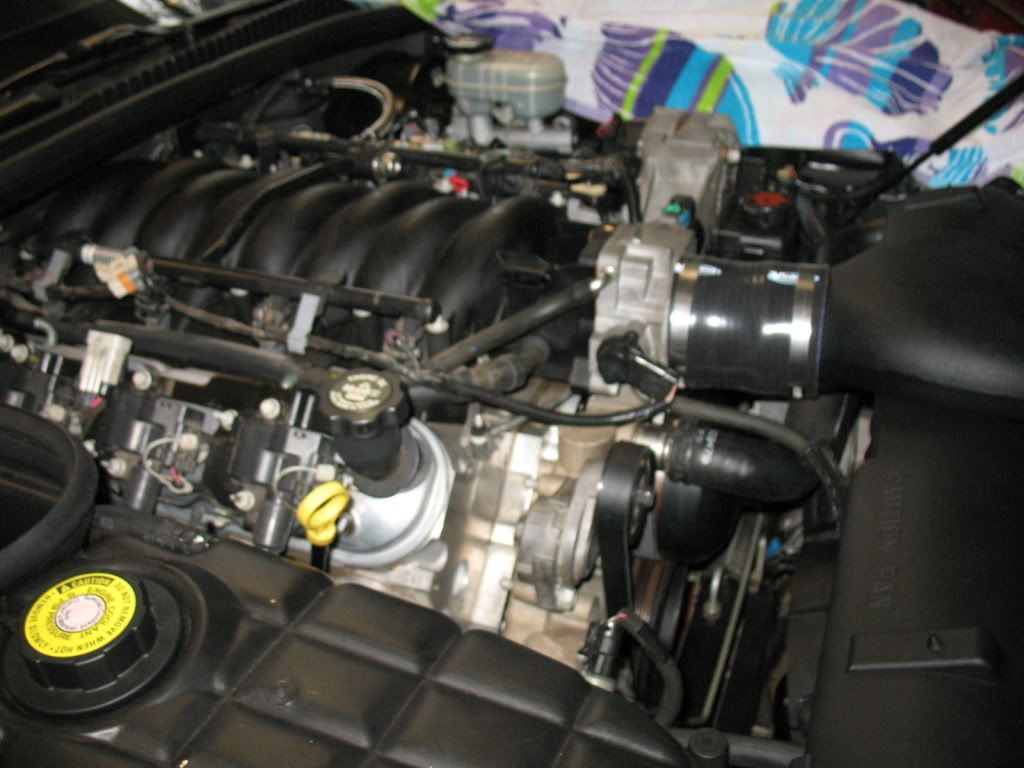
The Edelbrock two piece cover. You need to replace the backing plate bolts on the water pump in order for it to clear the cover. No where in the paperwork that comes with it does it tell you that.
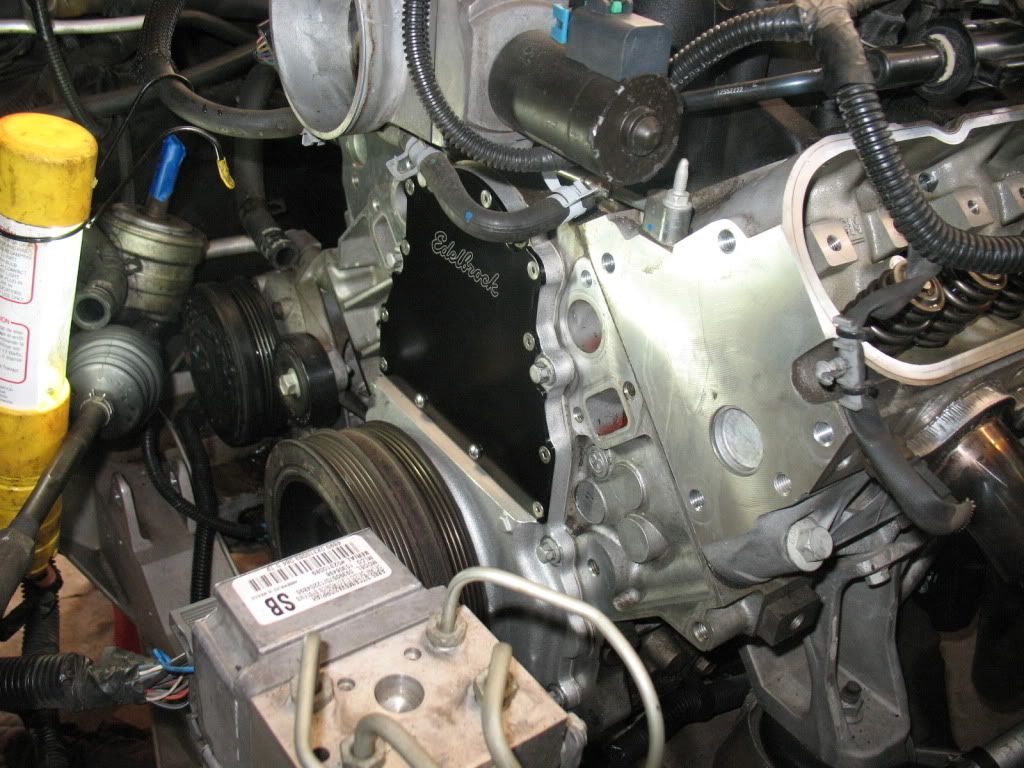
Timing cover installed, looks really nice!!!
Oh well, say goodbye to that great looking bling, its getting covered up!!
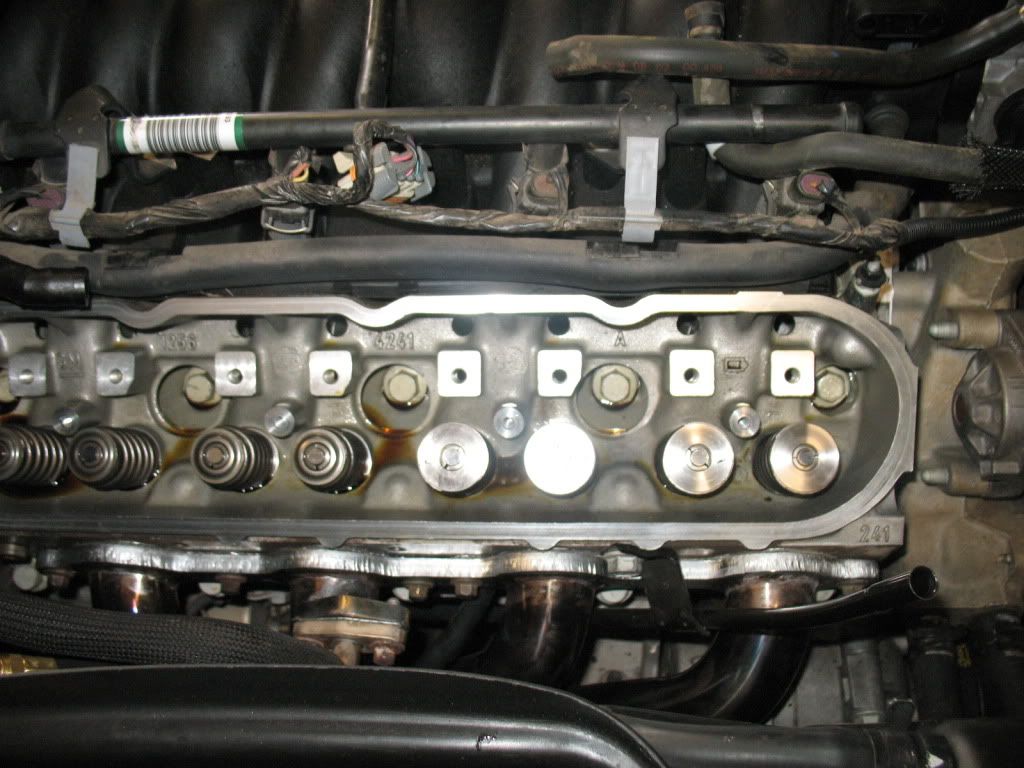
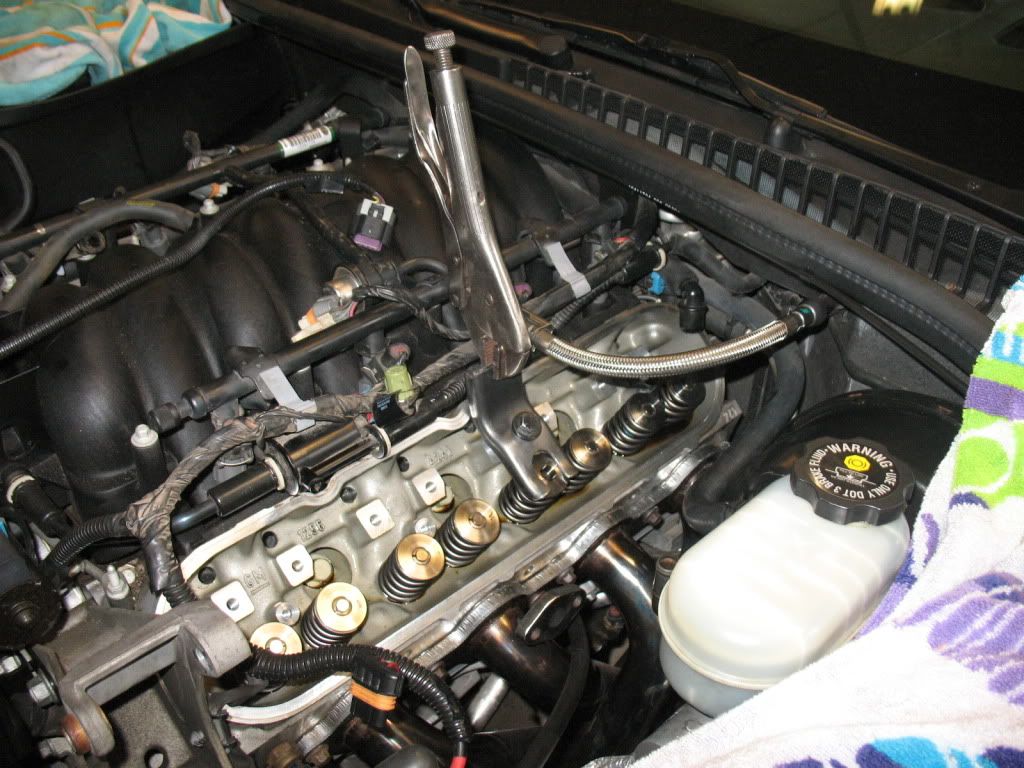
Springs, started on the passenger side and got them all done but one on the drivers side.
That damn valve spring. I'll get that one tomorrow!!
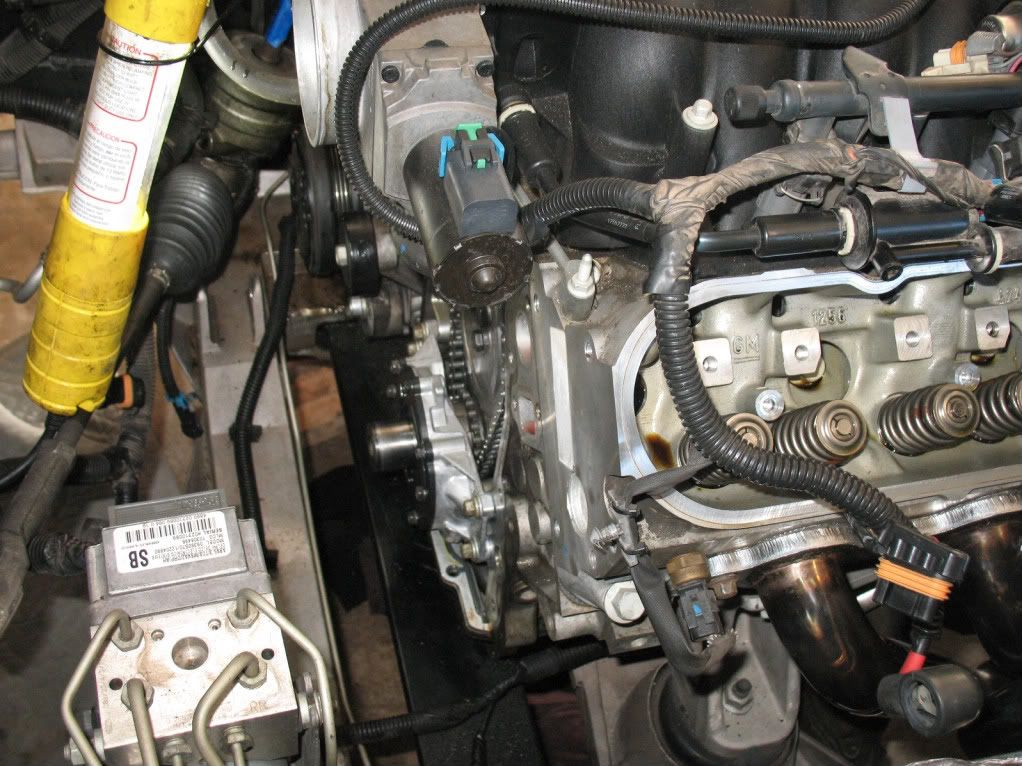
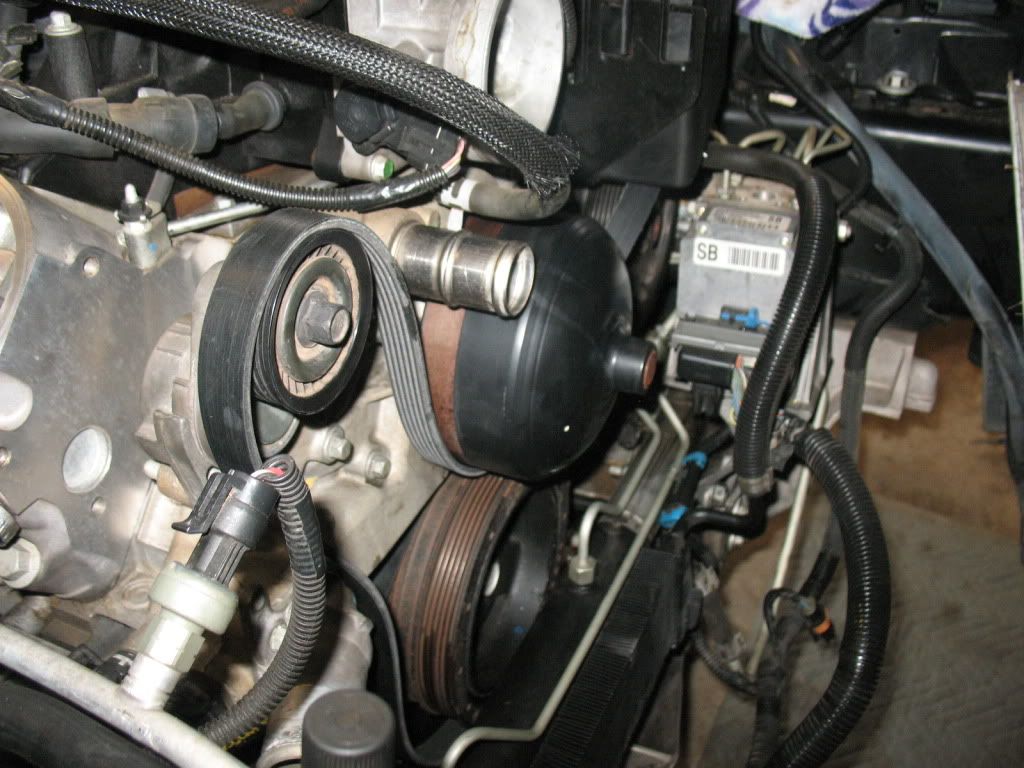
The picture of the clearance between the water pump and Edelbrock cover, not much at all.

Here is the video. The car has Metal Matrix cats and Ti exhaust. I think a more agressive exhuast is in order!!!
[youtube]GieHUuR9S5M[/youtube]
I also picked up PRC .650 dual springs w/ the Ti seats and retainers.
Ported and shimmed LS6 oil pump.
LS2 HD timing chain.
Edelbrock 4254 two piece timing cover.
I got everything torn down and the cam was ready to be pulled in around 6-7 hours. I used 5/16th's steel rod that I flattened out on one side to hold up the lifters, which did a marginal job at best. I kept hearing a lifter hit the cam while spinning it. I left the push rods in and spun the cam to see which lifters were going to stay up in the trays and which weren't. I found one problematic lifter that fell even with the rods in and used a pen magnet to hold it up.
Everything went pretty well, the oil pump was easy, the tube and O ring slid right in as I made sure it was very well lubed.
I heated the balancer up in the oven for 20 minutes or so at 250 degrees, and it slid right on. I used a piece of 2x4 and a hammer to set it pretty far in and pulled it in the rest of the way with the old bolt, by hand. It was pretty easy as well. Torquing the bolt was a PITA. I think I almost got the whole 140 degrees on the new bolt thanks to my 1/2 breaker bar and jack handle.
Everything is almost done, I have to put the radiator and shroud back in, which is the only thing I expect to be a pain. I have one valve spring yet to change that is blocked by the fuel pressure line. I have to trim my tool to fit, I'll do that tomorrow.
I didn't go to nuts with the pics, hopefully I will have a video and idle clip soon.
On to the pics:
Cam in, LS2 chain on and LS6 ported/shimmed pump in place. The motor was spotless inside, real clean.
The Edelbrock two piece cover. You need to replace the backing plate bolts on the water pump in order for it to clear the cover. No where in the paperwork that comes with it does it tell you that.
Timing cover installed, looks really nice!!!
Oh well, say goodbye to that great looking bling, its getting covered up!!
Springs, started on the passenger side and got them all done but one on the drivers side.
That damn valve spring. I'll get that one tomorrow!!
The picture of the clearance between the water pump and Edelbrock cover, not much at all.
Here is the video. The car has Metal Matrix cats and Ti exhaust. I think a more agressive exhuast is in order!!!
[youtube]GieHUuR9S5M[/youtube]
Last edited by Chevy Guy; Oct 6, 2010 at 09:47 AM.
The best advice I can give is to take your time when it comes to that part. Keep the push rods in and see which lifters are likely to give you trouble. A dropped lifter will ruin your day, thats for sure.
Also, get yourself some gear wrenches, they save a lot of time when unbolting the power steering assembly, and the for the two bolts on the bottom of the timing cover.
Last edited by Chevy Guy; Oct 3, 2010 at 09:00 PM.
Trending Topics
So I am cough cough......"working from home" today.
This is how I left it last night.

Started on that last valve spring.
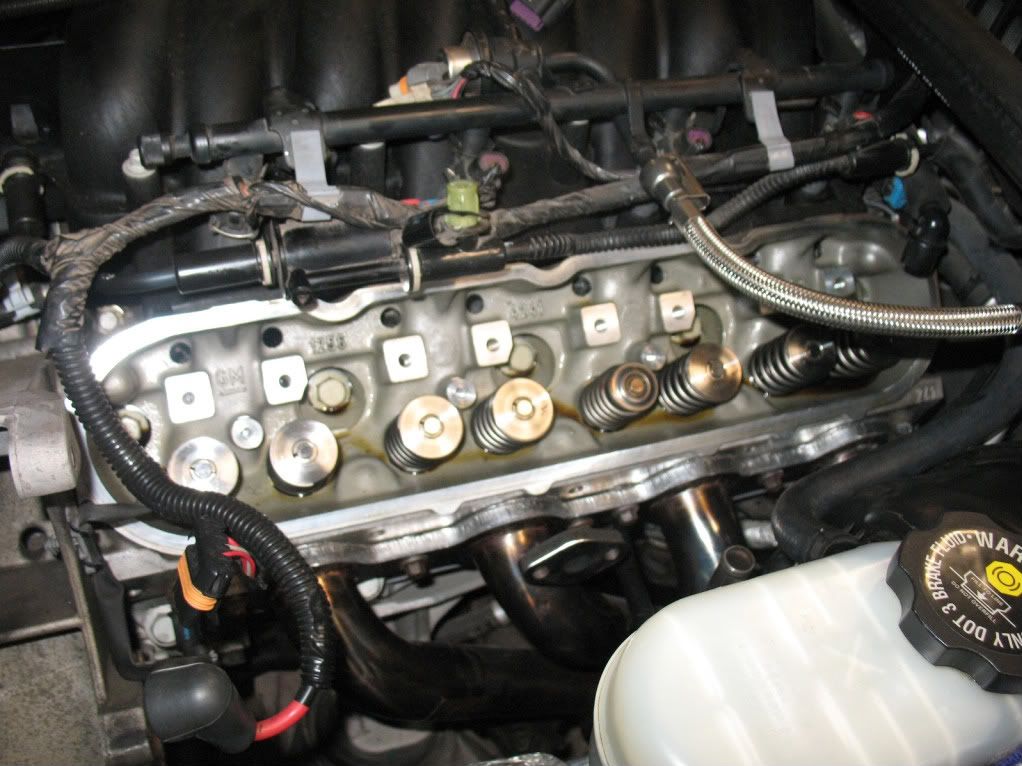
Time to put the rest of the valvetrain together.
Beefy pushrods.
All together. I turned the engine over by hand at least three or four times and retorqued the rockers every 45 degrees, I wanted to be EXTRA sure everything was OK.
Take this opportunity to clean out the condensor and raditator. The crap that came out of these was unreal. I used a shop vac, compressed air, and a garden hose on the radiator.
All buttoned up, I am actually nervous to start it. Maybe tonight or tomorrow.
Yes, I cleaned all the parts that nobody will ever see, lol.
This is how I left it last night.
Started on that last valve spring.
Time to put the rest of the valvetrain together.
Beefy pushrods.
All together. I turned the engine over by hand at least three or four times and retorqued the rockers every 45 degrees, I wanted to be EXTRA sure everything was OK.
Take this opportunity to clean out the condensor and raditator. The crap that came out of these was unreal. I used a shop vac, compressed air, and a garden hose on the radiator.
All buttoned up, I am actually nervous to start it. Maybe tonight or tomorrow.
Yes, I cleaned all the parts that nobody will ever see, lol.
LS1 Tech Stories
The Best V8 Stories One Small Block at Time

Gas Monkey Built a 6-Wheel Ferrari Testarossa With a Corvette LT4 Engine
Verdad Gallardo
7 Most Reliable High-Performance Engines GM Has Ever Built
Verdad Gallardo
Amazing '71 Camaro Restomod Is Modern Muscle Car Under the Skin
Verdad Gallardo
6 Common C5 Corvette Failures and What's Involved In Repairing Them
Pouria Savadkouei
Retro Modern Bandit Pontiac Trans AM Comes With Burt Reynolds' Autograph
Verdad Gallardo
Top 10 Greatest Cadillac V Series Performance Models Ever, Ranked
Pouria Savadkouei
Top 10 Most Powerful Chevy Trucks Ever Made!

Hennessey's New Supercharged Silverado ZR2 Has 700 HP
Verdad Gallardo
Coachbuilt N2A Anteros Is an LS2-Powered C6 Corvette In Italian Clothes
Verdad Gallardo FYI, the 233/239 was more designed for nitrous usage due to its extra split in duration, not lift 
Congrats on the install! Looks nice and uneventful! Have fun
Congrats on the install! Looks nice and uneventful! Have fun
__________________

Largest Stocking Distributor of LS-x Engines / CHECK OUT OUR NEW WEBSITE!
COMP - FAST - PACESETTER - DIAMOND RACING - EAGLE SPECIALTY PRODUCTS - CALLIES - COMETIC GASKETS
RAM CLUTCHES - MOSER ENGINEERING - KOOK'S HEADERS - ARP - GM BOLTS AND GASKETS - MSD - NGK
POWERBOND - ASP - AND MORE!
Largest Stocking Distributor of LS-x Engines / CHECK OUT OUR NEW WEBSITE!
COMP - FAST - PACESETTER - DIAMOND RACING - EAGLE SPECIALTY PRODUCTS - CALLIES - COMETIC GASKETS
RAM CLUTCHES - MOSER ENGINEERING - KOOK'S HEADERS - ARP - GM BOLTS AND GASKETS - MSD - NGK
POWERBOND - ASP - AND MORE!
After looking at it for a while, it finally came to me. The cap screws replace the bolts on the backing plate, this give it the clearance it needs.


The cover is a bit thicker than the OE unit, with the stock bolts on the water pump backing plate, they hit the cover. The cover comes with "extra" cap head bolts, but no indication of what to do with them.
After looking at it for a while, it finally came to me. The cap screws replace the bolts on the backing plate, this give it the clearance it needs.
After looking at it for a while, it finally came to me. The cap screws replace the bolts on the backing plate, this give it the clearance it needs.


