block rear oil mod, learn from my mistake
 11-30-2010, 10:00 AM
#1

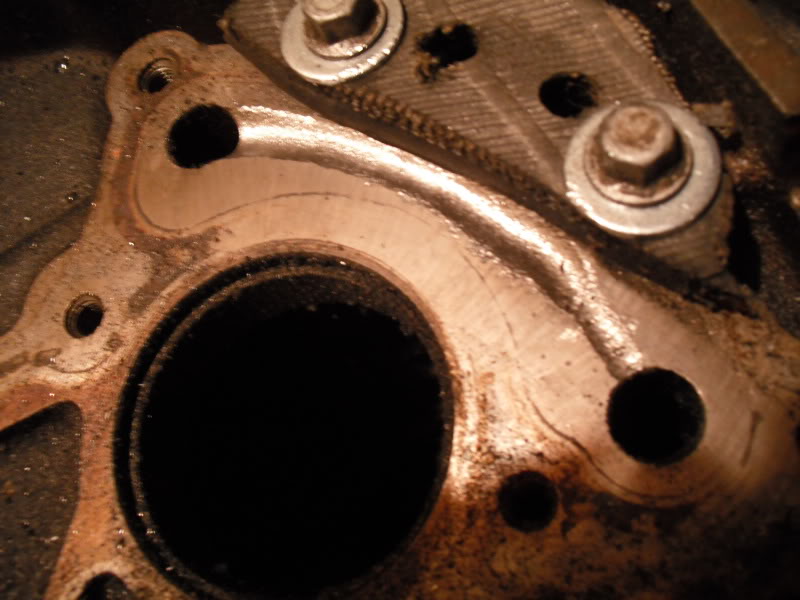
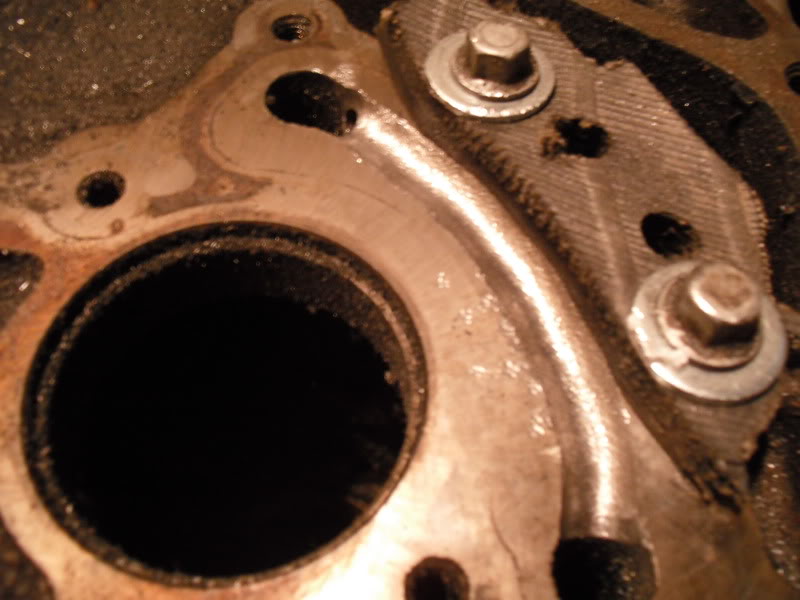
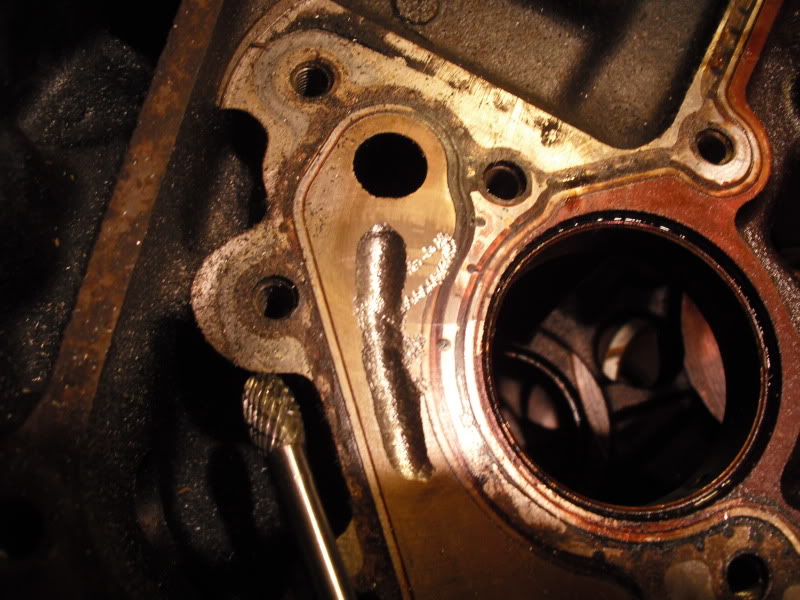
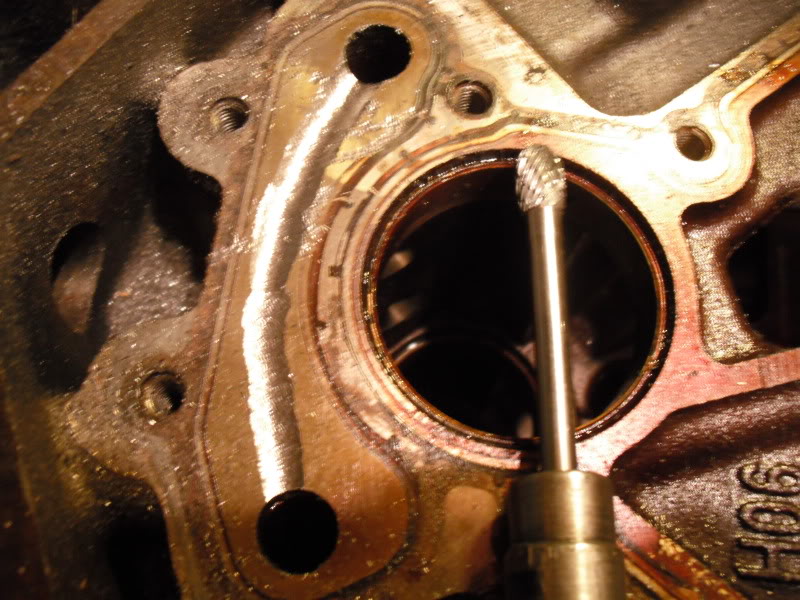
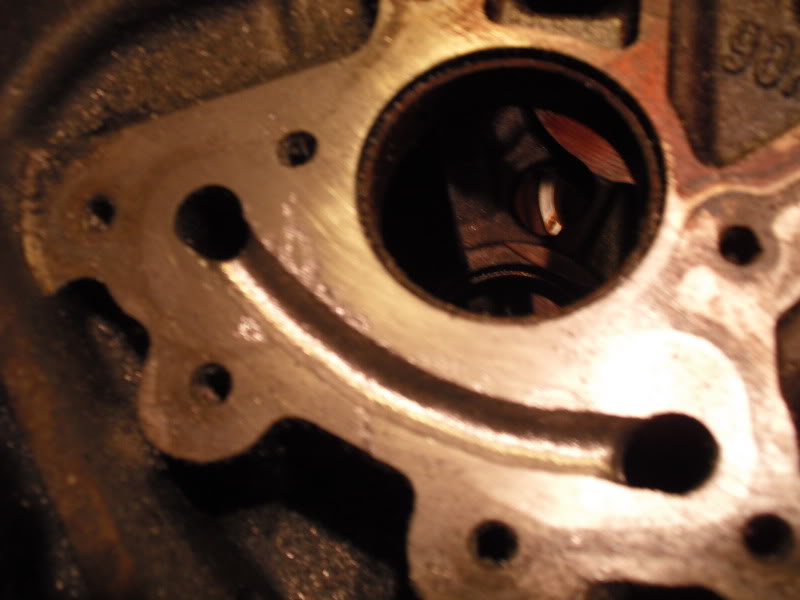
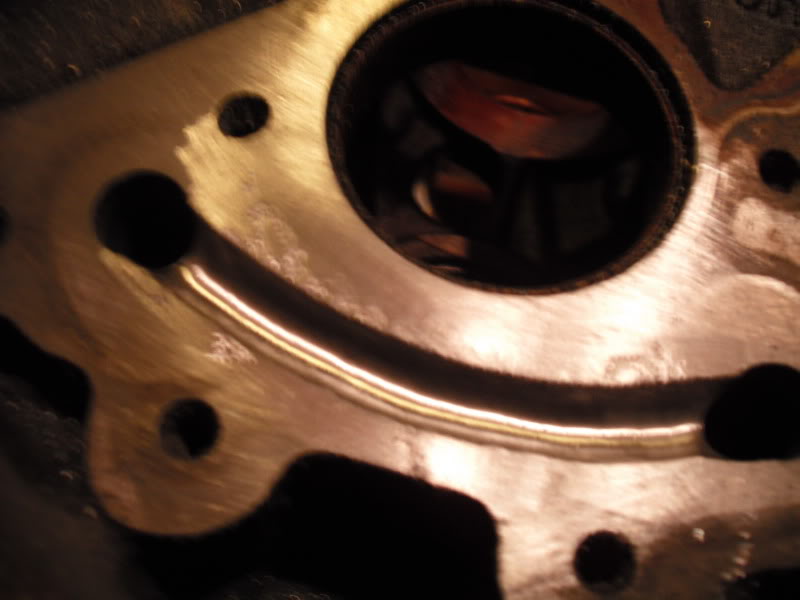
Well, another recent thread, which I can't find now, inspired me to try this. I do very well with porting heads, so I thought I'd try free hand grinding the oil crossover passage into the rear of my cracked '01 LQ4 block, before trying it on my perfectly good '01 LM7 block.
I found it much harder to keep the carbide from jumping sideways. For the second attempt, I will be making some sort of guide first, to protect the sealing faces.
However, I refuse to get too depressed by this, it'll be good to find out if these tiny nicks are problematic or not.
Now, here are pics so you can start bashing me.
 11-30-2010, 01:15 PM
#2
once you finished it looked really good.
At least you are "practicing" on a junk block first.
Can you use heavy painters tape or duct tape to protect around what you dont want to cut?
then use goo gone to clean up and parts that stick, that way if it jumps it just gets the tape and not the mating surface.
I even wonder why GM didnt even do this trick for the new LSX blocks.
 11-30-2010, 02:19 PM
#5

Don't know if it's done on the LSX block, but is done on 04 & later LS6 blocks.
To the OP. The thread that inspired you may have been mine. The member in California that cuts pre-04 blocks does it on a CNC w/ a program he wrote specifically for cutting the rear oil passage slot. It wasn't meant to be done by hand w/ a die grinder. Thought of doing it that way myself, but is not worth the risk to me. Nice work though... as long as it has remained within the seal of the rear cover.
11-30-2010, 02:30 PM
#6
Please excuse the double post. Didn't see this before or would have quoted in previous post.
Absolutely, it's worth it. I have both LS6 & LS1 blocks. Oil gets to the heads of the LS6 block much faster than the restrictive LS1 blocks because of the tiny rear oil passage in the LS1 blocks.
Every time I read an LS1 top end failure thread, think to myself, "wonder how long he let the engine run after starting before getting on it." Takes several minutes for oil to reach the top end of an LS1 block. Dyno operators need to be aware & take care to allow the engine to run for a few minutes before making pulls. Obviously, not all top end failures are due to lack of oil, but how many are?
11-30-2010, 05:40 PM
#7
First, I thank all of you for being kind, rather than the bashing I expected and didn't really want.
Second, I do have use of a Bridgeport mill, but even at it's maximum adjustment, this block didn't quite fit this particular model of milling machine.
Third, you guys have some good ideas for ways to stay in the intended groove, I'm not sure yet which I'll use with my LM7 block, but I'll post pics when the time comes.
Fourth, props to LS1-450, because I believe in giving credit where it's due. I understood it wasn't intended to be done by hand, but I was curious, I have a sacrificial block, and I'm willing to take one for the team, as the saying goes.
Fifth, this cracked 6.0L will yet be run, even if it self-destructs in the first few moments. So many half-**** fixes being done to it at this point, that we need to get some idea which, if any, might work, and which, if any, won't.
Thanks again!
Trending Topics
12-03-2010, 10:16 AM
#8
TECH Resident
iTrader: (13)
Join Date: Mar 2008
Location: On the coast of somewhere
Posts: 779
Likes: 0
Received 1 Like
on
1 Post
Good info, thanks for the "sacrificial lamb". Did not know the top end "oil starvation" problem existed. Just an idea, would drilling shallow holes to start a "track" from hole to hole work before grinding the slot? Seems like it would aleviate some of the bit from jumping so much.
12-03-2010, 10:52 AM
#9
TECH Junkie
iTrader: (3)

Join Date: May 2003
Location: Clayton, North Carolina
Posts: 3,898
Likes: 0
Received 6 Likes
on
6 Posts

Years ago I drilled the second galley and tapped it 1/8 pipe so I could watch the oil pressure on the "restricted" side. The oil pressure was the same on both sides with no modifications on the iron block on the dyno from idle to 8500rpm.
Kurt
Kurt
12-03-2010, 10:10 PM
#11

Here is the link to my post on CNC machining the rear oil passage:
https://ls1tech.com/forums/14083982-post4.html
Bridgeport would not be tall enough to stand the block up on the table even with a riser. It may be possible to hang the block off the side of the table with a plate bolted to the bell housing face and reach that area.
Steve
https://ls1tech.com/forums/14083982-post4.html
Bridgeport would not be tall enough to stand the block up on the table even with a riser. It may be possible to hang the block off the side of the table with a plate bolted to the bell housing face and reach that area.
Steve
__________________
Steve Demirjian
Race Engine Development
Oceanside, Ca.
760-630-0450
web: www.raceenginedevelopment.com/
e-mail: race-engine-development@***.net
Steve Demirjian
Race Engine Development
Oceanside, Ca.
760-630-0450
web: www.raceenginedevelopment.com/
e-mail: race-engine-development@***.net
12-04-2010, 10:00 AM
#12
TECH Junkie
iTrader: (3)
Join Date: May 2003
Location: Clayton, North Carolina
Posts: 3,898
Likes: 0
Received 6 Likes
on
6 Posts
So you are saying that the stock oiling does not oil the pass side when it starts? For how long? How did the stock engines live?
Both galleys read pressure at the same time when tested.......
Kurt
Both galleys read pressure at the same time when tested.......
Kurt
12-04-2010, 06:54 PM
#13
Isolde is correct. It took me probably a half dozen times of watching the top end oiling to really believe it. It takes minutes for the oil to reach the passenger side of a stock LS1 block (pre-04). The volume requirement isn't there because of the restrictive rear oil passage in the rear cover. As stated above, I wonder how many top end related failures are due to guys making a habit out of jumping on it right after starting the engine.
I've had a dyno operator look @ me sideways when I ask them to let it idle for a few minutes before starting the pull.
Also, as I've stated before; Every pre-04 block that I own would be @ Steve's (Steve - Race engine) shop for machining if he wasn't so far away. Isolde's thread here has me contemplating doing myself w/ wooden guides, as suggested.
12-04-2010, 08:27 PM
#15

Isolde - Nice effort - I think it's great when people try stuff like this. I wonder if it might work better using a cut-off wheel or maybe the die grinder with a ball-shaped burr with the axis if the tool perpendicular to the cut vs. in line with the cut? That would eliminate the 'jumping' problem.
12-04-2010, 09:32 PM
#16
I'm glad to see you guys presenting other options. The pre-drilling might go well with the cut-off wheel.
The duct tape idea seems least likely, even substituting Gorilla tape. To get it to stick effectively would require cleaning away the witness marks that show where the rubber "o-ring" seal was touching the block. Those seem necessary to me.
Using the carbide would chew into ANY wood quite readily, and aluminum is softer than the iron blocks I have. Good for preserving the carbide, but it's much cheaper than a block.
I'm looking at using a 1/4" steel plate for a guide. It's fairly easy to cut with any jigsaw. It'll be a couple more days before I can do this to my 5.3 block, but I'll post "during" and "after" pics.