

Finally pulling the trigger on parts!
 11-06-2013, 05:24 PM
#661
TECH Fanatic
great progress, pictures look really good.
you mentioned that you want a better way to measure valve relief depth. This setup shown here cost about $40 from Jegs. Even with aluminum block you can hold the base steady and get reliable measurements.

you mentioned that you want a better way to measure valve relief depth. This setup shown here cost about $40 from Jegs. Even with aluminum block you can hold the base steady and get reliable measurements.

 11-06-2013, 07:40 PM
#662
As we discussed via text, yeah, it's a screw up. The biggest thing though is when it's all said and done is that you smooth everything out. Detonation deflection is key here.
Jake, again, in all seriousness, this as a whole is an amazing thread. Step by step picture book that can help a LOT of folks out in the future. Awesome thread, and I expect the next 5 pages to be the same as well!
Jake, again, in all seriousness, this as a whole is an amazing thread. Step by step picture book that can help a LOT of folks out in the future. Awesome thread, and I expect the next 5 pages to be the same as well!
11-06-2013, 08:03 PM
#663
TECH Fanatic
iTrader: (9)
Join Date: Apr 2012
Location: Georgetown, Tx
Posts: 1,053
Likes: 0
Received 0 Likes
on
0 Posts

As we discussed via text, yeah, it's a screw up. The biggest thing though is when it's all said and done is that you smooth everything out. Detonation deflection is key here.
Jake, again, in all seriousness, this as a whole is an amazing thread. Step by step picture book that can help a LOT of folks out in the future. Awesome thread, and I expect the next 5 pages to be the same as well!
Jake, again, in all seriousness, this as a whole is an amazing thread. Step by step picture book that can help a LOT of folks out in the future. Awesome thread, and I expect the next 5 pages to be the same as well!
11-06-2013, 08:16 PM
#664
What I appreciate is that Jake doesn't just show when things are going great but shows when things go wrong or he makes a mistake. There's A LOT of people on here with ego's much larger than their @#@! that wouldn't show that.
Keep up the good work Jake.
Keep up the good work Jake.
11-06-2013, 09:23 PM
#666
Husky.
I have another one from Autozone. They both are calibrated the same. Both click on a bolt torqued to 18ft-lbs for example. So I think they're pretty close to being right.
And thanks for the words guys. We all screw up. I don't have any ego. I just fix it and keep going. That's what gearheading is all about. But yeah, usually it's when I try to go a little faster than I need to is when I mess up. Patience is not a virtue for me haha.
11-06-2013, 09:25 PM
#667
I'll try that. I have the LS specific Comp kit and it allows me to bolt the dial to any number of threads on the block. When you measure, do you just zero it out on the flat of the piston, then swing it to the base of the relief? Then there's your measurement?
11-06-2013, 10:40 PM
#668
Husky.
I have another one from Autozone. They both are calibrated the same. Both click on a bolt torqued to 18ft-lbs for example. So I think they're pretty close to being right.
And thanks for the words guys. We all screw up. I don't have any ego. I just fix it and keep going. That's what gearheading is all about. But yeah, usually it's when I try to go a little faster than I need to is when I mess up. Patience is not a virtue for me haha.
I have another one from Autozone. They both are calibrated the same. Both click on a bolt torqued to 18ft-lbs for example. So I think they're pretty close to being right.
And thanks for the words guys. We all screw up. I don't have any ego. I just fix it and keep going. That's what gearheading is all about. But yeah, usually it's when I try to go a little faster than I need to is when I mess up. Patience is not a virtue for me haha.
One of my best friends "no name" torque wrench was almost 40 ft lbs off from true torque.
We all have a good idea what "tight" or snug is on a bolt, rather it be 5/16 or 3/8, etc... with a certain ratchet.
11-07-2013, 04:56 AM
#670
TECH Fanatic
 11-07-2013, 11:39 AM
#673
Just a suggestion, but you may want to check the pickup to pan clearance. Usually when I have to move them for the spaced out oil pump, they'll be off. I do it by cleaning the pickup with acetone and covering it with tape. Then I put two pieces of clay in a cone shape on either end and opposite sides. Then I drop the pan on with the gasket and run a couple bolts in with a speeder bar and tighten it. Take it all off and measure the thickness of the clay. You want to shoot for 1/4"-3/8". Too much clearance and you can cause the oil level may get below the pickup in hard acceleration. Too little clearance, and enough oil won't be able to get into the pickup. Either scenario can be very, very bad.
Second, good idea with the button head bolts on the oil pump cover. I've seen some shops use the same button head bolts on the oil pump housing when bolting it onto the block. You may want to try that when you fit the front cover back on.
Without the dowels you can have a lot of play in the cylinder head on the deck. I've seen as much as .035 with the larger 11mm bolts installed and about .015" with the smaller 8mm. This could REALLY throw off your radial PTV if it is too far FUBAR'd.
Lastly, I wouldn't use the dial indicator to measure the valve relief depths. Rotating the base from the top of the piston where you zero'd it out to the bottom of the relief could cause some inconsistencies, especially if any of the dial indicator clamps are loose or it has a flex joint. I would prefer a deck bridge, like what you would use to measure how far the piston is in or out of the hole, or a depth mic like already suggested. Less chance of inaccuracies with those.
11-07-2013, 11:44 AM
#674
 11-07-2013, 12:00 PM
#675
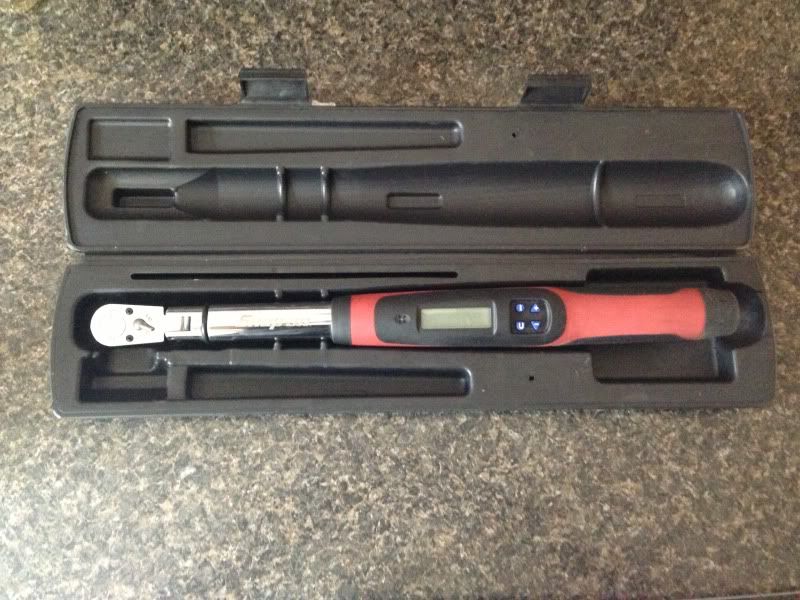
I have a spare digital Snap On torque wrench I'm selling. I just bought another one that will measure in degrees of rotation for the TTY/TTA bolts, like main caps, etc. I just paid $450 for my new one. I'll sell you the old one for less than half that.
Link
11-07-2013, 01:39 PM
#676
That is a good deal. And thanks for the info on the pickup. I'll clay it and see.
KCS, one question. How do I get the dowels out of the head? Otherwise, looks like I'm grabbing my other stock head and disassembling to make sure all the cuts are good for the exhaust side w/dowels.
Because without the dowels it's bad. I just went out and tried to get the depth right on the three flycuts that were off. The tool is pretty much worn. It won't cut any deeper. But getting it to align in the flycut takes a lot of patience. Luckily, I've been able to get it to sit pretty much correctly.
Anyway, I threw my new heads on there and clayed them. They look okay. When I go to knock these down with sandpaper to clean them up, I'll make sure I try to open them up slightly as well to be safe. I'll try with the dowels after I get the flycuts deeper on the intake side. I'm sitting around .050" when I'm shooting for .080". It's just hazing the cut and sanding it for me. And there is still room until it hits the lock collar. I don't want to put much pressure on the drill, but even with some pressure and WOT, it isn't cutting.
Now, I just need to figure out how to get the damn reliefs deeper. I guess I could put sandpaper on there?