

Finally pulling the trigger on parts!
 10-18-2013 | 08:27 AM
#622

TECH Enthusiast

Joined: Feb 2007
Posts: 625
Likes: 0
From: Raleigh, NC
Then, I moved from the piston to the cam. I took an old GM lifter and placed it on the intake lobe and put a 5" extension on my dial indicator on the body of the lifter. I then rotated the crank CCW until I hit maximum lift and went another .050" and recorded the number and went back CW until I went .050" past maximum lift. I ended up with an ICL of 110 when my cam is ground on a 108.
10-18-2013 | 08:33 AM
#623
Thread Starter
Super Hulk Smash
iTrader: (7)
Joined: Aug 2004
Posts: 11,255
Likes: 141
From: Pace, FL
I should note I rotate CCW .100" lift on the dial then back into the position CW .050" to remove slack from the chain. I come from both ATDC and BTDC to get the ICL. I did the same to find TDC.
Last edited by JakeFusion; 10-18-2013 at 08:38 AM.
10-18-2013 | 08:44 AM
#624
TECH Enthusiast
Joined: Feb 2007
Posts: 625
Likes: 0
From: Raleigh, NC

When I had the JP timing chain problem, I did rotate CW only 720 degrees on several trials, but it was a fluke, and a defective part.
10-18-2013 | 01:40 PM
#625
Thread Starter
Super Hulk Smash
iTrader: (7)
Joined: Aug 2004
Posts: 11,255
Likes: 141
From: Pace, FL
Good news is I double-checked TDC and I was off a degree. Little things right. But then I checked ICL again and that 1 degree of TDC made a difference. I got 107.5 ICL. So, the cam is about as close as I'm going to get it.
10-19-2013 | 01:44 AM
#626
Thread Starter
Super Hulk Smash
iTrader: (7)
Joined: Aug 2004
Posts: 11,255
Likes: 141
From: Pace, FL
Oh look. More fun.
I pulled the oil pan and windage tray. Here is the stock, unmolested bottom end.
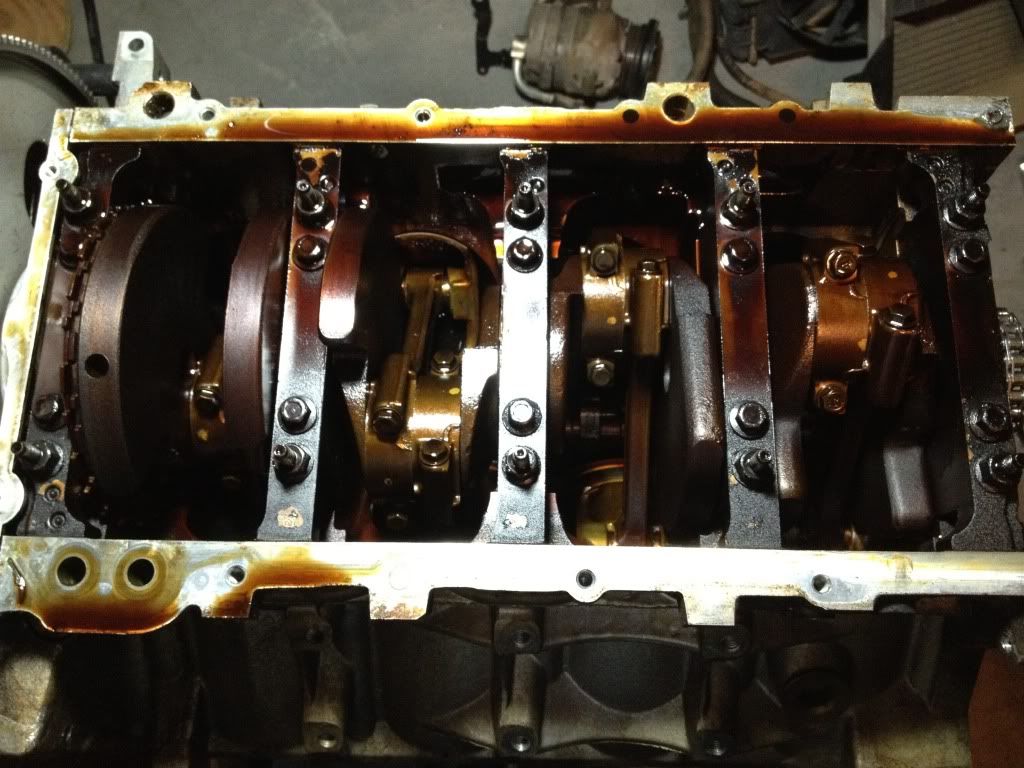
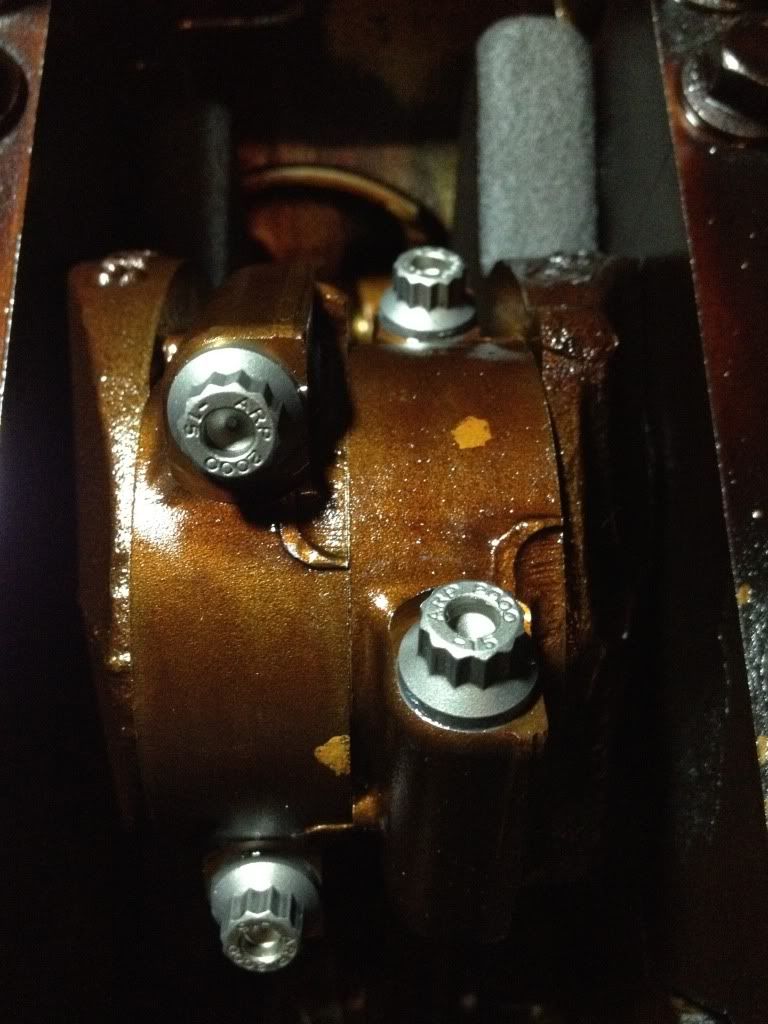
I decided that it needed something new and shiny in there. Yes, I'm well aware of the need to resize with ARP bolts, but here's how I installed them: I removed the stock bolts and pulled them out once they were in the ferrule and removed the bolt and ferrule together (first one I failed getting the ferrule out, but then the next 15 went like butter).
I only pulled one bolt at a time from a rod to maintain cap integrity. I then applied the ARP lube to the threads and under the head, hand tightened, and did a three pass torque sequence: two passes at 35ft-lbs with un-tightening between each pass and a final pass at 45ft-lbs. ARP claims to do one 45ft-lbs or do the stretch method. Since I didn't have a stretch gauge and wasn't buying one for this, I'd just go with the torque sequence. I never like to just torque and forget. I usually like to do a staged pass to burnish the threads and get a little bit more of a stretch out of the bolt.
Now, are my rods OoR? I will probably end up taking the whole shortblock to the machine shop so they can check. Or I might see if I can rent a nice bore gauge and doublecheck myself. If everything checks out, I'm running it as it sits. I suppose I can have them check stretch for me as well.
I pulled the oil pan and windage tray. Here is the stock, unmolested bottom end.
I decided that it needed something new and shiny in there. Yes, I'm well aware of the need to resize with ARP bolts, but here's how I installed them: I removed the stock bolts and pulled them out once they were in the ferrule and removed the bolt and ferrule together (first one I failed getting the ferrule out, but then the next 15 went like butter).
I only pulled one bolt at a time from a rod to maintain cap integrity. I then applied the ARP lube to the threads and under the head, hand tightened, and did a three pass torque sequence: two passes at 35ft-lbs with un-tightening between each pass and a final pass at 45ft-lbs. ARP claims to do one 45ft-lbs or do the stretch method. Since I didn't have a stretch gauge and wasn't buying one for this, I'd just go with the torque sequence. I never like to just torque and forget. I usually like to do a staged pass to burnish the threads and get a little bit more of a stretch out of the bolt.
Now, are my rods OoR? I will probably end up taking the whole shortblock to the machine shop so they can check. Or I might see if I can rent a nice bore gauge and doublecheck myself. If everything checks out, I'm running it as it sits. I suppose I can have them check stretch for me as well.
10-19-2013 | 08:22 AM
#627
Did you use or do you have EPL (extreme pressure lube) ?? It looks like old
bearing grease and works really well under the bolt head where it contacts
the cap to prevent galling which can give a false torque reading as the undue
friction can diminish proper bolt stretch. Just an FYI
bearing grease and works really well under the bolt head where it contacts
the cap to prevent galling which can give a false torque reading as the undue
friction can diminish proper bolt stretch. Just an FYI
10-19-2013 | 08:46 AM
#628
I wish I could give better insight other than what I've read from here...
My opinion, and this is JUST ME- I'd run it. There's plenty of guys that have done ARP's on frickin jack stands no less, and probably don't follow the torque sequence as good as you. Theirs are still holding together without issue. In aware of only a handful of folks that have spun bearings shortly after doing this.
If you take it to the machine shop, you might as well pony up for new 3.903/3.905 forged pistons/rings. It's there already, right?
Just my opinion Jake.
10-19-2013 | 09:11 AM
#629
Id say put it in the car, sidestep the clutch @ 7200 rpm hold it there for 20 seconds in first gear. slide into home and never bring it up again. Just trying to save you some time .LOL
10-19-2013 | 11:22 AM
#630
Thread Starter
Super Hulk Smash
iTrader: (7)
Joined: Aug 2004
Posts: 11,255
Likes: 141
From: Pace, FL
Did you use or do you have EPL (extreme pressure lube) ?? It looks like old
bearing grease and works really well under the bolt head where it contacts
the cap to prevent galling which can give a false torque reading as the undue
friction can diminish proper bolt stretch. Just an FYI
bearing grease and works really well under the bolt head where it contacts
the cap to prevent galling which can give a false torque reading as the undue
friction can diminish proper bolt stretch. Just an FYI
As far as taking to the machine shop... I'm probably going to chance it and run it, and I have two reasons or this (so I guess I'll be the guinea pig):
1) Katech and ARP bolts have pretty much the same install guidelines for 45ft-lbs or .060-.070" of stretch. I find that odd since the Katech is a 260k psi tensile strength while the ARP 2000 is 200k. I would imagine the Katech puts more of a load on the rod cap when stretched the same as a lesser tensile strength bolt. And Katechs don't require a resize despite this addition clamping force. So that brings me to my next point...
2) I've seen folks say the Katechs need a resize too. My question is with the cracked rods, if you remove the rod and install a new bolt does it go out of round by default? I know there's really only one way for cracked rods to go back together, but I wonder if after the initial torque by GM and subsequent heat cycling in the engine if removing the cap will cause the roundness spec to change regardless of the bolt? Basically, by removing it, you then have to rehone it and install a new bearing.
I suspect this is why Katech doesn't require a resize, because their installation instructions are specific on how to install 1 bolt at a time to maintain cap integrity - which is probably the key to all of this.
10-19-2013 | 02:33 PM
#631
TECH Fanatic
Joined: Jun 2011
Posts: 1,331
Likes: 6
From: Katy, TX
Pics look great, nice progress! I've been following your thread for a while now.
Regardless of strength level, all steel has roughly the same relationship between stress and strain (modulus of elasticity). This means that assuming both the Katech and ARP bolts are the same cross-sectional area, then each will exert the same clamping force given the same amount of stretch.
Also, I would not trust a torque wrench alone. When I built my motor, my toque wrench was set to the correct torque spec, however this only resulted in half of the necessary stretch. I recommend getting a stretch gauge and torquing on the bolts until the correct stretch spec is reached. You can always pull the bolts back out and confirm there was no permanent stretch.
Here are some of my reference links on the subject.
http://www.scribd.com/doc/160936551/...d-Bolt-Preload
https://ls1tech.com/forums/generatio...t-stretch.html
Good luck, keep the pictures coming!
I used the ARP Ultra Torque lube provided. I coated the threads and put it under the bolt head. Stuff is blue and makes a mess haha.
As far as taking to the machine shop... I'm probably going to chance it and run it, and I have two reasons or this (so I guess I'll be the guinea pig):
1) Katech and ARP bolts have pretty much the same install guidelines for 45ft-lbs or .060-.070" of stretch. I find that odd since the Katech is a 260k psi tensile strength while the ARP 2000 is 200k. I would imagine the Katech puts more of a load on the rod cap when stretched the same as a lesser tensile strength bolt. And Katechs don't require a resize despite this addition clamping force. So that brings me to my next point...
2) I've seen folks say the Katechs need a resize too. My question is with the cracked rods, if you remove the rod and install a new bolt does it go out of round by default? I know there's really only one way for cracked rods to go back together, but I wonder if after the initial torque by GM and subsequent heat cycling in the engine if removing the cap will cause the roundness spec to change regardless of the bolt? Basically, by removing it, you then have to rehone it and install a new bearing.
I suspect this is why Katech doesn't require a resize, because their installation instructions are specific on how to install 1 bolt at a time to maintain cap integrity - which is probably the key to all of this.
Also, I would not trust a torque wrench alone. When I built my motor, my toque wrench was set to the correct torque spec, however this only resulted in half of the necessary stretch. I recommend getting a stretch gauge and torquing on the bolts until the correct stretch spec is reached. You can always pull the bolts back out and confirm there was no permanent stretch.
Here are some of my reference links on the subject.
http://www.scribd.com/doc/160936551/...d-Bolt-Preload
https://ls1tech.com/forums/generatio...t-stretch.html
Good luck, keep the pictures coming!
 10-19-2013 | 05:08 PM
#633
Thread Starter
Super Hulk Smash
iTrader: (7)
Joined: Aug 2004
Posts: 11,255
Likes: 141
From: Pace, FL
It doesn't slide easily. But it would not torque down before. It wobbled since it didn't actually align. With the chain on, it wasn't happening. In Joseph Potak's book he confirmed you could hone for fit and said it was usually necessary. I mean I fought with that for a while. I barely took anything out. I had very few of any shavings. Just enough apparently.
Also I may grab a stretch gauge. I suspect they aren't tight enough. The stock ones were much tighter to get off than the 45 ftlbs was to torque down.
Also I may grab a stretch gauge. I suspect they aren't tight enough. The stock ones were much tighter to get off than the 45 ftlbs was to torque down.
Last edited by JakeFusion; 10-19-2013 at 05:15 PM.
10-21-2013 | 01:06 AM
#634
Thread Starter
Super Hulk Smash
iTrader: (7)
Joined: Aug 2004
Posts: 11,255
Likes: 141
From: Pace, FL
Sometimes, I do stupid ****. I bought the Lindy tools and only one guide rod. I wish I had bought two. Then I'd be looking at pulling the head 8 times vs 16. Horrifying.
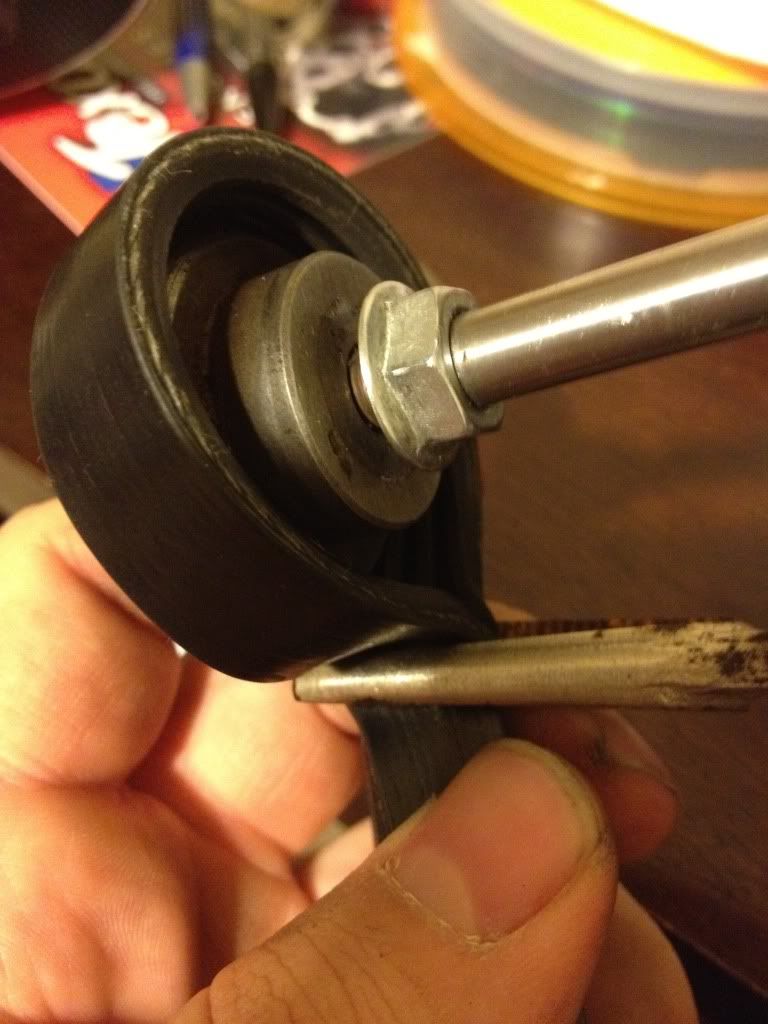
Anyway, to use the one guide rod, I have to remove from the flycutting head. It was installed on the exhaust cutter when I got them. I cannot remove it. I know it simply screws in, but I cannot find a way to hold the round head cutter without damaging it.
Any suggestions?
Added a pic. I believe it's RH threaded. At first, I thought the nut might be a lock nut and the stem screwed in, but it's all one piece looking at other pics of the removed stem.
Last edited by JakeFusion; 10-21-2013 at 01:18 AM.
10-21-2013 | 01:31 AM
#635
Thread Starter
Super Hulk Smash
iTrader: (7)
Joined: Aug 2004
Posts: 11,255
Likes: 141
From: Pace, FL
Nevermind. I took my old A/C belt, wrapped it around the head tight, tightened down my vice grips to hold the belt and then held it all against my workbench and broke it free with my wrench.
10-21-2013 | 06:56 AM
#636
 10-21-2013 | 09:11 PM
#640
Thread Starter
Super Hulk Smash
iTrader: (7)
Joined: Aug 2004
Posts: 11,255
Likes: 141
From: Pace, FL
I don't think they will. That's why I wanted to take off the damn stem, just so I could test fit. I think they would be very close to touching. And I think I'd want the other valve clear anyway, just because the amount of shavings it produces would be horrifying.
And thanks, Noah. I started the thread with the intent of buying the parts, why I bought them, how they all get installed, and at the end, the payoff. I hope to lay down a good time.
And thanks, Noah. I started the thread with the intent of buying the parts, why I bought them, how they all get installed, and at the end, the payoff. I hope to lay down a good time.