


How To: Lapping Your Valves At Home
Thread Starter
Joined: Aug 2007
Posts: 24,241
Likes: 89
From: Turnin' Wrenches Infractions: 005
For the most part LS heads are very good quality, you find that most (even higher mileage units) do not require a valve job. If you are swapping on a used set, and want to save some $$$ at the machine shop, here is an alternative for you. I hope this gives you an understanding of valve sealing, and saves you some money.
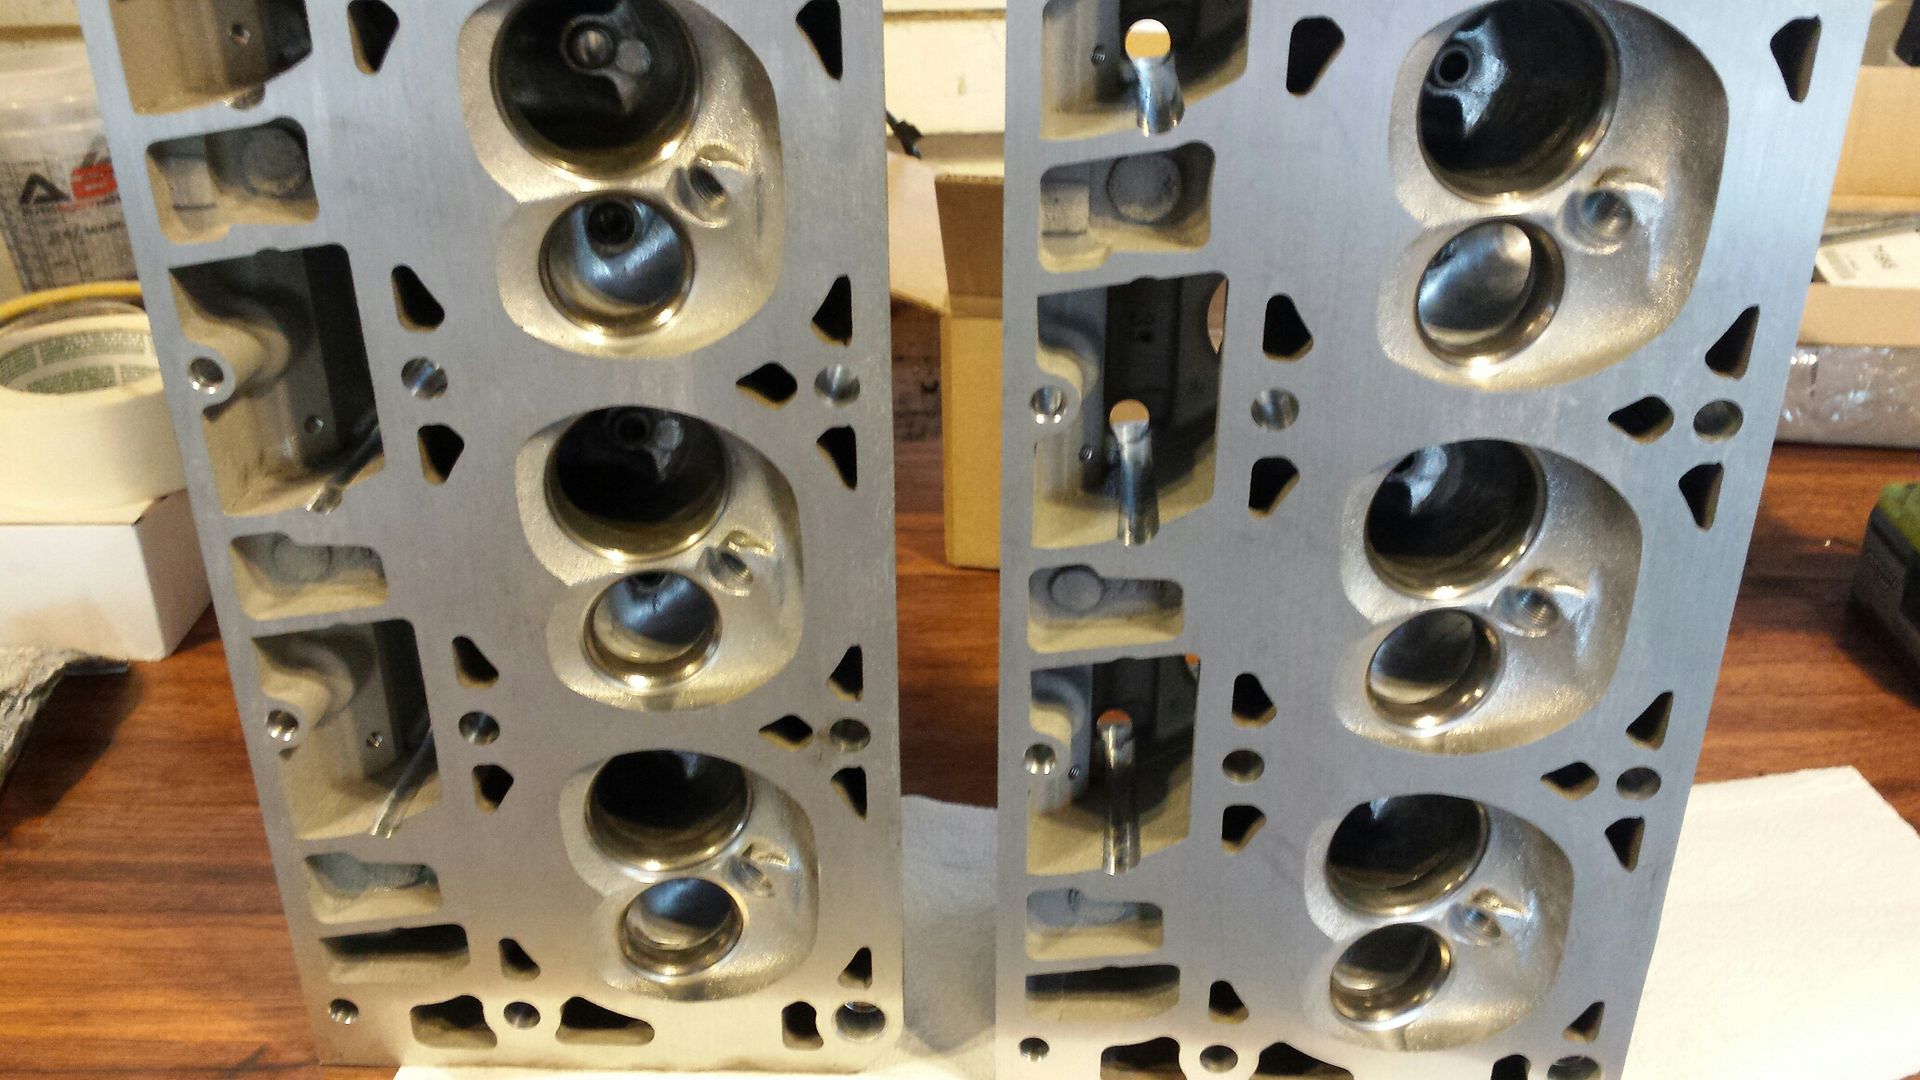
These heads were taken to a machine shop. They were cleaned and milled lightly but no other work was performed. The bill was around $80.
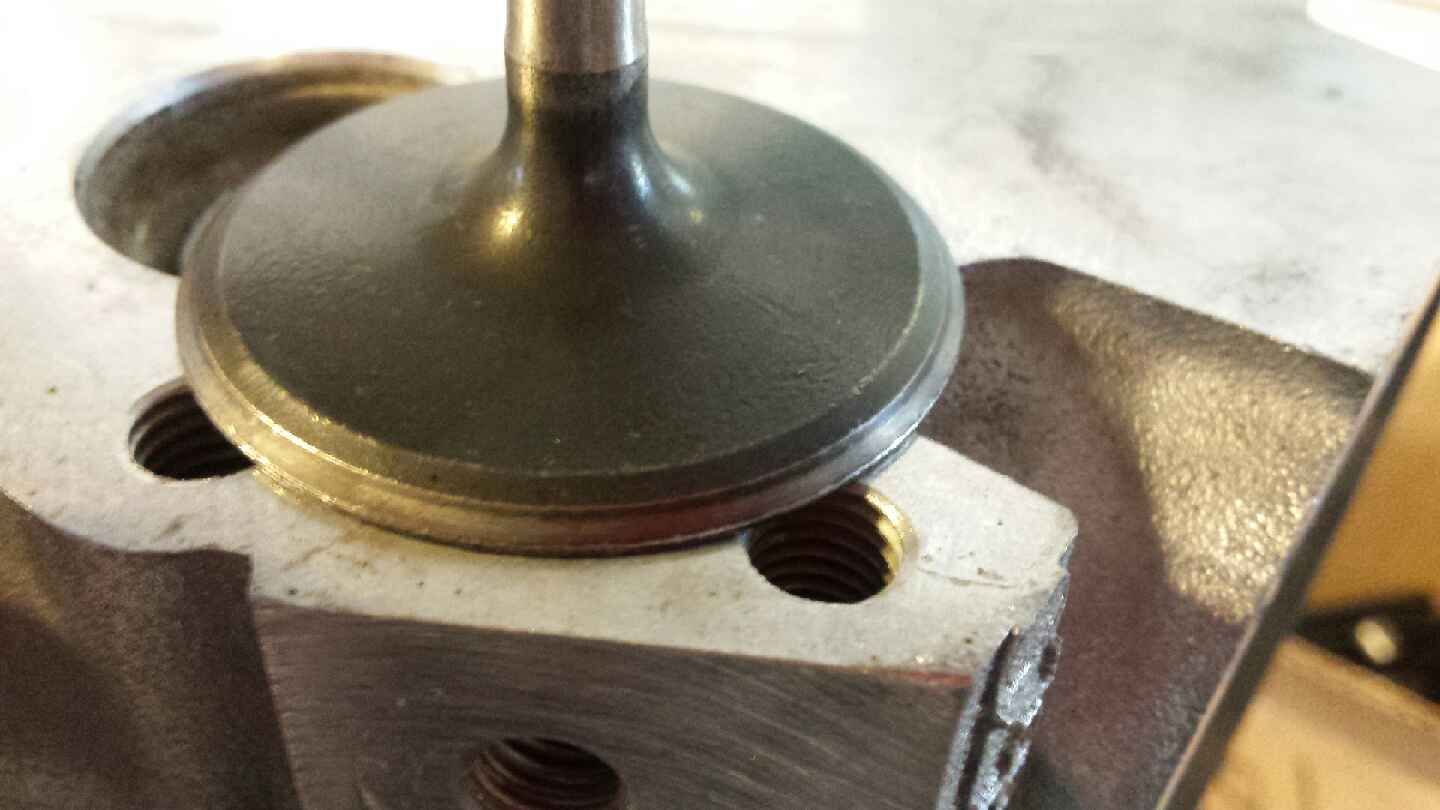
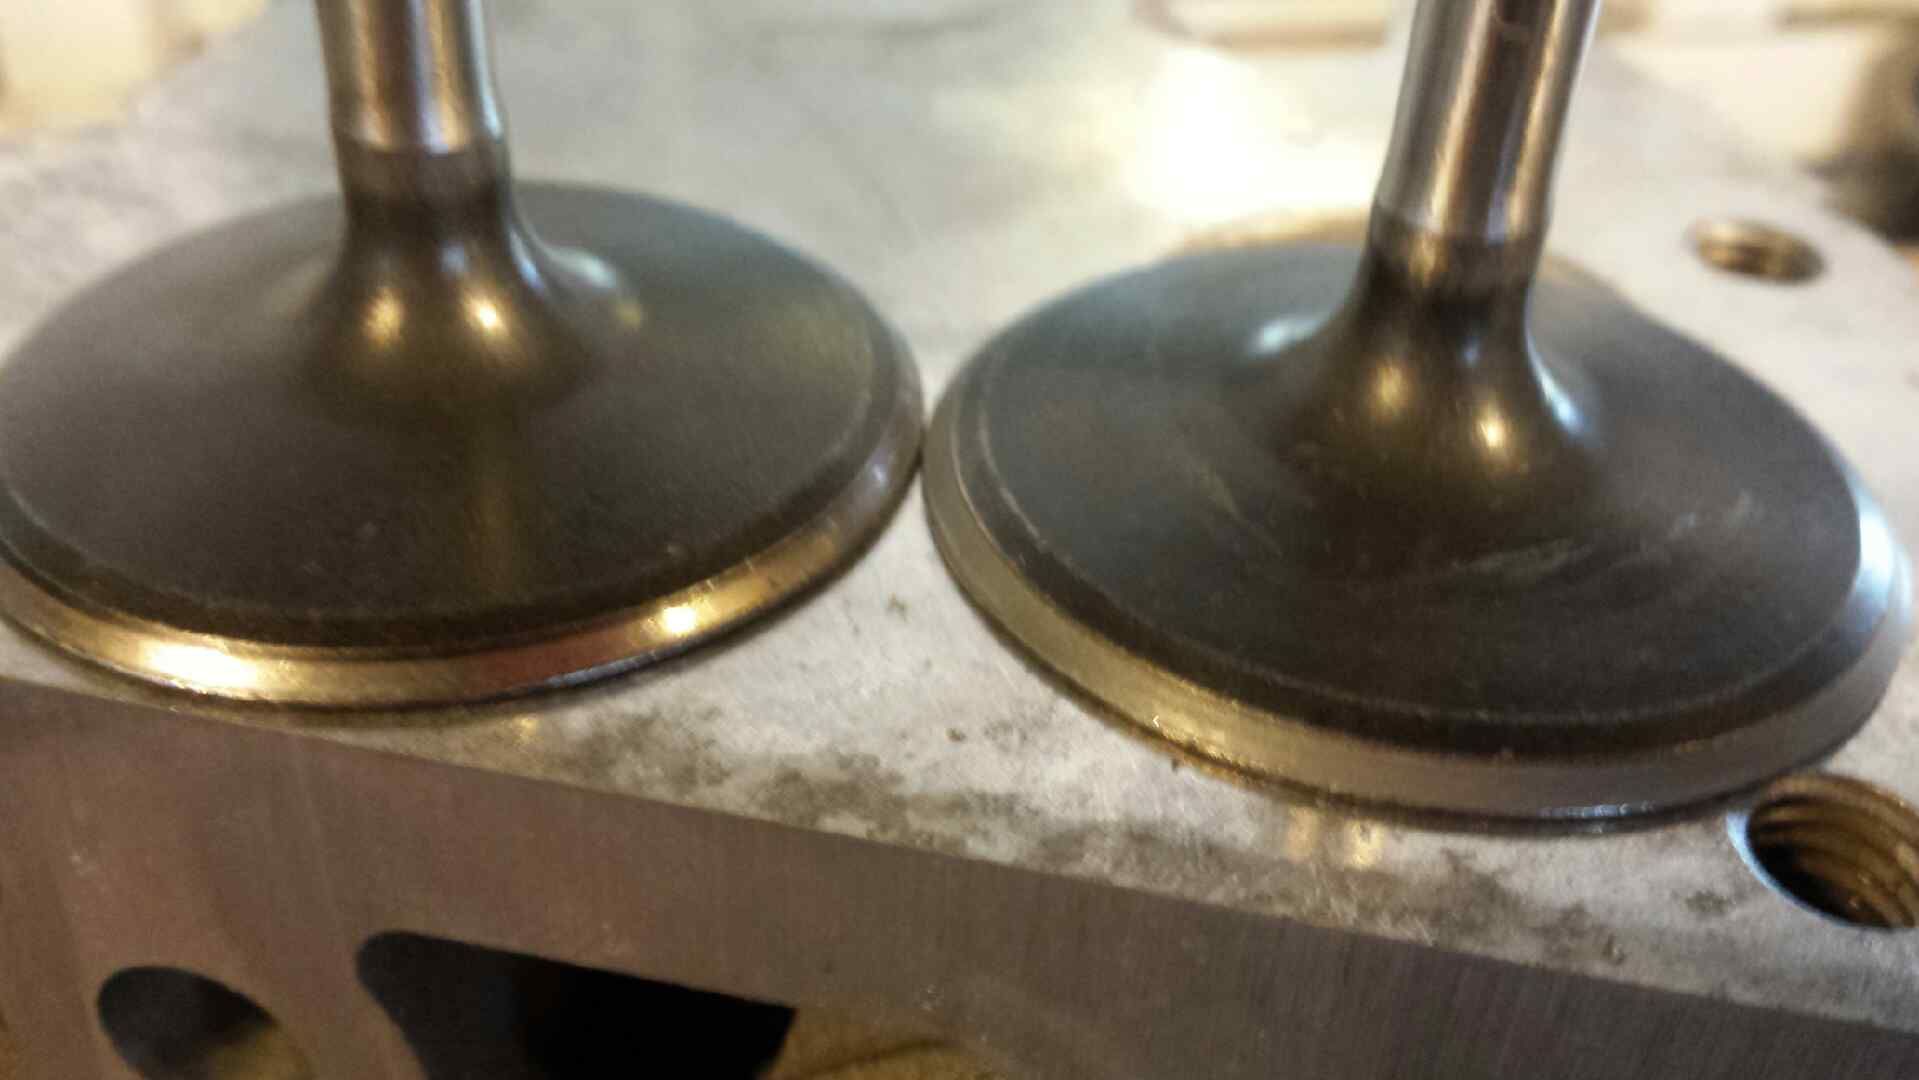
Here's an intake valve. Notice the silver streak around the lower edge. That's where it seals to the valve seat in the head. We are gonna freshen that surface and hopefully widen it some for a better seal.
Take your compound, and spread it like so. Doesn't have to be perfect.
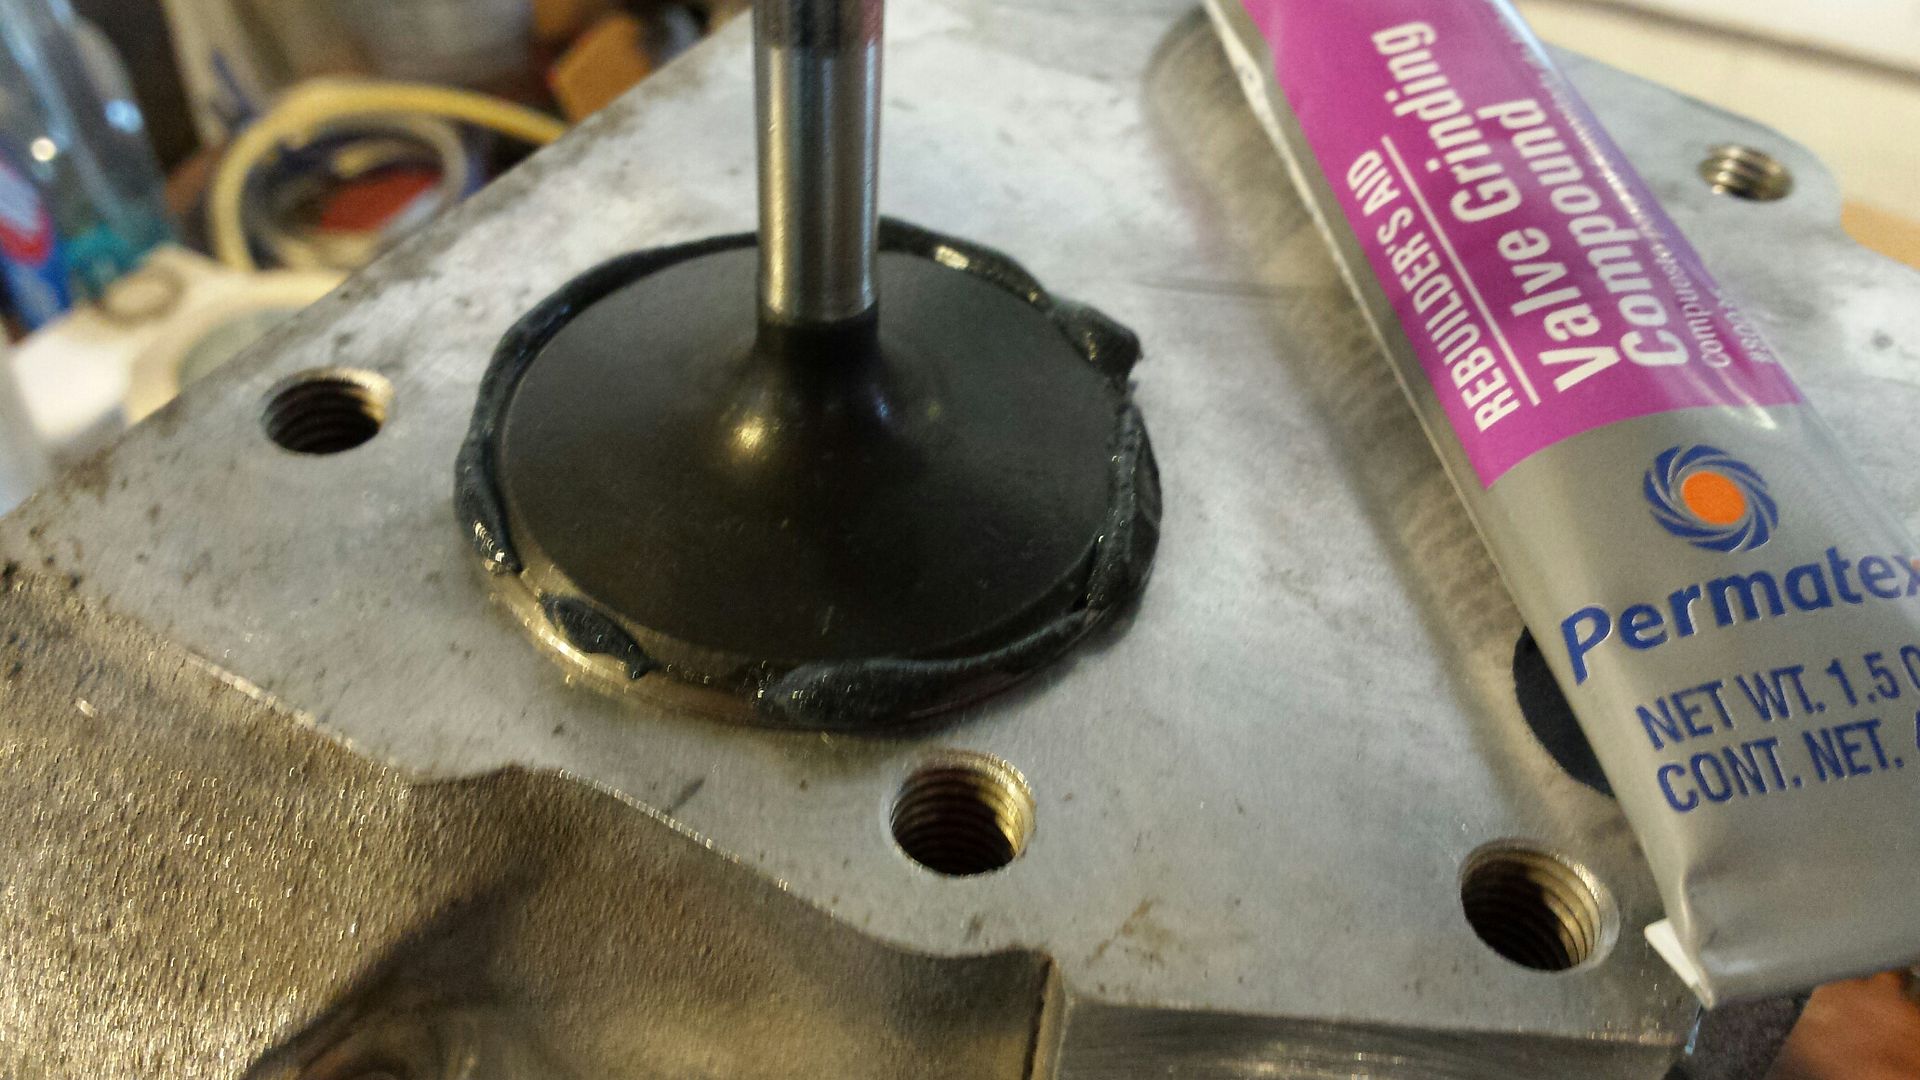
Stick it into its hole and clamp your drill onto the stem so you can use the drill to spin the valve in the head.

Use the slow speed setting on your drill, and move it in and out (on and off the seat). Wow what a difference 20 seconds makes.
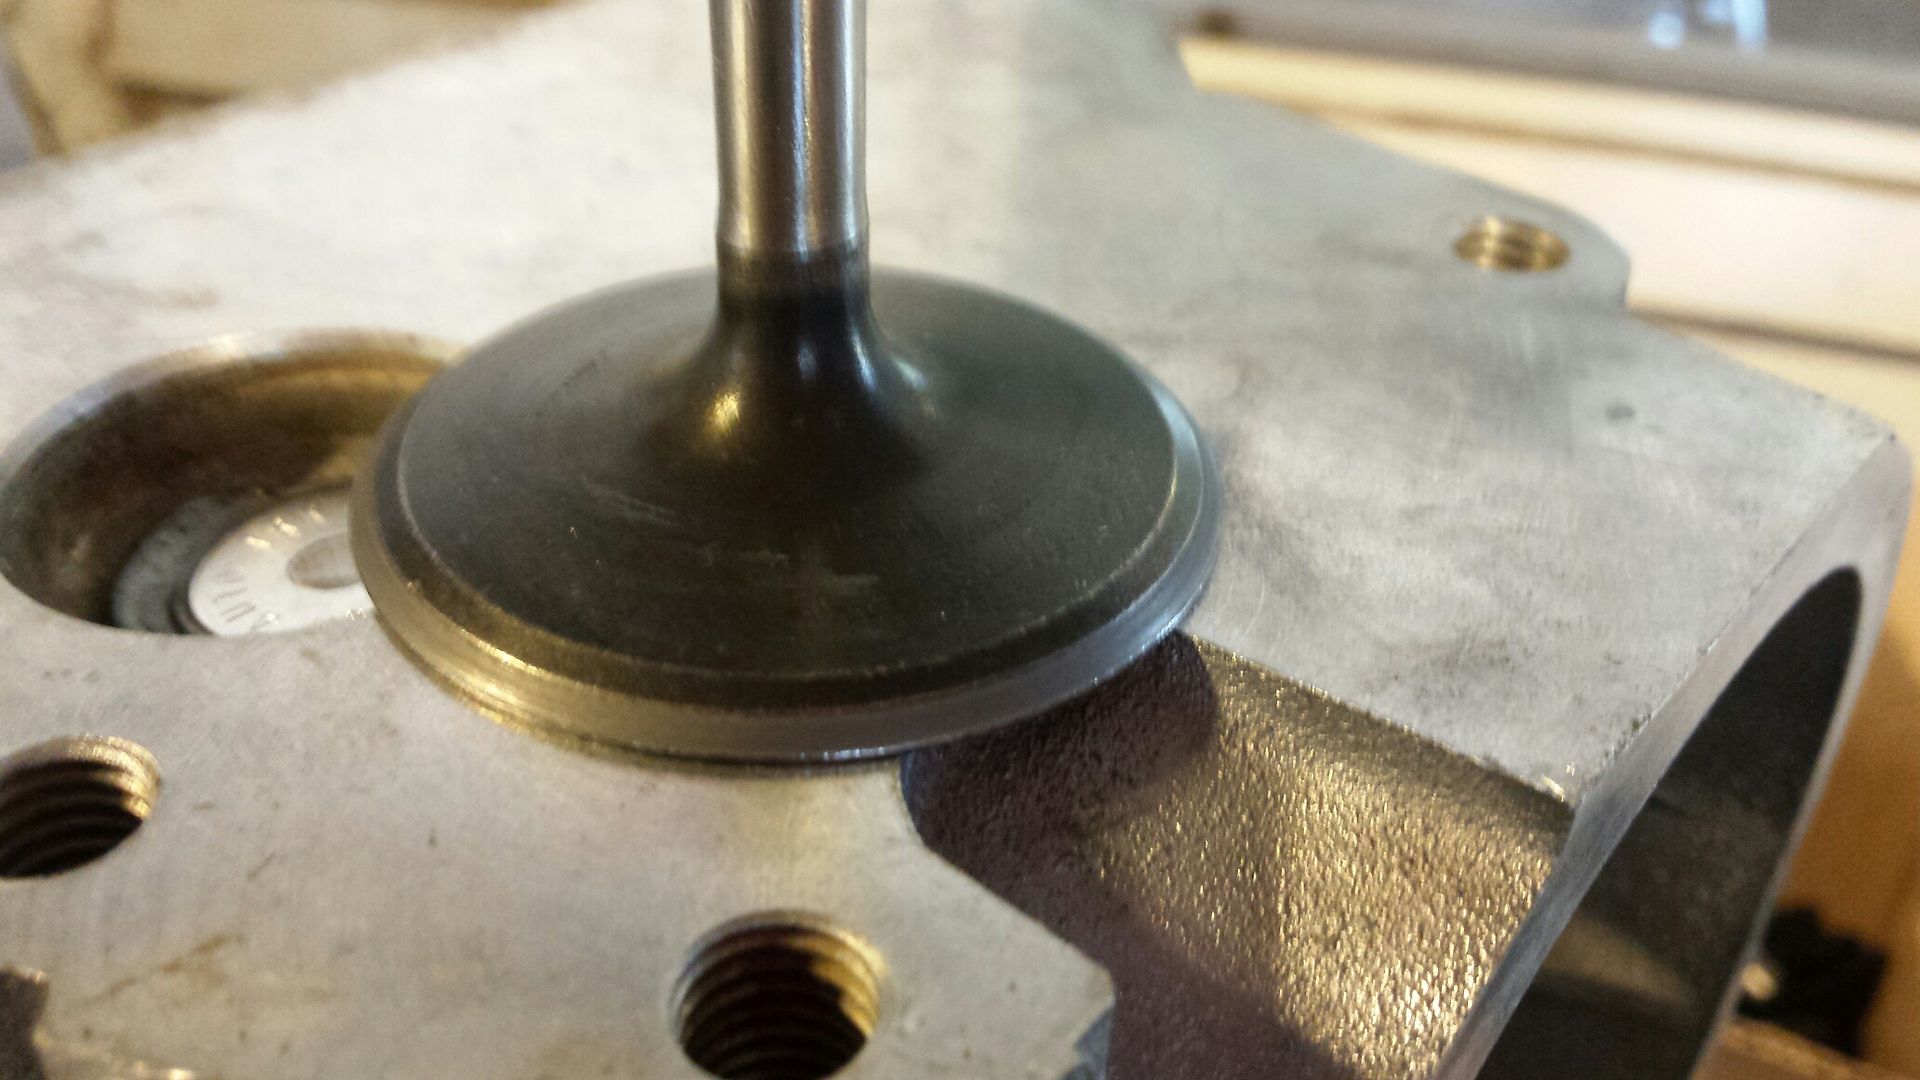
Comparison.
The sealing surface in the head.

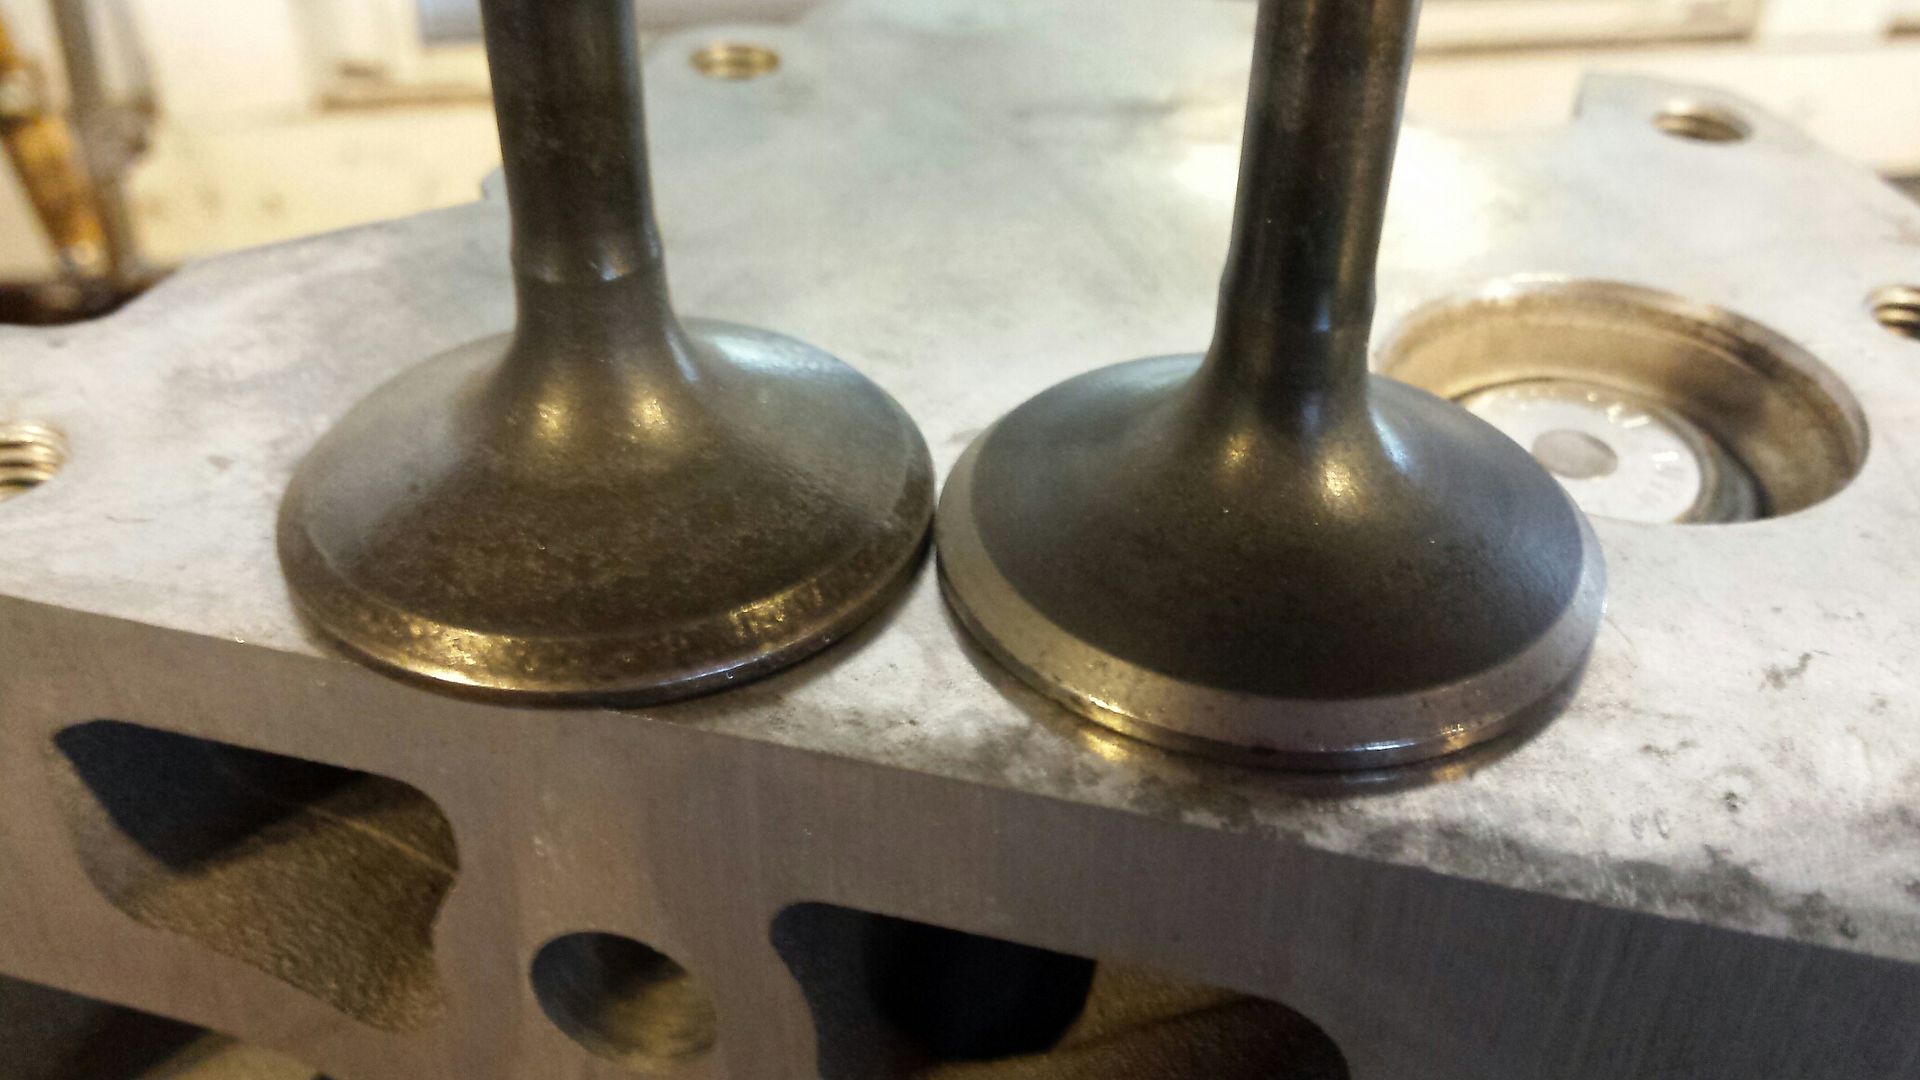
Exhaust valve comparison. A little pitting on them is normal and nothing to worry about. Once i mate a valve to a hole, it stays there. I dont move it around once its been ground in. Also make sure you wipe as much of the compound off the head and valve as you can when youre done and hit the valve stem with some wd40 to help it slide in the valve guide easier.
Thats it, repeat the procedure for all 16 valves, makes sure you have a nice even band around each valve and you're good. If one looks off or not even all the way around check the valve and see if its bent slightly. Any questions just ask.
These heads were taken to a machine shop. They were cleaned and milled lightly but no other work was performed. The bill was around $80.

Here's an intake valve. Notice the silver streak around the lower edge. That's where it seals to the valve seat in the head. We are gonna freshen that surface and hopefully widen it some for a better seal.

Take your compound, and spread it like so. Doesn't have to be perfect.

Stick it into its hole and clamp your drill onto the stem so you can use the drill to spin the valve in the head.

Use the slow speed setting on your drill, and move it in and out (on and off the seat). Wow what a difference 20 seconds makes.

Comparison.

The sealing surface in the head.

Exhaust valve comparison. A little pitting on them is normal and nothing to worry about. Once i mate a valve to a hole, it stays there. I dont move it around once its been ground in. Also make sure you wipe as much of the compound off the head and valve as you can when youre done and hit the valve stem with some wd40 to help it slide in the valve guide easier.

Thats it, repeat the procedure for all 16 valves, makes sure you have a nice even band around each valve and you're good. If one looks off or not even all the way around check the valve and see if its bent slightly. Any questions just ask.
Trending Topics
LS1 Tech Stories
The Best V8 Stories One Small Block at Time

6 Common C5 Corvette Failures and What's Involved In Repairing Them
Pouria Savadkouei
Retro Modern Bandit Pontiac Trans AM Comes With Burt Reynolds' Autograph
Verdad Gallardo
Top 10 Greatest Cadillac V Series Performance Models Ever, Ranked
Pouria Savadkouei
Top 10 Most Powerful Chevy Trucks Ever Made!

Hennessey's New Supercharged Silverado ZR2 Has 700 HP
Verdad Gallardo
Coachbuilt N2A Anteros Is an LS2-Powered C6 Corvette In Italian Clothes
Verdad Gallardo
Awesome K5 Blazer Restomod Comes With C7 Corvette Power
Verdad Gallardo
10 Camaros You Should Never Buy

10 LS Engine Myths That Refuse to Die
Verdad Gallardo


Done it on every set of heads I have apart (even new out of the box) but I do the old fashioned wooden stick with a rubber suction cup on the end.
Biggest snag for a first timer is to make sure you get all of the lapping compound off the head and the valve.
Biggest snag for a first timer is to make sure you get all of the lapping compound off the head and the valve.

Great info 01ssreda4
Last edited by A.R. Shale Targa; Nov 15, 2017 at 09:08 AM.
Thread Starter
Joined: Aug 2007
Posts: 24,241
Likes: 89
From: Turnin' Wrenches Infractions: 005


Thread Starter
Joined: Aug 2007
Posts: 24,241
Likes: 89
From: Turnin' Wrenches Infractions: 005
I started doing it that way, nothing wrong with it, it just takes forever. Quick blip with the drill and youre done. Thats why i do it that way.