
Harland Sharp LS trunion upgrade review & how to
 11-19-2012, 12:13 PM
#1

There are several threads and videos on installing the Competition Cams trunion upgrade, but not much info available here for the Harland Sharp trunion upgrade. I thought I'd post some info here along with a step-by-step on upgrading the factory rockers now that I've been through it.
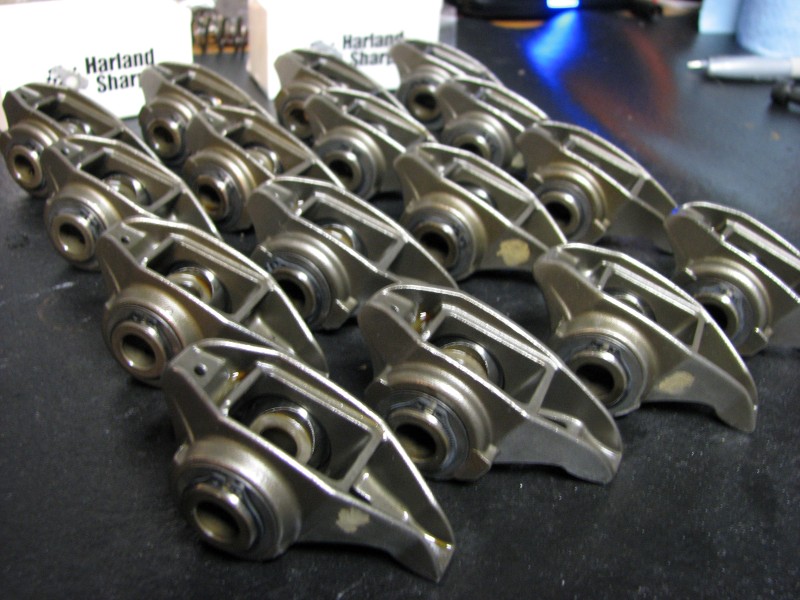
A few weeks ago I contacted Hardland Sharp to see what I could learn about their product. I spoke to Randy Jr, son of the owner (Randy Sr) at length about what they offer. Here is a photo:

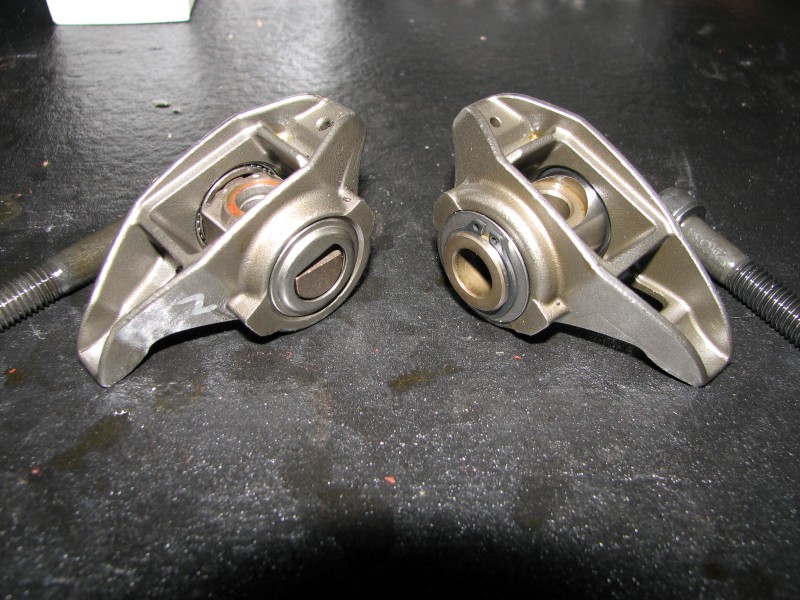
As an engineer, I was pleased to get real technical information and hear some of the differences between the HS kit and the Comp kit as well as understand the manufacturing processes and tolerances associated with the components. Design wise they are very similar, but HS does have two notable differences. First, HS cross drills their trunions to provide access for splash oil to get to the bearings. You can see this if you look at the ends of the trunion. Rather than being flat like the Comp Cams trunions, they have a hole drilled. Second, the HS trunions include hardened washers between the c-clips and the rocker. This image highlights those features:
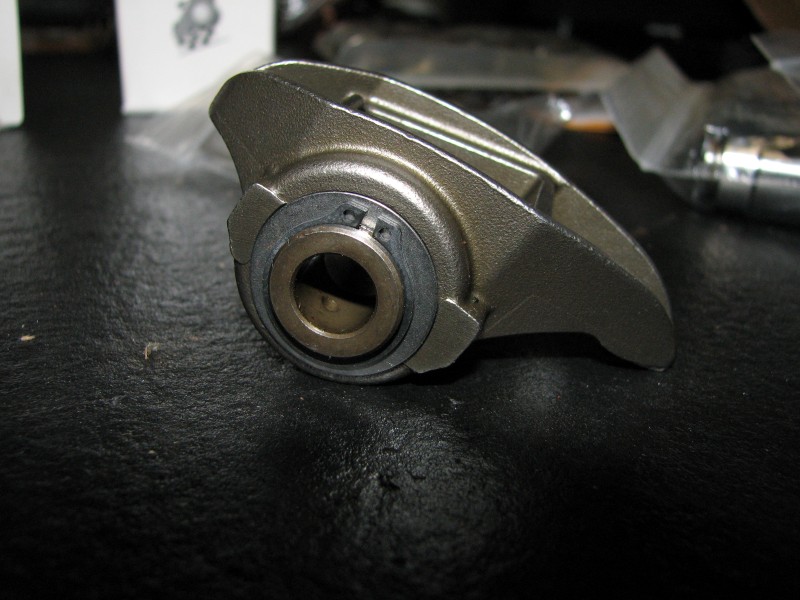
The HS parts are 100% US made; the cap screws, retaining clips, washers, and bearings are all US parts. The trunions are US material and centerless ground in house by HS in Strongsville, Ohio. The bearings themselves are the same part from the same US manufacturer as the Comp kit.
Beyond the technical details, I was impressed with Randy's open and friendly communication and have a huge amount of respect for a successful family-run business. While the HS kit costs more than the Comp kit, it isn't as big of a discrepancy as the website pricing would have you think. I decided to buy the HS kit and paid considerably less than their web advertised price. If you are considering a trunion upgrade, I would strongly consider calling them as well as the many great LS1tech.com vendors who sell either Comp Cams or Harland Sharp products. I don't think you can go wrong with either product when installed properly.
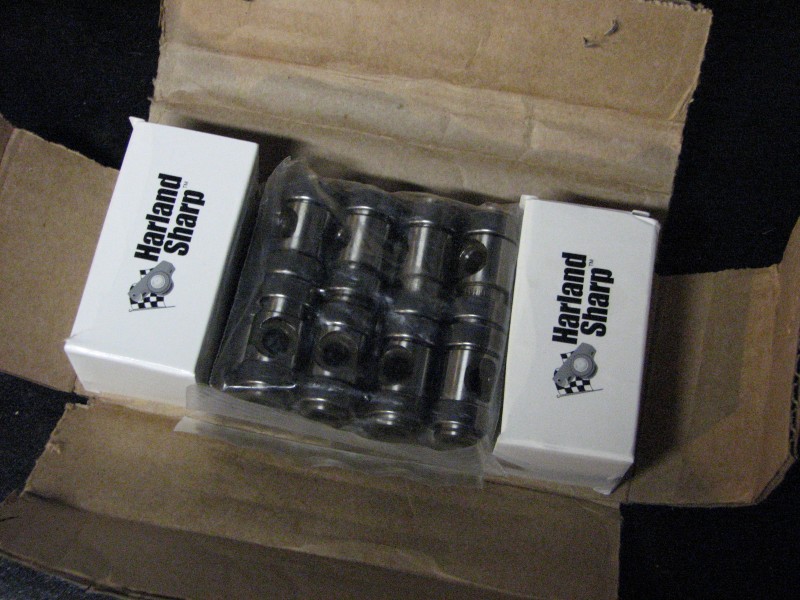
Here is the kit as I received it. It includes 16 trunions w/ bearings, 32 washers, 32 c-clips and 16 socket cap screws.
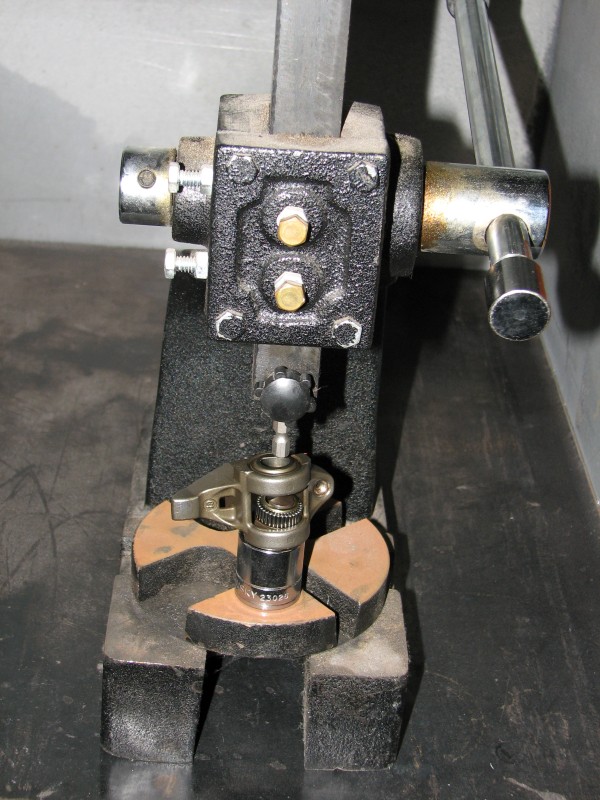
Now on to the install. First off, I am a big proponent of having tools. For this job a small arbor press is your friend. It gives you feedback so you can tell when you've hit bottom and if anything is going in crooked. I think the second best tool for this might be a drill press used as an arbor press. There are other ways of doing this depending on what tools you have, for example a bench vice or a hammer or some combination.
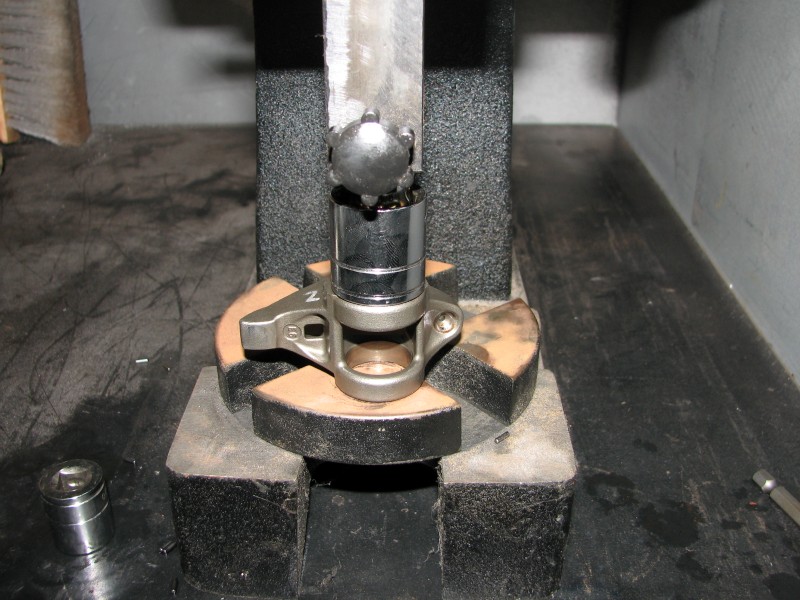
The first step is removing the old trunion. I did this with a socket under the rocker to support it, but you could also span the slot in the lower arbor plate. You can get creative with the end effector on the press. I kept some carefully selected sockets and bits nearby to switch out. For efficiency sake, I recommend removing all the trunions first then installing all the new trunions rather than completing one rocker at a time. I marked the rockers with a silver sharpie ahead of time so they would go back to their respective valves.
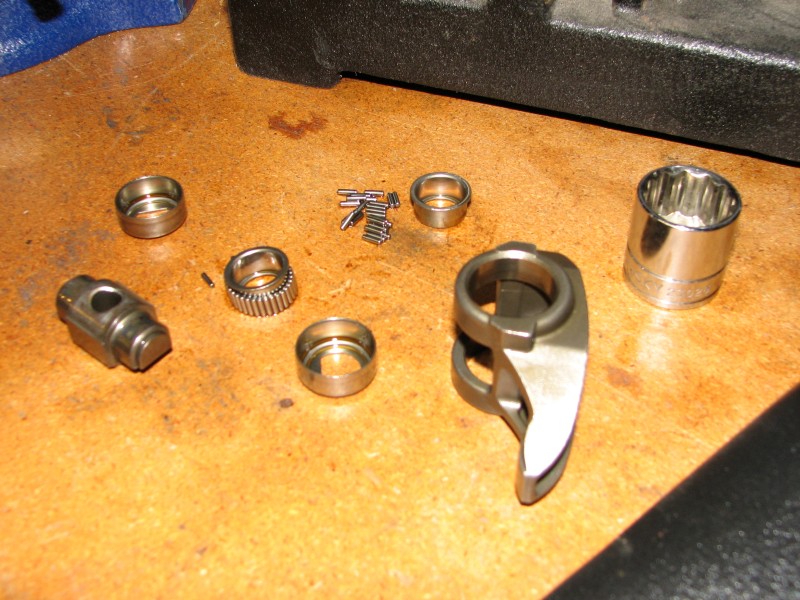
Here is the factory trunion blown apart. The main problems I saw with the factory trunions are loose clearances and no bearing retention beyond the press fit of the bearing shells. These have been known to come apart even on stock engines.
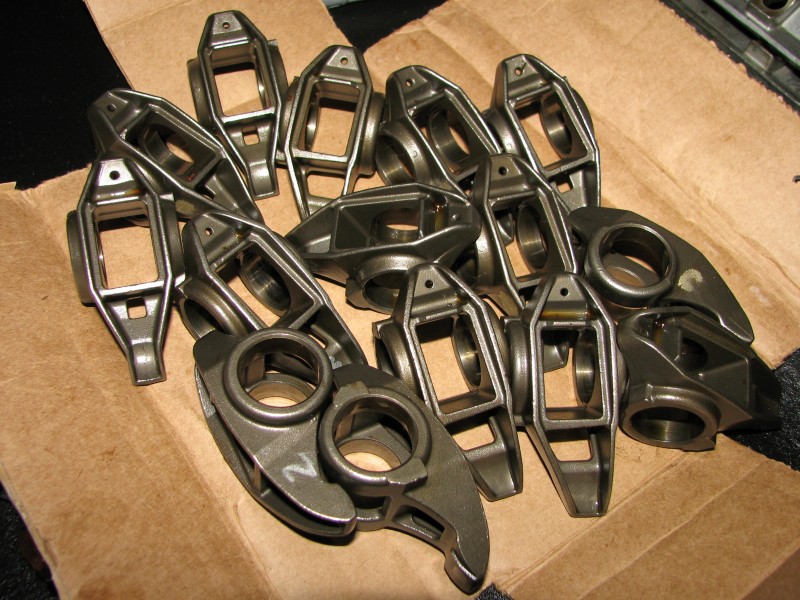
Do this 16 times and you'll have a pile like this:
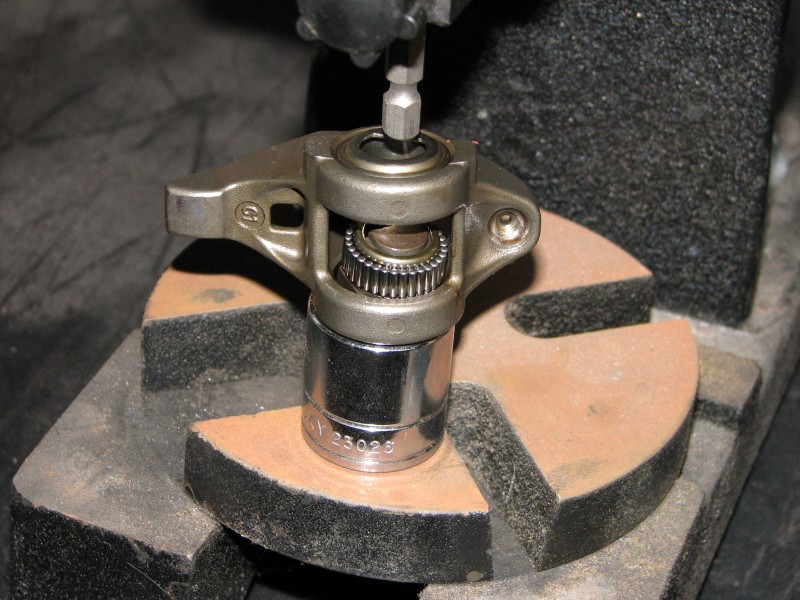
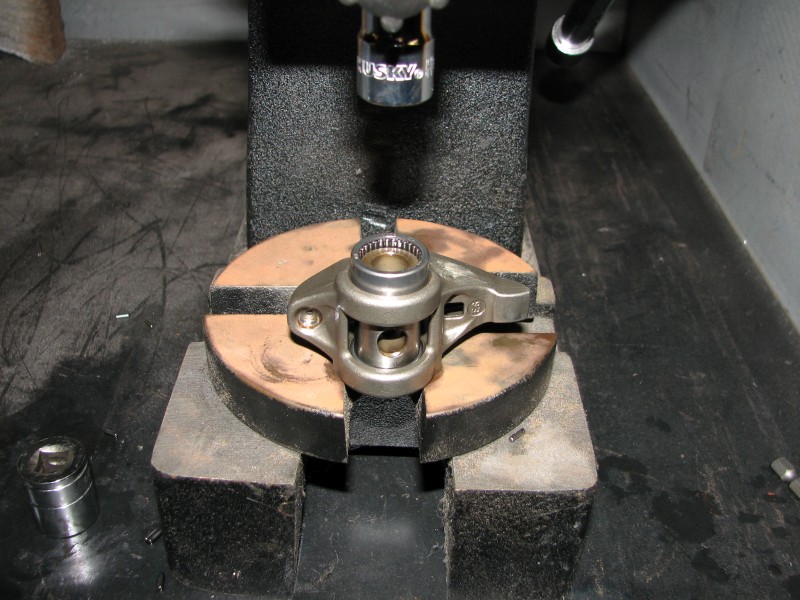
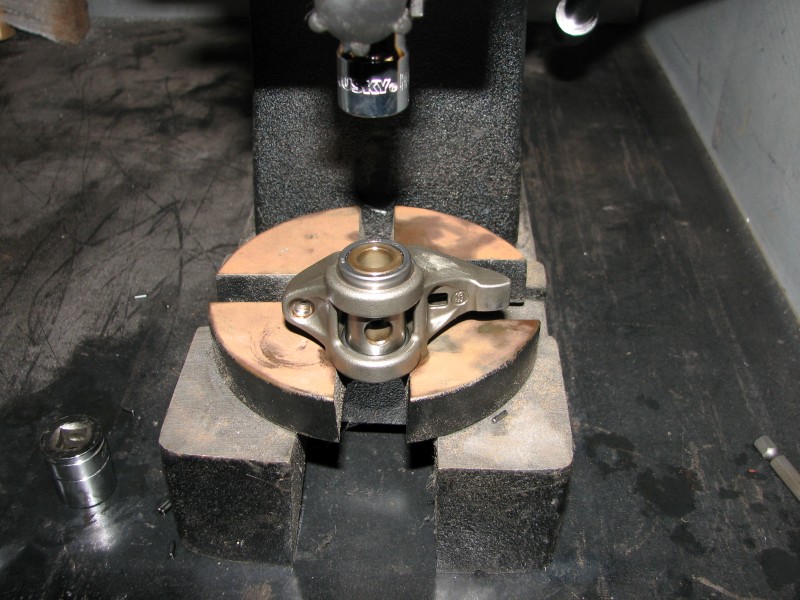
Now the fun part, putting in the new stuff. The rockers have flats machined on one side. Start with the flats up - I'll explain why shortly. Position one of the bearings, text up over the rocker bore.
Next place the flat side of a socket (or other suitable flat object) on top of the bearing, keeping the bearing straight before pressing. Then press the bearing in place until the top surface is flush with the top of the rocker. If you use an object slighly larger in diameter than the rocker bore it will stop the press in an appropriate position.
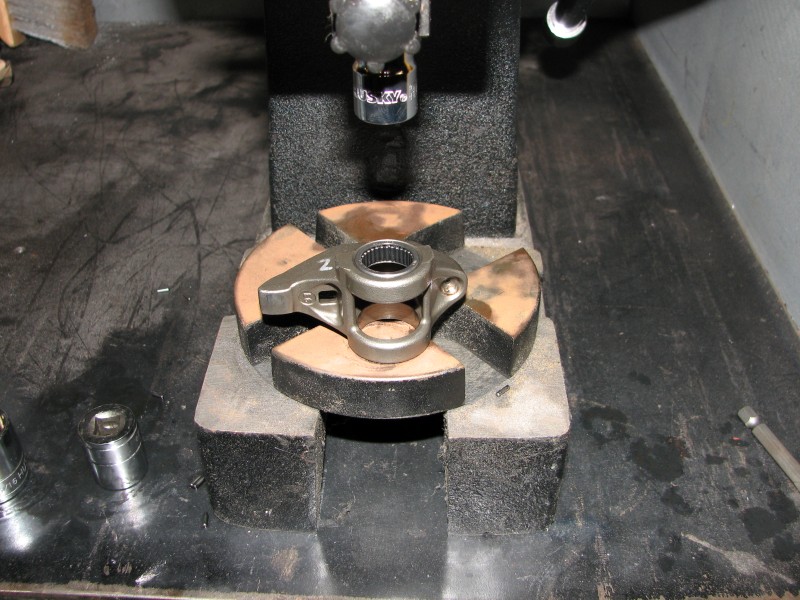
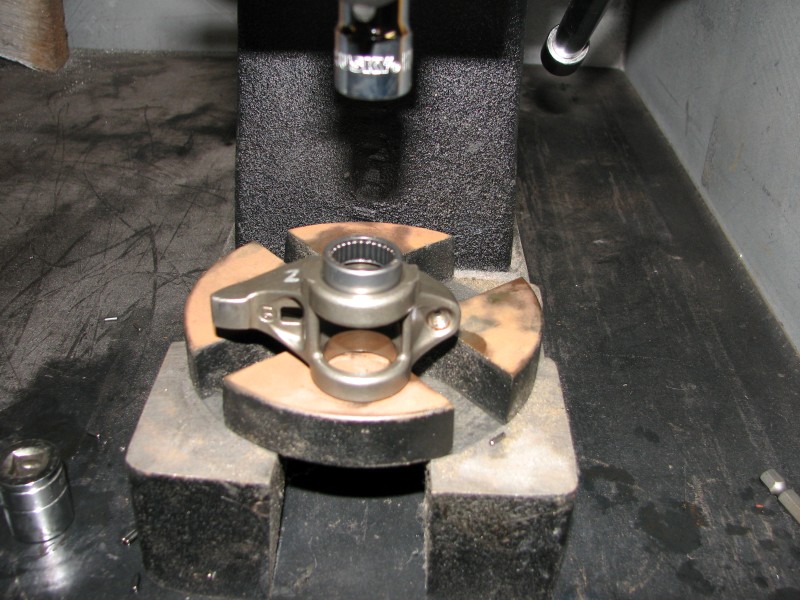
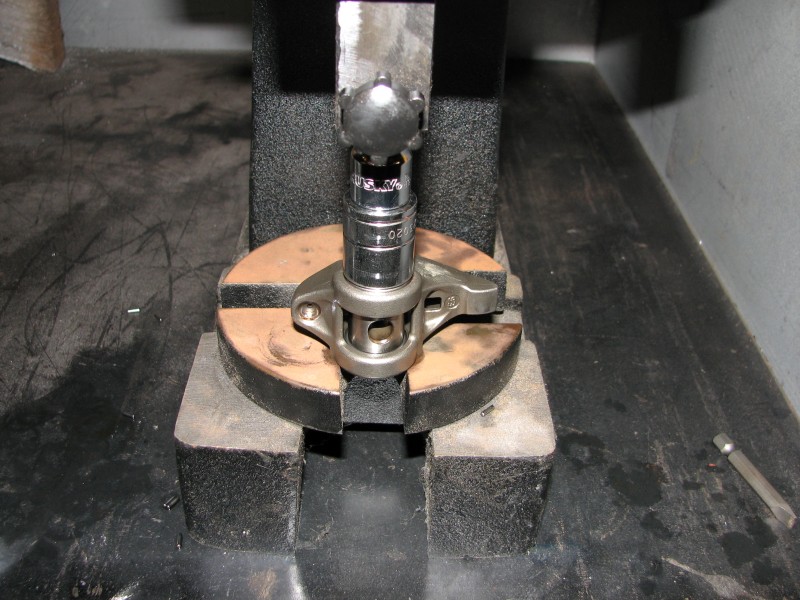
Now flip the rocker over and slide the trunion in. The bearing can go with it but will rest on the top of its bore. Now that the rocker is flipped over, the flats I talked about earlier can sit on either side of the lower arbor plate slot, providing a flat stable surface to press against and leaving room for the trunnion.
The next step is optional. I used the same socket used before to press the bearing until the top surface hit the trunion. This gets the bearing started.
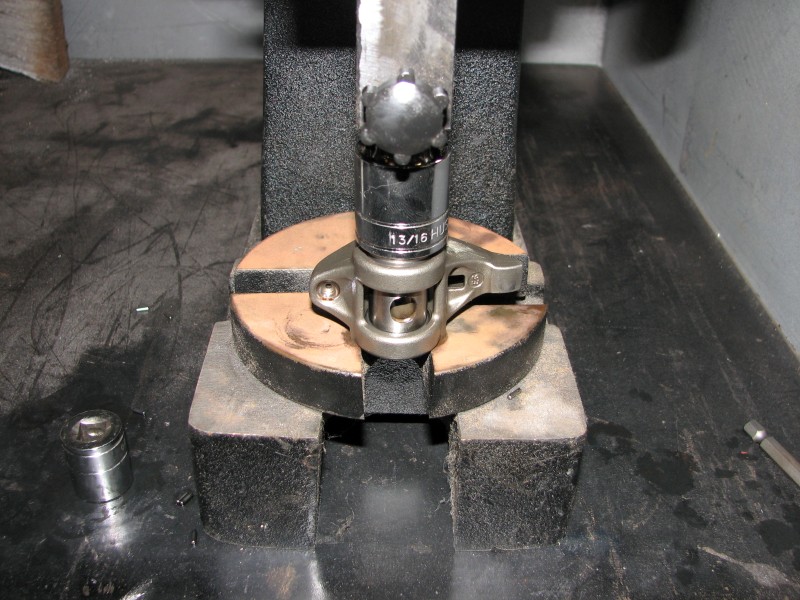
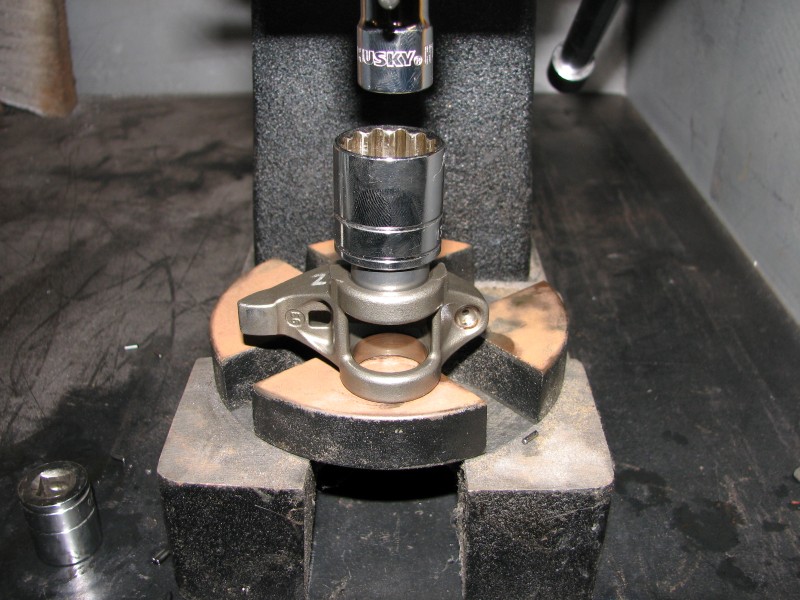
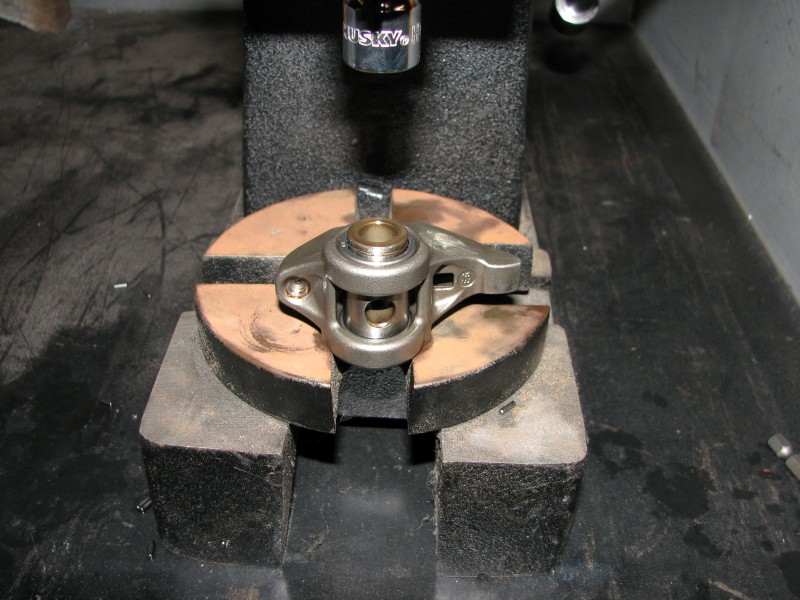
Now you can use the open end of an appropriately sized socket to press the bearing down. In this case you can press until the bearing stops against the trunion itself. Don't overdo it - you just need to feel it make contact, not clamp it down.
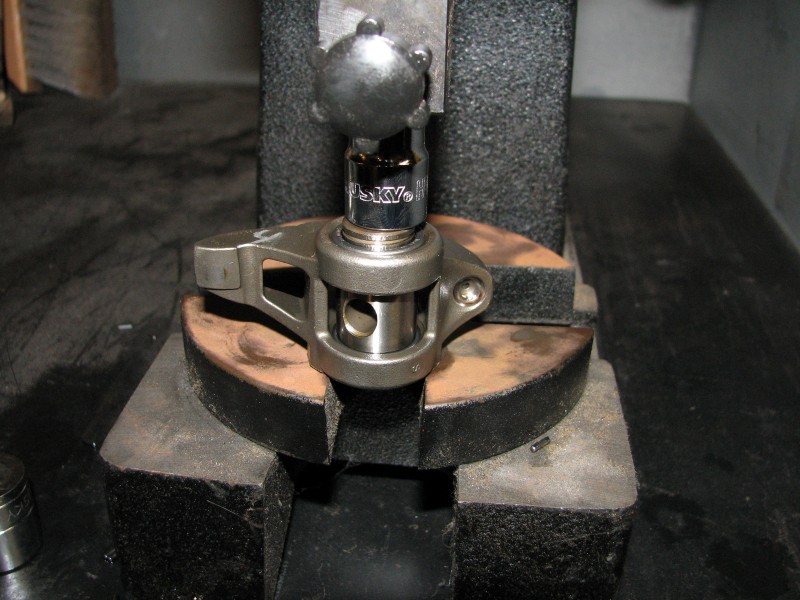
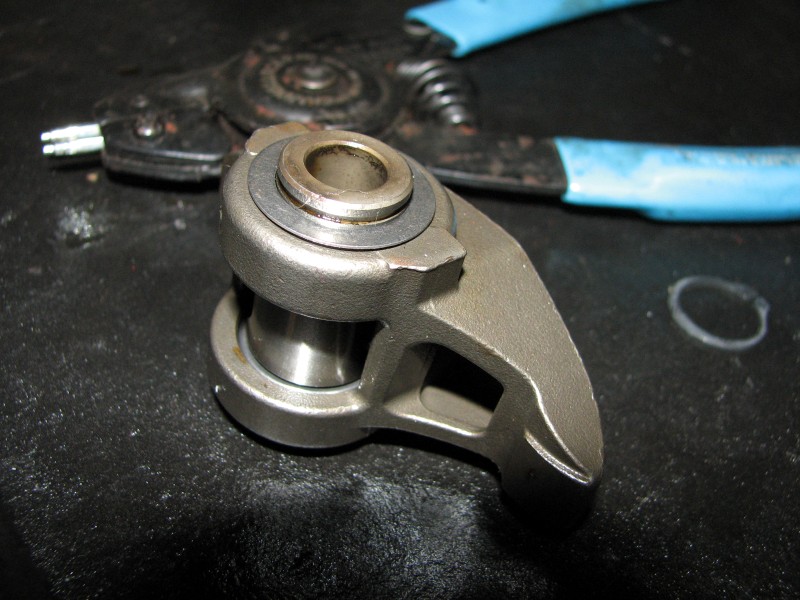
Now place the rocker in your hand and feel the side-to-side play of the trunion. It should have just a small amount of play, maybe a few thousandths, and you should be able to make it "click" back and forth. Also try rotating the trunion. It should move smoothly. If you can't rotate the rocker freely, chances are you pressed the bearings too hard. This causes them to clamp against the trunion and bind everything. When this happens, you can press against the trunion a small distance as shown below to move the bearings back apart. You may have to press them back in again depending on how skilled you are with the press. In the end you want to end up with the amount of play described above and a free rotating trunion.
Do that 16 times.
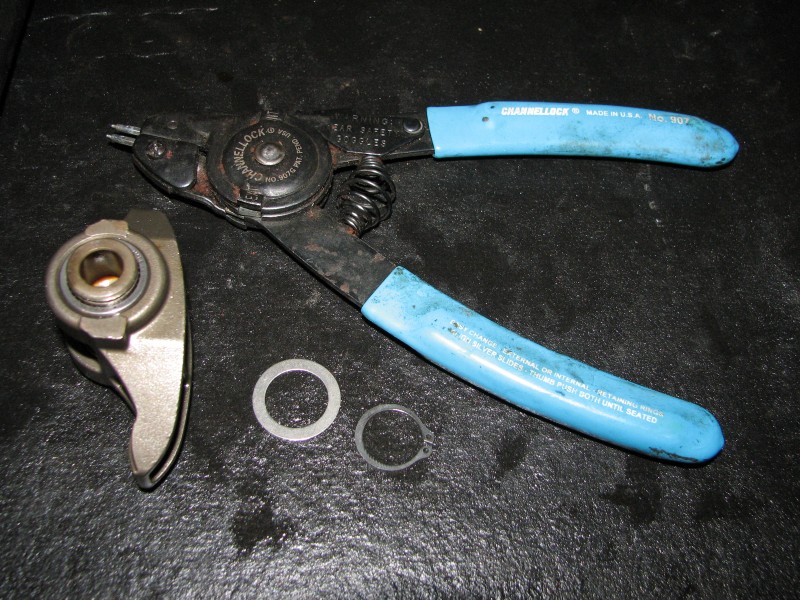
Now you're ready to install the washers and c-clips. You'll need snap ring pliers for this job - I wouldn't do it any other way.
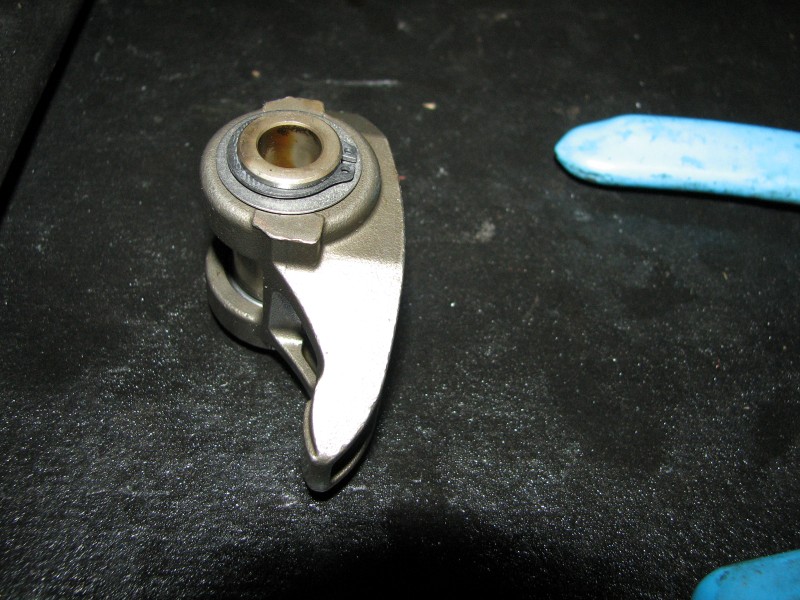
I recommend placing the rocker on its side to keep gravity on your side. Place a washer over the bearing as shown. Be sure it's fully seated.
Next install the c-clip. When doing this, you should hold the c-clip flatly against the end of the trunion before spreading it apart. Keep a finger on the side opposite the snap ring pliers to help press it into place. You should get a nice "snap" when it gets into place.
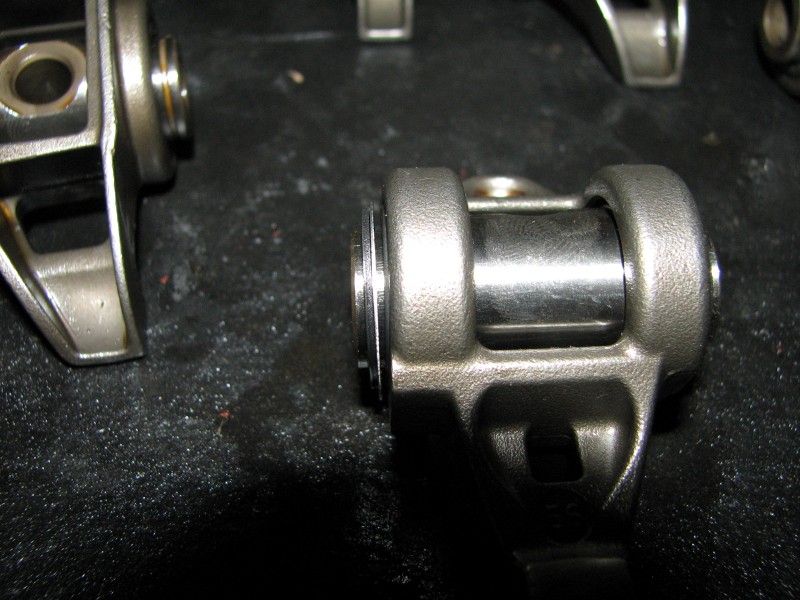
This may seem pretty straight forward, but there is one pitfall you need to be aware of. The washers are very thin and can easily get sandwiched in the c-clip slot. The image below shows what I'm talking about. Check each and every rocker you put together to make sure you leave none like this. If you do you could have the c-clip come off later - not good!
Here is the factory trunion (left) compared to the Hardland Sharp trunion (right). The bearings are much tighter than the factory set. Also notice the ends of the HS trunions are drilled to allow splash oil flow down into the bearings. The caged bearings and c-clips will prevent things from ever coming apart, unlike the lightly pressed factory bearings which have been known to come apart.
Do this 16 times and you will have a nice set of upgraded rockers! Be sure to use the provided socket cap screws to attach them and NOT the factory screws.
The total time for this was 1 hour 45 min (yes I timed it) to complete all 16 rockers. Of course this doesn't include removing and re-installing them on the engine.
A few weeks ago I contacted Hardland Sharp to see what I could learn about their product. I spoke to Randy Jr, son of the owner (Randy Sr) at length about what they offer. Here is a photo:
As an engineer, I was pleased to get real technical information and hear some of the differences between the HS kit and the Comp kit as well as understand the manufacturing processes and tolerances associated with the components. Design wise they are very similar, but HS does have two notable differences. First, HS cross drills their trunions to provide access for splash oil to get to the bearings. You can see this if you look at the ends of the trunion. Rather than being flat like the Comp Cams trunions, they have a hole drilled. Second, the HS trunions include hardened washers between the c-clips and the rocker. This image highlights those features:
The HS parts are 100% US made; the cap screws, retaining clips, washers, and bearings are all US parts. The trunions are US material and centerless ground in house by HS in Strongsville, Ohio. The bearings themselves are the same part from the same US manufacturer as the Comp kit.
Beyond the technical details, I was impressed with Randy's open and friendly communication and have a huge amount of respect for a successful family-run business. While the HS kit costs more than the Comp kit, it isn't as big of a discrepancy as the website pricing would have you think. I decided to buy the HS kit and paid considerably less than their web advertised price. If you are considering a trunion upgrade, I would strongly consider calling them as well as the many great LS1tech.com vendors who sell either Comp Cams or Harland Sharp products. I don't think you can go wrong with either product when installed properly.
Here is the kit as I received it. It includes 16 trunions w/ bearings, 32 washers, 32 c-clips and 16 socket cap screws.
Now on to the install. First off, I am a big proponent of having tools. For this job a small arbor press is your friend. It gives you feedback so you can tell when you've hit bottom and if anything is going in crooked. I think the second best tool for this might be a drill press used as an arbor press. There are other ways of doing this depending on what tools you have, for example a bench vice or a hammer or some combination.
The first step is removing the old trunion. I did this with a socket under the rocker to support it, but you could also span the slot in the lower arbor plate. You can get creative with the end effector on the press. I kept some carefully selected sockets and bits nearby to switch out. For efficiency sake, I recommend removing all the trunions first then installing all the new trunions rather than completing one rocker at a time. I marked the rockers with a silver sharpie ahead of time so they would go back to their respective valves.
Here is the factory trunion blown apart. The main problems I saw with the factory trunions are loose clearances and no bearing retention beyond the press fit of the bearing shells. These have been known to come apart even on stock engines.
Do this 16 times and you'll have a pile like this:
Now the fun part, putting in the new stuff. The rockers have flats machined on one side. Start with the flats up - I'll explain why shortly. Position one of the bearings, text up over the rocker bore.
Next place the flat side of a socket (or other suitable flat object) on top of the bearing, keeping the bearing straight before pressing. Then press the bearing in place until the top surface is flush with the top of the rocker. If you use an object slighly larger in diameter than the rocker bore it will stop the press in an appropriate position.
Now flip the rocker over and slide the trunion in. The bearing can go with it but will rest on the top of its bore. Now that the rocker is flipped over, the flats I talked about earlier can sit on either side of the lower arbor plate slot, providing a flat stable surface to press against and leaving room for the trunnion.
The next step is optional. I used the same socket used before to press the bearing until the top surface hit the trunion. This gets the bearing started.
Now you can use the open end of an appropriately sized socket to press the bearing down. In this case you can press until the bearing stops against the trunion itself. Don't overdo it - you just need to feel it make contact, not clamp it down.
Now place the rocker in your hand and feel the side-to-side play of the trunion. It should have just a small amount of play, maybe a few thousandths, and you should be able to make it "click" back and forth. Also try rotating the trunion. It should move smoothly. If you can't rotate the rocker freely, chances are you pressed the bearings too hard. This causes them to clamp against the trunion and bind everything. When this happens, you can press against the trunion a small distance as shown below to move the bearings back apart. You may have to press them back in again depending on how skilled you are with the press. In the end you want to end up with the amount of play described above and a free rotating trunion.
Do that 16 times.
Now you're ready to install the washers and c-clips. You'll need snap ring pliers for this job - I wouldn't do it any other way.
I recommend placing the rocker on its side to keep gravity on your side. Place a washer over the bearing as shown. Be sure it's fully seated.
Next install the c-clip. When doing this, you should hold the c-clip flatly against the end of the trunion before spreading it apart. Keep a finger on the side opposite the snap ring pliers to help press it into place. You should get a nice "snap" when it gets into place.
This may seem pretty straight forward, but there is one pitfall you need to be aware of. The washers are very thin and can easily get sandwiched in the c-clip slot. The image below shows what I'm talking about. Check each and every rocker you put together to make sure you leave none like this. If you do you could have the c-clip come off later - not good!
Here is the factory trunion (left) compared to the Hardland Sharp trunion (right). The bearings are much tighter than the factory set. Also notice the ends of the HS trunions are drilled to allow splash oil flow down into the bearings. The caged bearings and c-clips will prevent things from ever coming apart, unlike the lightly pressed factory bearings which have been known to come apart.
Do this 16 times and you will have a nice set of upgraded rockers! Be sure to use the provided socket cap screws to attach them and NOT the factory screws.
The total time for this was 1 hour 45 min (yes I timed it) to complete all 16 rockers. Of course this doesn't include removing and re-installing them on the engine.

 11-19-2012, 12:41 PM
#4
I bought the kit directly from Harland Sharp aka Custom Speed Parts Inc. I will ask if they are okay with me sharing what I paid. Their website is way off and I'm not sure what contracts they have with vendors, so I'd hate to throw a price up here and step on people's toes.

 08-18-2013, 07:14 PM
#10
I got the set, impressed with quality. I took it a step further and had parts treated for friction reduction. I'll install in my vise or with my small press. The kit is way nicer than the comp kit, this is the best way to go, other than using the expensive che set-up. At that point, might as well blueprint everything and go full roller.
 10-09-2018, 02:29 PM
#13
TECH Senior Member

But to answer your question, the way to go lately is a bronze bushing trunnion upgrade, as it was found that needle bearings would eat at the trunnion metal. Comp had the most trouble with this. The two most common kits for this are Straub and CHE. Both excellent quality. Check their websites for part #'s and prices
10-09-2018, 02:44 PM
#14
Registered User

Join Date: Oct 2018
Posts: 4
Likes: 0
Received 0 Likes
on
0 Posts
You are replying to a 5-year old thread.
But to answer your question, the way to go lately is a bronze bushing trunnion upgrade, as it was found that needle bearings would eat at the trunnion metal. Comp had the most trouble with this. The two most common kits for this are Straub and CHE. Both excellent quality. Check their websites for part #'s and prices
But to answer your question, the way to go lately is a bronze bushing trunnion upgrade, as it was found that needle bearings would eat at the trunnion metal. Comp had the most trouble with this. The two most common kits for this are Straub and CHE. Both excellent quality. Check their websites for part #'s and prices
Oh wow! I didn't even notice the 2013 date lol. Thanks for the info though .
10-09-2018, 02:48 PM
#15
TECH Senior Member
You are welcome! Either of these kits will do a good job on your rockers.