LT1-LT4 Modifications 1993-97 Gen II Small Block V8

AI 355 Build Thread and More

Thread Tools
 
Search this Thread
 
Old 09-19-2010, 04:05 PM
  #81  
11 Second Club
Thread Starter
iTrader: (5)
 
SpeedDensityZ's Avatar
 
Join Date: Nov 2006
Location: Macclenny FL
Posts: 852
Likes: 0
Received 0 Likes on 0 Posts

Default

Originally Posted by _twisted_
Thanks for sharing all this info, f- bodies are new to me - so all the pics and info of what worked and what didn't will make my project easier to tackle.

I have a 94 Formula, all stock w. slp cold air and a loudmouth, 110,000 on the clock, and at least 60k on the opti, if the original owner didnt replace it then it has 110
Good luck with your build. You'l hate to love it!
Old 09-19-2010, 08:41 PM
  #82  
11 Second Club
iTrader: (10)
 
grn95t/a's Avatar
 
Join Date: Nov 2006
Location: york county, va.
Posts: 802
Likes: 0
Received 0 Likes on 0 Posts
Default

damn, wish i could find a sweet deal on a rear like that! killer man!
Old 09-19-2010, 09:09 PM
  #83  
TECH Fanatic
iTrader: (26)
 
1961ba427's Avatar
 
Join Date: Mar 2010
Location: Milledgeville, GA
Posts: 1,909
Likes: 0
Received 0 Likes on 0 Posts
Default

Originally Posted by SpeedDensityZ
I just got back from Tampa with a Moser 12bolt. It has 33 spline axles, 3.73 gears, and an eaton posi. I plan on replacing the posi with a spool since the spider gears are pretty much trashed. The ring gear looks to be in excellent shape though, it only has a couple small chips in it and they are not located in the wear pattern. I got it for 900.00 which I think is a pretty good deal. I should have it done and finished for under 1150.00.
I was watching that since it popped up a couple days ago....was hoping it would end up in a silver lt1 camaro...just mine instead of yours. lol I had just spent my money on some other parts instead. Do you know if anyone sells a housing and axle package for the 12 bolt? I have asked in the gears section and all I get for replies are to use a 9"....9" costs about the same......blah blah blah.
I don't have anything against the Ford rear, but I prefer the 12 bolt....plus I already use 12 bolts in other stuff, and have a spare posi, spare spool, spare gears, etc.
I just need a torque arm compatible housing.
Old 09-19-2010, 09:53 PM
  #84  
11 Second Club
Thread Starter
iTrader: (5)
 
SpeedDensityZ's Avatar
 
Join Date: Nov 2006
Location: Macclenny FL
Posts: 852
Likes: 0
Received 0 Likes on 0 Posts

Default

Originally Posted by grn95t/a
damn, wish i could find a sweet deal on a rear like that! killer man!
Thanks, it seems I can never find one for sale period and when I do they want an arm and a leg. Me and my dad have set up a couple and they were fine, so were going to do this one too. I knew I was going to have to find a fixer upper.

Originally Posted by 1961ba427
I was watching that since it popped up a couple days ago....was hoping it would end up in a silver lt1 camaro...just mine instead of yours. lol I had just spent my money on some other parts instead. Do you know if anyone sells a housing and axle package for the 12 bolt? I have asked in the gears section and all I get for replies are to use a 9"....9" costs about the same......blah blah blah.
I don't have anything against the Ford rear, but I prefer the 12 bolt....plus I already use 12 bolts in other stuff, and have a spare posi, spare spool, spare gears, etc.
I just need a torque arm compatible housing.
I don't think anyone sells an axle/housing combo for the 12 bolt. I know the 9in. housing and axle combo usually runs around 1000.00 but, id doesn't come with a center section. That's the expensive part. You'll tie over 1200.00 up in it using mediocre parts. Yeah, I had been saving for one and when the ad popped up I called and got lucky.
Old 10-01-2010, 06:25 AM
  #85  
11 Second Club
Thread Starter
iTrader: (5)
 
SpeedDensityZ's Avatar
 
Join Date: Nov 2006
Location: Macclenny FL
Posts: 852
Likes: 0
Received 0 Likes on 0 Posts

Default

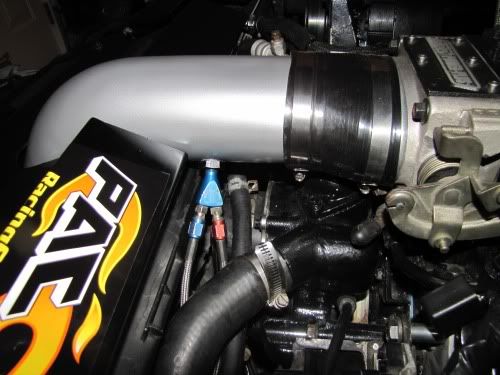
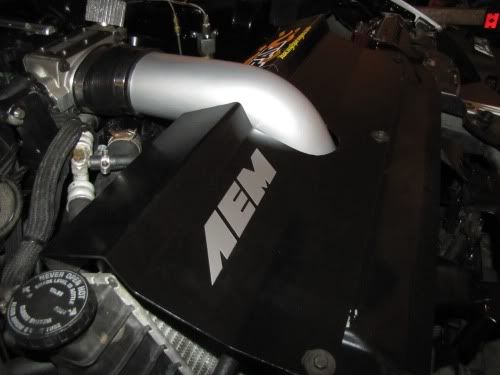
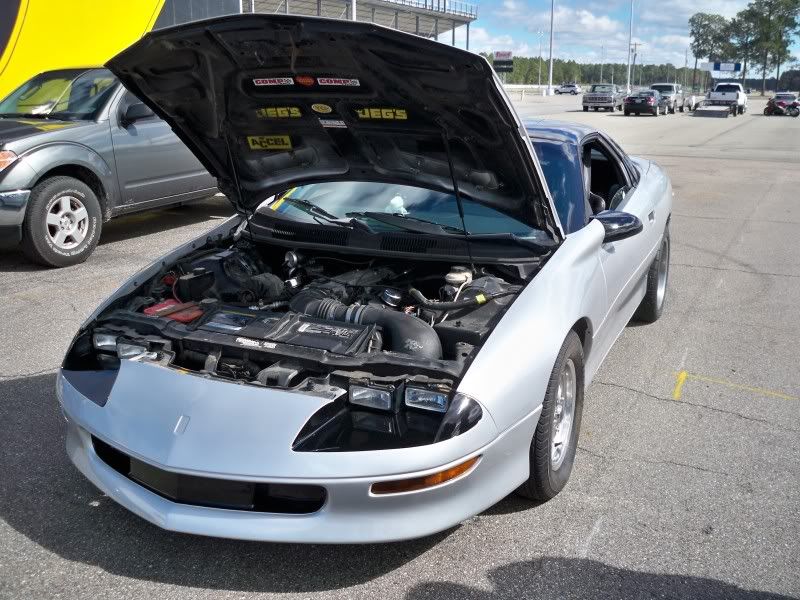
Well, since I'm low on cash at the moment I did some piddling around and finally painted the intake and radiator support. I also mounted the fogger nozzle in the intake tube. I am buying my spool next week and will have pics of the rearend done and installed. Here's some pics of the intake. It was painted the same color as the car.


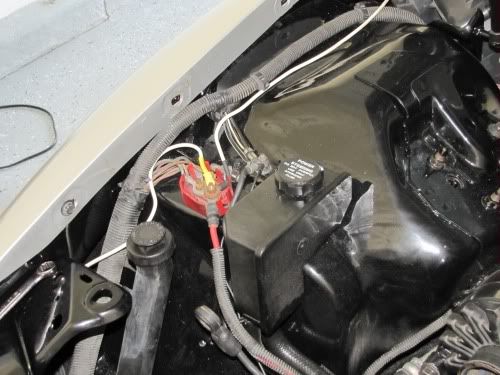
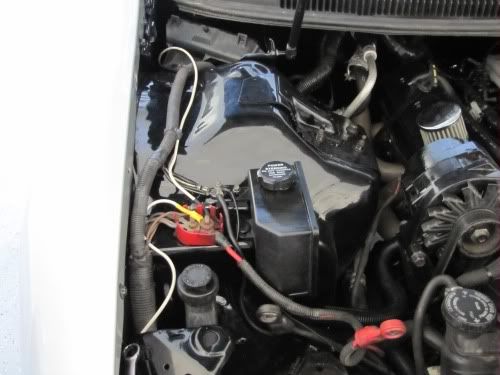
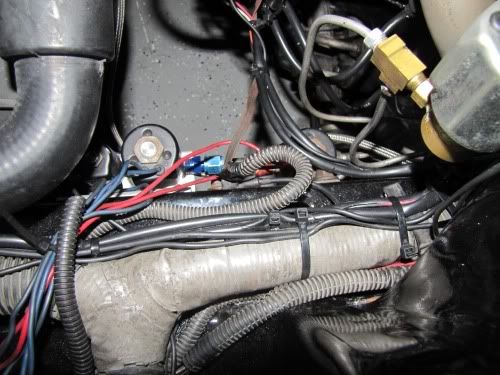
This is where I mounted the N20 solenoids on the frame rail where the ABS once was. I'm wiring it in today and doing a wire tuck on the passenger fender.

Old 10-01-2010, 08:25 AM
  #86  
registered user
iTrader: (3)
 
ScreaminRedZ's Avatar
 
Join Date: Oct 2005
Posts: 2,940
Received 0 Likes on 0 Posts

Default

Very nice job with the build. I can't wait to see how it dynoes and runs at the track. Good luck!
Old 10-01-2010, 07:43 PM
  #87  
11 Second Club
Thread Starter
iTrader: (5)
 
SpeedDensityZ's Avatar
 
Join Date: Nov 2006
Location: Macclenny FL
Posts: 852
Likes: 0
Received 0 Likes on 0 Posts

Default

Originally Posted by ScreaminRedZ
Very nice job with the build. I can't wait to see how it dynoes and runs at the track. Good luck!
Thanks, shouldn't bee too much longer and I'll have it at the track. I'm using track money for mod money at the moment. Anyway, I finally did the wire tuck today and it turned out really good. I just need to clean the engine bay up and get ready for a car show next weekend. The next thing I plan on doing is an alternator relocate. I'm going to modify the stock bracket so we'll see how it turns out. I just drilled a hole on the back of the shock tower near the CPU and run the wires underneath the inner fender well and hooked to ground up in the same location. Took about an hour, could have took less time if I had all the right tools. Here are some pics of the wire relocate.

Before:


After:


Old 10-01-2010, 08:46 PM
  #88  
TECH Addict
iTrader: (15)
 
flyinZ's Avatar
 
Join Date: Jun 2002
Location: IL
Posts: 2,642
Likes: 0
Received 0 Likes on 0 Posts

Default

Damn, I've got to do that wire mod, lol. Looks good man!
Old 10-01-2010, 11:23 PM
  #89  
11 Second Club
Thread Starter
iTrader: (5)
 
SpeedDensityZ's Avatar
 
Join Date: Nov 2006
Location: Macclenny FL
Posts: 852
Likes: 0
Received 0 Likes on 0 Posts

Default

Originally Posted by flyinZ
Damn, I've got to do that wire mod, lol. Looks good man!
Thanks, it really cleaned it up. I did the fuel lines and was so happy with it I did the passenger side too.
Old 10-02-2010, 12:04 AM
  #90  
Teching In
 
ThorsLT1's Avatar
 
Join Date: May 2010
Location: Washington
Posts: 49
Likes: 0
Received 0 Likes on 0 Posts
Default

where did you reroute them? in the fender? is there a write up?
Old 10-02-2010, 06:30 AM
  #91  
9 Second Club
iTrader: (35)
 
MattSapp95_T/A's Avatar
 
Join Date: Feb 2009
Location: Macclenny Florida
Posts: 1,542
Likes: 0
Received 2 Likes on 2 Posts
Default

Originally Posted by ThorsLT1
where did you reroute them? in the fender? is there a write up?
Yea through the fender... Drill a hole right above the PCM and run the wires through it... Really easy... There are some write ups if your search for "wire mod"

Matt
Old 10-02-2010, 06:42 AM
  #92  
11 Second Club
Thread Starter
iTrader: (5)
 
SpeedDensityZ's Avatar
 
Join Date: Nov 2006
Location: Macclenny FL
Posts: 852
Likes: 0
Received 0 Likes on 0 Posts

Default

Originally Posted by ThorsLT1
where did you reroute them? in the fender? is there a write up?
Here ya go, it is for an LS1 car but, you get the idea.

https://ls1tech.com/forums/appearanc...al-inside.html
Old 10-02-2010, 08:56 AM
  #93  
registered user
iTrader: (3)
 
ScreaminRedZ's Avatar
 
Join Date: Oct 2005
Posts: 2,940
Received 0 Likes on 0 Posts

Default

Nice job with the wires. I'm interested to see how the alternator relocation goes, there are definitely some cool home-built setups out there.
Old 10-02-2010, 09:43 AM
  #94  
9 Second Club
iTrader: (35)
 
MattSapp95_T/A's Avatar
 
Join Date: Feb 2009
Location: Macclenny Florida
Posts: 1,542
Likes: 0
Received 2 Likes on 2 Posts
Default

Originally Posted by ScreaminRedZ
Nice job with the wires. I'm interested to see how the alternator relocation goes, there are definitely some cool home-built setups out there.
It will turn out great we are going to do it just like i did mine pictured on page 3....

Yea I like DIY stuff gives you more of a since of pride
Old 10-02-2010, 02:22 PM
  #95  
11 Second Club
Thread Starter
iTrader: (5)
 
SpeedDensityZ's Avatar
 
Join Date: Nov 2006
Location: Macclenny FL
Posts: 852
Likes: 0
Received 0 Likes on 0 Posts

Default

Well, I finished wiring in the nitrous today. It went nice and smooth without any hiccups. I decided to crank the car up and wouldn't you know it the FN ignition switch quit working. It has on but it doesn't have run and start. I knew it was coming, it had been giving me some problems. I suppose the contacts are wore out. So, now I have to drop the steering column and replace it, has anyone ever done this and give me some tips on how to make it easier?
Old 10-02-2010, 03:46 PM
  #96  
9 Second Club
iTrader: (35)
 
MattSapp95_T/A's Avatar
 
Join Date: Feb 2009
Location: Macclenny Florida
Posts: 1,542
Likes: 0
Received 2 Likes on 2 Posts
Default

Originally Posted by SpeedDensityZ
Well, I finished wiring in the nitrous today. It went nice and smooth without any hiccups. I decided to crank the car up and wouldn't you know it the FN ignition switch quit working. It has on but it doesn't have run and start. I knew it was coming, it had been giving me some problems. I suppose the contacts are wore out. So, now I have to drop the steering column and replace it, has anyone ever done this and give me some tips on how to make it easier?
Yea sale that turd and buy a honda!
Old 10-03-2010, 01:13 AM
  #97  
On The Tree
 
96ssindeed's Avatar
 
Join Date: Apr 2009
Location: Livingston, LA
Posts: 123
Likes: 0
Received 0 Likes on 0 Posts
Default

Originally Posted by MattSapp95_T/A
Yea sale that turd and buy a honda!
Lol. This would be funny if i hadn't just sold mine to start driving my old civic again.
Old 10-03-2010, 02:41 AM
  #98  
TECH Fanatic
iTrader: (1)
 
Rob94hawk's Avatar
 
Join Date: Aug 2010
Posts: 1,662
Received 25 Likes on 13 Posts

Default

Originally Posted by SpeedDensityZ
After:

Nice! How big was the hole you drilled and did you use a grommet. I'm gonna do this on monday.
Old 10-03-2010, 09:34 AM
  #99  
11 Second Club
Thread Starter
iTrader: (5)
 
SpeedDensityZ's Avatar
 
Join Date: Nov 2006
Location: Macclenny FL
Posts: 852
Likes: 0
Received 0 Likes on 0 Posts

Default

All I had was a 1 inch drill bit. I drilled two holes and ground the center out. So it was actually an oval hole. Just the right size for the conncector. I didn't have a grommet that big so I used a piece of hose cut down the center.
Old 10-08-2010, 12:02 PM
  #100  
11 Second Club
Thread Starter
iTrader: (5)
 
SpeedDensityZ's Avatar
 
Join Date: Nov 2006
Location: Macclenny FL
Posts: 852
Likes: 0
Received 0 Likes on 0 Posts

Default

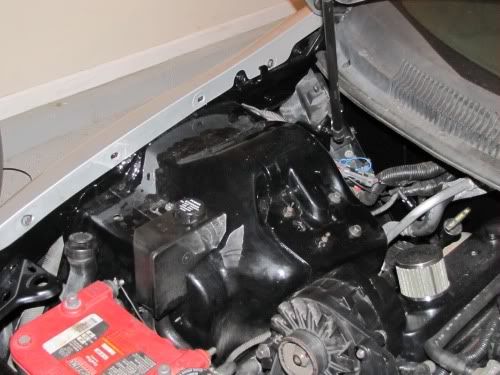
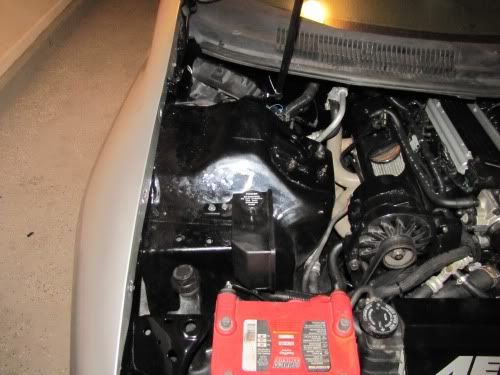
I cleaned the engine bay up yesterday and I just couldn't believe how far it has come in just a few short months. Here is before and after pix of the engine bay. Not a great close up but, it's all I can find.

Before


After


Quick Reply: AI 355 Build Thread and More


All times are GMT -5. The time now is 07:25 AM.