


parts needed to finish
Bumping this thread up from the grave!! So short story... Got screwed by Clayton Racing (big surprise) he sent me a pallet full of boxes instead of the assembled shortblock it was supposed to be. He also kept some parts that I ended up having to re-order like a billet oil pump drive and little stupid things.
But now I found a guy in Phoenix, WFO racing engines that hooked me up...

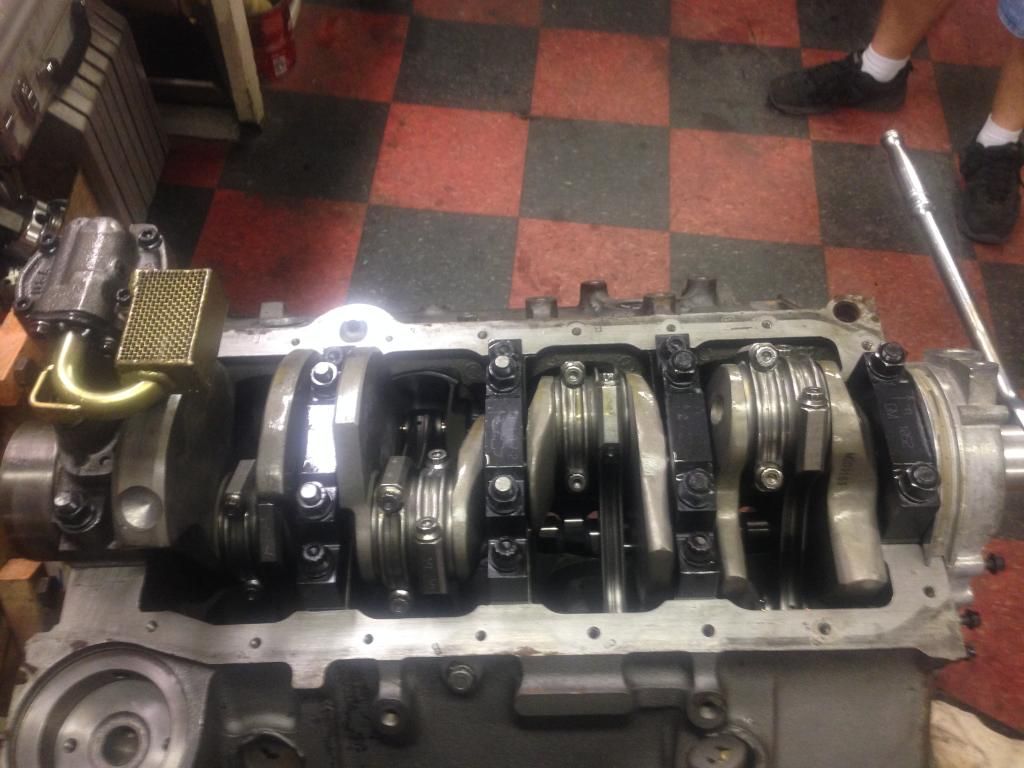
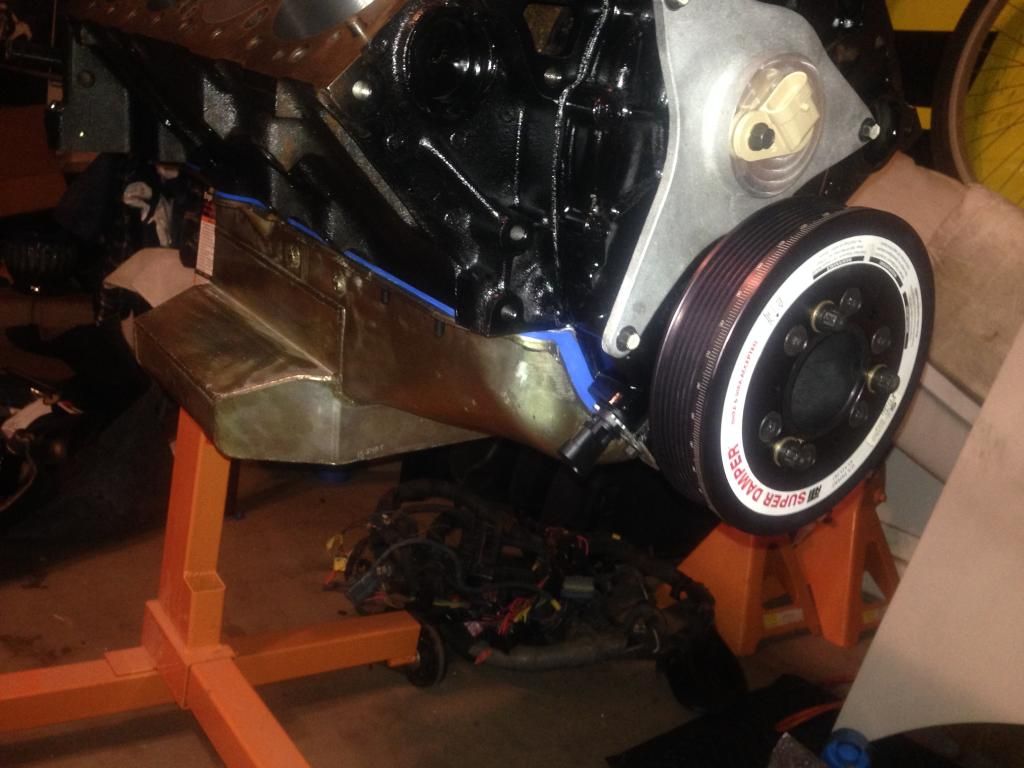
Everything came out awesome. I'm in the process of installing the Morel link bar lifters, heads and intake. Then throwing the new stainless headers on and it should be ready to drop in. I'm trying to get a buddy to my house to help finish with the wiring and then I should be able to fire it up. Hopefully it's drive able within the next month or so. With my luck it will be Xmas time
But now I found a guy in Phoenix, WFO racing engines that hooked me up...


Everything came out awesome. I'm in the process of installing the Morel link bar lifters, heads and intake. Then throwing the new stainless headers on and it should be ready to drop in. I'm trying to get a buddy to my house to help finish with the wiring and then I should be able to fire it up. Hopefully it's drive able within the next month or so. With my luck it will be Xmas time
So I got the heads on, then had to take them back off to fit the link bars lifters in...FML. Put the heads BACK on, torqued them down. I go to put the intake on, now it's not lining up so I can't get the new ARP intake manifold bolts to bolt the intake down. What the **** is wrong?! Why can't this just work for me. So now idk what to do. I may have to take the heads off again and have the intake machined to line up with the heads unless I'm doing something wrong.
Just the bolt holes. Looking at it, it looks like the guy that powder coated the intake powder coated where the bolts go in so I'm wondering if I grind out where the powder coat is, if it will help
Our intakes are dry, so really as long as you're not clipping the gasket you can do whatever you need to hold it down. Hell, my intake has a strip of aluminum welded to the front and back facings to raise it higher to match the tall ports on my hogged out AFRs. Just be sure you can seal the rear wall for oil leaks and the gasket/ports match up and you'll be fine.
So I really had to hog out the holes to get the bolt holes to match up but I finally got it fixed and bolted down.
Now I've got to put the pushrods and rocker arms in. Now I'm going to be using the 24 x conversion but I'm assuming I still base it off the LT1 firing order? Also does anyone think I should have an issue adjusting the rocker arms with the intake still on? And what is the recommended pre-load with Comp Pro-Mag rocker arms
Now I've got to put the pushrods and rocker arms in. Now I'm going to be using the 24 x conversion but I'm assuming I still base it off the LT1 firing order? Also does anyone think I should have an issue adjusting the rocker arms with the intake still on? And what is the recommended pre-load with Comp Pro-Mag rocker arms
LS1 Tech Stories
The Best V8 Stories One Small Block at Time

Gas Monkey Built a 6-Wheel Ferrari Testarossa With a Corvette LT4 Engine
Verdad Gallardo
7 Most Reliable High-Performance Engines GM Has Ever Built
Verdad Gallardo
Amazing '71 Camaro Restomod Is Modern Muscle Car Under the Skin
Verdad Gallardo
6 Common C5 Corvette Failures and What's Involved In Repairing Them
Pouria Savadkouei
Retro Modern Bandit Pontiac Trans AM Comes With Burt Reynolds' Autograph
Verdad Gallardo
Top 10 Greatest Cadillac V Series Performance Models Ever, Ranked
Pouria Savadkouei
Top 10 Most Powerful Chevy Trucks Ever Made!

Hennessey's New Supercharged Silverado ZR2 Has 700 HP
Verdad Gallardo
Coachbuilt N2A Anteros Is an LS2-Powered C6 Corvette In Italian Clothes
Verdad Gallardo Thanks for that Merim. Next questions. Does anyone know the size of the plug that's supposed to go in this canton oil pan?
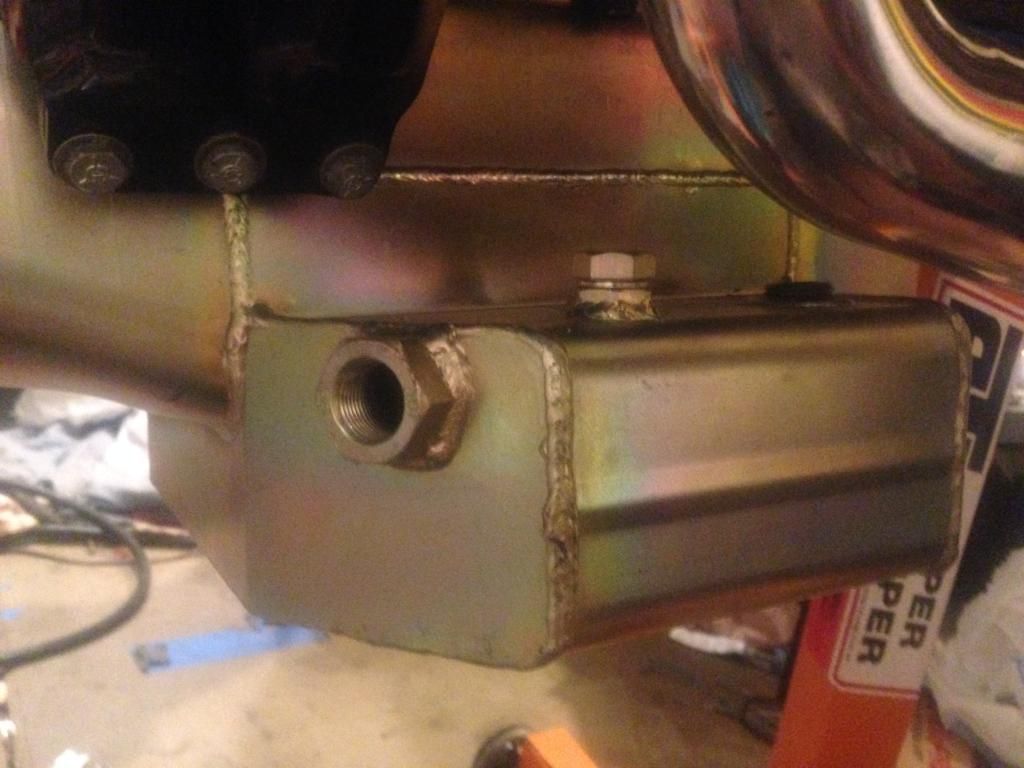
And is there supposed to be something bolted into either one of these holes or are they supposed to be plugged at all?
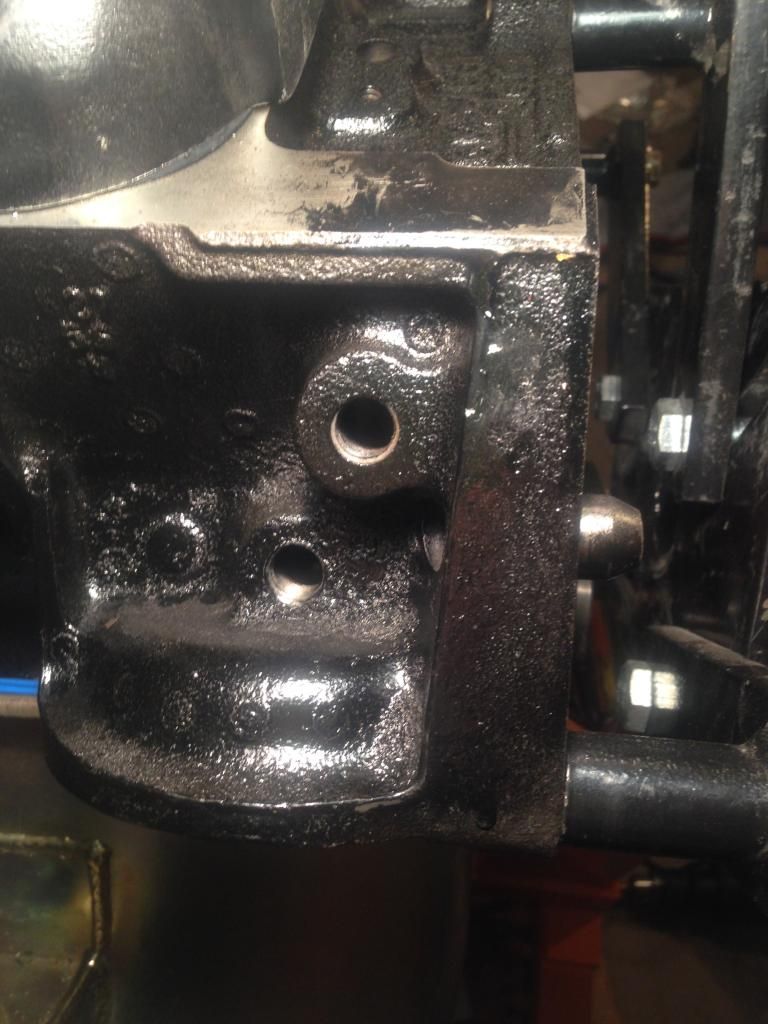
These stupid little things are killing me. Also if they are supposed to be plugged, please tell me where to get the hex head plugs from.

And is there supposed to be something bolted into either one of these holes or are they supposed to be plugged at all?

These stupid little things are killing me. Also if they are supposed to be plugged, please tell me where to get the hex head plugs from.
TECH Addict
Joined: Dec 2010
Posts: 2,610
Likes: 4
From: Maricopa, AZ
The oil pan I'm really not sure about, but gonna guess anyway and say it's for the oil level sensor.
The block above the filter, yes those should be plugged. I don't remember the sizes though.
I used the lower one for my mechanical oil pressure gauge....
The block above the filter, yes those should be plugged. I don't remember the sizes though.
I used the lower one for my mechanical oil pressure gauge....


Are those tapped??
My first guess is 1/8" NPT- but it looks bigger the more I look at your pic-
That is just a guess though!
I'll check my block tomorrow morning unless someone else beets me to it-
My first guess is 1/8" NPT- but it looks bigger the more I look at your pic-
That is just a guess though!
I'll check my block tomorrow morning unless someone else beets me to it-
Last edited by Tomhames; Sep 1, 2014 at 08:47 PM. Reason: Half asleep

