
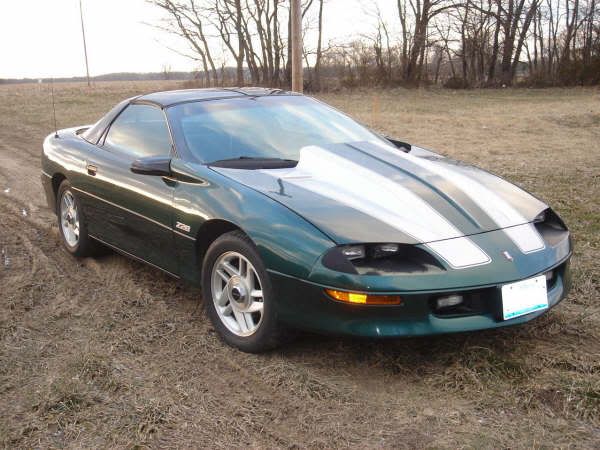
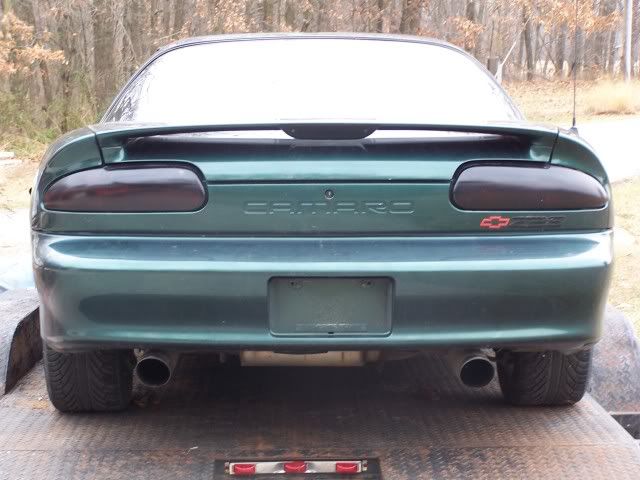
The story of my 94 Z
 09-01-2012, 04:04 PM
#1
On The Tree
Thread Starter
iTrader: (2)

Join Date: Dec 2008
Location: Edwardsville, IL
Posts: 181
Likes: 0
Received 0 Likes
on
0 Posts

Disclaimer: LONG story LOTS of pictures!
Post #1 is the history of everything leading up to what I have been working on this summer
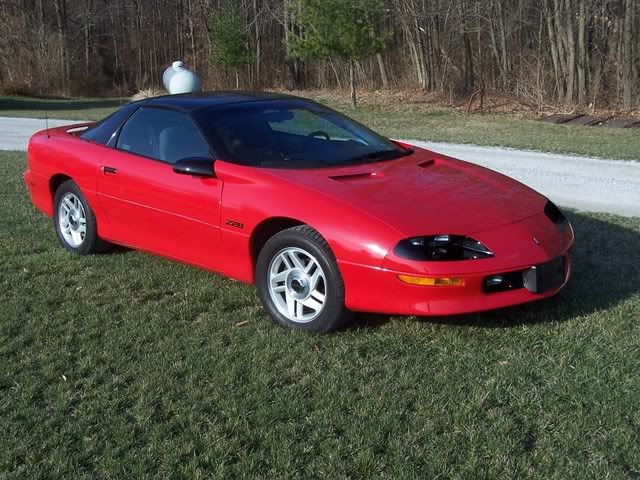
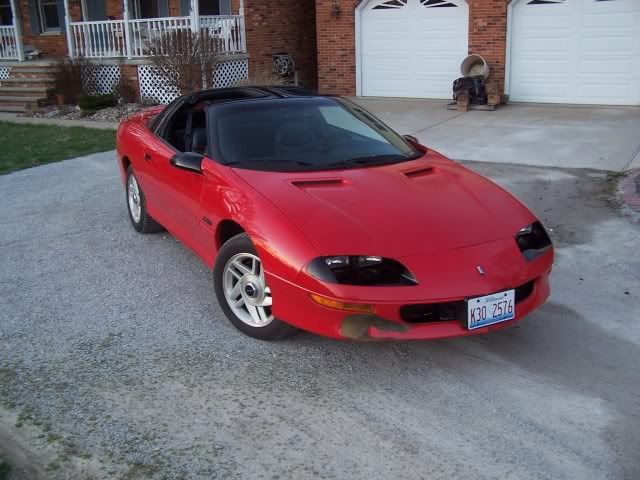
Well, I guess I will start with some back story on myself and the car. I bought it back in March of 2006 when I was 18 for $3000. It was my first real car, and I was loving it... Talk about a HUGE step up from the '89 Taurus I had been driving! It had 143,000 miles and was completely stock with the exception of the Moroso cold air intake. It needed a few things that my dad and I replaced right off the bat: 4 new tires, ball joints, fuel pump, a piece of window trim, a clip on the driver's door switch, and we went ahead and did an oil change and changed the transmission fluid for piece of mind.
Here are a couple pics shortly after buying it, and cleaning her up a bit.
I really did not know much about cars before I bought the Camaro, much less how to work on them.. Pretty much everything I have learned is from my dad, or by spending countless hours reading forums and other articles on the internet. I have a great sense of pride in knowing that all the work that has been done on this car was performed by my dad and I, and I surely couldn't have done it without him. So, THANKS DAD.
Speaking of my dad, later on that same year, my parents bought a beautiful, '02 pewter WS6 TA, with about 17k miles.. It was (and is) in mint condition, with ebony leather interior, and a 6 speed manual. I had never driven a manual before, so every once in awhile I would get to drive the TA somewhere with them, and I slowly got the hang on it.
...After driving that, my old auto Z28 started to feel inadequate..
I didn't have a lot of money laying around, so the only thing I did to the car for the next few years was normal maintenance stuff. The clear coat began to flake off the driver's side fender just a few weeks after buying it, and it slowly got worse and worse. Currently, there is almost no clear on the fender, the door looks terrible, and there isn't much clear left on the hood. I also had an area of paint about the size of a softball break off of my front bumper after hitting a raccoon.. So needless to say, I have been wanting a paint job for a long time.
It was about the summer of 2008 (I think) when I was considering selling the car so I could buy a different f-body, with a 6-speed. I was tired of looking at it, and the automatic just wasn't doing it for me anymore. Then when I got home from work one night in early September, I went to back into my parking spot, and I feel a big *thunk* when I stick it in reverse. It had the forward gears, but lost neutral and reverse.
So then my options were.. 1) sell the car for next to nothing. 2) rebuild the auto with a stall and shift kit. 3) do a T56 swap.
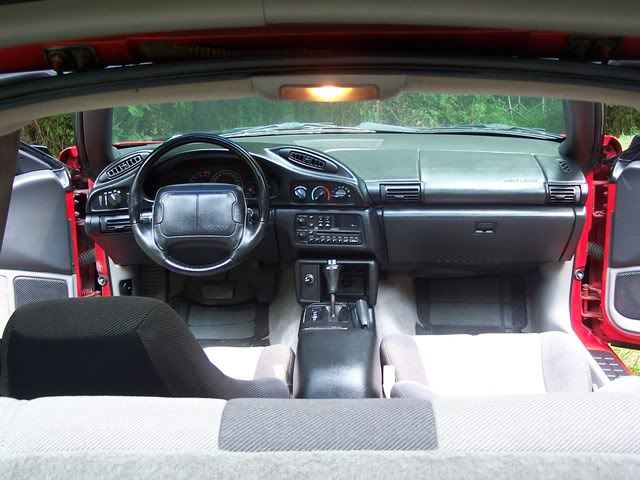
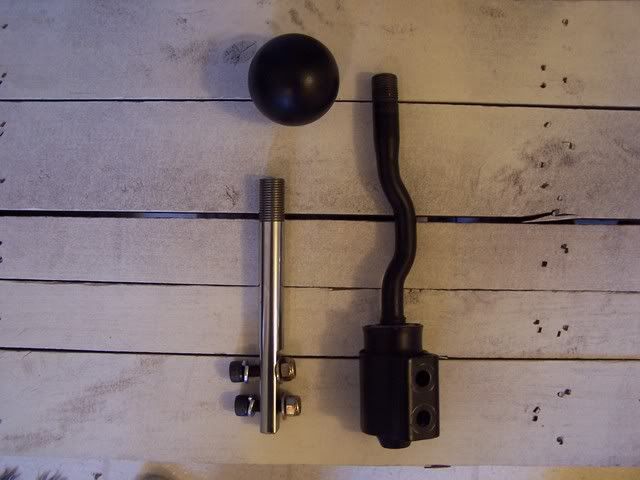
Within a couple weeks we had the parts for the swap shipped up from Texas from a member on here. We then spent the next 3-4 weeks doing the conversion in the garage up on jack stands. I got a great deal on a brand new Hurst shifter that the local GM dealer had in stock for years, and to go with that I bought a short stick from the ws6store. It felt great to drive it again after being down for so long, I loved my car again!
The stock clutch we put in during the swap didn't last all that long before the throwout bearing went out, and we replaced it with a lightly used SPEC stage 2 clutch that I got from another member. I also got a starter from him to replace mine, since it wouldn't engage every time.
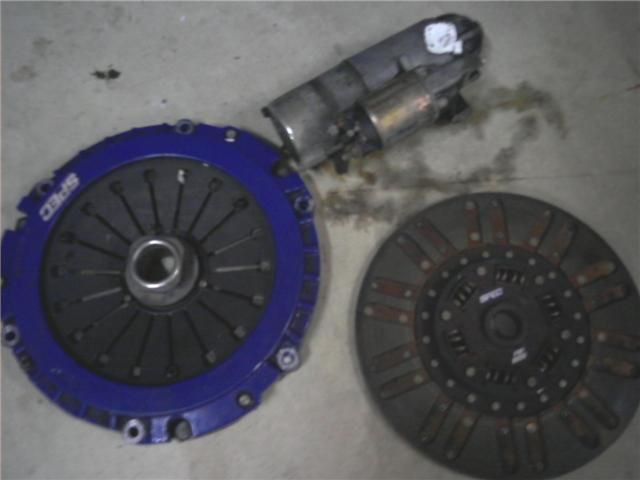
I hated this clutch.... It chattered bad on slow take offs, and creeping through a parking lot or through traffic sucked. But I've managed to live with it so far for over 20k miles... lol.
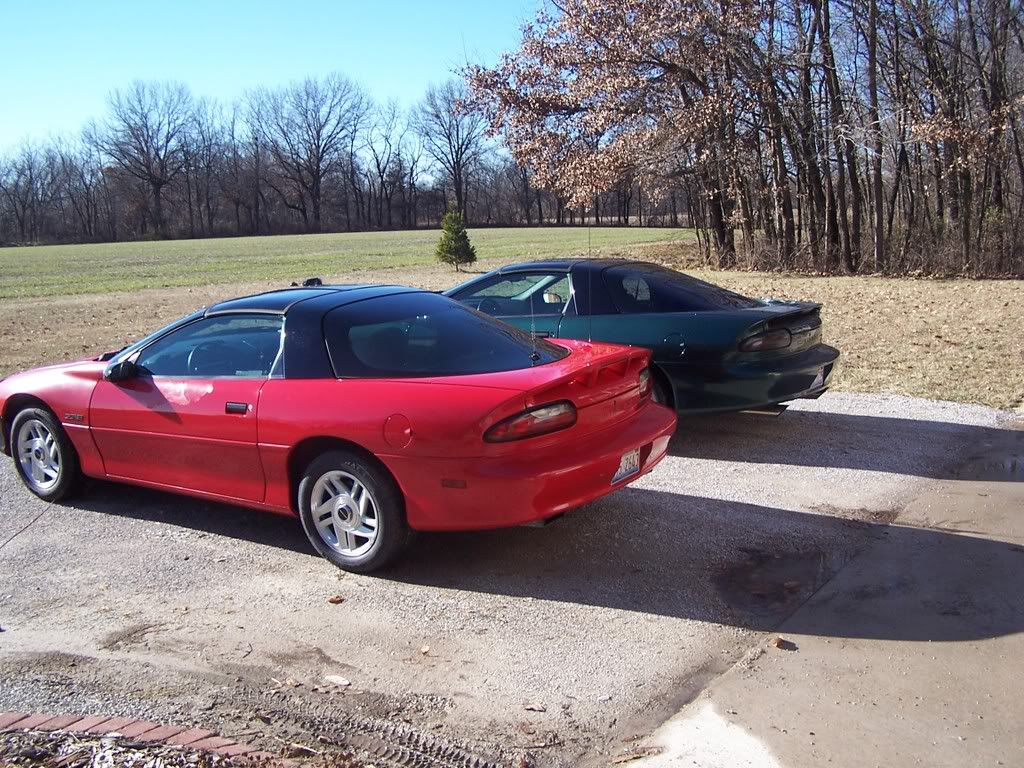
The following winter my dad found a '96 Z28 a few hours away in Indiana, and we went over there and brought it home for $1500.
The car was in ok condition, but it had some issues that needed attention. It didn't run, the previous owner said it just needed a fuel pump.. So we put in a new fuel pump, and it fired right up. My dad did some more work to it, fixing all the little issues until it was right. It was then sold to a local kid for a small profit.. but not until after I got the graphite leather interior out of it! The seats show some slight wear, but there are no rips or anything. The carpet was junk.. so new carpet was an order, as well as a recovered headliner. This was also the year I got a 98+ SS spoiler! It really makes the back end look much better, imo. I also swapped the smoked glass t-tops with the dot matrix style that were on my car. I like being able to see out of them rather than trying to look through a bunch of tiny dots.

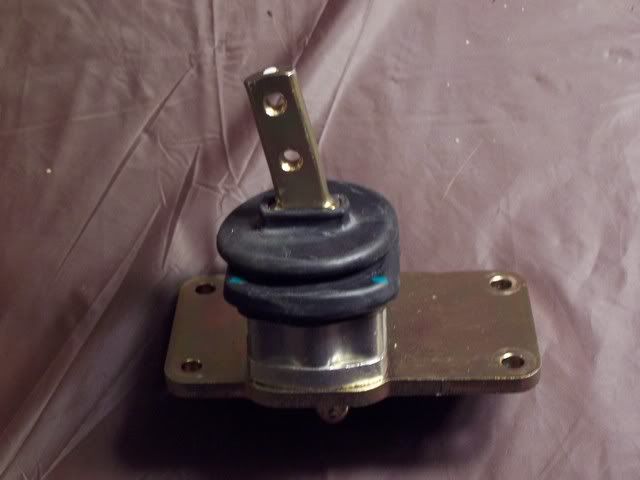
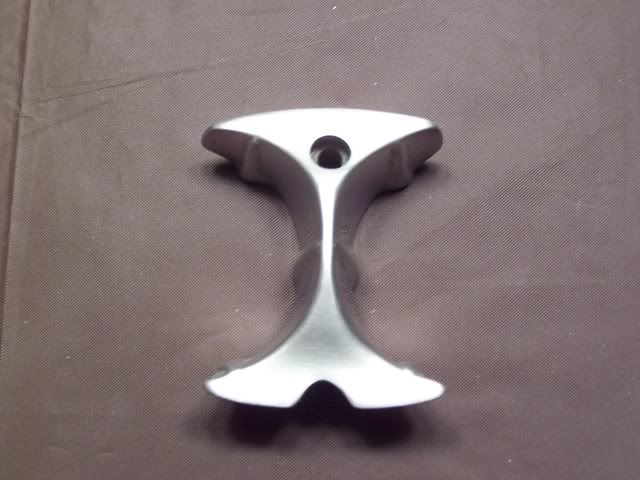
I also stole this little guy from the 96's throttle body, and hand polished it up!
I don't think I would spend the money on one, but it was free, so why not make use of it?
Little by little the car was starting to come together.. Man did I have some big dreams for it.. Patience and planning is the key!.
Now the winter of '09-'10 rolls around, and I have started to accumulate some exhaust parts down in the basement. The centerpiece being a brand new set of pacesetter ceramic coated long tube headers that I bought from someone on a local board for a good price. I picked up the Y-pipe, also new, from a different person on the local board. Both the magnaflow catback and the QTP electric cutout came second hand from members on here.

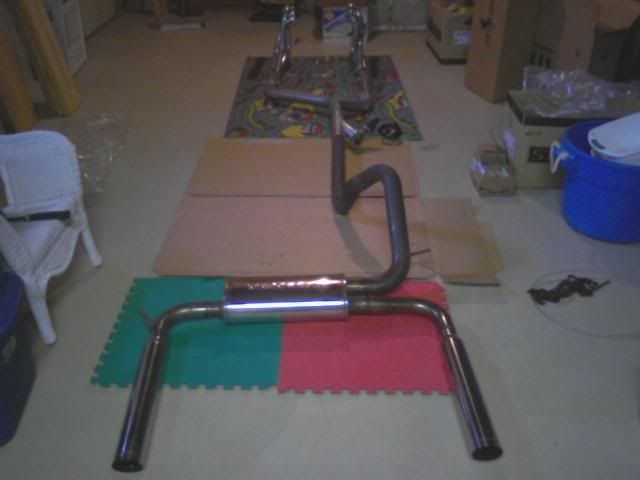
Then finally I bought some Prothane motor mounts, ARP bolts, Felpro gaskets, and a bunch of band clamps from Summit to complete my installation.

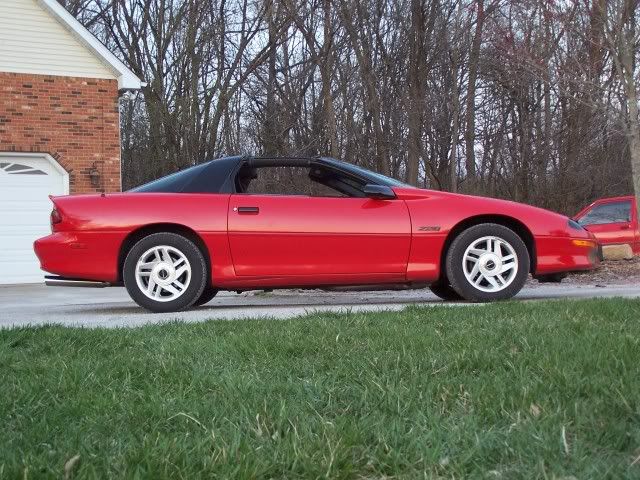
Here she is with the new exhaust setup in spring of 2010. Ground clearance is excellent at stock ride height!

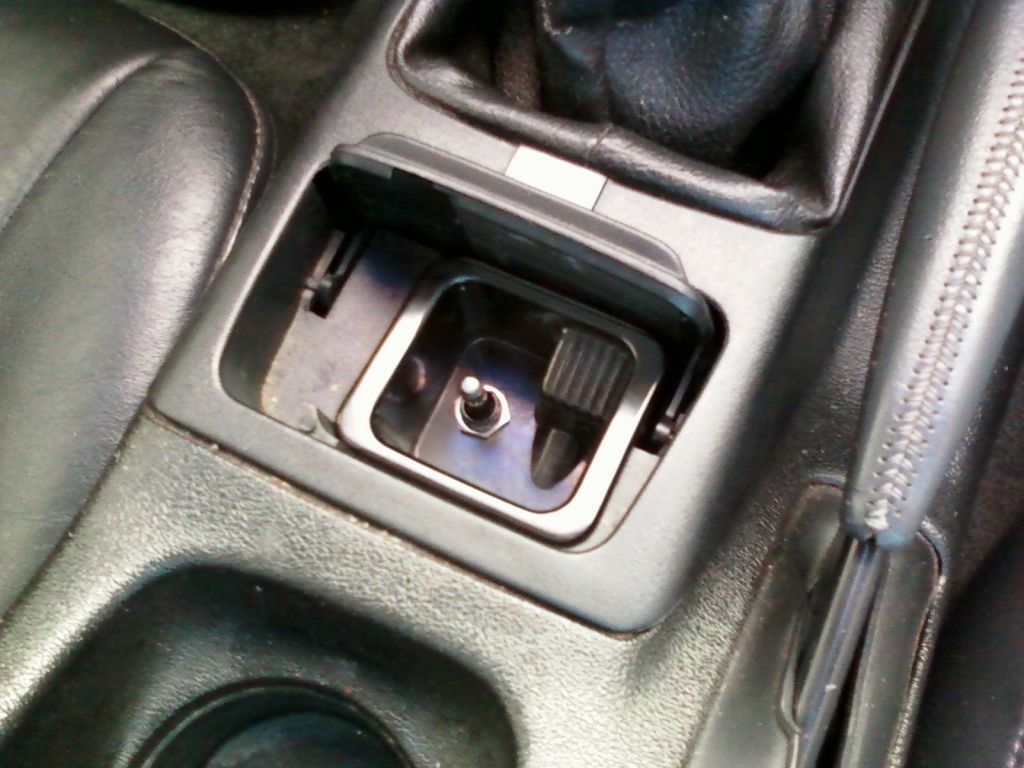
I LOVED the new exhaust, and one of my favorite mods for sure is the electric cutout! It's pretty neat changing how the car sounds with just the flip of a little switch in the ash tray.
I also found these pictures of some other stuff I did at some point:
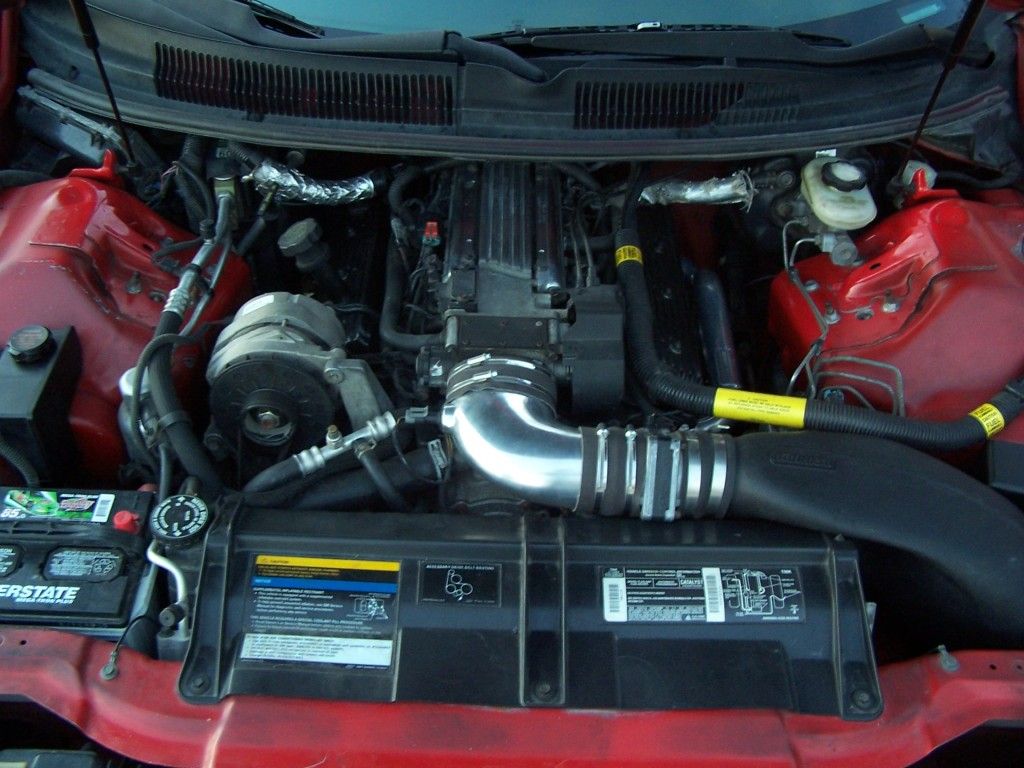
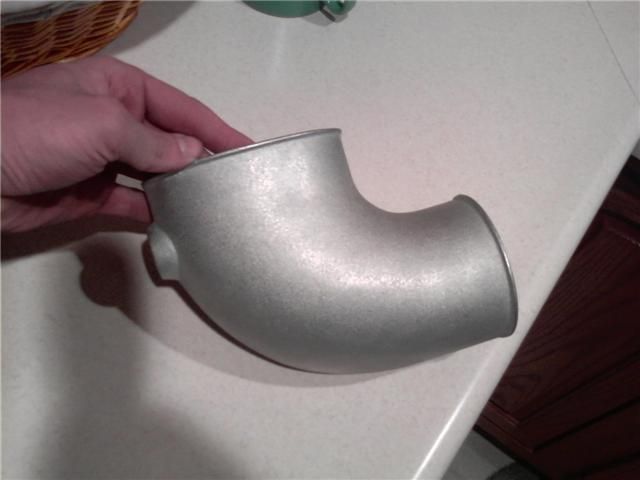
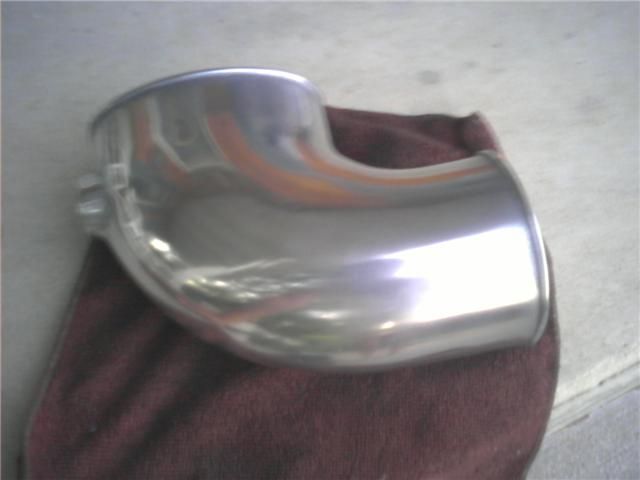
Polished up a Trick Flow elbow I got off ebay to replace my torn factory elbow. Here's a before and after, I did the inside too:
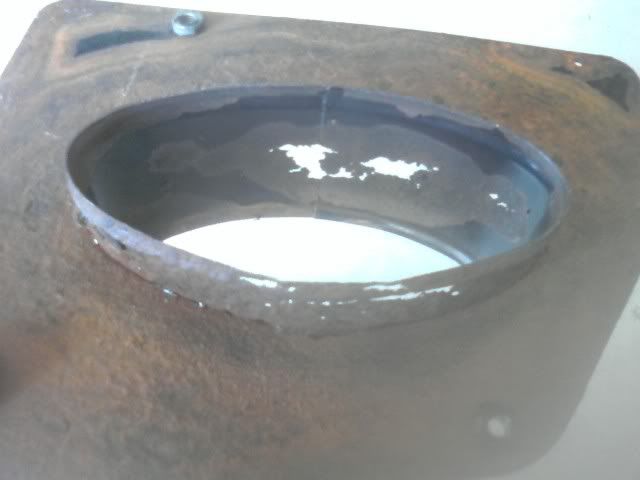
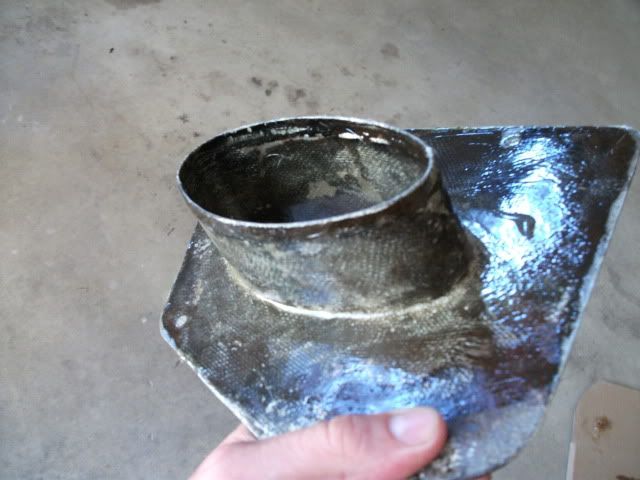
This is the piece of the Moroso CAI that mounts to the body of the car to separate the filter from the intake tubing... mine was a rusty POS. So I scraped all the rust scale off, then sanded it down as best I could.. then fiberglassed over the whole thing. I had never worked with fiberglass of any sort, so this was a learning experience. I put in a lot of work, and I think it turned out great! Plus it will never rust again
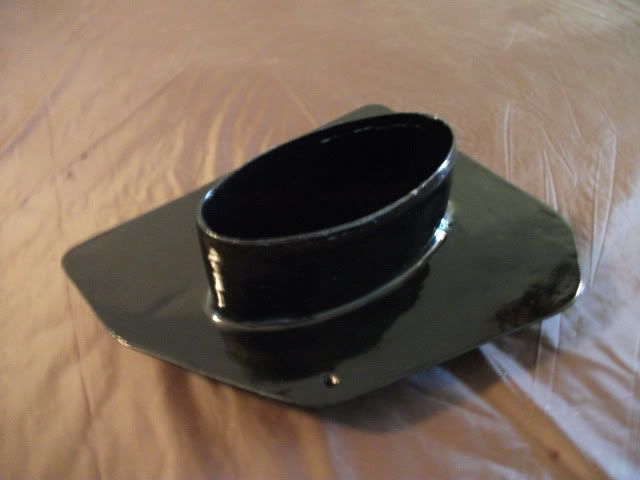
Finished product:
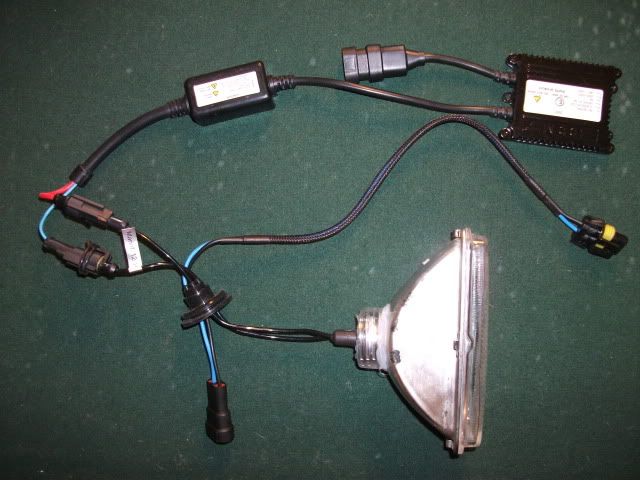
I think the only thing I did to it this past summer was a HID conversion for my low beams (5000k), because I was tired of the terrible lighting, and I hated replacing a crappy light with another crappy light when it burned out. I will eventually get HIDs for the high beams and the fogs if I decide to put them back on. I do have 1le fog delete vents though, so I'm not sure what I'm going to do yet.
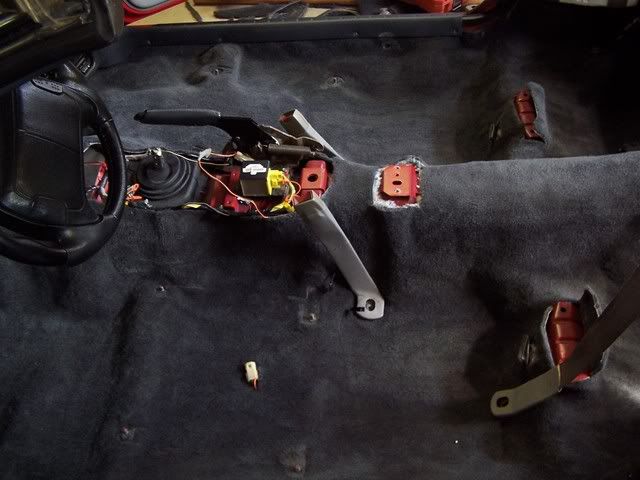
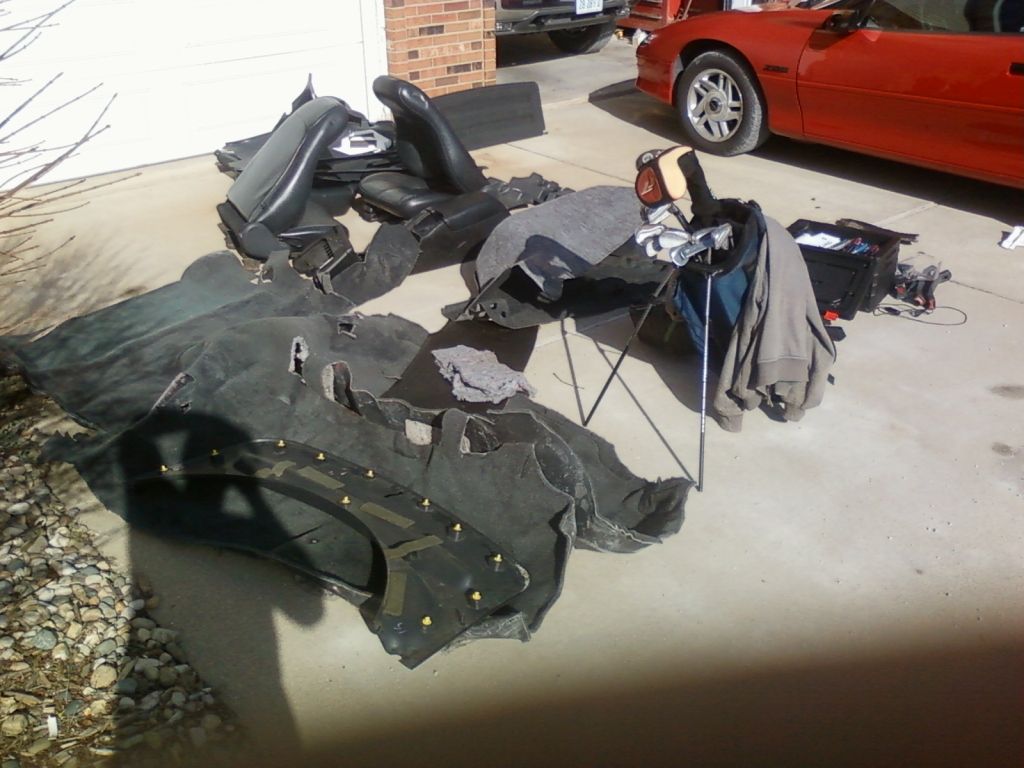
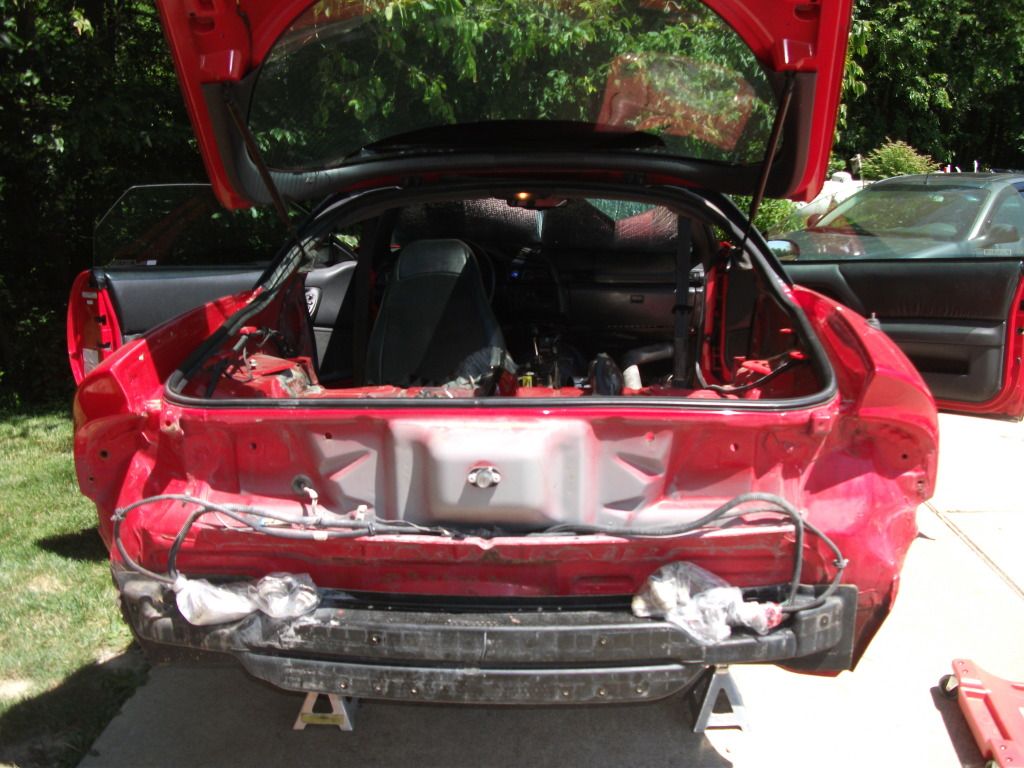
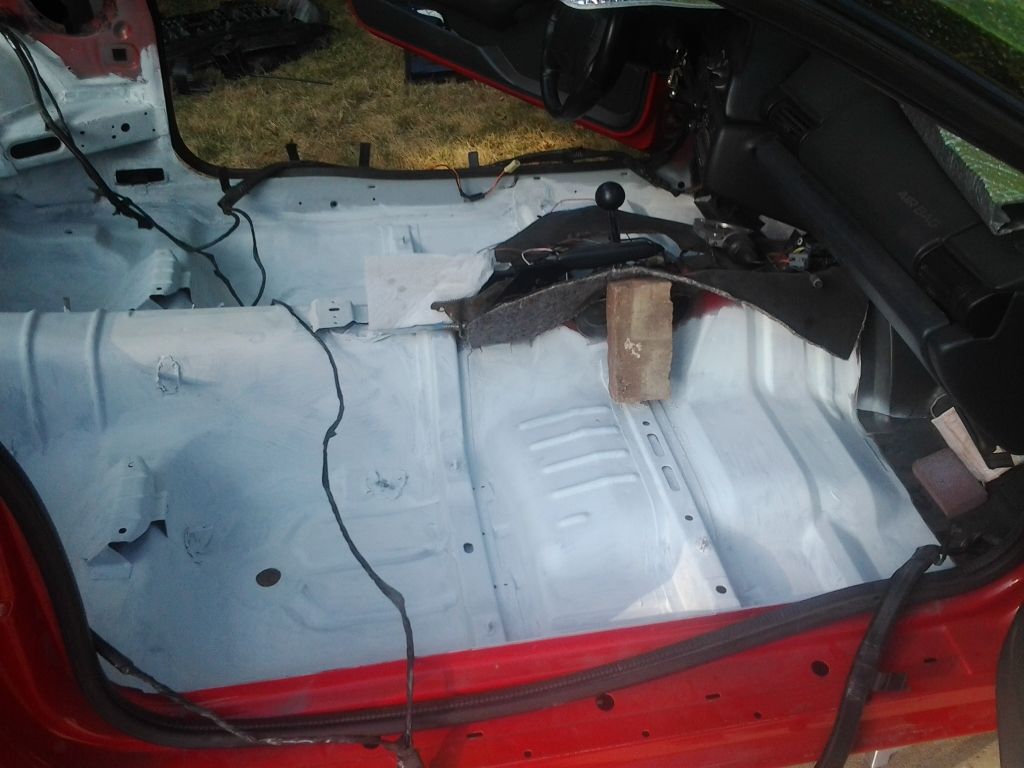
Aaaand finally.. This last picture leads me to about March of this year. I am finally going to get it painted! BUT, there is a lot of stuff I need/want to do before it is all said and done. Here you can see all the insides of my car laid out on the driveway.. From what I recall, it all weight about 225 pounds.
Post #1 is the history of everything leading up to what I have been working on this summer
Well, I guess I will start with some back story on myself and the car. I bought it back in March of 2006 when I was 18 for $3000. It was my first real car, and I was loving it... Talk about a HUGE step up from the '89 Taurus I had been driving! It had 143,000 miles and was completely stock with the exception of the Moroso cold air intake. It needed a few things that my dad and I replaced right off the bat: 4 new tires, ball joints, fuel pump, a piece of window trim, a clip on the driver's door switch, and we went ahead and did an oil change and changed the transmission fluid for piece of mind.
Here are a couple pics shortly after buying it, and cleaning her up a bit.
I really did not know much about cars before I bought the Camaro, much less how to work on them.. Pretty much everything I have learned is from my dad, or by spending countless hours reading forums and other articles on the internet. I have a great sense of pride in knowing that all the work that has been done on this car was performed by my dad and I, and I surely couldn't have done it without him. So, THANKS DAD.
Speaking of my dad, later on that same year, my parents bought a beautiful, '02 pewter WS6 TA, with about 17k miles.. It was (and is) in mint condition, with ebony leather interior, and a 6 speed manual. I had never driven a manual before, so every once in awhile I would get to drive the TA somewhere with them, and I slowly got the hang on it.
...After driving that, my old auto Z28 started to feel inadequate..
I didn't have a lot of money laying around, so the only thing I did to the car for the next few years was normal maintenance stuff. The clear coat began to flake off the driver's side fender just a few weeks after buying it, and it slowly got worse and worse. Currently, there is almost no clear on the fender, the door looks terrible, and there isn't much clear left on the hood. I also had an area of paint about the size of a softball break off of my front bumper after hitting a raccoon.. So needless to say, I have been wanting a paint job for a long time.
It was about the summer of 2008 (I think) when I was considering selling the car so I could buy a different f-body, with a 6-speed. I was tired of looking at it, and the automatic just wasn't doing it for me anymore. Then when I got home from work one night in early September, I went to back into my parking spot, and I feel a big *thunk* when I stick it in reverse. It had the forward gears, but lost neutral and reverse.
So then my options were.. 1) sell the car for next to nothing. 2) rebuild the auto with a stall and shift kit. 3) do a T56 swap.
Within a couple weeks we had the parts for the swap shipped up from Texas from a member on here. We then spent the next 3-4 weeks doing the conversion in the garage up on jack stands. I got a great deal on a brand new Hurst shifter that the local GM dealer had in stock for years, and to go with that I bought a short stick from the ws6store. It felt great to drive it again after being down for so long, I loved my car again!
The stock clutch we put in during the swap didn't last all that long before the throwout bearing went out, and we replaced it with a lightly used SPEC stage 2 clutch that I got from another member. I also got a starter from him to replace mine, since it wouldn't engage every time.
I hated this clutch.... It chattered bad on slow take offs, and creeping through a parking lot or through traffic sucked. But I've managed to live with it so far for over 20k miles... lol.
The following winter my dad found a '96 Z28 a few hours away in Indiana, and we went over there and brought it home for $1500.
The car was in ok condition, but it had some issues that needed attention. It didn't run, the previous owner said it just needed a fuel pump.. So we put in a new fuel pump, and it fired right up. My dad did some more work to it, fixing all the little issues until it was right. It was then sold to a local kid for a small profit.. but not until after I got the graphite leather interior out of it! The seats show some slight wear, but there are no rips or anything. The carpet was junk.. so new carpet was an order, as well as a recovered headliner. This was also the year I got a 98+ SS spoiler! It really makes the back end look much better, imo. I also swapped the smoked glass t-tops with the dot matrix style that were on my car. I like being able to see out of them rather than trying to look through a bunch of tiny dots.
I also stole this little guy from the 96's throttle body, and hand polished it up!
I don't think I would spend the money on one, but it was free, so why not make use of it?
Little by little the car was starting to come together.. Man did I have some big dreams for it.. Patience and planning is the key!.
Now the winter of '09-'10 rolls around, and I have started to accumulate some exhaust parts down in the basement. The centerpiece being a brand new set of pacesetter ceramic coated long tube headers that I bought from someone on a local board for a good price. I picked up the Y-pipe, also new, from a different person on the local board. Both the magnaflow catback and the QTP electric cutout came second hand from members on here.
Then finally I bought some Prothane motor mounts, ARP bolts, Felpro gaskets, and a bunch of band clamps from Summit to complete my installation.
Here she is with the new exhaust setup in spring of 2010. Ground clearance is excellent at stock ride height!
I LOVED the new exhaust, and one of my favorite mods for sure is the electric cutout! It's pretty neat changing how the car sounds with just the flip of a little switch in the ash tray.
I also found these pictures of some other stuff I did at some point:
Polished up a Trick Flow elbow I got off ebay to replace my torn factory elbow. Here's a before and after, I did the inside too:
This is the piece of the Moroso CAI that mounts to the body of the car to separate the filter from the intake tubing... mine was a rusty POS. So I scraped all the rust scale off, then sanded it down as best I could.. then fiberglassed over the whole thing. I had never worked with fiberglass of any sort, so this was a learning experience. I put in a lot of work, and I think it turned out great! Plus it will never rust again
Finished product:
I think the only thing I did to it this past summer was a HID conversion for my low beams (5000k), because I was tired of the terrible lighting, and I hated replacing a crappy light with another crappy light when it burned out. I will eventually get HIDs for the high beams and the fogs if I decide to put them back on. I do have 1le fog delete vents though, so I'm not sure what I'm going to do yet.
Aaaand finally.. This last picture leads me to about March of this year. I am finally going to get it painted! BUT, there is a lot of stuff I need/want to do before it is all said and done. Here you can see all the insides of my car laid out on the driveway.. From what I recall, it all weight about 225 pounds.
 09-01-2012, 04:06 PM
#2
On The Tree
Thread Starter
iTrader: (2)
Join Date: Dec 2008
Location: Edwardsville, IL
Posts: 181
Likes: 0
Received 0 Likes
on
0 Posts
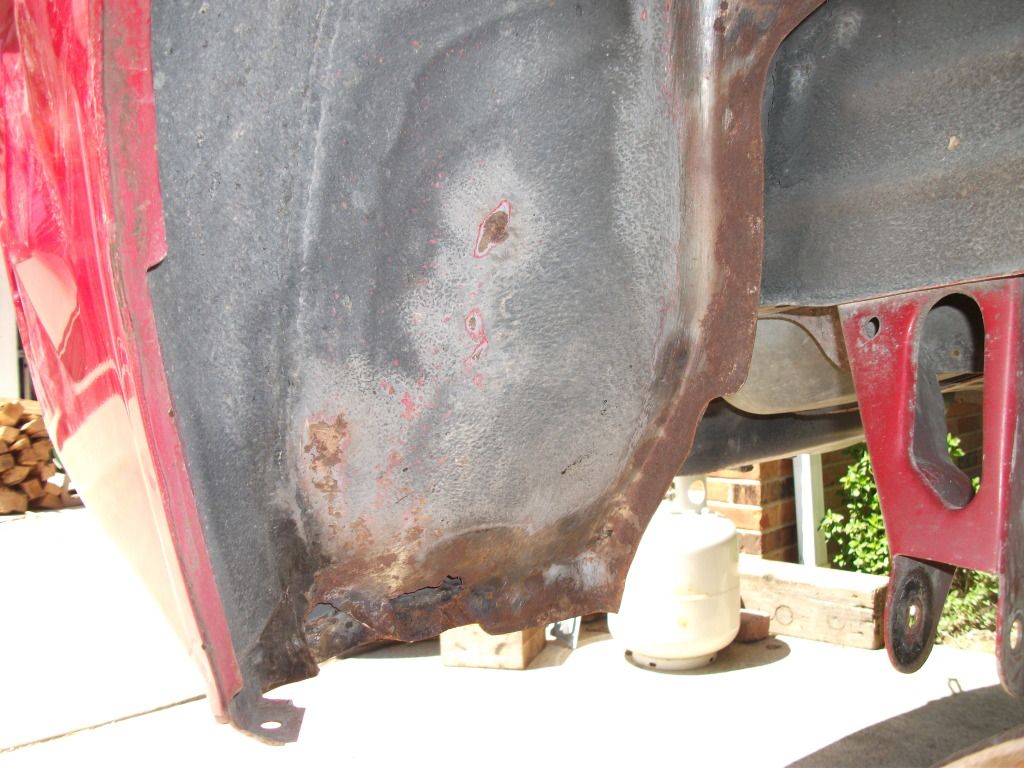
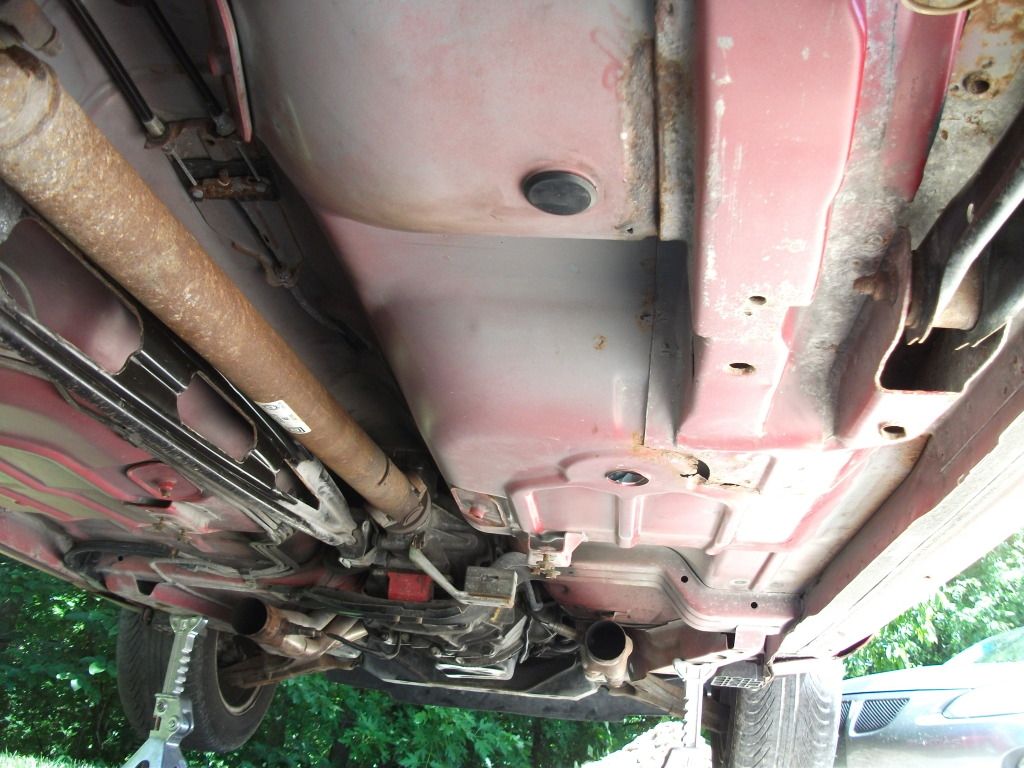
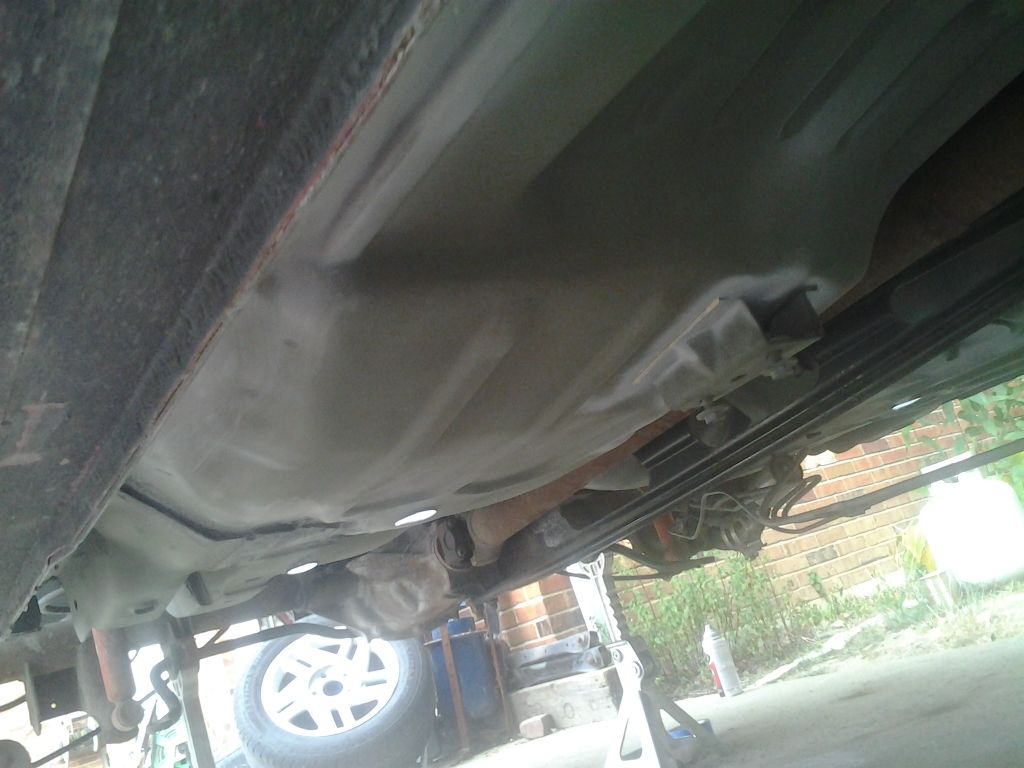
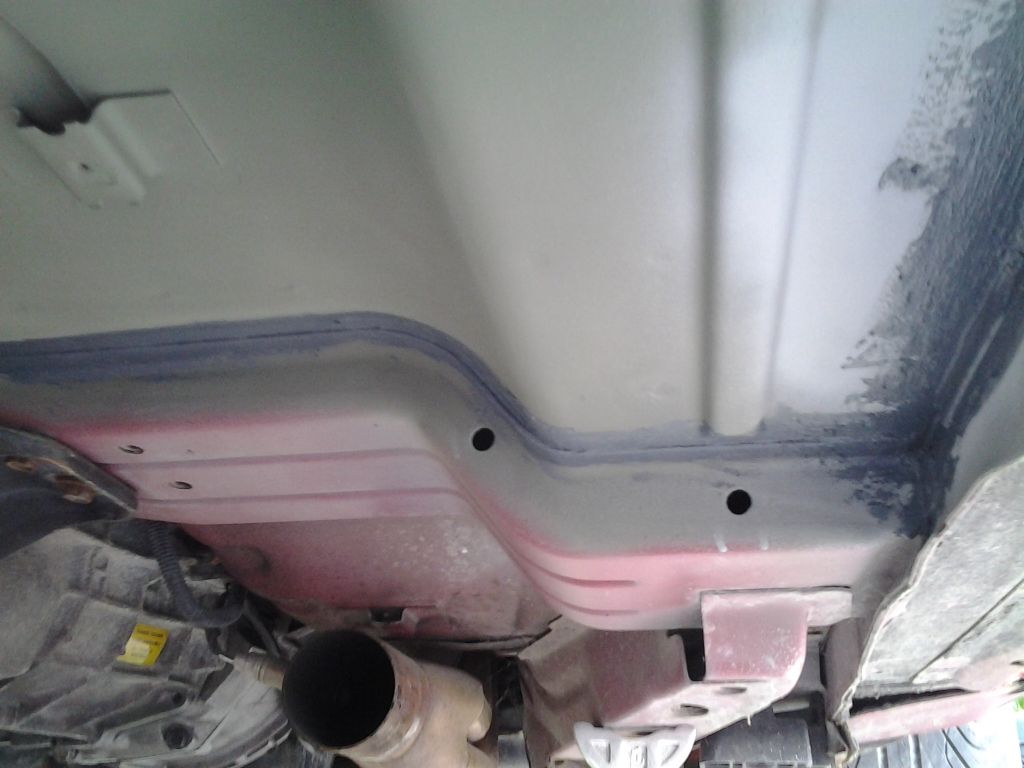
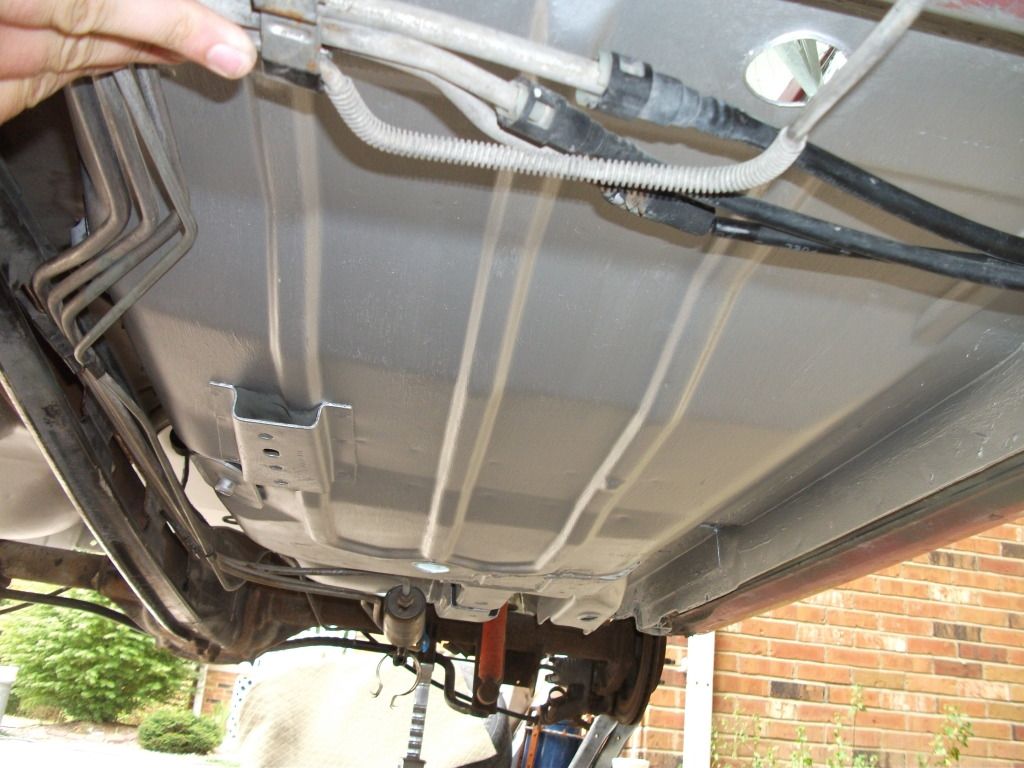
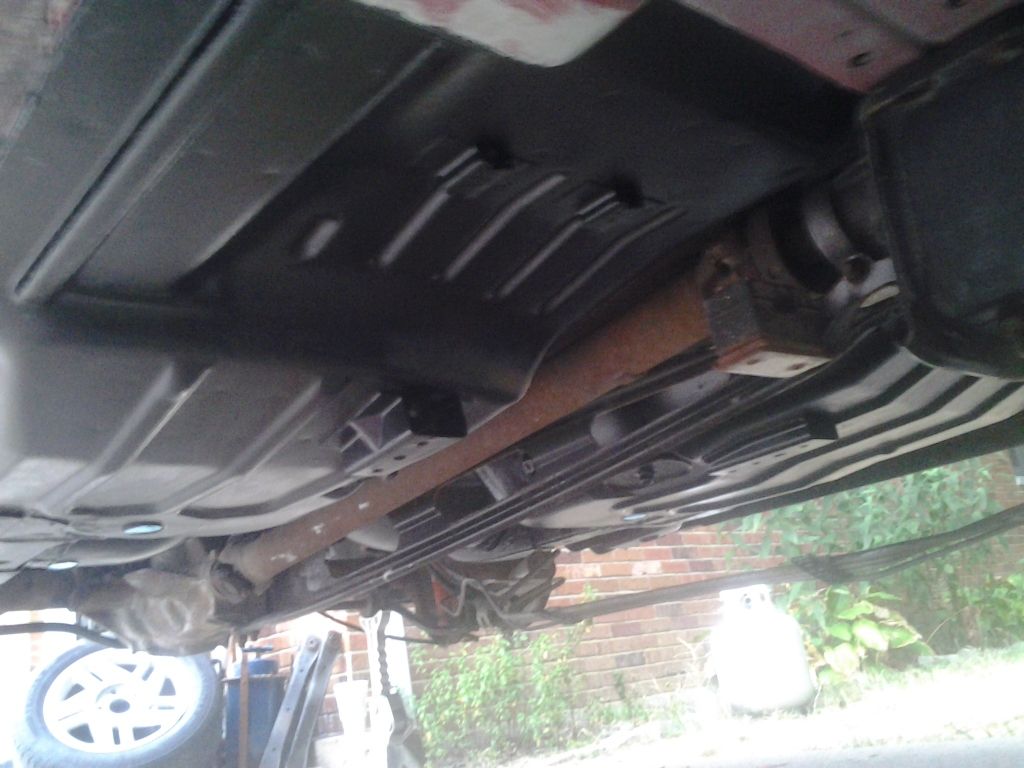
This has been the resting place of my car for the past 5 months.. After pulling the interior, there was a lot of rust to deal with before I could get it painted. One hole through the passenger side floor board, the same spot on the driver's side was almost as bad. The wheel wells were by far the worst spots though.. Pics of all the rust coming up....

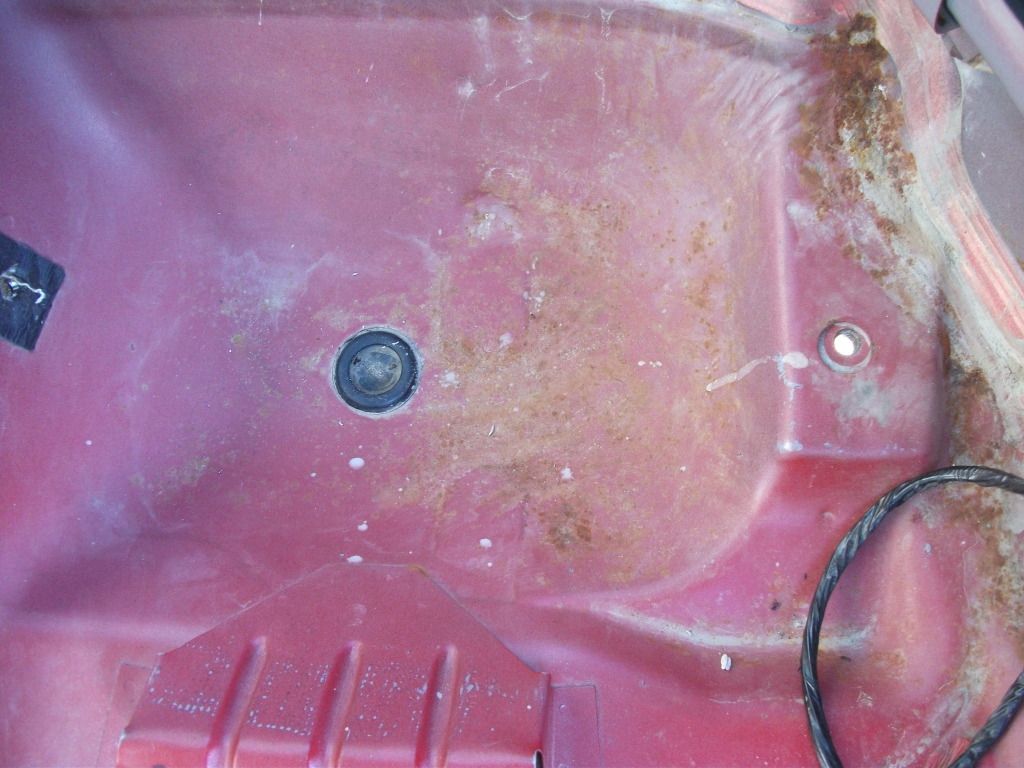
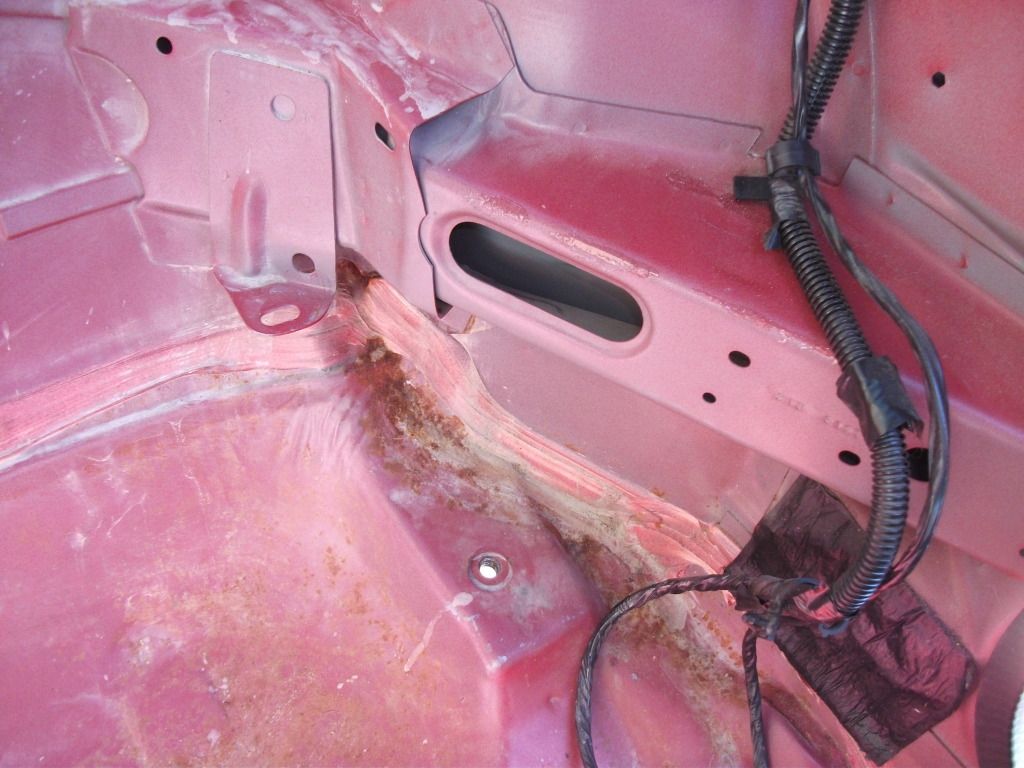
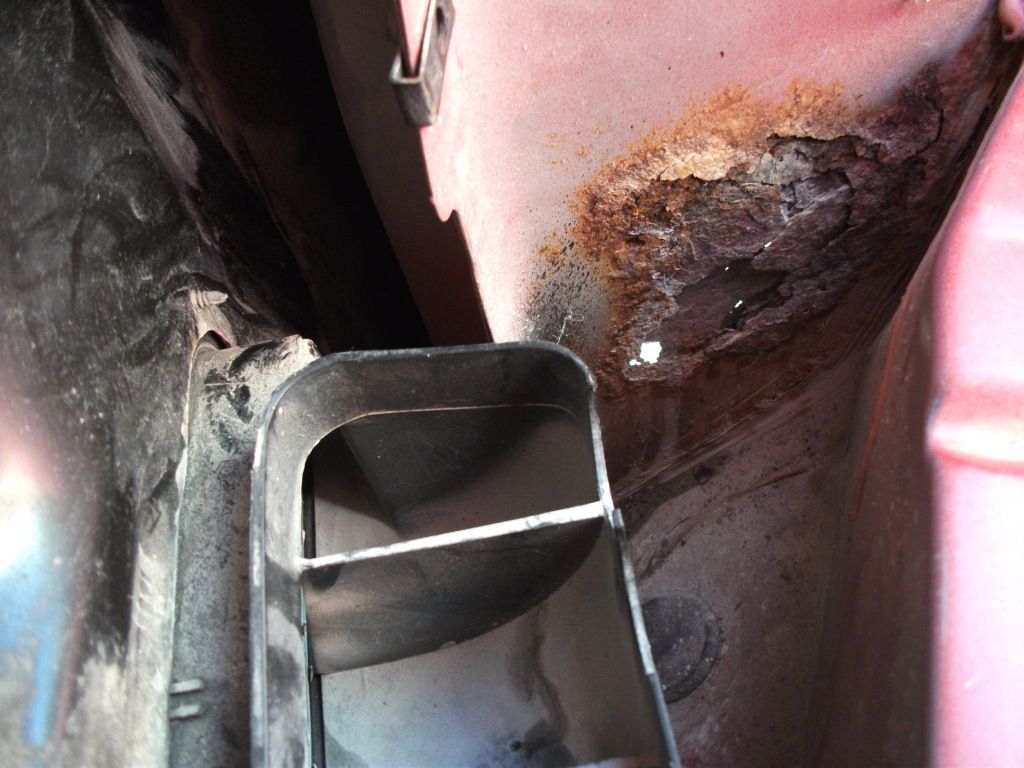
I guess I didn't take any pics of the wheel wells until we started working on them, but we had to replace a lot of metal.. At this point, I would probably be better off swapping my good parts over to a different car... but this car has a ton of sentimental value to me, and I didn't want to get rid of it. So me and my dad went to work on trying to repair as much rust as possible.
I sanded down as much as I could on the floor boards to find out where we need to patch in some new sheet metal.
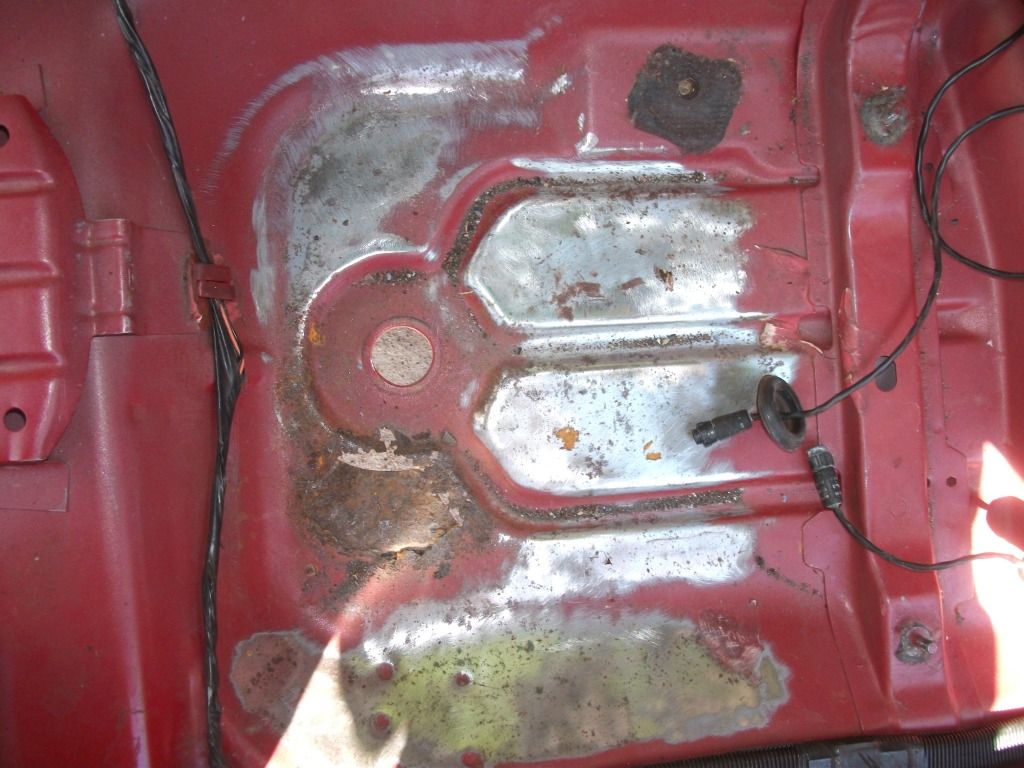
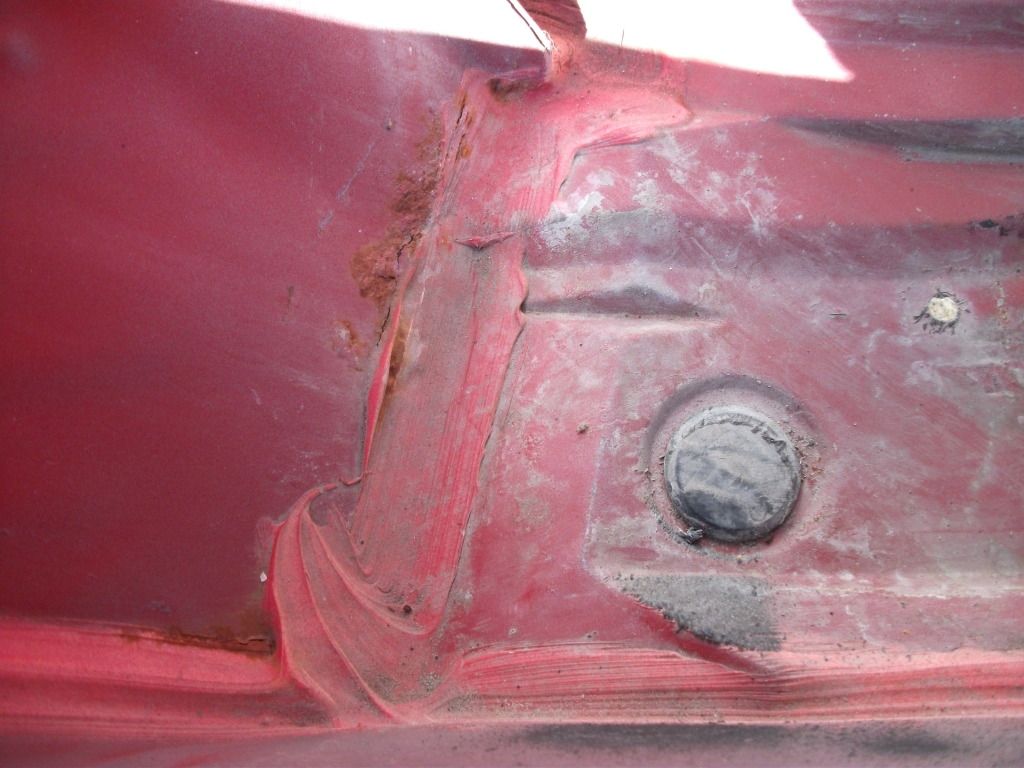
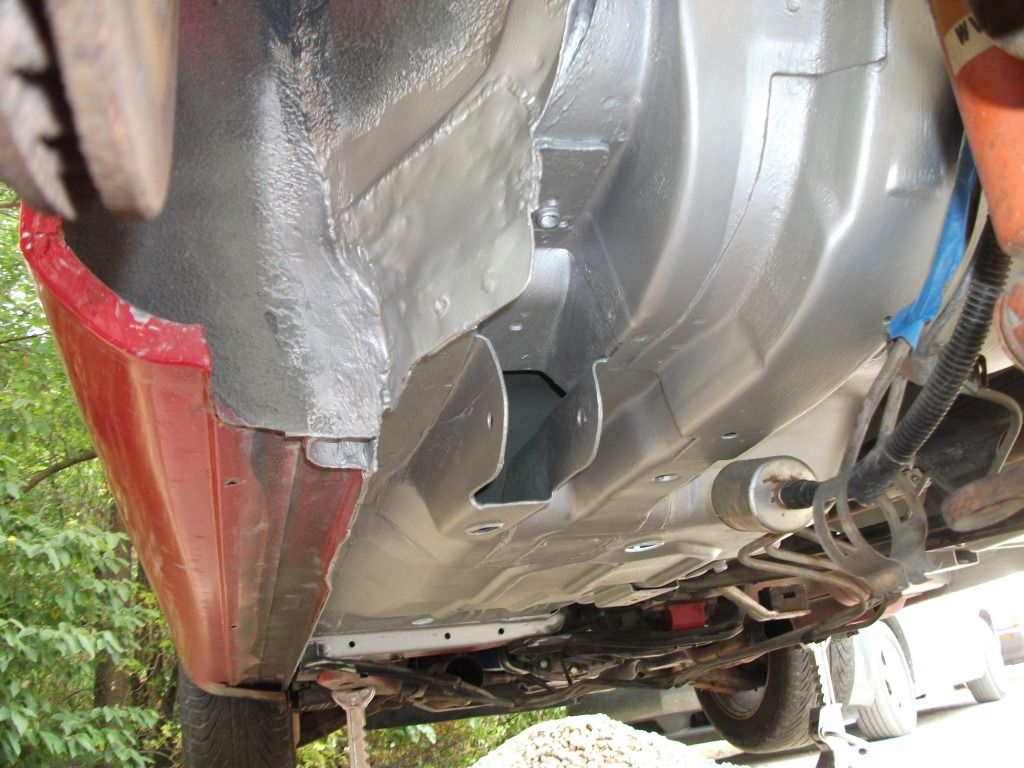
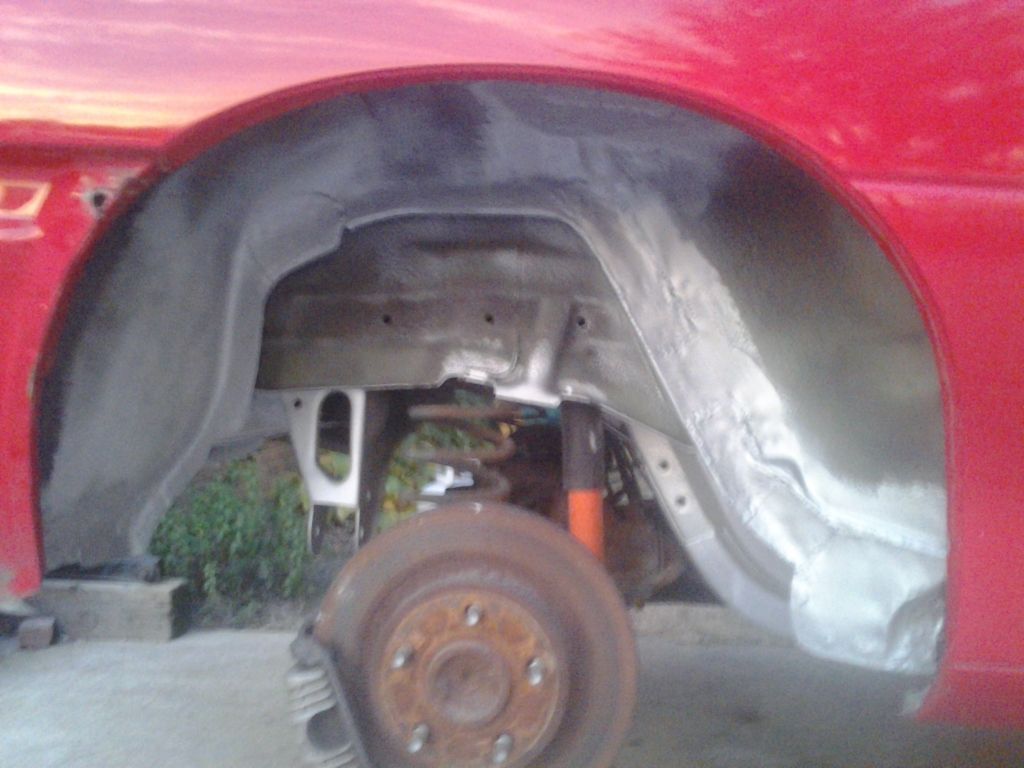
Here is the passenger's side wheel well after some patchwork. You can see the large piece we had to cut out of the top.


I don't have any pics of the driver's side in this stage, but it was nearly as bad as this one. Here it is with some self etching primer sprayed over all the bare metal. We had to make a new bracket to hold the wheel well plastic that covers the charcoal canister, since it was rusted beyond use.

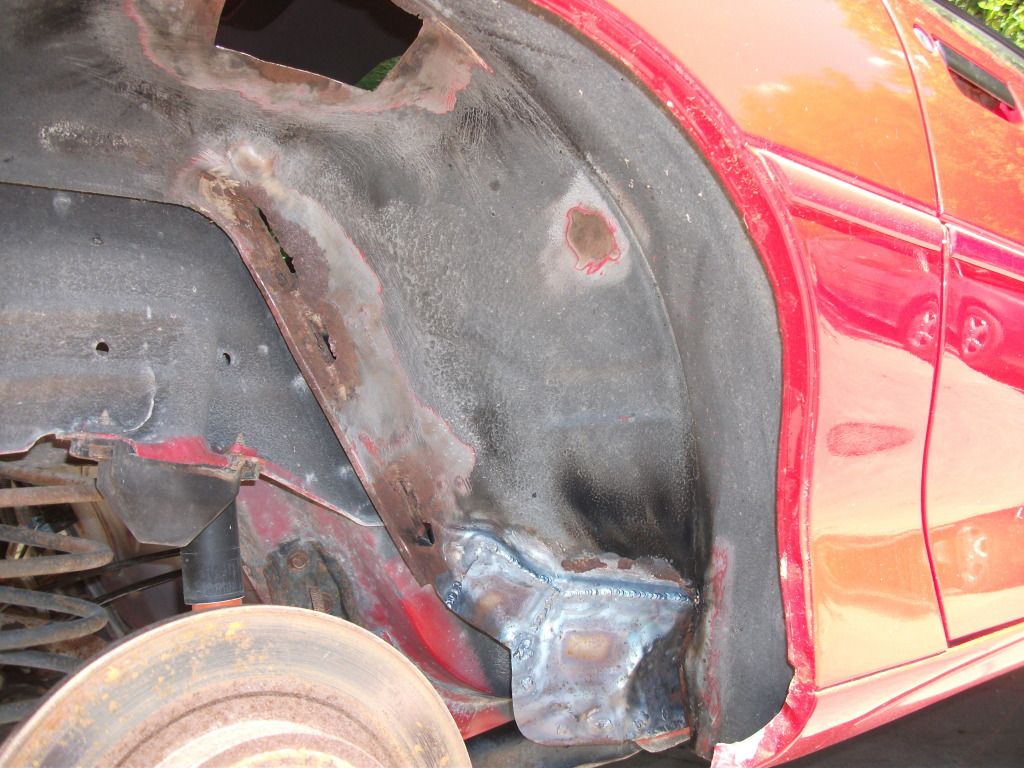
The rust repair took quite a long time, since my dad was doing all the welding, and it was hard to find time to work on it when it wasn't too hot out. Especially considering we had a two week stretch that was 100+ every day.. We were mostly limited to early mornings on the weekends, so it took awhile.. but definitely worth it. After tearing so much of the car apart, I decided that it must have had a pretty hard life. The driver's side quarter panel had been replaced, the driver's side inner fender has been patched, and the passenger's side rocker panel has a nice long dent in it from when a previous owner ran over a curb or something...
I'll have some more pictures up of the progress later on!
Last edited by SchaefZ28; 09-01-2012 at 04:56 PM.
09-01-2012, 09:29 PM
#3
On The Tree
Thread Starter
iTrader: (2)
Join Date: Dec 2008
Location: Edwardsville, IL
Posts: 181
Likes: 0
Received 0 Likes
on
0 Posts
I guess before I get too far into this I should outline some of the goals I am trying to accomplish with this project..
1) I want to protect the car from any future rust.
2) I want to make it feel more substantial, quieter on the inside, less rattly, and just like more of a nice solid car.
3) I want people to be able to look at it, and not believe it has over 200,000 miles (sitting at 194k and some change right now)
4) I want it to look not stock, but still close to it. Tasteful mods that remain true to the car.
On with the progress pics!
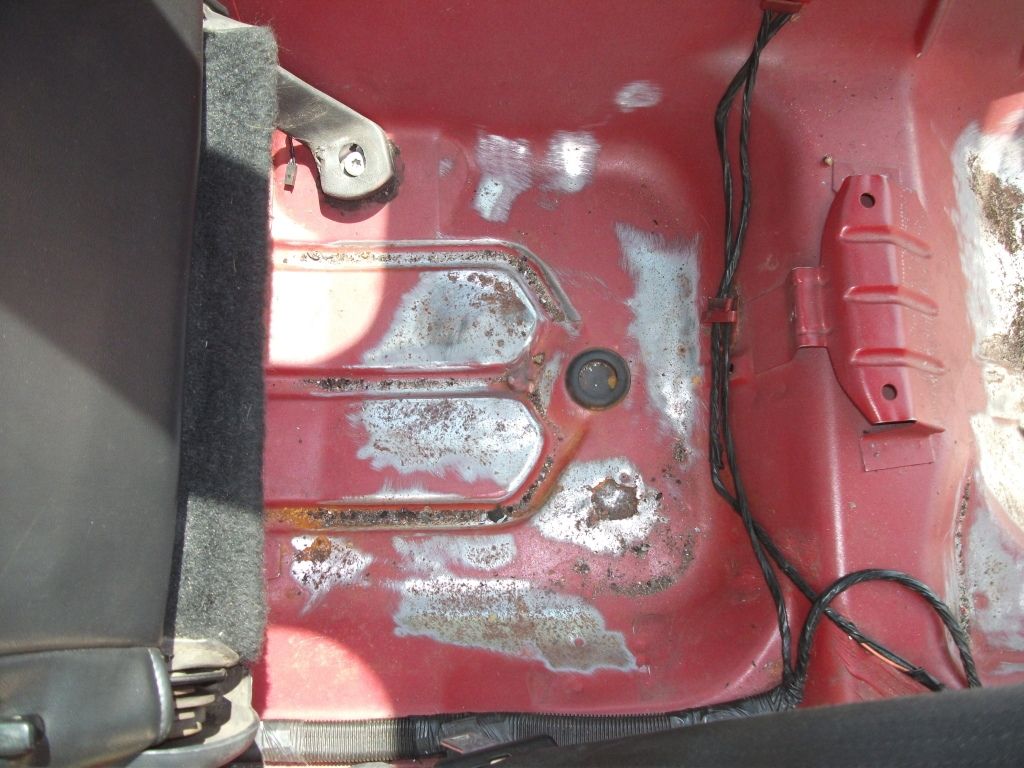
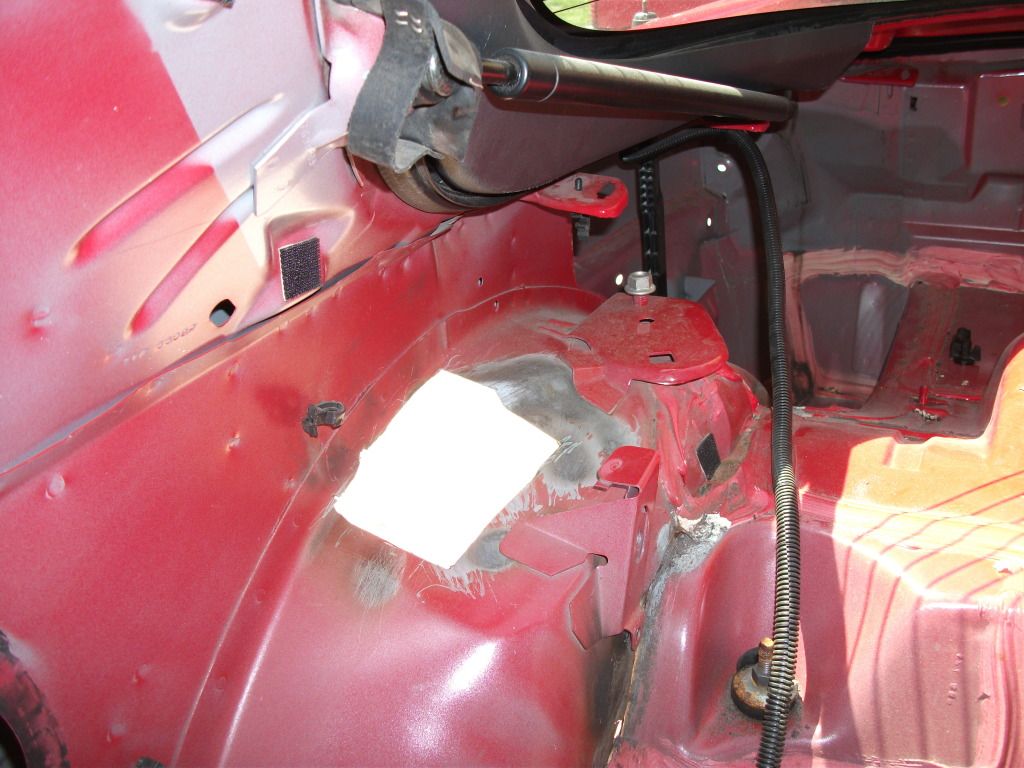
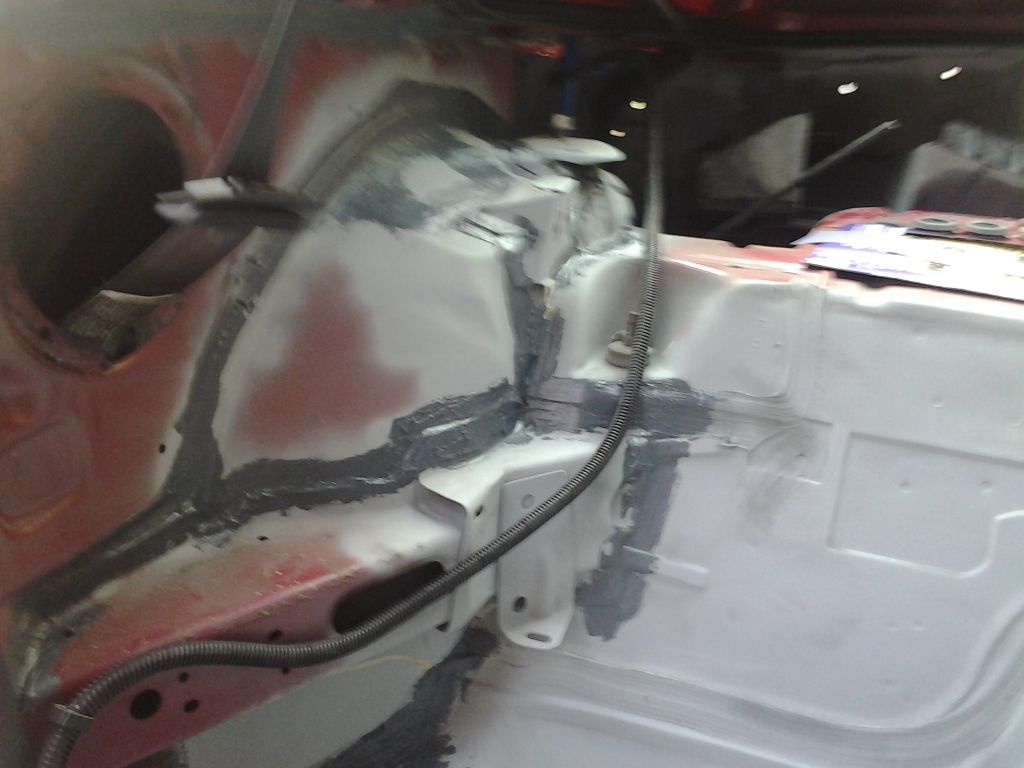
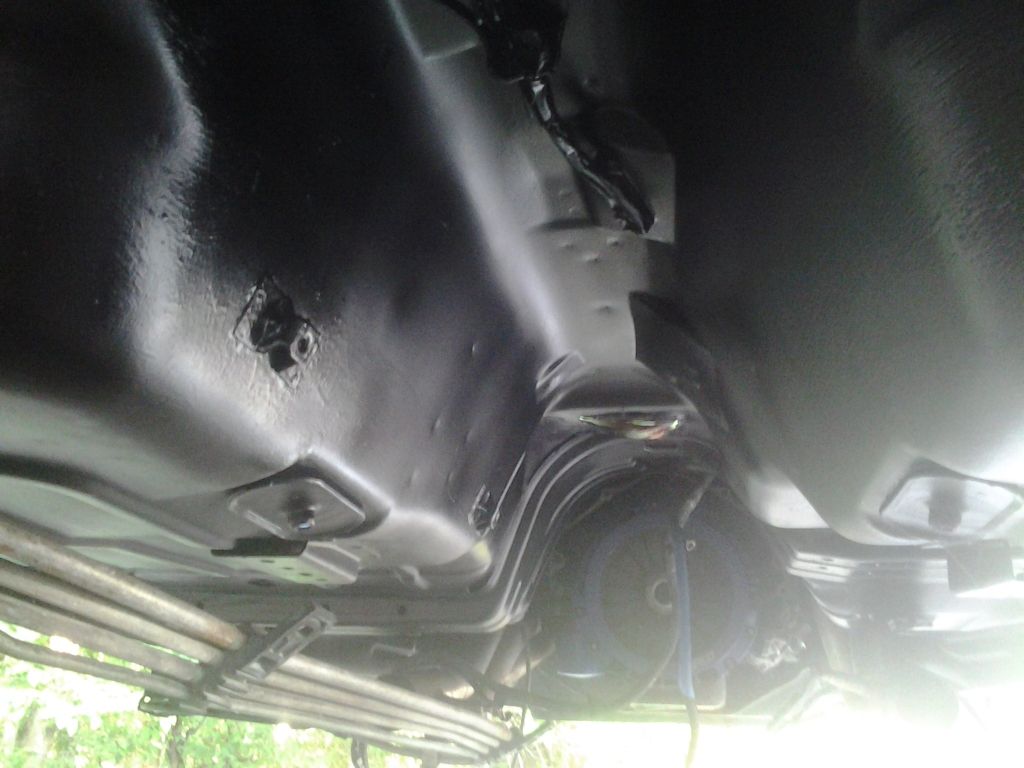
Here is the few patches we made to the floor boards. The two larger ones are doubled up, since it is where the subframe meets the body. We cut out the rust, then fit a piece on the bottom layer and welded it in, then fit a piece to cover the hole in the floor board, and welded that in. Then button welded them together.
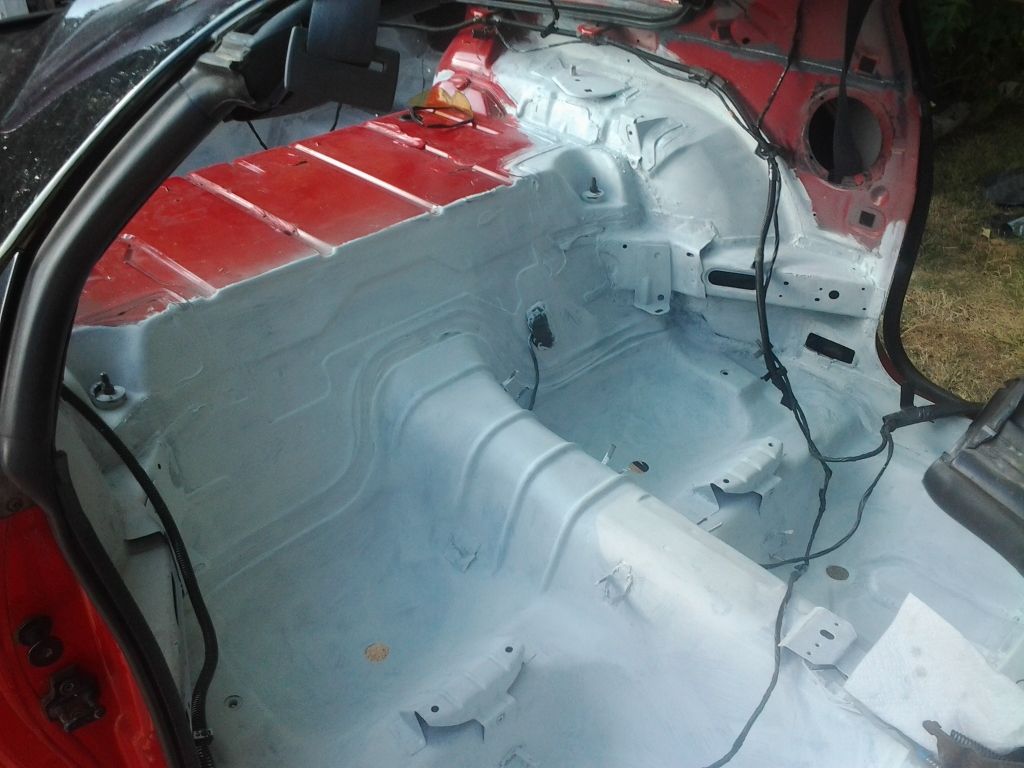
Since we were basically done with the patchwork at this point, I started to scuff the remainder of the interior and hit it with some self-etching primer.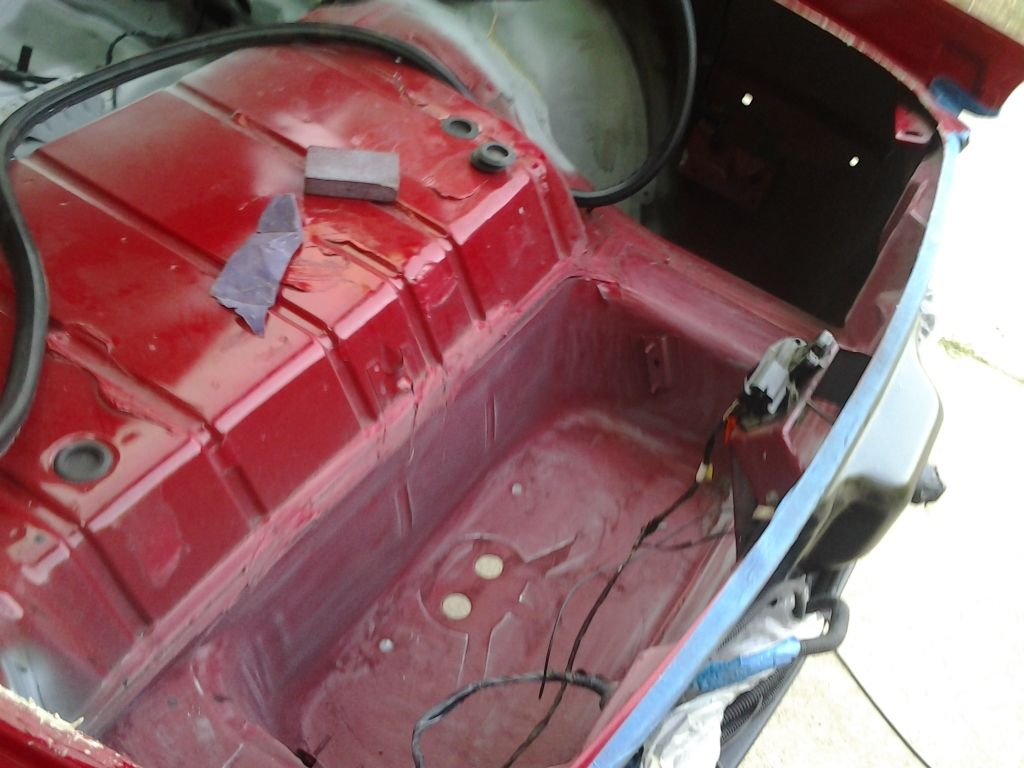
I also put down some regular primer where I was planning to put down some seam sealer, since it says on the directions not to use it on top of a self etching primer.
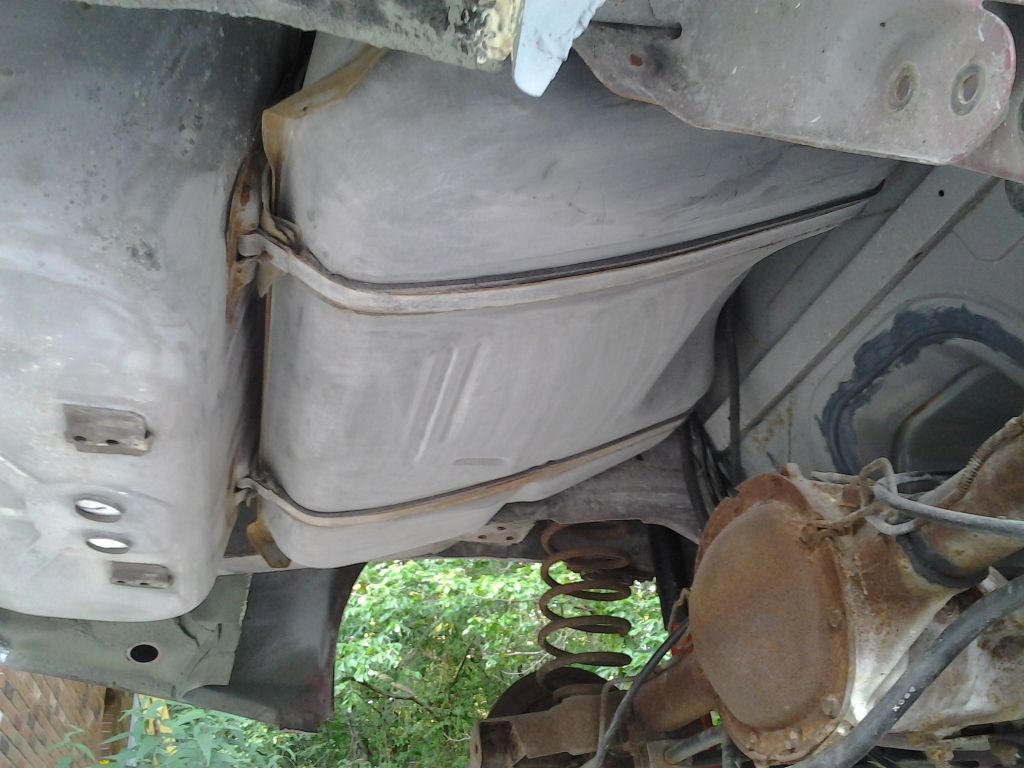
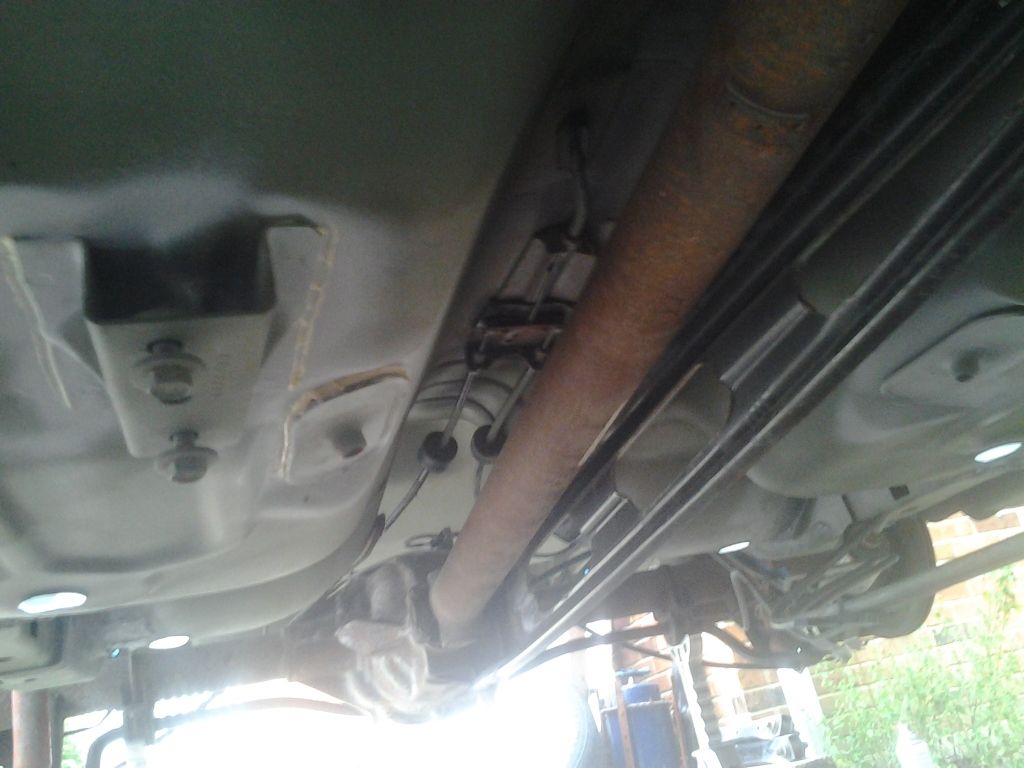
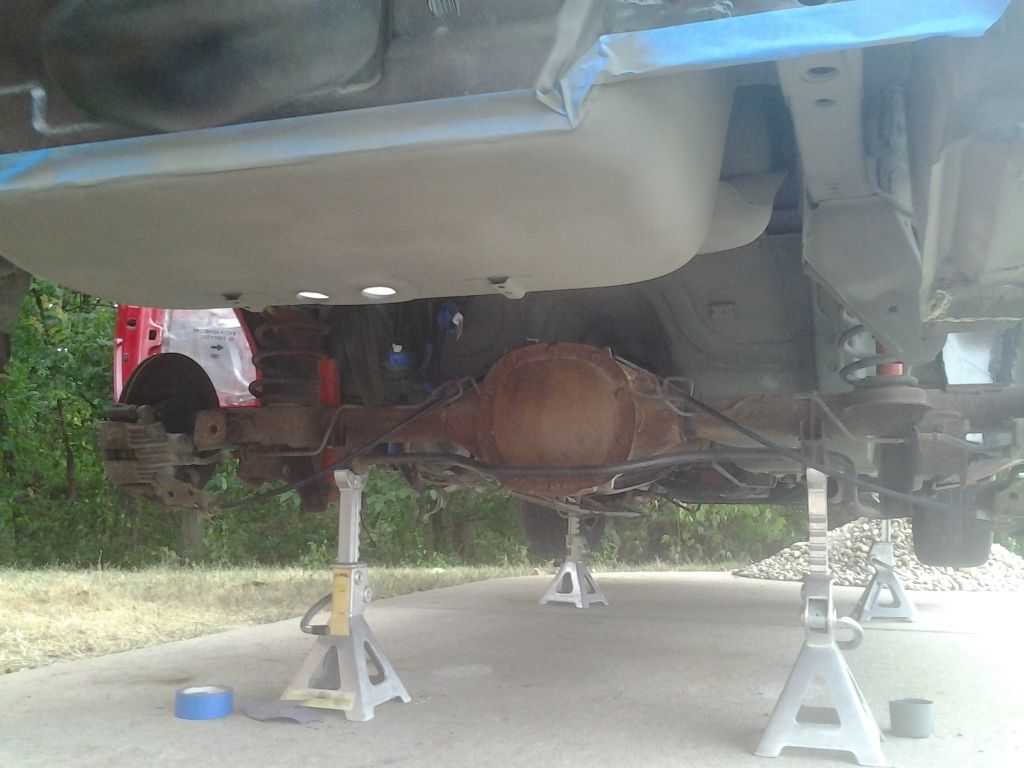
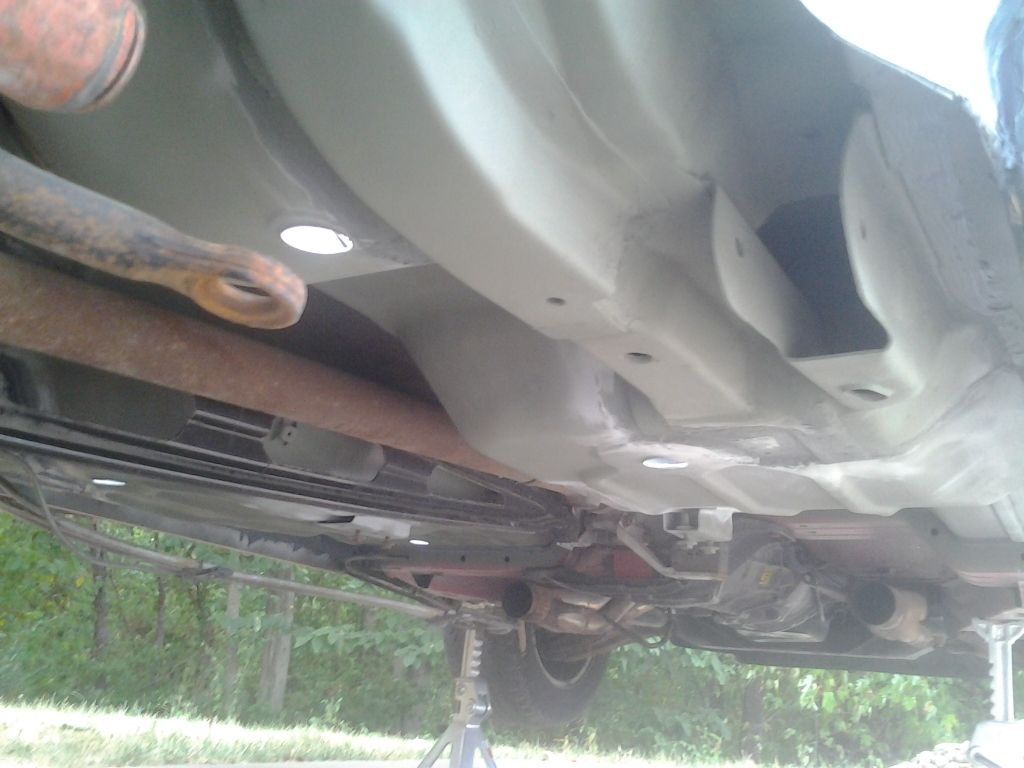
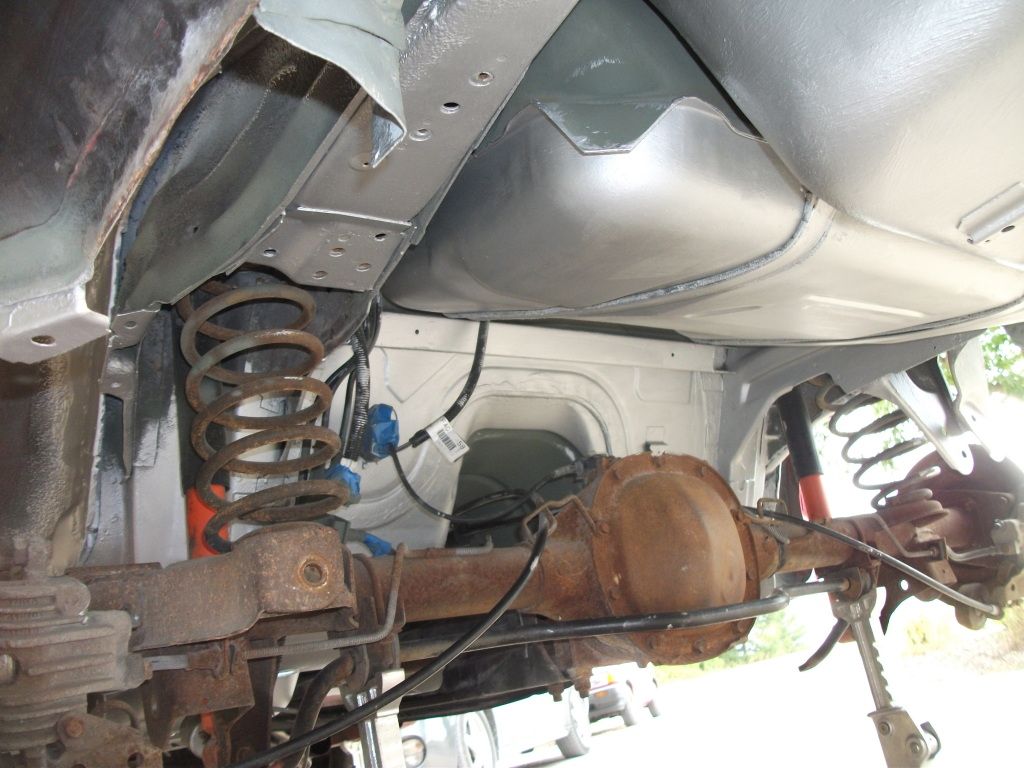
By this time, I had started in on the undercarriage..
It pretty much went in stages: Clean & degrease - wire wheel/grind whatever rust I could reach - sand - self etch primer - regular primer where I was going to use the seam sealer - seam sealer - two coats of Rust Bullet - top coat or two of Rustoleum semi-gloss black.
I'll start with some pics after I had started to clean it up some:
Now for some primer and seam sealer... I wanted to try to seal up any body seams and crevices where water/salt would be able to get into and cause corrosion.

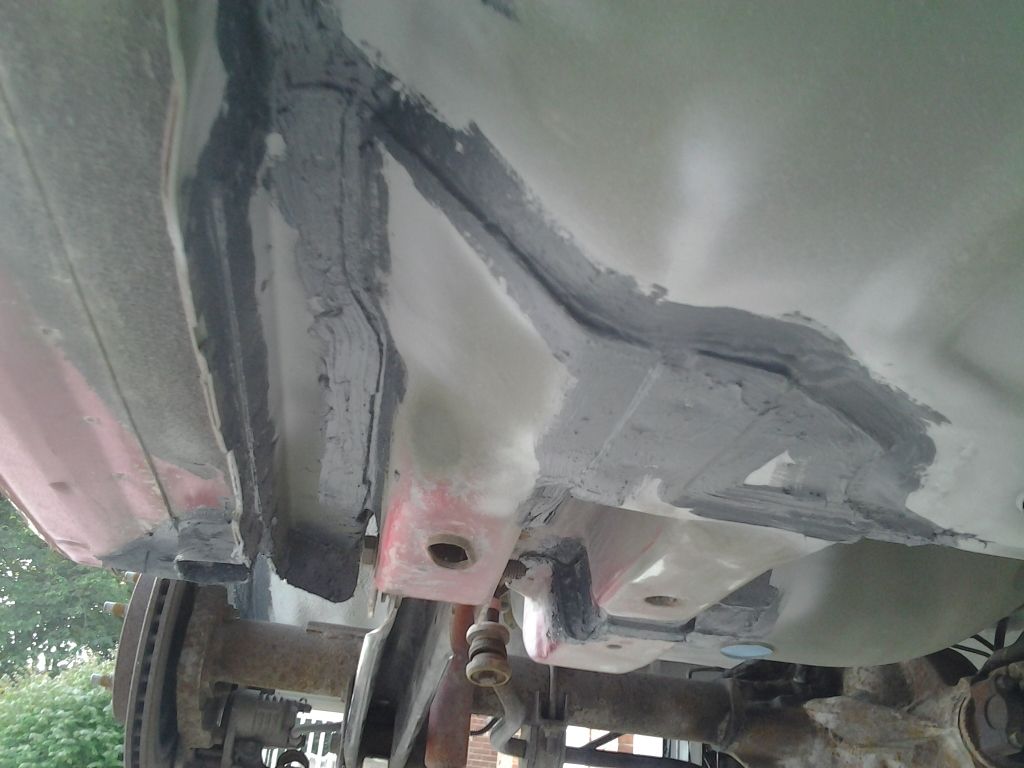
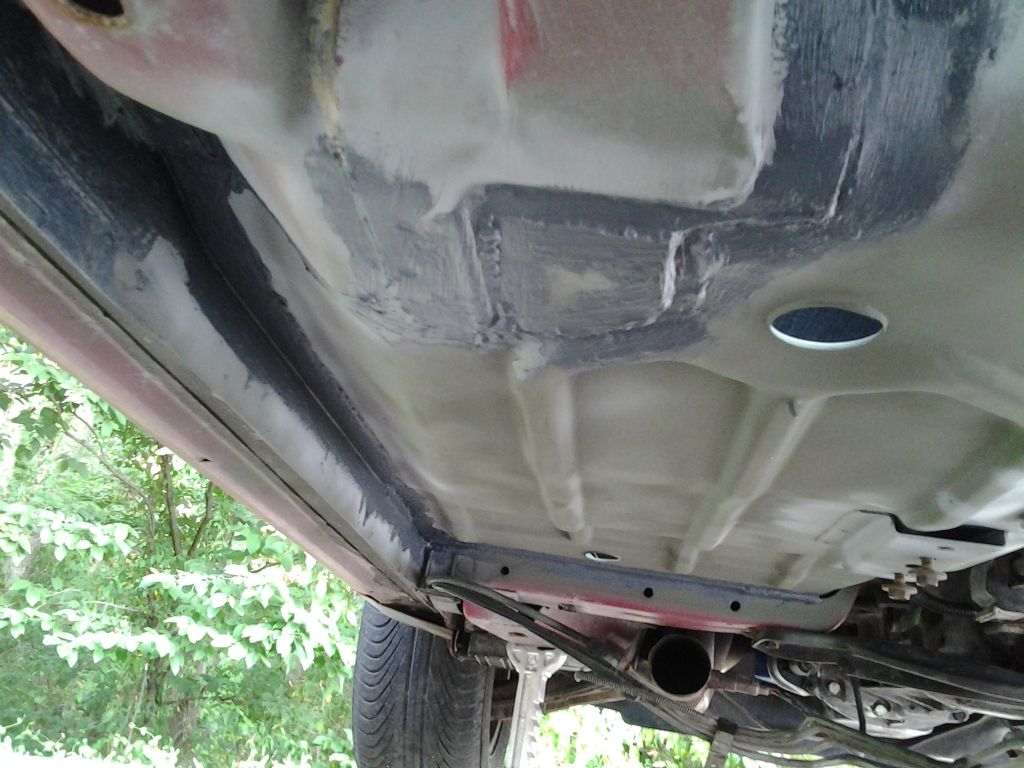
I put some on most of the seams on the interior as well.
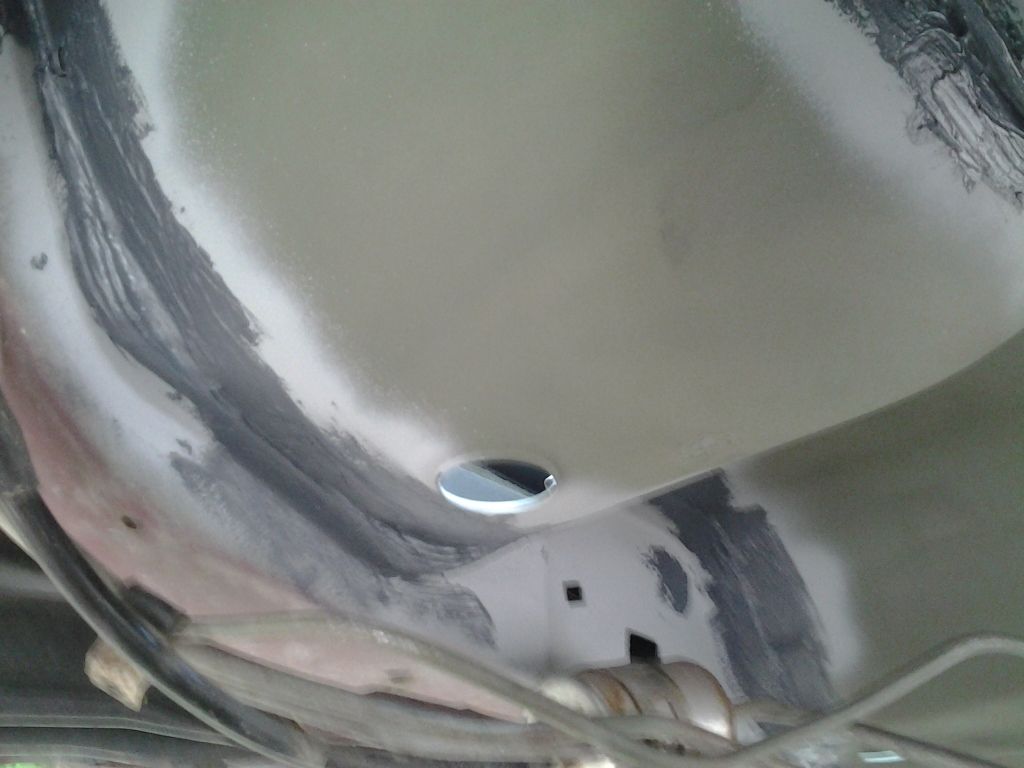
Then I brushed on a good coat of primer on the interior.
1) I want to protect the car from any future rust.
2) I want to make it feel more substantial, quieter on the inside, less rattly, and just like more of a nice solid car.
3) I want people to be able to look at it, and not believe it has over 200,000 miles
(sitting at 194k and some change right now)4) I want it to look not stock, but still close to it. Tasteful mods that remain true to the car.
On with the progress pics!
Here is the few patches we made to the floor boards. The two larger ones are doubled up, since it is where the subframe meets the body. We cut out the rust, then fit a piece on the bottom layer and welded it in, then fit a piece to cover the hole in the floor board, and welded that in. Then button welded them together.
Since we were basically done with the patchwork at this point, I started to scuff the remainder of the interior and hit it with some self-etching primer.
I also put down some regular primer where I was planning to put down some seam sealer, since it says on the directions not to use it on top of a self etching primer.
By this time, I had started in on the undercarriage..
It pretty much went in stages: Clean & degrease - wire wheel/grind whatever rust I could reach - sand - self etch primer - regular primer where I was going to use the seam sealer - seam sealer - two coats of Rust Bullet - top coat or two of Rustoleum semi-gloss black.
I'll start with some pics after I had started to clean it up some:
Now for some primer and seam sealer... I wanted to try to seal up any body seams and crevices where water/salt would be able to get into and cause corrosion.
I put some on most of the seams on the interior as well.
Then I brushed on a good coat of primer on the interior.
09-01-2012, 09:54 PM
#4
On The Tree
Thread Starter
iTrader: (2)
Join Date: Dec 2008
Location: Edwardsville, IL
Posts: 181
Likes: 0
Received 0 Likes
on
0 Posts
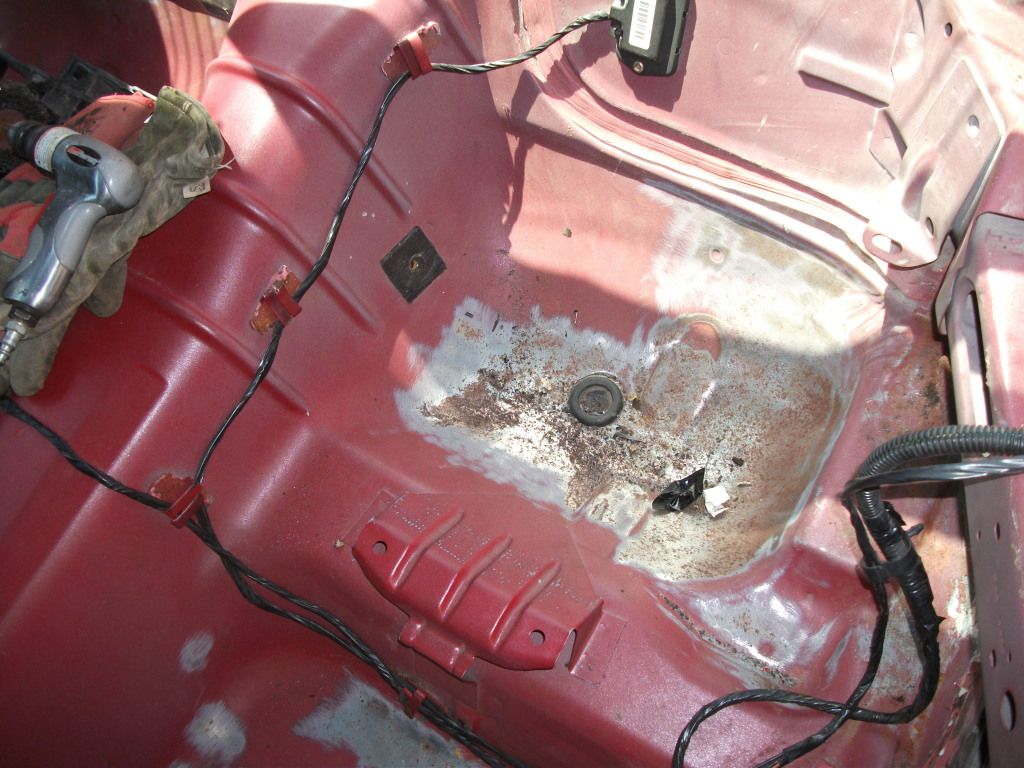
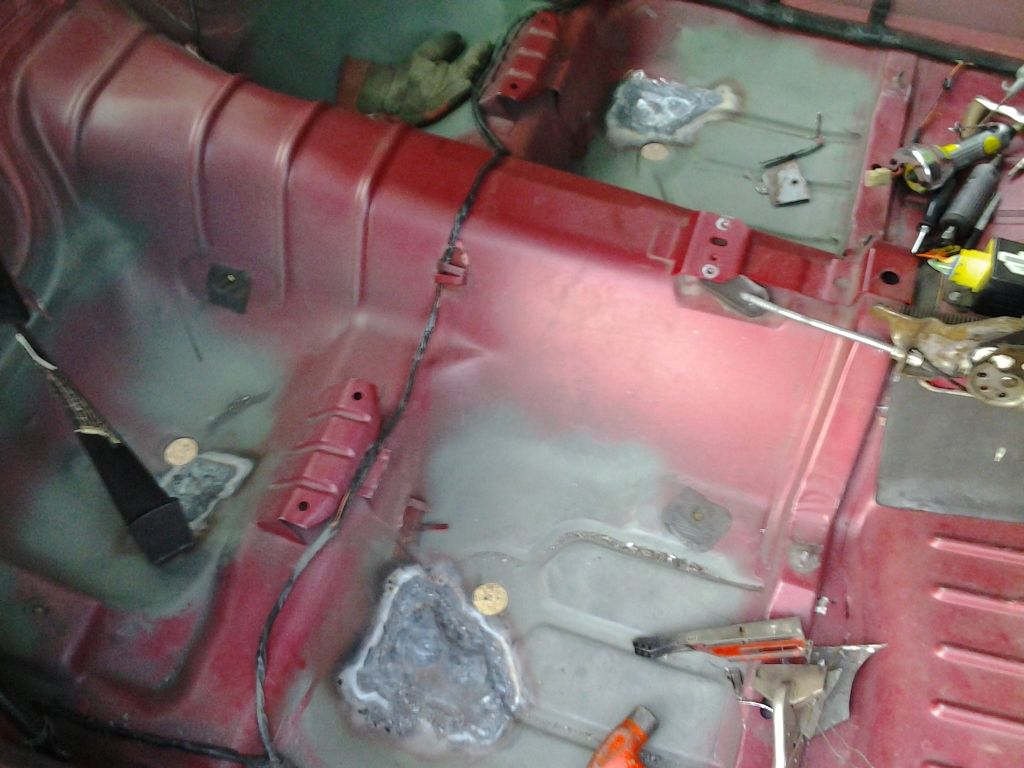
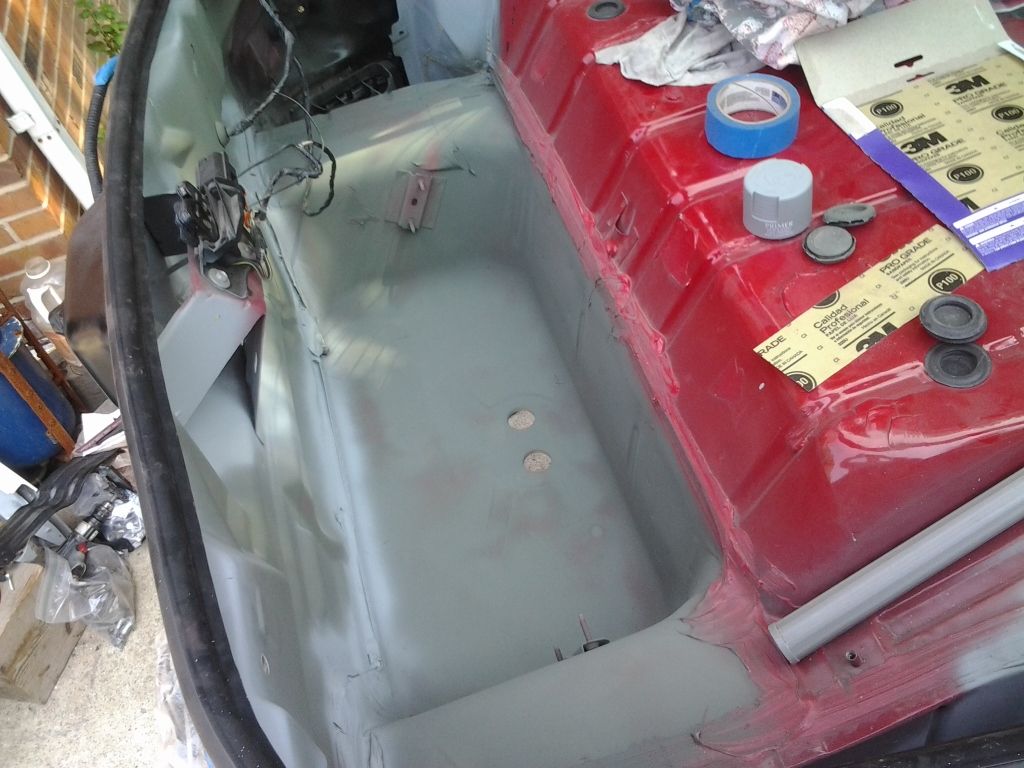
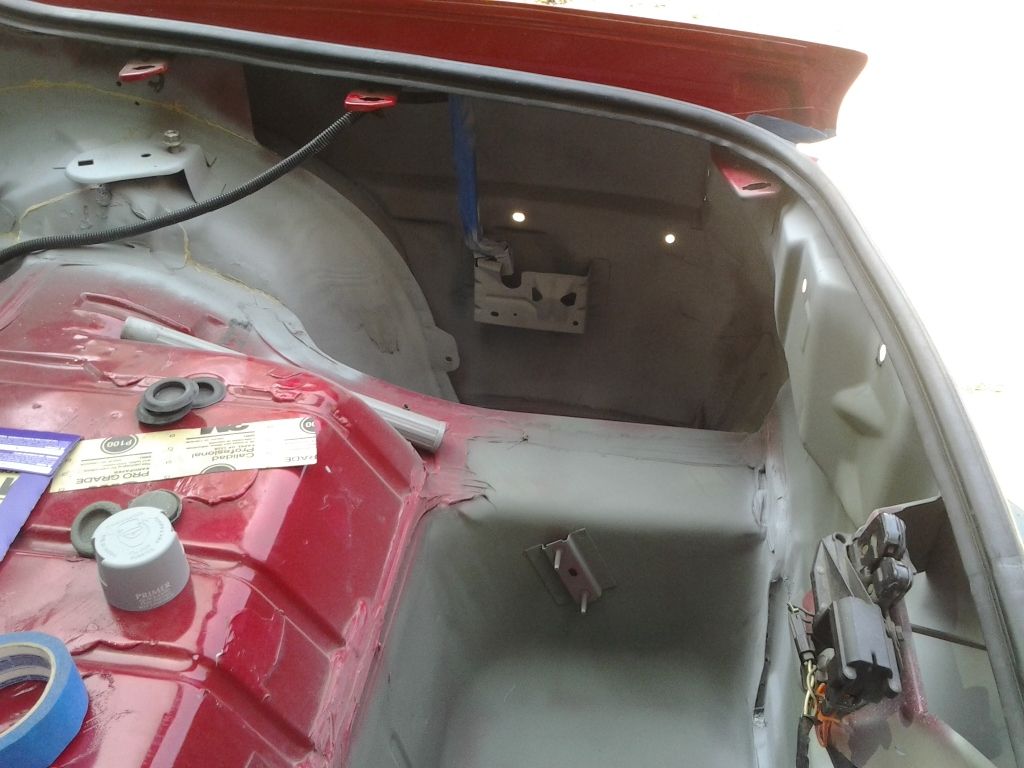
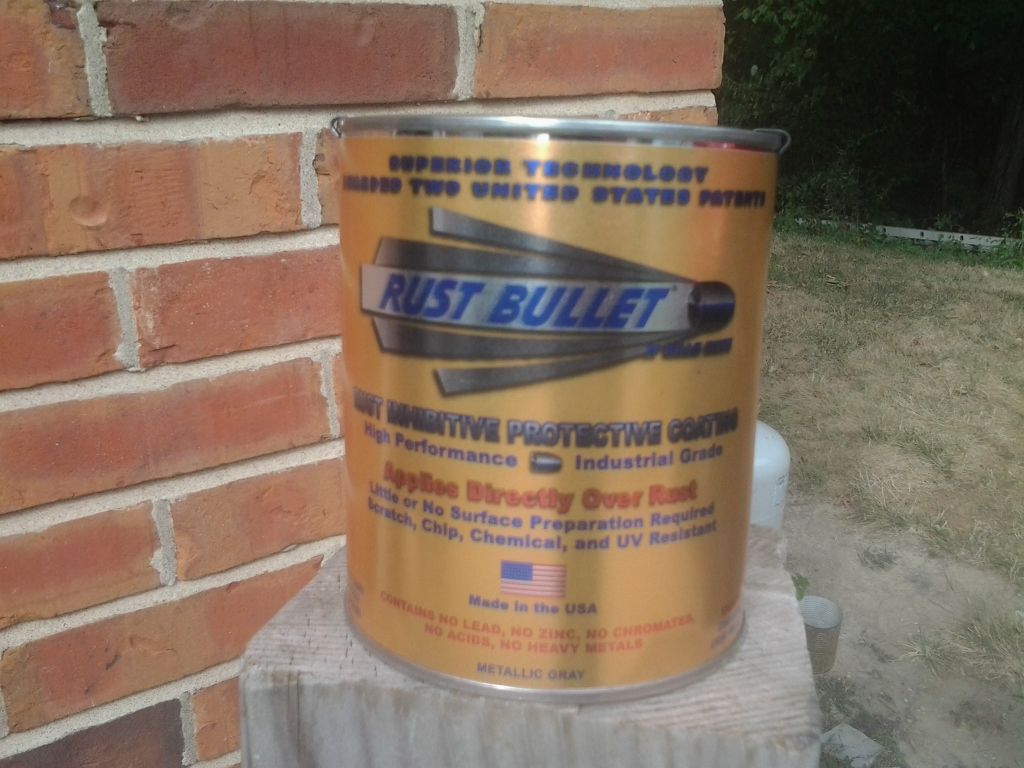
Now that the priming and sealing was done, it was time to break out the Rust Bullet protective paint. It's supposed to form a solid barrier from the elements, and is also resistant to solvents. I can tell you that the latter is true, I got a little on my shirt, my skin, and the concrete.. that sh*t doesn't come off. It's a good thing I was wearing gloves, or I woulda had silver all over my hands for a week 
So hopefully this is some good stuff.. It says to use two coats, so that's what I did. I only had one quart, which wasn't enough for two coats on everything, so the majority of the undercarriage got a double coat, except for the areas where rust didn't appear to be much of a problem - driveline tunnel, and up around the transmission.
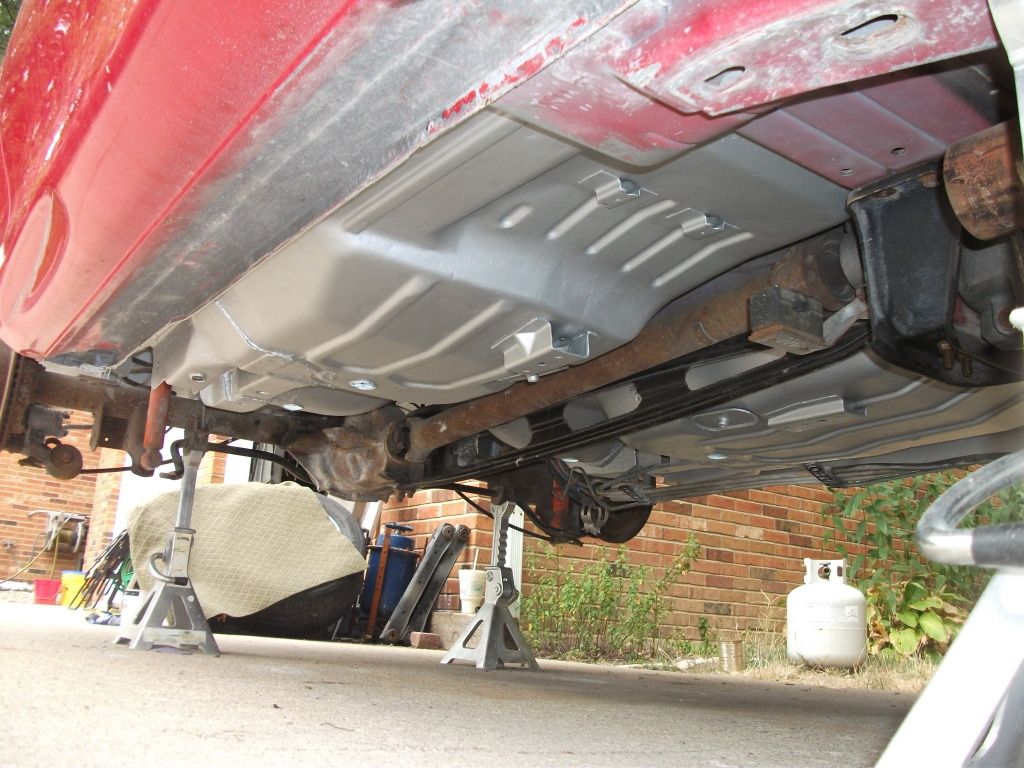

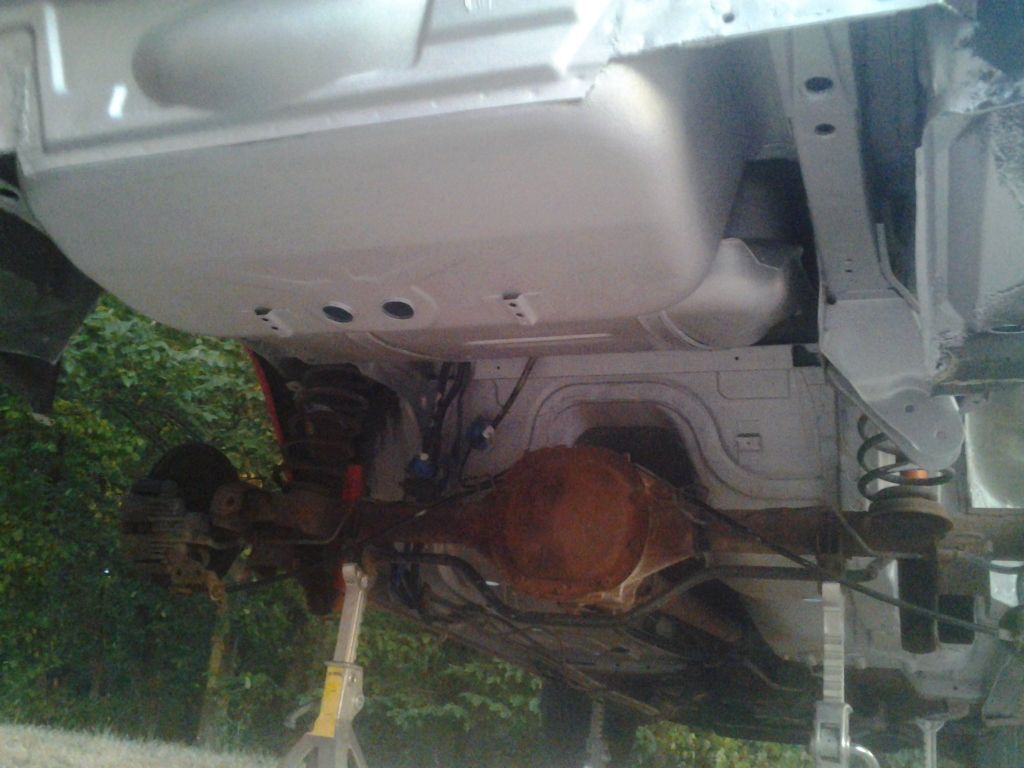
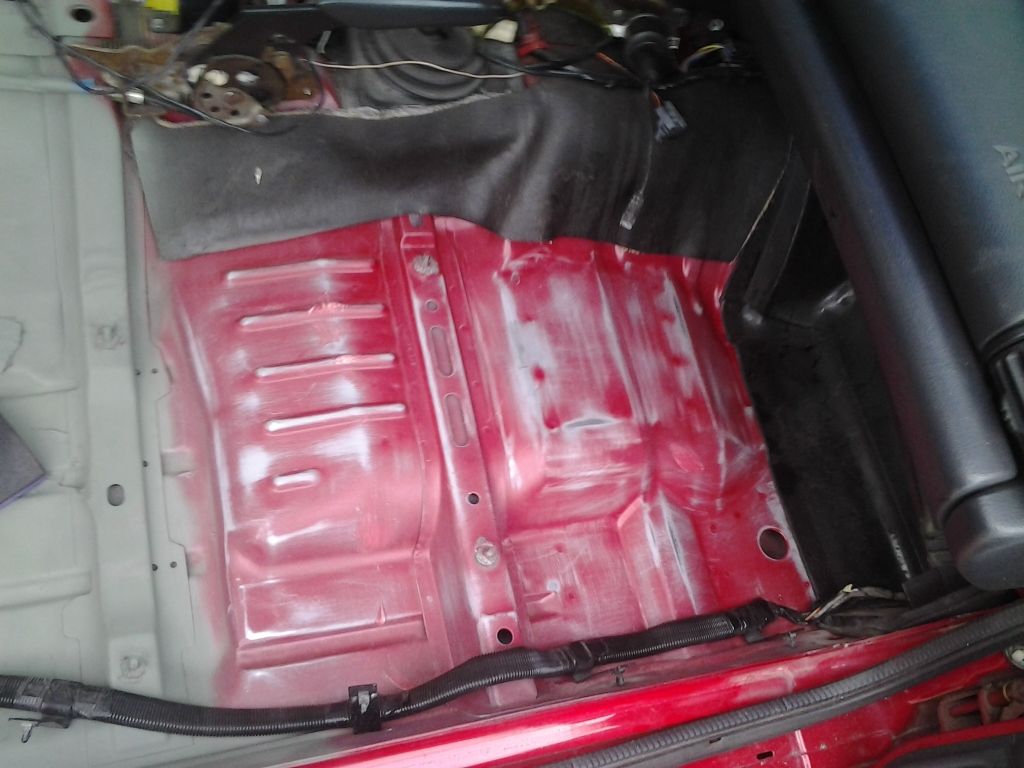
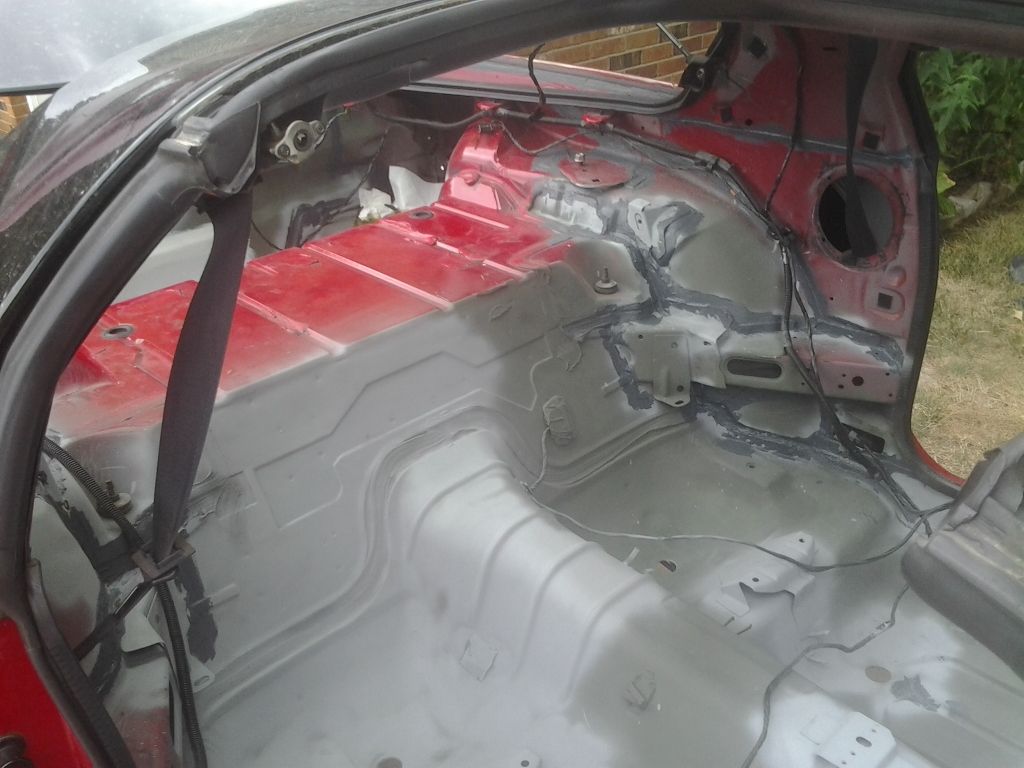
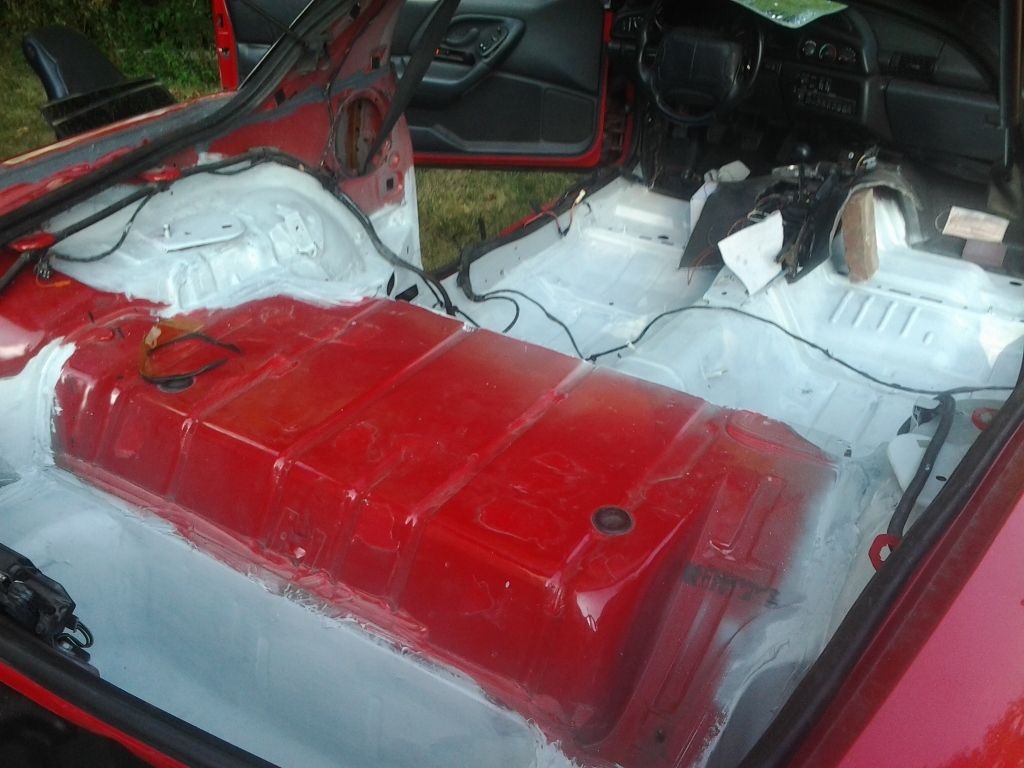
Progress had been going pretty good, and it was finally time for the final layers of paint. I went with Rustoleum semi-gloss black for underneath, and a Rustoleum red for the interior. Not that anyone will ever see it... but that's besides the point.

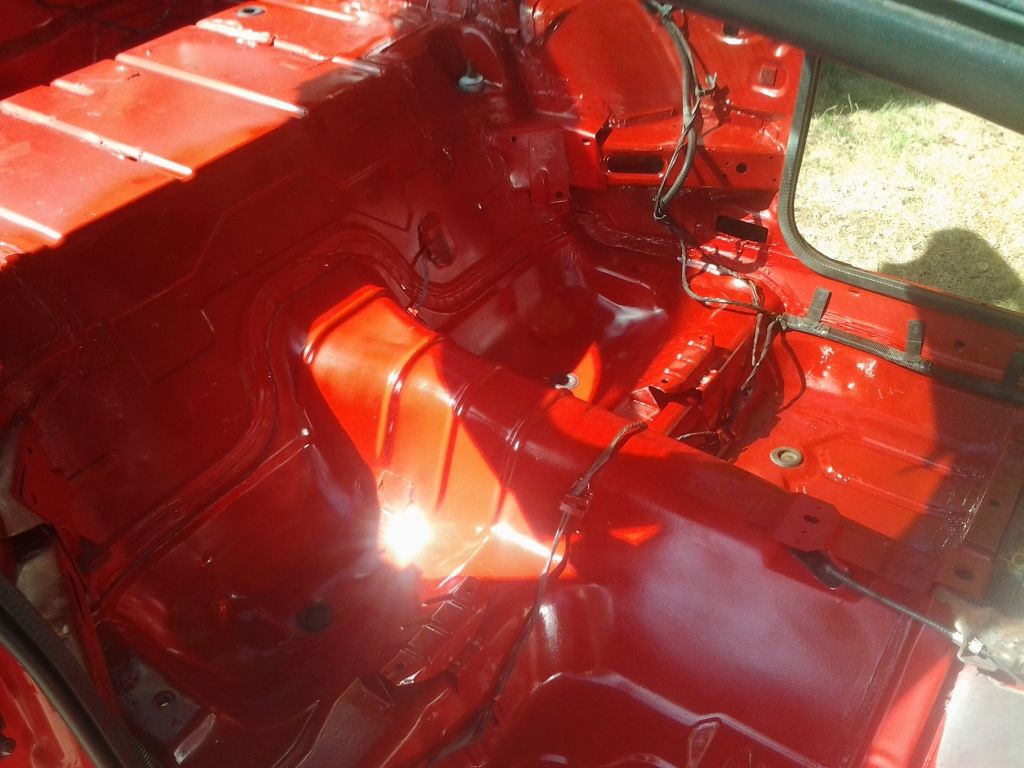
So hopefully this is some good stuff.. It says to use two coats, so that's what I did. I only had one quart, which wasn't enough for two coats on everything, so the majority of the undercarriage got a double coat, except for the areas where rust didn't appear to be much of a problem - driveline tunnel, and up around the transmission.
Progress had been going pretty good, and it was finally time for the final layers of paint. I went with Rustoleum semi-gloss black for underneath, and a Rustoleum red for the interior. Not that anyone will ever see it... but that's besides the point.
 09-01-2012, 10:09 PM
#7
On The Tree
Thread Starter
iTrader: (2)
Join Date: Dec 2008
Location: Edwardsville, IL
Posts: 181
Likes: 0
Received 0 Likes
on
0 Posts
This almost brings us up to date on all my progress this summer..
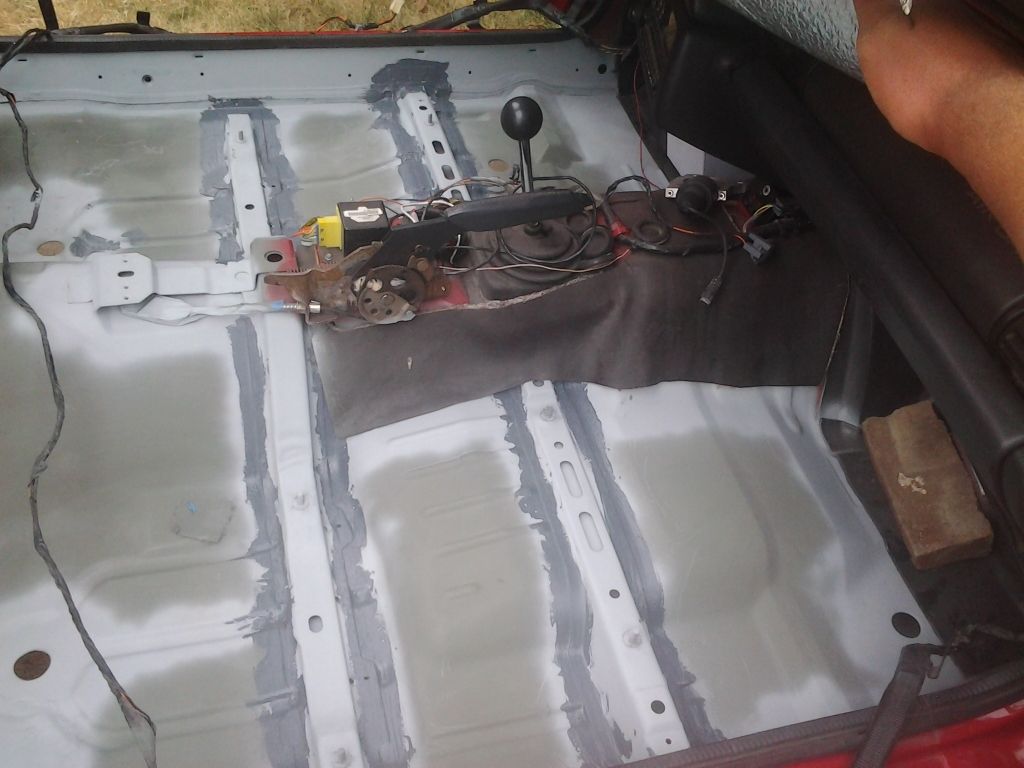
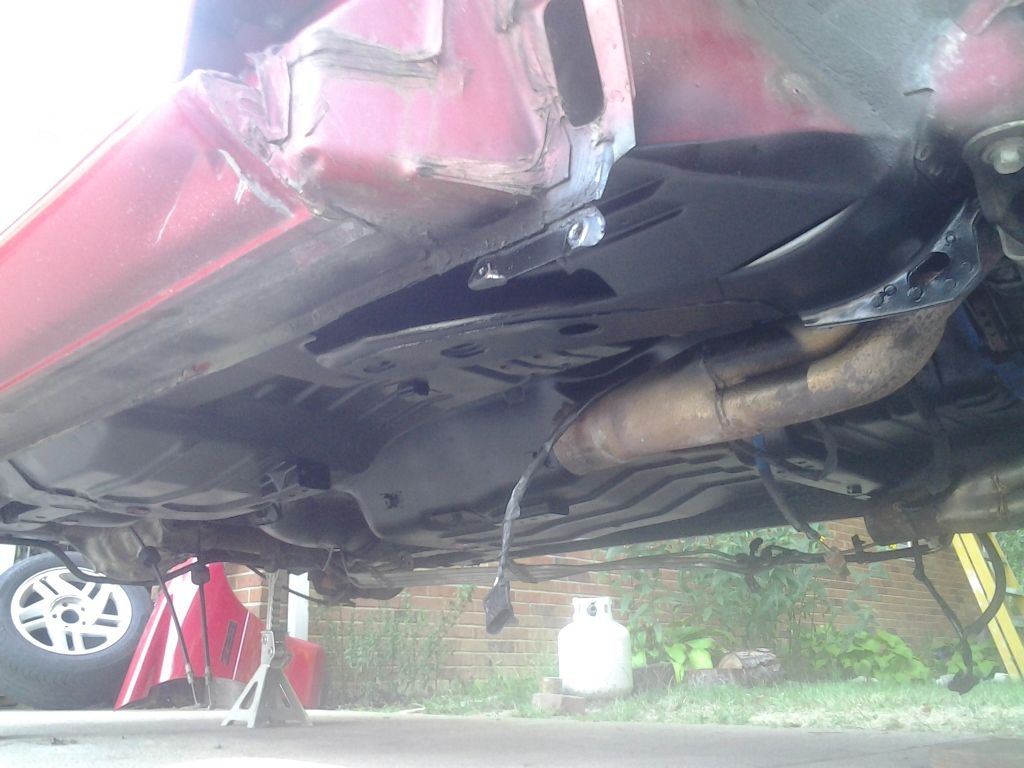
I pulled off the sway bar end link brackets and the panhard bars, and sand blasted them, primed, and painted gloss black. If you noticed some of the new bolts in the previous post.. I replaced almost every bolt/nut/washer/screw under the car with stainless steel. $$$ but I think it was well spent.
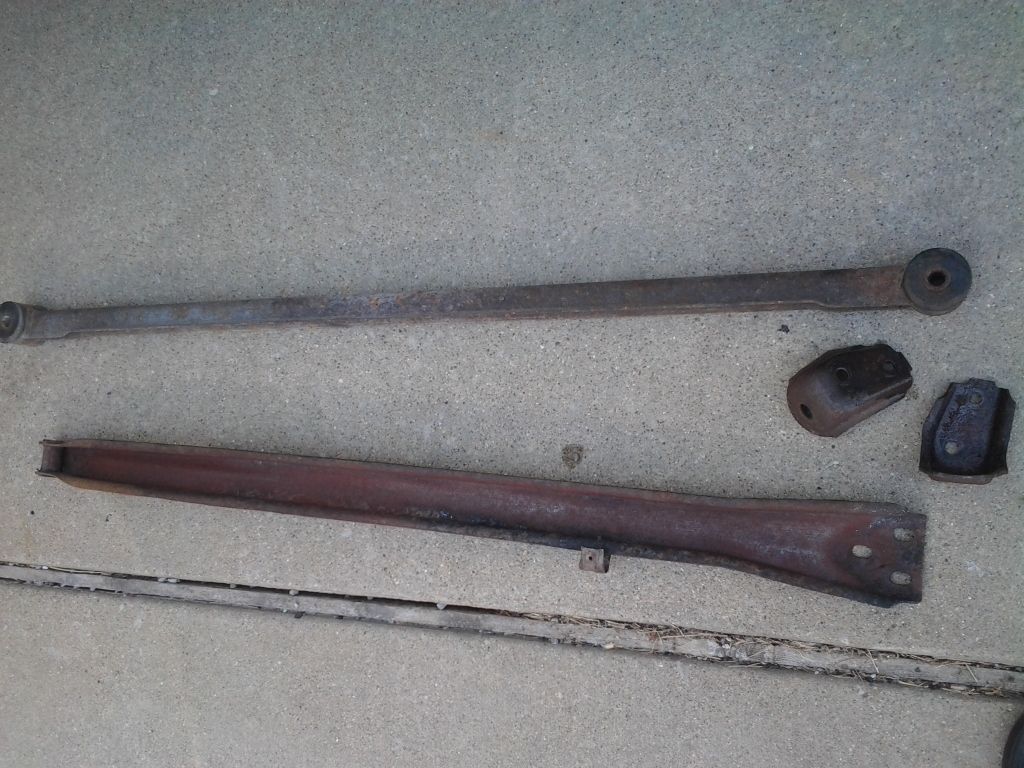
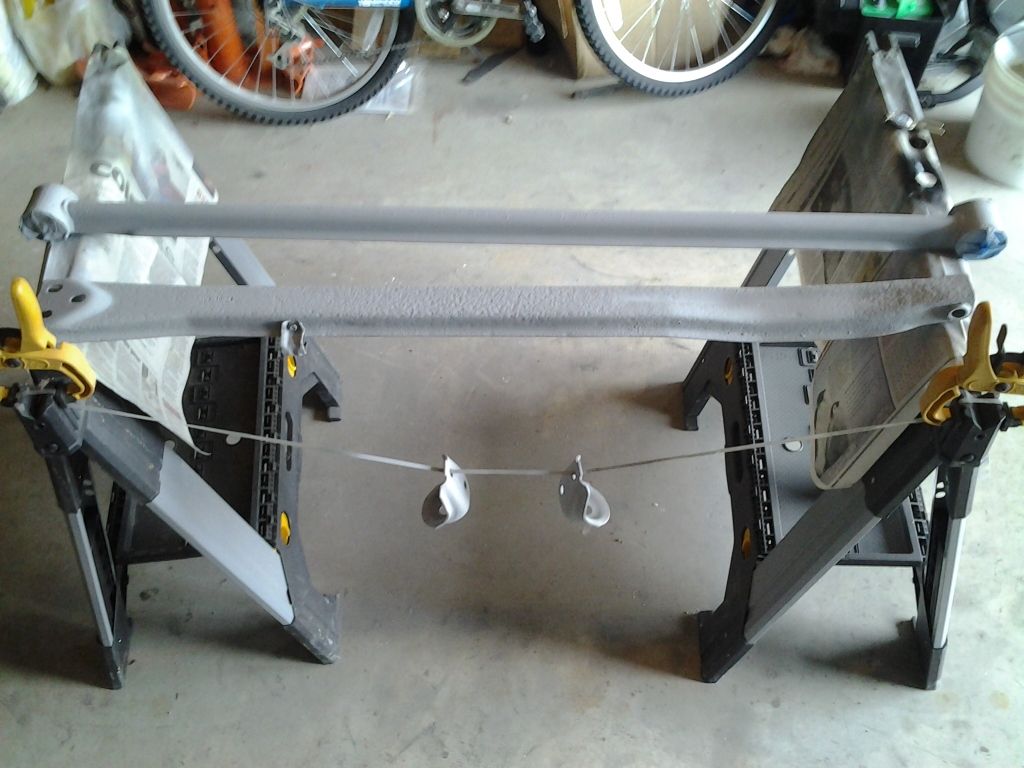
I pulled off the sway bar end link brackets and the panhard bars, and sand blasted them, primed, and painted gloss black. If you noticed some of the new bolts in the previous post.. I replaced almost every bolt/nut/washer/screw under the car with stainless steel. $$$ but I think it was well spent.
Trending Topics
09-01-2012, 10:33 PM
#10
On The Tree
Thread Starter
iTrader: (2)
Join Date: Dec 2008
Location: Edwardsville, IL
Posts: 181
Likes: 0
Received 0 Likes
on
0 Posts
Now for the fun part!
I replaced my old chattery clutch with a new stock replacement from O'Rielly. I hope it holds up good.. I was so tired of the Spec clutch, I just wanted something that would drive nice and smooth. I'm not making a ton of power, so I don't think I'll have a problem with it slipping, but we'll see I guess. I got the transmission put back in just this past week.
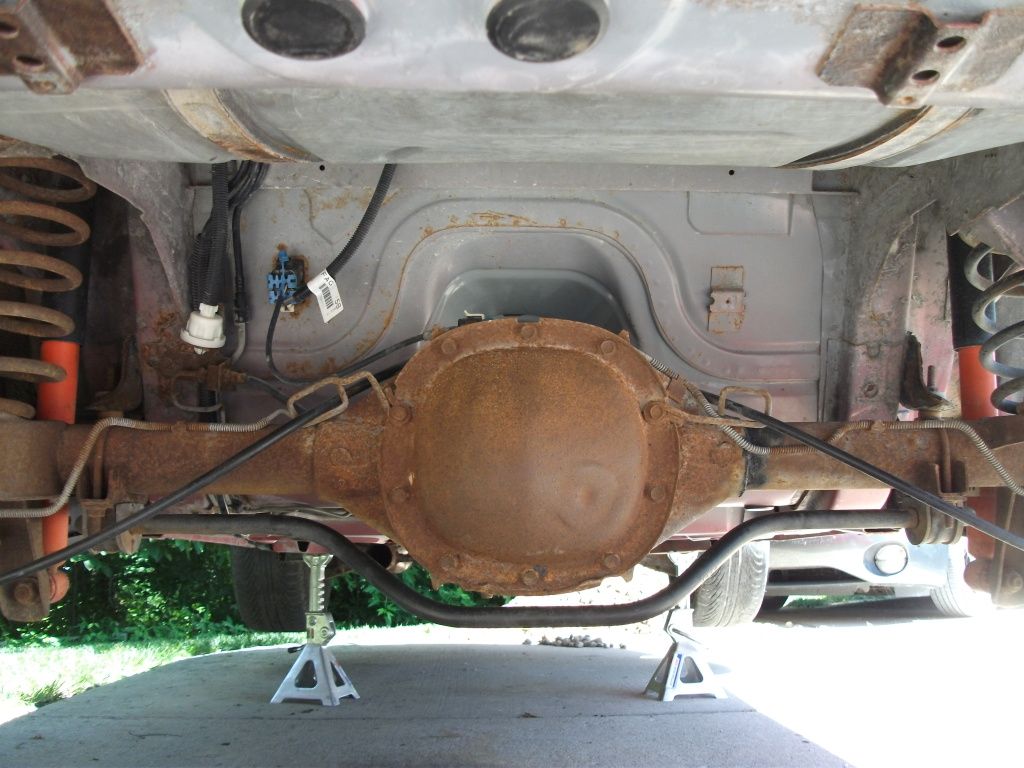
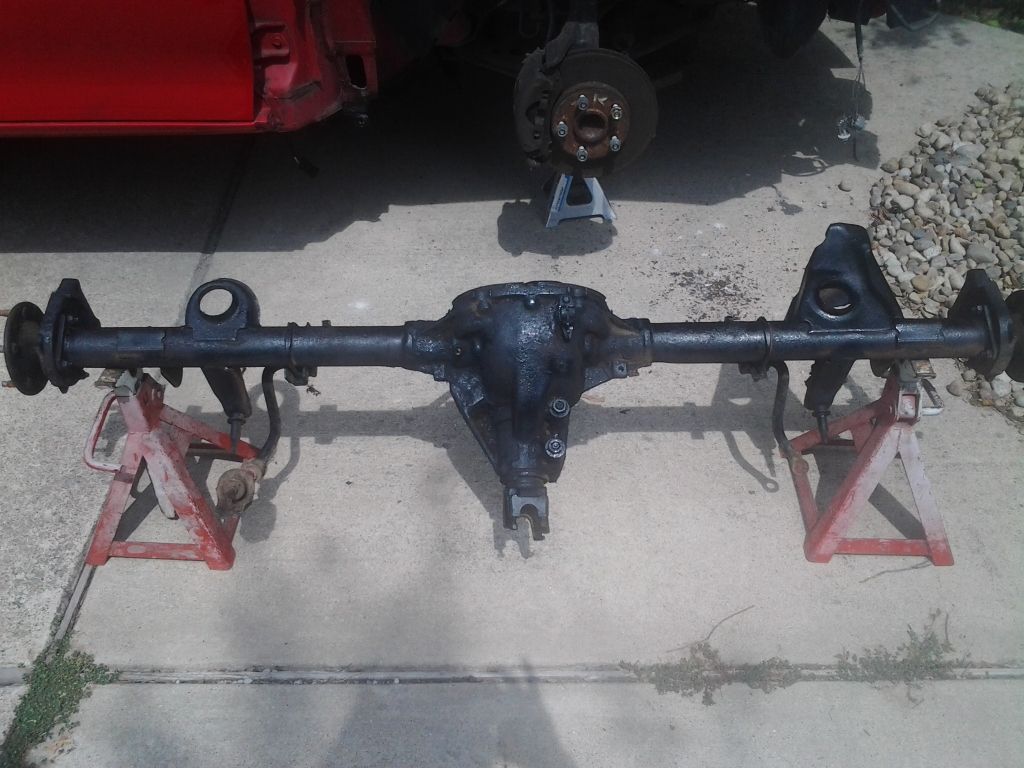
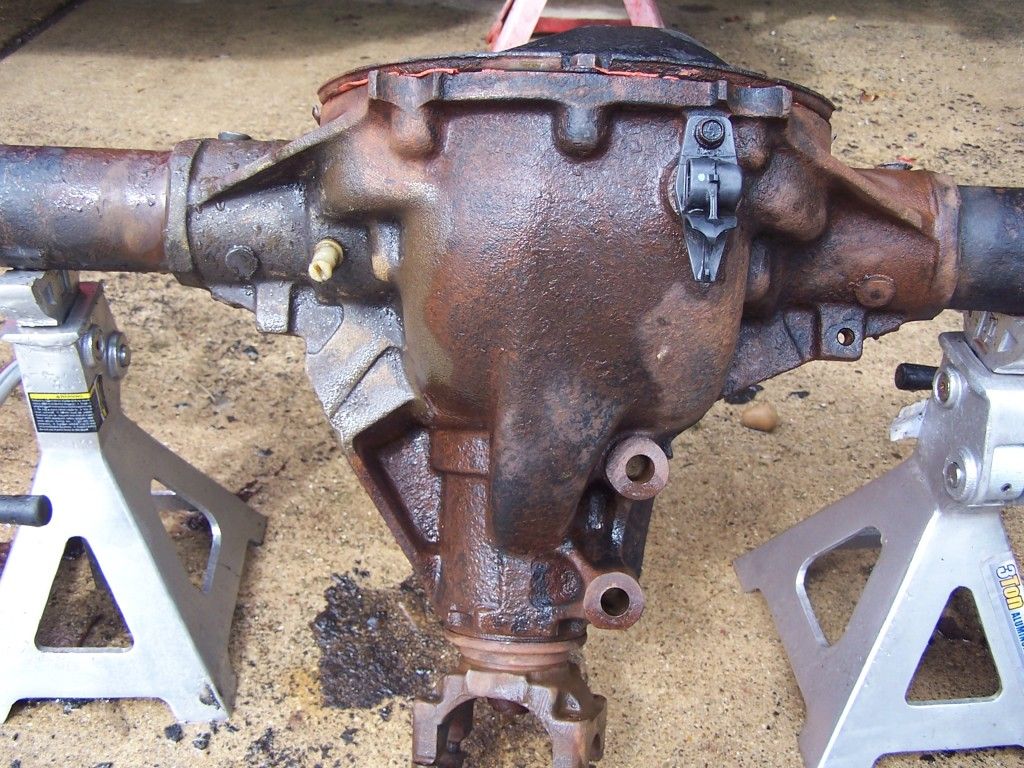
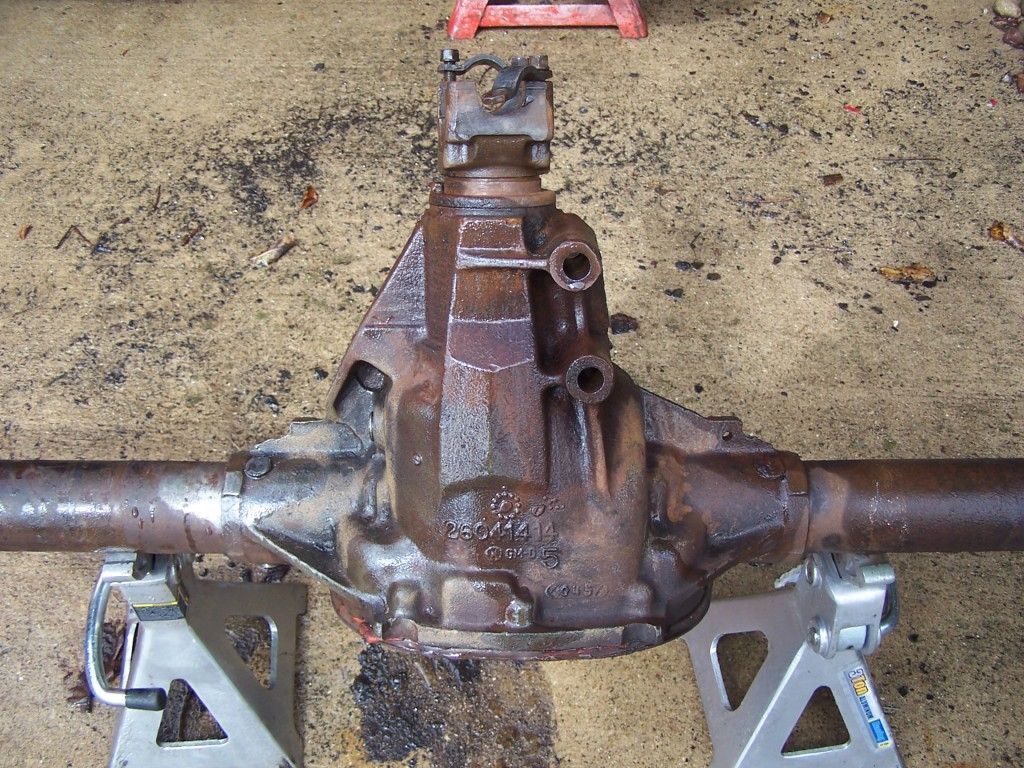
Last Saturday afternoon I spotted something on Craigslist... A complete rear end with 4.10 gears for $200. I jumped on this and immediately contacted the seller. He said all the internals had been replaced, and only had about 7k miles on them, the housing and axles had ~135k. This was perfect, because I have been itching for some different gears - I still have 3.23's in my stock rear, which also has a leaky pinion seal. So on Sunday morning my dad and I drove over to St. Louis to pick it up.
It needs to be cleaned up, so I'm going to run a torch over it with a wire brush to get rid of the grease & rust scale. Then I want to sand blast it, and paint it. I'll either go with semi-gloss black that I have left over, or get some more gloss black Rustoleum.
I was planning on doing this while the car was away for painting, but I talked to the guy who is going to paint it and he has a couple other small side projects he needs to finish up, so it'll be a couple weeks before he's ready for it. No matter, that just means I'll try to get the rear cleaned up and swapped out before paint! Maybe I ought to look for an ls1 aluminum driveshaft too while I'm at it?
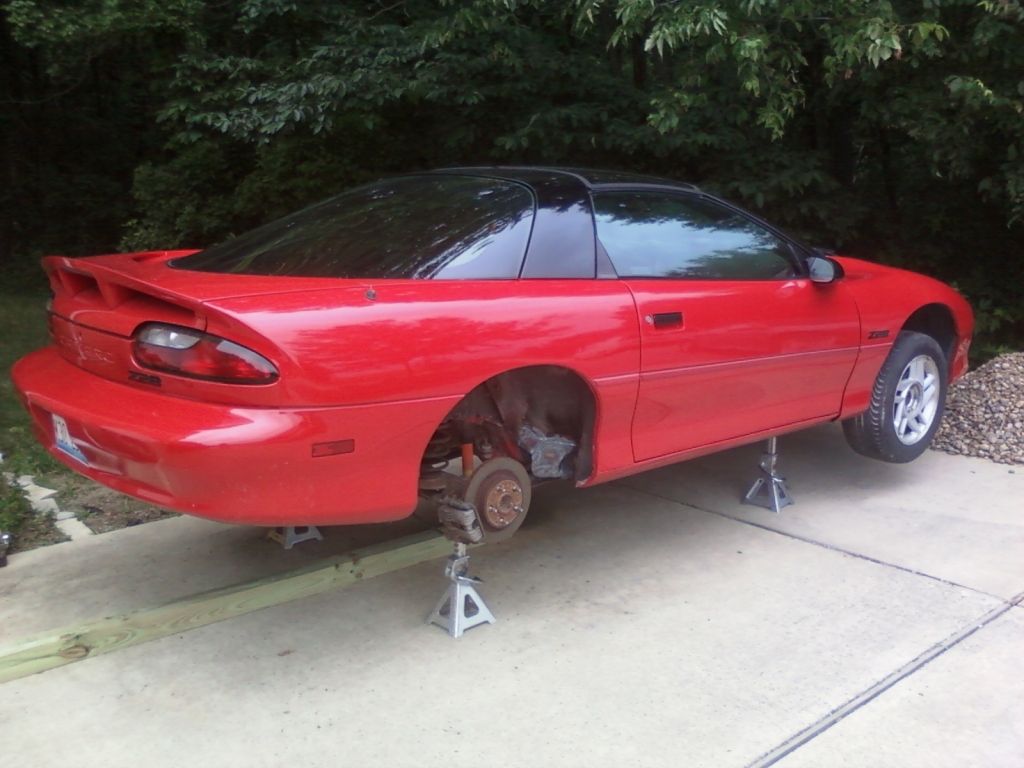
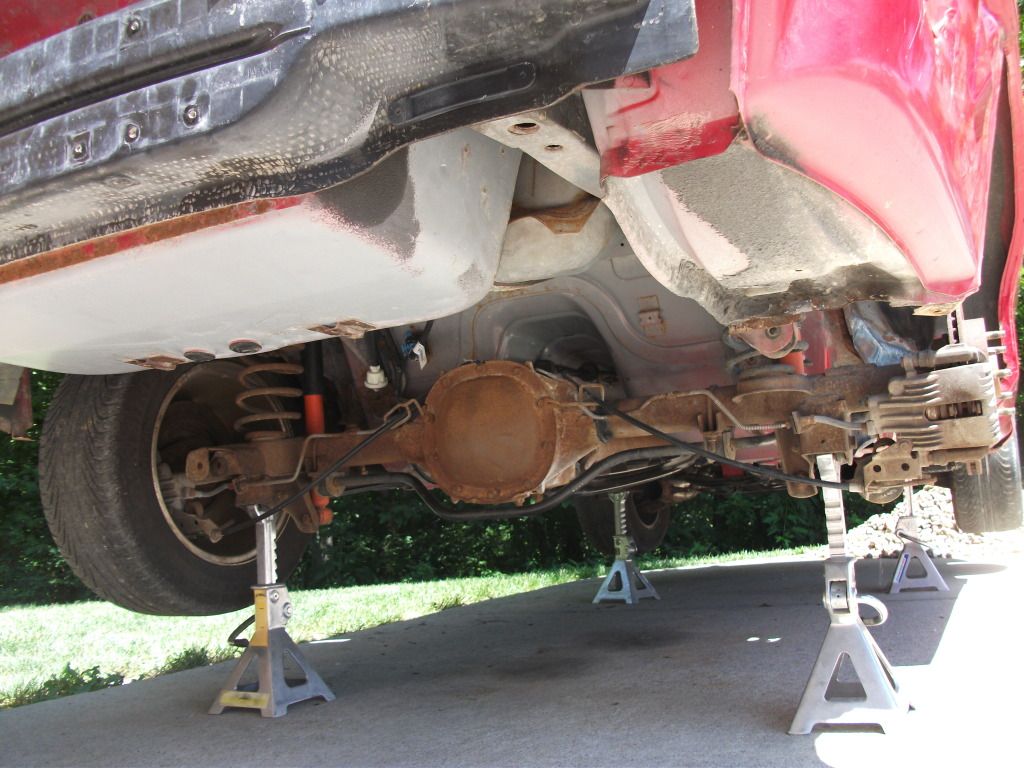
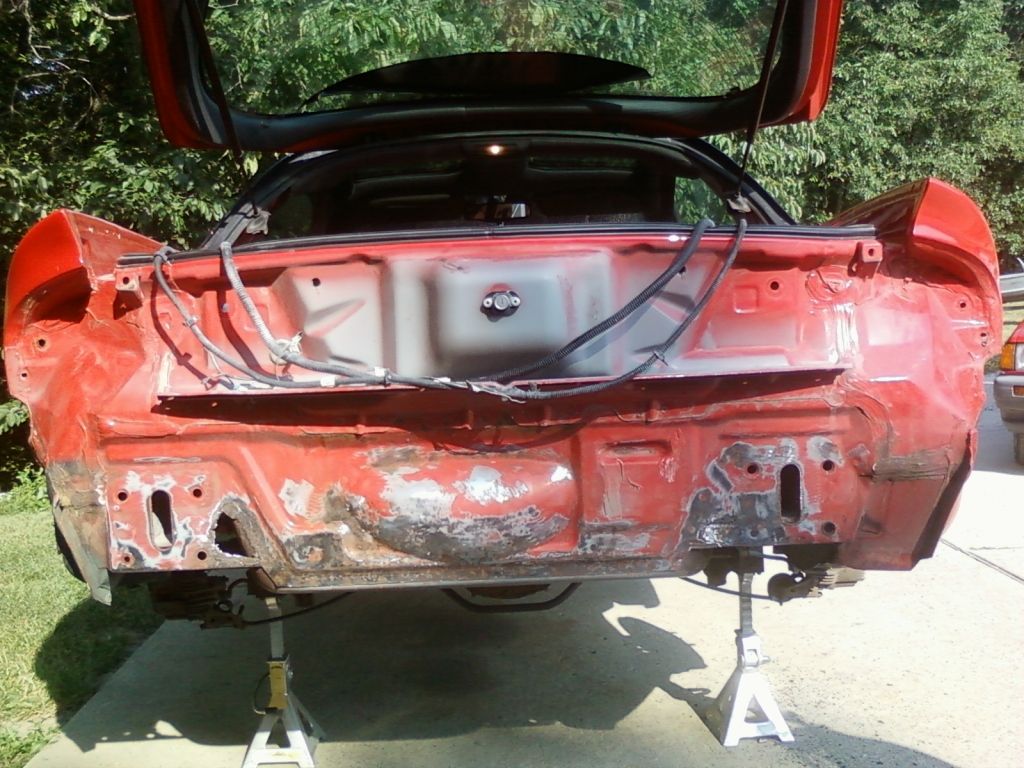
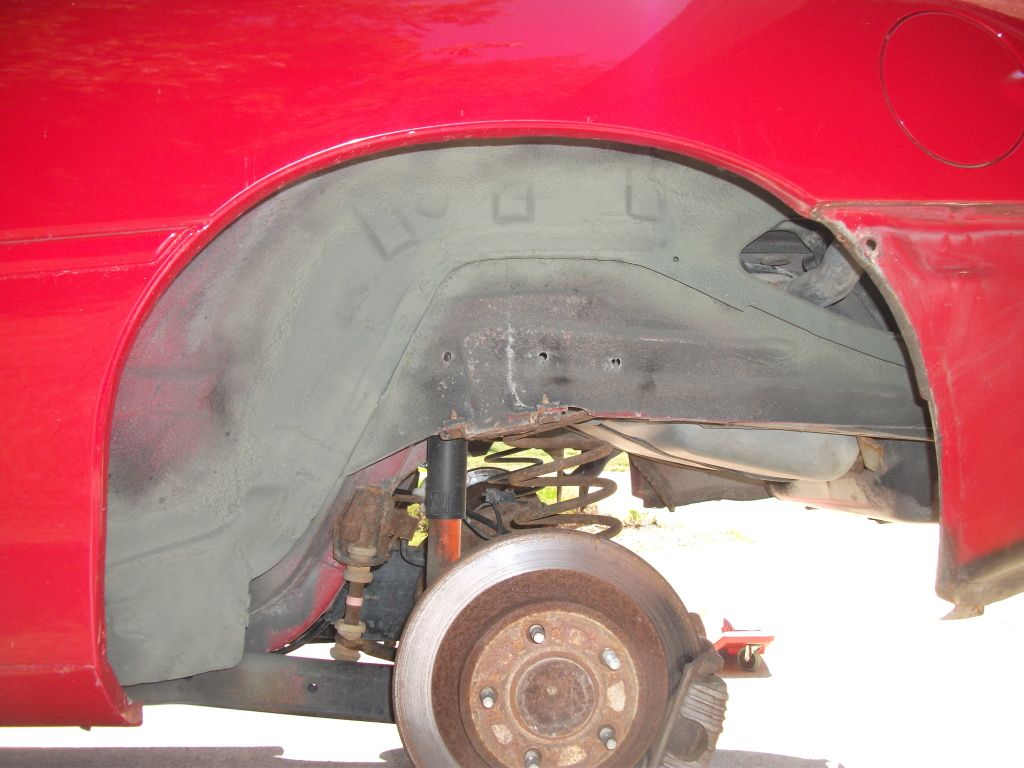
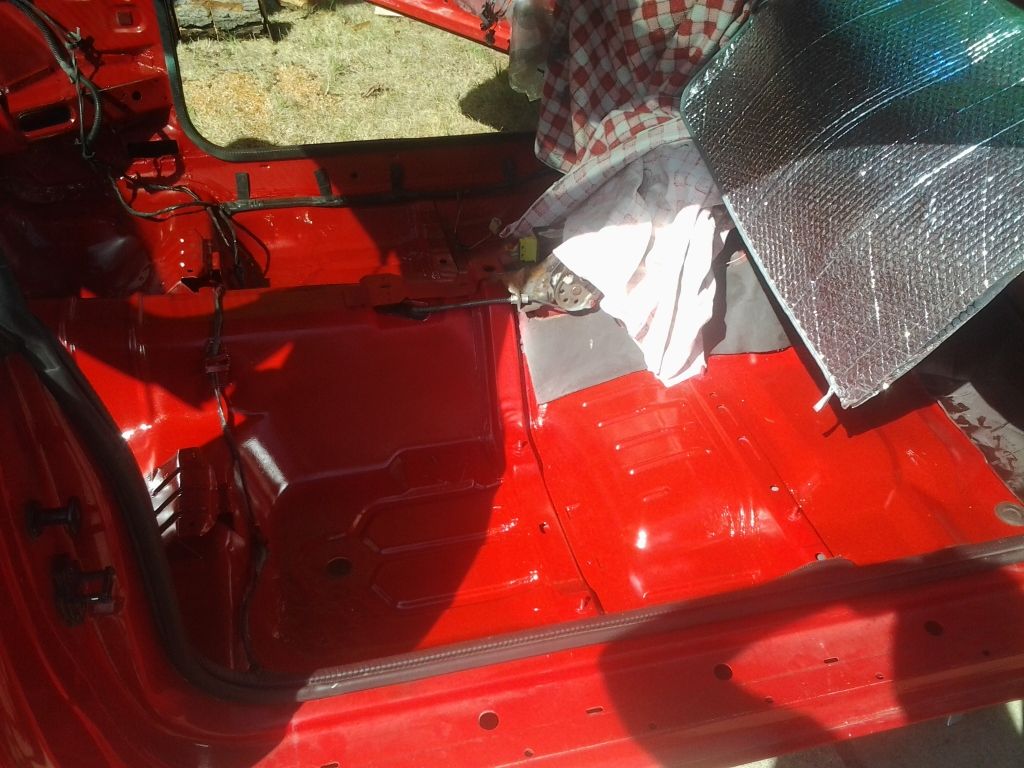
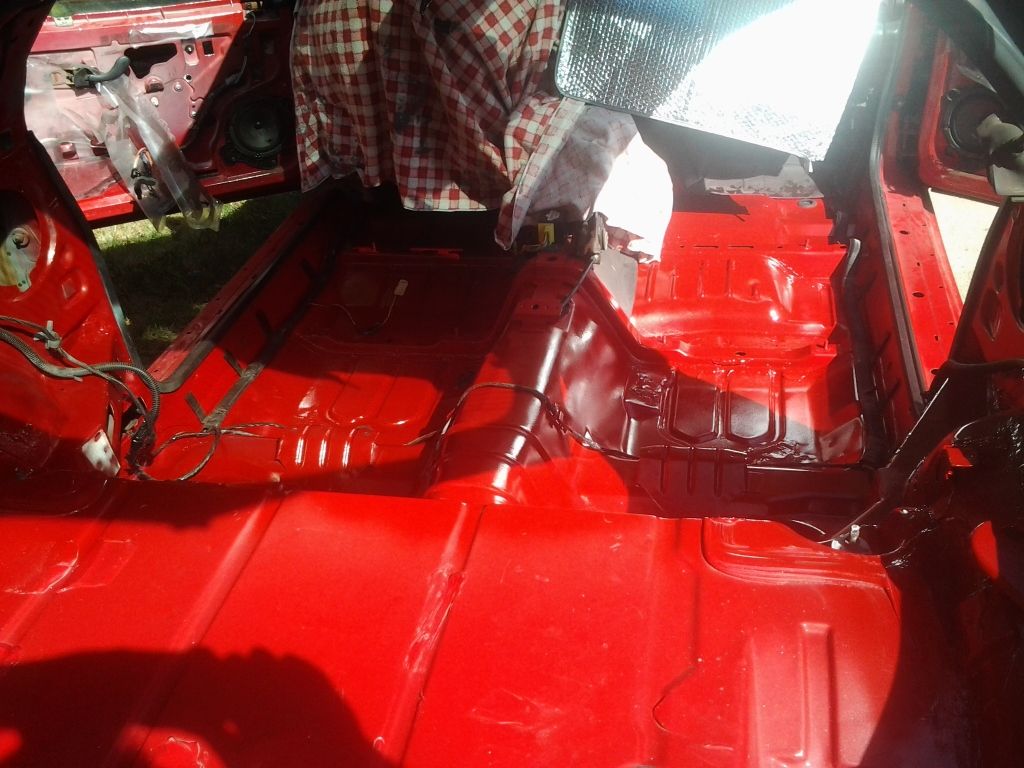
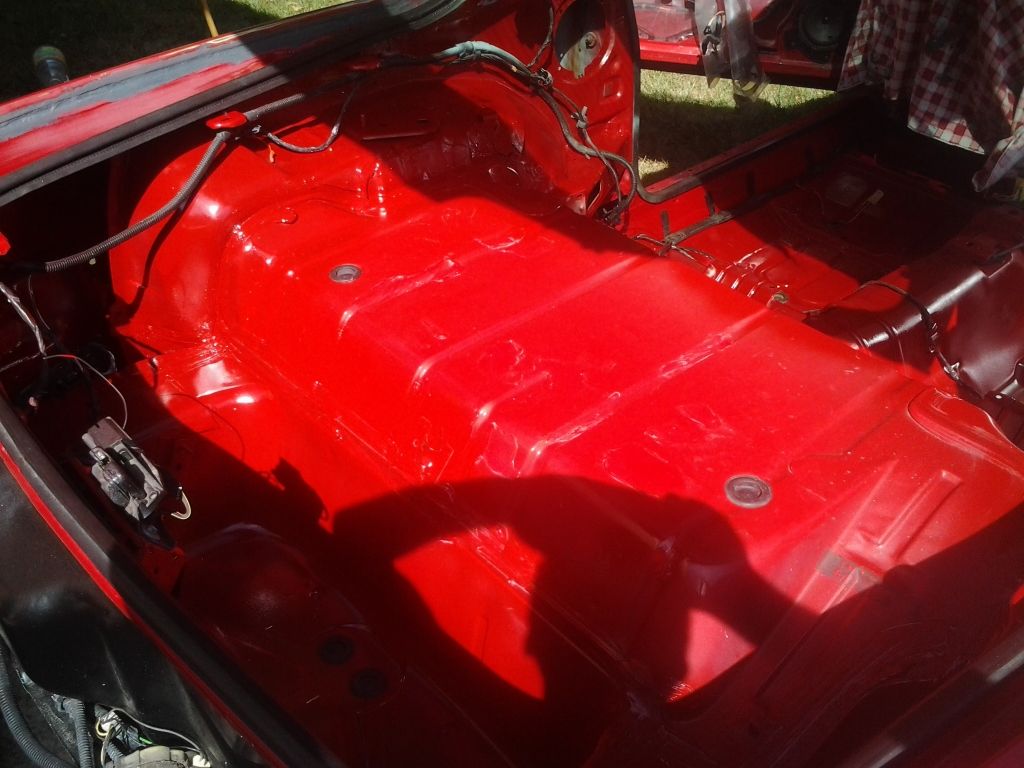
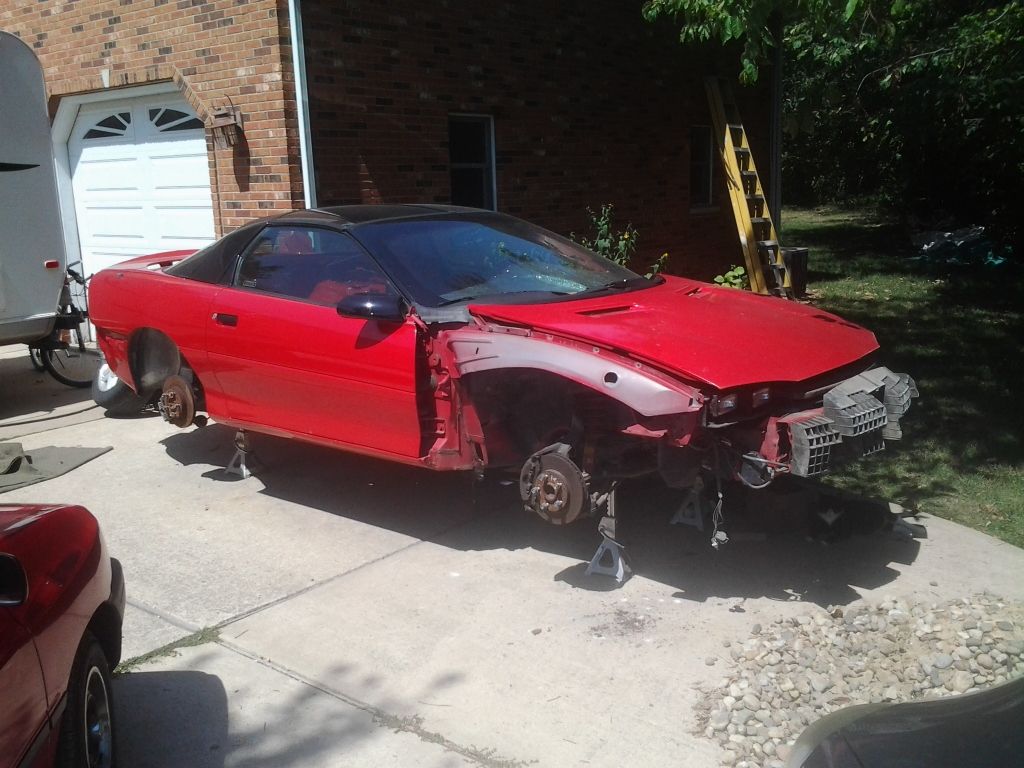
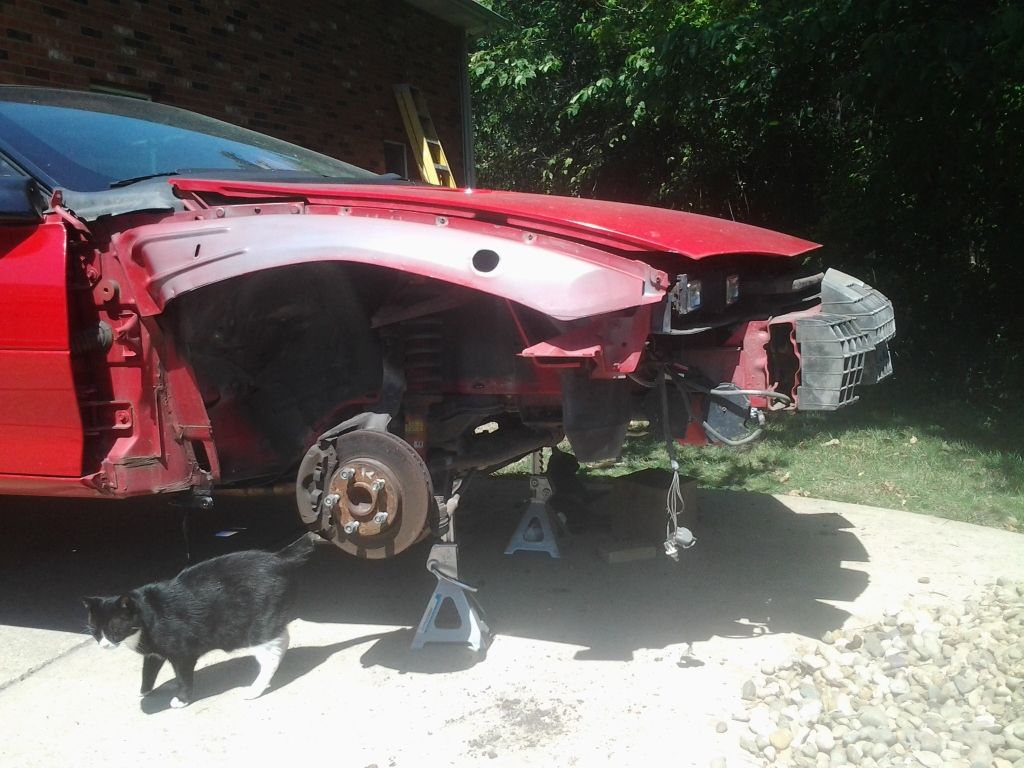
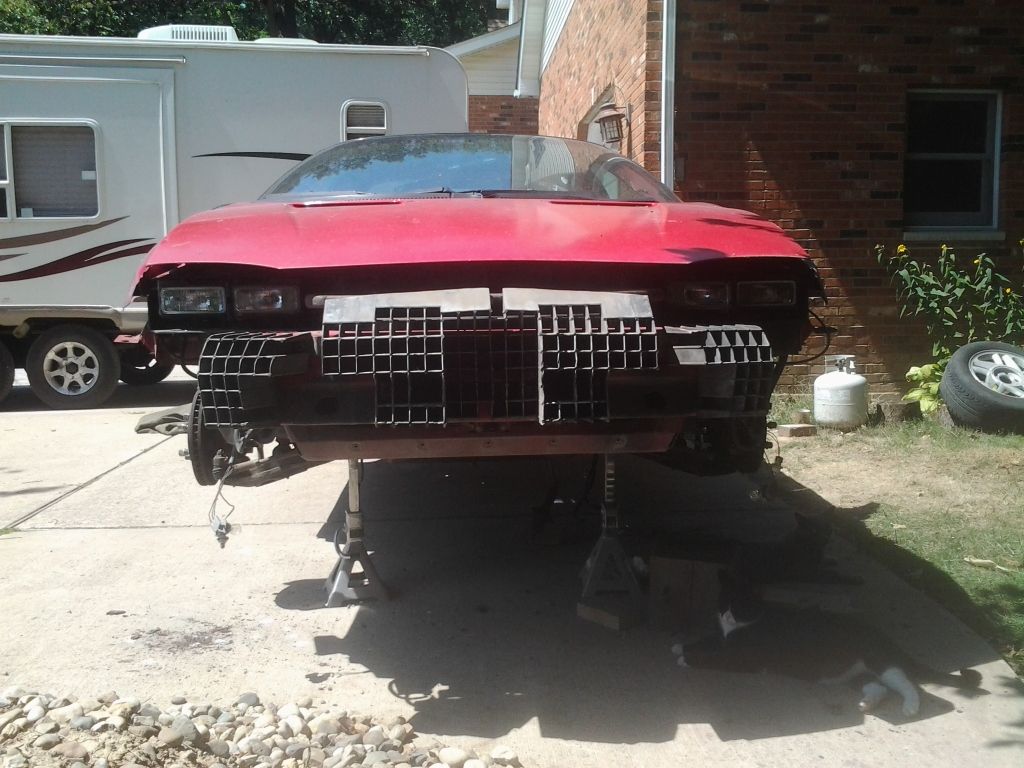
Here are some pictures of the car as she sits right now. No bumper covers or fenders, no interior except for the dash..
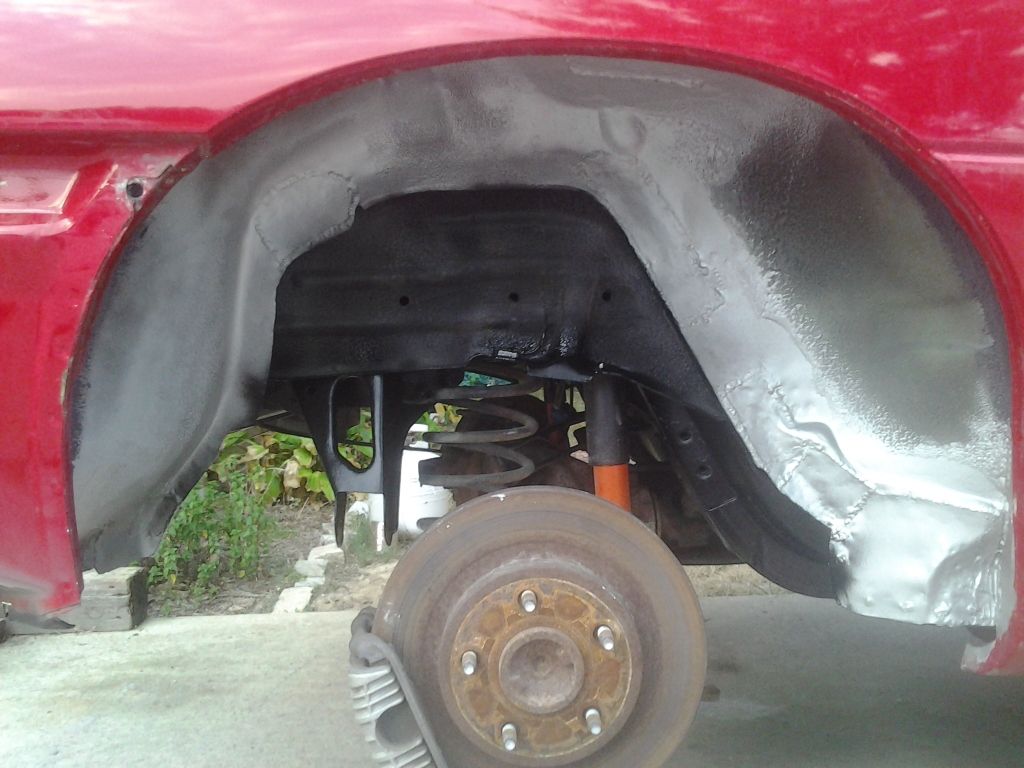
I will probably also get around to putting some undercoating in all 4 wheel wells before paint too. I think they do a pretty shitty job of undercoating at the dealer, or wherever they did this at. So I'm going to do my best to make it look good... I already sprayed some Rustoleum rubberized undercoating in the rear passenger's wheel well, but I was a bit disappointed in how it turned out. It's nice and black, but it's not as 'chunky' as I was expecting. Like it doesn't match the existing undercoating very well. So I'm going to try to find something else that will match better...
I don't have any pictures of some of the other parts I have ready to go on... I'll have to get some when I make it back out to the house.
I replaced my old chattery clutch with a new stock replacement from O'Rielly. I hope it holds up good.. I was so tired of the Spec clutch, I just wanted something that would drive nice and smooth. I'm not making a ton of power, so I don't think I'll have a problem with it slipping, but we'll see I guess. I got the transmission put back in just this past week.
Last Saturday afternoon I spotted something on Craigslist... A complete rear end with 4.10 gears for $200. I jumped on this and immediately contacted the seller. He said all the internals had been replaced, and only had about 7k miles on them, the housing and axles had ~135k. This was perfect, because I have been itching for some different gears - I still have 3.23's in my stock rear, which also has a leaky pinion seal. So on Sunday morning my dad and I drove over to St. Louis to pick it up.
It needs to be cleaned up, so I'm going to run a torch over it with a wire brush to get rid of the grease & rust scale. Then I want to sand blast it, and paint it. I'll either go with semi-gloss black that I have left over, or get some more gloss black Rustoleum.
I was planning on doing this while the car was away for painting, but I talked to the guy who is going to paint it and he has a couple other small side projects he needs to finish up, so it'll be a couple weeks before he's ready for it. No matter, that just means I'll try to get the rear cleaned up and swapped out before paint! Maybe I ought to look for an ls1 aluminum driveshaft too while I'm at it?
Here are some pictures of the car as she sits right now. No bumper covers or fenders, no interior except for the dash..
I will probably also get around to putting some undercoating in all 4 wheel wells before paint too. I think they do a pretty shitty job of undercoating at the dealer, or wherever they did this at. So I'm going to do my best to make it look good... I already sprayed some Rustoleum rubberized undercoating in the rear passenger's wheel well, but I was a bit disappointed in how it turned out. It's nice and black, but it's not as 'chunky' as I was expecting. Like it doesn't match the existing undercoating very well. So I'm going to try to find something else that will match better...
I don't have any pictures of some of the other parts I have ready to go on... I'll have to get some when I make it back out to the house.
09-01-2012, 10:38 PM
#11
On The Tree
Thread Starter
iTrader: (2)
Join Date: Dec 2008
Location: Edwardsville, IL
Posts: 181
Likes: 0
Received 0 Likes
on
0 Posts
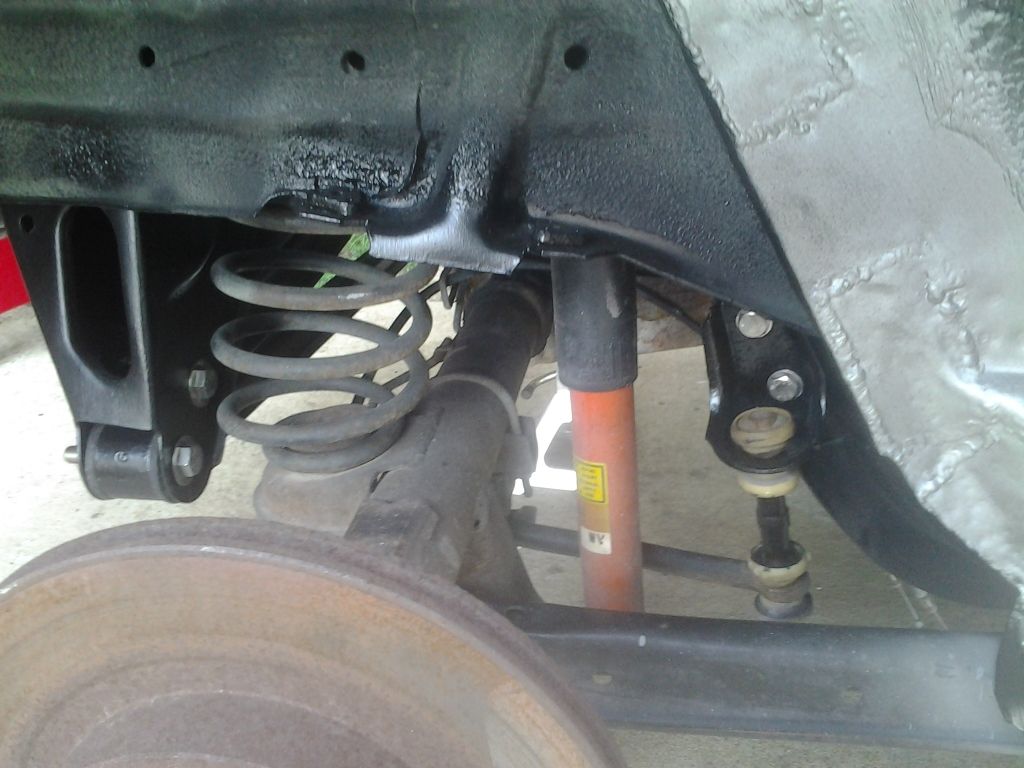
I am keeping the stock panhard bar for now since I'm not planning on lowering the car at the moment. I would love to drop it about an inch, but I am worried I might scrape in some places where I drive on a regular basis, and I'm trying to make the car ride good. I figure it's always something that I can just pick up down the road and install it in an hour, so when/if I decide I need one, I'll buy one 
 09-01-2012, 11:22 PM
#13
Wow you went through a TON of work, thanks for taking so many pics.
Like you said, once a body is rusty it is cheaper and easier to cut your losses and swap to a clean chassis...but anyone who puts money into an LT1 has got to understand sentimental value.
Can't wait to see how the car ends up once you are done with the maintenence/repair stuff and get into the fun mods.
Like you said, once a body is rusty it is cheaper and easier to cut your losses and swap to a clean chassis...but anyone who puts money into an LT1 has got to understand sentimental value.
Can't wait to see how the car ends up once you are done with the maintenence/repair stuff and get into the fun mods
.
09-02-2012, 09:35 AM
#15
On The Tree
Thread Starter
iTrader: (2)
Join Date: Dec 2008
Location: Edwardsville, IL
Posts: 181
Likes: 0
Received 0 Likes
on
0 Posts
Thanks for the kind words guys! Might have some more pics today..
Nascarnate, awesome job on that car! I just looked through your car domain. Especially love the wheels.
Nascarnate, awesome job on that car! I just looked through your car domain. Especially love the wheels.
09-02-2012, 07:31 PM
#16
On The Tree
Thread Starter
iTrader: (2)
Join Date: Dec 2008
Location: Edwardsville, IL
Posts: 181
Likes: 0
Received 0 Likes
on
0 Posts
Went back home today to get some pics of my 'parts stash' I have in the basement
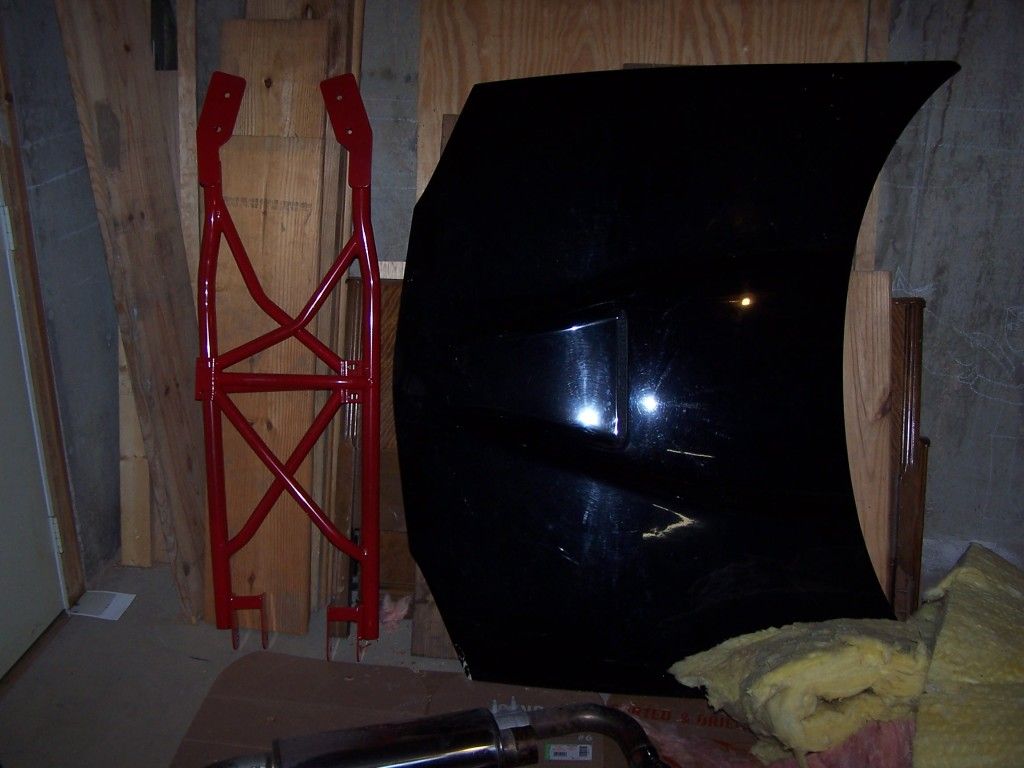
Here are the UMI 3-point subframe connectors I've had sitting down there for quite awhile, and an OEM hood from a 97 SS.
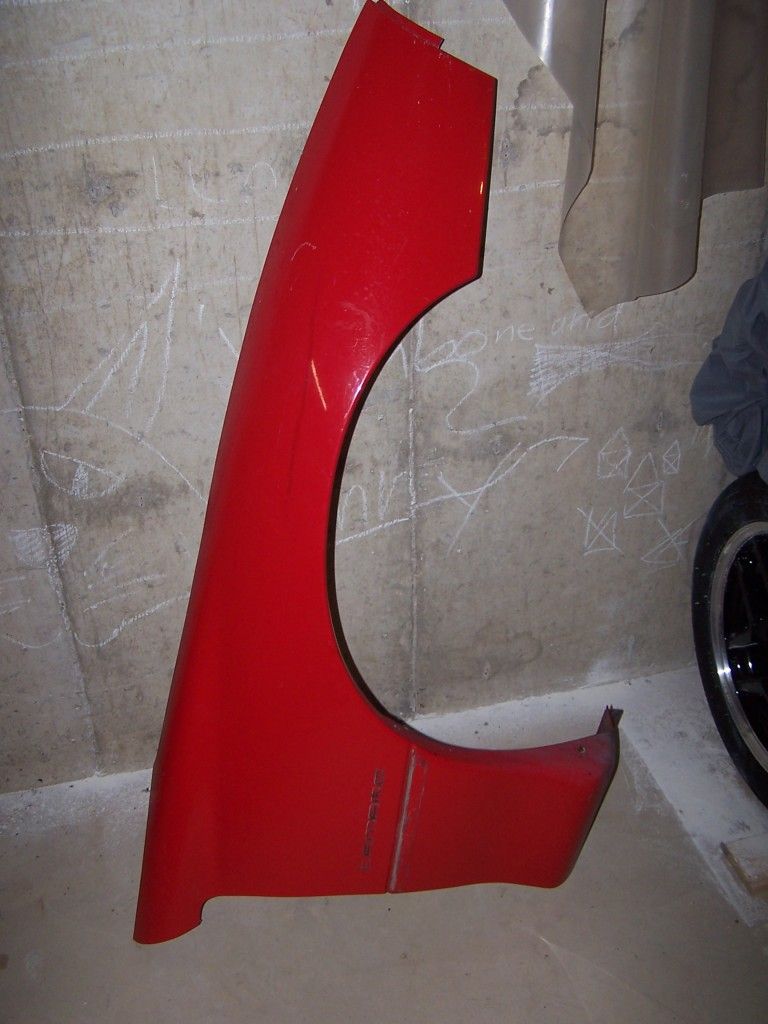
I picked up another right side fender this summer to replace mine, since it is ripped along the bottom. Most likely happened the same time they mashed in the rocker panel.
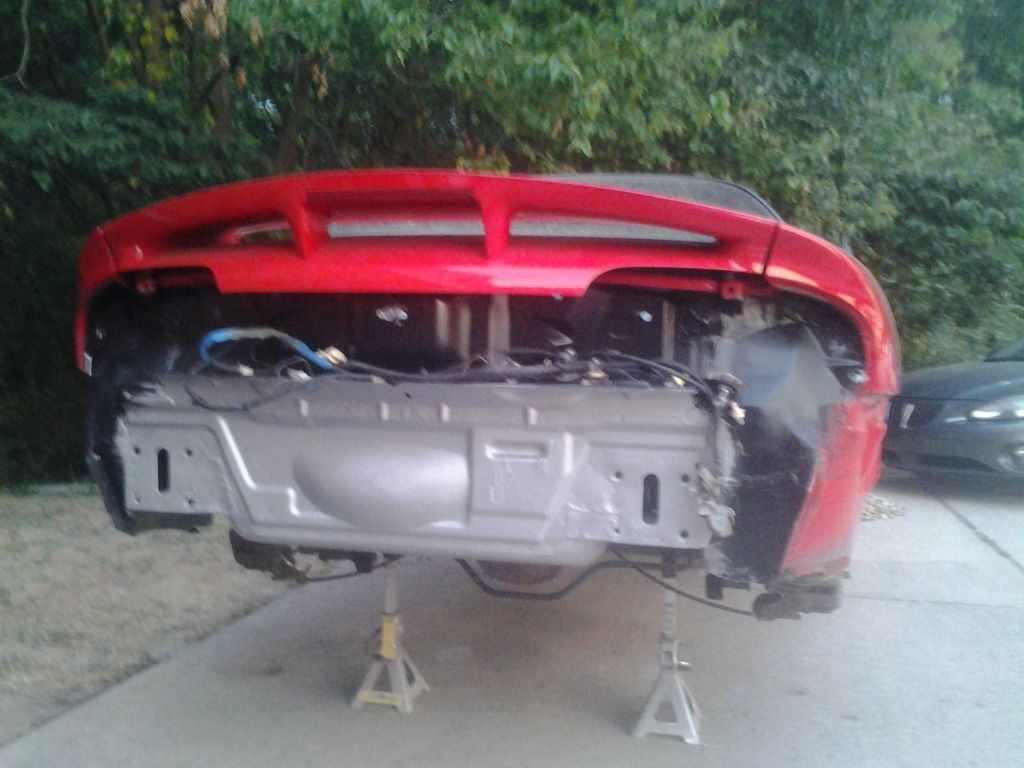
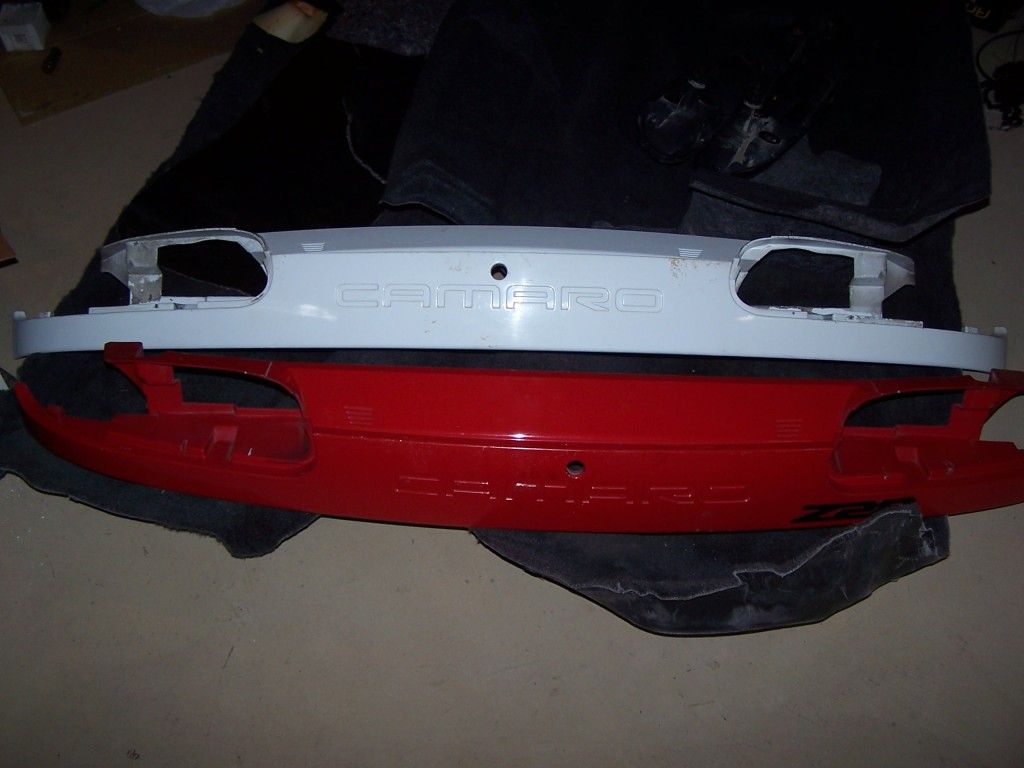
I also got another tail panel from the junkyard for pretty cheap. I'm going to have the white one painted gloss black.. that way I'll be able to change between black and red whenever I feel like it. Right now I think I'll be using the black one, with some stainless CAMARO inserts..
I also cleaned up the new rear end while I was out there. I got it pretty clean, and I will be doing some sand blasting on it after work sometime this week...
More parts will be showing up in the mail this week....
Here are the UMI 3-point subframe connectors I've had sitting down there for quite awhile, and an OEM hood from a 97 SS.
I picked up another right side fender this summer to replace mine, since it is ripped along the bottom. Most likely happened the same time they mashed in the rocker panel.
I also got another tail panel from the junkyard for pretty cheap. I'm going to have the white one painted gloss black.. that way I'll be able to change between black and red whenever I feel like it. Right now I think I'll be using the black one, with some stainless CAMARO inserts..
I also cleaned up the new rear end while I was out there. I got it pretty clean, and I will be doing some sand blasting on it after work sometime this week...
More parts will be showing up in the mail this week....
09-02-2012, 07:50 PM
#17
TECH Junkie
iTrader: (12)
Join Date: Sep 2007
Location: SFL
Posts: 3,011
Likes: 0
Received 0 Likes
on
0 Posts
Looking great!!!
I wire-wheeled/degreased my rear and painted it with Rustoleum Hammered paint (brush-on). It came out incredible. I would imagine sand-blasting would be 10x better though.
I wire-wheeled/degreased my rear and painted it with Rustoleum Hammered paint (brush-on). It came out incredible. I would imagine sand-blasting would be 10x better though.
