LT1-LT4 Modifications 1993-97 Gen II Small Block V8

Need write up to replace heater hose assembly GM# 10261147 on 97 Firehawk LT1 M6

Thread Tools
 
Search this Thread
 
Old 05-05-2019, 10:36 PM
  #1  
Staging Lane
Thread Starter
 
prix57's Avatar
 
Join Date: Jun 2017
Posts: 91
Received 0 Likes on 0 Posts
Default Need write up to replace heater hose assembly GM# 10261147 on 97 Firehawk LT1 M6


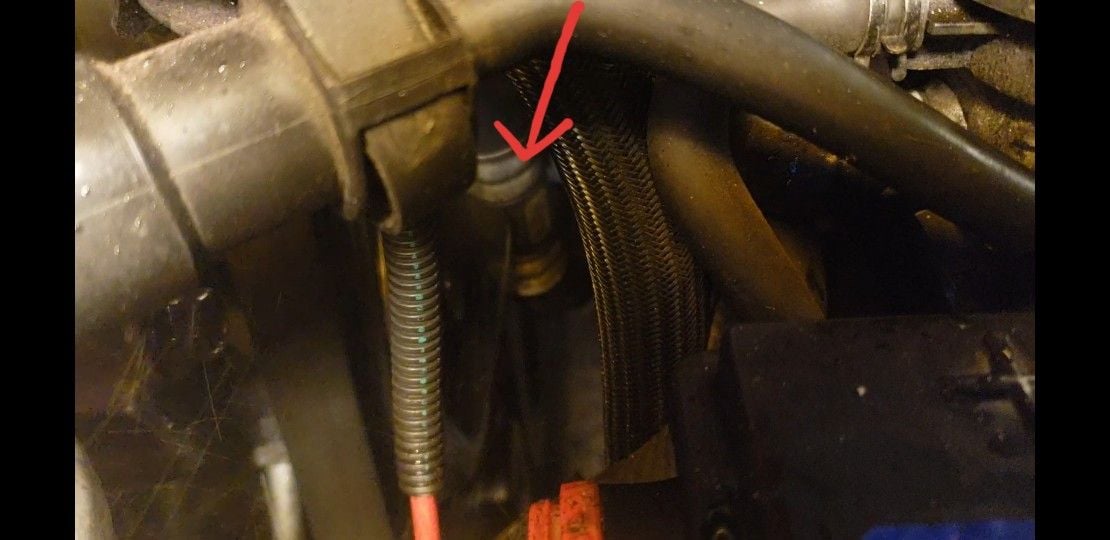
I have a 1997 Firebird Formula Firehawk LT1 M6 and found a coolant leak in my heater hose assembly. There is a crack in it and it's spraying coolant down towards the passenger side. I went ahead and picked up an OEM replacement heater hose assembly GM# 10261147.

I was wondering if anyone here has a write up or tutorial on replacing this heater hose assembly?

It's pretty tight and was hoping the find the best way to get it done.

I tried searching but did not find anything. Looked in the Haynes manual as well and nothing.

​​​​
Thanks!

Last edited by prix57; 05-06-2019 at 12:30 AM.
Old 05-06-2019, 06:49 AM
  #2  
10 Second Club
iTrader: (8)
 
HioSSilver's Avatar
 
Join Date: Aug 2002
Location: Winchester, VA
Posts: 5,927
Received 412 Likes on 330 Posts

Default

I just used regular heater hose. I did it to create more room back by the heater box . I routed it over top of it.
Old 05-06-2019, 09:45 PM
  #3  
Staging Lane
Thread Starter
 
prix57's Avatar
 
Join Date: Jun 2017
Posts: 91
Received 0 Likes on 0 Posts
Default

I already got the OEM assembly so just looking to see what is the best way to get it replaced.

If anyone here has replaced it with the same OEM assembly I would appreciate any info.
Old 05-06-2019, 10:03 PM
  #4  
10 Second Club
iTrader: (8)
 
HioSSilver's Avatar
 
Join Date: Aug 2002
Location: Winchester, VA
Posts: 5,927
Received 412 Likes on 330 Posts

Default

It's pretty straightforward.
Old 05-10-2019, 04:33 PM
  #5  
TECH Veteran
iTrader: (1)
 
leadfoot4's Avatar
 
Join Date: Sep 2005
Location: Webster, NY
Posts: 4,611
Received 4 Likes on 4 Posts

Default

Originally Posted by prix57
I already got the OEM assembly so just looking to see what is the best way to get it replaced.

If anyone here has replaced it with the same OEM assembly I would appreciate any info.
There are two connections at the heater end of the assembly, and two at the engine/radiator end. Simply disconnect all four connections and replace with the new assembly...
Old 05-11-2019, 02:40 AM
  #6  
Staging Lane
Thread Starter
 
prix57's Avatar
 
Join Date: Jun 2017
Posts: 91
Received 0 Likes on 0 Posts
Default

Originally Posted by leadfoot4
There are two connections at the heater end of the assembly, and two at the engine/radiator end. Simply disconnect all four connections and replace with the new assembly...
I will probably have to remove the ram air intake assembly to get to the connections.

Should I be covering the optispark with a plastic bag or anything to prevent it from getting wet?

Anything else I should remove to make accessing the connections easier?

Thanks.
Old 05-11-2019, 06:01 AM
  #7  
TECH Veteran
iTrader: (1)
 
leadfoot4's Avatar
 
Join Date: Sep 2005
Location: Webster, NY
Posts: 4,611
Received 4 Likes on 4 Posts

Default

Originally Posted by prix57
I will probably have to remove the ram air intake assembly to get to the connections.

Should I be covering the optispark with a plastic bag or anything to prevent it from getting wet?

Anything else I should remove to make accessing the connections easier?

Thanks.
You're going to be draining the radiator, prior to removing the heater hoses, therefore there won't be any large amounts of coolant splashing around, and any residual coolant shouldn't be anywhere near the Opti.
Old 05-16-2019, 09:29 AM
  #8  
Launching!
iTrader: (1)
 
Camaro_freak's Avatar
 
Join Date: Aug 2005
Location: Algonquin, IL
Posts: 242
Likes: 0
Received 1 Like on 1 Post

Default

I had the same problem last week but decided to just replace the leaking part of the hose (the restrictor at the water pump). I bought just the restrictor and short elbow hose that connects it to the water pump and spliced it into the remainder of the heater hose. Less than $20 and about 15 minutes to repair.
Old 05-17-2019, 01:12 PM
  #9  
Staging Lane
Thread Starter
 
prix57's Avatar
 
Join Date: Jun 2017
Posts: 91
Received 0 Likes on 0 Posts
Default

Originally Posted by Camaro_freak
I had the same problem last week but decided to just replace the leaking part of the hose (the restrictor at the water pump). I bought just the restrictor and short elbow hose that connects it to the water pump and spliced it into the remainder of the heater hose. Less than $20 and about 15 minutes to repair.
Where did you just the individual parts from?

I tried looking for them but they were discontinued. I already have the while assembly so I will just replace it all. Hoping to get it done this weekend.
Old 05-18-2019, 08:18 AM
  #10  
Launching!
iTrader: (1)
 
Camaro_freak's Avatar
 
Join Date: Aug 2005
Location: Algonquin, IL
Posts: 242
Likes: 0
Received 1 Like on 1 Post

Default

Originally Posted by prix57
Where did you just the individual parts from?

I tried looking for them but they were discontinued. I already have the while assembly so I will just replace it all. Hoping to get it done this weekend.
Here's a diagram from shbox's site.

shbox.com/1/heater_hoses.jpg
Old 05-18-2019, 02:24 PM
  #11  
TECH Veteran
 
shbox's Avatar
 
Join Date: Dec 2008
Location: Little Rock, AR
Posts: 4,116
Received 50 Likes on 44 Posts

Default

I'd replace the whole thing. All the hoses have the same age. If one goes, the rest can't be far behind.
The following users liked this post:
Germansheperd1 (05-15-2020)
Old 05-19-2019, 12:05 PM
  #12  
Staging Lane
Thread Starter
 
prix57's Avatar
 
Join Date: Jun 2017
Posts: 91
Received 0 Likes on 0 Posts
Default

Originally Posted by shbox
I'd replace the whole thing. All the hoses have the same age. If one goes, the rest can't be far behind.
Yeah makes sense.
Going to try replacing the assembly later on today.
Watched video online where it seemed to be pretty straightforward until i realized it was on a F body with the 3.8L V6, you have alot more space in the engine bay.
With the 5.7L LT1 it is extremely tight, it will be a mission getting this pipe assembly in and out.

Last edited by prix57; 05-19-2019 at 12:44 PM.
Old 05-19-2019, 03:58 PM
  #13  
TECH Addict
iTrader: (3)
 
moehorsepower's Avatar
 
Join Date: Feb 2003
Location: Texas
Posts: 2,334
Likes: 0
Received 17 Likes on 14 Posts

Default

Originally Posted by prix57
Yeah makes sense.
Going to try replacing the assembly later on today.
Watched video online where it seemed to be pretty straightforward until i realized it was on a F body with the 3.8L V6, you have alot more space in the engine bay.
With the 5.7L LT1 it is extremely tight, it will be a mission getting this pipe assembly in and out.
I cut the old one to get it out and I snaked the new one in, the only difference in the path was that the hose now went on top instead under power steering hoses, I also removed the alternator for ease.
Old 05-20-2019, 03:18 AM
  #14  
Staging Lane
Thread Starter
 
prix57's Avatar
 
Join Date: Jun 2017
Posts: 91
Received 0 Likes on 0 Posts
Default

Originally Posted by moehorsepower
I cut the old one to get it out and I snaked the new one in, the only difference in the path was that the hose now went on top instead under power steering hoses, I also removed the alternator for ease.
Is there any trick to disconnect the hoses connected to heater core? Got the clamps off but the hose is stuck on there good. Tried making an incision on the hose end but its hard to reach.
Old 05-20-2019, 09:03 AM
  #15  
Village Troll
iTrader: (2)
 
SS RRR's Avatar
 
Join Date: Oct 2002
Location: Jackstandican
Posts: 11,006
Received 518 Likes on 374 Posts

Default

Originally Posted by prix57
Is there any trick to disconnect the hoses connected to heater core? Got the clamps off but the hose is stuck on there good. Tried making an incision on the hose end but its hard to reach.
I take channel locks or large pliers, grab onto the part of the hose which is on the fitting and gently rock them back and forth until loose. I feel dirty after typing that.
Old 05-27-2019, 02:30 AM
  #16  
Staging Lane
Thread Starter
 
prix57's Avatar
 
Join Date: Jun 2017
Posts: 91
Received 0 Likes on 0 Posts
Default

I finally got the hoses on the heater core end off. Had to make incisions and use long reach long nose pliers.

To get the old assembly off I had to cut it in the middle where the metal hoses are, that was a mission.

Any tips on getting the new assembly in?

It's so tight in that engine bay, not sure which way to get it back on. With the metal parts in the assembly you don't get much flexibility...

Last edited by prix57; 06-03-2019 at 04:22 AM.
Old 06-03-2019, 04:24 AM
  #17  
Staging Lane
Thread Starter
 
prix57's Avatar
 
Join Date: Jun 2017
Posts: 91
Received 0 Likes on 0 Posts
Default

Got the new assembly in finally, it was quite the ordeal. Refilled the rad etc and now all is well. No more leak and temp is back to normal.
Old 06-04-2019, 04:59 PM
  #18  
TECH Resident
 
ACE1252's Avatar
 
Join Date: Jun 2013
Location: Kernersville, NC
Posts: 844
Received 27 Likes on 24 Posts

Default

I hear ya on the ordeal. I've got a new heater hose assembly waiting on mine right now. I'm trying to wait until next time I pull the engine to change them. I may actually put a new heater core in as well.....insurance against a future leak.
The following users liked this post:
prix57 (04-07-2020)
Old 05-14-2020, 09:27 PM
  #19  
Teching In
 
chet sethi's Avatar
 
Join Date: May 2020
Location: Cedar Park, Tx
Posts: 2
Likes: 0
Received 1 Like on 1 Post
Default

Originally Posted by prix57
Got the new assembly in finally, it was quite the ordeal. Refilled the rad etc and now all is well. No more leak and temp is back to normal.
I'm in the middle of this project as well. What did you have to remove to get the new hose assembly in?
Old 08-16-2020, 12:47 AM
  #20  
Staging Lane
Thread Starter
 
prix57's Avatar
 
Join Date: Jun 2017
Posts: 91
Received 0 Likes on 0 Posts
Default

Originally Posted by chet sethi
I'm in the middle of this project as well. What did you have to remove to get the new hose assembly in?
Hey sorry for the late reply.

I had to remove the air intake box and the alternator. I had to cut the old hose assembly in the middle where the steel pipes are to get it out.

Were you able to get this done?


All times are GMT -5. The time now is 11:21 AM.