


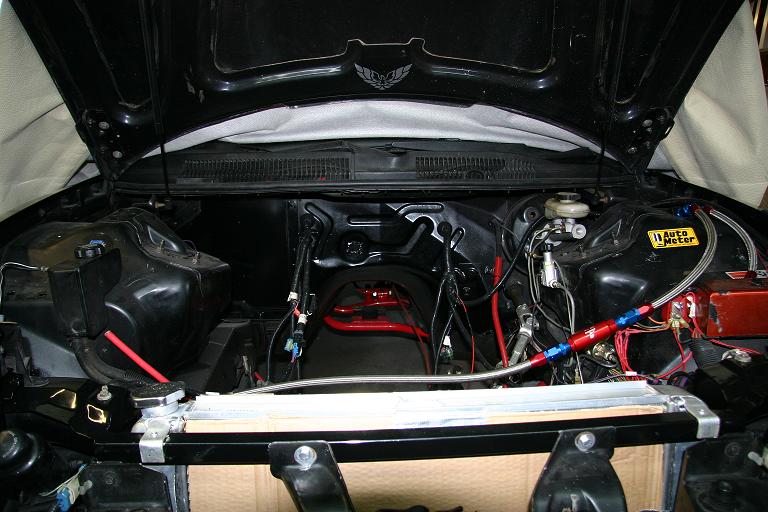
complete removal of ac/heater
got mine done yesterday
g/f got a good laugh of me sitting on the k-member vacuuming fiberglass dust
litch: why'd you have to remove all the controls?
huge thanks to everyone (especially the_merv) for the tips and photos
g/f got a good laugh of me sitting on the k-member vacuuming fiberglass dust
litch: why'd you have to remove all the controls?
huge thanks to everyone (especially the_merv) for the tips and photos
Originally Posted by thesoundandthefury
Capping them off won't hurt anything, in fact I pulled all the pipes out of my pump and installed aluminum NPT fittings in their places.
If you decide to loop them, keep in mind that both of those pipes are different diameters. It would probably be easier to use a hose that fits the larger lower pipe than to try and wrestle a hose with a smaller I.D that fits the upper pipe onto the lower one.
If you decide to loop them, keep in mind that both of those pipes are different diameters. It would probably be easier to use a hose that fits the larger lower pipe than to try and wrestle a hose with a smaller I.D that fits the upper pipe onto the lower one.
litch: why'd you have to remove all the controls?
LT1 gremlins. When i would turn on the A/C it would make my fuel relay start clicking, which was intermiting my fuel causing it to die. Not to sure why it was doing this so i am making a new AC power but stil using the contols just moving them into the center console. Then i will put in an old style slid swith for the cool/heat door inside the box.
LT1 gremlins. When i would turn on the A/C it would make my fuel relay start clicking, which was intermiting my fuel causing it to die. Not to sure why it was doing this so i am making a new AC power but stil using the contols just moving them into the center console. Then i will put in an old style slid swith for the cool/heat door inside the box.
i originally looped mine but when i replaced the WP i just put caps over each the two nipples on the WP and just removed it all together. But i am about to replace the heater core so i will have to reinstall those lines. Trying to thinking of a new cleaner way to install the water line though.
LS1 Tech Stories
The Best V8 Stories One Small Block at Time

6 Common C5 Corvette Failures and What's Involved In Repairing Them
Pouria Savadkouei
Retro Modern Bandit Pontiac Trans AM Comes With Burt Reynolds' Autograph
Verdad Gallardo
Top 10 Greatest Cadillac V Series Performance Models Ever, Ranked
Pouria Savadkouei
Top 10 Most Powerful Chevy Trucks Ever Made!

Hennessey's New Supercharged Silverado ZR2 Has 700 HP
Verdad Gallardo
Coachbuilt N2A Anteros Is an LS2-Powered C6 Corvette In Italian Clothes
Verdad Gallardo
Awesome K5 Blazer Restomod Comes With C7 Corvette Power
Verdad Gallardo
10 Camaros You Should Never Buy

10 LS Engine Myths That Refuse to Die
Verdad Gallardo I'm setting up my new motor to have the water lines be configured similar to how they were in the 92 Corvette LT1's. In that year only, they actually used the two steam pipe crossover tubes at the back of the heads to feed hot engine coolant directly into the heater core, and then ran a single return line to a pressurized radiator overflow tank and then back to the water pump. The only difference with mine is that I won't be running a pressurized overflow tank.
I'll only have a single heater hose coming off the water pump this way. I've enlarged the ports on the back of each head to accept a 1/2" NPT to -6AN fitting, so hopefully the larger holes will help scavenge heat from the heads better.
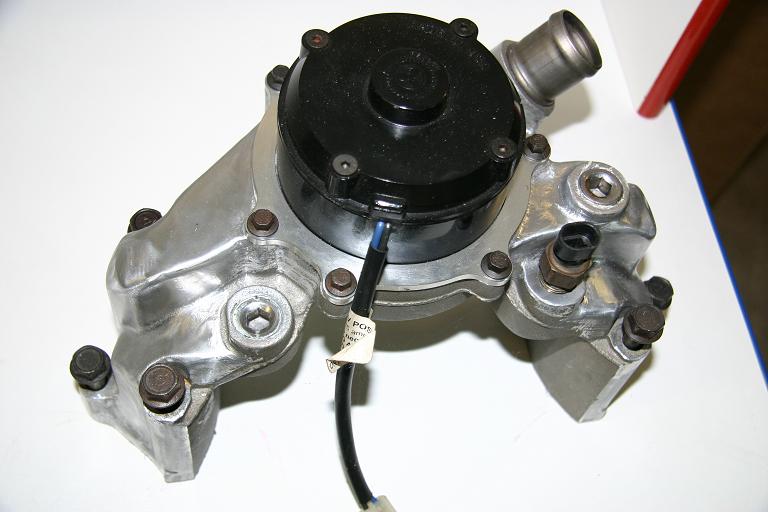
These pics are premature because the fittings haven't been welded in yet and it's not done being polished, but this'll give you an idea of what can be done to the pump in terms of the extra pipes:
http://i46.photobucket.com/albums/f1...gbeforewel.jpg
http://i46.photobucket.com/albums/f1...ngbefore-1.jpg
^^^The idea behind changing the fitting is to do away with that dorky looking stock heater hose with the bleeder pipe, and just run some nice stainless coolflex hose instead.
Here's a water pump that I polished awhile back that I deleted all the extra pipes on and welded them all shut:
http://i46.photobucket.com/albums/f1...terpump1-1.jpg
http://i46.photobucket.com/albums/f1...terpump5-1.jpg
I'll only have a single heater hose coming off the water pump this way. I've enlarged the ports on the back of each head to accept a 1/2" NPT to -6AN fitting, so hopefully the larger holes will help scavenge heat from the heads better.
These pics are premature because the fittings haven't been welded in yet and it's not done being polished, but this'll give you an idea of what can be done to the pump in terms of the extra pipes:
http://i46.photobucket.com/albums/f1...gbeforewel.jpg
http://i46.photobucket.com/albums/f1...ngbefore-1.jpg
^^^The idea behind changing the fitting is to do away with that dorky looking stock heater hose with the bleeder pipe, and just run some nice stainless coolflex hose instead.
Here's a water pump that I polished awhile back that I deleted all the extra pipes on and welded them all shut:
http://i46.photobucket.com/albums/f1...terpump1-1.jpg
http://i46.photobucket.com/albums/f1...terpump5-1.jpg
Originally Posted by InsaneAuto86
Where can I get those aluminum NPT fittings at?
http://store.summitracing.com/partde...5&autoview=sku


Originally Posted by InsaneAuto86
Anyone else have any input on capping the heater lines or looping them at the water pump?
i capped everything on my pump, including the oil cooler line. So on my pump all i got is the 2 radatior hoses and thats it and my **** runs perfectly fine and runs about 200 with a EWP. So IMO its fine and i would do it.
Originally Posted by thesoundandthefury
Originally Posted by InsaneAuto86
Anyone have an extra 3/8 and 1/2" sitting around? I am NOT paying $10 shipping for a $4 part!!!!!
Originally Posted by InsaneAuto86
CHROME!! I'll be blingin now!! lol Thanks a lot! I assume stainless steel? (wont be a problem being they are on a water pump?)
Originally Posted by thesoundandthefury
It appears I was wrong about them being steel. I tried seeing if a magnet would stick to one and it didn't, so they've gotta be aluminum.
TECH Enthusiast
Joined: Sep 2003
Posts: 501
Likes: 0
From: bethel PA
I welded a piece of sheet metal to cover that hole in mine.
as far as my pump I tapped the holes and put plugs in there, I think Im going to put fittings on there tho with AN ends and just put caps on there now, I have plans on making a defroster under my dash wiht out the heater box just for those nights where the windows do fog up.
as far as my pump I tapped the holes and put plugs in there, I think Im going to put fittings on there tho with AN ends and just put caps on there now, I have plans on making a defroster under my dash wiht out the heater box just for those nights where the windows do fog up.
Last edited by lethal93ta; Jul 21, 2007 at 09:27 AM.