Update on my a/c evaporator core removal
 11-10-2007, 09:11 AM
#1
TECH Apprentice
Thread Starter
iTrader: (8)

Join Date: Sep 2004
Posts: 396
Likes: 0
Received 0 Likes
on
0 Posts

I just figured I would make a thread and show my progress on removing the a/c evaporator core box from my car. Hopefully this will help people who were in the same boat as me. I would like to thank Lethal93TA, the_Merv, and litch2004 for helping me out and giving me advice along the way. Without their assistance, I would have been freaking out.
A little background...I accidentally smashed the fiberglass part of the box while removing my engine. I had to drop the new shortblock back in so I could return the engine hoist to the rental yard.
It wasn't difficult to remove the box with the shortblock in the engine compartment, but I could see how it would be harder with the whole engine in there and less room to work.
Here's some pics with descriptions of the process from beginning to end.
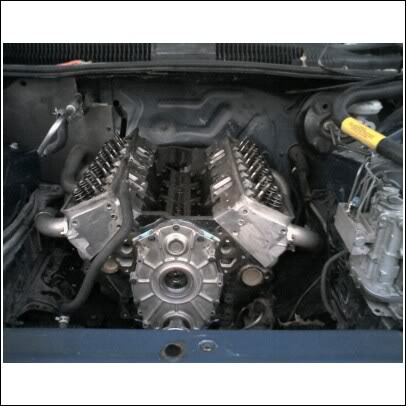
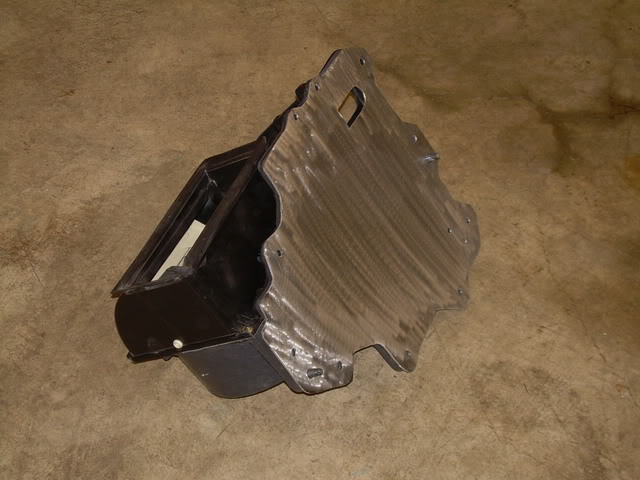
Here's the broken box after I pulled the engine out:
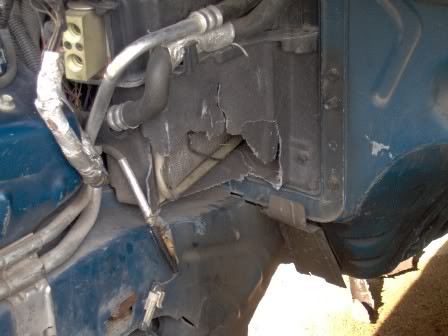
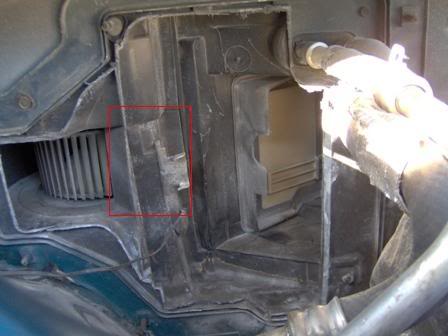
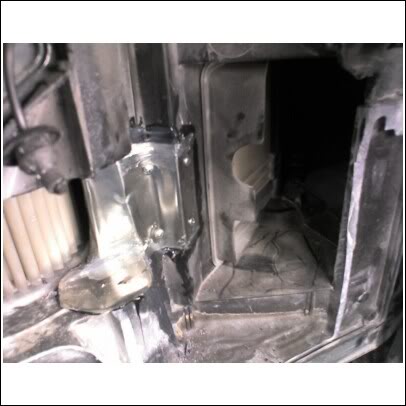
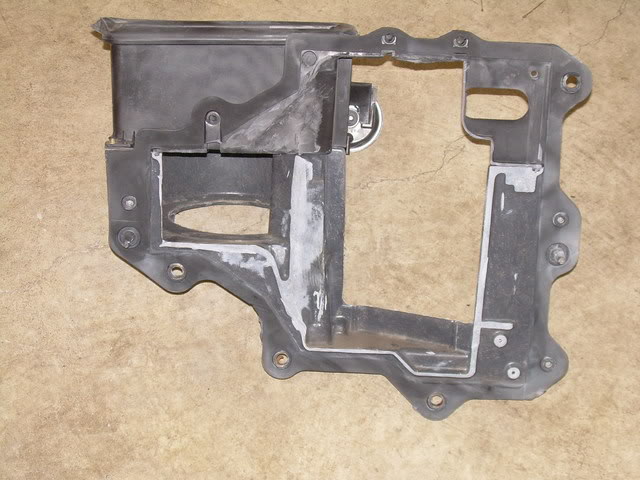
Here's the aftermath of removing all the evaporator core and box. If you plan on keeping the heater, the area in the red square will have to be removed to provide a passage for air to get by the heater core. That way the blend door will still operate as intended. Also, don't hack up the vacuum line in the top left corner if you want to be able to direct air to different vents. If you chop up the vacuum line, the vents will be stuck on defrost.
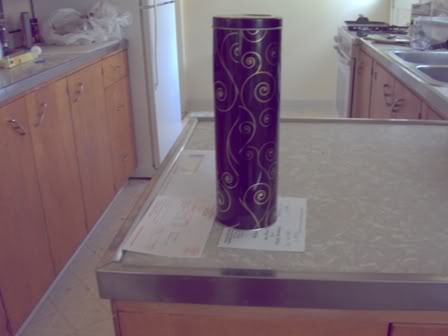
After removing the area in the red box above to make the passage for the air to travel, you must patch the area and seal it off. I didn't want to buy some thin sheet metal, so I used a tin cookie container I had laying around. I just cut it open with my cutting disc, rolled it flat, then cut to shape.
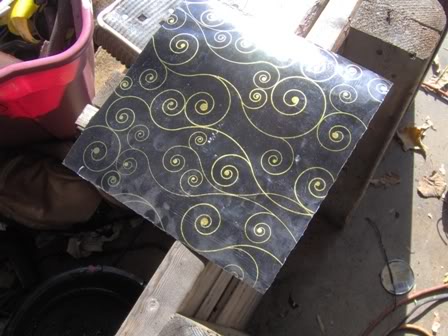
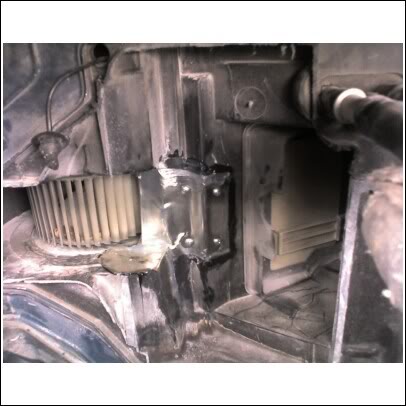
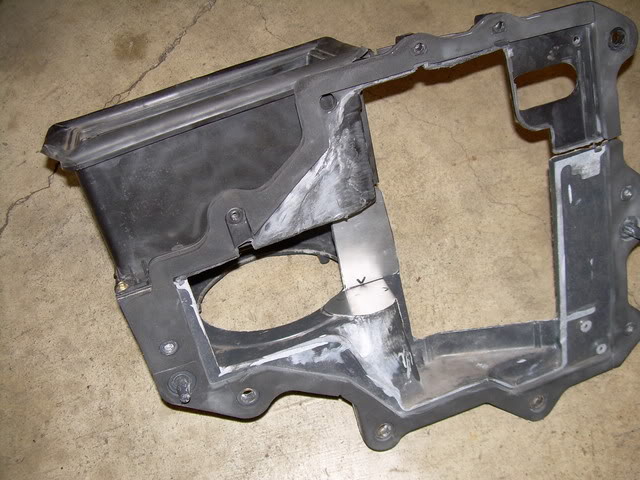
Here's my patch work with the tin. I put a couple screws in there to hold it in place, then I siliconed everything up to make sure it was sealed nicely.
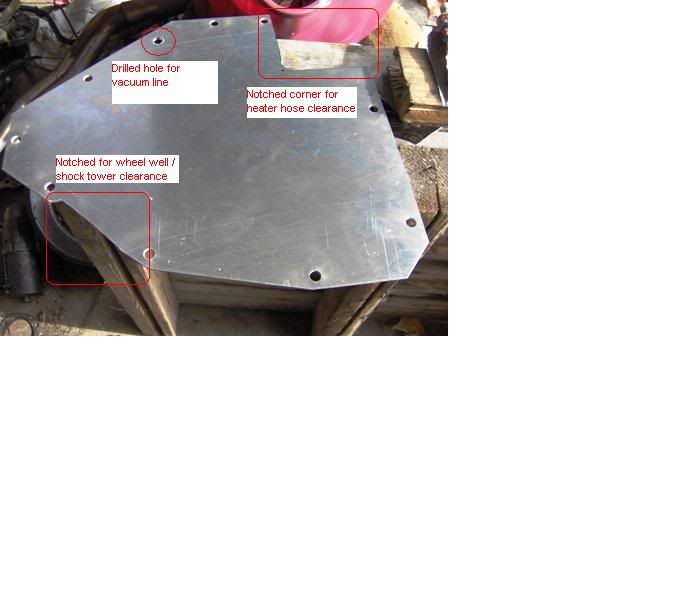
Here's the HVAC delete plate I got from Speed Inc. It's designed for use if you are going to delete the entire heater box under the dash. As such, I had to clearance it for the heater core hoses, as well as drill a hole for the vacuum line. I also had to trim the bottom to fit it, as it was hitting the wheel well/shock tower where it meets the firewall.
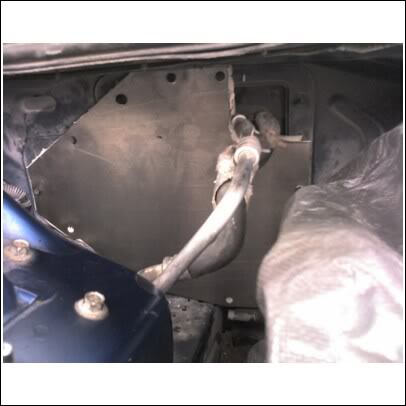
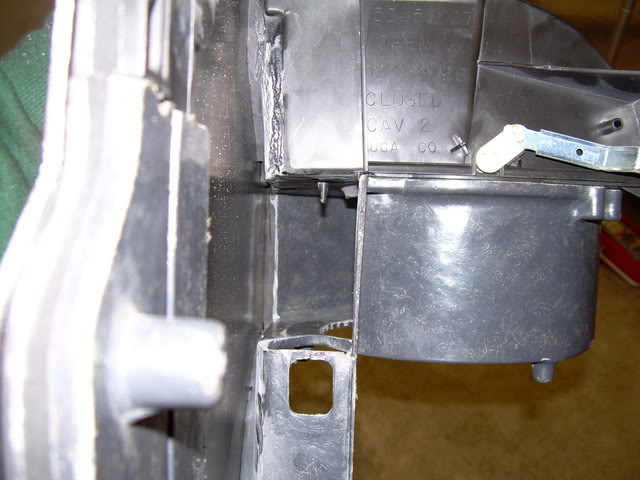
Here's the finished product with the panel in place. I put some self-adhesive closed-cell weatherstripping on the back of the plate to help it seal well against the firewall.
A little background...I accidentally smashed the fiberglass part of the box while removing my engine. I had to drop the new shortblock back in so I could return the engine hoist to the rental yard.
It wasn't difficult to remove the box with the shortblock in the engine compartment, but I could see how it would be harder with the whole engine in there and less room to work.
Here's some pics with descriptions of the process from beginning to end.
Here's the broken box after I pulled the engine out:
Here's the aftermath of removing all the evaporator core and box. If you plan on keeping the heater, the area in the red square will have to be removed to provide a passage for air to get by the heater core. That way the blend door will still operate as intended. Also, don't hack up the vacuum line in the top left corner if you want to be able to direct air to different vents. If you chop up the vacuum line, the vents will be stuck on defrost.
After removing the area in the red box above to make the passage for the air to travel, you must patch the area and seal it off. I didn't want to buy some thin sheet metal, so I used a tin cookie container I had laying around. I just cut it open with my cutting disc, rolled it flat, then cut to shape.
Here's my patch work with the tin. I put a couple screws in there to hold it in place, then I siliconed everything up to make sure it was sealed nicely.
Here's the HVAC delete plate I got from Speed Inc. It's designed for use if you are going to delete the entire heater box under the dash. As such, I had to clearance it for the heater core hoses, as well as drill a hole for the vacuum line. I also had to trim the bottom to fit it, as it was hitting the wheel well/shock tower where it meets the firewall.
Here's the finished product with the panel in place. I put some self-adhesive closed-cell weatherstripping on the back of the plate to help it seal well against the firewall.


 11-10-2007, 12:41 PM
#6
TECH Enthusiast

Join Date: May 2006
Posts: 600
Likes: 0
Received 0 Likes
on
0 Posts

Trending Topics
11-10-2007, 01:44 PM
#9
TECH Apprentice
Thread Starter
iTrader: (8)
Join Date: Sep 2004
Posts: 396
Likes: 0
Received 0 Likes
on
0 Posts
I had to do this to get my heater to work though. With the big hole in the box where my engine smashed it, all the air from the heater would have escaped through there rather than go through the heater ducts.
In my opinion, the biggest benefit of doing this is that it really cleans up the engine compartment.
11-10-2007, 01:53 PM
#10
TECH Apprentice
Thread Starter
iTrader: (8)
Join Date: Sep 2004
Posts: 396
Likes: 0
Received 0 Likes
on
0 Posts
That's the easiest way. The bottom portion is fiberglass and the top portion is plastic. The areas I could reach easily I cut flush to the firewall with a cut off disc on my dremel. What I couldn't reach with the dremel I just broke off with pliers. Even the plastic broke off easily.
 11-10-2007, 08:26 PM
#14
TECH Apprentice
Thread Starter
iTrader: (8)
Join Date: Sep 2004
Posts: 396
Likes: 0
Received 0 Likes
on
0 Posts

Thanks man. Nice wheels...whered you get them?


 11-11-2007, 08:41 AM
#17
TECH Apprentice
Thread Starter
iTrader: (8)
Join Date: Sep 2004
Posts: 396
Likes: 0
Received 0 Likes
on
0 Posts
I bet he regrets selling them 
Very nice work. I almost wish I could have pulled my dash out and done mine a little nicer, but with the weather getting bad around here in Chicago I was on a tight schedule. I still have a solid day or two worth of work left getting the intake on, setting up the valvetrain, and getting the accessories on to get this thing running before "winter".
Looks very simular to the Desighn I came up with. Works Great!
Good job!
Here are the pics from mine.
http://i7.photobucket.com/albums/y29...07Feb18013.jpg
http://i7.photobucket.com/albums/y29...7Sept04013.jpg
http://i7.photobucket.com/albums/y29...07may13046.jpg
http://i7.photobucket.com/albums/y29...07may13045.jpg
http://i7.photobucket.com/albums/y29...07may13048.jpg
http://i7.photobucket.com/albums/y29...7Sept04019.jpg
The whole serise can be seen HERE
Next I am going to modify the hose routing to clean it up even more

