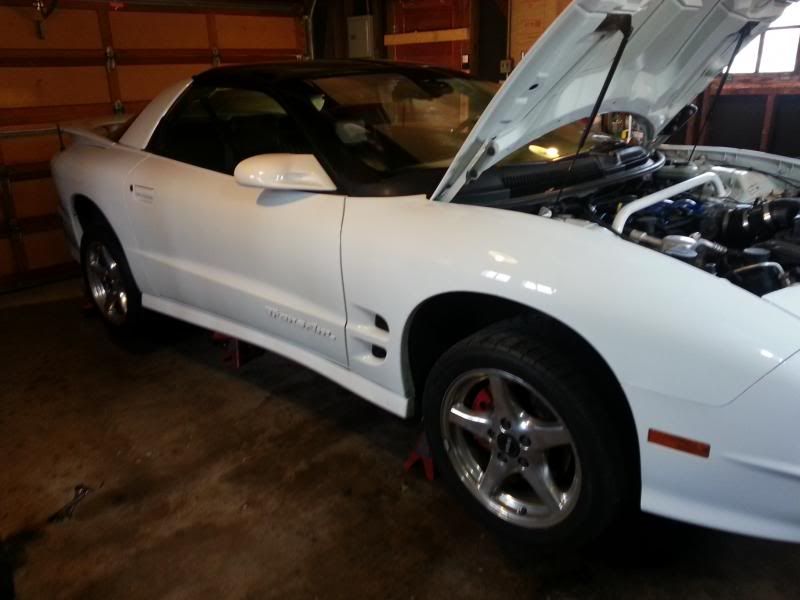
2000 WS6 Trans Am undercarriage restoration - In Progress


 03-18-2013, 10:37 AM
#22
TECH Fanatic
Thread Starter
iTrader: (32)
Join Date: Jan 2011
Posts: 1,298
Likes: 0
Received 0 Likes
on
0 Posts

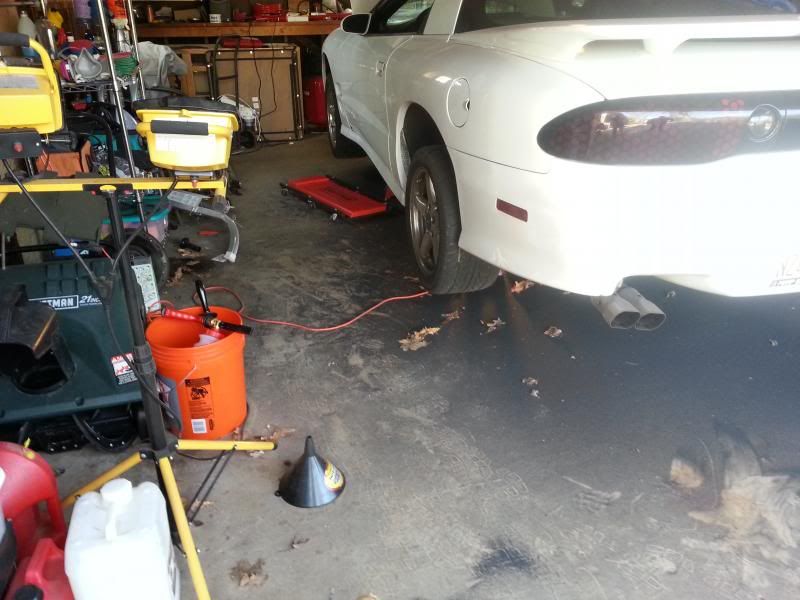
Needless to say, no work on the car, or irish themed festivities for me. Here is when the work started.
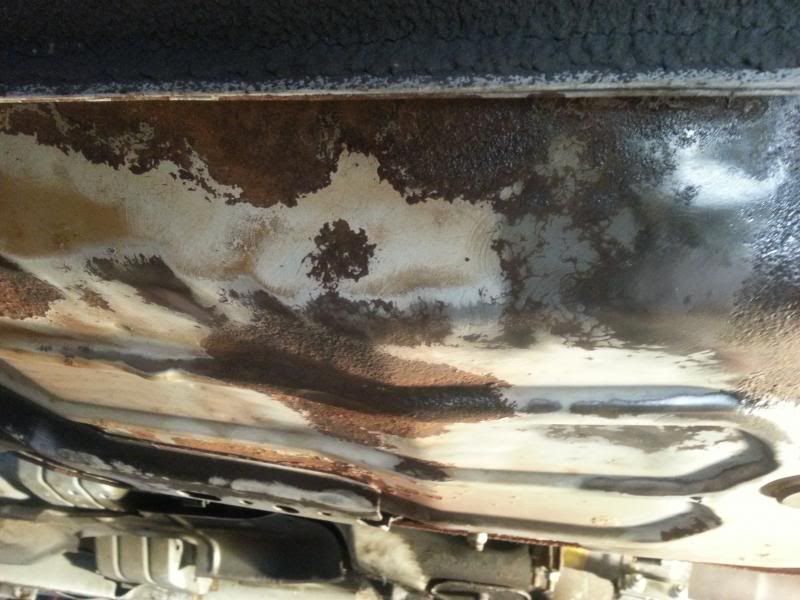
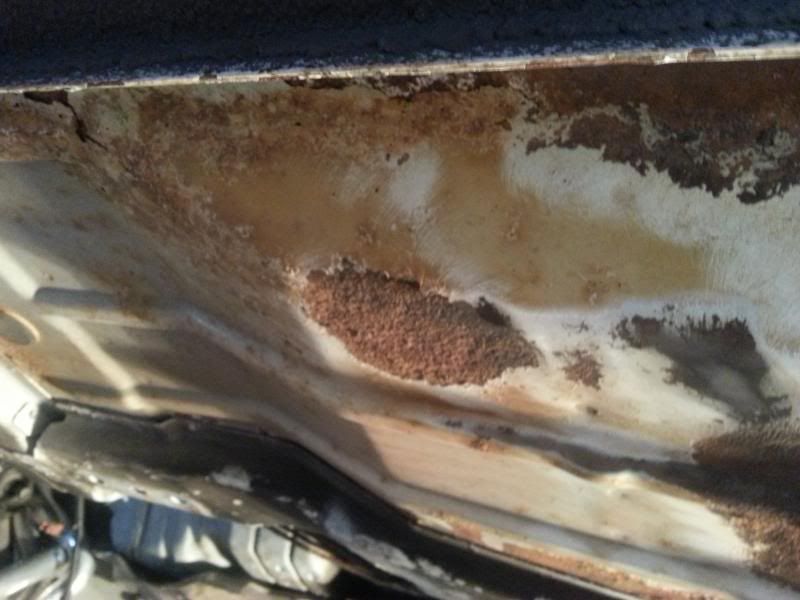
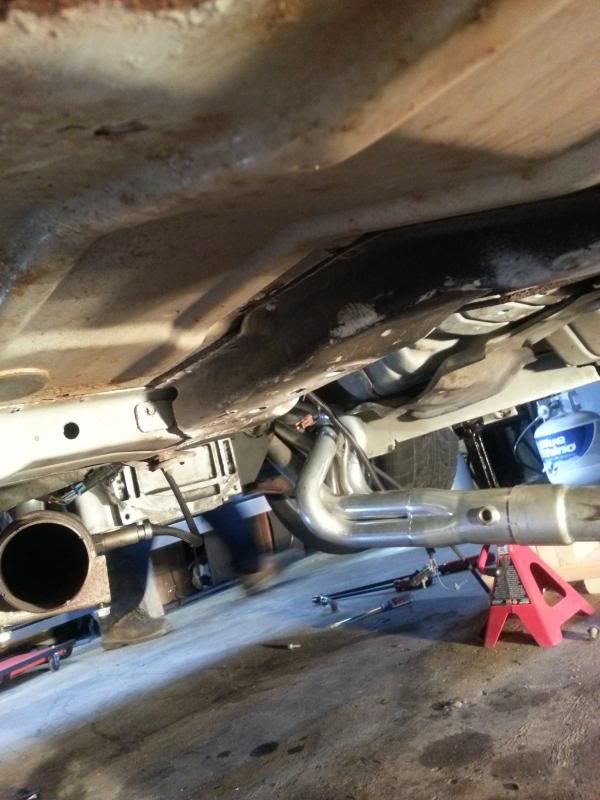
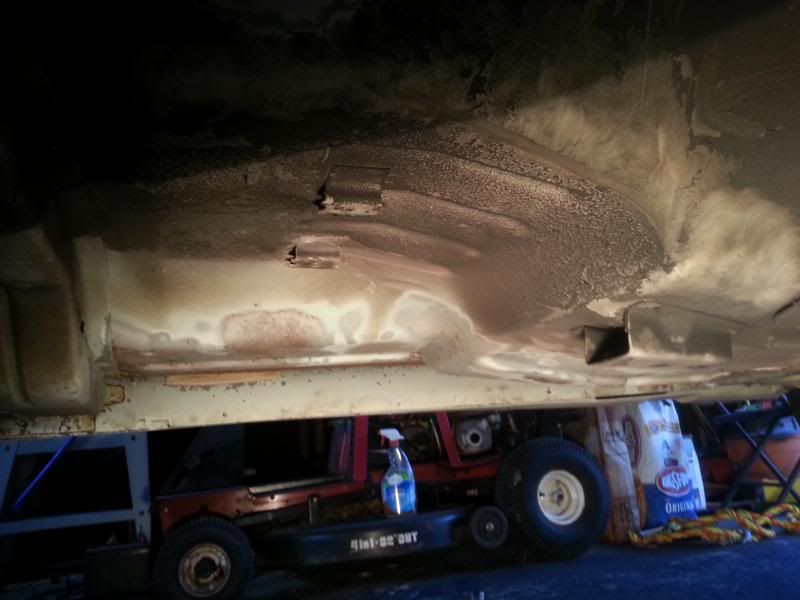
Car was jacked up. Exhaust was removed (after about a half a can of pb blaster was used!) Definitely have some corrosion on the borla exhaust. Might be emailing them to see if any pieces are under warranty. Anyways, spent a good amount of time stripping the exhuast, and driveshaft. Everything is corroded to **** under there! The tunnel above the driveshaft just has oil sludge buildup, but no rust. The floorboards however, totally different story! Pics of that will be up shortly.

Removed the center console, stock shifter (will be replace with an MGW), and eventually the transmission. We discovered a reasonably sized oil leak coming from the rear of the engine, so one must assume rear crankshaft oil seal is bad. Will be replacing that my next shift day off. Still need to remove the differential and fuel tank, then sand the living hell out of the undercarriage. I purchased a 4.5" Makita angle grinder, and attached a 4" wire wheel cup like mentioned earlier in this thread. So far, it looks like this combo has plenty of bite and I have even discovered a few areas of the undercarriage that I was able to sand down to bare metal relatively easily! Will try and take some additional pictures tonight and keep everyone posted on the process.
http://makitausa.com/en-us/Modules/T...px?Name=GA4534
Still have plenty of work to do. For now, I'm planning to spray the accessible areas of the undercarriage with some Optimum Power Clean (one of the best degreasers on the market imo) and really clean up the tunnel area to assess the rust damage, if any. Once that is done, time to start sanding like crazy! Still need to grab a respirator and find some long sleeved shirts to get to work.
Last edited by Rare96LT1Formula; 03-21-2013 at 10:16 AM.
03-21-2013, 10:22 AM
#23
TECH Fanatic
Thread Starter
iTrader: (32)
Join Date: Jan 2011
Posts: 1,298
Likes: 0
Received 0 Likes
on
0 Posts
Update:
Was able to finally remove the transmssion (which required removal of the passender side header), pressure plate, clutch, flywheel, and pilot bearing. My new monster stage two clutch went in with corresponding ARP hardware and torqued to spec.
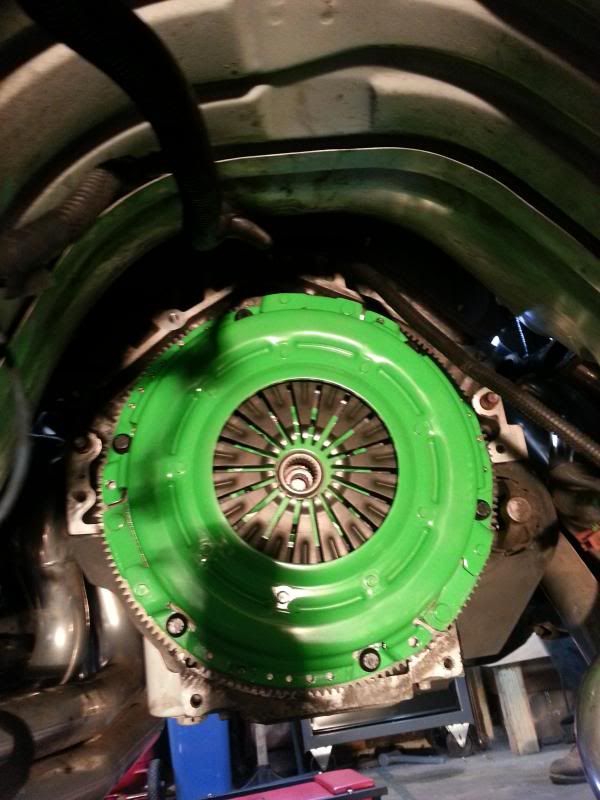
I was lucky to discover that my rear main seal did NOT appear to have a leak as previously thought, so that was one step that was able to be skipped.
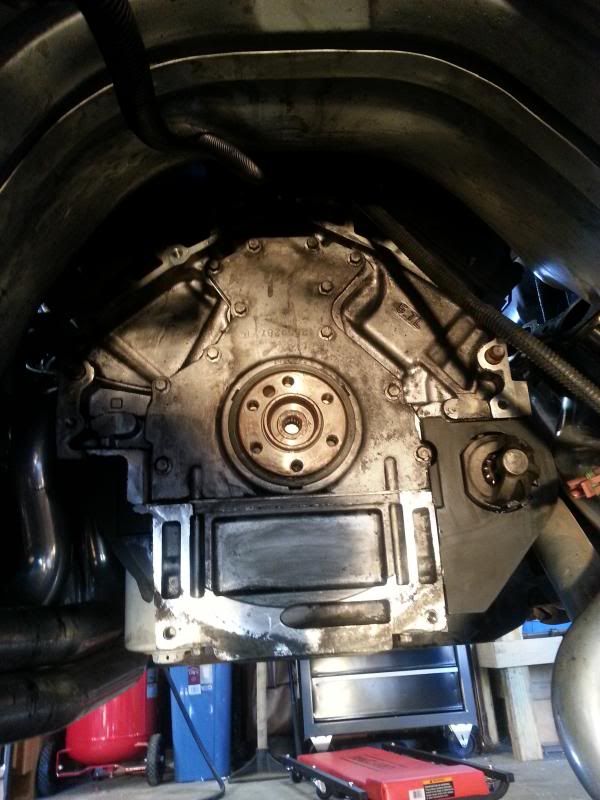
Now I am finally in a position to do some rust removal. You can see in the pictures the severity of the problem. I will continue to post pictures as my work progresses.
Was able to finally remove the transmssion (which required removal of the passender side header), pressure plate, clutch, flywheel, and pilot bearing. My new monster stage two clutch went in with corresponding ARP hardware and torqued to spec.
I was lucky to discover that my rear main seal did NOT appear to have a leak as previously thought, so that was one step that was able to be skipped.
Now I am finally in a position to do some rust removal. You can see in the pictures the severity of the problem. I will continue to post pictures as my work progresses.
03-21-2013, 12:10 PM
#26
TECH Fanatic
Thread Starter
iTrader: (32)
Join Date: Jan 2011
Posts: 1,298
Likes: 0
Received 0 Likes
on
0 Posts
The only issues I've been having now is my Makita 4.5" angle grinder with 4" cupped wire brush "walking" on me. It's very difficult to control, and with all the curves on the undercarriage, I've banged up my hands and arms pretty good over the past few days. I'm thinking about busting out my Makita 9227 rotary buffer and attaching the 4" cup brush to that... I'll have to see.
Was also considering a cheap sand blaster from Harbor Freight to hook up to my 12 gallon 125psi Craftsman. I've heard that can become quite the mess though, but the quick work makes it a tempting option.
http://www.harborfreight.com/portabl...kit-37025.html
I will try and get some higher resolution photos next time I'm under the vehicle. The photos shown here were taken with my Samsung Galaxy SIII. I have a Cannon T3 that I'll bust out and try and capture some better pictures.
03-21-2013, 12:15 PM
#27
TECH Fanatic
Thread Starter
iTrader: (32)
Join Date: Jan 2011
Posts: 1,298
Likes: 0
Received 0 Likes
on
0 Posts
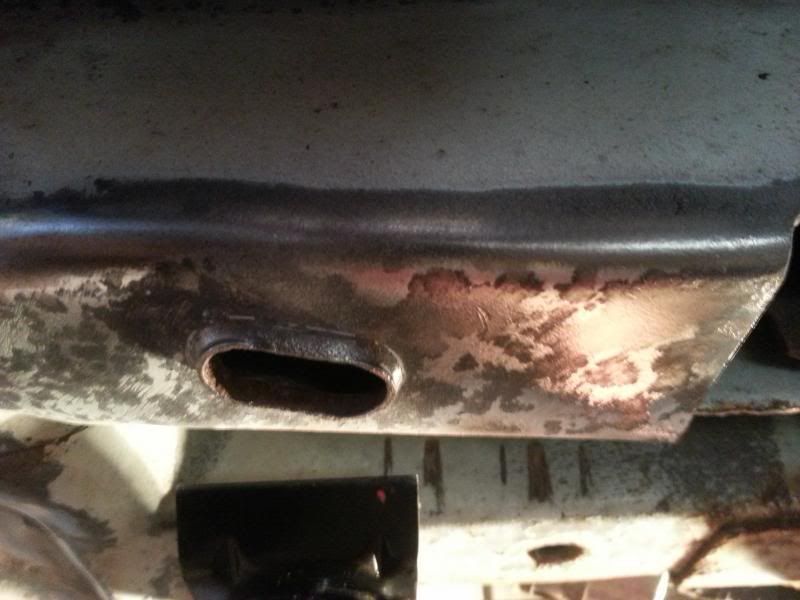
My subframes seem to be in ok condition. Still nowhere near where I want them to be. Lots of sanding and prep work to keep me busy here, and with temperatures in the 20's here in Chicago, I have literally zero temptations to get the car back on the road anytime soon. Time to kill this rust!
 03-21-2013, 12:52 PM
#28
I've never used the 'cupped' wire wheels. I've only used the standard ones in a corded drill. At least those spin in a rotary and you can muscle into it.
Do you have a compressor? If you do, the best method to remove the rust is a die grinder with sanding disc. They might even sell a corded version.....


Do you have a compressor? If you do, the best method to remove the rust is a die grinder with sanding disc. They might even sell a corded version.....
03-21-2013, 01:58 PM
#29
TECH Fanatic
Thread Starter
iTrader: (32)
Join Date: Jan 2011
Posts: 1,298
Likes: 0
Received 0 Likes
on
0 Posts
I've never used the 'cupped' wire wheels. I've only used the standard ones in a corded drill. At least those spin in a rotary and you can muscle into it.
Do you have a compressor? If you do, the best method to remove the rust is a die grinder with sanding disc. They might even sell a corded version.....
Do you have a compressor? If you do, the best method to remove the rust is a die grinder with sanding disc. They might even sell a corded version.....
http://www.harborfreight.com/4-inch-...ush-65050.html
I also purchased a 3" version that seems to control a bit easier. I am familiar with the die grinder route, but I'm concerned my compressor won't be able to power it. I'm running this compressor.
http://www.sears.com/craftsman-12-ga...1&blockType=G1
03-21-2013, 03:37 PM
#31
The wire wheel will walk on you a bit. And considering you are laying on your back and side it probably makes it hard to put any muscle behind it. I'd imagine it bucks back at you when you hit a sharp angle or edge.
Think of it this way, not only are you getting rid of the rust, but your getting a good work out too!
Think of it this way, not only are you getting rid of the rust, but your getting a good work out too!
03-21-2013, 06:03 PM
#32
TECH Fanatic
Thread Starter
iTrader: (32)
Join Date: Jan 2011
Posts: 1,298
Likes: 0
Received 0 Likes
on
0 Posts
The wire wheel will walk on you a bit. And considering you are laying on your back and side it probably makes it hard to put any muscle behind it. I'd imagine it bucks back at you when you hit a sharp angle or edge.
Think of it this way, not only are you getting rid of the rust, but your getting a good work out too!
Think of it this way, not only are you getting rid of the rust, but your getting a good work out too!
03-31-2013, 06:42 PM
#34
TECH Fanatic
Thread Starter
iTrader: (32)
Join Date: Jan 2011
Posts: 1,298
Likes: 0
Received 0 Likes
on
0 Posts
Update:
Well, I purchased a cheap angle grinder from harbor freight to try and combat the rust with. The problem was, as expected, my 12 gallon (2.4 scfm/90 psi) Craftsman compressor simply couldn't keep up with the air that the tool needed. So, I went to sears and grabbed a 33 Gallon 1.6HP Craftsman to give us the air we needed to work (5.3 scfm/90 psi).
After I purchased the compressor, I got to thinking, maybe sandblasting would be the most time saving and thorough way to remove the rust from my undercarriage. Having already invested over $400 into the compressor, I figured what the hell and purchased a cheap harbor freight media blasting gun, and a giant container of aluminum oxide blasting media. Let me tell you, this combo simply works! The blasting made a mess, but well worth it imo. I will be uploading pictures shortly to show the progress.
04-01-2013, 07:38 AM
#35
TECH Fanatic
Thread Starter
iTrader: (32)
Join Date: Jan 2011
Posts: 1,298
Likes: 0
Received 0 Likes
on
0 Posts
As mentioned in my earlier post, my air compressor simply wasn't keeping up with my air demands. Was able to score this 33 gallon from Sears for $350.

After we grabbed a cheap $25 media blast gun from habor freight, along with a big jug of aluminum oxide blast media, work has finally begun!
Needless to say, we were finally moving at a nice pace! This new compressor/sand blaster combo is flat out dominating my undercarriage. The underbody is about 50% complete as of right now, with work set to continue tonight and tomorrow, all day long. Will likely try to clean the garage up, and hopefully recycle the aluminum oxide to blast the undercarriage with again.
04-01-2013, 07:45 AM
#36
Looking good man. The compressor will come in handy regardless. Sell your older one to someone on Craigslist and re-coop some money.
Did you try the angled die grinder like I posted? With the brief experience I have with metal work, that always worked for me.
Did you try the angled die grinder like I posted? With the brief experience I have with metal work, that always worked for me.
04-01-2013, 07:53 AM
#37
TECH Fanatic
Thread Starter
iTrader: (32)
Join Date: Jan 2011
Posts: 1,298
Likes: 0
Received 0 Likes
on
0 Posts
 04-03-2013, 07:51 PM
#38
TECH Fanatic
Thread Starter
iTrader: (32)
Join Date: Jan 2011
Posts: 1,298
Likes: 0
Received 0 Likes
on
0 Posts
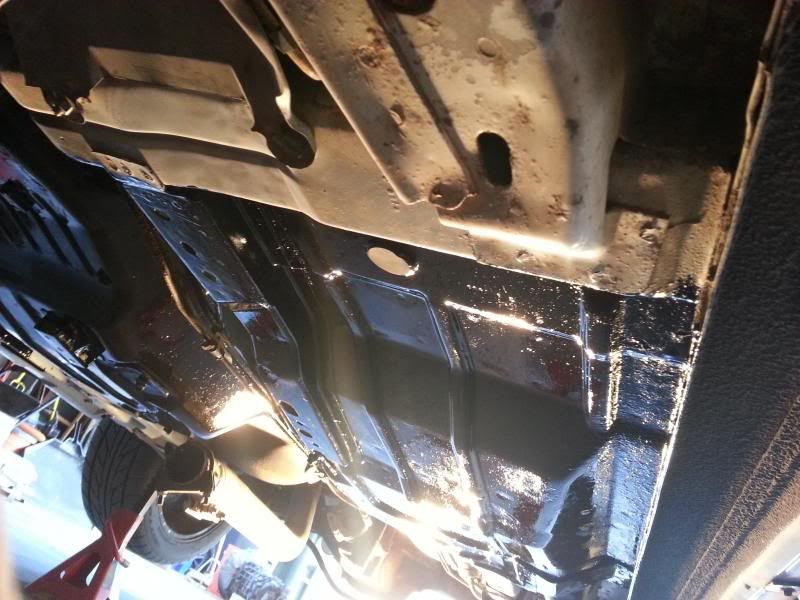
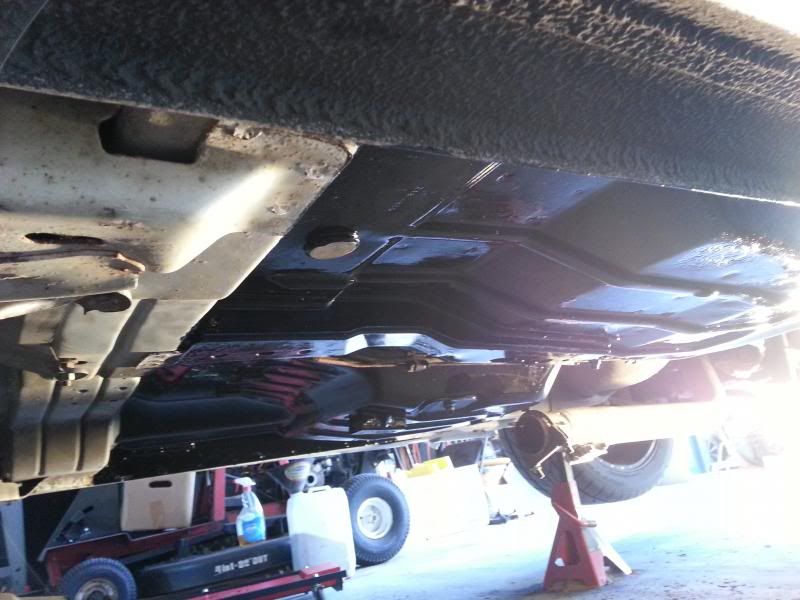
First coat of chassis saver
Still have a little ways to go. I ran out of the aluminum oxide blast media, and tried some fine grade walnut shell. I've noticed the walnut shell works but doesn't quite "cut" as quickly as the aluminum oxide did. Most of the rust from here on out is very minimal considering what I was dealing with on the floor boards. I will probably just use my angle grinder for the rest of the rust removal. I'll sandblast the miscellaneous suspension pieces.
Still have a little ways to go. I ran out of the aluminum oxide blast media, and tried some fine grade walnut shell. I've noticed the walnut shell works but doesn't quite "cut" as quickly as the aluminum oxide did. Most of the rust from here on out is very minimal considering what I was dealing with on the floor boards. I will probably just use my angle grinder for the rest of the rust removal. I'll sandblast the miscellaneous suspension pieces.
04-04-2013, 08:28 AM
#40
TECH Fanatic
Thread Starter
iTrader: (32)
Join Date: Jan 2011
Posts: 1,298
Likes: 0
Received 0 Likes
on
0 Posts
http://magnetpaints.com/underbody.asp
After sandblasting with aluminum oxide, I ran out of blast media and purchased some fine grade walnut shell. I made a quick pass with the walnut shell, then spent a good hour or two cleaning up the mess I made in the garage. After that, we did a quick wipedown with some Meguiars Professional All Purpose Cleaner diluted 1:1. After that, the surface was down to bare metal, cleaned, and ready for the first coat of chassis saver. I accidentally purchased the gloss black paint, and it actually turned out better than I imagined it would. Turns out that just like detail work, it's all in the surface prep! Will be touching up a couple areas with an angle grinder and coating the rest of the car shortly.
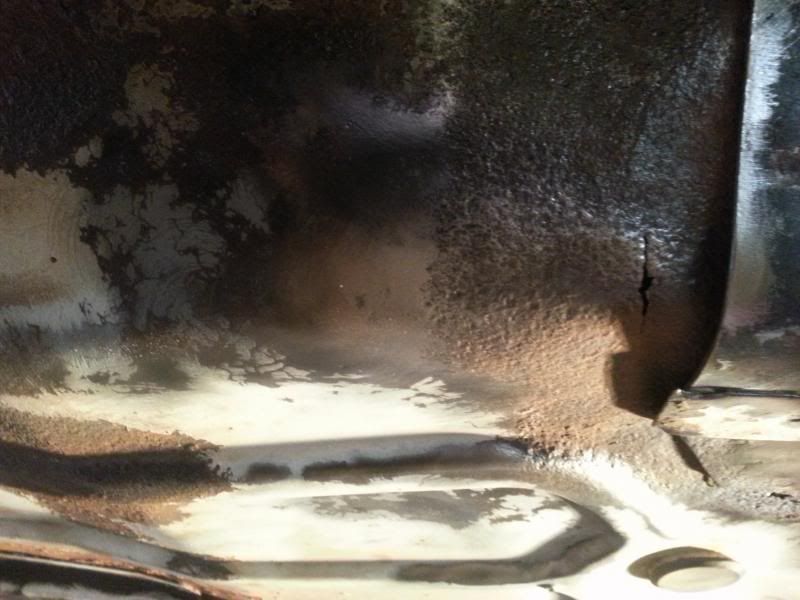
One issue that we did run into that I haven't mentioned yet is on the driver side floor pan, where the pan connects to the rear frame rail. There is a decent size (about 1") stress crack in the pan. My friend suggested that we cut the section out and weld in some replacement steel. The jury is still out on that one, as I'm debating what to do there. Will try and get some pictures of the area and get some of your guys' opinions on that one.