2000 WS6 Trans Am undercarriage restoration - In Progress
 04-06-2013, 06:26 AM
#41

Good stuff. My only concern is that it clearly states that this magnet paint will fade from a gloss black to a charcoal gray from UV rays. I understand the bottom of the car should never see sunlight, but its something to consider. I looked on POR15's website, and there was no mention of their product being UV resistant or not. I want to look into this further as I may end up painting my spindles, a-arms, etc that will encounter some percentage of UV rays. The last thing I want is to spend a ton of time making it nice, only to find it turn gray over time.
I'm not against using this magnet paint just yet, I'm just researching a little further. Keep up the good work.
You should change your thread title now! Haha
I'm not against using this magnet paint just yet, I'm just researching a little further. Keep up the good work.
You should change your thread title now! Haha
 04-06-2013, 11:14 PM
#42
TECH Fanatic
Thread Starter
iTrader: (32)
Join Date: Jan 2011
Posts: 1,298
Likes: 0
Received 0 Likes
on
0 Posts

Good stuff. My only concern is that it clearly states that this magnet paint will fade from a gloss black to a charcoal gray from UV rays. I understand the bottom of the car should never see sunlight, but its something to consider. I looked on POR15's website, and there was no mention of their product being UV resistant or not. I want to look into this further as I may end up painting my spindles, a-arms, etc that will encounter some percentage of UV rays. The last thing I want is to spend a ton of time making it nice, only to find it turn gray over time.
I'm not against using this magnet paint just yet, I'm just researching a little further. Keep up the good work.
You should change your thread title now! Haha
I'm not against using this magnet paint just yet, I'm just researching a little further. Keep up the good work.
You should change your thread title now! Haha
For suspension parts like you mentioned, I would personally look into powder coating. Have them media blasted and sent out for coating. Shouldn't cost much, and the end product will look amazing. I am also in the process of gathering miscellaneous parts that I will be sending to CPC Coatings for full powdercoating, and may even have a few plastic items hydro dipped for that custom look. Well worth the money imo.
How do I change the thread title?
04-09-2013, 09:28 PM
#45
On The Tree
iTrader: (2)

Join Date: Dec 2008
Location: Edwardsville, IL
Posts: 181
Likes: 0
Received 0 Likes
on
0 Posts
Cool thread. Keep up the good work. It feels great once you know the underside of your car is clean and rust free! I spent most of last summer doing this on my camaro. Do it once, do it right 
04-10-2013, 11:46 AM
#46
TECH Fanatic
Thread Starter
iTrader: (32)
Join Date: Jan 2011
Posts: 1,298
Likes: 0
Received 0 Likes
on
0 Posts
It has been an extremely labor intensive project, much more severe than I have initially thought. I had to purchase numerous tools to get this work going, but overall I'm extremely happy I've taken this work on.
I look at it like I have put this car into a much better condition than when I initially purchased it. This car should last a long time!
04-13-2013, 09:45 AM
#48
TECH Fanatic
Thread Starter
iTrader: (32)
Join Date: Jan 2011
Posts: 1,298
Likes: 0
Received 0 Likes
on
0 Posts
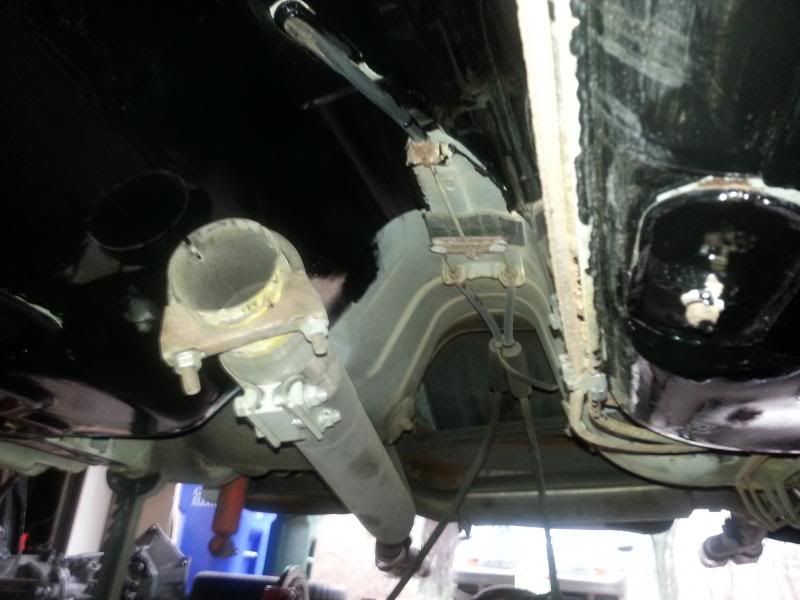
Ok, so I was able to get some additional work done on the car. We finished sanding down the trans tunnel, cleaned, and prepped the area for its first coat of chassis saver. First coat was applied and we moved onto applying the second coat of chassis saver over the floor pans. We roughed up the area with 400 grit sandpaper per the chassis saver directions and moved onto applying the second coat.
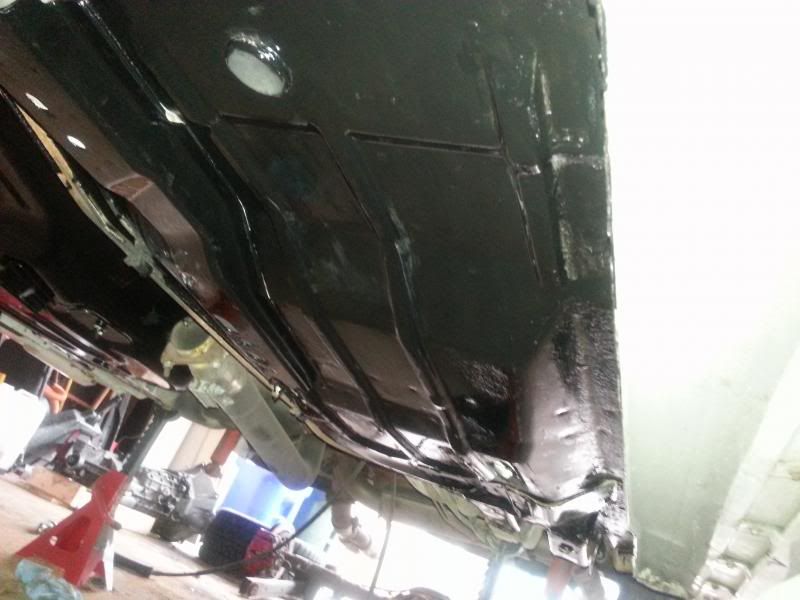
Still have a few spots that may need to be touched up. I'll let the coating dry for another 24 hours and take a peak at it.
Look ma! No differential!
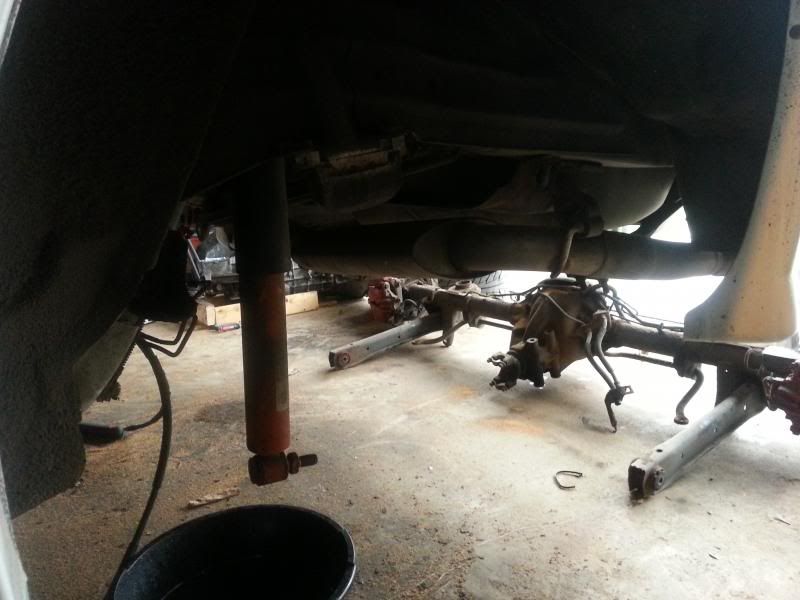
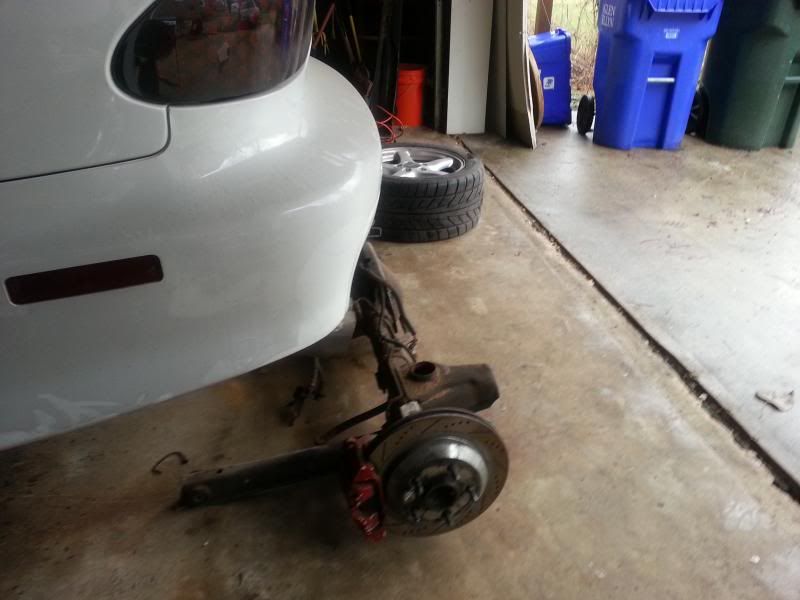
This stock 10 bolt will be stripped down for sandblasting and paint, calipers will be removed and sent out for powdercoating. Car still has a long ways to go.
I am currently debating saving some cash and making my own brake and fuel lines. I'd love to have these professionally bent and shipped back to me, but funding on this project is starting to get tight. Any suggestions?
I should also note, I'm planning on applying a spray on rubber coating to the inside of the rear quarter panels. I do have plenty of factory coating left in that area, but as a precaution will be adding an additional layer of protection.
http://shop.advanceautoparts.com/web...m+undercoating

Still have a few spots that may need to be touched up. I'll let the coating dry for another 24 hours and take a peak at it.

Look ma! No differential!

This stock 10 bolt will be stripped down for sandblasting and paint, calipers will be removed and sent out for powdercoating. Car still has a long ways to go.

I am currently debating saving some cash and making my own brake and fuel lines. I'd love to have these professionally bent and shipped back to me, but funding on this project is starting to get tight. Any suggestions?
I should also note, I'm planning on applying a spray on rubber coating to the inside of the rear quarter panels. I do have plenty of factory coating left in that area, but as a precaution will be adding an additional layer of protection.
http://shop.advanceautoparts.com/web...m+undercoating
 04-13-2013, 11:21 AM
#50
On The Tree
iTrader: (2)
Join Date: Dec 2008
Location: Edwardsville, IL
Posts: 181
Likes: 0
Received 0 Likes
on
0 Posts
Not to thread jack or anything, but you should check out my build thread here: https://ls1tech.com/forums/lt1-lt4-m...y-my-94-z.html
Since I've already done what you're in the process of doing Also, I would really recommend 3M Body Schutz that you spray with a gun over the spray can undercoating. I tried a can of it since it's cheaper, but the quality of the body schutz is 100x better. I've got plenty of pics of it. I even sand blasted my rear end and painted it too, came out great...
Anyways, keep it up, it's definitely a ton of work!
Since I've already done what you're in the process of doing
Also, I would really recommend 3M Body Schutz that you spray with a gun over the spray can undercoating. I tried a can of it since it's cheaper, but the quality of the body schutz is 100x better. I've got plenty of pics of it. I even sand blasted my rear end and painted it too, came out great... Anyways, keep it up, it's definitely a ton of work!
04-13-2013, 04:41 PM
#51
TECH Fanatic
Thread Starter
iTrader: (32)
Join Date: Jan 2011
Posts: 1,298
Likes: 0
Received 0 Likes
on
0 Posts
Not to thread jack or anything, but you should check out my build thread here: https://ls1tech.com/forums/lt1-lt4-m...y-my-94-z.html
Since I've already done what you're in the process of doing Also, I would really recommend 3M Body Schutz that you spray with a gun over the spray can undercoating. I tried a can of it since it's cheaper, but the quality of the body schutz is 100x better. I've got plenty of pics of it. I even sand blasted my rear end and painted it too, came out great...
Anyways, keep it up, it's definitely a ton of work!
Since I've already done what you're in the process of doing
Also, I would really recommend 3M Body Schutz that you spray with a gun over the spray can undercoating. I tried a can of it since it's cheaper, but the quality of the body schutz is 100x better. I've got plenty of pics of it. I even sand blasted my rear end and painted it too, came out great... Anyways, keep it up, it's definitely a ton of work!
04-19-2013, 11:53 AM
#52
TECH Fanatic
Thread Starter
iTrader: (32)
Join Date: Jan 2011
Posts: 1,298
Likes: 0
Received 0 Likes
on
0 Posts
UPDATE:
Due to my insane work schedule lately, I have not had another opportunity to work on the car. I will be resuming work on Wednesday. Still need to purchase some seam sealer, undercarriage uv-resistant paint, more blast media, brake lines, the list goes on.
At this point, I'm honestly debating just keeping the car down for the summer (or as long as necessary) to get this car back to pristine condition (or as close to it as funds allow).
04-28-2013, 08:31 AM
#53
TECH Fanatic
Thread Starter
iTrader: (32)
Join Date: Jan 2011
Posts: 1,298
Likes: 0
Received 0 Likes
on
0 Posts
Update:
The entire undercarriage from the transmission towards the back of the car is finally coated. Now I'm debating painting over the top, still undecided on that. Pictures to follow...
The entire undercarriage from the transmission towards the back of the car is finally coated. Now I'm debating painting over the top, still undecided on that. Pictures to follow...
04-29-2013, 12:45 PM
#57
Would it be best to clean the under car with high pressure sprayer,
then degrease/clean with this product and a scrub brush
http://www.eastwood.com/eastwood-pre-painting-prep.html
Then apply this after clean
http://www.eastwood.com/por-15-prep-ready-gallon.html
And paint with this (color of choice)
http://www.eastwood.com/por-15-semi-...ck-gallon.html
Would 1 gallon suffice 2 coats? And is seam sealer necessary?
(I think eastwood is sponsor)
If not i apologize for posting illegal links
04-29-2013, 03:57 PM
#58
TECH Fanatic
Thread Starter
iTrader: (32)
Join Date: Jan 2011
Posts: 1,298
Likes: 0
Received 0 Likes
on
0 Posts
Would it be best to clean the under car with high pressure sprayer,
then degrease/clean with this product and a scrub brush
http://www.eastwood.com/eastwood-pre-painting-prep.html
Then apply this after clean
http://www.eastwood.com/por-15-prep-ready-gallon.html
And paint with this (color of choice)
http://www.eastwood.com/por-15-semi-...ck-gallon.html
Would 1 gallon suffice 2 coats? And is seam sealer necessary?
(I think eastwood is sponsor)
If not i apologize for posting illegal links
then degrease/clean with this product and a scrub brush
http://www.eastwood.com/eastwood-pre-painting-prep.html
Then apply this after clean
http://www.eastwood.com/por-15-prep-ready-gallon.html
And paint with this (color of choice)
http://www.eastwood.com/por-15-semi-...ck-gallon.html
Would 1 gallon suffice 2 coats? And is seam sealer necessary?
(I think eastwood is sponsor)
If not i apologize for posting illegal links
POR 15 is a great product from what I've heard, but in my mind, surface prep is everything. It's going to turn out only as good as your prep work. I would suggest removing everything and going at it with an open canvas to work with. Seam sealer is not necessarily needed, but it is cheap insurance in protecting the numerous seams that the undercarriage has. Many of my most problematic spots were at seams. I used it on my restoration, and I would highly recommend it to anyone else taking on this type of project. I'm just not a huge fan of painting right on top of rust, it just doesn't work for me. I needed to make sure that it was GONE before I went ahead to undercoating the entire undercarriage. That's just me though..
IMHO - Do it once, and don't look back
Also, I only used 1 quart on my undercarriage. Two thin coats on bare metal that was scuffed, and hit with an all purpose cleaner to promote optimal bonding.
04-30-2013, 04:19 PM
#60
TECH Fanatic
Thread Starter
iTrader: (32)
Join Date: Jan 2011
Posts: 1,298
Likes: 0
Received 0 Likes
on
0 Posts
Yes, in my case, only a quart was necessary. I have heard that when applied directly over rust, you will use more product. I'm not entirely sure how accurate that statement is, but I can say without a doubt that when applied to properly treated and scuffed surfaces, the product spreads thin and even. I ended up using foam paint brushes, probably used about 20 brushes total. I used Meguiars All Purpose Cleaner diluted 1:1 with distilled water.