
How to remove and paint and make your own Berger panel
 01-26-2006, 01:10 AM
#1
On The Tree
Thread Starter
Join Date: May 2005
Location: Midland, Tx
Posts: 135
Likes: 0
Received 0 Likes
on
0 Posts
After reading a countless number of theads about removing and painting the rear panel on camaros, I decided to try a write up on it, keep in mind this is my first write up on anything so if you see any mistakes, typos, left out info, ect. please let me know so I can fix it. 
Tools needed:
10mm socket or wrench
400,1000 grit wet sanding paper
Primer
Flat, Satin, Gloss black spray paint
Bowl of water
How to remove your panel.
1. Open the trunk hatch
2. Remove the spare tire cover on the passenger side of the car it's held on by 3 fasteners. (dont worry about removing the harness for the speakers, just set both panels up against your back seat, you'll still have pleanty of room)
3. Remove the drivers side cover, its held on by little plastic tabs.
4. Pull back the carpet, start at the top by the latch that holds the hatch down, and work your way down, about halfway down theres gunna be a black tab, just move the carpet around the tab enough to get it off. Then you continue pulling the carpet down.
5. Unscrew the 2 wingnuts that hold on the drivers side tail light, after you get the light out, remove the bulbs and set the whole thing to the side
6. Repeat above for the passengers side.
7. Next find the two 10mm nuts on the drivers side, remove them and set them on the side.
8. Repeat above for passengers side.
9. Now your panel should be ready to pull off, just grab where the tail lights used to be, (and if you did all this right, it should just "pop" out.)
How to paint your panel, (as from www.projectcamaro.com)
1. You will need a sheet of 400 grit sand paper... Get a little bowl of water, and dip a section of the sandpaper in the water (Called wetsanding)... Begin to take the glosscote off of the panel, make sure to get the WHOLE panel...
2. When you think you are done, go to the bathroom, and use your shower to wash the residue off... Let the panel dry, and inspect it for gloss paint. There will be some, so repeat steps 3 and 4 as needed.
3. I got a can of FLAT BLACK PRIMER... use the primer to get a nice base coat over the original color... caution: USE VERY LIGHT COATS! IF YOU HAVE TO PUT 3 OR 4 COATS ON TO AVOID RUNS IN THE PAINT. THE FIRST COAT SHOULD NOT GET RID OF THE ORIGINAL COLOR... USE SHORT 10-12 INCH STROKES TO GET NICE EVEN COATS!
4. Once you have layed enough coats on the panel to cover the original color, get a sheet of 1000 grit sand paper to smooth out any imperfections in the primer layer... note: IF YOU USE EASY LIGHT COATS, THERE WILL BE NO IMPERFECTIONS!
5. The 1000 grit is likely to remove a small amount of primer, so respray it with the primer to even it back out...
6. Once the primer has dried, shouldnt take too long... Use either Flat Black, Semi-Gloss(Satin) Black, or Gloss Black, depending on your preference... and apply a nice light coat of black over the primer. note: SAME RULES APLLY WITH THE PAINT AS DID WITH THE PRIMER... VERY EASY, LIGHT COATS 10-12 INCH SECTIONS TO PREVENT RUNS...
7. Once you have applied enough coats to satisfy yourself, make sure you keep the panel in a warm dry place to allow it to dry... leave it for a minimum of 6 hours, preferably 12-24 hours or as much as time will allow!
8. Once the panel is dry and no longer tacky, take it back out to the car and place it back in it's original position... Put the nuts back in place to hold the panel on... Manuever the lights back into place and put the nuts back on them... Then put the carpet back in place and enjoy your HOME-MADE BERGER PANEL...
Now take a sec step back and congradulate your-self on making your own berger panel!
Last edited by Xsta Z 28; 02-01-2006 at 01:47 PM.

 04-04-2006, 02:13 AM
#3
Teching In
Join Date: Mar 2006
Location: san diego California
Posts: 43
Likes: 0
Received 0 Likes
on
0 Posts
Why sand a perfectly good part of the car and rattlecan it. i just dont understand the logic here. I mean i rattlecanned my calipers but i mean there not painted in the first place. in my eyes rattlecaning the *** end of my 17000 dollar car just freaks me out. whats the history behind this mod?
04-04-2006, 02:46 AM
#5
12 Second Club
iTrader: (4)
Join Date: Aug 2003
Location: NorCal
Posts: 1,618
Likes: 0
Received 0 Likes
on
0 Posts

Cant wait to do this.. I scored a spare panel off a buddies parts car.
Do you have to get all the original gloss off or just score it? Scored gloss will look like its all off when it might not be completely removed, right? I know you said "whole panel" but do you mean completely removing it?
Thanks for the writeup.
Do you have to get all the original gloss off or just score it? Scored gloss will look like its all off when it might not be completely removed, right? I know you said "whole panel" but do you mean completely removing it?
Thanks for the writeup.
04-04-2006, 10:11 AM
#6
12 Second Club
Join Date: Sep 2005
Location: Springfield, Missouri
Posts: 354
Likes: 0
Received 0 Likes
on
0 Posts
Originally Posted by hhidyhoneighbor
Why sand a perfectly good part of the car and rattlecan it. i just dont understand the logic here. I mean i rattlecanned my calipers but i mean there not painted in the first place. in my eyes rattlecaning the *** end of my 17000 dollar car just freaks me out. whats the history behind this mod?
http://www.bergerchevy.com/CamaroSS/CamaroSS.htm
04-04-2006, 03:08 PM
#7
Teching In
Join Date: Mar 2006
Location: san diego California
Posts: 43
Likes: 0
Received 0 Likes
on
0 Posts
Now i understand, makes sense, but if i were gonna do that to my car id take the panel off and have a bodyshop spray it, wouldnt be that much $ for such a small piece.
Trending Topics


 09-19-2006, 02:29 PM
#15
On The Tree
Thread Starter
Join Date: May 2005
Location: Midland, Tx
Posts: 135
Likes: 0
Received 0 Likes
on
0 Posts
Originally Posted by will69camaro
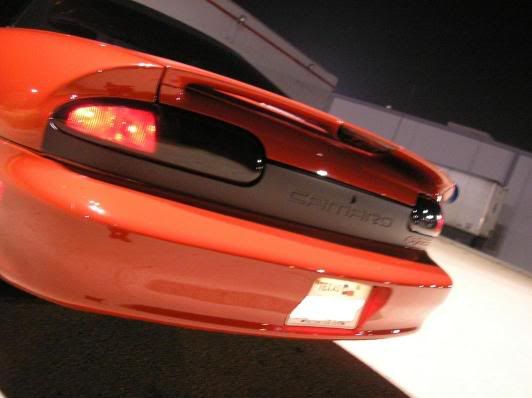
Writeup looks good man. What color is that car? Looks orange I'm from midland as well but away at school. Maybe see the car around and check out that berger panel in person on a holiday.
William
I'm from midland as well but away at school. Maybe see the car around and check out that berger panel in person on a holiday.William
09-19-2006, 05:12 PM
#16
TECH Regular
iTrader: (1)
Join Date: Feb 2005
Location: Broken Arrow, OK
Posts: 404
Likes: 0
Received 0 Likes
on
0 Posts
Kinda late for this info considering this thread has been around for 5 months, but either way I thought I would point out that if you arent taking the panel all the way down and you arent fixing any imperfections in the surface you really dont need primer. Wetsand the panel with 600 really well just removing the gloss dont go past the clear and then paint right on top of that. Spray paint uses a mechanical bond and spraying primer is really unnecessary if you are starting out with a decent panel. Take it to a body shop and they will do the same only using uros which will hold up much longer.
10-29-2006, 04:42 PM
#17
Originally Posted by hhidyhoneighbor
whats the history behind this mod?
10-29-2006, 05:26 PM
#18
Originally Posted by bww3588
actully, this "mod" was a factory deal on the first and i think second gen cars. the blacked out tail pannel let everyone behind you know they just got spanked by a big block car.
Well it sure as hell is a mod if the Berger option hasn't been around for over 20 years.
Else where did the term, Berger mod come from. Otherwise it would just be a "black panel on the back of the car mod."
10-29-2006, 05:44 PM
#20
Originally Posted by Genesis_26317
Well it sure as hell is a mod if the Berger option hasn't been around for over 20 years.
Else where did the term, Berger mod come from. Otherwise it would just be a "black panel on the back of the car mod."
Else where did the term, Berger mod come from. Otherwise it would just be a "black panel on the back of the car mod."